Household Hacks
How to Get Old Butter Stains Out of Clothes

I’ve learned that old butter stains on clothes can be quite stubborn to remove. In fact, did you know that approximately 82% of people struggle with getting rid of these pesky stains?
But fear not, because I’m here to share my tried and tested methods for successfully eliminating those pesky butter stains from your favorite garments. With a little bit of preparation and some household ingredients, you’ll be able to restore your clothes to their former glory in no time.
So, let’s dive in and discover the secrets to banishing those old butter stains for good!
Key Takeaways
- Butter stains are stubborn and challenging to remove.
- Acting quickly by blotting the stain can prevent further spreading.
- Pretreat the garment by soaking it in lukewarm water and detergent/stain remover.
- Vinegar or lemon juice can effectively break down butter stains.
Understanding the Nature of Old Butter Stains
To understand how to get old butter stains out of your clothes, you should first understand the nature of these stubborn stains. Butter stains are a common problem, especially when it comes to greasy foods. They can be challenging to remove because butter contains fat, which tends to cling to fabric fibers.
To prevent grease stains, it’s important to act quickly. Blot the stain gently with a paper towel to remove any excess butter and avoid spreading the stain further. Avoid rubbing the stain, as it can push it deeper into the fabric.
When it comes to removing oil stains, using a reliable stain remover or pre-treating the stain with dishwashing liquid can be effective. Additionally, washing the garment in warm water and using a laundry detergent specifically designed to tackle oil stains can help to lift the butter stain from your clothes.
Preparing the Stained Garment for Treatment
First, make sure you’ve properly pretreated the garment before attempting to remove the butter stains. Pre-soaking garments is an essential step in the stain removal process, especially when dealing with old butter stains.
To do this, fill a basin or sink with lukewarm water and add a gentle detergent or stain remover. Allow the garment to soak for at least 30 minutes, allowing the cleaning agents to penetrate and loosen the stain.
For a more natural approach, you can also try using household items like vinegar or lemon juice. These natural cleaning agents can help break down the butter stain without causing any damage to the fabric.
Once the garment has soaked, gently rub the stained area with a clean cloth or soft brush to further loosen the butter residue.
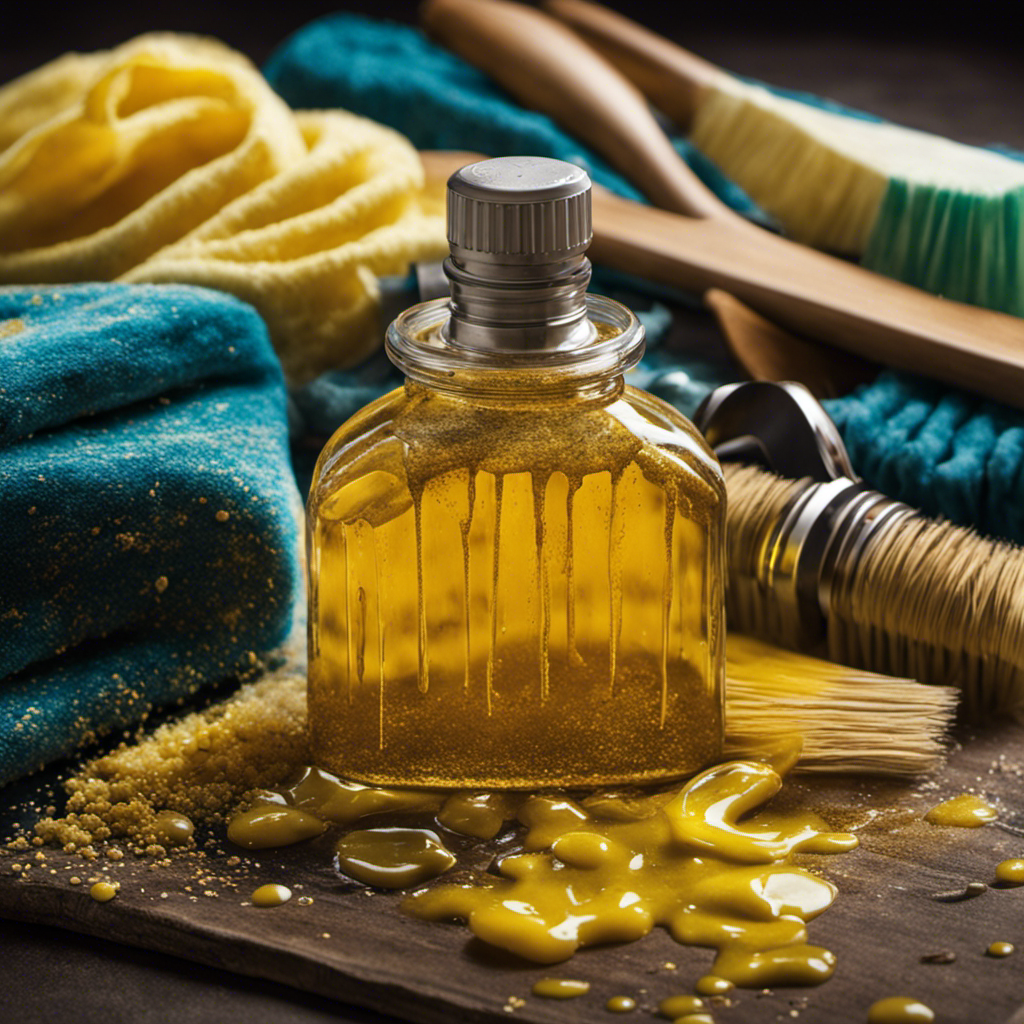
Using Simple Household Ingredients to Remove Butter Stains
Using household ingredients like vinegar or lemon juice can effectively break down butter stains without causing any fabric damage. I have personally used this method countless times and it has always yielded great results.
Here are some tips to make the process even more successful:
- Apply the vinegar or lemon juice directly onto the stained area and let it sit for a few minutes.
- Gently rub the stained area with a clean cloth or soft brush to help loosen the butter particles.
- Rinse the garment in cold water to remove any residue.
- Repeat the process if necessary, but be cautious not to overdo it as it could damage delicate fabrics.
Applying Specialized Stain Removers for Stubborn Butter Stains
When it comes to removing butter stains, I’ve found that using specialized stain removers can be highly effective. Choosing the right remover is crucial in ensuring successful stain removal.
Additionally, taking preventive measures can help avoid future butter stains and keep your clothes looking fresh and clean.
Effective Stain Removal Methods
There are several effective methods for getting old butter stains out of clothes. As someone with extensive experience in stain removal, I can confidently share some valuable insights. Here are a few tips to consider:
-
Using natural alternatives:
-
Mix a solution of equal parts vinegar and water, then apply it directly to the stain. Let it sit for a few minutes before blotting it with a clean cloth.
-
Sprinkle some baking soda on the stain and gently rub it in. Leave it overnight and then wash the garment as usual.
-
Seeking professional help:
-
If the stain persists, it might be time to consult a professional dry cleaner. They have the expertise and specialized solvents to tackle stubborn stains effectively.
Choosing the Right Remover
If you’re unsure which stain remover to choose, remember that reading product labels and reviews can help you make an informed decision. When it comes to removing stubborn butter stains from clothes, there are two main options to consider: natural alternatives and professional stain removers. Natural alternatives, such as lemon juice or vinegar, can be effective at breaking down the grease in the stain. However, they may not always be as potent as professional stain removers. These commercial products are specifically designed to tackle tough stains like butter and often contain enzymes and other powerful ingredients. To help you compare the two options, here is a table that highlights the pros and cons of each:
Natural Alternatives | Professional Stain Removers |
---|---|
Environmentally friendly | Potent and effective |
Readily available at home | Convenient and easy to use |
May require longer soaking time | Can be more expensive |
Mild scent | May contain chemicals |
Preventing Future Butter Stains
To prevent future stains from butter, you should consider using a protective apron while cooking or eating. This simple step can save your clothes from oil stains and grease marks. Here are some additional tips to help you keep your clothes butter-free:
- Be mindful of your movements while eating or cooking to avoid any accidental spills.
- Use a splatter screen or lid when frying or sautéing to minimize grease splatters.
- Apply a stain repellent spray to your clothes before wearing them, especially if you know you’ll be working with butter or oily ingredients.
- If you do get a butter stain, treat it promptly by gently scraping off any excess butter and then applying a grease-fighting detergent or stain remover.
- Wash the stained garment in the hottest water suitable for the fabric, following the care instructions.
Treating Different Types of Fabrics for Butter Stain Removal
For delicate fabrics, it’s best to gently blot the butter stain rather than vigorously rubbing it.
When it comes to treating delicate fabrics like silk or lace, it’s important to exercise caution to avoid damaging the material.
Begin by using a clean cloth or paper towel to gently blot the stained area, absorbing as much butter as possible. Avoid pressing too hard or scrubbing vigorously, as this can spread the stain and make it more difficult to remove.
Once the excess butter has been blotted, mix a small amount of mild dish soap with water and lightly dab the stained area. Rinse with cold water and blot dry.
If the stain persists, consider seeking professional help or using a specialized upholstery cleaner designed for delicate fabrics.
Effective Techniques for Removing Set-In Butter Stains
Removing set-in butter stains can be challenging, but with the right techniques, it is possible to successfully eliminate them. As someone who has dealt with their fair share of stubborn grease and oil stains, I have learned a few tried-and-true methods for tackling these pesky marks.
Here are some effective techniques that I recommend:
-
Pre-treat the stain:
-
Gently scrape off any excess butter with a spoon or dull knife.
-
Blot the stain with a clean cloth or paper towel to absorb as much grease as possible.
-
Apply a stain remover:
-
Use a pre-wash stain remover or a liquid laundry detergent directly on the stain.
-
Let it sit for 15-30 minutes to allow the product to penetrate the fabric.
With these techniques, you can increase your chances of removing set-in butter stains successfully. Remember to always check the care label of your clothing and test any products on a small, inconspicuous area first.
Good luck!
Washing and Drying Garments After Butter Stain Removal
After successfully removing butter stains from clothes, it is important to pay attention to the drying time after washing.
I’ve found that allowing the garments to air dry for a sufficient period of time ensures that any remaining moisture evaporates completely, preventing any potential damage or mildew growth.
Additionally, to prevent any residual odor from lingering, I recommend using a fabric freshener or hanging the clothes outside in the fresh air to naturally eliminate any unwanted smells.
Drying Time After Washing
Once the clothes are washed, it is important to let them air dry to avoid setting the butter stains. Proper drying techniques play a crucial role in maintaining the fabric’s integrity and preventing shrinkage. Here are some tips to ensure proper drying of your garments:
-
Allow the clothes to hang freely: Hanging them on a clothesline or a drying rack helps to evenly distribute the weight and allows for better air circulation.
-
Avoid direct sunlight: Excessive exposure to sunlight can fade colors and damage delicate fabrics. It’s best to dry your clothes in a shaded area or indoors.
-
If using a dryer, select a low heat setting: High temperatures can cause shrinkage and damage the fabric fibers. Opt for a gentle cycle with low heat to prevent any mishaps.
Proper drying techniques are essential not only for stain removal but also for preventing residual odor, as we’ll discuss in the next section.
Preventing Residual Odor
To prevent residual odor, make sure you thoroughly dry your clothes before storing them away. This is especially important when dealing with stains like old butter, which can leave behind a lingering smell if not properly eliminated. I have found that by following a few simple steps, you can effectively remove any residual grease and get rid of that unpleasant odor.
First, scrape off any excess butter from the fabric using a blunt knife or spoon. Then, apply a pre-treatment stain remover directly to the stained area. Let it sit for a few minutes before laundering the garment as usual. For an extra boost, add a cup of white vinegar to the wash cycle. Finally, make sure to air dry your clothes completely before storing them to avoid any moisture that may lead to mildew or odor.
Here’s a table to summarize the steps:
Steps to Eliminate Butter Stains and Residual Odor |
---|
1. Scrape off excess butter |
2. Apply pre-treatment stain remover |
3. Launder with white vinegar |
Preventing Future Butter Stains on Clothing
If you want to prevent future butter stains on your clothing, you should avoid eating while wearing your favorite outfits. Butter stains can be stubborn and frustrating to remove, so it’s best to take proactive measures to avoid them altogether.
Here are some butter stain prevention tips that I’ve learned through my own experiences:
-
Be mindful of your surroundings: Eating in messy or crowded environments increases the chances of butter accidentally splattering on your clothes.
-
Use protective measures: Consider wearing an apron or a napkin tucked into your collar to catch any potential butter drips.
-
Be cautious with buttery foods: When consuming buttery foods like toast or popcorn, take smaller bites and be mindful of any potential butter residue that may transfer onto your clothes.
Frequently Asked Questions
How Long Does It Take for Old Butter Stains to Set In?
I’m not exactly sure how long it takes for old butter stains to set in, but I do know some tips for preventing butter stains from setting in and removing them from upholstery.
Can I Use the Same Techniques to Remove Butter Stains From Delicate Fabrics Like Silk or Satin?
I’ve had success removing butter stains from delicate fabrics like silk or satin using gentle techniques. It’s important to act quickly and blot the stain, avoiding rubbing. I can share more tips if you’re interested.
Are There Any Household Ingredients That Should Not Be Used on Certain Types of Fabrics?
There are certain household ingredients that should not be used on certain types of fabrics. For example, bleach can be risky to use on delicate fabrics. It’s important to explore alternative methods for removing stains from sensitive fabrics.
What Is the Best Way to Remove Butter Stains From Leather or Suede Garments?
The best way to remove butter stains from leather is to gently blot the stain with a clean cloth and apply a leather cleaner or mild detergent. For suede, use a suede brush to remove any dried butter and then apply a suede cleaner.
Can I Use a Hairdryer to Speed up the Drying Process After Removing Butter Stains?
Using a hairdryer can be effective in speeding up the drying process after removing butter stains from clothes. However, there are alternative drying methods like air drying or using a fan that can also work well.
Conclusion
In conclusion, removing old butter stains from clothes may seem daunting, but it can be easily accomplished with the right techniques and ingredients. By understanding the nature of the stain and taking proper steps to treat it, you can eliminate even the most stubborn butter stains.
However, some may argue that prevention is the best solution. While this is true, accidents happen, and knowing how to effectively remove stains is a valuable skill.
So, don’t let old butter stains ruin your favorite clothes. Tackle them head-on and enjoy stain-free garments!
Diana’s meticulous nature and editorial prowess set the gold standard for our content. With over a decade in the culinary and publishing industries, her guidance ensures that every article perfectly blends information and entertainment. A culinary experimenter, Diana loves whipping up new butter-based concoctions in her kitchen.
Household Hacks
What Gets Butter Out of Clothes

I’ve got some exciting news for you – I’ve discovered the ultimate solution to the dreaded butter stains on clothes!
You know that sinking feeling when you accidentally smear butter on your favorite shirt? Well, worry no more. In this article, I’ll reveal the common household items, effective techniques, and natural remedies that will banish those butter stains for good.
Plus, I’ll share expert tips to ensure you never have to deal with this pesky problem again.
Get ready to say goodbye to butter stains and hello to spotless clothes!
Key Takeaways
- Dish soap contains enzymes that break down butter stains.
- Vinegar can effectively remove butter stains.
- Baking soda can be used as a pre-treatment for butter stains.
- Consider using commercial products specifically designed for removing butter stains.
Common Household Items for Removing Butter Stains
You can use common household items like dish soap, vinegar, or baking soda to remove butter stains from your clothes. Household products are often the most convenient and cost-effective solutions when it comes to tackling stains.
Dish soap, for example, contains enzymes that can break down the oils in butter, making it easier to remove. Simply apply a small amount of dish soap to the stain, gently rub it in, and let it sit for a few minutes before rinsing with cold water.
Vinegar is another DIY solution that can effectively remove butter stains. Mix equal parts vinegar and water, sponge the mixture onto the stain, and then rinse with cold water.
Baking soda, on the other hand, can be used as a pre-treatment for butter stains. Create a paste by mixing baking soda with water, apply it to the stain, and let it sit for about 30 minutes before washing as usual.
These household items are readily available and can be used to effectively remove butter stains from your clothes. However, if these DIY solutions don’t work, there are other effective stain-removing techniques that can be employed.
Effective Stain-Removing Techniques
To effectively remove stains from your garments, try using a combination of dish soap and warm water. This method is one of the quickest and easiest ways to remove butter stains from clothes.
Simply mix a few drops of dish soap with warm water and gently rub the solution onto the stained area. Allow it to sit for a few minutes and then rinse with cold water.
If the stain persists, you may want to consider using effective commercial products specifically designed for removing butter stains on clothing. These products are formulated to break down the grease and oil in the butter, making it easier to remove.
Transitioning into the subsequent section about natural remedies for butter stains, let’s explore some alternative options that you can try at home.
Natural Remedies for Butter Stains
If you’re looking for a more environmentally-friendly approach, consider using vinegar and baking soda to tackle butter stains on your garments. These DIY butter stain remover recipes are not only effective but also gentle on delicate fabrics.
Here are some tips to help you remove butter stains from your favorite clothes:
- Mix equal parts vinegar and water in a spray bottle and spritz the stained area.
- Let the vinegar solution sit for a few minutes to break down the butter.
- Gently blot the stain with a clean cloth to lift the butter.
- Create a paste using baking soda and water, and apply it to the remaining stain.
- Allow the paste to dry completely, then brush it off with a soft brush.
- Wash the garment as usual to remove any residue.
Expert Tips for Removing Butter From Clothes
For expert tips on removing butter stains from your garments, consider using dish soap and warm water as a pre-treatment solution. This simple and effective method can help break down the butter’s greasy residue, making it easier to remove.
After applying the dish soap and warm water mixture to the stained area, gently rub the fabric together to work in the solution. Then, rinse the garment thoroughly with cold water.
If the stain persists, don’t worry. There are other options available. One option is to use the best detergent for butter stain removal. Look for a detergent that contains enzymes, as they are effective in breaking down grease and oil stains.
If the stain is particularly stubborn, professional dry cleaning may be necessary. Dry cleaners have specialized solvents and techniques that can remove even the toughest butter stains.
Preventing Future Butter Stains on Clothing
To prevent future stains on your clothing, try to be mindful of how you handle butter and avoid any accidental spills. Here are some tips to help you avoid butter spills and prevent future stains:
- Store butter properly: Keep butter in a covered dish or container to prevent it from melting and spilling onto your clothes.
- Use butter alternatives: Consider using butter alternatives like margarine or spreads that come in squeeze bottles or tubs, which are less likely to spill.
- Be cautious when spreading butter: When spreading butter on bread or toast, do it over a plate or a napkin to catch any potential drips.
By following these simple tips, you can prevent future butter stains and keep your clothes looking clean and fresh.
Frequently Asked Questions
Can I Use Dish Soap to Remove Butter Stains From Clothes?
Sure, dish soap can be effective in removing butter stains from clothes. However, using vinegar to remove butter stains is a great alternative method as it helps break down the oils.
Are There Any Special Techniques for Removing Butter Stains From Delicate Fabrics?
When it comes to removing butter stains from delicate fabrics, it’s important to know the proper techniques. There are alternative methods that can be used, and taking preventive measures can help avoid setting the stains.
How Long Should I Let a Butter Stain Remover Sit on the Fabric Before Washing It?
I usually let a butter stain remover sit on the fabric for about 10-15 minutes before washing it. It allows the remover to penetrate the stain and make it easier to remove. Some of the best laundry detergents for removing butter stains are ones with enzymes.
Can I Use a Hairdryer to Speed up the Drying Process After Removing a Butter Stain?
Using a hairdryer to speed up the drying process after removing a butter stain is not recommended. It can cause the stain to set further into the fabric. It’s best to let the fabric air dry or use alternative drying methods.
Is It Necessary to Pre-Treat Butter Stains Before Washing the Clothes?
Before washing clothes with butter stains, it is necessary to pre-treat them. This step helps in preventing the stain from setting and makes it easier to remove later.
Conclusion
Well, there you have it folks. Who knew that removing butter stains from clothes could be such a riveting topic?
But fear not, because armed with the knowledge of common household items, effective stain-removing techniques, natural remedies, and expert tips, you can now conquer any butter-related clothing disaster that comes your way.
So go forth, my butter-stained comrades, and fear not the greasy messes that life throws at you. With these methods in your arsenal, butter stains will be a thing of the past.
Stay clean, stay butter-free, and may your clothes forever be stain-free.
Sunny’s articles radiate enthusiasm, much like her sunny disposition. As our resident “Butter Geek”, she delves deep into the latest butter trends, ensuring our readers are always in the know. Beyond her writing, Sunny’s passion lies in exploring vegan butter alternatives and hosting butter-tasting soirées.
Household Hacks
How to Quickly Defrost Butter

I’ve always believed that time is of the essence, especially when it comes to cooking and baking. That’s why I’ve mastered the art of quickly defrosting butter.
In this article, I’ll share with you the best methods I’ve discovered through trial and error. Understanding the science behind butter freezing is crucial, and I’ll explain it to you in simple terms.
Get ready to learn some quick and easy microwave techniques, oven tricks, and even a cold water bath method for rapid butter defrosting.
Let’s get started!
Key Takeaways
- Quick defrosting of butter allows for easy spreading on bread or toast.
- Proper defrosting preserves the texture and consistency of the final dish.
- Slow defrosting can result in soft and oily butter, making it difficult to incorporate evenly into recipes.
- Alternative methods such as warm water, room temperature, or grating can be used when a microwave is not available.
Why Defrost Butter Quickly Matters
Defrosting butter quickly matters because it allows for easy spreading on bread or toast. The importance of defrosting butter quickly cannot be underestimated, especially when it comes to the impact it has on recipes. Slow butter defrosting can significantly affect the texture and consistency of the final dish.
When butter is slowly defrosted, it tends to become soft and oily, making it difficult to incorporate into the recipe evenly. This can result in a lumpy or greasy texture, which is not desirable in many dishes.
In contrast, when butter is defrosted quickly, it retains its solid form while becoming soft enough to easily mix into batters or doughs. This ensures a smoother and more consistent outcome, enhancing the overall taste and appearance of the dish.
Understanding the Science of Butter Freezing
Understanding the science of how butter freezes can help with its thawing process. When butter is exposed to low temperatures, it undergoes a physical change and solidifies. The freezing process occurs when the temperature of butter drops below its melting point, which is around 32°F (0°C).
The effect of temperature on butter defrosting is significant. As the temperature rises, the butter transitions from a solid to a semi-solid state, making it easier to spread or use in recipes. This is why it’s important to defrost butter at the right temperature to ensure its texture and quality are preserved.
Now, let’s explore the best methods for defrosting butter and how to do it quickly and efficiently.
The Best Methods for Defrosting Butter
To thaw your butter effectively, you can try using the microwave or leaving it at room temperature for a few hours.
If you’re short on time, the microwave is the quickest method. Simply place the wrapped butter in a microwave-safe dish and heat it on the defrost setting for 10-15 seconds at a time, checking and flipping the butter every few seconds until it softens. Be careful not to overheat it, as the butter can melt unevenly.
Alternatively, you can leave the butter at room temperature for a few hours. This method is slower but allows for a more even thaw.
Once the butter is soft and spreadable, you can move on to incorporating it into your recipes.
Now, let’s explore some quick and easy microwave defrosting techniques.
Quick and Easy Microwave Defrosting Techniques
If you’re in a hurry, you can simply pop the wrapped butter in the microwave for 10-15 seconds at a time, checking and flipping it until it softens. However, it’s important to take some microwave safety precautions to ensure you don’t accidentally melt the butter or damage the microwave.
Here are a few alternative defrosting methods you can try if you don’t have a microwave or prefer not to use one:
- Place the wrapped butter in a ziplock bag and submerge it in a bowl of warm water.
- Cut the butter into smaller pieces and let it sit at room temperature until it softens.
- Use a grater to grate the frozen butter into smaller flakes, which will thaw more quickly.
These methods are all safe and effective ways to defrost butter when you’re short on time. However, if you’re looking for another quick option, using the oven can also speed up the defrosting process.
Using the Oven to Speed Up Butter Defrosting
Using the oven is a simple and efficient way to thaw butter in a hurry. When I need softened butter quickly for baking or cooking, I preheat my oven to a low temperature, around 200°F.
I then place the wrapped butter on a baking sheet and pop it into the oven. The low oven temperature gently warms the butter, allowing it to thaw without melting completely. It’s important to keep an eye on the butter and check it frequently to ensure it doesn’t melt.
Butter has a melting point of around 90°F, so it can quickly go from soft to liquid if left in a high-temperature oven. By using a low oven temperature, I can safely thaw my butter without worrying about it melting too much.
The Cold Water Bath Method for Rapid Butter Defrosting
I love using the cold water bath method to quickly defrost butter because it has several benefits.
First, it’s a time-saving technique that allows me to have soft and ready-to-use butter in just a few minutes.
Second, it’s a proper way to defrost butter as it helps maintain its texture and flavor without compromising its quality.
Lastly, this method is simple and convenient, making it a go-to technique for busy individuals who need softened butter on demand.
Cold Water Method Benefits
To defrost butter quickly, you can place it in a sealed plastic bag and submerge it in cold water. This method softens the butter without melting it completely. It offers several benefits for defrosting butter.
- It is a quick and efficient way to soften butter, especially for baking or cooking purposes.
- The cold water helps maintain the butter’s texture and prevents it from becoming too runny or melted.
- This method is easy to do and requires minimal preparation.
However, there are some disadvantages to using the cold water method. It may not be suitable for defrosting large quantities of butter as it can be time-consuming. Additionally, you need to monitor the water temperature to ensure it remains cold enough but not too cold to freeze the butter.
If you’re looking for alternative methods, there are a few options to consider. One alternative is using the microwave, but you need to be careful not to overheat or melt the butter. Another option is letting the butter sit at room temperature, but this method takes longer. Ultimately, choose a method that suits your needs and time constraints.
Now, let’s move on to the next section where I will introduce a time-saving defrosting technique.
Time-Saving Defrosting Technique
Now that we’ve explored the benefits of the cold water method, let’s dive into some time-saving defrosting techniques and hacks.
When it comes to defrosting butter quickly, there are a few tricks that can save you precious minutes in the kitchen. One technique is to use the microwave. Simply place the wrapped butter in a microwave-safe dish and defrost it using the microwave’s low power setting in short bursts, checking and flipping it frequently to ensure even defrosting.
Another hack is to grate frozen butter. By grating the butter straight from the freezer, you can easily incorporate it into recipes without having to wait for it to soften.
These time-saving techniques and defrosting hacks will help you whip up delicious dishes in no time.
Proper Butter Defrosting
By grating frozen butter, you can easily incorporate it into recipes without waiting for it to soften, saving precious time in the kitchen. This technique allows you to quickly add cold butter to your doughs or batters, resulting in flaky pastries and tender cakes.
Here are some butter defrosting tips to ensure you do it safely:
- Grate the frozen butter using a box grater or a food processor.
- Sprinkle the grated butter directly onto the dry ingredients.
- Gently incorporate the butter into the mixture until it resembles coarse crumbs.
These simple steps will give you perfectly softened butter in no time.
However, if you’re in a hurry and need to defrost butter quickly, there are some pro tips for safely defrosting butter in a hurry that you should know about.
Pro Tips for Safely Defrosting Butter in a Hurry
If you’re in a hurry, there are some pro tips to safely defrost butter quickly.
One method is to use the microwave. Start by placing the butter in a microwave-safe bowl and covering it with a microwave-safe lid or plastic wrap. Set the microwave to the defrost setting or use 30-second intervals on low power. Check the butter frequently to avoid melting it.
Another option is to grate the frozen butter. This increases the surface area and helps it defrost faster.
You can also try placing the butter in a sealable plastic bag and submerging it in warm water. Make sure the water is not too hot to prevent melting.
With these pro tips, you can safely defrost butter in a hurry.
Frequently Asked Questions
Can I Use the Same Methods to Defrost Margarine or Other Dairy Products?
Yes, you can use the same methods to defrost margarine or other dairy products. However, it’s important to consider the effects of using different defrosting methods on the quality of dairy products.
Can I Leave the Butter on the Kitchen Counter to Defrost Naturally?
Sure, you can leave butter on the kitchen counter to defrost naturally, but it can take a while. Depending on the temperature, it can take anywhere from 1-4 hours.
Can I Use a Hairdryer to Defrost Butter Quickly?
Using hot water to defrost butter quickly can affect its texture. I wouldn’t recommend using a hairdryer as it may heat unevenly. Instead, try placing the butter in a sealed plastic bag and submerging it in warm water for faster thawing.
Can I Use the Microwave to Defrost Butter if It’s Still in Its Paper Wrapper?
Yes, you can use the microwave to quickly defrost butter, even if it’s still in its paper wrapper. Just make sure to use the defrost setting and check it frequently to prevent melting.
Can I Refreeze Butter After It Has Been Defrosted?
Yes, you can refreeze butter after it’s been defrosted. However, it’s best to use it immediately to maintain quality. If you need to quickly defrost butter, try using the microwave or submerging it in warm water.
Conclusion
In conclusion, defrosting butter quickly is essential for those moments when time is of the essence in the kitchen. Understanding the science behind butter freezing allows us to employ the best methods for defrosting.
Whether it’s using the microwave, oven, or a cold water bath, these techniques will help you thaw out your butter in no time.
So next time you’re in a hurry, don’t let frozen butter slow you down. With these tips, you’ll be spreading soft, creamy goodness like a hot knife through butter.
Sunny’s articles radiate enthusiasm, much like her sunny disposition. As our resident “Butter Geek”, she delves deep into the latest butter trends, ensuring our readers are always in the know. Beyond her writing, Sunny’s passion lies in exploring vegan butter alternatives and hosting butter-tasting soirées.
Household Hacks
How to Melt Butter on Stove

I’ve always loved the rich, creamy taste of melted butter. It adds a delicious flavor to so many dishes. However, I used to struggle with getting it just right on the stove. The heat would often be too high, resulting in burnt or unevenly melted butter. That’s why I’m here to share my tried-and-true method for melting butter on low heat.
By using low heat, you can slowly melt the butter without risking burning it. This gentle process helps to maintain the butter’s smooth texture and prevent any unwanted browning. To start, gather your ingredients and tools. All you’ll need is a stove, a pan, and of course, the butter.
Once you have everything ready, it’s time to begin. Place the pan on the stove over low heat. This will ensure that the butter melts slowly and evenly. Next, add the desired amount of butter to the pan. It’s important to use the correct amount for your recipe, so be sure to measure it out accurately.
As the butter starts to melt, you may notice some foam forming on the surface. This is normal and can be skimmed off if desired. Gently stir the butter occasionally to help it melt evenly. Be patient and resist the temptation to turn up the heat. Slow and steady wins the race when it comes to melting butter.
Once the butter is completely melted, remove it from the heat. It should be smooth and creamy, ready to be used in your favorite recipes. Whether you’re making a batch of cookies, sautéing vegetables, or drizzling it over popcorn, your melted butter will be perfect every time.
So, grab your stove and pan, and let’s get started on this delicious journey together. Follow these simple steps, and you’ll be able to achieve perfectly melted butter that will elevate your dishes to a whole new level. Enjoy!
Key Takeaways
- Select a saucepan suitable for the amount of butter and ensure all ingredients and tools are ready before starting.
- Use a non-stick pan with high sides and a lid to prevent splattering and ensure the pan is clean and dry.
- Cut the butter into smaller chunks for even and faster melting, and use time-saving techniques like grating or rolling pin methods.
- Stir constantly to achieve even melting and distribution of flavor, and incorporate air for a lighter and fluffier texture.
Gathering the Ingredients and Tools
First, you’ll need to gather the butter, a saucepan, and a stove. Time management is crucial when melting butter on the stove. To ensure a smooth and efficient process, it’s important to have all the necessary ingredients and tools ready before you begin.
Start by selecting a saucepan that is suitable for the amount of butter you wish to melt. A small saucepan works well for smaller quantities, while a larger one is better for larger amounts. Next, measure the desired amount of butter and place it in the saucepan. It’s important to cut the butter into smaller chunks to ensure even and faster melting.
Place the saucepan on a stove burner, set the heat to low, and allow the butter to melt slowly. By following these melting techniques and managing your time effectively, you’ll have perfectly melted butter for your culinary creations.
Preparing the Stove and Pan
Before you start, make sure the stove and pan are properly prepared.
To prevent butter from splattering, choose a pan with high sides and a lid. Non-stick pans are great because they make it easier to melt the butter without sticking.
Before heating the pan, ensure it is clean and dry. Moisture can cause the butter to splatter when it comes in contact with the hot surface.
Set the stove to low or medium heat to slowly melt the butter without overheating it. This will prevent unwanted splattering and ensure a smooth melting process.
Cutting the Butter Into Even Pieces
When it comes to cutting butter into even pieces, it’s not just about aesthetics, but also about achieving consistent results in your cooking. Evenness is crucial because it allows the butter to melt evenly and distribute its flavor and richness throughout your dish.
To save time and effort, I find it helpful to use time-saving techniques like the ‘grating’ method or the ‘rolling pin’ method, which help create uniform butter pieces quickly and efficiently.
Importance of Evenness
To ensure your melted butter is smooth and consistent, make sure you keep stirring it constantly on the stove. This is crucial for achieving an even melting process and a smooth texture. Here’s why it’s important:
-
Uniform heat distribution: Stirring the butter prevents hot spots from forming, ensuring that it melts evenly throughout. This helps avoid any burnt or unevenly melted areas.
-
Incorporation of air: Constant stirring helps incorporate air into the butter, resulting in a lighter and fluffier texture once melted. This is especially important for recipes that require a delicate and airy consistency.
-
Homogeneous mixture: By stirring the butter continuously, you ensure that any solids or fat separation is evenly distributed, creating a smooth and cohesive texture in the final product.
Time-Saving Techniques
If you’re looking to save time in the kitchen, try using a microwave-safe bowl to melt your butter instead. This is one of the time-saving tips I always rely on when I’m in a hurry.
Simply place the desired amount of butter in the bowl and microwave it in short bursts, stirring in between, until it’s completely melted. This method is quick and efficient, allowing you to move on with your cooking or baking without wasting precious minutes.
However, if you prefer alternative melting methods, melting butter on low heat is another option worth considering. It requires a bit more patience, as you’ll need to constantly stir the butter over low heat until it melts slowly and evenly.
Melting Butter on Low Heat
When it comes to melting butter on the stove, achieving the optimal heat level is crucial. Too high of a heat can cause the butter to burn, resulting in a bitter taste and potentially ruining your dish.
Optimal Heat Level
The optimal heat level for melting butter on the stove is medium-low. This ensures that the butter melts slowly and evenly, preventing it from burning or losing its flavor. When melting butter on medium-low heat, here are three things to keep in mind:
-
A small saucepan: Use a small saucepan to melt the butter. This allows for better control over the heat and prevents the butter from spreading too thin.
-
Gentle bubbling: As the butter melts, it will start to bubble gently. This is normal and indicates that the butter is heating at the right temperature.
-
Stirring occasionally: While the butter melts, stir it occasionally with a wooden spoon. This helps distribute the heat evenly and prevents any hot spots.
By following these guidelines, you can achieve the optimal melting time for butter and maintain its delicious flavor.
Now, let’s move on to the next section where we’ll discuss how to prevent butter from burning.
Prevent Butter Burning
Now that we know the optimal heat level to melt butter on the stove, let’s discuss how to prevent it from burning.
It’s crucial to avoid butter browning, as it can greatly affect the taste and quality of your dish. To prevent splattering and butter browning, start by using a heavy-bottomed pan. The thickness of the pan helps distribute heat evenly and reduces the risk of hot spots.
Next, melt the butter over low to medium heat, stirring constantly with a heat-resistant spatula. This ensures that the butter is melted gradually and prevents it from overheating.
Additionally, you can add a splash of water to the pan before melting the butter. The water creates a barrier between the butter and the hot pan, preventing direct contact and reducing the chances of browning.
Time and Consistency
To achieve the desired consistency, it’s important to monitor the time while melting butter on the stovetop. Here are three key factors to consider:
-
Control the heat: Start by melting the butter over low heat to prevent it from burning. Gradually increase the heat if needed, but be cautious not to overdo it.
-
Stir constantly: Continuously stir the butter while it melts to ensure even heat distribution and prevent any parts from burning. This will result in a smooth and creamy consistency.
-
Be patient: Melting butter may take some time, but it’s worth it. Rushing the process can lead to uneven melting or burnt butter, which can ruin the flavor and texture.
Saving energy: To conserve energy, consider alternative melting methods such as using a microwave or a double boiler. These methods are quicker and require less heat, resulting in reduced energy consumption.
Stirring the Butter to Ensure Even Melting
Start by gently stirring the butter to ensure it melts evenly. This step is crucial because evenness is of utmost importance when melting butter on the stove. When the butter is heated, there can be pockets of unmelted butter, which can affect the outcome of your recipe.
By stirring the butter, you help distribute the heat evenly and promote uniform melting. This ensures that every part of the butter melts at the same rate, saving you time and preventing any inconsistencies in your dish.
Additionally, stirring the butter helps prevent it from burning or sticking to the pan, allowing it to melt smoothly and effortlessly. So, take a few moments to stir that butter, and you’ll be rewarded with perfectly melted goodness every time.
Monitoring the Butter’s Temperature
Make sure you’re keeping an eye on the temperature of that creamy goodness as it heats up on the stovetop. Monitoring the temperature is crucial in maintaining consistency and preventing the butter from burning or becoming too runny.
Here are three important things to consider while monitoring the temperature:
-
Use a reliable kitchen thermometer: This will allow you to accurately measure the temperature of the butter as it melts. Ensure that the thermometer is inserted into the thickest part of the butter to get an accurate reading.
-
Adjust the heat: As the butter begins to melt, you may need to adjust the heat to maintain a steady temperature. Lower the heat if the butter starts to bubble too vigorously or increase it slightly if the melting process is slow.
-
Stir frequently: Stirring the butter will help distribute the heat evenly and prevent any hotspots. Make sure to scrape the bottom and sides of the pan to ensure thorough melting.
Removing the Melted Butter From the Stove
Once the butter has reached the desired temperature, it’s time for you to carefully remove it from the stove. To do this, make sure you have a heat-resistant pot holder or oven mitt on hand to protect yourself from any possible burns.
Gently grasp the handle of the pot or pan containing the melted butter and lift it off the heat source. Place it on a heat-resistant surface, such as a trivet or a cooling rack. Be cautious not to tilt the pot too much, as this can cause the hot butter to spill and potentially stain your clothes.
If any butter does spill, quickly attend to it by blotting the area with a clean cloth or paper towel. Avoid rubbing or spreading the butter, as this may drive it deeper into the fabric.
Now that the butter is safely off the stove, let’s move on to the next step: storing and using melted butter.
Storing and Using Melted Butter
Now that you’ve safely removed the melted butter from the stove, let’s discuss how to store and utilize it.
Storing melted butter properly is essential to maintain its freshness and quality. Here are three techniques to store and three alternative uses for melted butter:
-
Storing Techniques:
- Transfer the melted butter into an airtight container and refrigerate it. It can last for up to two weeks when stored correctly.
- Pour the melted butter into ice cube trays and freeze. Once frozen, transfer the butter cubes into a freezer bag. This method allows you to conveniently portion out the butter as needed.
- If you don’t plan to use the melted butter within a few days, you can also can it using a pressure canner. This method provides long-term storage.
-
Alternative Uses:
- Melted butter can be brushed onto bread or pastries before baking, giving them a golden and flavorful crust.
- It can be used as a base for homemade sauces and gravies, adding richness and depth of flavor.
- Melted butter can be drizzled over steamed vegetables, enhancing their taste and adding a touch of indulgence.
Frequently Asked Questions
How Do I Know When the Butter Is Fully Melted?
When melting butter on the stove, it’s important to know when it’s fully melted. Look for a smooth, liquid consistency with no solid bits remaining. This ensures it’s ready for baking or any other use.
Can I Use Margarine Instead of Butter?
I prefer using butter over margarine when baking because it adds a rich flavor and helps create a tender texture. While margarine can be a healthier alternative, it may not yield the same results in terms of taste and texture.
What Is the Best Type of Pan to Use for Melting Butter?
The best type of pan for melting butter is a non-stick pan. It allows for even heat distribution and prevents the butter from sticking. To melt butter, simply place it in the pan and heat over low to medium heat until fully melted.
Can I Melt Butter in the Microwave Instead of on the Stove?
Yes, you can melt butter in the microwave instead of on the stove. The microwave is quicker, but it can be harder to control the temperature. Stove melting gives you more control, but takes longer.
How Long Can Melted Butter Be Stored Before It Goes Bad?
Melted butter can be stored for about two weeks in the refrigerator. Look for signs of spoiled butter such as a rancid smell, mold, or an off taste. Proper storage can help maintain its freshness.
Conclusion
In conclusion, melting butter on the stove is a simple and efficient way to have smooth, melted butter ready for your culinary creations. By following the steps outlined in this article, you can ensure that your butter melts evenly and maintains its flavor.
While some may argue that using a microwave is quicker, melting butter on the stove allows for better control over the temperature and prevents the butter from overheating.
So why not give it a try and elevate your cooking game with perfectly melted butter?
From sneaky childhood butter licks to penning some of our most popular articles, Jamie’s journey with butter has been lifelong. His culinary background gives him a unique perspective, allowing him to craft mouthwatering articles that educate and tantalize equally. Jamie’s travel adventures revolve around finding the world’s best buttery treats when he isn’t writing.
-
Recipes & Culinary Uses3 weeks ago
How to Scramble Eggs Without Butter or Oil
-
Butter Basics3 weeks ago
What Is a Knob of Butter
-
Butter Basics3 weeks ago
What Do You Put Apple Butter on
-
Butter Tips and Tricks3 weeks ago
How Many Tablespoons of Butter Equals 1/3 Cup
-
Production & Processing3 weeks ago
Blonde Butter Maker How to Make
-
Specialized Equipment3 weeks ago
Canna Butter Infuser
-
Butter Basics3 weeks ago
When to Use Beard Butter
-
Butter Tips and Tricks3 weeks ago
How Much Does 1 Tbsp of Butter Weigh