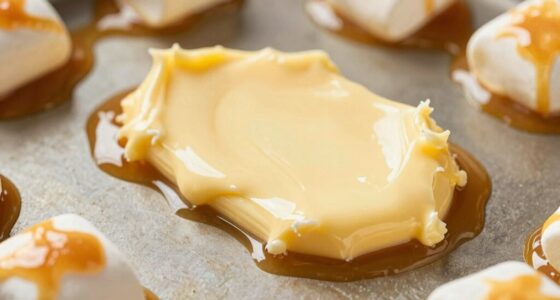
Household Hacks
How to Melt Butter on Stove

I’ve always loved the rich, creamy taste of melted butter. It adds a delicious flavor to so many dishes. However, I used to struggle with getting it just right on the stove. The heat would often be too high, resulting in burnt or unevenly melted butter. That’s why I’m here to share my tried-and-true method for melting butter on low heat.
By using low heat, you can slowly melt the butter without risking burning it. This gentle process helps to maintain the butter’s smooth texture and prevent any unwanted browning. To start, gather your ingredients and tools. All you’ll need is a stove, a pan, and of course, the butter.
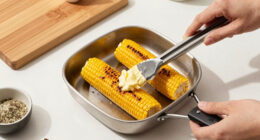
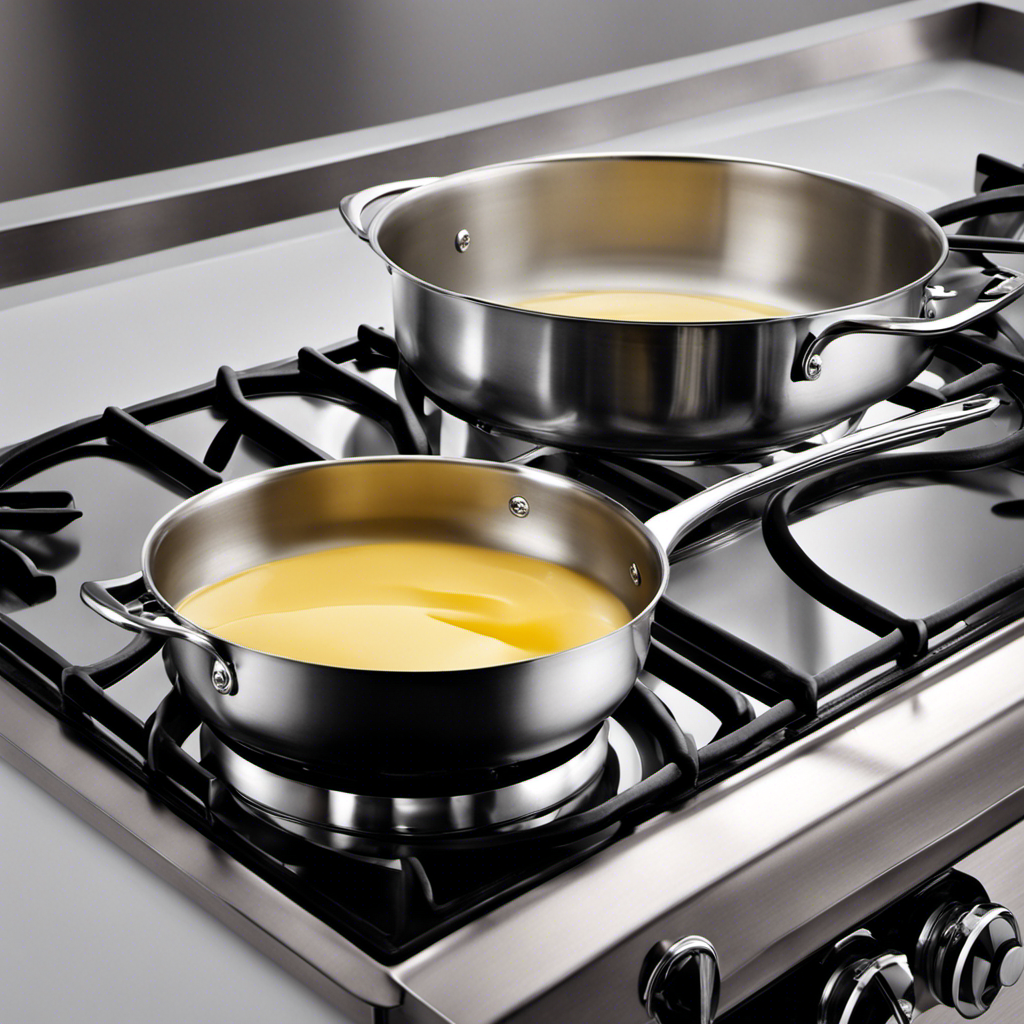
Once you have everything ready, it’s time to begin. Place the pan on the stove over low heat. This will ensure that the butter melts slowly and evenly. Next, add the desired amount of butter to the pan. It’s important to use the correct amount for your recipe, so be sure to measure it out accurately.
As the butter starts to melt, you may notice some foam forming on the surface. This is normal and can be skimmed off if desired. Gently stir the butter occasionally to help it melt evenly. Be patient and resist the temptation to turn up the heat. Slow and steady wins the race when it comes to melting butter.
Once the butter is completely melted, remove it from the heat. It should be smooth and creamy, ready to be used in your favorite recipes. Whether you’re making a batch of cookies, sautéing vegetables, or drizzling it over popcorn, your melted butter will be perfect every time.
So, grab your stove and pan, and let’s get started on this delicious journey together. Follow these simple steps, and you’ll be able to achieve perfectly melted butter that will elevate your dishes to a whole new level. Enjoy!
Key Takeaways
- Select a saucepan suitable for the amount of butter and ensure all ingredients and tools are ready before starting.
- Use a non-stick pan with high sides and a lid to prevent splattering and ensure the pan is clean and dry.
- Cut the butter into smaller chunks for even and faster melting, and use time-saving techniques like grating or rolling pin methods.
- Stir constantly to achieve even melting and distribution of flavor, and incorporate air for a lighter and fluffier texture.
Gathering the Ingredients and Tools
First, you’ll need to gather the butter, a saucepan, and a stove. Time management is crucial when melting butter on the stove. To ensure a smooth and efficient process, it’s important to have all the necessary ingredients and tools ready before you begin.
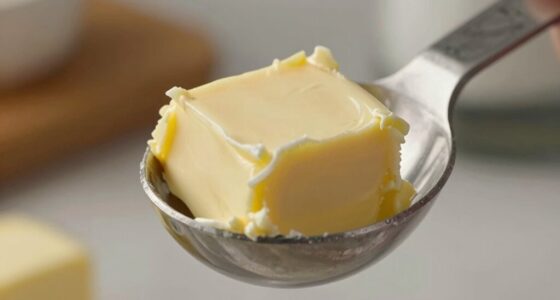
Start by selecting a saucepan that is suitable for the amount of butter you wish to melt. A small saucepan works well for smaller quantities, while a larger one is better for larger amounts. Next, measure the desired amount of butter and place it in the saucepan. It’s important to cut the butter into smaller chunks to ensure even and faster melting.
Place the saucepan on a stove burner, set the heat to low, and allow the butter to melt slowly. By following these melting techniques and managing your time effectively, you’ll have perfectly melted butter for your culinary creations.
Preparing the Stove and Pan
Before you start, make sure the stove and pan are properly prepared.
To prevent butter from splattering, choose a pan with high sides and a lid. Non-stick pans are great because they make it easier to melt the butter without sticking.
Before heating the pan, ensure it is clean and dry. Moisture can cause the butter to splatter when it comes in contact with the hot surface.
Set the stove to low or medium heat to slowly melt the butter without overheating it. This will prevent unwanted splattering and ensure a smooth melting process.
Cutting the Butter Into Even Pieces
When it comes to cutting butter into even pieces, it’s not just about aesthetics, but also about achieving consistent results in your cooking. Evenness is crucial because it allows the butter to melt evenly and distribute its flavor and richness throughout your dish.
To save time and effort, I find it helpful to use time-saving techniques like the ‘grating’ method or the ‘rolling pin’ method, which help create uniform butter pieces quickly and efficiently.
Importance of Evenness
To ensure your melted butter is smooth and consistent, make sure you keep stirring it constantly on the stove. This is crucial for achieving an even melting process and a smooth texture. Here’s why it’s important:
-
Uniform heat distribution: Stirring the butter prevents hot spots from forming, ensuring that it melts evenly throughout. This helps avoid any burnt or unevenly melted areas.
-
Incorporation of air: Constant stirring helps incorporate air into the butter, resulting in a lighter and fluffier texture once melted. This is especially important for recipes that require a delicate and airy consistency.
-
Homogeneous mixture: By stirring the butter continuously, you ensure that any solids or fat separation is evenly distributed, creating a smooth and cohesive texture in the final product.
Time-Saving Techniques
If you’re looking to save time in the kitchen, try using a microwave-safe bowl to melt your butter instead. This is one of the time-saving tips I always rely on when I’m in a hurry.
Simply place the desired amount of butter in the bowl and microwave it in short bursts, stirring in between, until it’s completely melted. This method is quick and efficient, allowing you to move on with your cooking or baking without wasting precious minutes.
However, if you prefer alternative melting methods, melting butter on low heat is another option worth considering. It requires a bit more patience, as you’ll need to constantly stir the butter over low heat until it melts slowly and evenly.
Melting Butter on Low Heat
When it comes to melting butter on the stove, achieving the optimal heat level is crucial. Too high of a heat can cause the butter to burn, resulting in a bitter taste and potentially ruining your dish.
Optimal Heat Level
The optimal heat level for melting butter on the stove is medium-low. This ensures that the butter melts slowly and evenly, preventing it from burning or losing its flavor. When melting butter on medium-low heat, here are three things to keep in mind:
-
A small saucepan: Use a small saucepan to melt the butter. This allows for better control over the heat and prevents the butter from spreading too thin.
-
Gentle bubbling: As the butter melts, it will start to bubble gently. This is normal and indicates that the butter is heating at the right temperature.
-
Stirring occasionally: While the butter melts, stir it occasionally with a wooden spoon. This helps distribute the heat evenly and prevents any hot spots.
By following these guidelines, you can achieve the optimal melting time for butter and maintain its delicious flavor.
Now, let’s move on to the next section where we’ll discuss how to prevent butter from burning.
Prevent Butter Burning
Now that we know the optimal heat level to melt butter on the stove, let’s discuss how to prevent it from burning.
It’s crucial to avoid butter browning, as it can greatly affect the taste and quality of your dish. To prevent splattering and butter browning, start by using a heavy-bottomed pan. The thickness of the pan helps distribute heat evenly and reduces the risk of hot spots.
Next, melt the butter over low to medium heat, stirring constantly with a heat-resistant spatula. This ensures that the butter is melted gradually and prevents it from overheating.
Additionally, you can add a splash of water to the pan before melting the butter. The water creates a barrier between the butter and the hot pan, preventing direct contact and reducing the chances of browning.
Time and Consistency
To achieve the desired consistency, it’s important to monitor the time while melting butter on the stovetop. Here are three key factors to consider:
-
Control the heat: Start by melting the butter over low heat to prevent it from burning. Gradually increase the heat if needed, but be cautious not to overdo it.
-
Stir constantly: Continuously stir the butter while it melts to ensure even heat distribution and prevent any parts from burning. This will result in a smooth and creamy consistency.
-
Be patient: Melting butter may take some time, but it’s worth it. Rushing the process can lead to uneven melting or burnt butter, which can ruin the flavor and texture.
Saving energy: To conserve energy, consider alternative melting methods such as using a microwave or a double boiler. These methods are quicker and require less heat, resulting in reduced energy consumption.
Stirring the Butter to Ensure Even Melting
Start by gently stirring the butter to ensure it melts evenly. This step is crucial because evenness is of utmost importance when melting butter on the stove. When the butter is heated, there can be pockets of unmelted butter, which can affect the outcome of your recipe.
By stirring the butter, you help distribute the heat evenly and promote uniform melting. This ensures that every part of the butter melts at the same rate, saving you time and preventing any inconsistencies in your dish.
Additionally, stirring the butter helps prevent it from burning or sticking to the pan, allowing it to melt smoothly and effortlessly. So, take a few moments to stir that butter, and you’ll be rewarded with perfectly melted goodness every time.
Monitoring the Butter’s Temperature
Make sure you’re keeping an eye on the temperature of that creamy goodness as it heats up on the stovetop. Monitoring the temperature is crucial in maintaining consistency and preventing the butter from burning or becoming too runny.
Here are three important things to consider while monitoring the temperature:
-
Use a reliable kitchen thermometer: This will allow you to accurately measure the temperature of the butter as it melts. Ensure that the thermometer is inserted into the thickest part of the butter to get an accurate reading.
-
Adjust the heat: As the butter begins to melt, you may need to adjust the heat to maintain a steady temperature. Lower the heat if the butter starts to bubble too vigorously or increase it slightly if the melting process is slow.
-
Stir frequently: Stirring the butter will help distribute the heat evenly and prevent any hotspots. Make sure to scrape the bottom and sides of the pan to ensure thorough melting.
Removing the Melted Butter From the Stove
Once the butter has reached the desired temperature, it’s time for you to carefully remove it from the stove. To do this, make sure you have a heat-resistant pot holder or oven mitt on hand to protect yourself from any possible burns.
Gently grasp the handle of the pot or pan containing the melted butter and lift it off the heat source. Place it on a heat-resistant surface, such as a trivet or a cooling rack. Be cautious not to tilt the pot too much, as this can cause the hot butter to spill and potentially stain your clothes.
If any butter does spill, quickly attend to it by blotting the area with a clean cloth or paper towel. Avoid rubbing or spreading the butter, as this may drive it deeper into the fabric.
Now that the butter is safely off the stove, let’s move on to the next step: storing and using melted butter.
Storing and Using Melted Butter
Now that you’ve safely removed the melted butter from the stove, let’s discuss how to store and utilize it.
Storing melted butter properly is essential to maintain its freshness and quality. Here are three techniques to store and three alternative uses for melted butter:
-
Storing Techniques:
- Transfer the melted butter into an airtight container and refrigerate it. It can last for up to two weeks when stored correctly.
- Pour the melted butter into ice cube trays and freeze. Once frozen, transfer the butter cubes into a freezer bag. This method allows you to conveniently portion out the butter as needed.
- If you don’t plan to use the melted butter within a few days, you can also can it using a pressure canner. This method provides long-term storage.
-
Alternative Uses:
- Melted butter can be brushed onto bread or pastries before baking, giving them a golden and flavorful crust.
- It can be used as a base for homemade sauces and gravies, adding richness and depth of flavor.
- Melted butter can be drizzled over steamed vegetables, enhancing their taste and adding a touch of indulgence.
Frequently Asked Questions
How Do I Know When the Butter Is Fully Melted?
When melting butter on the stove, it’s important to know when it’s fully melted. Look for a smooth, liquid consistency with no solid bits remaining. This ensures it’s ready for baking or any other use.
Can I Use Margarine Instead of Butter?
I prefer using butter over margarine when baking because it adds a rich flavor and helps create a tender texture. While margarine can be a healthier alternative, it may not yield the same results in terms of taste and texture.
What Is the Best Type of Pan to Use for Melting Butter?
The best type of pan for melting butter is a non-stick pan. It allows for even heat distribution and prevents the butter from sticking. To melt butter, simply place it in the pan and heat over low to medium heat until fully melted.
Can I Melt Butter in the Microwave Instead of on the Stove?
Yes, you can melt butter in the microwave instead of on the stove. The microwave is quicker, but it can be harder to control the temperature. Stove melting gives you more control, but takes longer.
How Long Can Melted Butter Be Stored Before It Goes Bad?
Melted butter can be stored for about two weeks in the refrigerator. Look for signs of spoiled butter such as a rancid smell, mold, or an off taste. Proper storage can help maintain its freshness.
Conclusion
In conclusion, melting butter on the stove is a simple and efficient way to have smooth, melted butter ready for your culinary creations. By following the steps outlined in this article, you can ensure that your butter melts evenly and maintains its flavor.
While some may argue that using a microwave is quicker, melting butter on the stove allows for better control over the temperature and prevents the butter from overheating.
So why not give it a try and elevate your cooking game with perfectly melted butter?
From sneaky childhood butter licks to penning some of our most popular articles, Jamie’s journey with butter has been lifelong. His culinary background gives him a unique perspective, allowing him to craft mouthwatering articles that educate and tantalize equally. Jamie’s travel adventures revolve around finding the world’s best buttery treats when he isn’t writing.
Household Hacks
What Gets Butter Out of Clothes

I’ve got some exciting news for you – I’ve discovered the ultimate solution to the dreaded butter stains on clothes!
You know that sinking feeling when you accidentally smear butter on your favorite shirt? Well, worry no more. In this article, I’ll reveal the common household items, effective techniques, and natural remedies that will banish those butter stains for good.
Plus, I’ll share expert tips to ensure you never have to deal with this pesky problem again.
Get ready to say goodbye to butter stains and hello to spotless clothes!
Key Takeaways
- Dish soap contains enzymes that break down butter stains.
- Vinegar can effectively remove butter stains.
- Baking soda can be used as a pre-treatment for butter stains.
- Consider using commercial products specifically designed for removing butter stains.
Common Household Items for Removing Butter Stains
You can use common household items like dish soap, vinegar, or baking soda to remove butter stains from your clothes. Household products are often the most convenient and cost-effective solutions when it comes to tackling stains.
Dish soap, for example, contains enzymes that can break down the oils in butter, making it easier to remove. Simply apply a small amount of dish soap to the stain, gently rub it in, and let it sit for a few minutes before rinsing with cold water.
Vinegar is another DIY solution that can effectively remove butter stains. Mix equal parts vinegar and water, sponge the mixture onto the stain, and then rinse with cold water.
Baking soda, on the other hand, can be used as a pre-treatment for butter stains. Create a paste by mixing baking soda with water, apply it to the stain, and let it sit for about 30 minutes before washing as usual.
These household items are readily available and can be used to effectively remove butter stains from your clothes. However, if these DIY solutions don’t work, there are other effective stain-removing techniques that can be employed.
Effective Stain-Removing Techniques
To effectively remove stains from your garments, try using a combination of dish soap and warm water. This method is one of the quickest and easiest ways to remove butter stains from clothes.
Simply mix a few drops of dish soap with warm water and gently rub the solution onto the stained area. Allow it to sit for a few minutes and then rinse with cold water.
If the stain persists, you may want to consider using effective commercial products specifically designed for removing butter stains on clothing. These products are formulated to break down the grease and oil in the butter, making it easier to remove.
Transitioning into the subsequent section about natural remedies for butter stains, let’s explore some alternative options that you can try at home.
Natural Remedies for Butter Stains
If you’re looking for a more environmentally-friendly approach, consider using vinegar and baking soda to tackle butter stains on your garments. These DIY butter stain remover recipes are not only effective but also gentle on delicate fabrics.
Here are some tips to help you remove butter stains from your favorite clothes:
- Mix equal parts vinegar and water in a spray bottle and spritz the stained area.
- Let the vinegar solution sit for a few minutes to break down the butter.
- Gently blot the stain with a clean cloth to lift the butter.
- Create a paste using baking soda and water, and apply it to the remaining stain.
- Allow the paste to dry completely, then brush it off with a soft brush.
- Wash the garment as usual to remove any residue.
Expert Tips for Removing Butter From Clothes
For expert tips on removing butter stains from your garments, consider using dish soap and warm water as a pre-treatment solution. This simple and effective method can help break down the butter’s greasy residue, making it easier to remove.
After applying the dish soap and warm water mixture to the stained area, gently rub the fabric together to work in the solution. Then, rinse the garment thoroughly with cold water.
If the stain persists, don’t worry. There are other options available. One option is to use the best detergent for butter stain removal. Look for a detergent that contains enzymes, as they are effective in breaking down grease and oil stains.
If the stain is particularly stubborn, professional dry cleaning may be necessary. Dry cleaners have specialized solvents and techniques that can remove even the toughest butter stains.
Preventing Future Butter Stains on Clothing
To prevent future stains on your clothing, try to be mindful of how you handle butter and avoid any accidental spills. Here are some tips to help you avoid butter spills and prevent future stains:
- Store butter properly: Keep butter in a covered dish or container to prevent it from melting and spilling onto your clothes.
- Use butter alternatives: Consider using butter alternatives like margarine or spreads that come in squeeze bottles or tubs, which are less likely to spill.
- Be cautious when spreading butter: When spreading butter on bread or toast, do it over a plate or a napkin to catch any potential drips.
By following these simple tips, you can prevent future butter stains and keep your clothes looking clean and fresh.
Frequently Asked Questions
Can I Use Dish Soap to Remove Butter Stains From Clothes?
Sure, dish soap can be effective in removing butter stains from clothes. However, using vinegar to remove butter stains is a great alternative method as it helps break down the oils.
Are There Any Special Techniques for Removing Butter Stains From Delicate Fabrics?
When it comes to removing butter stains from delicate fabrics, it’s important to know the proper techniques. There are alternative methods that can be used, and taking preventive measures can help avoid setting the stains.
How Long Should I Let a Butter Stain Remover Sit on the Fabric Before Washing It?
I usually let a butter stain remover sit on the fabric for about 10-15 minutes before washing it. It allows the remover to penetrate the stain and make it easier to remove. Some of the best laundry detergents for removing butter stains are ones with enzymes.
Can I Use a Hairdryer to Speed up the Drying Process After Removing a Butter Stain?
Using a hairdryer to speed up the drying process after removing a butter stain is not recommended. It can cause the stain to set further into the fabric. It’s best to let the fabric air dry or use alternative drying methods.
Is It Necessary to Pre-Treat Butter Stains Before Washing the Clothes?
Before washing clothes with butter stains, it is necessary to pre-treat them. This step helps in preventing the stain from setting and makes it easier to remove later.
Conclusion
Well, there you have it folks. Who knew that removing butter stains from clothes could be such a riveting topic?
But fear not, because armed with the knowledge of common household items, effective stain-removing techniques, natural remedies, and expert tips, you can now conquer any butter-related clothing disaster that comes your way.
So go forth, my butter-stained comrades, and fear not the greasy messes that life throws at you. With these methods in your arsenal, butter stains will be a thing of the past.
Stay clean, stay butter-free, and may your clothes forever be stain-free.
Sunny’s articles radiate enthusiasm, much like her sunny disposition. As our resident “Butter Geek”, she delves deep into the latest butter trends, ensuring our readers are always in the know. Beyond her writing, Sunny’s passion lies in exploring vegan butter alternatives and hosting butter-tasting soirées.
Household Hacks
How to Quickly Defrost Butter

I’ve always believed that time is of the essence, especially when it comes to cooking and baking. That’s why I’ve mastered the art of quickly defrosting butter.
In this article, I’ll share with you the best methods I’ve discovered through trial and error. Understanding the science behind butter freezing is crucial, and I’ll explain it to you in simple terms.
Get ready to learn some quick and easy microwave techniques, oven tricks, and even a cold water bath method for rapid butter defrosting.
Let’s get started!
Key Takeaways
- Quick defrosting of butter allows for easy spreading on bread or toast.
- Proper defrosting preserves the texture and consistency of the final dish.
- Slow defrosting can result in soft and oily butter, making it difficult to incorporate evenly into recipes.
- Alternative methods such as warm water, room temperature, or grating can be used when a microwave is not available.
Why Defrost Butter Quickly Matters
Defrosting butter quickly matters because it allows for easy spreading on bread or toast. The importance of defrosting butter quickly cannot be underestimated, especially when it comes to the impact it has on recipes. Slow butter defrosting can significantly affect the texture and consistency of the final dish.
When butter is slowly defrosted, it tends to become soft and oily, making it difficult to incorporate into the recipe evenly. This can result in a lumpy or greasy texture, which is not desirable in many dishes.
In contrast, when butter is defrosted quickly, it retains its solid form while becoming soft enough to easily mix into batters or doughs. This ensures a smoother and more consistent outcome, enhancing the overall taste and appearance of the dish.
Understanding the Science of Butter Freezing
Understanding the science of how butter freezes can help with its thawing process. When butter is exposed to low temperatures, it undergoes a physical change and solidifies. The freezing process occurs when the temperature of butter drops below its melting point, which is around 32°F (0°C).
The effect of temperature on butter defrosting is significant. As the temperature rises, the butter transitions from a solid to a semi-solid state, making it easier to spread or use in recipes. This is why it’s important to defrost butter at the right temperature to ensure its texture and quality are preserved.
Now, let’s explore the best methods for defrosting butter and how to do it quickly and efficiently.
The Best Methods for Defrosting Butter
To thaw your butter effectively, you can try using the microwave or leaving it at room temperature for a few hours.
If you’re short on time, the microwave is the quickest method. Simply place the wrapped butter in a microwave-safe dish and heat it on the defrost setting for 10-15 seconds at a time, checking and flipping the butter every few seconds until it softens. Be careful not to overheat it, as the butter can melt unevenly.
Alternatively, you can leave the butter at room temperature for a few hours. This method is slower but allows for a more even thaw.
Once the butter is soft and spreadable, you can move on to incorporating it into your recipes.
Now, let’s explore some quick and easy microwave defrosting techniques.
Quick and Easy Microwave Defrosting Techniques
If you’re in a hurry, you can simply pop the wrapped butter in the microwave for 10-15 seconds at a time, checking and flipping it until it softens. However, it’s important to take some microwave safety precautions to ensure you don’t accidentally melt the butter or damage the microwave.
Here are a few alternative defrosting methods you can try if you don’t have a microwave or prefer not to use one:
- Place the wrapped butter in a ziplock bag and submerge it in a bowl of warm water.
- Cut the butter into smaller pieces and let it sit at room temperature until it softens.
- Use a grater to grate the frozen butter into smaller flakes, which will thaw more quickly.
These methods are all safe and effective ways to defrost butter when you’re short on time. However, if you’re looking for another quick option, using the oven can also speed up the defrosting process.
Using the Oven to Speed Up Butter Defrosting
Using the oven is a simple and efficient way to thaw butter in a hurry. When I need softened butter quickly for baking or cooking, I preheat my oven to a low temperature, around 200°F.
I then place the wrapped butter on a baking sheet and pop it into the oven. The low oven temperature gently warms the butter, allowing it to thaw without melting completely. It’s important to keep an eye on the butter and check it frequently to ensure it doesn’t melt.
Butter has a melting point of around 90°F, so it can quickly go from soft to liquid if left in a high-temperature oven. By using a low oven temperature, I can safely thaw my butter without worrying about it melting too much.
The Cold Water Bath Method for Rapid Butter Defrosting
I love using the cold water bath method to quickly defrost butter because it has several benefits.
First, it’s a time-saving technique that allows me to have soft and ready-to-use butter in just a few minutes.
Second, it’s a proper way to defrost butter as it helps maintain its texture and flavor without compromising its quality.
Lastly, this method is simple and convenient, making it a go-to technique for busy individuals who need softened butter on demand.
Cold Water Method Benefits
To defrost butter quickly, you can place it in a sealed plastic bag and submerge it in cold water. This method softens the butter without melting it completely. It offers several benefits for defrosting butter.
- It is a quick and efficient way to soften butter, especially for baking or cooking purposes.
- The cold water helps maintain the butter’s texture and prevents it from becoming too runny or melted.
- This method is easy to do and requires minimal preparation.
However, there are some disadvantages to using the cold water method. It may not be suitable for defrosting large quantities of butter as it can be time-consuming. Additionally, you need to monitor the water temperature to ensure it remains cold enough but not too cold to freeze the butter.
If you’re looking for alternative methods, there are a few options to consider. One alternative is using the microwave, but you need to be careful not to overheat or melt the butter. Another option is letting the butter sit at room temperature, but this method takes longer. Ultimately, choose a method that suits your needs and time constraints.
Now, let’s move on to the next section where I will introduce a time-saving defrosting technique.
Time-Saving Defrosting Technique
Now that we’ve explored the benefits of the cold water method, let’s dive into some time-saving defrosting techniques and hacks.
When it comes to defrosting butter quickly, there are a few tricks that can save you precious minutes in the kitchen. One technique is to use the microwave. Simply place the wrapped butter in a microwave-safe dish and defrost it using the microwave’s low power setting in short bursts, checking and flipping it frequently to ensure even defrosting.
Another hack is to grate frozen butter. By grating the butter straight from the freezer, you can easily incorporate it into recipes without having to wait for it to soften.
These time-saving techniques and defrosting hacks will help you whip up delicious dishes in no time.
Proper Butter Defrosting
By grating frozen butter, you can easily incorporate it into recipes without waiting for it to soften, saving precious time in the kitchen. This technique allows you to quickly add cold butter to your doughs or batters, resulting in flaky pastries and tender cakes.
Here are some butter defrosting tips to ensure you do it safely:
- Grate the frozen butter using a box grater or a food processor.
- Sprinkle the grated butter directly onto the dry ingredients.
- Gently incorporate the butter into the mixture until it resembles coarse crumbs.
These simple steps will give you perfectly softened butter in no time.
However, if you’re in a hurry and need to defrost butter quickly, there are some pro tips for safely defrosting butter in a hurry that you should know about.
Pro Tips for Safely Defrosting Butter in a Hurry
If you’re in a hurry, there are some pro tips to safely defrost butter quickly.
One method is to use the microwave. Start by placing the butter in a microwave-safe bowl and covering it with a microwave-safe lid or plastic wrap. Set the microwave to the defrost setting or use 30-second intervals on low power. Check the butter frequently to avoid melting it.
Another option is to grate the frozen butter. This increases the surface area and helps it defrost faster.
You can also try placing the butter in a sealable plastic bag and submerging it in warm water. Make sure the water is not too hot to prevent melting.
With these pro tips, you can safely defrost butter in a hurry.
Frequently Asked Questions
Can I Use the Same Methods to Defrost Margarine or Other Dairy Products?
Yes, you can use the same methods to defrost margarine or other dairy products. However, it’s important to consider the effects of using different defrosting methods on the quality of dairy products.
Can I Leave the Butter on the Kitchen Counter to Defrost Naturally?
Sure, you can leave butter on the kitchen counter to defrost naturally, but it can take a while. Depending on the temperature, it can take anywhere from 1-4 hours.
Can I Use a Hairdryer to Defrost Butter Quickly?
Using hot water to defrost butter quickly can affect its texture. I wouldn’t recommend using a hairdryer as it may heat unevenly. Instead, try placing the butter in a sealed plastic bag and submerging it in warm water for faster thawing.
Can I Use the Microwave to Defrost Butter if It’s Still in Its Paper Wrapper?
Yes, you can use the microwave to quickly defrost butter, even if it’s still in its paper wrapper. Just make sure to use the defrost setting and check it frequently to prevent melting.
Can I Refreeze Butter After It Has Been Defrosted?
Yes, you can refreeze butter after it’s been defrosted. However, it’s best to use it immediately to maintain quality. If you need to quickly defrost butter, try using the microwave or submerging it in warm water.
Conclusion
In conclusion, defrosting butter quickly is essential for those moments when time is of the essence in the kitchen. Understanding the science behind butter freezing allows us to employ the best methods for defrosting.
Whether it’s using the microwave, oven, or a cold water bath, these techniques will help you thaw out your butter in no time.
So next time you’re in a hurry, don’t let frozen butter slow you down. With these tips, you’ll be spreading soft, creamy goodness like a hot knife through butter.
Sunny’s articles radiate enthusiasm, much like her sunny disposition. As our resident “Butter Geek”, she delves deep into the latest butter trends, ensuring our readers are always in the know. Beyond her writing, Sunny’s passion lies in exploring vegan butter alternatives and hosting butter-tasting soirées.
Household Hacks
How to Measure Butter in a Tub

I’ve always struggled with measuring butter in a tub. It can be frustrating when a recipe calls for a specific amount, and you’re left guessing how much to use.
But fear not! In this article, I’ll guide you through the process of measuring butter in a tub with precision and ease.
From understanding the measurement units to utilizing the right tools, I’ll share tips and tricks to ensure your butter measurements are spot on every time.
Key Takeaways
- Precise measurements are crucial for baking and cooking.
- Using a kitchen scale provides the most precise measurement.
- Reading the packaging for tablespoon or cup equivalents can help measure butter without a scale.
- Converting from sticks to cups or tablespoons ensures accurate measurements in recipes.
Understanding the Measurement Units
To understand the measurement units, you’ll need to familiarize yourself with tablespoons and cups. When it comes to measuring butter, it’s important to know the equivalents. One stick of butter is equal to 8 tablespoons or 1/2 cup. This knowledge will help you accurately measure the amount of butter needed for your recipe.
It’s also crucial to understand butter density. Butter can vary in density depending on its temperature and brand. Softened butter is denser than cold butter, so when measuring, it’s best to pack it tightly into the measuring cup or spoon. This ensures that you’re getting the right amount of butter for your recipe.
Now that you understand the measurement units and butter density, let’s move on to the tools required for measuring butter.
Tools Required for Measuring Butter
When it comes to measuring ingredients like butter, having the right tools is crucial. Two common options for measuring butter are a measuring spoon or a scale.
Using a measuring spoon can be convenient and easy, but using a scale ensures more accurate measurements.
However, if you don’t have access to these measuring tools, there are some substitutes you can use to still achieve accurate measurements.
Measuring Spoon or Scale
You can use a measuring spoon or a scale to accurately measure butter in a tub.
When it comes to understanding different measurements, a measuring spoon is a common choice. It allows you to scoop out the desired amount of butter, whether it’s a teaspoon or a tablespoon.
However, using a scale has its own benefits. A scale provides a more precise measurement as it allows you to weigh the butter in grams or ounces. This is especially useful when following a recipe that requires an exact amount of butter.
Additionally, using a scale eliminates the need for multiple measuring spoons, making it a more efficient and convenient option.
Accurate Measurements Guarantee
Using either a measuring spoon or a scale guarantees precise measurements for your recipes. When it comes to butter, accurate measurements are crucial to achieve the desired texture and taste in your baked goods.
Here are four reasons why precise butter measurement techniques are important:
-
Consistency: By measuring butter accurately, you ensure that each batch of your recipe turns out the same, creating a consistent and reliable outcome every time.
-
Texture: Butter contributes to the texture of your baked goods. Precise measurements ensure that the right amount of fat is incorporated, resulting in tender and moist treats.
-
Flavor: Too much or too little butter can affect the flavor of your recipe. Precise measurements help maintain the perfect balance, enhancing the overall taste of your dish.
-
Baking Science: Baking is a science, and precise measurements are essential to achieve the desired chemical reactions and reactions between ingredients. Accurate butter measurement techniques play a crucial role in the successful execution of your recipes.
Substitutes for Measuring Tools
If you’re in a pinch and don’t have access to traditional measuring tools, there are substitutes you can use to accurately measure ingredients.
When it comes to measuring butter, there are a few alternative methods you can try. One simple substitute is using the markings on the butter wrapper itself. Most butter wrappers have tablespoon and cup measurements printed on them, making it easy to measure out the desired amount.
Another option is using a kitchen scale. Simply weigh the butter and convert the weight to tablespoons or cups using a conversion chart.
Additionally, you can use a tablespoon as a makeshift measuring tool. One tablespoon is equal to about 14 grams of butter, so you can estimate the amount based on that.
With these alternative measuring methods, you can accurately measure butter even without traditional measuring tools.
Measuring Butter by Weight
To measure butter by weight, it’s important to use a kitchen scale. Using a scale ensures accuracy and consistency in your recipes. Here are four reasons why weighing butter is beneficial:
-
Precise Measurements: By weighing butter, you can achieve precise measurements, resulting in more accurate and consistent recipe outcomes.
-
Easy Conversion: Weighing butter allows for easy conversion between different units of measurement. You can easily convert grams to ounces or vice versa.
-
Consistency in Baking: Baking is a science, and precise measurements are crucial for consistent results. Weighing butter helps maintain the desired texture and taste in your baked goods.
-
Less Mess: Unlike measuring butter by volume, using a kitchen scale eliminates the need for scraping butter into measuring cups, reducing mess and ensuring you have the exact amount needed.
Now, let’s explore another method of measuring butter: measuring by volume.
Measuring Butter by Volume
When measuring butter by volume, it’s important to consider the texture and shape of the butter. Understanding butter density is crucial for accurate measurements. Butter can have varying densities depending on its temperature and how it has been stored.
To convert volume to weight, it’s helpful to know that one tablespoon of butter weighs approximately 14 grams. So, if a recipe calls for ½ cup of butter, which is equivalent to 8 tablespoons, you can calculate that it weighs around 112 grams. However, it’s always best to use a kitchen scale for precise measurements.
Tips for Measuring Butter in a Tub
Accurate butter portioning is crucial for precise baking and cooking. In this discussion, I will explore alternative measuring methods to help ensure accurate butter portioning.
Accurate Butter Portioning
You can easily measure butter in a tub by using a kitchen scale. This allows for accurate portioning and eliminates the need for estimating.
Here are four reasons why measuring butter equivalents is essential:
-
Precision: Measuring butter with a scale ensures precise amounts for your recipes, resulting in consistent and delicious outcomes.
-
Consistency: By using accurate measurements, you can achieve the same taste and texture every time you prepare a dish that requires butter.
-
Control: Measuring butter allows you to have better control over the fat content in your recipes, which is crucial for those watching their dietary intake.
-
Professional results: When you measure butter accurately, your baked goods will turn out just like those from a professional bakery, impressing family and friends alike.
Alternative Measuring Methods
If you’re looking for different ways to gauge the amount of butter, consider using alternative measuring methods.
When it comes to portioning butter, there are a few creative techniques you can try.
One method is using a kitchen scale to weigh the butter. Simply place a bowl on the scale, tare it to zero, and then add the desired amount of butter.
Another option is using a butter cutter or slicer. These tools have markings to help you measure the butter precisely.
Additionally, you can use a butter mold or ice cube tray to portion the butter into individual servings. This is especially helpful if you need to measure smaller amounts for baking or cooking.
These alternative measuring techniques can make it easier to measure the perfect amount of butter for your recipes.
Converting Butter Measurements
Converting butter measurements can be tricky when trying to measure it in a tub. It’s important to understand butter equivalents and how to convert butter ratios accurately. Here are four key points to consider:
-
Use a kitchen scale: Weighing the butter will provide the most precise measurement, especially when dealing with recipes that require specific amounts.
-
Read the packaging: Many butter tubs have markings indicating tablespoon or cup equivalents. This can be helpful when trying to measure without a scale.
-
Convert from sticks: If a recipe calls for butter in sticks and you only have a tub, remember that one stick is equal to ½ cup or 8 tablespoons.
-
Adjust for different butter fat percentages: Some recipes may require unsalted butter, while others call for salted butter. Be sure to adjust the measurements accordingly.
Frequently Asked Questions
Can I Use a Regular Kitchen Scale to Measure Butter by Weight?
Yes, you can use a regular kitchen scale to measure butter by weight. It’s a precise method of converting volume to weight measurements. I recommend using a digital kitchen scale for accurate results.
How Do I Convert Tablespoons Into Grams When Measuring Butter by Volume?
Converting tablespoon measurements can be tricky when measuring butter by volume. However, there are alternative ways to measure butter, such as using a kitchen scale to weigh it in grams.
Is It Possible to Measure Butter in a Tub Using a Measuring Cup?
Yes, you can use a measuring spoon instead of a cup to measure butter in a tub. Alternatively, you can also use a kitchen scale to measure the weight of the butter.
Can I Use a Knife to Level off the Top of the Butter in the Tub for Accurate Measurements?
Using a knife to level off the top of the butter in the tub is a great way to ensure accurate measurements. It helps create a smooth surface, making it easier to measure the desired amount.
What Is the Best Way to Soften Butter Before Measuring It in a Tub?
To soften butter before measuring it in a tub, I recommend leaving it at room temperature for about 30 minutes. Alternatively, you can use a microwave on low power or grate the butter for easier measurement.
Conclusion
In conclusion, measuring butter in a tub may seem daunting, but it can be easily accomplished with the right tools and knowledge. Whether you choose to measure by weight or volume, accuracy is key. Remember to take into account the different measurement units and convert accordingly.
By following these tips, you’ll be able to confidently measure your butter and create delicious recipes that are sure to impress. So go ahead and ‘butter’ up your dishes with precision and enjoy the delectable results!
Diana’s meticulous nature and editorial prowess set the gold standard for our content. With over a decade in the culinary and publishing industries, her guidance ensures that every article perfectly blends information and entertainment. A culinary experimenter, Diana loves whipping up new butter-based concoctions in her kitchen.
-
Butter Tips and Tricks3 weeks ago
How Much Salt in 1/2 Cup Salted Butter
-
Recipes & Culinary Uses3 weeks ago
How to Season Popcorn Without Butter
-
Recipes & Culinary Uses3 weeks ago
What Is a Cup of Butter
-
Butter Basics3 weeks ago
What Is Salted Sweet Cream Butter
-
Nutritional Information3 weeks ago
How Many Carbs in Cabbage Cooked in Butter
-
Recipes & Culinary Uses3 weeks ago
What Goes Good With Butter Beans
-
Recipes & Culinary Uses3 weeks ago
How to Scramble Eggs Without Butter or Oil
-
Butter Basics3 weeks ago
How to Cut Butter Lettuce