Connect with us

Recipes & Culinary Uses

How Many Sticks of Butter Equals a Pound: A Handy Guide

Published

on

An image showcasing a balanced scale, with one side holding a pound of butter and the other side displaying multiple sticks of butter

Have you ever wondered how many sticks of butter equal a pound? Well, let me spill the beans for you.

In this article, I’ll break it down and simplify the process of converting butter measurements. We’ll explore the ins and outs of butter packaging, calculate butter equivalents, and provide you with a handy butter conversion chart.

So, if you’re ready to butter up your knowledge, let’s dive in and demystify this delicious dilemma.

Key Takeaways

  • One pound of butter equals four sticks.
  • Butter substitutions can vary depending on the recipe and desired outcome.
  • Butter is often packaged in rectangular blocks or sticks, but there are also tubs or tubular containers available.
  • Accurate measurements are crucial in baking and knowing the standard measurements for butter can help with conversions.

Understanding Butter Measurements

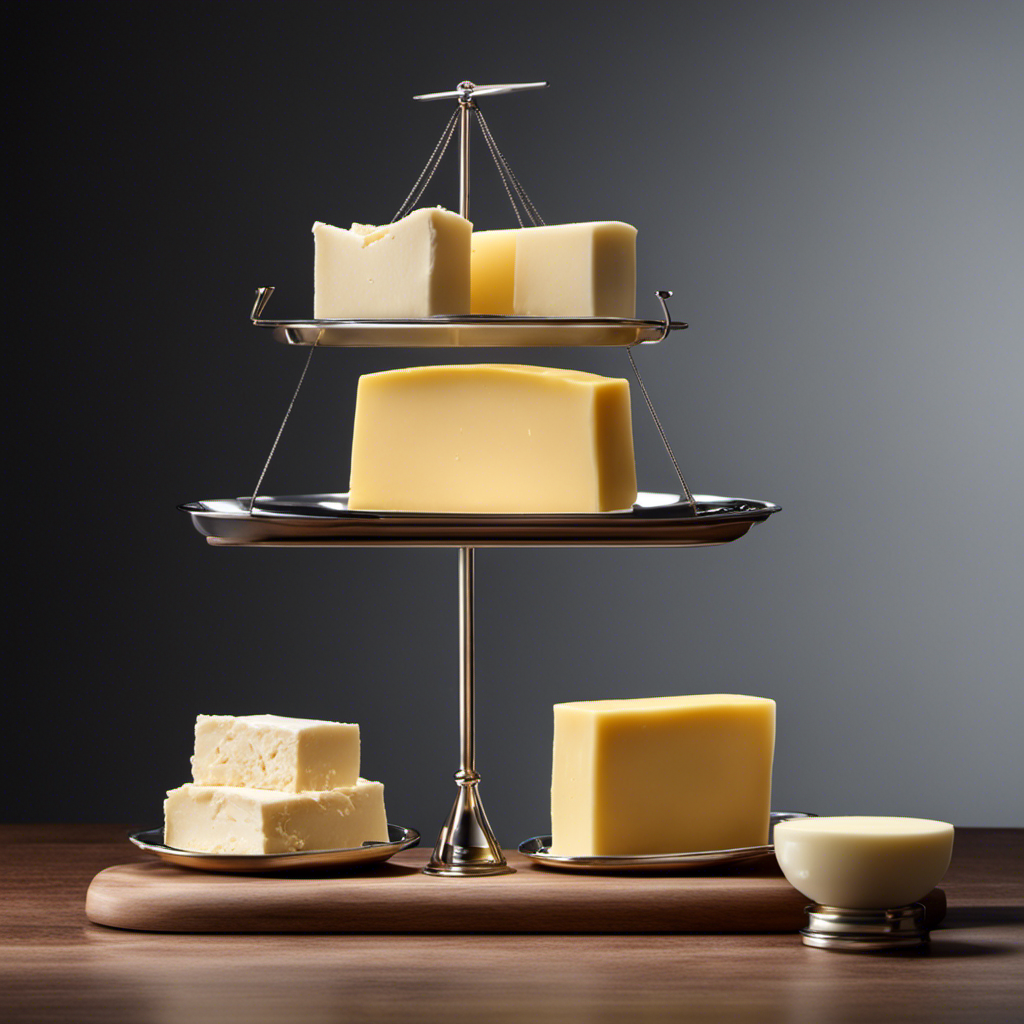
To understand butter measurements, it’s important to know how many sticks of butter equal a pound. In general, one pound of butter is equal to four sticks. Each stick of butter weighs 1/4 pound or 113 grams. This standard measurement is widely used in baking and cooking.

Advertisement

However, it’s also important to know that butter substitutions can vary depending on the recipe and desired outcome. Some common butter substitutes include margarine, coconut oil, and applesauce. These substitutions can have different effects on the texture and flavor of your dish, so it’s crucial to choose the right substitute for your specific needs.

With a solid understanding of butter measurements and substitutions, you can confidently navigate through various recipes and create delicious dishes.

Now let’s explore butter packaging and its role in preserving the freshness of butter.

Exploring Butter Packaging

If you’re wondering about the packaging of butter, did you know that it typically comes in rectangular blocks or sticks? This has been the traditional way of packaging butter for many years. However, there are now alternative packaging options available in the market.

Here are some interesting facts about butter packaging:

Advertisement
  • Butter is often packaged in rectangular blocks or sticks, which makes it easy to measure and use in recipes.
  • Some butter brands have started using tubs or tubular containers for packaging, which are more convenient for spreading.
  • There are also butter wrappers available, which are individual portions of butter wrapped in paper or foil.
  • In the past, butter was often packaged in wooden barrels or churns, which were not as practical or easy to use as the current packaging options.

The history of butter packaging shows how manufacturers have evolved to meet consumer needs and preferences. From wooden barrels to modern tubs and individual wrappers, butter packaging has come a long way.

Converting Sticks of Butter to Pounds

Did you know that a pound of butter is equivalent to four sticks? Converting butter measurements can be a bit confusing, especially when recipes call for butter in pounds but it’s sold in sticks. To help you with this, I’ve created a table below showing the conversion between sticks and pounds of butter.

Sticks of Butter Pounds of Butter
1 0.25
2 0.5
3 0.75
4 1
5 1.25

As you can see, each stick of butter weighs 0.25 pounds. So if a recipe calls for 2 sticks of butter, you would need 0.5 pounds. Similarly, if a recipe calls for 5 sticks of butter, you would need 1.25 pounds. This table should make converting butter measurements a breeze, ensuring your recipes turn out just right.

Calculating Butter Equivalents

You can easily calculate the equivalent amount of butter by using the table provided. When it comes to calculating conversions, it’s important to be clear about the measurements to avoid any butter measurement confusion. Here’s a simple guide to help you:

Advertisement
  • 1 pound of butter is equal to 4 sticks or 2 cups.
  • 1 stick of butter is equal to 1/2 cup or 8 tablespoons.
  • 1/2 pound of butter is equal to 2 sticks or 1 cup.
  • 1/4 pound of butter is equal to 1 stick or 1/2 cup.

Standard Measurements for Butter

When it comes to baking, getting the measurements right is crucial. In this discussion, I will be talking about the standard measurements for butter, including butter pound conversion, sticks to pounds, and butter measurement equivalents.

Knowing these measurements will help you accurately follow recipes and achieve the desired results in your baking endeavors.

Butter Pound Conversion

To convert pounds to sticks of butter, all you have to do is divide the number of pounds by 0.25. This conversion is handy when following recipes that call for butter in pounds but you only have sticks of butter available.

Here are some tips to help you understand butter ratios and make the pound to stick conversion easier:

Advertisement
  • Always remember that 1 pound of butter is equal to 4 sticks.
  • If a recipe calls for 1/2 pound of butter, you will need 2 sticks.
  • For 1/4 pound of butter, you will need 1 stick.
  • To convert any amount of pounds to sticks, simply divide the number of pounds by 0.25.

Understanding butter ratios and using these conversion tips will ensure that you have the right amount of butter for your recipes. Happy baking!

Sticks to Pounds

If a recipe calls for sticks of butter, dividing the number of sticks by 4 will give you the equivalent weight in pounds. Understanding butter packaging and its measurement equivalents can be helpful in the kitchen. Here is a table that shows the conversion between sticks and pounds of butter:

Sticks of Butter Pounds of Butter
1 0.25
2 0.5
3 0.75

For example, if a recipe calls for 2 sticks of butter, you would need 0.5 pounds of butter. This information can be useful when you need to adjust a recipe based on the amount of butter you have on hand. Remember, 1 stick of butter is equal to 0.25 pounds. So, next time you’re in the kitchen, you’ll have a better understanding of butter measurements and will be able to confidently convert between sticks and pounds.

Butter Measurement Equivalents

Understanding the conversion between sticks and pounds of butter can be helpful in the kitchen. Accuracy in butter measurement is crucial for achieving desired results in baking and cooking.

Here are some alternative butter measurements to consider:

  • Cups: 1 pound of butter is equal to 2 cups.
  • Ounces: 1 stick of butter is equal to 4 ounces.
  • Tablespoons: 1 stick of butter is equal to 8 tablespoons.
  • Grams: 1 pound of butter is equal to approximately 454 grams.

It’s important to note that different brands of butter may have slightly different weights per stick, so it’s always a good idea to check the packaging for accurate measurements.

Butter Conversion Chart

When it comes to baking, it’s important to have accurate measurements for butter. Knowing the pound equivalents of butter can be incredibly helpful in ensuring your recipes come out just right.

Advertisement

In this discussion, we will explore the butter pound equivalents and also delve into the importance of conducting a conversion accuracy check to guarantee precise measurements for your baking endeavors.

Butter Pound Equivalents

There’s no doubt that 1 pound of butter is equivalent to 4 sticks. When it comes to butter, understanding the weight and finding suitable substitutes can be helpful. Here are a few key points to consider:

  • Butter Weight: 1 pound of butter weighs approximately 454 grams or 16 ounces. It is important to keep this in mind when following recipes that call for specific amounts of butter.

  • Butter Substitutes: If you’re looking for alternatives to butter, there are a few options to consider. Margarine, which is made from vegetable oils, is a common substitute. Coconut oil can also be used as a dairy-free alternative. Another option is using applesauce or mashed bananas for baking purposes.

  • Healthier Choices: If you’re watching your calorie intake or trying to make healthier choices, there are low-fat or reduced-fat butter options available. These options can help reduce the overall fat content without sacrificing taste.

  • Experiment and Enjoy: Don’t be afraid to experiment with different butter substitutes in your recipes. It can lead to delicious discoveries and unique flavors.

Conversion Accuracy Check

To ensure accuracy in your conversions, it’s important to double-check the measurements when substituting butter in your recipes. Butter weight calculations can vary depending on the packaging size, so it’s crucial to compare different options. Here’s a table to help you understand the conversions:

Butter Packaging Size Weight (in ounces)
Stick of Butter 4
Block of Butter 16
Pound of Butter 16

As you can see, a stick of butter weighs 4 ounces, while a block of butter and a pound of butter both weigh 16 ounces. This information is essential when you need to convert between different packaging sizes. By double-checking your measurements, you can ensure that your recipes turn out just right. So next time you’re substituting butter, refer back to this table to accurately convert the measurements.

How Many Sticks of Butter in a Pound

You can find out how many sticks of butter are in a pound by dividing it by 0.25. This butter weight conversion is a helpful ratio to know when following recipes or measuring ingredients.

Advertisement

Here are some key points about the butter pound ratio:

  • A pound of butter is equivalent to 4 sticks.
  • Each stick of butter typically weighs 0.25 pounds.
  • Sticks of butter are commonly marked with measurements on the wrapper, making it easy to cut the desired amount.
  • If a recipe calls for a specific amount of butter in pounds, you can easily convert it to sticks by dividing the poundage by 0.25.

Knowing the butter pound ratio can simplify your cooking and baking endeavors, ensuring accurate measurements and delicious results.

Butter Measurements Simplified

When baking or cooking, it’s helpful to know the measurements for butter. It can be confusing to convert butter measurements, especially when a recipe calls for pounds or sticks. To simplify butter conversions, here is a handy table that shows the equivalent measurements for butter:

Measurement Sticks of Butter Cups Grams
1 pound 4 sticks 2 cups 454 g
1 stick 0.25 pounds 0.5 cup 113 g
1 cup 2 sticks 0.5 pounds 227 g
1 gram 0.0022 pounds 0.0044 cups 0.0044 g

Frequently Asked Questions

Can I Use Margarine Instead of Butter in Recipes?

Yes, you can use margarine instead of butter in recipes. Margarine is a common butter alternative that can be used in a 1:1 ratio. Just make sure to check the labels for any differences in fat content.

How Can I Soften Butter Quickly for Baking?

To quickly soften butter for baking, I zap it in the microwave for a few seconds or grate it with a cheese grater. As for alternative butter substitutes, margarine or coconut oil can be used.

What Is the Difference Between Salted and Unsalted Butter?

In my experience, when it comes to baking, using unsalted butter is better because it allows you to control the amount of salt in your recipe. Salted butter already has salt added to it.

Advertisement

Can I Freeze Butter for Long-Term Storage?

I freeze butter for long-term storage to preserve its freshness. It’s a great way to keep butter on hand for baking or cooking. Plus, it’s super convenient to have sticks of butter ready whenever I need them.

How Long Does Butter Last in the Refrigerator?

In the fridge, butter typically lasts around 1-3 months. Signs of spoiled butter include a rancid smell or taste, mold growth, or a change in color or texture.

Conclusion

So there you have it, folks! After diving into the world of butter measurements, exploring packaging, and calculating equivalents, we have finally reached our conclusion.

It turns out that there are four sticks of butter in a pound. Yes, you heard me right, four sticks!

So next time you’re whipping up a batch of cookies or a delicious buttercream frosting, you’ll know just how much butter to use.

Advertisement

Happy baking!

Continue Reading
Advertisement

Recipes & Culinary Uses

How to Make Tincture-Infused Canna-Butter in 3 Simple Steps

Published

on

By

An image showcasing the process of making canna-butter with tincture

I have always enjoyed trying out new things in the kitchen, especially when it involves incorporating cannabis into my go-to recipes. The mixture of tincture and butter results in a powerful and adaptable ingredient called canna-butter.

In this article, I’ll guide you through the process of making canna-butter with tincture, step by step. Get ready to unlock a whole new world of culinary possibilities and elevate your dishes to a higher level.

Let’s dive in and discover the art of infusing cannabis into butter.

Key Takeaways

  • Different tincture extraction methods include alcohol and oil extraction
  • Alcohol extraction produces a stronger tincture, while oil extraction provides a milder flavor
  • Strain the tincture to remove any plant matter using a fine mesh strainer or cheesecloth
  • Choose the right method for infusing the tincture into butter, such as the traditional, slow cooker, or sous vide method

Choosing the Right Tincture for Canna-Butter

When making canna-butter, it’s important to choose the right tincture. There are different tincture extraction methods that can be used to create the perfect tincture for your canna-butter.

Advertisement

One method is the alcohol extraction method, which involves soaking the cannabis in high-proof alcohol to extract the cannabinoids and terpenes.

Another method is the oil extraction method, where the cannabis is infused in a carrier oil such as olive oil or coconut oil. Each method has its own advantages and disadvantages, so it’s important to consider your preferences and needs.

The alcohol extraction method tends to produce a stronger and more potent tincture, while the oil extraction method provides a milder flavor.

Once you have chosen the right tincture, you can move on to preparing it for infusion into the butter.

Preparing the Tincture for Infusion

To prepare the tincture for infusion, you’ll need to strain out any remaining plant matter. This step is crucial in ensuring a smooth and potent canna butter. Start by obtaining a fine mesh strainer or cheesecloth. Place it over a clean bowl or container.

Advertisement

Slowly pour the tincture through the strainer, allowing it to flow into the container while catching any plant matter. Gently press the plant matter with a spoon to extract any residual liquid.

Now, let’s talk about the type of alcohol you should use for tincture extraction. Different types of alcohol, such as high-proof grain alcohol or vodka, can be used. These alcohols have a high alcohol content, which helps in extracting the cannabinoids effectively.

Infusing the Tincture Into Butter

Once you’ve strained out any remaining plant matter, it’s time to infuse the tincture into the butter. This step is crucial in creating a potent and flavorful canna-butter. Here are three infusing techniques you can try:

Advertisement
  1. The Traditional Method: In a double boiler or a heatproof bowl set over a pot of simmering water, melt the desired amount of butter. Once melted, add the tincture and stir continuously for about 30 minutes. This method ensures a thorough and even infusion.

  2. The Slow Cooker Method: Place the butter and tincture in a slow cooker on low heat. Let it simmer for 2-3 hours, stirring occasionally. This method is convenient and allows for hands-off infusing.

  3. The Sous Vide Method: In a vacuum-sealed bag, combine the butter and tincture. Place the bag in a preheated water bath set to 185°F (85°C) and let it infuse for 1-2 hours. This method preserves the flavors and nutrients of the ingredients.

Once the infusion is done, it’s time to move on to straining and storing your canna-butter.

Straining and Storing Your Canna-Butter

After infusing the tincture into the butter, strain out any remaining plant matter and store your potent canna-butter in an airtight container. Straining is an essential step to ensure a smooth and pure final product.

There are a few straining techniques you can use. One popular method is to use a cheesecloth or fine mesh strainer to separate the liquid from the solid plant material. Gently pour the mixture through the strainer, allowing the liquid to flow into a separate container while trapping the plant matter. Press down on the solids to extract every last drop of canna-butter.

Once strained, transfer the canna-butter into an airtight container for long term storage. It is important to choose the right container to maintain freshness and potency. Glass jars or plastic containers with tight-fitting lids work well. Remember to label the container and store it in a cool, dark place to preserve the canna-butter’s quality.

Tips and Tricks for Using Canna-Butter in Recipes

Advertisement

Using canna-butter in recipes adds a delicious and potent twist to your favorite dishes. Here are some tips and tricks for incorporating canna-butter into your cooking:

  1. Start with small doses: When cooking with canna-butter, it’s important to start with a low dose and gradually increase if needed. This will help you find the right balance and avoid overwhelming effects.

  2. Opt for low heat cooking techniques: High heat can degrade the potency of canna-butter, so it’s best to use low heat cooking methods like baking or sautéing. This will help preserve the THC content and ensure a consistent dosage.

  3. Experiment with flavors: Canna-butter can have a distinct herbal taste, so it’s a good idea to experiment with flavors to enhance the overall taste of your dishes. Add herbs, spices, or even citrus zest to complement the earthy flavors of canna-butter.

Frequently Asked Questions

Can I Use Any Type of Tincture for Making Canna-Butter?

Yes, you can use different types of tinctures for making canna-butter. The benefits of using specific tincture strains for canna-butter include enhanced flavor and potency. It’s important to choose a tincture that complements the desired flavor profile of your canna-butter.

What Is the Shelf Life of the Prepared Tincture for Infusion?

The shelf life of prepared tincture for infusion varies depending on the method and storage conditions. Properly stored, it can retain its potency for up to two years, ensuring long-lasting effects for your homemade canna-butter.

Can I Reuse the Strained Plant Material After Making Canna-Butter?

After making canna-butter, I can reuse the strained plant material for alternative uses. It can be used to make infused oils, teas, or even added to baked goods for an extra kick. Waste not, want not!

Advertisement

Can I Substitute Canna-Butter With Regular Butter in Recipes?

Substituting regular butter with canna-butter in recipes is possible, but it will have an impact on the taste and effects. The substitution options depend on personal preference and the desired outcome of the recipe.

How Long Can I Store My Canna-Butter in the Refrigerator?

In the refrigerator, canna-butter can be stored for a long time if you use proper storage methods. It’s important to keep it in an airtight container to maintain its potency and freshness.

Conclusion

In conclusion, making canna-butter with tincture is a simple and effective way to infuse your favorite recipes with the benefits of cannabis.

While some may argue that using tincture can be expensive, the truth is that a little goes a long way.

By carefully choosing the right tincture and following the steps outlined in this article, you can create potent and delicious canna-butter that will enhance your culinary creations.

Advertisement

So don’t let cost deter you, give it a try and elevate your cooking to a whole new level!

Continue Reading

Recipes & Culinary Uses

How to Make Stretchy Butter Slime at Home

Published

on

By

E of a pair of hands kneading a vibrant, glossy blob of butter slime

Were you aware that merely one out of ten individuals successfully create stretchy butter slime from their initial attempt? If you find yourself among the remaining nine, don’t worry, I’ve got your back.

In this article, I will guide you through the process of creating the perfect butter slime that stretches just the way you want it to. From choosing the right ingredients to mastering the secret ingredient, I’ll provide you with the precise steps you need to take for a successful batch of stretchy butter slime.

Key Takeaways

  • Use clear PVA glue for elasticity
  • Adjust activator quantities for desired texture
  • Incorporate lotion to make the slime more pliable and stretchy
  • Proper storage maintains the slime’s texture and stretchiness

Choosing the Right Ingredients

To make your butter slime stretchy, you’ll want to make sure you’re using the right ingredients. One of the most common mistakes people make when attempting to create butter slime is using the wrong type of glue. It is essential to use clear PVA glue, as it provides the necessary elasticity for the slime to stretch.

Another common mistake is using too much or too little activator. Activator, typically made from a mixture of borax and water, is responsible for binding the ingredients and giving the slime its stretchiness. Finding the right balance is crucial for achieving the desired texture.

Advertisement

However, if you don’t have borax, you can use alternative ingredients such as contact lens solution or liquid laundry detergent, which also work as activators. Just make sure to adjust the quantities accordingly to maintain the slime’s stretchiness.

Mixing the Ingredients

Once you’ve got all the ingredients ready, you can start mixing them together to create a smooth and stretchy slime.

To achieve the perfect consistency, it’s important to follow a few key steps.

First, pour the desired amount of glue into a mixing bowl.

Next, add the shaving cream and mix until well combined. This will give the slime its fluffy texture.

Advertisement

Now, it’s time to add the magic ingredient – the contact lens solution. Start by adding a small amount and gradually mix it in until the slime starts to pull away from the sides of the bowl. Be careful not to add too much, as it can make the slime too stiff.

Finally, knead the slime with your hands until it becomes stretchy and pliable. For vibrant colors, consider adding food coloring or glitter before mixing in the contact lens solution. Just a few drops will do the trick.

Now you’re ready to enjoy your homemade butter slime!

Adding the Secret Ingredient

Advertisement

Now, you’ll need to carefully incorporate the secret ingredient into the mixture.

When it comes to making butter slime stretchy, exploring alternative ingredients and experimenting with different ratios is key.

The secret ingredient I recommend is lotion. Lotion contains oils and moisturizers that help make the slime more pliable and stretchy.

Start by adding a small amount of lotion to the mixture and knead it in thoroughly.

Monitor the consistency and texture of the slime as you go. If it’s still not stretchy enough, add a bit more lotion and continue kneading until you achieve the desired stretchiness.

Advertisement

Remember to add the lotion in small increments to avoid making the slime too sticky or wet.

Kneading and Stretching the Slime

Start by incorporating the lotion into the slime mixture and knead it thoroughly to achieve the desired consistency and stretchiness. Kneading is an essential step in making butter slime stretchy. By repeatedly folding and pressing the slime, you are helping to distribute the lotion evenly throughout the mixture, resulting in a smooth and elastic texture.

The benefits of kneading include:

  • Improved stretchiness: Kneading allows the lotion to penetrate the slime, making it more pliable and stretchy.
  • Enhanced durability: The repeated folding and pressing action strengthens the slime, making it less likely to break or tear during play.
  • Better texture: Kneading helps to eliminate any lumps or clumps, resulting in a smoother and more enjoyable slime experience.
  • Increased sensory stimulation: Working the slime with your hands provides a satisfying tactile experience, enhancing sensory development.
  • Relaxation and stress relief: The rhythmic motion of kneading can be soothing and help to reduce anxiety and stress.

Remember to knead the slime thoroughly for optimal results.

Storing and Maintaining Stretchiness

Advertisement

To maintain the stretchiness of your slime, store it in an airtight container to prevent drying out. Storing slime properly is crucial in keeping its texture and stretchiness intact.

When exposed to air, slime can dry out, causing it to become stiff and less stretchy. To prevent this, transfer your slime into a clean and dry airtight container immediately after playing with it. Make sure the container is sealed tightly to minimize air exposure. Avoid leaving the slime uncovered or in open containers, as this will accelerate the drying process.

Additionally, store your slime in a cool and dry place, away from direct sunlight or heat sources, as excessive heat can also affect its stretchiness.

By following these storage precautions, you can maintain the stretchiness of your slime for a longer period of time.

Now, let’s move on to troubleshooting common issues.

Advertisement

Troubleshooting Common Issues

When it comes to making butter slime stretchy, there are a few common mistakes that people often make. These mistakes can lead to a slime that is not as stretchy as desired. However, there are alternative ingredients that can be used to fix these issues and achieve the desired stretchiness.

Some common mistakes include:

  • Using too much or too little activator, which can affect the slime’s texture and stretchiness.
  • Not kneading the slime enough, which can result in a stiff and less stretchy consistency.
  • Adding too much lotion or oil, which can make the slime too soft and not stretchy enough.
  • Using low-quality glue, which may not produce the same stretchy results as higher-quality glue.
  • Not allowing the slime to rest and develop its stretchiness over time.

To fix these issues, alternative ingredients can be used. For example, adding a small amount of borax solution or liquid starch can help increase the stretchiness of the slime. Additionally, using a higher-quality glue or adding a small amount of cornstarch can also improve the slime’s stretchiness.

Frequently Asked Questions

How Long Does It Take for Butter Slime to Dry Out?

It takes approximately 1-2 days for butter slime to dry out completely. To prevent drying out, store it in an airtight container. If it does dry out, add a few drops of lotion or baby oil to revive it.

Can I Use Margarine Instead of Butter in the Recipe?

Yes, you can use margarine as an alternative to butter in a slime recipe. However, keep in mind that margarine may affect the texture and stretchiness of the slime compared to using butter.

What Can I Do if My Butter Slime Becomes Too Sticky?

If my butter slime becomes too sticky, I can try adding a little bit of lotion or baby oil. I can also try kneading it with my hands to help distribute the moisture evenly.

Advertisement

Is It Safe for Children to Play With Butter Slime?

Playing with butter slime can be safe for children. Sensory play has numerous benefits for their development. However, if concerned about safety, there are alternative options available that provide similar tactile experiences without the potential risks of butter slime.

Can I Add Food Coloring to My Butter Slime to Make It More Colorful?

Yes, I can add food coloring to my butter slime to make it more colorful. It’s important to use gel-based coloring for vibrant colors. To store properly, place in an airtight container to prevent drying out.

Conclusion

In conclusion, crafting a stretchy butter slime is an enjoyable and achievable endeavor. By carefully selecting the appropriate ingredients, like glue, cornstarch, and lotion, and skillfully mixing them together, you can create a smooth and malleable slime base.

Adding the secret ingredient, such as model magic clay, enhances its stretchiness and texture. Through patient kneading and stretching, you can achieve the desired elasticity.

Properly storing the slime and addressing any troubleshooting issues will help maintain its stretchiness for prolonged enjoyment.

Advertisement

So why wait? Get your ingredients ready and let the stretchy butter slime-making adventure begin!

Continue Reading

Recipes & Culinary Uses

3 Simple Steps to Make Authentic Danish Butter Cookies

Published

on

By

An image featuring a close-up shot of a golden tray filled with freshly baked Danish butter cookies, showcasing their delicate crumbly texture and beautiful floral-shaped designs

Baking is a passion of mine, and Danish butter cookies rank highly among my favorite desserts to prepare.

Did you know that Danish butter cookies are enjoyed by people all over the world?

In this article, I’ll be sharing my tried-and-true recipe for these delicious treats.

We’ll start by gathering the simple ingredients, then mix the dough to perfection.

Next, we’ll shape the cookies into beautiful designs before baking them to golden perfection.

Advertisement

Finally, we’ll let them cool and get ready to enjoy the irresistible taste of Danish butter cookies.

Let’s get started!

Key Takeaways

  • Use softened butter and cream it with sugar for a light and fluffy texture.
  • Adjust the dough consistency by adding milk or water if too dry or more flour if too wet.
  • Get creative with shaping techniques such as using a cookie press or cookie cutters.
  • Follow baking tips like using a light-colored baking sheet and rotating it for even browning.

Gathering the Ingredients

First, you’ll need to gather all of the ingredients for your Danish butter cookies. To start, make sure you have 2 cups of all-purpose flour, 1 cup of unsalted butter, 1/2 cup of granulated sugar, and 1 teaspoon of vanilla extract. These basic ingredients will give you the classic Danish butter cookie flavor.

However, if you want to experiment with different variations, you can add ingredients like chocolate chips, chopped nuts, or even dried fruits.

Advertisement

Once you have gathered all the necessary ingredients, it is important to store the cookies properly to maintain their freshness. I recommend using an airtight container or a cookie jar to keep them crispy and delicious for a longer period of time.

Mixing the Dough

Next, start by mixing the dough for your delicious treats. To achieve the perfect dough consistency, it’s important to follow a few key tips.

First, make sure to use softened butter, as it will mix more easily with the other ingredients. Cream the butter and sugar together until light and fluffy. This step is crucial for creating a tender and melt-in-your-mouth texture.

If you encounter any common mixing issues, such as a dry or crumbly dough, try adding a tablespoon of milk or water to moisten it. On the other hand, if the dough appears too wet or sticky, gradually add more flour until it reaches the desired consistency.

Shaping the Cookies

Advertisement

To achieve the desired shape, gently roll the dough into small balls before placing them on the baking sheet. This step is crucial in creating perfectly shaped Danish butter cookies.

However, there are various other shapes you can try to add a touch of creativity to your cookies. Here are some tips to help you achieve perfectly shaped cookies:

  1. Use a cookie press: A cookie press allows you to create intricate designs and shapes effortlessly. Simply load the dough into the press and press it onto the baking sheet.

  2. Roll and cut: Roll out the dough and use cookie cutters to create different shapes. This is a classic method that gives you uniform cookies every time.

  3. Thumbprint cookies: Make an indentation in the center of the dough ball using your thumb or the back of a spoon. Fill the indentations with jam, chocolate, or any other filling of your choice.

These tips will help you create beautifully shaped Danish butter cookies that are not only delicious but also visually appealing.

Baking and Cooling

For even baking and a perfect golden color, remember to preheat your oven to the recommended temperature before placing the cookie dough on the baking sheet. This step is crucial in ensuring that your Danish butter cookies turn out just right.

Advertisement

Here are some baking techniques and troubleshooting tips to help you achieve the best results:

  • Use a light-colored baking sheet to prevent the cookies from browning too quickly.
  • Space the cookies evenly on the baking sheet to allow for proper air circulation.
  • Rotate the baking sheet halfway through the baking time to ensure even browning.
  • If your cookies are spreading too much, try chilling the dough before baking.

Enjoying the Delicious Danish Butter Cookies

Indulge in the irresistible taste of these delectable treats and savor every bite. Danish butter cookies are a true delight for the taste buds. They are crispy, buttery, and melt-in-your-mouth delicious.

When serving these cookies, you can arrange them on a beautiful platter, allowing their golden hue to shine. Alternatively, you can place them in a decorative tin, perfect for gifting or for keeping them fresh.

As for variations and flavor additions, you can experiment with different types of fillings. Try adding a dollop of Nutella or raspberry jam in the center of each cookie before baking. You can also sprinkle some powdered sugar or drizzle melted chocolate on top for an extra touch of sweetness.

Advertisement

No matter how you choose to enjoy them, these Danish butter cookies are sure to satisfy your cravings.

Frequently Asked Questions

How Long Do Danish Butter Cookies Typically Last Before Going Stale?

Typically, Danish butter cookies last for about 2-3 weeks before going stale. To keep them fresh, store them in an airtight container at room temperature. If they do go stale, you can try reviving them by placing them in a sealed container with a slice of bread overnight.

Can I Substitute Margarine for Butter in This Recipe?

Sure, you can substitute margarine for butter in the recipe. However, keep in mind that margarine has a higher water content and lower fat content, which may affect the texture and flavor.

Can I Freeze the Dough and Bake the Cookies at a Later Time?

Yes, you can freeze the dough for Danish butter cookies and bake them at a later time. Freezing the dough helps to preserve its freshness, and you can easily bake the cookies whenever you’re ready for a sweet treat.

Are Danish Butter Cookies Suitable for People With Gluten Allergies?

Yes, Danish butter cookies can be made without gluten-containing ingredients, making them suitable for people with gluten allergies. As for vegan alternatives, there are recipes that use plant-based ingredients to create delicious versions of these cookies.

Advertisement

Can I Add Different Flavors, Such as Chocolate or Almond, to the Cookie Dough?

Yes, you can definitely add different flavors like chocolate or almond to the cookie dough. It allows you to experiment with unique combinations and create a variety of delicious Danish butter cookies.

Conclusion

After following the steps and techniques mentioned, I can confidently say that making Danish butter cookies is not only simple but also incredibly rewarding.

As I indulged in the delicious aroma that filled my kitchen, I couldn’t help but ponder the deeper meaning behind this culinary journey.

It reminded me that sometimes, investigating the truth of a theory can uncover hidden treasures and bring immense joy.

So, next time you embark on a baking adventure, remember that the process itself holds the power to enlighten and delight you in ways you never imagined.

Advertisement
Continue Reading
Advertisement

Affiliate disclaimer

As an affiliate, we may earn a commission from qualifying purchases. We get commissions for purchases made through links on this website from Amazon and other third parties.

Advertisement

Trending