Connect with us

Recipes & Culinary Uses

How Much Salt to Add to Unsalted Butter to Make It Salted: A Simple Guide

Published

on

An image showcasing a pat of unsalted butter gradually dissolving into a sea of exquisite salt crystals, beautifully illustrating the process of transforming it into perfectly salted butter

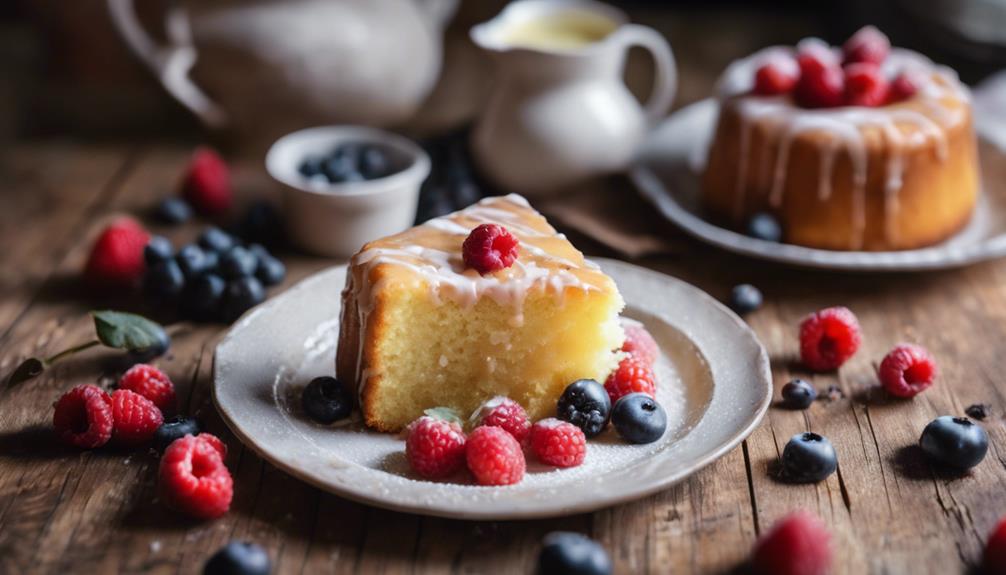
Just like a blank canvas ready to be transformed into a masterpiece, unsalted butter has the potential to turn into a flavorful and versatile ingredient.

But how much salt should be added to turn it into the beloved staple of every kitchen – salted butter?

In this article, I will delve into the science behind the salt-to-butter ratio, offer guidelines for baking and cooking, and explore the various flavors and dietary considerations.

Get ready to unlock the secrets to perfecting your own homemade salted butter creations.

Key Takeaways

  • Salt enhances flavor and acts as a preservative in salted butter.
  • The salt-to-butter ratio should be adjusted to suit personal taste preferences.
  • Consideration of intended use and health benefits is important before adding salt to butter.
  • Experimenting with different flavors can create customized salted butter variations.

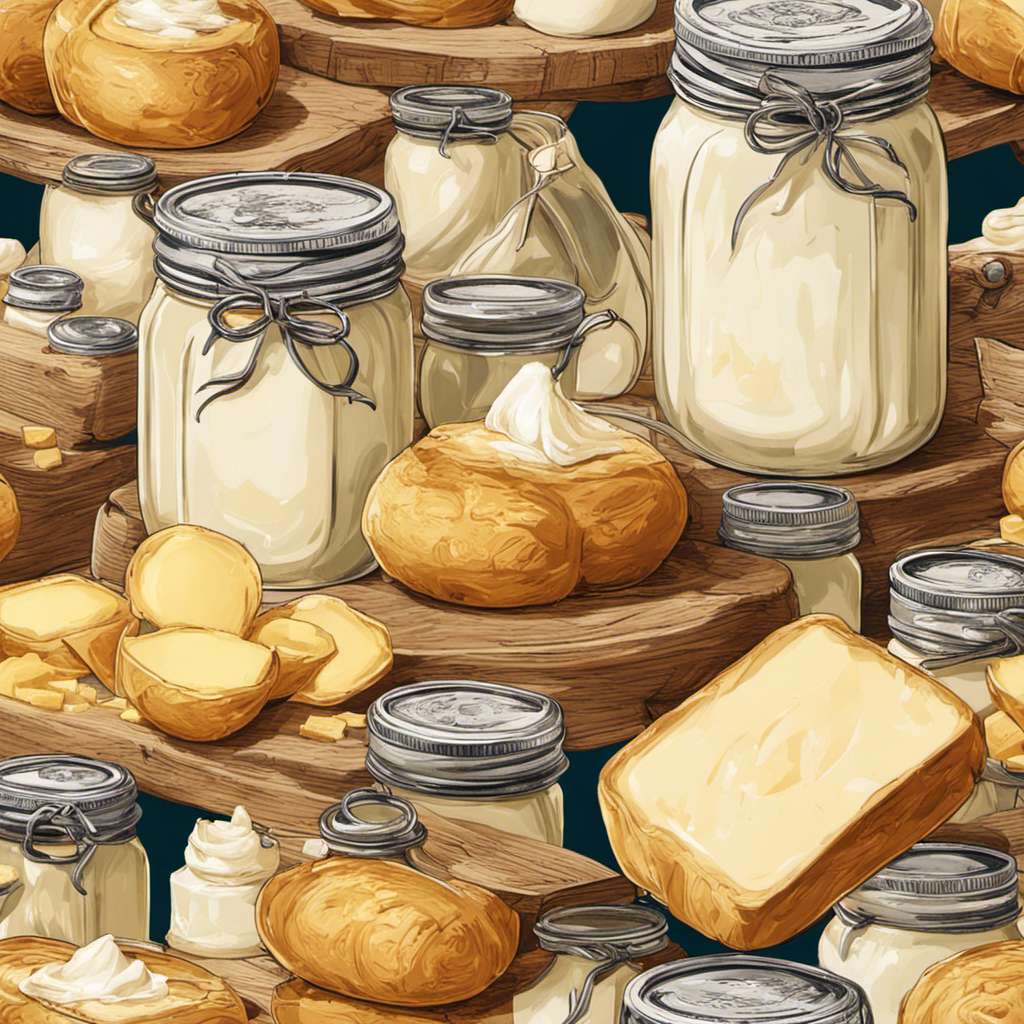
The Science Behind Salted Butter

Advertisement

To understand the science behind salted butter, you should know that the addition of salt not only enhances the flavor but also helps preserve the butter.

Salted butter is made by incorporating salt into unsalted butter during the churning process. The amount of salt added can vary depending on the desired taste, but it typically ranges from 1-3% of the butter’s weight.

The role of salt in butter goes beyond just adding flavor. Salt acts as a preservative by inhibiting the growth of bacteria and other microorganisms that can cause spoilage. It also helps to stabilize the structure of the butter, preventing excessive softening or melting.

Additionally, the salt in butter can enhance the aroma, texture, and overall sensory experience of the final product.

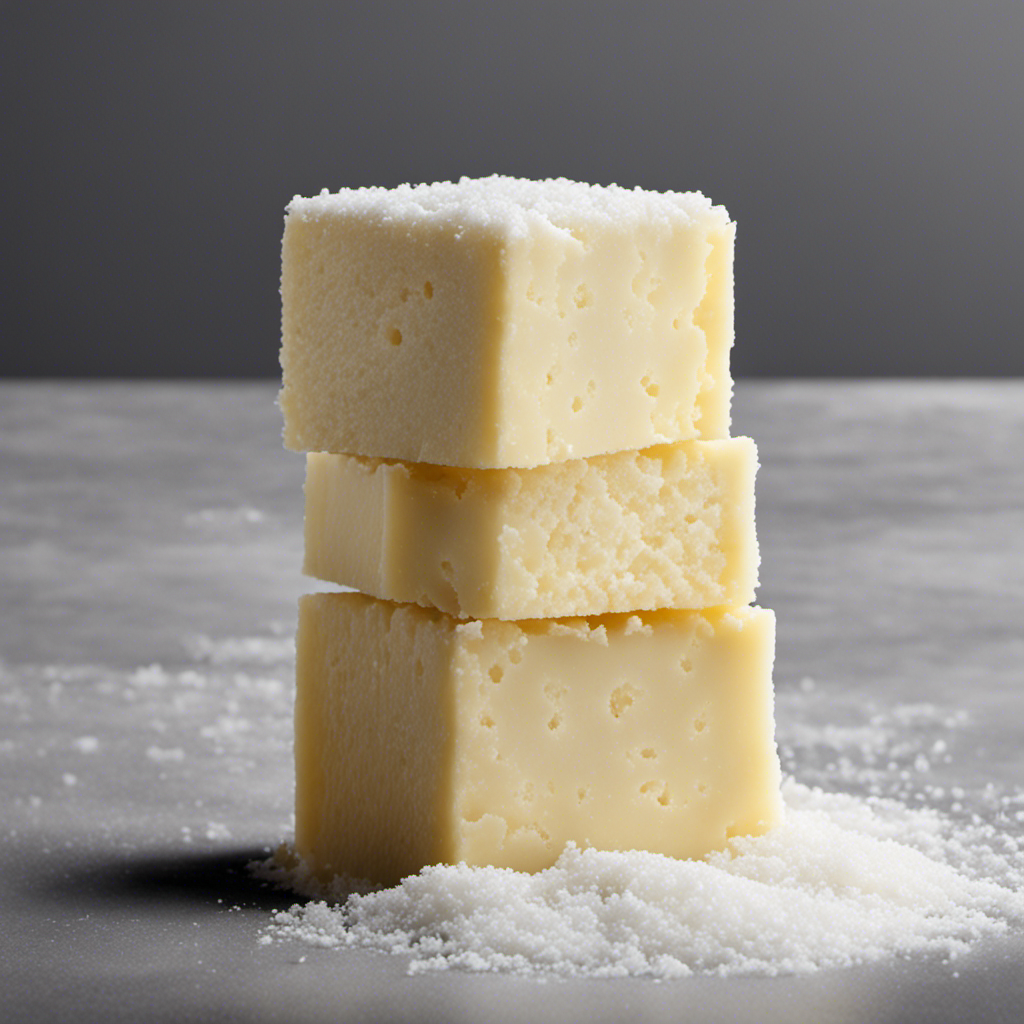
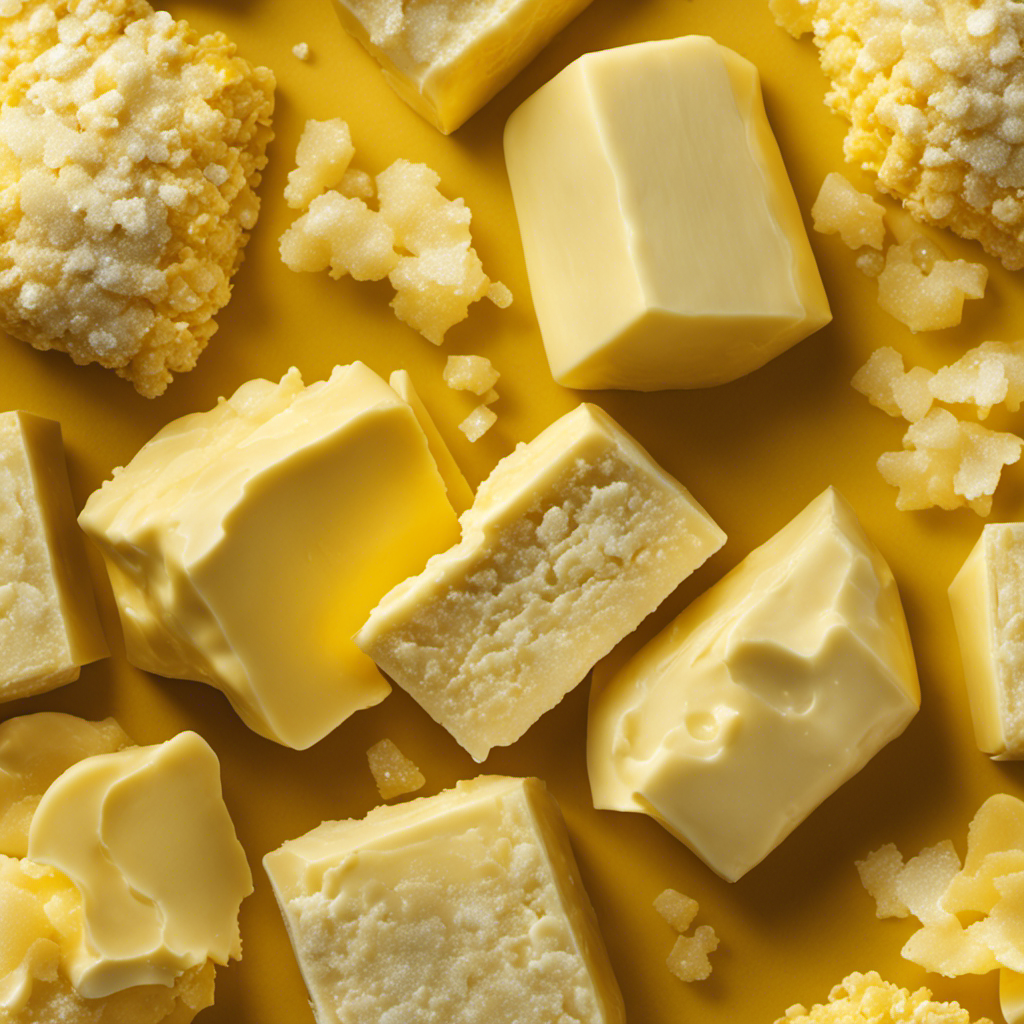
Understanding the Salt-to-Butter Ratio

When making salted butter, you’ll want to ensure that the ratio of salt to butter is just right. The right amount of salt can greatly enhance the flavor of the butter and make it perfect for baking or spreading on toast.

Advertisement

Here are a few things to keep in mind when determining the salt-to-butter ratio:

  • Start with unsalted butter: Using unsalted butter as a base allows you to control the amount of salt added and ensures consistency in flavor.

  • Taste as you go: Add salt gradually and taste the butter along the way. This will help you achieve the desired level of saltiness without overdoing it.

  • Consider the recipe: The importance of salt in baking cannot be overstated. It helps to balance flavors, enhance sweetness, and even improve texture in certain recipes.

  • Experiment and personalize: Everyone’s taste preferences vary, so feel free to adjust the salt-to-butter ratio to suit your own taste buds. Just remember to keep it balanced and enjoy the flavorful results!

Factors to Consider Before Adding Salt

Consideration should be given to the impact of different factors before incorporating salt into the butter.

There are several factors to consider when deciding how much salt to add to unsalted butter. First, it is important to consider personal taste preferences. Some people may prefer a more subtle saltiness, while others may enjoy a stronger flavor.

Advertisement

Additionally, the intended use of the salted butter should be taken into account. If the butter is being used in baking, a higher salt content may be desired to enhance the flavors of the baked goods. On the other hand, if the butter is being used for spreading on toast or other dishes, a lower salt content may be preferred.

Finally, it is worth noting the potential health benefits of adding salt to unsalted butter. Salt can enhance the flavor of food and also act as a natural preservative, extending the shelf life of the butter.

In conclusion, considering personal taste, intended use, and potential health benefits are important factors to consider before incorporating salt into the butter. This can help ensure that the final product is tailored to individual preferences and needs.

Now, let’s explore the next section and delve into experimenting with different salted butter flavors.

Experimenting With Different Salted Butter Flavors

You can start experimenting with various flavors to create unique variations of butter. Here are some ideas to inspire you:

Advertisement
  • Garlic and Herb: Mix in minced garlic, dried herbs like thyme or rosemary, and a pinch of salt for a savory spread.
  • Cinnamon Sugar: Blend in ground cinnamon and sugar for a sweet and fragrant butter, perfect for toast or pancakes.
  • Chili Lime: Add a kick to your butter by combining lime zest, chili powder, and a touch of salt for a tangy and spicy twist.
  • Honey Almond: Stir in honey and chopped almonds for a rich and nutty butter that pairs well with breads and pastries.

By taste testing different salted butters with these different seasoning combinations, you can discover your favorite flavors. These variations can be used in cooking, spreading on bread, or as a topping for vegetables.

Now, let’s explore the guidelines for using salted butter in baking.

Guidelines for Salted Butter in Baking

When it comes to baking, salted butter is often the go-to choice for adding flavor and richness. However, there are times when you may need to explore alternatives to salted butter, whether due to dietary restrictions or personal preference.

In addition, understanding the proper distribution of salt in your baked goods is crucial to achieving the perfect balance of flavors.

Advertisement

Let’s dive into the discussion on salted butter alternatives and the importance of proper salt distribution in baking.

Salted Butter Alternatives

If you’re looking for a substitute for salted butter, there are a few alternatives worth considering. While salted butter is commonly used in baking, there are other options that can provide similar results. Here are some alternatives to salted butter:

  • Margarine: Margarine is a popular substitute for salted butter in baking. It has a similar texture and can be used in equal amounts in most recipes.

  • Unsalted Butter with Salt: If you have unsalted butter on hand, you can simply add salt to it to make it salted. Start with a 1/4 teaspoon of salt for every 1/2 cup of butter and adjust according to your taste.

  • Ghee: Ghee is clarified butter and can be a great substitute for salted butter. It has a rich flavor and can enhance the taste of your baked goods.

  • Coconut Oil: Coconut oil is a plant-based alternative to salted butter. It adds a subtle coconut flavor and works well in many baking recipes.

These alternatives can help you achieve the desired flavor and texture in your baked goods, even if you don’t have salted butter on hand. Now, let’s discuss the importance of proper salt distribution in baking.

Proper Salt Distribution?

Proper salt distribution is essential for achieving the desired flavor and texture in baked goods. When it comes to baking, simply adding salt to the batter or dough is not enough. The salt needs to be evenly distributed throughout the mixture to ensure that every bite has the perfect balance of saltiness.

Achieving the desired saltiness requires careful measurement and thorough mixing. I recommend measuring the salt accurately using a kitchen scale or measuring spoons. Then, incorporate the salt into the dry ingredients and mix well before adding any liquid ingredients. This will help distribute the salt evenly and prevent any pockets of saltiness or blandness in your baked goods.

Advertisement

Now, let’s move on to the next topic: using salted butter for sautéing and cooking.

Salted Butter for Sauteing and Cooking

For sautéing and cooking, adding salt to unsalted butter will give you salted butter. It’s a simple way to enhance the flavor of your dishes and add a savory touch to your cooking. Here are some benefits of using salted butter for sautéing:

  • Provides a balanced seasoning: Salted butter already contains salt, so you don’t have to worry about adding extra salt separately.

  • Enhances the flavors: The combination of butter and salt brings out the natural flavors of the ingredients, making your dish more delicious.

  • Adds depth to the dish: The salt in the butter helps to deepen the overall taste of the dish, making it more satisfying.

  • Versatile in recipes: Salted butter can be used in a wide range of recipes, from savory dishes to baked goods, adding complexity to your culinary creations.

By using salted butter for sautéing, you can ensure that your dishes are seasoned well and have that extra burst of flavor.

Now let’s explore how salted butter can further enhance the flavor of your dishes.

Enhancing Flavor With Salted Butter

When it comes to enhancing flavor in my cooking, one of my go-to ingredients is salted butter. Not only does it add a rich and savory taste to dishes, but it also brings out the flavors of other ingredients.

Advertisement

However, there are times when I run out of salted butter and need a substitute. In this discussion, I will explore the benefits of using salted butter in cooking and provide some alternatives for when it’s not available.

Salted Butter Benefits

One of the benefits of salted butter is that it adds a savory flavor to dishes. Salted butter contains salt, while unsalted butter does not. This difference impacts both the taste and the health implications of using these two types of butter.

Here are some key points to consider:

  • Enhanced flavor: Salted butter adds a delicious savory taste to dishes, making them more flavorful.

  • Convenience: Salted butter eliminates the need to add additional salt to your recipes.

  • Preservation: The salt in salted butter acts as a natural preservative, extending its shelf life.

  • Moderation: It’s important to consume salted butter in moderation, as excessive salt intake can have negative health effects, such as high blood pressure and water retention.

Substitutes for Salted Butter?

If you’re looking to switch up your butter options, there are several substitutes available that can still add flavor to your dishes.

While salted butter is commonly used for its savory taste, unsalted butter can be a healthier alternative. Unsalted butter is free from added salt, which can be beneficial for those watching their sodium intake. Additionally, unsalted butter allows you to have more control over the amount of salt added to your recipes.

Advertisement

To give your dishes a similar taste to salted butter, you can simply mix in a pinch of salt to unsalted butter. This way, you can enjoy the flavor of salted butter while still maintaining the health benefits of unsalted butter.

Now, let’s explore the use of salted butter in homemade spreads and sauces.

Salted Butter in Homemade Spreads and Sauces

To make your homemade spreads and sauces with salted butter, simply add the desired amount of salt to the unsalted butter and mix well. It’s a simple and effective way to give your recipes a delicious salty kick.

Using salted butter in baked goods can elevate the flavors, adding a savory element to sweet treats like cookies or cakes. But besides the taste, there are also health benefits to using salted butter.

The sodium in salted butter helps regulate fluid balance in the body and supports nerve function. It also aids in the absorption of certain vitamins and minerals.

Advertisement

Adjusting Salted Butter for Dietary Restrictions

When adjusting for dietary restrictions, you’ll want to consider the sodium content in the butter you’re using. For individuals with heart health concerns, it becomes crucial to find low sodium alternatives to regular salted butter.

While salted butter adds flavor to dishes, it can also contribute to high blood pressure and other cardiovascular issues due to its sodium content. To adjust salted butter for heart health, one option is to switch to unsalted butter and add a pinch of low sodium salt to achieve a similar taste without the excessive sodium.

Another alternative is to explore low sodium butter options available in the market. These alternatives offer a reduced sodium content while still providing the rich, creamy taste of butter.

Benefits of Using Salted Butter in Everyday Cooking

Using salted butter in everyday cooking offers a range of benefits that enhance the overall culinary experience.

Firstly, its addition provides an enhanced flavor profile to dishes, adding a subtle salty note that complements a variety of ingredients.

Advertisement

Secondly, the use of salted butter allows for precise control over seasoning, as the amount of salt in the butter can be adjusted according to personal taste preferences.

Lastly, the versatility of salted butter shines through in various dishes, from savory recipes like roasted vegetables to sweet treats like cookies, making it a valuable ingredient in the kitchen.

Enhanced Flavor Profile

Adding salt to unsalted butter enhances its flavor profile. The simple act of seasoning the butter with salt can elevate its taste and make it more enjoyable to use in various recipes. Here are a few reasons why this cooking technique can result in a flavor enhancement:

  • Balances the richness: Salt helps to cut through the richness of the butter, providing a well-rounded flavor experience.

  • Accentuates other ingredients: The addition of salt brings out the flavors of other ingredients in the dish, making them more pronounced and satisfying.

  • Adds depth: Salt adds depth and complexity to the overall taste of the butter, making it more interesting and delicious.

  • Improves mouthfeel: The salt enhances the texture of the butter, giving it a smoother and creamier feel on the palate.

Ease of Seasoning Control

It’s easier to control the level of seasoning in butter when we start with unsalted butter. By using unsalted butter as a base, we have the freedom to customize the flavor according to our preferences.

Whether we want a hint of salt or a bold, savory taste, we have complete control over the seasoning process. This ease of seasoning allows for a more personalized and tailored experience when it comes to cooking and baking. We can add just the right amount of salt to enhance the flavors without overpowering them.

Advertisement

With unsalted butter, we have the power to create a balance that suits our taste buds perfectly. It’s all about flavor customization and the ability to fine-tune our dishes to perfection.

Versatility in Various Dishes

When it comes to using salted butter in different dishes, the possibilities are endless. Its versatility goes beyond just adding flavor to savory dishes. In fact, incorporating salted butter in desserts can take your sweet treats to a whole new level.

Here are some ways I love to use salted butter in my cooking and baking adventures:

  • Tossing roasted vegetables in melted salted butter before serving adds a delicious richness and depth of flavor to my salads.
  • Adding a small amount of salted butter to my cookie dough or cake batter enhances the overall taste and brings out the sweetness.
  • Drizzling melted salted butter over popcorn gives it a tasty, savory twist that is hard to resist.
  • Using salted butter in pie crusts and tart shells adds a subtle saltiness that perfectly balances the sweetness of the filling.

With salted butter, you can elevate the taste of both savory and sweet dishes, making them even more enjoyable and satisfying.

Storing and Preserving Salted Butter

To store and preserve your salted butter, make sure to keep it in an airtight container in the refrigerator. This will help maintain its freshness and prevent it from absorbing any unwanted odors from other foods in the fridge.

It’s important to choose a container that is specifically designed for storing butter, as it will provide the best protection. Additionally, it’s crucial to keep the butter away from direct sunlight and heat sources, as these can cause it to melt and spoil.

Advertisement

If you want to extend the shelf life of your salted butter even further, you can also store it in the freezer. Just make sure to wrap it tightly in plastic wrap or place it in a freezer bag to prevent freezer burn.

Frequently Asked Questions

How Is Unsalted Butter Made?

Unsalted butter is made by churning cream until it separates into butterfat and buttermilk. The manufacturing process removes the salt typically found in salted butter, resulting in a product that is neutral in flavor.

What Are the Health Benefits of Using Salted Butter?

Using salted butter can have health concerns due to its higher sodium content. However, it can also provide some nutritional value, such as a small amount of vitamin A. Moderation is key.

Can I Use Any Type of Salt When Making Salted Butter?

When making salted butter, it’s important to choose the right type of salt. Different types, like kosher or sea salt, can affect the taste and texture. Salt plays a crucial role in butter making, enhancing flavor and acting as a preservative.

How Long Does Salted Butter Last in the Refrigerator?

In my experience, salted butter typically lasts for about 2-3 weeks in the refrigerator. The main difference between salted and unsalted butter is the addition of salt, which acts as a preservative.

Advertisement

Can I Substitute Salted Butter for Unsalted Butter in a Recipe?

I can substitute salted butter for unsalted butter in a recipe, but I need to adjust the amount of added salt. The difference between salted and unsalted butter is the salt content already present in salted butter.

Conclusion

In conclusion, understanding the art of making salted butter is a science that can elevate your cooking. By adding the right amount of salt to unsalted butter, you can create a flavor profile that enhances your dishes.

Just like a pinch of salt can transform a bland soup into a culinary masterpiece, adding salt to unsalted butter can take your recipes to the next level.

So next time you’re in the kitchen, don’t be afraid to experiment with different salted butter flavors and unleash your inner chef. Your taste buds will thank you.

Advertisement
Continue Reading
Advertisement

Recipes & Culinary Uses

Creamy Delight: Best Butter Pecan Ice Cream Recipe for Summer!

Yearning for a creamy summer treat that will leave you craving more?

Published

on

By

butter pecan ice cream

Savor a delicious summer treat with our Butter Pecan Ice Cream recipe. Mix butter, brown sugar, cream, and pecans for a creamy delight. Melt butter, cook pecans, whisk eggs, and blend for a rich flavor. Add pecans, cream, and vanilla, then freeze to perfection. Master this easy-to-follow recipe for a tasty dessert to beat the heat.

Key Takeaways

  • Rich and creamy blend of butter, brown sugar, and heavy cream
  • Toasted pecans for a nutty crunch and flavor
  • Easy-to-follow steps for homemade ice cream perfection
  • Customization options with variations like bourbon or chocolate
  • Perfect summer treat with a decadent, refreshing taste

Recipe Ingredients for Butter Pecan Ice Cream

To create a delectable batch of butter pecan ice cream, gather the essential ingredients listed in the recipe.

You'll need:

  • Butter
  • Brown sugar
  • Heavy cream
  • Pecans

These ingredients combine to bring out the rich and nutty flavors of this classic dessert.

The brown sugar adds a caramel-like sweetness, while the heavy cream contributes to a creamy texture that's essential for a decadent treat.

Pecans, when toasted in butter, provide a delightful crunch and enhance the overall flavor profile of the ice cream.

Cooking Instructions for Homemade Ice Cream

making ice cream at home

Start by melting butter in a skillet to infuse the pecans with a rich, nutty flavor for your homemade butter pecan ice cream.

Here's a quick guide to help you make this creamy delight:

Advertisement
  • Melt butter and cook pecans for flavor.
  • Whisk eggs and combine with half-and-half and brown sugar for a creamy base.
  • Cook until thickened, then mix with eggs in a bowl.
  • Add cream, pecans, and vanilla extract.
  • Freeze the mixture in an ice cream maker.

Following these steps will guarantee your homemade butter pecan ice cream turns out rich and delicious.

Remember to carefully adhere to the manufacturer's instructions for your ice cream maker to achieve the perfect consistency.

Enjoy the process of creating this delightful treat that will surely be a hit during the summer months.

Ice Cream Preparation Steps

ice cream recipe instructions

Mix half and half with brown sugar over medium heat in a large bowl to prepare the ice cream base.

Next, whisk beaten eggs and temper them with the warm milk mixture to create a smooth custard.

Once done, thicken the mixture on low heat, then cool it over an ice bath to achieve ideal texture.

After that, stir in heavy cream, vanilla extract, maple extract, and a pinch of salt for rich flavor.

Advertisement

Remember to refrigerate the mixture for 1 1/2 – 2 hours before churning it into creamy butter pecan ice cream.

This process ensures that the flavors meld together beautifully and the ice cream attains the perfect consistency for scooping and savoring.

Nutritional Information and Tips

healthy eating guidance provided

Considering the rich and creamy nature of homemade butter pecan ice cream, it's important to be mindful of its nutritional content and serving size. When indulging in this delectable dessert, remember these essential tips:

  • Portion Control: Enjoy in moderation to savor the flavors without overindulging.
  • Brown Sugar Sweetness: Opt for a moderate amount of brown sugar to balance sweetness without overwhelming the palate.
  • Room Temperature Ingredients: Confirm ingredients like butter and heavy cream are at room temperature for a smoother texture.
  • Nutritional Awareness: Be mindful that homemade butter pecan ice cream can vary in nutritional content, so adjust ingredients accordingly.
  • Consultation: Seek advice from a nutritionist or healthcare provider for personalized guidance on incorporating this treat into a balanced diet.

Homemade Butter Pecan Ice Cream Variations

delicious homemade ice cream

Explore creative twists on traditional butter pecan ice cream by incorporating different nuts, spirits, sauces, chocolates, and dairy-free alternatives.

For a unique flavor, try substituting pecans with walnuts or almonds in the full recipe. Toast the nuts in a separate bowl until browned and fragrant, then chop them finely enough to coat in the ice cream mixture.

To add a boozy kick, mix in a splash of bourbon or rum to the base as you churn the ice cream. For an extra indulgent touch, swirl in caramel sauce or fudge ripple throughout the mixture.

Incorporate chunks of chocolate or chocolate-covered nuts for a delightful contrast in texture, giving each bite a sweet surprise.

Advertisement

If you prefer a lighter, dairy-free option, consider using coconut milk or almond milk as a substitute for traditional dairy products. These alternatives provide a creamy base while catering to plant-based diets.

Experiment with these variations to create a personalized butter pecan ice cream that suits your taste preferences.

Frequently Asked Questions

What Is the Secret to Making Ice Cream Very Creamy?

To make ice cream very creamy, you use a rich base of ingredients like heavy cream, eggs, and sugar. Chilling the base before churning is crucial for a smoother texture. Adding vanilla extract enhances creaminess, and slow churning prevents a dense outcome.

What Flavor Is the Ice Cream in Butter Pecan?

The ice cream in butter pecan is a delightful blend of buttery richness, vanilla sweetness, and maple undertones, perfectly paired with toasted pecans for a nutty crunch. This flavor combination creates a harmonious and indulgent treat.

What's the Difference Between Butter Pecan Ice Cream and Praline Pecan Ice Cream?

In butter pecan ice cream, you'll savor the buttery richness of pecans blended with a creamy base. On the other hand, praline pecan ice cream highlights caramelized sweetness with a swirl of praline sauce for a delightful flavor contrast.

Advertisement

What Age Group Eats Butter Pecan Ice Cream?

You'll find that adults and older individuals, typically in the 30-60 age group, enjoy butter pecan ice cream. It's a favorite among those with a more refined palate, drawn to its rich and nutty flavor.

Conclusion

So there you have it, folks! Whip up this buttery, nutty delight for a taste of summer in every scoop.

Don't cry over spilled milk – grab a cone and enjoy this creamy treat that's sure to satisfy your sweet tooth.

Get churning and indulge in the best butter pecan ice cream you've ever tasted!

Advertisement
Continue Reading

Recipes & Culinary Uses

Festive Favorites: Best Peanut Butter Blossoms Recipe for Holidays!

Unleash the ultimate holiday baking magic with the best Peanut Butter Blossoms recipe – an irresistible treat that will elevate your festive celebrations!

Published

on

By

holiday baking with flair

Elevate your holiday baking with the ultimate Peanut Butter Blossoms recipe. Cream together peanut butter, butter, sugars, and salt, then add egg and vanilla. Roll dough into balls, coat in brown sugar, bake until golden, then press a Hershey's kiss on top. Adjust baking time as needed. Explore ingredient swaps for a personalized touch. Enjoy with hot cocoa or pair with savory dishes. For more tips, ideas, and customization options, the recipe holds more festive surprises.

Key Takeaways

  • Cream together peanut butter, butter, sugars for rich flavor.
  • Bake at 375°F for 8-10 minutes for soft, chewy cookies.
  • Customize with ingredient swaps like almond butter or maple syrup.
  • Pair with savory dishes or hot cocoa for holiday enjoyment.
  • Press Hershey kisses onto warm cookies for a classic finish.

Ingredients for Peanut Butter Blossoms

For the classic Peanut Butter Blossoms recipe, gather peanut butter, butter, sugar, an egg, and Hershey's kisses as your essential ingredients.

Peanut butter is the star, offering a rich flavor that blends perfectly with the sweetness of the cookies.

Butter plays a pivotal role by adding moisture and richness to the dough, ensuring a soft and chewy texture.

The sugar not only sweetens the cookies but also contributes to their festive appeal, making them a perfect treat for any occasion.

Finally, the Hershey's kisses on top provide a delightful chocolatey finish that elevates these cookies to a whole new level of deliciousness.

Advertisement

Together, these ingredients create a harmonious blend of flavors and textures that make Peanut Butter Blossoms a beloved classic for holiday baking or any time you crave a sweet and satisfying treat.

Recipe Steps for Peanut Butter Blossoms

bake peanut butter cookies

To make Peanut Butter Blossoms, start by creaming together peanut butter, butter, sugars, and salt until light and fluffy.

Next, add in the egg and vanilla extract, making sure to mix well to combine all the ingredients thoroughly.

Then, gradually incorporate the dry ingredients into the wet mixture until a smooth dough forms.

Once the dough is ready, roll it into balls and coat each ball generously in brown sugar.

Place the sugar-coated dough balls on a baking sheet, making sure to leave enough space between them for spreading during baking.

Advertisement

Bake the cookies in a preheated oven until they turn a beautiful golden brown.

As soon as the cookies are out of the oven, press a Hershey's kiss into the center of each cookie gently.

The heat from the freshly baked cookies will melt the chocolate just enough to adhere it to the cookie.

These Peanut Butter Blossoms are a delightful treat perfect for Christmas celebrations!

Pro Tips for Making Peanut Butter Blossoms

baking perfect peanut blossoms

To enhance your peanut butter blossom baking experience, consider adjusting the baking time based on your oven's performance for best results.

Additionally, explore ingredient substitutions to cater to dietary preferences or allergies without compromising the flavor or texture of the cookies.

Advertisement

These pro tips can help you customize your peanut butter blossoms while ensuring delicious outcomes.

Baking Time Recommendations

Achieving the ideal texture for your peanut butter blossoms involves baking them at 375°F for 8-10 minutes. This baking duration guarantees that the cookies have a soft and chewy consistency while allowing the Hershey kisses on top to be softened but not completely melted.

Once out of the oven, remember to press the Hershey kisses onto the cookies immediately to secure them in place for that classic appearance.

For the best outcomes, chill the cookie dough for about 30 minutes before baking. This step helps the cookies maintain their shape and prevents excessive spreading during baking, ensuring your peanut butter blossom cookies are perfectly formed and ready to impress during your holiday baking.

Shortening or extending the baking time can alter the texture of the cookies. A quick bake of 6-8 minutes produces softer and chewier cookies, while longer baking times yield a slightly crispier consistency. Stick to the recommended 8-10 minutes for the best soft and chewy peanut butter blossoms.

Advertisement

Ingredient Substitutions

Consider incorporating different ingredients to elevate the flavor and nutritional profile of your peanut butter blossoms. For a healthier option, swap out shortening with unsalted butter to achieve a unique texture and taste in your cookies.

Try using natural peanut butter instead of creamy to add a wholesome twist to the classic recipe. If you're looking to reduce the glycemic impact, substitute brown sugar with coconut sugar in your baking. For a natural sweetener alternative, replace regular granulated sugar with maple syrup in the cookie dough mixture.

Additionally, for a distinct flavor experience, experiment with almond butter as a substitute for peanut butter in your blossoms. These ingredient substitutions can bring a new dimension to your peanut butter blossoms, making them not only delicious but also tailored to your dietary preferences.

Upgrade your baking game this holiday season with these creative twists on a beloved recipe!

Serving Suggestions for Peanut Butter Blossoms

peanut butter cookie recipe

Enhance the enjoyment of your peanut butter blossoms by pairing them with savory dishes like lasagna tortellini soup for a satisfying meal. These classic cookies also complement family-friendly dinners such as easy ground beef shepherd's pie and creamy broccoli cheddar soup, making for a delightful combination. The holiday season calls for cozy treats, and the sweet nuttiness of peanut butter blossoms pairs perfectly with a warm cup of hot cocoa. Whether you're participating in a cookie exchange or looking for a festive touch to your holiday dessert spread, consider rolling the cookies in red, green, and white sugar sprinkles to add a pop of color and fun.

Serving Suggestions Pairing Ideas
Lasagna Tortellini Soup Comforting and hearty meal alongside the cookies
Easy Ground Beef Shepherd's Pie Delicious combination for a family dinner
Creamy Broccoli Cheddar Soup Perfect accompaniment to the nutty cookie flavors

12 Days of Christmas Cookies Recipes

baking traditions for the holidays

Indulge in a variety of delightful Christmas cookie recipes each day during the holiday season. One standout choice is the classic Peanut Butter Blossoms. These holiday cookies feature a peanut butter base topped with a Hershey's kiss, making them a beloved treat for cookie exchanges and festive gatherings.

The process of making these cookies is simple yet rewarding. Start by rolling the dough balls in sugar before baking to add a sweet crunch to each bite. The combination of rich peanut butter flavor and the chocolatey goodness of the Hershey's kiss creates a perfect balance of sweetness.

Advertisement

When enjoying these Christmas cookies, consider pairing them with a glass of milk for a classic and satisfying treat.

Whether you're baking them for your family, a cookie exchange, or a holiday party, Peanut Butter Blossoms are sure to be a hit. Make each day of the holiday season a little sweeter with these delicious cookies.

User Engagement Features

user interaction enhancements

Let's talk about how user interaction features and personalization options enhance your experience with the Peanut Butter Blossoms recipe.

You can engage with others by leaving comments and sharing your results, creating a sense of community around this holiday treat.

Personalization options like name and email entry fields help tailor the experience to your preferences, making it more engaging and enjoyable.

User Interaction Features

Utilizing user engagement features on the website allows for increased participation and feedback from visitors. The comment section enables users to interact with each other and provide valuable feedback on the Peanut Butter Blossoms recipe or share their experiences with Hershey's kisses. By incorporating a reply option, users can engage in conversations, fostering a sense of community around baking these delightful peanut butter cookies.

Advertisement

Moreover, the inclusion of name and email fields not only allows for personalization but also facilitates communication between the website and its visitors. This data storage feature guarantees that users can conveniently access their information for future visits, enhancing their overall user experience.

These user engagement features play an essential role in creating an interactive platform where users can engage, provide feedback, and communicate effectively. Such interaction not only enriches the user experience but also encourages visitors to actively participate in the community surrounding the Peanut Butter Blossoms recipe.

Personalization Options

Enhance your website's user engagement by incorporating personalized options such as commenting, replying, and sharing feedback on the Peanut Butter Blossoms recipe. This level of user interaction not only fosters a sense of community building but also encourages customization and feedback. By allowing users to share their thoughts, results, and experiences with the festive favorites, you create a more engaging and interactive user experience. Additionally, providing users with the option to save their data for future visits and encouraging them to tag @preppykitchen and use #preppykitchen when trying the recipe further enhances their engagement.

Personalization Options Description Benefits
Commenting Users can leave comments on the Peanut Butter Blossoms recipe, sharing their thoughts and experiences. Fosters community building and user engagement.
Replying Users can reply to comments and engage in discussions with other users about the recipe. Encourages active participation and interaction.
Feedback Sharing Users can share feedback on the recipe, providing valuable insights for improvement. Enhances user experience and customization.

Additional Information

clarifying specific details provided

You may find it interesting to know more about the history of the Peanut Butter Blossoms recipe and its cultural significance during the holidays.

  • The Peanut Butter Blossoms recipe's popularity is backed by IRI MULO data, making it a sought-after choice for holiday baking.
  • Copyright for this beloved recipe belongs to The J.M. Smucker Company, a reputable name in the food industry known for quality products.
  • These delightful cookies aren't only perfect for serving at holiday parties but also make excellent gifts due to their festive appeal.

Frequently Asked Questions

Why Are My Peanut Butter Blossoms Dry?

If your peanut butter blossoms are dry, it could be due to using too much flour, overbaking, using natural peanut butter that requires stirring, or not enough butter/shortening. Guarantee precise measurements and follow the recipe closely to maintain moisture.

Why Did My Peanut Butter Blossoms Go Flat?

When making peanut butter blossoms, going flat happens due to overmixing, too much flour, insufficient chilling, or low oven temperature. Remember to avoid these pitfalls. Preheat the oven properly and follow the recipe for perfect blossoms!

What Is America's Favorite Christmas Cookie?

America's favorite Christmas cookie is Peanut Butter Blossoms. Loved for their peanut butter-chocolate combo and nostalgic Hershey's Kiss center, these easy-to-make treats are a holiday staple at parties and gatherings. They're a must-have during the festive season.

Advertisement

What Is Baskin Robbins Peanut Butter Blossom?

You asked about Baskin Robbins Peanut Butter Blossom. It's a delectable seasonal ice cream flavor featuring creamy peanut butter ice cream with a ribbon of more peanut butter and chocolate cookie pieces. Indulge in this festive treat!

Conclusion

Indulge in the warm, gooey goodness of these peanut butter blossoms this holiday season. With the perfect blend of creamy peanut butter and rich chocolate, these cookies are sure to bring joy to your festivities.

Picture yourself surrounded by loved ones, sharing laughter and memories as you enjoy these delicious treats. Let the aroma of freshly baked cookies fill your home and create a cozy, festive atmosphere.

Happy baking and happy holidays!

Advertisement
Continue Reading

Recipes & Culinary Uses

Bite-Sized Treats: Best Peanut Butter Ball Recipe You'll Love!

Adore these heavenly peanut butter balls with a delectable mix of smooth peanut butter, powdered sugar, and vanilla—perfect for indulging in bite-sized bliss!

Published

on

By

delicious peanut butter balls

You'll adore these easy and heavenly peanut butter balls. Mix smooth peanut butter, powdered sugar, and vanilla extract for a delectable dough. Roll into small balls and chill. Dip in melted chocolate, then refrigerate to set. Enhance the flavor with rum extract, nuts, or crushed pretzels. Get creative with colorful sprinkles and different chocolate coatings. Use quality chocolate coating and adjust mix consistency. Store them in the fridge or freezer. Enjoy these mouthwatering treats alone or at gatherings. More tips and delightful variations await!

Key Takeaways

  • Creamy peanut butter, powdered sugar, and vanilla create a smooth dough.
  • Incorporate nuts, rum extract, or pretzels for flavor and texture variety.
  • Use quality chocolate coating like candy melts for best results.
  • Chill peanut butter balls before dipping for easier handling.
  • Store in the fridge or freezer for convenient snacking and serving.

Ingredients and Preparation

To create irresistible peanut butter balls, gather creamy peanut butter, powdered sugar, and vanilla extract as your key ingredients.

Begin by mixing the peanut butter, butter, sugar, and vanilla until you have a smooth dough. Roll this mixture into small balls and chill them before dipping them in melted chocolate.

The type of chocolate you use, such as dark or milk chocolate, will enhance the flavor of your peanut butter balls. After dipping, make sure to refrigerate the balls until the chocolate sets for a perfect finish.

This process guarantees that each bite-sized treat isn't only visually appealing but also bursting with delicious peanut butter and chocolate flavors.

Variations and Enhancements

creative modifications and improvements

You can elevate the flavor of your peanut butter balls by incorporating unique ingredients like chopped nuts or rum extract.

Experiment with different chocolate coatings such as white almond bark or dark chocolate candy melts for a varied taste experience.

Advertisement

Get creative by adding finishing touches like colorful sprinkles to make your peanut butter balls visually appealing.

Flavorful Ingredient Additions

Enhance the flavor of your peanut butter balls by incorporating unique ingredient variations and enhancements. While the classic combination of peanut butter, powdered sugar, and butter creates a delicious dough for your treats, you can take it up a notch by adding flavorful ingredient additions.

Consider mixing in crushed pretzels for a salty crunch that complements the sweetness of the peanut butter. Chopped nuts like almonds or pecans can also add a delightful texture and nutty taste to your chocolate-covered peanut butter balls.

For a burst of fruity flavor, try incorporating dried cranberries or raisins into the dough. These additions not only provide a contrast in texture but also introduce a hint of sweetness that pairs well with the creamy peanut butter.

Another option is to include a sprinkle of cinnamon or a dash of vanilla extract to elevate the overall taste profile of your peanut butter balls. Experiment with these flavorful ingredient additions to create a unique and delectable twist on the classic treat.

Advertisement

Chocolate Coating Options

Experiment with different types of chocolate coatings – dark, white, or milk chocolate – to suit your preferences and elevate the flavor of your peanut butter balls.

When considering the chocolate coating for your crunchy peanut butter treats, here are some options to enhance your culinary creation:

  1. Choose Candy Melts or Almond Bark: Opt for candy melts or almond bark for a smooth and firm chocolate coating that sets well on your peanut butter balls.
  2. Avoid Chocolate Chips: Steer clear of using chocolate chips for coating, as they may contain stabilizers that hinder smooth melting, affecting the overall texture.
  3. Add Colored Sprinkles: For a festive touch, sprinkle colored sprinkles on top of the chocolate coating before it sets to add a pop of color and extra crunch to your peanut butter balls.

Experimenting with different chocolate coatings and techniques can take your peanut butter balls to the next level, ensuring a delightful and indulgent treat for any occasion.

Creative Finishing Touches

To elevate the flavor profile of your peanut butter balls, consider incorporating creative finishing touches through various enhancements and unique variations.

You can enhance the texture by adding chopped nuts or crispy rice cereal to the peanut butter mixture, providing a delightful crunch with every bite.

Experiment with different flavors by using almond extract or rum extract instead of vanilla for a twist on the traditional taste.

Advertisement

For a festive touch, roll the balls in crushed graham crackers, sprinkles, or a sprinkle of sea salt to add a pop of flavor.

Drizzle white chocolate over the dark, semi-sweet, or milk chocolate coating for a visually appealing contrast that will impress your guests.

If you enjoy a crunchy element, try coating the balls in crushed pretzels or toasted coconut before the chocolate sets.

These creative enhancements will take your peanut butter balls to the next level, making them a standout treat at any gathering.

Tools and Tips

crafting with precision

Consider using a 1 tablespoon cookie scoop for consistent sizing when preparing your peanut butter balls. This tool will help guarantee all your treats are uniform in size, making for a neat presentation and even cooking.

Here are some additional tools and tips to enhance your peanut butter ball-making experience:

Advertisement
  1. Invest in Quality Chocolate Coating: Opt for candy melts or almond bark for a smooth and firm chocolate coating on your peanut butter balls. These coatings melt easily and provide a professional finish to your treats.
  2. Adjust Peanut Butter Mixture Consistency: If your peanut butter mixture is too sticky or too dry, adjust the consistency by adding more peanut butter or powdered sugar. This will help you achieve the perfect texture for shaping your balls.
  3. Refrigerate Before Dipping: Prior to dipping your peanut butter balls in chocolate, chill them in the refrigerator. This step will make the balls firmer, making them easier to handle and coat without falling apart.

Storage and Serving Suggestions

great suggestion for storage

For best freshness and presentation of your peanut butter balls, follow these storage and serving suggestions.

To keep your peanut butter balls tasting delicious, store them properly. You can store them in an airtight container in the fridge for up to 1 week or in the freezer for up to 2 months. When freezing, remember to thaw the frozen peanut butter balls before serving by bringing them to room temperature. To prevent them from sticking together, separate the layers of peanut butter balls with wax paper.

Here is a helpful table summarizing the storage and serving suggestions:

Storage Serving Frozen
Airtight container Display on festive tray Thaw before serving
Fridge – 1 week Pair with hot cocoa Bring to room temp
Freezer – 2 months Enjoy at holiday gatherings
Separate with wax paper

Additional Peanut Butter Desserts

peanut butter dessert recipes

Explore a variety of delectable peanut butter desserts to satisfy your sweet cravings.

  1. Peanut Butter Blossom Cookies: Indulge in the classic combination of peanut butter cookies topped with a chocolate kiss for a delightful treat.
  2. Peanut Butter Chocolate Mug Cake: Whip up this easy-to-make single-serving dessert that combines the rich flavors of peanut butter and chocolate in a mug for a quick fix.
  3. Peanut Butter Overload Cookies: For those who can't get enough peanut butter, these cookies are loaded with peanut butter chips, chocolate chips, and chopped peanuts for an explosion of flavor in every bite.

These additional peanut butter desserts offer a diverse selection to cater to your cravings.

Whether you're in the mood for a classic treat like Peanut Butter Blossom Cookies, a quick fix with Peanut Butter Chocolate Mug Cake, or a flavor-packed experience with Peanut Butter Overload Cookies, there's something for every peanut butter lover.

Enjoy these easy-to-make delights whenever you need a sweet pick-me-up!

Recipe Instructions and Nutritional Information

cooking guidance and facts

To create these delectable Peanut Butter Balls, start by blending peanut butter, butter, sugar, and vanilla to form a dough. Roll the mixture into small balls and place them on a baking sheet lined with parchment paper. Chill the peanut butter balls in the refrigerator for about 30 minutes until firm.

Once chilled, melt chocolate in a heatproof bowl over simmering water or in the microwave. Dip each chilled peanut butter ball into the melted chocolate, ensuring they're evenly coated. Place the coated balls back on the parchment paper and let the chocolate set.

Advertisement

Each serving of these delightful treats contains approximately 114 calories.

Store the finished peanut butter balls in the fridge for up to 2 weeks or freeze them for up to 3 months.

Enjoy these decadent bite-sized snacks whenever you crave a sweet and nutty indulgence.

Frequently Asked Questions

Can I Use Chunky Peanut Butter Instead of Creamy for This Recipe?

Yes, you can use chunky peanut butter instead of creamy for this recipe. It will add a delightful texture and extra crunch to your peanut butter balls. Enjoy experimenting with different variations!

How Long Do Chocolate Covered Peanut Butter Balls Stay Fresh?

Like a sweet memory, chocolate-covered peanut butter balls stay fresh for up to two weeks when stored in an airtight container in the fridge. Indulge in these delectable treats within that time frame for best taste.

Advertisement

Can I Freeze the Peanut Butter Balls for Later Enjoyment?

Yes, you can freeze the peanut butter balls for later enjoyment. Simply place them in an airtight container or freezer bag. When ready to indulge, let them thaw in the fridge for a few hours.

What Type of Chocolate Is Best for Coating the Peanut Butter Balls?

For coating the peanut butter balls, semi-sweet or milk chocolate works best. They provide a delicious contrast to the creamy peanut butter filling. Simply melt the chocolate, dip the balls, and enjoy the sweet treat!

Can I Add Chopped Nuts or Sprinkles to the Peanut Butter Balls for Extra Flavor?

You can definitely add chopped nuts or sprinkles to the peanut butter balls for extra flavor. It's a great way to customize your treats and add a delightful crunch or colorful touch to each bite.

Conclusion

Indulge in these irresistible peanut butter balls that are sure to satisfy your sweet tooth cravings.

With just a few simple ingredients and easy-to-follow instructions, you can enjoy these bite-sized treats in no time.

Advertisement

So go ahead, treat yourself to a little taste of heaven and experience the perfect combination of creamy peanut butter and rich chocolate.

You won't be able to resist coming back for more!

Continue Reading

Trending