Connect with us

Recipes & Culinary Uses

How to Make Butter From Buttermilk

Published

on

An image showcasing the transformation of creamy buttermilk into rich, velvety butter

Imagine the satisfaction of spreading homemade butter on warm bread.

In this article, I’ll share my simple and foolproof method for making butter from buttermilk. We’ll gather the materials, choose the perfect buttermilk, separate the cream, chill it, and then whip it into delicious butter.

I’ll guide you through each step, from draining the buttermilk to washing the butter. Get ready to create the creamiest, tastiest butter you’ve ever had.

Let’s get started!

Key Takeaways

  • Choose the right buttermilk based on personal preference and recipe requirements, considering factors such as fat content and flavor.
  • Use proper cream separation methods, such as gravity, centrifugation, skimming, sieving, or churning, to obtain fresh buttermilk for flavorful butter.
  • Whip the cream using chilled equipment and gradually increase mixer speed to achieve a light and fluffy texture, checking for soft peaks to form and hold their shape.
  • Shape the butter using techniques such as rolling it into a log shape or using butter molds, and consider adding salt for enhanced flavor, extended shelf life, and a savory element, based on personal taste preferences.

Gathering the Materials

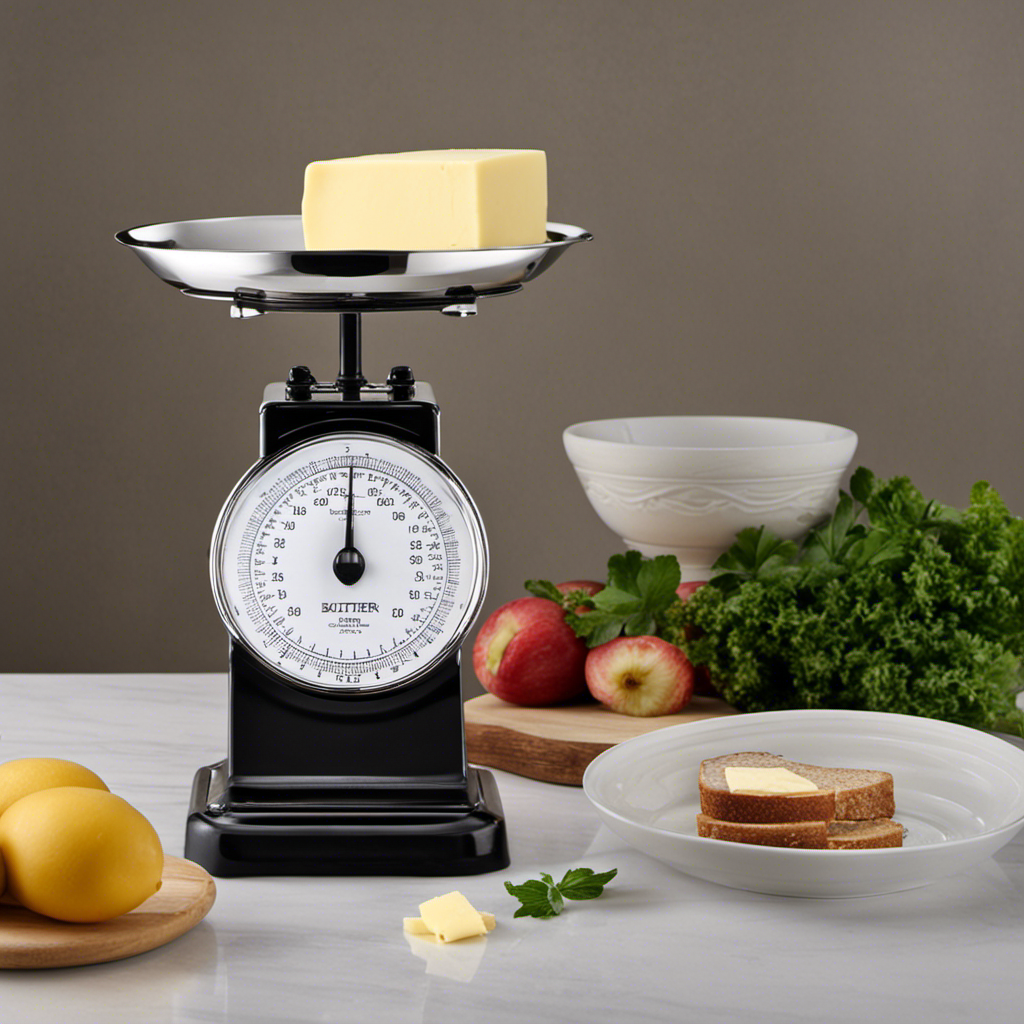
Before starting, make sure you’ve gathered all of the necessary materials.

When making butter from buttermilk, it is important to choose the right container and maintain temperature control during cream separation.

For the container, I recommend using a glass jar with a tight-fitting lid. Glass is non-reactive and won’t affect the flavor or quality of the butter. It’s also important to ensure the jar is clean and sterilized to prevent any unwanted bacteria from contaminating the buttermilk.

When it comes to temperature control, it’s best to keep the cream at around 55°F to 60°F. This allows for proper separation of the butterfat from the buttermilk.

Once you have gathered all the necessary materials and set the right temperature, you can proceed to the next step of choosing the right buttermilk.

Choosing the Right Buttermilk

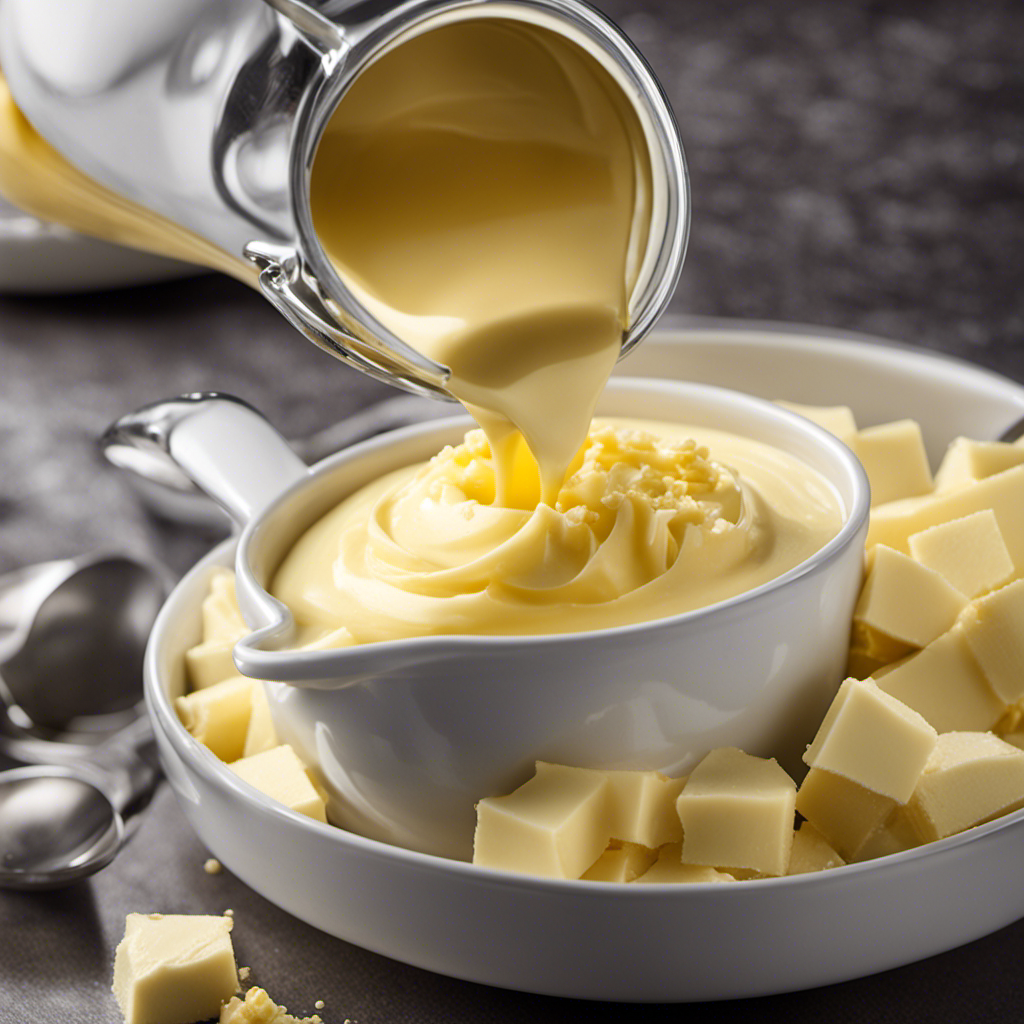
When choosing the right buttermilk, it’s important to consider the fat content in order to achieve the desired consistency. There are several options available, including fresh buttermilk, which is the traditional choice, and alternative options such as low-fat or non-fat buttermilk.

Fresh buttermilk is made by churning cream into butter and then adding a culture to ferment it. It has a rich, creamy texture and a tangy flavor. However, if you prefer a lighter consistency, you can opt for low-fat or non-fat buttermilk, which have a lower fat content and a milder flavor.

Ultimately, the choice depends on personal preference and the specific recipe you are using. Now that you know how to choose the right buttermilk, let’s move on to the next step: separating the cream from the buttermilk.

Separating the Cream From the Buttermilk

When it comes to separating cream from buttermilk, there are a few techniques that I have found to be effective.

One method involves allowing the mixture to sit undisturbed in the refrigerator overnight, allowing the cream to rise to the top.

Another technique involves using a specialized cream separator, which helps to separate the cream from the buttermilk more efficiently.

It is important to note that using fresh buttermilk is crucial for achieving a delicious and flavorful butter, as it adds a tangy taste to the final product.

As for the equipment needed, a butter churn or a stand mixer with a whisk attachment can be used to agitate the cream and turn it into butter.

Cream Separation Techniques

To separate the cream from the buttermilk, you’ll need to let the mixture sit undisturbed for a few hours. During this time, the cream will rise to the top, while the buttermilk settles at the bottom.

Here are some cream separation methods that I’ve found effective:

  • Gravity: Allowing the mixture to naturally separate by leaving it undisturbed.
  • Centrifugation: Using a machine to spin the mixture at high speeds, causing the cream to separate.
  • Skimming: Carefully scooping off the cream from the top of the mixture.
  • Sieving: Pouring the mixture through a fine mesh sieve to separate the cream from the buttermilk.
  • Churning: Agitating the mixture vigorously to encourage the separation of cream and buttermilk.

Now that we’ve successfully separated the cream, let’s move on to the importance of fresh buttermilk in the process of making butter.

Importance of Fresh Buttermilk

Fresh buttermilk is essential for achieving the desired texture and flavor in your homemade recipes. Not only does it add a tangy and creamy taste to dishes like pancakes, biscuits, and dressings, but it also provides several health benefits. Buttermilk is low in fat and calories, making it a healthier alternative to whole milk. It is also rich in calcium, which is important for strong bones and teeth. Additionally, buttermilk contains probiotics, which promote a healthy gut by improving digestion and boosting the immune system.

Here is a table highlighting the nutritional content of fresh buttermilk:

Nutrient Amount per 1 cup
Calories 99
Fat 2.2g
Carbohydrate 17g
Protein 3.3g
Calcium 285mg

Incorporating fresh buttermilk into your recipes not only enhances the taste but also provides you with these essential health benefits. So, don’t hesitate to include it in your next culinary adventure.

Butter-Making Equipment Needed

You’ll need a few essential pieces of equipment to successfully create homemade butter. Here are the key items you’ll need:

  • Butter churn: This is the main tool used to agitate cream and separate the butterfat from the buttermilk. It can be a traditional hand-crank churn or an electric churn for convenience.

  • Cream separator: If you’re starting with fresh milk, a cream separator will help you extract the cream from the milk before churning.

  • Butter muslin or cheesecloth: These are used to strain the buttermilk from the butter during the churning process.

  • Butter paddles or butter molds: These tools are used to shape and work the butter, removing any excess moisture and creating a smooth texture.

  • Salt: Optional, but adding a pinch of salt can enhance the flavor of your homemade butter.

With these equipment items, you’ll be well-equipped to embark on your homemade butter-making adventure.

Chilling the Cream

First, make sure you refrigerate the cream for at least 12 hours to chill it properly. Chilling the cream is crucial for successful butter making. The cream temperature should be around 45-50°F (7-10°C) to achieve the best results.

When the cream is refrigerated for a sufficient amount of time, it becomes cold and thick, which helps in separating the butterfat from the buttermilk later on. This process of chilling also helps to stabilize the cream and prevents it from splattering during the whipping process.

Once the cream has been chilled, it is ready to be whipped into butter. So, let’s move on to the next step and learn how to whip the cream to turn it into delicious homemade butter.

Whipping the Cream

When it comes to whipping cream, there are a few crucial tips to keep in mind.

First, make sure to use a chilled bowl and beaters for the best results.

Secondly, gradually increase the speed of the mixer to achieve a light and fluffy texture.

Lastly, check the cream’s consistency by lifting the beaters – if soft peaks form and hold their shape, it’s ready.

The time required for whipping can vary depending on the cream’s fat content and the desired level of stiffness, but on average, it takes about 3-5 minutes.

Whipping Technique Tips

To achieve the perfect whipped consistency, don’t rush the process and keep whisking until the buttermilk turns into butter. Whipping cream is a delicate process that requires patience and precision. Here are some whipping technique alternatives and troubleshooting tips to help you along the way:

  • Use an electric mixer: This can save you time and energy, allowing for a faster and more efficient whipping process.

  • Chill the cream: Cold cream whips better, so make sure to refrigerate it before starting.

  • Add a stabilizer: If your cream is not holding its shape, try adding a stabilizer such as gelatin or cornstarch to help it stay whipped.

  • Avoid over-whipping: Keep a close eye on the cream as it can quickly turn from whipped to curdled if you overdo it.

  • Use a chilled bowl: Whipping cream in a chilled bowl can help maintain a cooler temperature, resulting in better texture and consistency.

With these whipping technique alternatives and troubleshooting tips, you’ll be able to create perfectly whipped butter from buttermilk every time.

Cream Consistency Check

If you want to check the consistency of your cream, simply give it a gentle shake and see if it jiggles slightly without being too runny. Having the right consistency is crucial when it comes to making butter from buttermilk. To help you troubleshoot any issues you may encounter, here are some tips:

Issue Possible Cause Solution
Runny cream High fat content, insufficient chilling Chill the cream for longer before whipping
Grainy texture Over-whipping, inadequate fat content Whip the cream just until soft peaks form and ensure it has a high fat content
Curdled cream Over-whipping, high acidity Start with chilled cream and avoid over-whipping

Time Required for Whipping

For the perfect consistency, whip your cream until it forms soft peaks, which should take about 3-5 minutes. To achieve this, set your mixer to medium-high whipping speed.

Make sure your cream is at room temperature, around 65-70°F, as colder cream takes longer to whip. As the beaters move through the cream, it will gradually thicken and increase in volume.

Imagine the cream swirling and rippling in the bowl, transforming into a fluffy white cloud. Watch as it slowly starts to hold its shape, forming soft peaks that gently droop when the beaters are lifted. The texture should be smooth and velvety, like a dollop of freshly fallen snow.

Be patient and keep a close eye on the cream, as over-whipping can quickly turn it into butter.

Adding Salt (Optional

Adding salt to the butter is optional, but it can enhance the flavor. Salt plays an important role in bringing out the natural taste of food, and butter is no exception. Some people prefer their butter unsalted, while others enjoy the savory kick that salt provides. It all comes down to personal taste preferences. To help you decide whether to add salt to your butter, here is a table comparing the pros and cons:

Pros Cons
Enhances flavor Can be too salty
Balances sweetness May mask other flavors
Extends shelf life Not suitable for low-sodium diets
Adds a savory element Some people may have dietary restrictions
Can be used in savory and sweet recipes Not recommended for those with high blood pressure

Ultimately, the decision is yours. Experiment with adding different amounts of salt to find your perfect balance of flavor.

Continuing to Whip

To continue whipping, you’ll want to ensure that the butter stays chilled throughout the process. This is crucial for butter formation. Here are some tips to keep in mind:

  • Use a chilled bowl and whisk to prevent the butter from melting too quickly.
  • Start with cold heavy cream, as it will whip faster and yield better results.
  • Whip the cream on medium speed until it thickens and soft peaks form.
  • Increase the speed to high and continue whipping until the cream separates into solid butter and buttermilk.
  • Stop whipping once the buttermilk is fully separated from the butter.

Draining the Buttermilk

After the buttermilk has been thoroughly whipped, it’s time to drain the buttermilk from the butter. This step is essential to separate the liquid from the solid, giving us the creamy, spreadable butter we desire. To do this, place a fine-mesh strainer or cheesecloth over a clean bowl or container. Carefully pour the mixture into the strainer, allowing the buttermilk to drain out. You can save this buttermilk for other recipes, such as pancakes, biscuits, or salad dressings. Buttermilk adds a tangy flavor and tenderizing properties to baked goods, making them moist and delicious. Here are a few ideas for using leftover buttermilk:

Recipe Ideas
Buttermilk pancakes
Buttermilk fried chicken
Buttermilk biscuits
Buttermilk ranch dressing

Now that the buttermilk has been drained, it’s time to move on to the next step: washing the butter.

Washing the Butter

When it comes to making butter, washing it after churning has several benefits.

First and foremost, washing helps remove any remaining buttermilk, resulting in a longer shelf life for the butter.

Secondly, it also improves the texture and consistency, making it smoother and easier to spread.

Lastly, there are time-saving techniques that can be employed, such as using cold water and kneading the butter under running water, that can expedite the washing process without compromising the end result.

Benefits of Washing

Washing the butter helps remove excess buttermilk and improves its texture. When I wash the butter, I notice several benefits and techniques that enhance the final product. Here are five things I’ve learned:

  • The water turns cloudy as it washes away the buttermilk, leaving behind pure, creamy butter.
  • Gently kneading the butter under cold water helps to remove any remaining buttermilk and impurities.
  • The butter becomes firmer and easier to handle after washing, making it ideal for shaping or spreading.
  • Washing also helps to extend the shelf life of the butter by removing any leftover buttermilk that could cause spoilage.
  • If desired, adding a pinch of salt during the washing process enhances the flavor and preserves the butter even longer.

Texture and Consistency

The texture and consistency of the butter greatly improve after it has been washed. When making butter from buttermilk, it is important to assess the texture to ensure a smooth and creamy end product. After churning the buttermilk, the resulting butter may have a slightly grainy texture. However, by washing the butter, you can remove any excess buttermilk and enhance its texture.

To do this, place the butter in a bowl of cold water and gently knead it with your hands. As you knead, you will notice the water turning cloudy, indicating the removal of buttermilk. Repeat this process until the water remains clear.

It is also important to troubleshoot any issues with texture, such as overly soft or hard butter, by adjusting the churning time and temperature.

Time-Saving Techniques

To save time while improving texture, try adjusting the churning time and temperature when making butter from buttermilk. Here are some time-saving tips and efficient methods I’ve found helpful:

  • Increase the churning speed: By using a higher speed on your mixer or churn, you can shorten the churning time significantly.

  • Control the temperature: Maintaining a slightly warmer temperature (around 60°F) during churning can accelerate the separation of butterfat from the buttermilk.

  • Use cold buttermilk: Starting with chilled buttermilk can speed up the process as the butterfat will solidify more quickly.

  • Use a larger container: By using a bigger container, you can churn a larger volume of buttermilk at once, saving time by avoiding multiple batches.

  • Pre-chill the churner or mixer: Cooling down the churner or mixer before starting will help keep the temperature of the buttermilk stable, ensuring efficient churning.

Shaping and Storing the Butter

Once you’ve shaped the butter into a solid block, make sure to store it in an airtight container to maintain freshness. Storing techniques for butter are crucial to prevent spoilage and maintain its quality.

When shaping the butter, you can use various methods based on personal preference. One popular technique is rolling the butter into a log shape using parchment paper. This method allows for easy slicing whenever needed. Another method is using butter molds to create decorative shapes, perfect for special occasions. Whichever shaping method you choose, ensure that the butter is completely solid before storing.

When it comes to storing, an airtight container is essential to prevent exposure to air and moisture, which can lead to rancidity. Remember to label the container with the date to keep track of its freshness.

Tips and Troubleshooting

For tips and troubleshooting, if you encounter difficulty in shaping the butter, try refrigerating it for a few minutes to firm it up. Sometimes, the butter can become too soft, making it challenging to shape.

Here are some troubleshooting tips and common mistakes to avoid when making butter from buttermilk:

  • Overchurning: Avoid overchurning the buttermilk, as it can lead to a watery consistency instead of creamy butter.

  • Insufficient chilling: Make sure to refrigerate the buttermilk before churning to achieve the desired texture.

  • Not removing excess buttermilk: After churning, rinse the butter in cold water and knead it to remove any remaining buttermilk. This helps prevent spoilage.

  • Adding salt too early: If you want salted butter, add the salt after shaping the butter. Adding it too early can affect the texture.

  • Not storing properly: Store the butter in an airtight container or wrap it tightly in wax paper to prevent it from absorbing odors in the refrigerator.

Frequently Asked Questions

Can I Use Any Type of Buttermilk to Make Butter?

Yes, you can use any type of buttermilk to make butter. There are different types of butter, each with its own uses. Making homemade butter has many benefits, such as controlling the ingredients and flavors.

How Long Does It Take for the Cream to Separate From the Buttermilk?

Separating cream from buttermilk takes time. I find it helpful to refrigerate the buttermilk overnight and let gravity do its work. The cream will rise to the top, ensuring a higher yield of butter.

Can I Skip Chilling the Cream Before Whipping It?

I can skip chilling the cream before whipping it, but it may take longer to separate into butter and buttermilk. Alternatively, I could use heavy cream or whipping cream instead of buttermilk for making butter.

Is It Necessary to Add Salt to the Butter?

Adding salt to homemade butter enhances its flavor and helps to preserve it. However, if you prefer a salt-free option, you can flavor the butter with herbs, spices, or citrus zest for a unique taste.

How Long Does the Butter Last in the Refrigerator?

Butter made from buttermilk can last up to two weeks in the refrigerator if stored properly. To keep it fresh, store in an airtight container and use clean utensils when handling. Try using homemade butter in recipes like garlic herb compound butter or cinnamon honey butter.

Conclusion

In conclusion, making butter from buttermilk is a rewarding process that requires patience and attention to detail. By following the steps outlined in this article, you can transform ordinary buttermilk into a rich and delicious homemade butter.

From gathering the materials to shaping and storing the butter, each step is crucial in achieving the desired result. So, why wait? Get ready to embark on a culinary adventure and discover the satisfaction of making your own butter. Trust me, the end result will be worth the wait.

Continue Reading

Recipes & Culinary Uses

How to Make Butter Potatoes

Published

on

By

An image showcasing golden, crispy potatoes freshly coated in creamy butter

I’ve got a foolproof recipe for the most divine butter potatoes you’ll ever taste. Trust me, this dish will have your taste buds dancing with delight.

In this article, I’ll walk you through the steps to create these delectable spuds from scratch. We’ll start by selecting the perfect potatoes and then move on to preparing and boiling them to perfection.

Then, we’ll whip up a luscious butter sauce that will take these potatoes to the next level.

So, let’s get started and elevate our potato game to new heights!

Key Takeaways

  • Choose the right type of potato for the desired texture and taste of the dish.
  • Boil the potatoes until they are easily pierced with a fork for soft and creamy butter potatoes.
  • Experiment with different herbs and ingredients to create a flavorful butter sauce.
  • Enhance the dining experience with toppings like sour cream, cheese, and fresh herbs, as well as table linens, candles, and fresh flowers.

Choosing the Right Potatoes

When making butter potatoes, it’s important to choose the right potatoes. The type of potato you select can greatly affect the taste and texture of your dish.

There are various potato cooking techniques that are suited for different types of potato dishes. For example, if you’re making mashed potatoes, you’ll want to choose a starchy potato like a Russet or Yukon Gold. These potatoes have a high starch content, which makes them perfect for creating a smooth and creamy texture when mashed.

On the other hand, if you’re making roasted potatoes, you may opt for a waxy potato like a red or fingerling potato. These potatoes hold their shape well during cooking and develop a crispy exterior.

Preparing the Potatoes

To prepare the potatoes, first, you’ll need to wash and peel them. Here’s how I like to do it:

  1. Start by rinsing the potatoes under cold water to remove any dirt or debris. Use a brush if necessary to scrub the surface clean.

  2. Next, grab a vegetable peeler and carefully remove the skin from each potato. Make sure to remove any blemishes or eyes as well.

  3. Once the potatoes are peeled, you can choose how to cook them based on your desired creaminess level. Boiling is a popular method that results in a soft, creamy texture. Baking in the oven can give you a crispy exterior with a fluffy interior. And if you’re short on time, microwaving is a quick option that still yields a delicious dish.

Boiling the Potatoes

For a soft and creamy texture, you’ll want to boil the peeled potatoes. This is an essential step in making butter potatoes.

To start, fill a large pot with enough water to cover the potatoes. Add a pinch of salt to enhance the flavor. Place the pot over high heat and bring the water to a rolling boil.

Once the water is boiling, carefully add the peeled potatoes. Reduce the heat to medium-low and let the potatoes simmer gently. The cooking time will vary depending on the size of the potatoes, but it usually takes around 15-20 minutes.

To check if they’re done, pierce a potato with a fork. If it easily slides through, they’re ready. Drain the potatoes and proceed with the recipe.

Making the Butter Sauce

Once the potatoes are boiled, it’s time to whip up a smooth and flavorful butter sauce. This sauce is the perfect accompaniment to the tender and creamy potatoes, adding richness and a burst of flavor. Here are three variations on the traditional butter sauce that you can try:

  1. Garlic Butter Sauce: Melt butter in a saucepan and add minced garlic. Cook until fragrant. This adds a delicious savory flavor to the sauce.

  2. Herb Butter Sauce: Mix softened butter with chopped fresh herbs like parsley, thyme, and chives. This adds a refreshing and aromatic element to the sauce.

  3. Lemon Butter Sauce: Combine melted butter with freshly squeezed lemon juice and zest. The tangy citrus flavor enhances the overall taste of the dish.

These alternative ingredients and variations on the butter sauce will take your butter potatoes to the next level.

Now, let’s move on to the next step of mashing the potatoes.

Mashing the Potatoes

When it comes to mashed potatoes, there are a few key points to consider: whether you prefer them creamy or chunky, which potato variety is the best, and if there are any alternatives to using butter.

Personally, I like my mashed potatoes to be creamy and smooth, but some people prefer a chunkier texture with bits of potato still intact.

As for the best potato variety, many chefs recommend using starchy potatoes like Russets for their fluffy texture, while others swear by waxy potatoes like Yukon Golds for their buttery flavor.

Lastly, if you’re looking for a butter alternative, you can try using olive oil, sour cream, or even Greek yogurt to add a different flavor profile to your mashed potatoes.

Creamy or Chunky

To achieve your desired texture, you can decide whether you want your butter potatoes to be creamy or chunky. Both options have their own unique qualities and can be enjoyed based on personal preference.

Here are three factors to consider when choosing between creamy and chunky butter potatoes:

  1. Creaminess: If you prefer a smooth and velvety texture, opt for creamy butter potatoes. This style is achieved by thoroughly mashing the potatoes until they are free of lumps. The result is a silky consistency that melts in your mouth.

  2. Chunkiness: On the other hand, if you enjoy a more rustic and textured dish, go for chunky butter potatoes. This involves mashing the potatoes just enough to break them down, leaving small chunks and bits of potato intact. The result is a more substantial and hearty side dish.

  3. Buttery Flavor: Regardless of the texture you choose, both creamy and chunky butter potatoes offer a rich and buttery flavor. The addition of butter adds a luxurious taste that enhances the overall experience of the dish.

Ultimately, the decision between creamy and chunky butter potatoes comes down to personal preference. Whether you enjoy the smoothness of creamy potatoes or the texture of chunky potatoes, both options are sure to delight your taste buds with their buttery goodness.

Best Potato Variety

The best potato variety for creamy or chunky butter potatoes depends on personal preference. There are several potato varieties that work well for making butter potatoes, each with their own unique texture and flavor. Here is a comparison table of three popular potato varieties:

Potato Variety Texture Flavor
Yukon Gold Creamy Buttery
Russet Fluffy Mild
Red potatoes Firm Earthy

Yukon Gold potatoes are known for their creamy texture and buttery flavor, making them a popular choice for creamy butter potatoes. Russet potatoes have a fluffy texture that works well for both creamy and chunky butter potatoes. Red potatoes have a firmer texture and earthy flavor, making them a great choice for chunky butter potatoes. Whichever variety you choose, cooking techniques such as boiling or roasting can enhance the flavor and texture of the potatoes. Using butter in your butter potatoes adds richness and a smooth mouthfeel. Now, let’s explore some butter alternatives.

Butter Alternatives?

One option for adding richness and a smooth mouthfeel to your creamy or chunky potatoes is to use butter alternatives. These alternatives not only provide a healthier option but also offer a wide range of flavor options.

Here are three butter alternatives that can elevate your potato dishes:

  1. Olive oil: This heart-healthy option adds a subtle fruity flavor to your potatoes. It is rich in monounsaturated fats, which can help lower bad cholesterol levels and reduce the risk of heart disease.

  2. Coconut oil: Known for its tropical aroma and flavor, coconut oil adds a unique twist to your potatoes. It contains medium-chain fatty acids that are metabolized differently by the body and can provide a quick source of energy.

  3. Avocado: Mashed avocado adds a creamy texture and a mild, buttery taste to your potatoes. It is packed with healthy fats, fiber, and various nutrients, making it a nutritious choice.

Adding the Butter Sauce

Mixing the melted butter and herbs together until well combined is the key step to achieving a delicious butter sauce consistency for your potatoes. By ensuring that the butter and herbs are thoroughly mixed, you guarantee that the flavors are evenly distributed throughout the sauce. This step is crucial in creating a smooth and creamy texture that will coat the potatoes perfectly.

When it comes to flavor variations, there are countless options to explore. You can experiment with different herbs such as rosemary, thyme, or dill to add a unique twist to your butter sauce. Additionally, you can incorporate other ingredients like garlic, lemon zest, or Parmesan cheese for an extra burst of flavor. The possibilities are endless, and it’s up to your taste preferences to determine the perfect combination.

Serving and Enjoying

When it comes to enjoying a delicious dish, the way it is presented and served plays a crucial role.

In this discussion, I will be exploring some tasty serving suggestions that can elevate your dining experience.

Additionally, we will delve into the age-old debate of butter versus other toppings, weighing the pros and cons of each option.

Lastly, we will explore how small touches and enhancements can truly enhance the overall dining experience, making it a memorable and enjoyable occasion.

Tasty Serving Suggestions

To enhance the flavor of your butter potatoes, you can try topping them with sour cream and crispy bacon. Trust me, it takes them to a whole new level of deliciousness.

Here are three tasty side dish ideas that will make your butter potatoes the star of the meal:

  1. Cheesy goodness: Sprinkle some shredded cheddar cheese over your butter potatoes and let it melt into gooey perfection. The combination of the creamy potatoes and the melted cheese is simply irresistible.

  2. Herb-infused: Add a sprinkle of fresh herbs like chives or parsley to your butter potatoes for a burst of freshness. Not only does it add a pop of color, but the herbs also add a subtle complexity to the dish.

  3. Garlic and Parmesan: For a bold and savory twist, drizzle some garlic-infused olive oil over your butter potatoes and sprinkle grated Parmesan cheese on top. The garlic and Parmesan complement the creamy potatoes perfectly, creating a mouthwatering combination.

Butter Vs Other Toppings

If you’re looking for alternative toppings, have you ever tried sprinkling some crispy breadcrumbs over your potatoes?

While butter is a classic and delicious choice for topping your butter potatoes, there are other options that can add a whole new level of flavor. One popular alternative is sour cream. Its tangy and creamy texture pairs perfectly with the buttery potatoes, creating a rich and indulgent combination.

On the other hand, if you’re a cheese lover, you can opt for grated cheese as a topping. The melted cheese adds a savory element and a gooey texture to the dish.

Whether you choose butter, sour cream, or cheese, these toppings will elevate your butter potatoes and make them even more enjoyable.

Now that we’ve explored the different toppings for butter potatoes, let’s move on to enhancing the dining experience.

Enhancing the Dining Experience

Enhancing the dining experience can be accomplished by trying out different seasonings and spices. Here are three ways to set the table and create a cozy ambiance:

  1. Use table linens: Adding a tablecloth, placemats, and cloth napkins can instantly elevate the dining experience. Choose colors and patterns that complement your decor and create a warm and inviting atmosphere.

  2. Utilize candles and dim lighting: Lighting plays a crucial role in setting the mood. Use candles or soft lighting to create a cozy ambiance. It not only adds warmth but also creates a romantic and intimate setting for your meal.

  3. Incorporate fresh flowers or greenery: Adding a centerpiece of fresh flowers or some greenery can bring life to your table. It adds a touch of elegance and freshness, making the dining experience more enjoyable.

Frequently Asked Questions

How Many Types of Potatoes Are There to Choose From?

There are many types of potatoes to choose from, each with different cooking methods. When it comes to frying, the best varieties are Russet and Yukon Gold potatoes. They both have a high starch content, resulting in crispy and delicious fried potatoes.

Can I Use Any Type of Potato for This Recipe?

Can I use sweet potatoes instead? Are there any alternative methods for cooking the potatoes? Yes, you can use sweet potatoes for this recipe. As for alternative cooking methods, you could try roasting or mashing them.

How Long Should I Boil the Potatoes For?

I usually boil the potatoes for about 15-20 minutes until they’re fork-tender. However, if you’re looking for alternative cooking methods, you can also try roasting or microwaving them for a different texture and flavor.

Can I Substitute the Butter Sauce With a Different Sauce?

Yes, you can substitute the butter sauce with a different sauce. However, using butter sauce adds richness and flavor to the potatoes. Different sauce options include garlic aioli, sour cream, or even a tangy vinaigrette.

Can I Add Any Additional Ingredients to the Mashed Potatoes?

Sure, you can definitely add cheese to mashed potatoes for an extra creamy and flavorful twist. And if you prefer, you can use olive oil instead of butter for a healthier alternative.

Conclusion

Well, there you have it folks! Making butter potatoes may seem like a simple task, but it requires careful consideration and attention to detail.

From choosing the right potatoes to mashing them to perfection, every step is crucial in creating a delightful dish.

And let’s not forget the pièce de résistance – the butter sauce! This creamy concoction takes the potatoes to a whole new level of deliciousness.

So next time you’re in the mood for some comfort food, don’t settle for anything less than the best butter potatoes. Trust me, your taste buds will thank you.

Continue Reading

Recipes & Culinary Uses

How to Make Butter Powder

Published

on

By

An image depicting the step-by-step process of making butter powder: a churner filled with creamy butter, transforming into fine powder particles, captured in a container, ready to be sprinkled on delicacies

I never thought I could transform butter into a fine, powdery form – until I discovered the secret technique.

Making butter powder opens up a world of culinary possibilities. With just a few simple ingredients and a step-by-step guide, you’ll be able to create this versatile ingredient right in your own kitchen.

So, grab your apron and get ready to embark on a scientific journey that will revolutionize your cooking game. Trust me, you won’t want to miss out on this buttery adventure.

Key Takeaways

  • Butter powder is lower in calories and fat compared to regular butter, making it a healthier alternative.
  • It contains essential vitamins and minerals like vitamin A and calcium, adding nutritional value to dishes.
  • Butter powder has a longer shelf life, making it practical for storage and travel.
  • It can easily be measured and incorporated into recipes without the need to soften or melt butter.

Benefits of Butter Powder

Butter powder is a convenient option for you if you’re looking for a long-lasting and easy-to-use alternative to traditional butter. It offers several nutritional advantages compared to regular butter.

First, butter powder is lower in calories and fat, making it a healthier choice for those watching their weight or cholesterol intake. Additionally, it contains essential vitamins and minerals, such as vitamin A and calcium, which are beneficial for overall health.

When compared to regular butter, butter powder also has a longer shelf life, making it a practical option for storage and travel. Its powdered form allows for easy measurement and incorporation into recipes, eliminating the need to soften or melt butter.

In the subsequent section, we will discuss the ingredients needed for making butter powder.

Ingredients Needed for Making Butter Powder

To create this powdered version, you’ll need a few key ingredients. Here are the ingredients you’ll need for making butter powder:

  • Unsalted butter: The main ingredient for making butter powder is unsalted butter. Make sure to use high-quality butter for the best results.

  • Nonfat milk powder: Nonfat milk powder is used to help dry out the butter and turn it into a powder form.

  • Flavorings: You can add flavor variations to your butter powder by incorporating herbs, spices, or even cheese powder for a savory twist.

  • Storage containers: Once your butter powder is ready, you’ll need proper storage options to keep it fresh. Airtight containers or vacuum-sealed bags are ideal for preserving the flavor and texture of the powder.

Now that you know the necessary ingredients, let’s move on to the step-by-step guide to making butter powder.

Step-by-Step Guide to Making Butter Powder

Now that you have all the necessary ingredients, let’s start by melting the unsalted butter. This step is crucial to create a smooth and creamy texture for the butter powder. Once the butter is melted, we will proceed with the next steps to make the butter powder. But before we dive into the process, let’s take a moment to explore the different types of butter powder available and the health benefits of using it in cooking.

Types of Butter Powder Health Benefits
Salted Butter Powder High in sodium, adds flavor to dishes
Unsalted Butter Powder Low in sodium, suitable for low-salt diets
Organic Butter Powder Made from organic dairy, free from pesticides and antibiotics

Using butter powder in cooking offers numerous health benefits. Firstly, it provides the rich flavor of butter without the need for refrigeration or worrying about spoilage. Secondly, it is a convenient option for those who are lactose intolerant or following a vegan diet. Lastly, butter powder is a good source of healthy fats, vitamins A, D, E, and K, and essential fatty acids. Incorporating butter powder into your cooking can enhance the taste of your dishes while also providing nutritional value.

Tips and Tricks for Perfect Butter Powder

For the perfect butter powder, you’ll want to ensure that you use high-quality ingredients and store it in an airtight container to maintain its freshness. Here are some tips and tricks to help you achieve the best results:

  • Storage options for butter powder:
  • Airtight container: Use a container with a tight-fitting lid to keep moisture and air out, which can cause the powder to clump and lose its flavor.
  • Cool, dark place: Store the container in a cool and dark pantry or cupboard to avoid exposure to light and heat, which can degrade the quality of the powder.
  • Refrigeration: If you live in a hot and humid climate, consider storing your butter powder in the refrigerator to prolong its shelf life.

Comparing homemade butter powder to store-bought options:

  • Quality control: Making your own butter powder allows you to have full control over the ingredients and ensures that you are using high-quality butter.
  • Customization: Homemade butter powder allows you to add your own flavors and spices, giving you a unique and personalized product.
  • Cost-effectiveness: Making your own butter powder can be a more economical option compared to buying pre-packaged versions.

Creative Ways to Use Butter Powder in Recipes

When incorporating butter powder into your recipes, you’ll discover a multitude of creative ways to enhance the flavors and textures of your dishes.

Butter powder is a versatile ingredient that can be used in various unique flavor combinations. For savory dishes, try adding butter powder to mashed potatoes, soups, or roasted vegetables to give them a rich and creamy taste.

In sweet recipes, incorporate butter powder into your cookie or cake batter for a buttery and indulgent flavor.

Additionally, butter powder can also be used in homemade beauty products. Mix it with other ingredients such as shea butter and essential oils to create a nourishing body butter or lip balm.

The possibilities are endless when it comes to incorporating butter powder into your culinary and beauty endeavors.

Frequently Asked Questions

How Long Does Butter Powder Last Once It Is Made?

Butter powder’s shelf life once made depends on storage recommendations. It can last for several months when stored in an airtight container in a cool, dry place. Proper storage is crucial for maintaining its quality and freshness.

Can I Use Margarine Instead of Butter to Make Butter Powder?

Using margarine as a substitute for butter in making butter powder may affect the flavor and texture. Butter powder offers the benefits of long shelf life and convenience, making it a versatile ingredient in various recipes.

Can I Add Flavorings or Seasonings to the Butter Powder?

Yes, you can add flavorings or seasonings to butter powder. It’s a great way to enhance the taste of your recipes. Some ideas include garlic powder, onion powder, or even herbs like thyme or rosemary. Experiment and find what works best for you.

How Does the Taste of Butter Powder Compare to Real Butter?

Butter powder has a similar taste to real butter, but it may lack some of the richness and depth. However, it still provides the convenience and versatility of real butter, making it a great option for various uses.

Can Butter Powder Be Used in Baking Recipes as a Substitute for Real Butter?

Yes, butter powder can be used in baking recipes as a substitute for real butter. It offers the benefits of convenience, extended shelf life, and easy measurement. Baking with butter powder yields similar results to using real butter.

Conclusion

In conclusion, making butter powder is a simple and convenient way to enjoy the delicious taste and benefits of butter in a powdered form. By following the step-by-step guide and using the right ingredients, anyone can create their own butter powder at home.

With its long shelf life and versatility in recipes, butter powder can be a valuable addition to any kitchen. So why not give it a try and experience the wonders of butter in a whole new way?

Can you imagine the endless possibilities of adding butter powder to your favorite dishes?

Continue Reading

Recipes & Culinary Uses

How to Make Butter Pecans

Published

on

By

-up shot of a golden-brown pecan sitting atop a dollop of creamy butter, surrounded by a scattering of crushed pecans and a drizzle of sticky caramel sauce

I’ve always loved the rich and indulgent taste of butter pecans, and now I want to share with you my foolproof recipe for making them at home.

Did you know that over 70% of people prefer homemade butter pecans over store-bought?

In this article, I’ll guide you through the step-by-step process of making butter pecans.

First, we’ll start by gathering the ingredients.

Next, we’ll move on to preparing the pecans.

Then, we’ll make the butter mixture.

After that, we’ll coat and bake the pecans.

Finally, we’ll add those final touches that will make your butter pecans absolutely irresistible.

Let’s get started!

Key Takeaways

  • Gather all necessary ingredients, including roasted or raw pecans, based on desired flavor.
  • Toast the pecans in a skillet until golden brown to enhance flavor and add crunch.
  • Create a butter mixture with softened butter and seasonings to bring all the flavors together.
  • Coat the pecans evenly with a mixture of melted butter and sugar for perfect butter pecans every time.

Gathering the Ingredients

Now that you’ve got all the ingredients, let’s start making some delicious butter pecans!

When it comes to butter pecans, there are a few key decisions to make. The first is whether you prefer them to be sweet or salty. If you have a sweet tooth, you may want to add a bit more sugar to the recipe. On the other hand, if you enjoy a savory snack, you can add a touch of salt to enhance the flavor.

Another decision to make is whether you want to use roasted or raw pecans. Roasted pecans have a deeper, nutty flavor, while raw pecans offer a lighter, more natural taste. Whichever option you choose, both will result in a delicious batch of butter pecans.

Preparing the Pecans

First, toast your pecans in a skillet until they are golden brown. This step is crucial as it enhances the nutty flavor and adds a delightful crunch to the butter pecans. Once toasted, the pecans can be seasoned in a variety of ways to suit your taste preferences. Here are some seasoning options for other nuts that you can try:

Seasoning Description Recommended Nuts
Cinnamon Sugar Sweet and aromatic Almonds
Smoky Paprika Spicy and smoky Cashews
Garlic Parmesan Savory and cheesy Walnuts

Now, let’s explore the different ways to use butter pecans. These delectable treats can be enjoyed on their own as a snack or used as a topping for desserts like ice cream, yogurt, or even salads for a delightful crunch. The possibilities are endless!

Next, we’ll move on to making the butter mixture and bringing all the flavors together.

Making the Butter Mixture

To bring all the flavors together, you’ll need to mix the softened butter with the chosen seasonings and herbs. The butter mixture is essential for adding that rich, savory taste to the butter pecans.

If you’re looking for alternatives to the traditional butter mixture, you can try using coconut oil or olive oil instead. These alternatives will give a unique twist to your butter pecans and can be a healthier option.

When troubleshooting common issues with the butter mixture, make sure that the butter is softened but not melted. If the butter is too soft, the mixture may become too runny, and if it’s too cold, the mixture may not blend properly.

Once you’ve got your butter mixture ready, it’s time to move on to coating the pecans.

Coating the Pecans

When it comes to coating pecans, there are a few key points to consider.

Firstly, the best coating method can vary depending on personal preference and the desired outcome.

Secondly, the choice between a sweet or savory coating can greatly impact the flavor profile of the pecans.

Lastly, deciding whether to roast or leave the pecans raw before coating can affect the texture and taste of the final product.

Considering these factors will help ensure the perfect coating for your butter pecans.

Best Coating Method

For the best coating method, you should gently toss the pecans in the melted butter and sugar mixture until they are evenly coated. This method ensures that every pecan is covered in the delicious sweetness of the butter and sugar.

However, if you’re feeling adventurous, you can try experimenting with different coating options to add a unique twist to your butter pecans. Some popular alternatives include using honey instead of sugar, adding cinnamon or cocoa powder for extra flavor, or even sprinkling a touch of sea salt for a sweet and salty combination.

Don’t be afraid to get creative and try different flavors to find your favorite combination. Just remember to coat the pecans evenly and thoroughly to achieve the perfect butter pecans every time.

Sweet or Savory

If you’re unsure whether to go for a sweet or savory twist, why not try a batch of both and see which one you prefer? Butter pecans can be made with different flavor profiles to suit your taste preferences. Here are four delicious options to consider:

  1. Sweet and Salty: Combine the richness of butter with the sweetness of brown sugar and the saltiness of sea salt. This classic combination is a crowd-pleaser.

  2. Spicy and Sweet: Add a kick to your butter pecans by incorporating cayenne pepper or chili powder. The heat will balance out the sweetness for a unique flavor experience.

  3. Herb-infused: Experiment with herbs like rosemary or thyme to give your butter pecans an earthy and aromatic twist. The herbs will add depth and complexity to the flavor.

  4. Citrus Burst: Enhance the sweetness of the pecans by adding a hint of citrus zest, such as orange or lemon. The bright and tangy flavor will make your butter pecans truly refreshing.

Roasted or Raw?

To determine your preference, try experimenting with roasted and raw pecans to see which one you enjoy more.

Roasted pecans have a rich, nutty flavor and a slightly crunchy texture. They are often seasoned with spices like cinnamon or salt for added taste.

On the other hand, raw pecans have a milder flavor and a softer texture. They can be used in a variety of recipes such as salads, granolas, or baked goods.

In terms of health benefits, both roasted and raw pecans are packed with nutrients like healthy fats, fiber, and antioxidants. However, roasting pecans may slightly reduce their nutritional content.

Ultimately, the choice between roasted and raw pecans depends on personal preference and the specific recipe you’re making.

Now, let’s move on to the next step of baking the pecans.

Baking the Pecans

When it comes to roasting pecans, the time and temperature are crucial factors to consider. The right roasting time and temperature can bring out the perfect balance of flavors and textures in the pecans.

Additionally, there are various seasoning options available to enhance the taste of roasted pecans. Some popular choices include cinnamon, sugar, or even savory spices like garlic powder or cayenne pepper.

Roasting Time and Temperature

The butter pecans should be roasted at a temperature of 350 degrees Fahrenheit for 10-12 minutes. This is the perfect roasting technique to achieve a crispy and flavorful nut. Here are four reasons why roasting at this temperature and time is essential for the best results:

  1. Even Roasting: The moderate temperature ensures that the pecans are evenly roasted, preventing any burnt or undercooked spots.

  2. Flavor Infusion: Roasting at 350 degrees Fahrenheit allows the natural oils in the pecans to be released, resulting in a rich and nutty flavor.

  3. Perfect Texture: The 10-12 minute roasting time gives the pecans a delightful crunch while still maintaining a slightly soft center.

  4. Time Efficiency: This temperature and time combination ensures that the pecans are roasted quickly, making it a convenient option for a quick snack or a last-minute addition to a recipe.

Now that the pecans are perfectly roasted, let’s move on to exploring the various seasoning options to elevate their flavor even further.

Seasoning Options for Pecans

Now that you’ve roasted your pecans to perfection, let’s explore the various seasoning options to elevate their flavor even further.

There are countless ways to add a burst of taste to your butter pecans, and the possibilities are truly endless. From sweet to savory, the choice is yours.

You can go for classic options like cinnamon and sugar, or get creative with cayenne pepper for a spicy kick. For a more indulgent treat, try drizzling melted chocolate over your pecans or sprinkling them with a hint of sea salt.

Not only do these different flavorings enhance the taste, but they also come with their own health benefits. Cinnamon, for example, is known to help regulate blood sugar levels, while cayenne pepper can boost metabolism.

Adding the Final Touches

To finish off your butter pecans, all you need to do is sprinkle a pinch of salt and a drizzle of melted butter over the top. This will add a burst of flavor and enhance the overall taste of the pecans.

However, if you want to get creative and explore different ways to add flavor to your butter pecans, here are a few suggestions:

  1. Spices: Try adding a sprinkle of cinnamon, nutmeg, or even a dash of cayenne pepper for a spicy kick.

  2. Sweeteners: Add a drizzle of honey or maple syrup to give your butter pecans a touch of sweetness.

  3. Extracts: Experiment with different extracts like vanilla, almond, or coconut to infuse your pecans with unique flavors.

  4. Savory options: Consider adding herbs like rosemary or thyme, or even a sprinkle of garlic powder for a savory twist.

To prevent your pecans from getting soggy when coating them, make sure they are completely dry before adding any toppings or seasonings. This will ensure that the butter and salt adhere properly to the pecans, creating a delightful crunch with every bite.

Storing and Serving

For optimal freshness, store your butter pecans in an airtight container in a cool, dry place. This will help extend their shelf life and maintain their delicious flavor. When it comes to serving suggestions, butter pecans are incredibly versatile. They can be enjoyed on their own as a tasty snack, added to desserts like ice cream or cookies, or even used as a topping for salads or roasted vegetables. Their rich, buttery taste and crunchy texture make them a delightful addition to any dish. To give you some inspiration, here are a few serving suggestions for butter pecans:

Serving Suggestion Description
Ice Cream Topping Sprinkle a handful of butter pecans over your favorite ice cream flavors for an indulgent treat.
Salad Add-On Add a handful of butter pecans to your salad for a crunchy texture and nutty flavor.
Baking Ingredient Incorporate butter pecans into your favorite baking recipes, such as cookies or brownies, for an extra layer of richness and crunch.

No matter how you choose to enjoy them, make sure to store your butter pecans properly to maximize their shelf life and savor their deliciousness for as long as possible.

Variations and Additions

When adding variations and additions to your dishes, don’t be afraid to get creative and experiment with different flavors and textures. Here are four ways you can elevate your dishes using the versatile and nutritious pecans:

  1. Roasted Pecans: Toss pecans with a drizzle of olive oil, sprinkle with salt and your favorite spices, then roast in the oven until golden brown. These crunchy and savory pecans make a great topping for salads or a delicious snack on their own.

  2. Candied Pecans: Coat pecans in a mixture of sugar, cinnamon, and a pinch of salt, then bake until caramelized. These sweet and crunchy pecans are perfect for adding a touch of sweetness to desserts or as a topping for ice cream.

  3. Pecan Butter: Blend roasted pecans in a food processor until smooth and creamy. Pecan butter is a healthier alternative to traditional butter and can be used as a spread on toast or as a base for sauces and dressings.

  4. Pecan Crumble: Combine chopped pecans with oats, brown sugar, and butter, then sprinkle over fruit crisps or pies. The nutty and crunchy pecan crumble adds a delightful texture and flavor to your baked goods.

In addition to their delicious taste, pecans also offer several health benefits. They’re packed with heart-healthy fats, fiber, and antioxidants that can help reduce inflammation and improve digestion. So go ahead and explore the many varieties of pecans and enjoy their wonderful taste and nutritional benefits in your dishes.

Tips and Tricks

Experimenting with different flavors and textures can elevate your dishes and make them more exciting.

When it comes to butter pecan recipes, there are endless flavor combinations that can take your creations to the next level.

One tip is to experiment with different spices and seasonings. For a savory twist, try adding a pinch of smoked paprika or cayenne pepper to your butter pecans. If you prefer a sweet and spicy flavor, sprinkle some cinnamon and nutmeg on top.

Another idea is to incorporate different nuts into your recipe. Mixing in some almonds or walnuts can add a delightful crunch and enhance the overall flavor profile.

Additionally, don’t be afraid to play around with different sweeteners. Brown sugar, maple syrup, or even a drizzle of honey can bring a new dimension to your butter pecan dishes.

Frequently Asked Questions

How Many Calories Are in a Serving of Butter Pecans?

A serving of butter pecans contains approximately 150 calories. It is important to be mindful of the calories per serving when considering the nutritional value of this delicious treat.

Can I Substitute the Pecans With Another Type of Nut?

Sure, you can substitute the pecans with another type of nut. However, it’s important to consider any nut allergies. Almonds or walnuts would be great alternatives, as they have similar flavors and textures.

Can I Use Margarine Instead of Butter in the Recipe?

Using margarine instead of butter in recipes has pros and cons. Margarine is a common substitute due to its lower saturated fat content. However, it may affect the flavor and texture of the dish.

How Long Do the Butter Pecans Stay Fresh?

Butter pecans can stay fresh for up to two weeks if stored properly. To maintain their shelf life, it’s important to store them in an airtight container in a cool, dry place.

Can I Freeze the Butter Pecans for Later Use?

Yes, you can freeze butter pecans for later use. I have some freezing tips and storing methods that will keep them fresh and delicious. Let me share them with you.

Conclusion

In conclusion, making butter pecans is a delightful and rewarding process.

As I carefully coated the pecans with the butter mixture and watched them bake to perfection, I couldn’t help but be reminded of how life can transform us through different experiences.

Just like the pecans, we go through trials and challenges, but with the right ingredients and a little heat, we can come out even more delicious and resilient.

So next time you’re in the mood for a sweet treat, give this recipe a try and savor the delicious metaphor of growth and transformation.

Continue Reading

Trending