Connect with us

Butter Tips and Tricks

How Does the Easy Butter Maker Work: A Step-by-Step Guide

Published

on

An image showcasing the step-by-step process of the Easy Butter Maker: a clear glass jar filled with melted butter, a mesh filter placed on top, fresh herbs being poured into the filter, and golden-green infused butter dripping into a waiting container

Have you ever been curious about the operation of the Easy Butter Maker? Allow me to explain its workings to you.

This nifty device is like having your own personal butter-making wizard in the kitchen. It takes all the hassle out of the process and delivers smooth, creamy butter in no time.

In this article, I will guide you through the components, preparation, assembly, and heating of the Easy Butter Maker.

Get ready to become a butter-making pro!

Key Takeaways

  • The Easy Butter Maker is a device that allows for easy and efficient butter making.
  • The device comes with a stainless steel container, mesh filter, silicone spatula, and sturdy handle for easy handling and pouring.
  • The process involves heating cream, infusing it with high-quality ingredients, and churning it to create customized and delicious infused butters.
  • Safety precautions should be taken when heating and monitoring the temperature carefully to avoid degradation of cannabinoids and decrease in potency.

[bulkimporter_image id=’2′]

Advertisement

The Easy Butter Maker’s Components

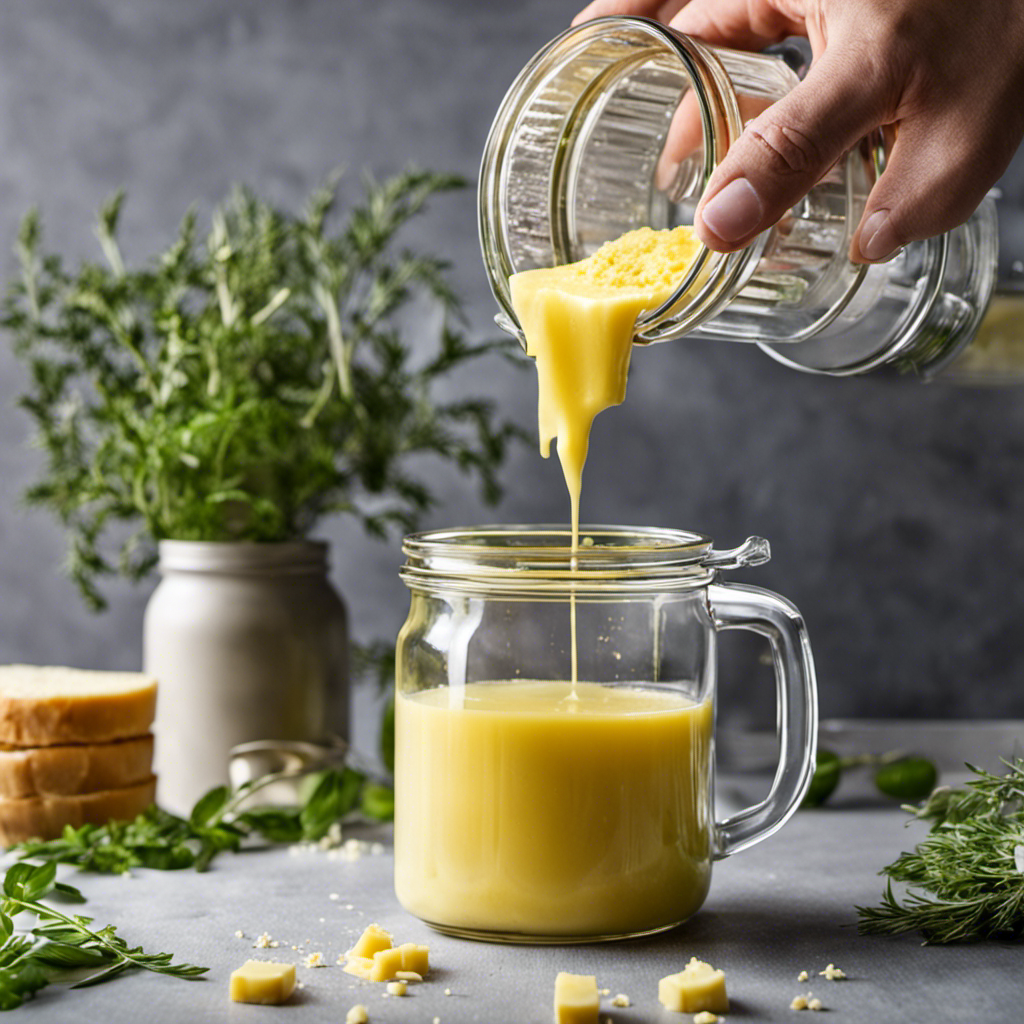
The Easy Butter Maker comes with all the components you need to make delicious homemade butter in a breeze. It includes a stainless steel container, a mesh filter, and a silicone spatula.

The stainless steel container is designed to withstand high temperatures and is perfect for the heating process involved in making butter. It has a sturdy handle that allows for easy handling and pouring.

The mesh filter is essential for straining the butter from the liquid whey. It ensures that only pure butter is obtained, free from any impurities.

Advertisement

The silicone spatula is used for stirring and scraping the sides of the container to ensure even heating and smooth consistency of the butter.

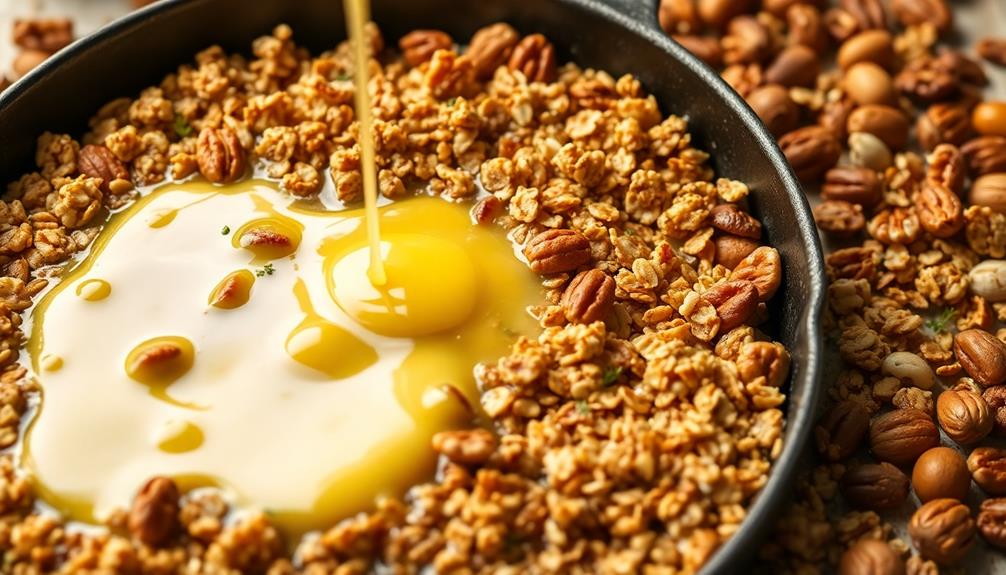
To prepare the ingredients, you will need to start with quality cream. It is recommended to use cream with a high fat content to achieve the best results. Pour the cream into the stainless steel container and place it on a stovetop over medium heat.

The heating process involves slowly heating the cream until it reaches a temperature of around 180°F. This temperature is crucial as it allows the butterfat to separate from the liquid whey. Once the cream has reached the desired temperature, remove it from the heat and let it cool for a few minutes.

[bulkimporter_image id=’3′]

Advertisement

Preparing Your Ingredients

When it comes to preparing ingredients for cooking, there are several key points to consider.

First, selecting the right ingredients is crucial for achieving the desired taste and texture in your dish.

Secondly, ensuring optimal ingredient preparation, such as proper washing and cutting techniques, can greatly enhance the overall quality of your meal.

Lastly, exploring alternatives to traditional ingredients can open up a whole new world of flavors and possibilities in your culinary creations.

Ingredient Selection Tips

To get the best results with your Easy Butter Maker, you’ll want to carefully select your ingredients. When it comes to alternative ingredients, the possibilities are endless. You can experiment with different types of herbs, spices, and even fruits to infuse unique flavors into your butter.

Advertisement

Here are some tips to help you make the most out of your ingredient selection:

  • Choose high-quality ingredients: Opt for fresh and organic ingredients to ensure the best flavor and potency.
  • Consider the intensity of flavors: Some herbs and spices can be overpowering, so it’s important to find the right balance for a delicious butter.
  • Experiment with different combinations: Get creative and try mixing different ingredients together to create your own signature flavor profile.

By selecting the right ingredients, you can elevate your butter-making experience and create truly exceptional infused butters.

Now, let’s move on to the next step: optimal ingredient preparation.

Optimal Ingredient Preparation

For the best results, it’s important to carefully prepare your ingredients before infusing them into the butter. Ingredient preparation techniques play a crucial role in ensuring that the flavors and aromas are extracted effectively during the infusion process.

One popular method is decarboxylation, which involves heating the cannabis or herbs to activate the compounds. This step maximizes the potency of the final product.

Another technique is grinding the ingredients to achieve a consistent texture, allowing for better infusion and distribution of flavors.

Advertisement

Additionally, some infusion methods require pre-infusing the ingredients in oil or water before adding them to the butter. This helps to extract the desired flavors and properties more efficiently.

By following these ingredient preparation techniques, you can enhance the quality and efficacy of your infused butter.

Now, let’s explore some alternatives to traditional ingredients.

Alternatives to Traditional Ingredients

Using different herbs and spices can add unique flavors to your infused butter. It’s not just about the traditional ingredients anymore. There are alternative ingredients that can enhance the taste of your butter while also providing health benefits.

Here are some options to consider:

Advertisement
  • Turmeric: Known for its anti-inflammatory properties, turmeric can give your infused butter a vibrant golden color and a warm, earthy flavor.

  • Rosemary: This herb adds a fragrant and pine-like taste to your butter. It is also believed to improve digestion and boost memory.

  • Cinnamon: Adding a touch of cinnamon to your butter can give it a sweet and spicy flavor. Additionally, cinnamon has been linked to lower blood sugar levels and reduced inflammation.

[bulkimporter_image id=’4′]

Assembling the Easy Butter Maker

The first step in assembling the Easy Butter Maker is attaching the lid securely. This ensures that the machine is properly sealed, preventing any leaks or spills during operation.

Once the lid is in place, the next step is to prepare the ingredients for infusion. Ingredient preparation is crucial to achieving optimal flavor and potency in your homemade butter. One key tip is to finely grind your herbs or spices before adding them to the machine. This helps to release their flavors and aromas more effectively.

Additionally, you can experiment with different flavor infusion techniques to create unique and delicious butters. One popular method is to melt the butter and infuse it with ingredients like garlic or chili peppers. This allows the flavors to infuse directly into the butter, resulting in a rich and flavorful end product.

Advertisement

Another technique is to mix in herbs or spices during the churning process, allowing the flavors to distribute evenly throughout the butter.

[bulkimporter_image id=’5′]

Choosing the Right Butter Ratio

To choose the right butter ratio, you should consider your personal preferences and desired potency. The butter ratio refers to the amount of butter you use relative to the other ingredients in your recipe. It has a significant impact on the final product’s taste and texture.

Here are some key factors to consider when determining the ideal butter ratio for your needs:

Advertisement
  • Personal Taste: Do you prefer a subtle butter flavor or a more pronounced one? Adjusting the butter ratio allows you to tailor the taste to your liking.

  • Potency: If you’re looking for a more potent butter, increasing the butter ratio can help achieve that desired effect.

  • Consistency: The amount of butter used also affects the consistency of your recipe. More butter can result in a softer, creamier texture.

When measuring ingredients, it’s essential to be precise. Use a kitchen scale or measuring spoons to ensure accuracy. Additionally, the consistency of the butter is crucial. Softened butter is often recommended for baking, as it combines more easily with other ingredients.

Now that you’ve chosen the right butter ratio, let’s move on to the next step: heating the easy butter maker.

[bulkimporter_image id=’6′]

Heating the Easy Butter Maker

When it comes to heating the Easy Butter Maker, there are two key points to consider: the optimal heating temperature and the necessary safety precautions.

Advertisement

The optimal heating temperature for the Easy Butter Maker is between 160-180°F, as this allows for the efficient extraction of cannabinoids from the plant material. However, it is important to note that heating above 180°F can result in the degradation of cannabinoids and a decrease in potency. Therefore, it is crucial to monitor the temperature carefully.

Additionally, safety precautions should be taken when heating the Easy Butter Maker. Using oven mitts or gloves is essential to protect against burns. It is also important to ensure proper ventilation to prevent the buildup of fumes.

Optimal Heating Temperature

For best results, the optimal heating temperature for the Easy Butter Maker is 160 degrees Fahrenheit. This temperature ensures that the ingredients are heated evenly and thoroughly, allowing for maximum extraction of flavors and cannabinoids. When the Easy Butter Maker is heated to this temperature, it effectively activates the THC and other compounds in the ingredients, resulting in a potent and flavorful infusion.

To enhance the infusion process and create unique flavors, I recommend experimenting with different ingredients and infusing techniques. Here are a few ideas to inspire your culinary creativity:

  • Try infusing your butter with herbs like rosemary or thyme for a savory twist.
  • Experiment with adding spices like cinnamon or nutmeg for a warm and aromatic infusion.
  • For a sweet treat, consider infusing your butter with vanilla beans or cocoa powder.

Safety Precautions When Heating

Ensure your safety by following these precautions when heating the Easy Butter Maker to the optimal temperature.

The first and most important step is to prevent overheating. The Easy Butter Maker is designed to operate at a specific temperature range, so it is crucial to monitor the heat carefully. Keep an eye on the temperature gauge and adjust the heat source accordingly.

Advertisement

Additionally, always use oven mitts or heat-resistant gloves when handling hot materials. The Easy Butter Maker can get extremely hot during the heating process, and it is essential to protect your hands from burns.

Remember to let the machine cool down completely before cleaning or disassembling to avoid any accidental burns.

[bulkimporter_image id=’7′]

Adding Your Ingredients

You’ll want to start by simply pouring your ingredients into the Easy Butter Maker. This innovative device allows for easy and efficient infusion of flavors into your butter.

Advertisement

To ensure the best results, it is important to carefully measure your ingredients. The Easy Butter Maker comes with a convenient measuring guide, which provides you with precise measurements for various infusion techniques.

Here are some key points to consider when adding your ingredients:

  • Be sure to use the recommended amount of butter. Too little butter may result in a weak infusion, while too much butter may dilute the flavors.
  • Choose high-quality ingredients for optimum flavor. Fresh herbs, spices, and other flavorings can greatly enhance the taste of your infused butter.
  • Experiment with different ingredient combinations to create unique and flavorful butters. The possibilities are endless!

Once you have poured your ingredients into the Easy Butter Maker, you can confidently move on to the next step of infusing flavors into your butter. By following the proper techniques and using the right ingredients, you can create delicious and customized infused butters to elevate your culinary creations.

[bulkimporter_image id=’8′]

Infusing Flavors Into Your Butter

Once you’ve added your ingredients, it’s time to infuse flavors into your butter using the Easy Butter Maker. Infusing techniques allow you to enhance the taste of your butter by incorporating various flavors. By using this innovative device, you can easily experiment with different combinations and create unique and delicious butters.

Advertisement

To get started, simply follow these steps:

  1. Place the Easy Butter Maker on a heat-resistant surface.
  2. Pour your melted butter into the container, filling it up to the indicated level.
  3. Add your desired flavorings to the infuser compartment. This is where the magic happens!
  4. Attach the infuser compartment to the Easy Butter Maker and secure it tightly.

Now, let’s explore some flavor combinations you can try with your butter:

Flavor Combinations Ingredients
Garlic and Herb Fresh garlic, dried herbs
Cinnamon and Honey Ground cinnamon, honey
Chili Lime Chili powder, lime zest
Lemon and Dill Lemon zest, fresh dill

[bulkimporter_image id=’9′]

Monitoring the Butter Making Process

When it comes to making butter, achieving the optimal cooking temperature is crucial for the extraction process. It is important to monitor the temperature closely to ensure that the butter is heated evenly and thoroughly.

Additionally, the time for butter extraction can vary depending on factors such as the quantity of butter being made and the desired consistency of the final product.

Advertisement

Optimal Cooking Temperature

To achieve the optimal cooking temperature, simply preheat the Easy Butter Maker before using it. This step ensures that the butter is heated evenly and allows for better temperature control throughout the cooking process. Maintaining the right temperature is crucial to achieving the desired consistency and flavor of the butter.

Here are some key points to consider:

  • Consistency: Heating the Easy Butter Maker to the optimal temperature ensures that the butter melts evenly, resulting in a smooth and creamy texture.

  • Flavor: Controlling the temperature allows you to avoid burning the butter, which can negatively affect its taste. By keeping the temperature in check, you can achieve a rich and flavorful end product.

  • Efficiency: Preheating the Easy Butter Maker helps speed up the cooking process, reducing the overall cooking time and ensuring that the butter is ready for use in no time.

Time for Butter Extraction?

Are you ready to extract the butter now?

The duration of butter extraction can vary depending on several factors. One of the main factors affecting extraction time is the temperature at which the butter is being extracted. Higher temperatures can speed up the extraction process, while lower temperatures may take longer.

Another factor is the consistency of the butter used. Softer and more pliable butter will extract faster than harder, cold butter.

Advertisement

The amount of pressure applied during the extraction process can also affect the duration. Applying more pressure can help extract the butter more quickly.

Lastly, the quality and freshness of the ingredients used can impact the extraction time. Using high-quality, fresh butter will generally result in a faster extraction.

[bulkimporter_image id=’10’]

Straining and Filtering Your Butter

Straining and filtering your butter is an essential step in the process of using the Easy Butter Maker. This ensures that your homemade butter is smooth and free from any unwanted particles or impurities. To achieve the best results, here are some infusing and butter straining techniques that you can employ:

Advertisement
  • Use a fine mesh strainer: Place the strainer over a container and pour the melted butter through it. This will remove any solids or residue, leaving you with a pure, clarified butter.

  • Cheesecloth method: Line the strainer with a double layer of cheesecloth and pour the melted butter through it. The cheesecloth will catch any small particles, resulting in a cleaner final product.

  • Coffee filter technique: This method is ideal for achieving an ultra-smooth butter. Simply pour the melted butter into a coffee filter placed inside a strainer, allowing it to slowly strain through. This meticulous process will remove even the tiniest impurities.

[bulkimporter_image id=’11’]

Storing Your Homemade Butter

When it comes to storing homemade butter, it is important to maintain ideal storage conditions to maximize its shelf life.

The ideal storage conditions for butter include keeping it in a cool and dark place, away from direct sunlight and heat sources.

Additionally, utilizing shelf life extension techniques such as wrapping the butter tightly in wax paper or plastic wrap can help preserve its freshness for a longer period of time.

Advertisement

Ideal Storage Conditions

To keep your butter fresh and flavorful, store it in a cool, dry place. Temperature fluctuations and high humidity can negatively affect the quality of butter, leading to rancidity and spoilage.

Here are some key factors to consider for ideal storage conditions:

  • Temperature: Keep your butter at a constant temperature between 32°F and 40°F (0°C and 4°C). Avoid exposing it to excessive heat or cold, as this can cause the butter to soften or harden.

  • Humidity Control: Maintain a humidity level of around 30-40% in the storage area. Excessive moisture can promote bacterial growth and accelerate spoilage.

  • Airtight Packaging: Store your butter in airtight containers or wrap it tightly with aluminum foil or wax paper to protect it from absorbing odors and moisture from the surrounding environment.

By following these guidelines, you can ensure that your butter stays fresh and delicious for an extended period.

Now, let’s explore how to extend the shelf life of homemade butter.

Shelf Life Extension

By following these guidelines, you can ensure that your homemade butter will stay fresh and delicious for a longer period of time.

Advertisement

One alternative food preservation method to extend the shelf life of butter is by using salt. Salt acts as a natural preservative by inhibiting the growth of bacteria and mold. To do this, simply add a small amount of salt to your homemade butter during the churning process.

Another method is to store the butter in an airtight container in the refrigerator. The cool temperature helps slow down the spoilage process and keeps the butter fresh for a longer time.

The benefits of extended shelf life include reduced food waste and the ability to enjoy homemade butter for a longer period, saving you time and money.

[bulkimporter_image id=’12’]

Advertisement

Cleaning and Maintaining the Easy Butter Maker

Cleaning and maintaining the Easy Butter Maker is important to ensure its longevity and optimal performance. Proper care not only helps to extend the lifespan of the machine but also ensures that it consistently produces high-quality butter. Here are some essential cleaning tips and maintenance techniques to keep your Easy Butter Maker in excellent condition:

  • Regularly clean the machine after each use to remove any residual butter or debris. Use warm, soapy water and a soft cloth to wipe the interior and exterior surfaces.

  • Pay close attention to the filter screen, as it can become clogged with butter residue. Gently scrub the screen with a brush or sponge to remove any build-up.

  • Lubricate the moving parts of the Easy Butter Maker periodically to prevent friction and ensure smooth operation. Use a food-grade lubricant for this purpose.

By following these cleaning tips and maintenance techniques, you can keep your Easy Butter Maker in top-notch condition and enjoy delicious homemade butter for years to come.

However, if you encounter any issues with the machine, don’t worry. In the next section, we will discuss troubleshooting common problems and provide solutions to help you get back to butter-making in no time.

[bulkimporter_image id=’13’]

Advertisement

Troubleshooting Common Issues

If you’re experiencing any issues with your Easy Butter Maker, don’t worry – troubleshooting common problems is easier than you think.

The Easy Butter Maker is a convenient tool that allows you to make homemade butter with ease. However, like any appliance, it can encounter some issues from time to time.

One common issue is the butter not solidifying properly. This could be due to not using enough cream or using cream that is too warm. To troubleshoot this issue, ensure that you are using the recommended amount of cream and that it is chilled before starting the process.

Another common issue is the butter not separating from the buttermilk. This could be caused by not agitating the cream enough or using cream that is not fresh. To troubleshoot this issue, make sure to agitate the cream vigorously during the churning process and use fresh cream.

Lastly, if the Easy Butter Maker is not working at all, check to see if the power cord is properly connected and if the switch is turned on. If the issue persists, contact customer support for further assistance.

Advertisement

Troubleshooting common butter maker issues can be easily done by following these simple steps.

[bulkimporter_image id=’14’]

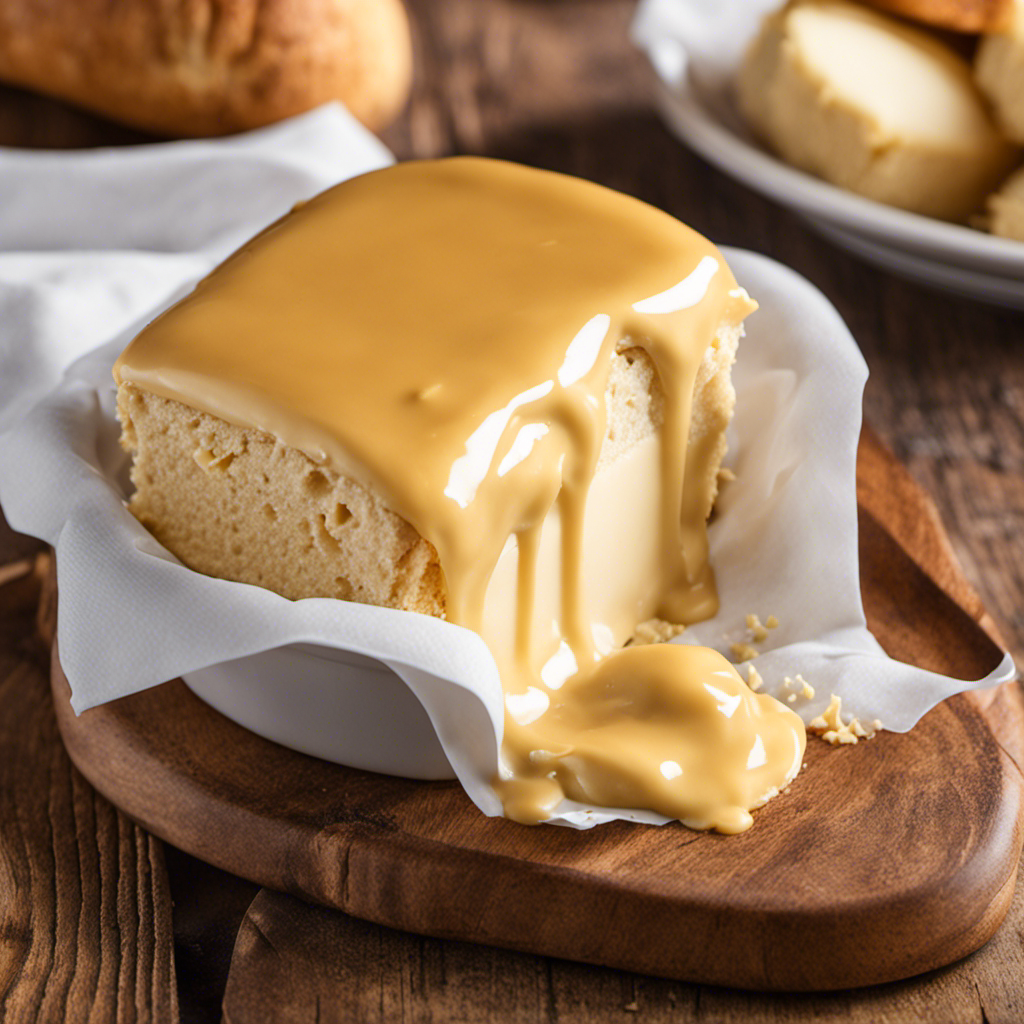
Tips and Tricks for Perfect Homemade Butter

For the perfect homemade butter, remember to use high-quality cream and make sure it is chilled before starting the process. This ensures that the butter will have a smooth and creamy texture.

There are several techniques you can use to make your own butter at home. One popular method is the traditional hand-churn method, where you simply agitate the cream until it separates into butter and buttermilk. Another method is using a blender or food processor to speed up the process. You can also use a butter churn or an electric butter maker for convenience.

Advertisement

When making homemade butter, it’s important to consider alternatives to butter. Coconut oil, avocado oil, and olive oil can be used as substitutes for butter in baking and cooking. These alternatives offer different flavors and health benefits, making them a great option for those with dietary restrictions or preferences.

Incorporating these techniques and alternatives into your butter making process will not only result in delicious homemade butter but also provide you with the satisfaction of creating something from scratch. Experiment with different methods and ingredients to find the perfect balance of flavor and texture for your homemade butter.

[bulkimporter_image id=’15’]

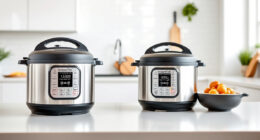
Easy Butter Maker Vs Traditional Methods

Using a blender or food processor can speed up the process of making homemade butter compared to traditional methods. The Easy Butter Maker is a convenient device that allows you to effortlessly create your own butter at home. But what are the benefits of using an Easy Butter Maker compared to traditional methods? Let’s take a closer look.

Advertisement
Easy Butter Maker Benefits Advantages of Traditional Butter Making
1. Saves time and effort 1. Connects you with tradition
2. Consistent results 2. More control over the process
3. Easy to use 3. No need for additional equipment
4. Versatile 4. Can be a therapeutic activity

The Easy Butter Maker offers several advantages over traditional butter making methods. Firstly, it saves time and effort. With just a few simple steps, you can have fresh homemade butter in no time. Secondly, the Easy Butter Maker ensures consistent results. It provides a uniform churn, resulting in a smooth and creamy butter every time. Additionally, it is easy to use, making it accessible for beginners and experienced butter makers alike. Lastly, the Easy Butter Maker is versatile. You can experiment with different flavors and ingredients, allowing you to create unique and personalized butter varieties.

While traditional butter making has its own advantages, such as connecting you with tradition and giving you more control over the process, the Easy Butter Maker offers convenience and efficiency. So, whether you choose the traditional route or opt for the Easy Butter Maker, the choice ultimately depends on your preferences and needs.

[bulkimporter_image id=’16’]

Frequently Asked Questions About the Easy Butter Maker

One common question people have about the Easy Butter Maker is how long it takes to make homemade butter. The answer to this question depends on several factors, including the ingredients used and the desired consistency of the butter. However, on average, it takes about 10-15 minutes to extract butter using the Easy Butter Maker.

Advertisement

To make homemade butter using the Easy Butter Maker, you will need to gather and store your ingredients properly. It is important to store your cream or milk in a cool environment, such as the refrigerator, to maintain its freshness and prevent spoilage. Additionally, make sure to use high-quality ingredients to ensure the best flavor and texture in your homemade butter.

During the butter extraction process, the Easy Butter Maker uses a simple yet effective mechanism to separate the butterfat from the cream or milk. The machine agitates the cream, causing the fat globules to clump together and form butter. This process typically takes around 10-15 minutes, depending on the amount of cream used and the desired consistency of the butter.

Frequently Asked Questions

How Long Does It Take to Make Butter Using the Easy Butter Maker?

It takes about 30-45 minutes to make butter using the Easy Butter Maker. After use, cleaning is simple with warm soapy water. With this device, you can create various flavors and variations of butter.

Can I Use the Easy Butter Maker to Make Other Types of Infused Oils or Tinctures?

Yes, the Easy Butter Maker can be used to make other types of infused oils, tinctures, and extracts. To ensure long-lasting use, it is important to properly clean and maintain the Easy Butter Maker.

Is the Easy Butter Maker Dishwasher Safe?

Yes, the Easy Butter Maker is dishwasher safe. However, it is recommended to hand wash it for better longevity. If you prefer a dishwasher safe alternative, there are other options available in the market.

Advertisement

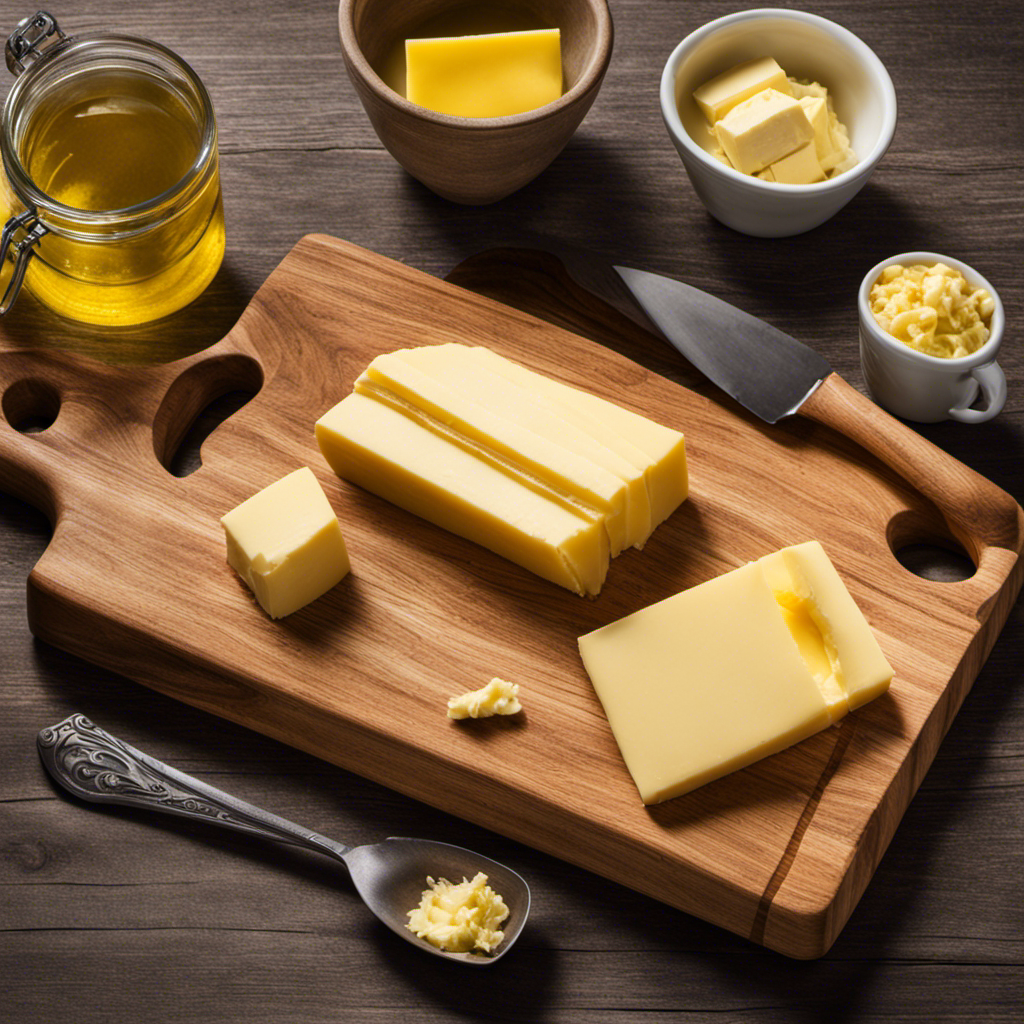
Can I Use Margarine Instead of Butter in the Easy Butter Maker?

Using margarine instead of butter in the Easy Butter Maker is not recommended. Butter provides better flavor and richness in cooking. There are alternative options available for those who prefer not to use butter or margarine.

Can I Make Small Batches of Butter With the Easy Butter Maker, or Does It Only Work for Larger Quantities?

Yes, the Easy Butter Maker can be used to make small batches of butter. It is not limited to larger quantities. This allows for flexibility and convenience when making butter at home.

Conclusion

In conclusion, the Easy Butter Maker is an innovative and efficient tool that revolutionizes the process of making homemade butter. By simplifying the steps and providing precise measurements, this device takes the guesswork out of the equation, ensuring consistent results every time.

With its user-friendly design and effective functionality, it’s no wonder why the Easy Butter Maker is becoming a favorite among butter enthusiasts.

So why settle for store-bought when you can easily create your own delicious butter at home? Embrace the convenience and satisfaction of the Easy Butter Maker today.

Advertisement
Continue Reading
Advertisement

Butter Tips and Tricks

Butter Hacks: 2/3 Cup Butter Is How Many Tablespoons?

Published

on

By

converting butter measurements easily

If you’ve ever wondered, 2/3 cup of butter equals around 10.67 tablespoons. This handy conversion guarantees your recipes turn out just right.

Key Takeaways

  • 2/3 cup of butter equals 10.67 tablespoons.
  • Useful for recipes specifying butter in tablespoons.
  • Ensures precise measurements in cooking.
  • Simplifies adjusting butter quantities.
  • Essential for accurate recipe results.

The Full Conversion Chart

Exploring the entire conversion chart for butter measurements can simplify your cooking endeavors. Understanding the different measurements for butter, such as blocks, sticks, cups, tablespoons, and weight in grams, allows you to easily adapt recipes to suit your needs.

For example, knowing that a block of butter weighs 5.33 ounces and that this is equivalent to 2.67 ounces in stick form can be incredibly helpful when following a recipe that specifies one form over the other.

Furthermore, realizing that 1/6 pound of butter is equal to one cup, or that one tablespoon of butter is approximately 80 milliliters, enables you to make precise adjustments based on what measuring tools you have available.

This detailed chart provides you with the flexibility to confidently experiment in the kitchen, ensuring that your dishes turn out just right every time. Whether you’re baking, sautéing, or simply spreading butter on your toast, having a solid grasp on these conversions will surely enhance your culinary skills.

How Much Is 1 Stick?

price of a single stick

To accurately measure butter, understanding the quantity in 1 stick is important for following recipes effectively. One stick of butter equals 8 tablespoons, approximately 4 ounces or 113 grams in weight, and fills half a cup. When working with recipes that call for butter, this information is vital for precise measurements.

Butter sticks are conveniently marked with tablespoon measurements, simplifying the process of cutting the right amount. By knowing how much butter is in 1 stick, you can easily adapt recipes to suit your needs without any guesswork.

Advertisement

Whether you’re baking a batch of cookies or whipping up a savory sauce, having this knowledge at your fingertips guarantees your dishes turn out just right every time. So next time you reach for a stick of butter, remember these measurements to ensure cooking or baking success.

Measuring Butter From Sticks

butter measurement using sticks

When measuring butter from sticks, make certain you understand that each stick is equivalent to 8 tablespoons or 1/2 cup. This means that if a recipe calls for 2/3 cup of butter, you’d need 1 stick plus 2 and 2/3 tablespoons of butter. Understanding this conversion is essential for accurately measuring butter in various recipes.

Measuring butter from sticks is a convenient way to portion out the right amount for your cooking or baking needs. By knowing that one stick equals 8 tablespoons, you can easily adjust the quantity of butter required for a recipe.

Whether you’re using butter in cups, tablespoons, or sticks, being able to convert between these measurements guarantees that your dishes turn out just right.

Next time you reach for a stick of butter, remember that it contains 8 tablespoons or 1/2 cup. This knowledge will simplify your cooking process and help you achieve consistent results in the kitchen.

Butter in Tablespoons (Tbsp.)

butter measurement in tablespoons

When measuring butter in tablespoons (Tbsp.), it’s essential to know that 2/3 cup of butter is equivalent to 10 and 2/3 tablespoons. Understanding this butter conversion can simplify your cooking and baking experience.

Here are a few key points to keep in mind:

Advertisement
  • Converting cups to tablespoons: To convert 2/3 cup of butter to tablespoons, multiply 2/3 by 16 (since 1 cup equals 16 tablespoons).
  • Precise measurement: The calculation results in 10.67 tablespoons, which can be rounded to 10 and 2/3 tablespoons. This accuracy is vital for achieving consistent results in your recipes.
  • Convenience in recipes: Knowing the butter measurements in tablespoons can be handy when a recipe specifies butter in this unit rather than cups, making it easier to follow instructions accurately.

Mastering butter measurements in tablespoons allows you to confidently navigate various recipes and secures your dishes turn out just right.

Butter Vs. Margarine Conversion

dairy debate butter or margarine

For a straightforward butter versus margarine conversion comparison, consider the differences in teaspoons and tablespoons.

ButterMargarine
1 Teaspoon1 Teaspoon
1 Tablespoon1 Tablespoon
1/4 Cup1/4 Cup

When substituting butter for margarine in recipes, bear in mind the conversion rate between the two. While both butter and margarine serve as fats in baking and cooking, they have slightly different compositions due to their ingredients. If a recipe calls for margarine but you prefer to use butter, a simple swap can be made using the table above. Remember that the water content in butter is higher than in margarine, which can affect the final texture of your dish. Experimenting with different ratios based on the conversion table can help you achieve the desired result.

Olive Oil Conversion

cooking with olive oil

To convert olive oil measurements effectively in your recipes, remember the following equivalences:

  • 1/4 Cup of olive oil is equivalent to 1/4 Cup of butter/margarine.
  • 1/4 Cup + 2 Tablespoons of olive oil is equal to 1/2 Cup of butter/margarine.
  • 1/2 Cup of olive oil is the same as 1/2 Cup + 1 Tablespoon of butter/margarine.

When substituting olive oil for butter or margarine in your recipes, keep these conversions in mind to guarantee your dish turns out just right. Whether you’re aiming for a healthier option or simply prefer the taste of olive oil, knowing how to make these conversions can make a significant difference in your cooking.

Next time you reach for olive oil instead of butter, confidently adjust your measurements using these simple equivalences.

Healthy Alternative: Olive Oil

heart healthy cooking with olives

Looking to make healthier choices in your cooking? Olive oil can be a great alternative to butter, providing a higher content of monounsaturated fats.

Benefits of Olive Oil

Consider incorporating olive oil into your cooking routine as a healthier alternative to butter, thanks to its rich content of monounsaturated fats. Substituting butter with olive oil not only reduces saturated fat intake but also maintains a similar texture and flavor profile in your dishes.

Here are some benefits of using olive oil:

  • Healthier Fat Option: Olive oil is packed with monounsaturated fats, which are considered heart-healthy fats that can help lower bad cholesterol levels.
  • Versatility in Cooking: From baking to sautéing and creating flavorful dressings, olive oil proves to be a versatile ingredient suitable for various cooking methods.
  • Unique Flavor Profile: Unlike butter, olive oil adds a distinct taste to your dishes, enhancing the overall flavor experience while offering a healthier alternative.

Incorporating olive oil into your daily cooking not only brings health benefits but also contributes to a more balanced and flavorful diet.

Cooking With Olive Oil

Enhance your cooking routine by incorporating olive oil as a healthier alternative to butter in various dishes. Olive oil offers a distinct flavor profile that can elevate the taste of your meals while providing several health benefits. Rich in monounsaturated fats, olive oil is considered heart-healthy and can help lower bad cholesterol levels.

Advertisement

When cooking with olive oil, you have the flexibility to use it in different methods such as sautéing, roasting, and making salad dressings. This versatility makes it a great choice for a wide range of recipes. By substituting butter with olive oil, you can reduce your saturated fat intake without compromising on flavor.

Next time you’re in the kitchen, consider reaching for olive oil instead of butter. Not only will you be making a healthier choice, but you’ll also be adding a delicious twist to your favorite dishes. Experiment with olive oil in your cooking and discover the wonderful benefits it can bring to your meals.

Contact & Copyright Information

contact and copyright details

For more details on butter and olive oil conversions, contact Monadnock Oil and Vinegar, LLC at their Dublin branch by dialing 603-563-7066 or at their Amherst branch at 603-589-9954.

If you prefer email correspondence, you can reach them at [emailprotected].

Remember that all content related to butter and olive oil conversions is protected by copyright owned by Monadnock Oil and Vinegar, LLC. Reproduction rights are reserved from 2015 to 2024, and any unauthorized use is strictly prohibited.

If you intend to use or refer to their content, make sure you have the appropriate permissions to avoid any copyright violations.

Advertisement

Frequently Asked Questions

How Many Tablespoons Is 2/3 Cup in a Stick of Butter?

To know how many tablespoons are in 2/3 cup of butter in a stick, remember it’s around 10 2/3 tablespoons or about 1 stick plus 2 tablespoons. This helps you accurately measure butter for recipes.

Is 1 Stick of Butter the Same as 1 2 Cup?

Yes, 1 stick of butter is equal to 1/2 cup. That means a stick of butter contains 8 tablespoons. Understanding these measurements can make your cooking and baking experiences smoother and more precise.

How Many Tablespoons Is a Full Cup of Butter?

To measure a full cup of butter, you’d need 16 tablespoons. That’s the scoop for your baking adventures. Remember this handy conversion to make your kitchen creations a piece of cake!

How Much Is 1 Cup of Butter in Stick Butter?

To convert 1 cup of butter to sticks, you need 2 sticks. For tablespoons, that’s 16 tablespoons. Knowing these conversions helps in precise measuring for recipes. It’s essential for successful baking and cooking.

Conclusion

Remember, when it comes to butter hacks, knowing how to convert measurements can make all the difference in your cooking.

Advertisement

As the saying goes, ‘A little butter can make everything better.’

So next time you’re in the kitchen and wondering how many tablespoons are in 2/3 cup of butter, you’ll be prepared to whip up something delicious with ease.

Happy cooking!

Continue Reading

Butter Tips and Tricks

How Many Sticks of Butter in 1 Cup: A Step-by-Step Guide

Published

on

By

An image showing a neatly arranged stack of 10 tablespoons of butter, each tablespoon represented by a smooth, rectangular slab with rounded edges, resembling traditional stick-shaped butter

Ever wondered how many sticks of butter are in one cup? Well, I have the answer for you!

Picture this: you’re in the middle of baking your favorite recipe and suddenly realize you’re out of butter. Panic sets in as you scramble to figure out the conversion from cups to sticks. But fear not!

In this article, I’ll break it down for you, providing all the information you need to know about the butter-to-cup ratio and how to make your baking adventures a breeze.

Key Takeaways

  • 1 cup of butter is equal to 2 sticks or 16 tablespoons.
  • Converting butter measurements from cups to sticks or vice versa is crucial for accurate recipe adjustments.
  • Different brands may have varying measurements for butter, so it’s important to be aware of equivalents.
  • Using the measurement markings on the butter wrapper allows for precise cutting of fractional amounts.
[bulkimporter_image id=’2′]

Understanding the Butter-to-Cup Ratio

1 cup of butter is equal to 2 sticks. When it comes to converting butter measurements, it’s important to understand the ratios.

If a recipe calls for tablespoons of butter, 1 stick is equivalent to 8 tablespoons. So, if you need 1 cup of butter, you’ll need 16 tablespoons or 2 sticks.

It’s also important to note the difference between salted and unsalted butter. Salted butter contains added salt, while unsalted butter does not. This can affect the taste and overall flavor of your dish.

When a recipe calls for unsalted butter, it’s best to stick to that recommendation to have better control over the amount of salt in the recipe. However, if you only have salted butter on hand, you can reduce the amount of added salt in the recipe.

[bulkimporter_image id=’3′]

Converting Butter Measurements: Cups to Sticks

When it comes to baking, understanding the butter cup to stick ratio is crucial. Knowing how many sticks of butter make up one cup can make or break a recipe.

In addition to the ratio, having an accurate conversion method from cups to sticks is essential for precise measurements.

Lastly, it’s important to familiarize oneself with common butter measurements to ensure successful baking endeavors.

Butter Cup to Stick Ratio

To determine the ratio of sticks of butter to cups, we can use this conversion chart. Understanding butter measurements is essential for baking and cooking. Converting butter ratios is a common task in the kitchen.

The standard stick of butter in the United States weighs 1/2 cup or 8 tablespoons. Therefore, if a recipe calls for 1 cup of butter, you will need 2 sticks. If the recipe calls for 1/2 cup of butter, you will need 1 stick.

It’s important to note that butter measurements can vary by country, so always consult a reliable conversion chart if you’re working with international recipes. By knowing the butter cup to stick ratio, you can confidently adapt recipes to suit your needs.

Accurate Conversion Method

The most accurate way to convert measurements is by consulting a reliable conversion chart. When it comes to measuring butter, it can be tricky since it often comes in sticks or cups. Here are some tips to help you accurately measure butter:

  1. Use a conversion chart: This will give you the exact measurement equivalents for butter, whether it’s in sticks or cups.
  2. Soften the butter: If a recipe calls for melted butter, measure it in its solid form and then melt it. This ensures accurate measurements.
  3. Use a kitchen scale: Weighing the butter can give you precise measurements, especially when dealing with small amounts.
  4. Know the standard measurements: One stick of butter is equal to 1/2 cup or 8 tablespoons. A cup of butter, on the other hand, is equal to 2 sticks or 16 tablespoons.

Common Butter Measurements?

Knowing the equivalents for different measurements of butter, such as tablespoons and sticks, can be helpful when following recipes. It ensures that you are adding the right amount of butter, which can greatly impact the outcome of your dish. Here are some common butter measurement equivalents to keep in mind:

Measurement Equivalent
1 stick 1/2 cup (8 tablespoons)
1/2 stick 1/4 cup (4 tablespoons)
1/4 stick 1/8 cup (2 tablespoons)
1 tablespoon 1/16 cup (1/2 stick)

When measuring butter, it’s important to be accurate. Use a kitchen scale for precise measurements, especially if the recipe calls for weight measurements. If you don’t have a scale, use a butter dish with marked measurements. Softened butter should be leveled off with a knife. When using tablespoons, make sure to fill them completely and level off the excess with a straight edge. These tips will help you measure butter accurately and achieve the best results in your recipes.

[bulkimporter_image id=’4′]

The Standard Size of a Stick of Butter

A stick of butter is typically equal to 1/2 cup. Understanding butter packaging and different butter measurements in other countries can be confusing.

Here are some key points to help you navigate the world of butter measurements:

  1. In the United States, butter is commonly sold in sticks, with each stick weighing 1/4 pound or 1/2 cup. This makes it easy to measure and use in recipes.
  2. In some European countries, butter is sold in blocks or tubs, with measurements listed in grams or kilograms. It’s important to convert these measurements to cups or ounces for American recipes.
  3. In Australia, butter is usually sold in 250g or 500g blocks, which can be converted to cups or ounces using conversion charts.
  4. When traveling or using international recipes, it’s helpful to familiarize yourself with the local butter measurements to ensure accurate results.
[bulkimporter_image id=’5′]

How Much Butter Is in 1 Cup

When it comes to baking, understanding the butter to cup ratio is crucial. Knowing how much butter is in 1 cup can help ensure that your recipes turn out perfectly.

Additionally, learning how to convert butter measurements can be helpful when using recipes from different countries or regions.

Lastly, if you’re looking for butter substitutes in baking, there are several options available that can still provide the moisture and richness that butter brings to baked goods.

Butter to Cup Ratio

To measure the butter to cup ratio, you can easily convert sticks of butter to cups. Understanding butter density is key to accurately converting butter measurements from tablespoons to cups. Here’s a step-by-step guide:

  1. Start by knowing that one stick of butter is equal to 1/2 cup. This is a common measurement used in many recipes.
  2. If your recipe calls for a different amount of butter in cups, you can use this conversion: 1 cup of butter is equivalent to 2 sticks or 16 tablespoons.
  3. To convert tablespoons to cups, divide the number of tablespoons by 16. For example, if you have 8 tablespoons of butter, it would be equal to 1/2 cup.
  4. Remember, when measuring butter, it’s important to consider its density. Softened or melted butter may take up less space compared to cold or solid butter.

Converting Butter Measurements

Understanding the conversion of butter measurements can help me confidently adjust my recipe. When it comes to baking or cooking, accuracy is key. Knowing the equivalents of butter can save me time and ensure the perfect outcome.

One cup of butter is equal to two sticks or 16 tablespoons. This information is crucial when a recipe calls for a specific amount of butter in cups, but I only have sticks. Conversely, if a recipe specifies butter in sticks, I can easily convert it to cups by dividing the number of sticks by two.

To measure butter accurately, I can use a kitchen scale or the markings on the butter wrapper. Softened butter should be packed into measuring cups, while solid butter should be cut according to the desired quantity.

With these tips, I can confidently use the correct amount of butter in my recipes.

Butter Substitutes in Baking

If you’re looking to substitute butter in your baking, there are various options available that can still yield delicious results. Here are four butter alternatives that not only provide a healthier option but also offer unique flavors and health benefits:

  1. Coconut oil: This versatile alternative adds a subtle tropical taste to your baked goods and is rich in healthy fats, promoting heart health.
  2. Avocado: Creamy and nutrient-dense, mashed avocado can replace butter in certain recipes, providing a boost of vitamins and minerals.
  3. Greek yogurt: With its tangy flavor and creamy texture, Greek yogurt adds moisture and protein to your baked treats while reducing the fat content.
  4. Applesauce: A natural sweetener and fat substitute, applesauce adds moisture and tenderness to your baked goods, making them lighter and healthier.
[bulkimporter_image id=’6′]

Butter Conversion: Cups to Sticks Simplified

You can easily convert 1 cup of butter to sticks by knowing that it equals 2 sticks.

When it comes to butter storage, it is important to consider the packaging. Butter is typically sold in wrapped blocks or sticks. The packaging not only protects the butter from external factors like air and light but also keeps it fresh for longer periods.

The most common packaging for butter is a waxed paper or foil wrapper. This type of packaging helps to maintain the butter’s quality and prevent it from spoiling. It is recommended to store butter in its original packaging or transfer it to an airtight container to maintain its freshness.

Proper butter storage ensures that it remains usable for a longer time and retains its flavor and texture.

[bulkimporter_image id=’7′]

Calculating Sticks of Butter for Your Recipe

To calculate the number of sticks needed for your recipe, it’s helpful to divide the total amount of butter by the conversion factor of 2. This will give you the accurate measurement in sticks.

Here are some tips for understanding butter measurements and achieving accurate conversions:

  1. Always use the conversion factor of 2 when converting cups to sticks of butter.
  2. Make sure to measure butter in its solid form for precise results.
  3. If your recipe calls for a fraction of a stick, you can easily cut it using the measurement markings on the wrapper.
  4. Remember that butter is sold in different sizes, so check the weight or volume on the packaging to ensure accuracy.

Now that you understand how to calculate the number of sticks needed for your recipe, let’s move on to some tips for measuring butter in cups.

[bulkimporter_image id=’8′]

Tips for Measuring Butter in Cups

When measuring butter in cups, it’s important to remember that different brands may have different measurements on their packaging. To ensure accuracy in your recipes, it’s helpful to be aware of butter measurement equivalents.

One cup of butter is equal to 2 sticks or 16 tablespoons. However, some brands of butter may label their packaging differently, so it’s always a good idea to double-check.

If you don’t have measuring cups or sticks of butter, there are alternative methods for measuring butter. One option is to use a kitchen scale to measure the desired amount in grams or ounces. Another option is to use the markings on the butter wrapper itself. Most butter sticks have measurements marked on the packaging, allowing you to easily cut off the desired amount.

[bulkimporter_image id=’9′]

Butter Conversions Made Easy: Cups to Sticks

When it comes to baking or cooking with butter, it’s important to have a clear understanding of the measurement equivalents. Knowing how many sticks of butter are in a cup can save time and ensure accurate results.

In this discussion, we will explore simple conversion techniques for butter measurements, providing you with the knowledge and confidence to easily adapt recipes to your preferred measurements.

Butter Measurement Equivalents

You can easily convert 1 cup of butter into sticks by dividing it into 2 sticks. This is a common measurement used in baking and cooking.

When it comes to understanding butter ratios and ensuring accurate measuring, here are some tips to keep in mind:

  1. Use a liquid measuring cup: Butter is a solid, but using a liquid measuring cup allows for more precise measurements.
  2. Soften the butter: To accurately measure butter, it should be softened to room temperature. This ensures that it is easily spreadable and can be measured accurately.
  3. Use a knife or bench scraper: When measuring butter, use a knife or bench scraper to level off the top. This will provide a consistent and accurate measurement.
  4. Pack it tightly: If a recipe calls for packed butter, make sure to tightly pack the butter into the measuring cup. This will give you the correct amount needed for the recipe.

Simple Conversion Techniques

To simplify conversions, try using a kitchen scale for more precise measurements. When it comes to baking, accurate measurements are crucial for the success of your recipe. Butter measurement equivalents in recipes can sometimes be confusing, especially when converting between different units.

Converting butter measurements for baking can be made easier by using a kitchen scale. By weighing the butter, you can accurately determine the amount needed for your recipe. For example, if a recipe calls for 1 cup of butter, you can weigh it on the scale to get the precise measurement in grams or ounces. This eliminates any guesswork and ensures that your baked goods turn out just right.

Now, let’s move on to how to substitute sticks of butter for cups.

[bulkimporter_image id=’10’]

How to Substitute Sticks of Butter for Cups

If you’re substituting sticks of butter for cups, it’s important to know that one stick of butter is equivalent to 1/2 cup. This knowledge is crucial for measuring accuracy in recipes.

Here are four key points to keep in mind when substituting sticks of butter for cups:

  1. Butter substitutes: In case you don’t have sticks of butter on hand, you can use other ingredients as substitutes. Options include margarine, shortening, coconut oil, or even applesauce for a healthier alternative.
  2. Measuring accuracy: When measuring butter in stick form, it’s essential to accurately cut the stick to the correct length. Each stick is typically 8 tablespoons or 1/2 cup, so make sure to measure it precisely.
  3. Conversions: If a recipe calls for a specific amount of cups, you may need to convert it to sticks of butter. Remember that two sticks of butter are equal to 1 cup, so adjust accordingly.
  4. Recipe adjustments: When substituting sticks of butter for cups, consider the impact on your recipe. Butter provides moisture and flavor, so using different substitutes may affect the final texture and taste.
[bulkimporter_image id=’11’]

Common Butter Measurements: Cups Vs Sticks

When baking, it’s helpful to know the difference between measuring butter in cups versus sticks. Understanding butter measurements and being able to convert between cups and sticks can make a big difference in the outcome of your baked goods. Here’s a simple table to help you understand the conversion:

Cups Sticks Grams
1 0.5 113
2 1 227
3 1.5 340

For example, if a recipe calls for 1 cup of butter, you can use 2 sticks or 227 grams. Similarly, if a recipe calls for 3 sticks of butter, you can use 1.5 cups or 340 grams. Having this understanding and being able to convert between cups and sticks will ensure that your baked goods turn out perfectly every time.

Frequently Asked Questions

Can I Use Margarine Instead of Butter When Measuring in Cups or Sticks?

Sure, you can use margarine instead of butter when measuring in cups or sticks. However, keep in mind that margarine has a different texture and flavor, so it may affect the outcome of your recipe. The butter vs margarine debate is a matter of personal preference.

How Much Does a Stick of Butter Weigh in Ounces?

A stick of butter weighs 4 ounces. Converting butter measurements can be tricky, but knowing that a stick of butter is 1/2 cup or 8 tablespoons helps in cooking and baking.

Can I Use Salted Butter Instead of Unsalted Butter in a Recipe That Calls for Measuring in Cups?

Yes, you can use salted butter instead of unsalted butter in a recipe that calls for measuring in cups. Just remember to adjust the amount of salt in the recipe accordingly.

Are There Any Special Considerations When Measuring Butter in High-Altitude Baking?

When baking at high altitudes, there are special considerations for measuring butter. The altitude affects the air pressure, which can impact the texture and rising of baked goods. Adjustments may be needed to ensure successful results.

Is There a Difference in Measurement if the Butter Is Cold or at Room Temperature When Using Cups or Sticks?

When measuring butter, it’s important to note that the accuracy may vary depending on whether the butter is cold or at room temperature. This applies to both measuring cups and sticks.

Conclusion

In conclusion, understanding the butter-to-cup ratio is crucial when it comes to baking. Converting measurements from cups to sticks can be simplified by knowing that one cup of butter is equal to two sticks.

It is important to note that a standard stick of butter typically measures 1/2 cup or 8 tablespoons. When measuring butter in cups, it is recommended to use precise measuring tools to ensure accurate results.

Remember, as the saying goes, “Measure twice, bake once!”

Continue Reading

Butter Tips and Tricks

How Many Cups of Butter Equal a Stick: A Simple Guide

Published

on

By

An image showing a neatly arranged cup filled with liquid butter, surrounded by a stack of butter sticks, one by one, gradually being poured into the cup until it reaches the brim

Ever thought about how many cups of butter are in one stick? Well, I have the answer for you! Deciphering butter measurements can be tricky, but don’t worry, I’m here to make it easier for you.

In this article, we’ll explore the standard stick of butter and how to convert it to cups. We’ll also delve into equivalents and measurements, as well as provide a handy butter conversion chart.

So, let’s dive in and demystify the world of butter measurements together!

Key Takeaways

  • One stick of butter is equal to 1/2 cup or 8 tablespoons.
  • Butter can be measured in grams or ounces for more precise measurements.
  • Conversion charts and kitchen scales are useful tools for accurate measurement conversion.
  • Knowing the equivalents (e.g., 1 stick = 1/2 cup, 2 sticks = 1 cup) helps measure butter accurately in recipes.

[bulkimporter_image id=’2′]

Understanding Butter Measurements

There’s no need to worry about how many cups of butter are in a stick because it’s a common measurement used in recipes. When it comes to accurately measuring butter, it’s important to understand the conversion from sticks to cups.

One stick of butter is equal to 1/2 cup or 8 tablespoons. This measurement is widely accepted and used in baking and cooking. However, it’s good to know that butter can also be measured in grams or ounces for more precise measurements.

To convert butter measurements for recipes, you can use a kitchen scale or refer to conversion charts that provide the equivalent measurements. Understanding these conversions ensures that you can accurately measure and use butter in your favorite recipes.

Advertisement

Now, let’s dive into the details of the standard stick of butter.

[bulkimporter_image id=’3′]

The Standard Stick of Butter

To determine the amount of butter in a standard stick, you’ll need to understand the conversion ratio. Understanding butter packaging and different butter measurements is crucial to accurately measuring ingredients in recipes. Here are some key points to keep in mind:

  • A standard stick of butter in the United States weighs 1/2 cup or 8 tablespoons.
  • The measurements on butter packaging are typically marked in tablespoons and cups.
  • European butter is often sold in 250-gram blocks, which is approximately 1 cup or 2 sticks of butter.
  • Some recipes may call for butter in ounces or grams, so it’s important to have a kitchen scale for precise measurements.
  • It’s also helpful to know that butter comes in different fat percentages, such as salted and unsalted.

[bulkimporter_image id=’4′]

Converting Sticks to Cups

When it comes to converting sticks to cups, it is important to understand the stick to cup ratio for accurate measurement conversion.

The stick to cup ratio is 1 stick of butter equals 1/2 cup. This means that if a recipe calls for 1 cup of butter, you will need 2 sticks.

Stick to Cup Ratio

The stick to cup ratio for butter is approximately 1/2 cup per stick. This ratio is important to know when it comes to baking and following recipes accurately.

Here are a few key points to keep in mind when it comes to butter measurements and baking conversions:

Advertisement

  • 1 stick of butter is equal to 1/2 cup or 8 tablespoons.
  • If a recipe calls for 1 cup of butter, you will need 2 sticks.
  • To convert tablespoons to cups, divide the number of tablespoons by 16.
  • It’s important to note that butter measurements can vary depending on the brand or type of butter you are using, so always check the packaging for accurate measurements.
  • When in doubt, it’s always a good idea to weigh your butter using a kitchen scale for precise measurements.

Knowing the stick to cup ratio and understanding butter measurements is essential for successful baking and achieving the desired results in your recipes.

Accurate Measurement Conversion

Remember, accurately converting measurements is crucial for achieving the desired results in your baking recipes.

When it comes to understanding butter measurements, it’s important to measure accurately to ensure your baked goods turn out just right.

Butter is often measured in sticks, and it’s helpful to know that one stick of butter is equal to 1/2 cup or 8 tablespoons.

This knowledge is especially handy when a recipe calls for a certain amount of cups and you only have sticks of butter on hand.

By measuring butter accurately, you can ensure that your recipes turn out perfectly every time.

Advertisement

Now that we understand how to measure butter correctly, let’s explore the equivalents and measurements for other common baking ingredients.

[bulkimporter_image id=’5′]

Equivalents and Measurements

You’ll need to know how many cups of butter are in a stick for accurate measurements. When it comes to butter measurement equivalents, it’s important to have the right conversions. Here are a few key measurements to keep in mind:

  • 1 stick of butter is equal to 1/2 cup
  • 1/2 stick of butter is equal to 1/4 cup
  • 2 sticks of butter is equal to 1 cup
  • 4 sticks of butter is equal to 2 cups
  • 8 sticks of butter is equal to 4 cups

Knowing these equivalents will help you measure butter accurately in your recipes.

Now that you have a good understanding of how many cups are in a stick of butter, let’s move on to the next section about how much butter is in a cup.

[bulkimporter_image id=’6′]

How Much Butter Is in a Cup

When it comes to baking or cooking, understanding the butter-to-cup ratio is crucial. Knowing how much butter is in a cup can make a huge difference in the outcome of your recipe.

In this discussion, we will explore the conversion of butter measurements and how to accurately measure the right amount of butter for your culinary endeavors.

Advertisement

Butter-To-Cup Ratio

To figure out the butter-to-cup ratio, divide the number of cups by the number of sticks. This ratio is essential when converting butter measurements or finding butter equivalents. Here are some important points to consider:

  • 1 stick of butter is equal to 1/2 cup.
  • 2 sticks of butter make 1 cup.
  • If a recipe calls for 1 cup of butter, you will need 2 sticks.
  • For 1/4 cup of butter, use half a stick.
  • To measure 1/3 cup of butter, you’ll need 5 and 1/3 tablespoons.

Understanding the butter-to-cup ratio allows for accurate measurements in recipes. Whether you’re baking cookies or making a savory dish, having the correct amount of butter is crucial for achieving the desired taste and texture.

Converting Butter Measurements?

Understanding how to convert butter measurements is essential for accurate recipe preparation. When it comes to converting butter measurements, there are a few common mistakes that people often make.

One of the most common mistakes is not knowing the correct conversion ratio. In the United States, butter is typically sold in sticks, with each stick weighing 1/2 cup or 8 tablespoons. However, in some recipes, butter may be measured in grams or ounces.

Another mistake people make is not properly measuring the butter. It is important to use a kitchen scale or measuring cups to ensure precise measurements.

Additionally, some recipes may call for melted butter, which can be measured differently than solid butter.

Advertisement

Understanding these conversions and avoiding these common mistakes will help ensure that your recipes turn out perfectly every time.

[bulkimporter_image id=’7′]

Measuring Butter for Baking

There’s no need to guess how many cups of butter are in a stick when measuring for baking. As someone who loves to bake, I have found that using the right tools for measuring butter is crucial for accurate results. Here are the best tools for measuring butter:

  • Measuring cups: These are the most common tools used for measuring butter. Make sure to use a dry measuring cup and pack the butter firmly for accurate measurements.

  • Kitchen scale: For precise measurements, a kitchen scale is the way to go. It allows you to measure the exact amount of butter required for your recipe.

  • Butter dish with markings: Some butter dishes come with markings that indicate the measurements. This makes it convenient to measure the required amount of butter directly from the dish.

  • Butter cutter: A butter cutter is a handy tool that helps you measure the butter by slicing it into tablespoons or teaspoons.

  • Butter wrappers: Butter wrappers often have measurements marked on them, making it easy to cut the butter into the desired amount.

By using these tools, you can ensure that your butter is measured accurately for your recipes.

Now, let’s move on to the next section where we will discuss a butter conversion chart.

[bulkimporter_image id=’8′]

Butter Conversion Chart

Now that we know how to measure butter for baking, let’s talk about butter conversion chart and how to convert butter for recipes.

Advertisement

It’s common to come across recipes that call for butter in different measurements, such as cups, tablespoons, or grams. To make things easier, there are some standard butter measurement equivalents that can be used for conversion.

For example, one stick of butter is equal to half a cup or 8 tablespoons. So if a recipe calls for 1 cup of butter, you would need 2 sticks or 16 tablespoons. It’s important to have these conversions handy to ensure you’re using the correct amount of butter in your recipes.

Now that we understand the butter conversion chart, let’s move on to some tips for measuring butter accurately.

[bulkimporter_image id=’9′]

Tips for Measuring Butter

To accurately measure butter, it’s helpful to soften it beforehand. Softening butter makes it easier to measure and ensures accurate results in your cooking. Here are some tips for measuring butter for cooking:

  • Take the butter out of the refrigerator and let it sit at room temperature for about 30 minutes before measuring.
  • Use a sharp knife to cut the butter into tablespoon-sized portions.
  • Fill a measuring cup with water and place the cut butter into the cup, submerging it completely.
  • Remove the butter from the water and drain any excess water.
  • Measure the butter in tablespoons or cups, depending on your recipe’s requirements.

[bulkimporter_image id=’10’]

Common Butter Measurement Mistakes

A common mistake when measuring butter is not using a sharp knife to cut it into proper portions. Accurately measuring butter is crucial in baking to achieve the desired results.

When butter is too soft or melted, it can throw off the texture and consistency of your baked goods. To measure butter accurately, start by using a sharp knife to cut the stick into tablespoon-sized portions. Then, use a measuring spoon to scoop out the desired amount.

Advertisement

It’s important to level off the butter with the back of a knife to ensure precise measurements. Another common mistake is eyeballing the amount of butter, which can lead to inconsistent results.

Frequently Asked Questions

Can I Use Margarine Instead of Butter in Baking Recipes?

I prefer using butter over margarine in baking recipes because it adds more flavor and richness. Margarine can affect the texture of baked goods, often making them softer and less tender. So, while margarine can be used as a substitute for butter in some recipes, it’s important to consider the impact on taste and texture.

How Can I Accurately Measure Butter Without Using a Scale?

When it comes to accurately measuring butter without a scale, it can be a bit tricky. But fear not! I’ve got you covered. Let me walk you through the process of converting butter measurements like a pro.

Can I Substitute Oil for Butter in a Recipe?

Substituting butter with oil in a recipe can have pros and cons. Oil can add moisture and make baked goods lighter, but it may also affect the taste and texture. The best oil substitutes for baking are vegetable oil, coconut oil, and olive oil.

How Much Butter Should I Use if the Recipe Calls for a Certain Number of Sticks?

When converting butter measurements, accurately measuring the amount of butter needed is crucial. If a recipe calls for a certain number of sticks, I can help you determine how much butter to use.

Advertisement

Can I Use Unsalted Butter Instead of Salted Butter in Baking Recipes?

Using unsalted butter for baking has its pros and cons. Pros include having more control over the saltiness of the recipe, while cons include potentially missing out on the flavor that salted butter provides.

Conclusion

In conclusion, understanding butter measurements is essential for successful baking. While a standard stick of butter is equivalent to 1/2 cup or 8 tablespoons, it’s important to note that this can vary depending on the brand or region.

To convert sticks to cups, simply divide the number of sticks by 2. Additionally, knowing that 1 cup of butter is equivalent to 2 sticks can help when following recipes.

By following a butter conversion chart and being mindful of common measurement mistakes, bakers can ensure accurate and delicious results.

Advertisement

Continue Reading

Trending