Connect with us

Recipes & Culinary Uses

Make Butter at Home from Milk

Published

on

An image of a glass jar filled with fresh, creamy milk being poured into a vintage butter churn

Have you ever wondered if it’s possible to turn ordinary milk into rich, creamy butter? Well, wonder no more! In this article, we’ll show you the simple and fascinating process of transforming milk into delectable butter right in your own kitchen.

From selecting the perfect milk to churning it into golden goodness, we’ve got you covered. So, roll up your sleeves and get ready to embark on a butter-making adventure like no other!

Key Takeaways

  • Choose organic milk from cows raised without antibiotics, hormones, or pesticides
  • Whole milk with 3.5% fat is best for making butter
  • Use a centrifuge or separator machine to separate cream and skim milk
  • Churning is the process of agitating cream until fat globules separate from buttermilk

Selecting the Right Milk

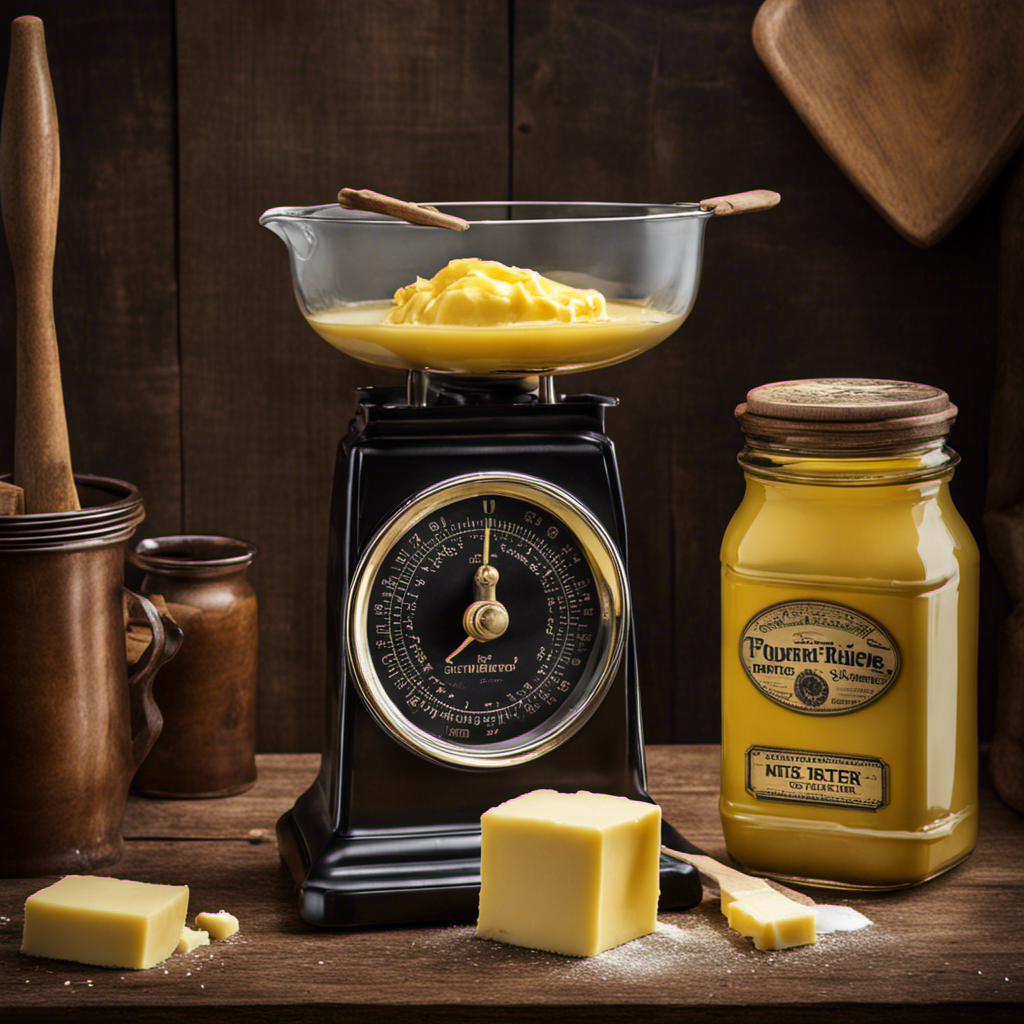
To make butter out of milk, you’ll need to start by selecting the right type of milk. When choosing organic milk, you can ensure that the milk comes from cows that have been raised without the use of antibiotics, synthetic hormones, or pesticides. Organic milk is also free from genetically modified organisms (GMOs).

Understanding milk fat content is crucial in the butter-making process. Whole milk, which contains around 3.5% fat, is the best option for making butter. The higher fat content in whole milk allows for a richer and creamier end product.

Advertisement

Once you have selected the right milk, you can proceed to the next step of separating the milk into cream and skim milk, which is essential in butter production.

Separating Milk Into Cream and Skim Milk

Separating milk into cream and skim milk involves using a centrifuge or a separator machine. A cream separator is a device designed specifically for this purpose. It works by spinning the milk at a high speed, causing the heavier cream to separate from the lighter skim milk.

This process can also be done manually, using a separator machine or by allowing the milk to sit undisturbed for a certain period. Once the cream is separated, it can be used to make various homemade dairy products, such as butter, whipped cream, or ice cream.

The skim milk, on the other hand, can be consumed as is or used in recipes that require a lower fat content. By separating the milk into cream and skim milk, you have the ability to create a variety of delicious homemade dairy products.
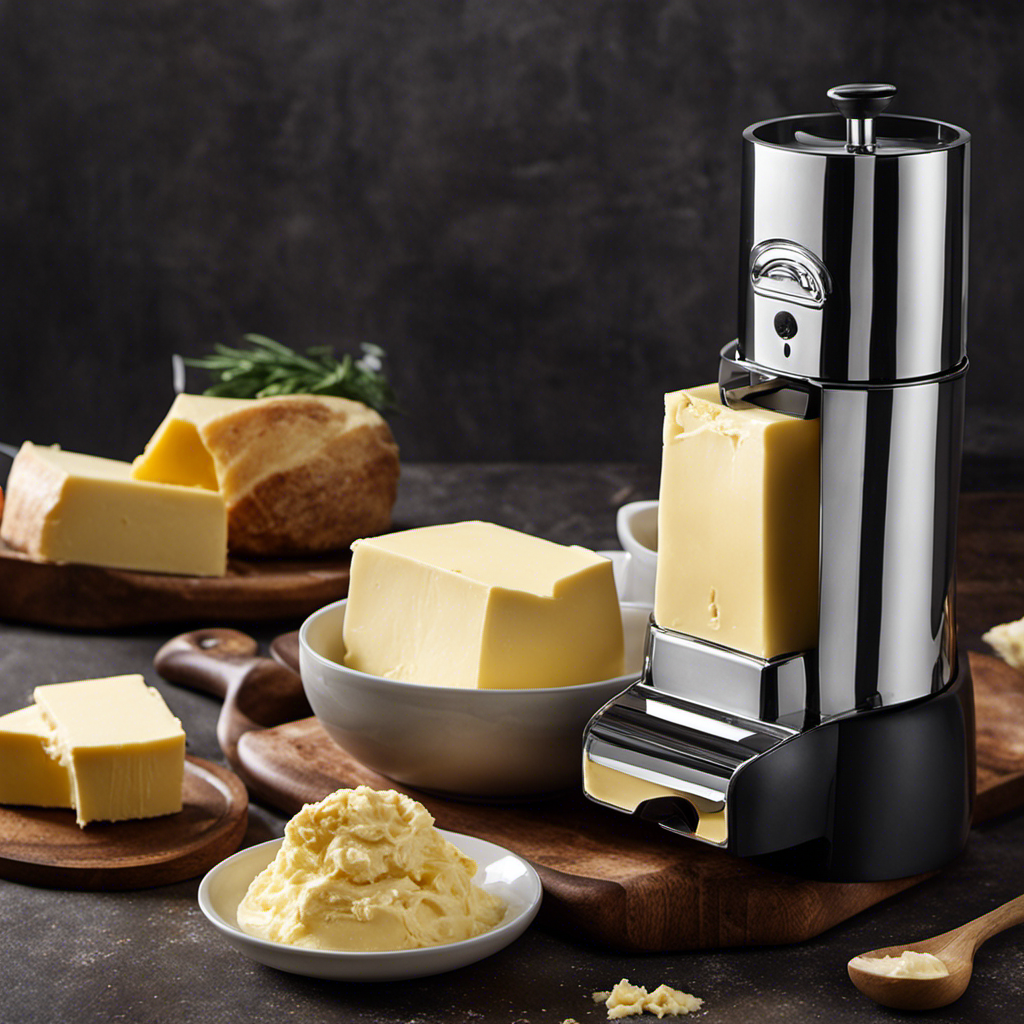
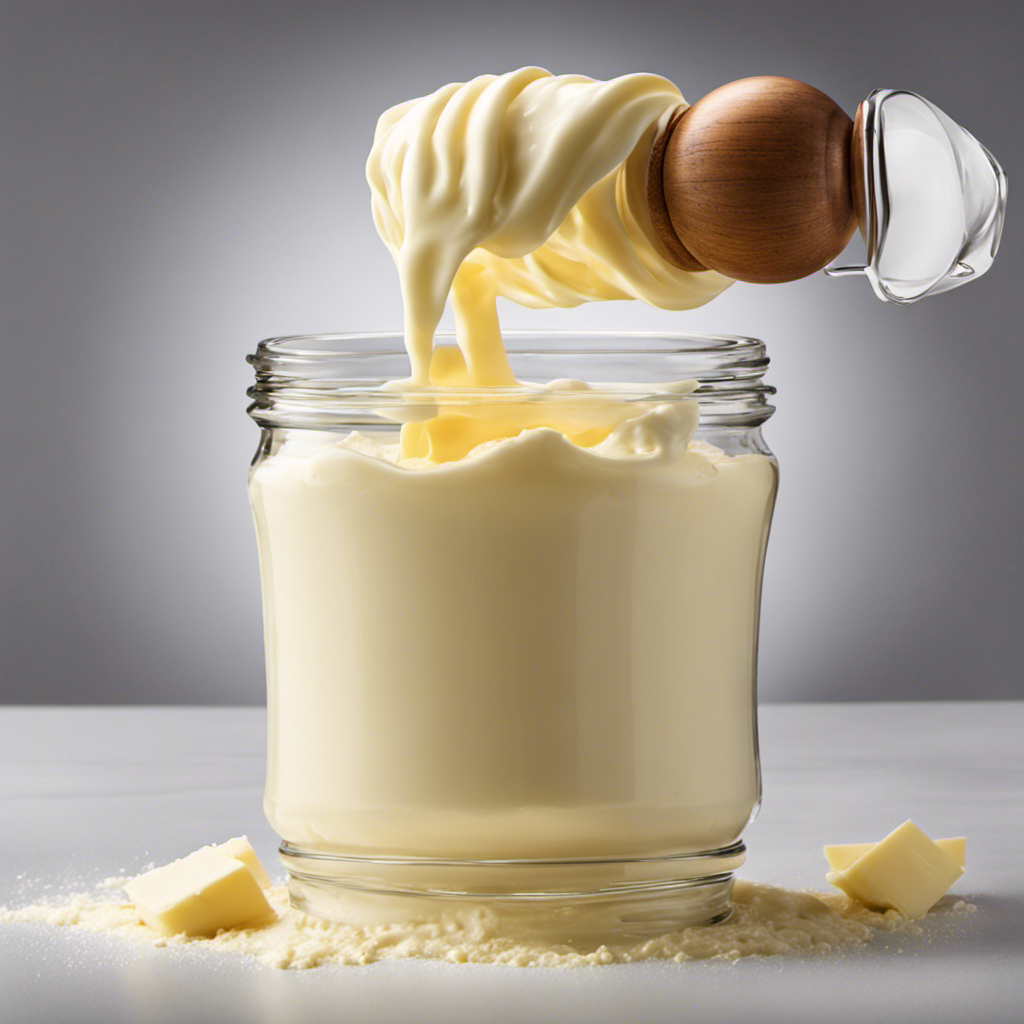
Churning the Cream

Advertisement

Churning the cream transforms it into a rich and creamy spread. Churning is the process of agitating the cream until the fat globules separate from the buttermilk.

There are various churning techniques you can use, such as using a butter churn, a stand mixer with a whisk attachment, or even a glass jar and some vigorous shaking. However, it’s important to note that churning can sometimes be tricky, and you may encounter common problems such as the cream not thickening, the butter not forming, or the butter being too soft.

To troubleshoot these issues, make sure the cream is chilled, use a proper churning technique, and adjust the speed or temperature if needed.

Once the cream has turned into butter, it’s time to move on to the next step: washing and collecting the butter.

Advertisement

Washing and Collecting the Butter

Once the cream has transformed into a rich and creamy spread, it’s time for you to wash and collect the butter. Washing the butter is an important step to remove any residual buttermilk, which can cause the butter to spoil faster. Here’s how to properly wash and collect the butter for best results:

  • Fill a bowl with cold water.
  • Place the butter in the water and gently knead it with your hands.
  • As you knead, you will notice the water turning cloudy. This is the buttermilk being released from the butter.
  • Drain the cloudy water and refill the bowl with fresh cold water.
  • Repeat the process of kneading and draining until the water remains clear.

By washing the butter thoroughly, you ensure its longevity and enhance its flavor.

Once washed, collect the butter in a clean container and refrigerate for later use.

Flavoring Your Homemade Butter

To enhance the taste of your homemade butter, you can easily add various flavorings such as herbs, spices, or even honey. Experimenting with different ingredients can take your butter to a whole new level of deliciousness.

Advertisement

Herbs like thyme, rosemary, and basil can infuse your butter with a fresh and aromatic flavor. Spices like cinnamon, nutmeg, and cardamom can add warmth and complexity. For a touch of sweetness, try adding honey or maple syrup.

The key to a successful flavoring is to start with a small amount and gradually add more until you achieve the desired taste. Remember to mix the flavorings well into the butter to ensure an even distribution.

Storing and Preserving Butter

Now that you’ve learned how to flavor your homemade butter, let’s talk about storing and preserving it to prevent spoilage.

Proper storage techniques can help maintain the freshness and flavor of your butter for a longer period of time. Here are some tips to keep in mind:

  • Keep it refrigerated: Butter should always be stored in the refrigerator, preferably in an airtight container to prevent it from absorbing any odors.

  • Use a butter dish: If you prefer to keep your butter at room temperature for easier spreading, use a butter dish with a lid to protect it from air exposure.

  • Wrap it properly: If you buy butter in bulk or have leftovers, wrap it tightly in wax paper or aluminum foil to prevent oxidation and maintain its quality.

  • Avoid direct sunlight: Butter should be kept away from direct sunlight or any source of heat, as exposure to these elements can cause it to spoil quickly.

  • Check the expiration date: Lastly, always check the expiration date on your butter and use it before it goes bad.

Using Leftover Buttermilk

If you have any leftover buttermilk, don’t let it go to waste – you can use it in various recipes to add a tangy flavor and creamy texture. Buttermilk is not only versatile in cooking but also offers several health benefits. It is low in fat and calories, making it a healthier alternative to whole milk or cream. Buttermilk is also rich in calcium, which is essential for strong bones and teeth. Additionally, it contains probiotics that promote a healthy gut and boost the immune system. When used in baking, buttermilk helps to tenderize and moisten the baked goods, resulting in a lighter and fluffier texture. It is commonly used in pancakes, biscuits, cakes, and muffins. Here are some ideas on how to incorporate leftover buttermilk into your baking:

Advertisement
Recipe Quantity
Buttermilk Pancakes 1 cup
Buttermilk Biscuits 1/2 cup
Buttermilk Pound Cake 1 1/4 cups
Buttermilk Muffins 3/4 cup
Buttermilk Cornbread 1 cup

Conclusion

In conclusion, making butter from milk is a simple process that can be done at home. By selecting the right milk and separating it into cream and skim milk, you can then churn the cream to create butter.

Washing and collecting the butter is important to remove any excess buttermilk, and you can also add flavorings to enhance the taste.

Did you know that homemade butter contains higher levels of vitamins and minerals compared to store-bought butter? So, give it a try and enjoy the nutritional benefits of your own homemade butter.

Continue Reading
Advertisement

Recipes & Culinary Uses

10 Steps to Use a Butter Mold for Beautiful Creations

Published

on

By

An image showcasing the step-by-step process of using a butter mold: a hand pressing softened butter into the intricately carved mold, gently removing the mold to reveal a beautifully shaped butter creation

I really love butter and find it fascinating to use a butter mold to turn a basic block of butter into a beautiful work of art.

The smooth curves and intricate designs not only make your butter look stunning, but also add an extra touch of elegance to your table.

In this article, I’ll guide you through the process of using a butter mold, from choosing the right mold to storing and caring for it.

Get ready to elevate your butter game and impress your guests with this delightful technique.

Key Takeaways

  • Consider the size, design, and material of the mold
  • Soften the butter at room temperature for a smooth texture
  • Press the butter firmly into the mold using a gentle rocking motion
  • Run a butter knife along the edges of the mold to loosen the butter for easy removal

Choosing the Right Butter Mold

Advertisement

To choose the right butter mold, you’ll want to consider the size and design that best suits your needs.

When it comes to decorating options, there are a variety of choices available. Some molds have intricate patterns that can create beautifully detailed butter shapes, while others have simple and elegant designs. It all depends on your personal preference and the style you want to achieve.

Additionally, you may also want to consider alternative materials for your butter mold. While traditional molds are made of wood or ceramic, there are now molds available in silicone and plastic. These materials are durable, easy to clean, and offer more flexibility when it comes to releasing the butter from the mold.

Ultimately, the choice is yours, but taking these factors into consideration will ensure you find the perfect butter mold for your needs.

Preparing the Butter for Molding

When it comes to preparing the butter for molding, there are a few key points to keep in mind.

Advertisement

First and foremost, softening the butter is crucial for achieving a smooth and even texture. To do this, I recommend leaving the butter at room temperature for about 30 minutes before starting the molding process.

Secondly, choosing the right mold is essential for creating beautiful and intricate designs. Look for molds that are made of high-quality materials, such as silicone or stainless steel, and have intricate patterns that will transfer onto the butter.

Lastly, properly filling the mold is important to ensure that the design is clear and defined. Make sure to press the softened butter firmly into all the nooks and crannies of the mold, using a spatula or the back of a spoon.

Softening the Butter

Start by letting the butter sit at room temperature to soften it before using the butter mold. Softening the butter is an essential step to ensure a smooth and easy molding process.

When the butter is at room temperature, it becomes pliable and malleable, making it easier to press into the mold and achieve the desired shape. Trying to mold cold or hard butter can be frustrating and may result in uneven shapes or difficult release from the mold.

Advertisement

To soften the butter, simply remove it from the refrigerator and let it sit at room temperature for about 30 minutes to an hour, depending on the temperature of your kitchen.

Once the butter has softened, it will be ready to be molded into beautiful and decorative shapes using your butter mold.

Choosing the Mold

To choose the perfect mold, you’ll want to consider the size, design, and material that best suits your butter molding needs. When it comes to butter mold materials, there are a few options to choose from. Here are some popular choices:

  1. Silicone: This material is flexible and easy to clean, making it a great option for intricate designs and easy release of the butter.

  2. Stainless Steel: Known for its durability, stainless steel molds are perfect for creating uniform shapes and designs.

  3. Wood: If you prefer a more traditional look, wooden molds are a great choice. They add a rustic charm to your butter and are often handcrafted.

  4. Ceramic: Ceramic molds are not only functional but also decorative. They come in a variety of colors and designs, adding a touch of elegance to your butter.

Consider the design and material that aligns with your style and needs, and soon you’ll be creating beautifully shaped butter masterpieces.

Properly Filling the Mold

As I’m filling the mold, I make sure to press the butter firmly to eliminate any air bubbles. This is an important step in properly using a butter mold.

Advertisement

Filling the mold is where you can get creative with different techniques and designs. One popular technique is layering different colored butters to create a marbled effect. Another technique is adding herbs or spices to the butter for a flavorful twist.

When filling the mold, it’s important to work quickly to prevent the butter from melting. If the butter is too soft, it won’t hold its shape in the mold. If this happens, simply refrigerate the butter until it firms up and try again.

With these filling techniques and troubleshooting tips, you’ll be able to create beautifully shaped butter every time.

Filling the Butter Mold

First, make sure you have softened the butter before filling the mold. Softened butter is easier to work with and will result in a smoother and more even mold. Once you have your softened butter ready, here are some tips for filling the butter mold:

  1. Fill the mold slowly and carefully to avoid any air pockets or uneven distribution.
  2. Use a small spatula or butter knife to press the butter into all the nooks and crannies of the mold.
  3. Smooth the surface of the butter with the back of the spatula or knife for a neat and clean finish.
  4. If you want to add a creative touch, consider adding herbs, spices, or even edible flowers to the butter before filling the mold for a unique and flavorful design.

By following these steps, you will be able to create beautifully shaped and delicious butter creations with your mold.

Don’t forget to clean and maintain your butter mold regularly to ensure its longevity and functionality. With the right maintenance and some creative butter mold designs, your butter will be the talk of the table.

Advertisement

Pressing the Butter Into Shape

Shaping the perfect mold is essential for creating visually appealing and evenly distributed butter. To achieve this, I will discuss various techniques for achieving evenness in the butter mold.

These techniques will not only ensure a beautiful end result, but also allow for easy removal of the butter from the mold.

Shaping the Perfect Mold

To create the perfect mold, you’ll need to press the softened butter firmly into the mold and smooth it out. This step is crucial for achieving a well-defined shape and ensuring that your butter mold turns out beautifully.

Here are some shaping techniques and troubleshooting tips to help you along the way:

  1. Use a gentle rocking motion while pressing the butter into the mold to ensure even distribution.
  2. If the butter sticks to the mold, try dusting it lightly with powdered sugar or flour.
  3. For intricate designs, use a small spatula or butter knife to carefully push the butter into every nook and cranny.
  4. If the butter cracks or breaks while unmolding, refrigerate it for a few minutes to firm it up before trying again.

By following these shaping techniques and troubleshooting tips, you’ll be well on your way to creating stunning butter molds.

Now, let’s explore some techniques for achieving evenness in your molds.

Advertisement

Techniques for Evenness

For achieving evenness in your molds, it’s important to evenly distribute the softened butter and ensure a smooth texture. Balancing butter is key to achieving uniformity, and there are a few techniques that can help you achieve this.

First, make sure your butter is at the right temperature. It should be softened but not melted. This will make it easier to spread evenly in the mold.

Next, use a spatula or a butter knife to evenly distribute the butter in the mold. Start from the center and work your way outwards, spreading the butter in a smooth, even layer. Take your time and be gentle to avoid any air bubbles or uneven spots.

Finally, give the mold a gentle shake or tap on the counter to settle the butter and ensure it fills all the nooks and crannies.

With these techniques, you’ll be able to achieve perfectly balanced and uniform butter molds every time.

Advertisement

Removing the Butter From the Mold

Once the butter has solidified in the mold, you can gently press on the sides to release it. However, there may be instances when you encounter issues with removing the butter from the mold. Don’t worry, troubleshooting butter mold issues is a common challenge that can be easily overcome. Here are some tips to help you out:

  1. Use a butter knife: Run a butter knife along the edges of the mold to loosen the butter. This will make it easier to release.

  2. Warm the mold: If the butter is not coming out easily, try warming the mold slightly by placing it in warm water for a few seconds. This will help soften the butter and facilitate its release.

  3. Chill the mold: On the other hand, if the butter is too soft and sticky, chilling the mold in the refrigerator for a few minutes can firm it up and make it easier to remove.

  4. Use non-stick molds: Investing in non-stick butter molds can make the process of removing the butter effortless, as the non-stick coating ensures smooth release every time.

In addition to using butter molds for their intended purpose, they can also be repurposed for other creative uses. Some alternative uses for butter molds include shaping homemade chocolates, molding bath bombs, or creating decorative soap bars. So, don’t limit yourself to just butter-making, let your imagination run wild!

Storing and Caring for the Butter Mold

Now that you’ve successfully removed the butter from the mold, it’s important to properly store and care for it. Storing butter molds requires a little extra attention to ensure they remain in good condition and ready for future use.

One of the most important steps in caring for butter molds is cleaning them after each use. This helps to prevent any residue or odors from transferring to the next batch of butter. To clean the mold, simply wash it with warm water and mild soap, making sure to remove any butter remnants. Avoid using harsh scrub brushes or abrasive cleaners, as these can damage the delicate designs on the mold.

Once the mold is clean and dry, it’s time to store it. I find it helpful to store butter molds in a cool, dry place away from direct sunlight. This helps to prevent any warping or discoloration. Additionally, you can wrap the mold in a clean cloth or place it in a protective container to further protect it from dust and potential damage.

Advertisement

Overall, with proper cleaning and storage, your butter molds will continue to bring beauty and elegance to your homemade butter creations for years to come.

Using Butter Molds for Special Occasions

To add an elegant touch to your special occasions, simply press softened butter into the intricately designed molds. Butter molds come in a variety of beautiful designs, allowing you to create unique and eye-catching butter shapes that will impress your guests.

Here are some creative butter mold ideas to inspire you:

  1. Floral designs: Use molds with intricate flower patterns to create delicate and beautiful butter flowers that will brighten up your table.

  2. Seasonal shapes: From snowflakes to pumpkins, choose butter mold designs that reflect the current season or holiday for a festive touch.

  3. Animal motifs: Butter molds in the shape of animals can be a fun and whimsical addition to your special occasion. Think butterflies, birds, or even farm animals.

  4. Monograms and initials: Personalize your butter with molds that feature monograms or initials, adding a sophisticated touch to your table setting.

By using these creative butter mold ideas, you can elevate your special occasions and delight your guests with the artistic and delicious addition of shaped butter.

Now, let’s move on to troubleshooting common issues with butter molds.

Advertisement

Troubleshooting Common Issues With Butter Molds

If you’re having trouble with your butter molds, here are some tips to help you troubleshoot common issues.

One common mistake is not properly greasing the mold before use. This can result in the butter sticking and not releasing cleanly. To avoid this, make sure to thoroughly grease the mold with melted butter or non-stick cooking spray.

Another common issue is using butter that is too soft or melted. This can cause the butter to lose its shape and not hold the intricate design of the mold. To prevent this, chill the butter in the refrigerator until it is firm but still pliable.

Lastly, make sure to press the butter firmly into the mold to ensure all the details are captured.

With these troubleshooting tips in mind, you’ll be able to create beautifully molded butter every time.

Advertisement

Frequently Asked Questions

How Do I Clean a Butter Mold After Use?

After using a butter mold, cleaning it is essential. To keep it sanitized, I wash it with warm soapy water and use a soft brush to remove any residue. Then, I let it air dry before storing it.

Can I Use a Butter Mold for Other Types of Spreads Besides Butter?

Oh, let me tell you, using a butter mold for spreads is a game changer! Not only can you shape other spreads like cream cheese or nut butter, but it also adds a touch of elegance to your presentation.

Can I Use a Silicone Mold for Shaping Butter?

Yes, you can use a silicone mold instead of a butter mold for shaping butter. The benefits of using a butter mold include easy removal and precise shapes. Silicone molds offer alternatives for shaping butter in unique and creative ways.

How Long Does It Take for the Butter to Set in the Mold?

It usually takes about 1-2 hours for butter to set in a mold. To speed up the process, you can place the mold in the refrigerator. If you’re having issues with the butter not setting, try using colder butter or adjusting the temperature.

Can I Freeze the Butter in the Mold?

Sure, you can definitely freeze butter in a mold! It’s a great way to keep it fresh and ready for future use. Plus, butter molds can also be used for shaping other ingredients like ice cream or chocolate.

Advertisement

Conclusion

After mastering the art of using a butter mold, I feel like a sculptor crafting a masterpiece. The process of choosing the perfect mold, preparing the butter, and pressing it into shape is akin to molding clay into a beautiful sculpture.

The satisfaction of removing the butter from the mold, perfectly formed and ready to be enjoyed, is like unveiling a work of art. With proper care and storage, your butter mold will become a cherished tool in your kitchen arsenal.

So go forth, embrace the artistry, and create buttery masterpieces for all occasions!

Continue Reading

Recipes & Culinary Uses

How to Tell if Butter Is Rancid: A Simple Guide

Published

on

By

An image showcasing a close-up shot of a stick of butter with its pale yellow color transformed into a dull, grayish hue

Were you aware that 20% of households are unknowingly using rancid butter? This article will demonstrate a simple way to check if your butter has spoiled.

By examining its physical appearance, checking for mold or discoloration, assessing the texture and consistency, and conducting a taste test, you can ensure you’re using fresh and safe butter in your cooking.

Additionally, I’ll provide insights on shelf life and expiration dates to further guide you in maintaining butter quality.

Key Takeaways

  • Rancid butter can be identified by its distinct yellow or brown color and greasy or oily texture.
  • The sour smell of rancid butter indicates spoilage and consuming it can have negative effects on health.
  • Mold or discoloration, ranging from yellow to brown, is a clear sign of rancidity in butter.
  • Checking the expiration date and properly storing butter are crucial in preventing spoilage and maintaining its freshness and quality.

Physical Appearance and Smell

I can quickly tell if butter is rancid by examining its physical appearance and smelling it. Rancid butter has a distinct yellow or brown color instead of the usual pale yellow. It may also have a greasy or oily texture and a sour smell.

Advertisement

It’s important to identify rancid butter because consuming it can have negative effects on health. Rancidity occurs when the fat molecules in butter break down, producing harmful substances that can cause digestive issues and even food poisoning.

To prevent butter from going rancid, proper storage techniques should be followed. Butter should be stored in an airtight container in the refrigerator, away from strong odors. It’s also recommended to use butter within the expiration date for optimal freshness and taste.

Check for Mold or Discoloration

Inspect the butter for any visible signs of mold or discoloration. Mold can appear as fuzzy spots or patches, while discoloration can range from yellow to brown. These are indicators that the butter may be rancid and should not be consumed. Proper storage conditions play a crucial role in preventing butter from going bad. Butter should be kept in a cool, dry place away from direct sunlight and heat sources. Additionally, the packaging of butter can affect its shelf life. Butter that is packaged in airtight containers or wrapped tightly in foil or parchment paper helps to maintain its freshness. It is important to check the butter for any signs of mold or discoloration before using it to ensure its quality and safety.

Storage Conditions Butter Packaging
Cool and dry place Airtight container
Away from sunlight and heat sources Tightly wrapped in foil or parchment paper
Properly sealed packaging

Butter Texture and Consistency

Advertisement

When I touch the butter, I can feel its texture and consistency. Butter is typically solid at room temperature, but it softens and becomes spreadable when warmed. This is due to its melting point, which is around 32 to 35 degrees Celsius (90 to 95 degrees Fahrenheit).

The texture of butter should be smooth and creamy, without any lumps or graininess. It should also be easy to spread and have a pleasant, rich flavor.

To maintain the texture and freshness of butter, it’s important to store it properly. Keep butter in an airtight container or wrap it tightly in wax paper or foil to prevent it from absorbing odors from other foods in the refrigerator. Additionally, store butter away from strong-smelling foods, as it can easily pick up their flavors.

Taste Test

After unwrapping the butter, I take a small bite to assess its flavor and freshness. The taste of butter can provide important clues about its quality and possible spoilage. If the butter tastes off or has a sour or rancid flavor, it is a clear sign that it has gone bad. Other signs of spoilage include a strong or unpleasant odor and a discolored or moldy appearance. Proper butter storage is crucial to prevent spoilage. It is recommended to store butter in the refrigerator, preferably in an airtight container to prevent absorption of odors. It is also important to check the expiration date and discard any butter that is past its prime. By conducting a simple taste test and being aware of the signs of spoilage, you can ensure that your butter is fresh and safe to consume.

Signs of Spoilage
Off flavor Sour or rancid taste Strong or unpleasant odor Discolored or moldy appearance

Shelf Life and Expiration Date

Advertisement

I can easily determine the shelf life and expiration date of my butter by checking the label on the packaging. This information is crucial in ensuring that the butter I use is fresh and safe to consume.

Here are some key points to keep in mind regarding the shelf life and storage recommendations of butter:

  • Butter typically has a shelf life of about 4-6 months from the date of production.
  • It’s important to store butter in a cool and dry place, away from direct sunlight and heat sources.
  • Keeping butter refrigerated can help extend its shelf life, especially during warmer months.
  • If the butter starts to develop an off smell or taste, or if there are any signs of mold or discoloration, it’s best to discard it.

Frequently Asked Questions

Can You Still Use Butter if It Has a Slightly Sour Smell?

If butter has a slightly sour smell, it could be an indication of spoilage. When discussing whether butter can still be used, it’s important to consider other spoilage indicators as well. These include a change in color or texture, the presence of mold, or a rancid taste.

If only the smell is slightly sour, it might be safe to use, but it’s recommended to rely on other indicators as well to ensure the butter is still fresh.

Is It Safe to Consume Butter With a Slight Change in Color?

It’s important to consider if it’s safe to consume butter with a slight change in color.

Advertisement

The color of butter can vary depending on factors like the cow’s diet or the butter-making process.

However, if the change in color is accompanied by a strong, unpleasant odor or a sour taste, it could be a sign of rancidity.

It’s always best to err on the side of caution and discard butter that shows signs of being rancid.

What Should I Do if My Butter Has a Grainy or Clumpy Texture?

If my butter has a grainy or clumpy texture, I first check if it’s still safe to consume. However, without the context of how to tell if butter is rancid, it can be difficult to determine the cause.

It’s important to store butter properly to prevent texture changes.

Advertisement

If the butter is still safe, I can use it for alternative purposes like cooking or baking where the texture won’t matter as much.

Can Butter Taste Different Without Being Rancid?

Butter flavor can vary without the butter being rancid. Different factors like the cow’s diet, processing methods, and storage conditions can all affect the taste of butter.

However, if there are signs of rancidity, such as a sour or off smell, a yellow or brown color, or a bitter taste, then it’s likely that the butter has gone bad.

It’s always best to trust your senses and discard any butter that appears to be rancid.

How Can I Extend the Shelf Life of Butter Past Its Expiration Date?

To extend the shelf life of butter and preserve its freshness past its expiration date, there are a few things I’ve found helpful.

Advertisement

First, make sure to store it in an airtight container in the refrigerator. This will help prevent exposure to air and moisture, which can accelerate spoilage.

Additionally, you can also freeze butter to extend its shelf life even further. Just make sure to wrap it tightly in freezer-safe packaging.

These methods have helped me keep my butter fresh for longer periods of time.

Conclusion

In conclusion, determining whether butter is rancid can be quite a task. By relying on our senses and conducting various tests, we can gauge its freshness.

Remember, it’s always better to be safe than sorry when it comes to consuming questionable butter. So next time you’re unsure, trust your instincts and give it a thorough inspection. After all, who doesn’t love a little adventure in their dairy aisle?

Advertisement
Continue Reading

Recipes & Culinary Uses

Easy French Bread Toasted in Oven with Butter

Published

on

By

An image capturing the golden-brown French bread slices emerging from the oven

I really enjoy treating myself to warm, buttery toast, especially when it’s made with perfectly toasted French bread.

In this article, I’ll guide you through the simple steps of toasting French bread in the oven with a luscious butter mixture.

From selecting the ideal loaf to achieving that golden, crispy perfection, you’ll have a delicious treat in no time.

So, grab your apron and let’s get started on this mouthwatering journey!

Key Takeaways

  • Choose fresh French bread with a golden brown, crispy crust and a soft, airy inside
  • Soften butter and mix with herbs and spices to create flavorful spreads
  • Use a serrated bread knife to cut the bread into even slices and store them properly
  • Preheat the oven to 375 degrees Fahrenheit, spread the butter mixture generously, and toast the bread for about 10-12 minutes for a golden, crispy crust and a soft center.

Selecting the Perfect French Bread

Advertisement

When selecting the perfect French bread, make sure it’s fresh and has a nice crust. Choosing the right ingredients is crucial for a delicious outcome.

Start by finding the best bakery in your area that specializes in French bread. Look for a bakery that uses high-quality ingredients and traditional baking methods. A good French bread should have a golden brown crust that is crispy and slightly chewy. The inside should be soft and airy, with a subtle tangy flavor. Avoid bread that feels too hard or dense, as it may not toast properly.

Now that you’ve found the perfect French bread, it’s time to move on to preparing the butter mixture for that extra burst of flavor.

Preparing the Butter Mixture

To make the butter mixture, simply soften the butter and mix it with your desired herbs and spices. It’s important to use softened butter as it will be easier to incorporate the herbs and spices evenly. Once the butter is soft, I like to add a pinch of salt and a sprinkle of freshly chopped parsley for a burst of flavor.

Here are a couple of ideas for alternative spreads you can make by adding herbs to your butter mixture:

Advertisement
  • Garlic and Herb Butter:
    Mix softened butter with minced garlic, chopped fresh thyme, and a squeeze of lemon juice. Spread it on the toasted French bread for a savory and aromatic taste.

  • Spicy Herb Butter:
    Combine softened butter with chopped fresh cilantro, minced jalapeno, and a dash of cayenne pepper. Spread it on the toasted French bread for a kick of heat and a burst of herbaceousness.

These alternative spreads will elevate your toast and make it even more delicious and flavorful.

Slicing the French Bread

Start by making sure the knife is sharp and then use it to cut the loaf of bread into evenly-sized slices. Choosing the right knife for the job is important. There are different types of bread knives, each designed to make slicing bread easier.

A serrated bread knife with a long, narrow blade is ideal for cutting through crusty bread without squishing it. Once you have your bread sliced, you may be wondering how to store the leftovers.

Advertisement

To keep your sliced bread fresh for longer, you can store it in a resealable plastic bag or wrap it tightly in plastic wrap. It’s best to keep the bread at room temperature or in a bread box to maintain its texture and prevent it from drying out.

With the right knife and storage method, you can enjoy freshly sliced bread whenever you want.

Preheating the Oven

When it comes to baking, getting the oven temperature just right is crucial for achieving the perfect results. In this discussion, we’ll explore the optimal oven temperature for different dishes, whether it’s a gooey chocolate chip cookie or a savory roasted chicken.

Additionally, we’ll delve into the age-old debate of whether to use butter or oil in our baking recipes, examining the flavor, texture, and health implications of each choice.

Optimal Oven Temperature

For the optimal oven temperature, preheat it to 375 degrees Fahrenheit. This is the perfect temperature to achieve a golden, crispy crust while maintaining a soft, fluffy center when toasting French bread with butter.

Advertisement

To make your toasting experience even more enjoyable, here are some helpful tips:

  • Best Butter Brands:

  • Kerrygold: Known for its rich and creamy texture, Kerrygold butter adds a delicious flavor to the bread.

  • Plugrá: With a higher butterfat content, Plugrá butter provides a luxurious and velvety touch to the French bread.

  • Alternative Oven Methods:

  • Broil Setting: If you’re looking for a quicker toasting option, switch the oven to the broil setting for a few minutes, but keep a close eye to prevent burning.

  • Toaster Oven: If you don’t have a regular oven, a toaster oven can be a great alternative. Adjust the temperature and time accordingly.

Experiment with different butter brands and alternative oven methods to find the perfect combination that suits your taste and preference. Enjoy the delightful experience of toasting French bread with butter!

Butter or Oil?

To achieve a different flavor profile, you may want to consider using oil instead of butter when toasting your bread. While butter is a classic choice, using oil can add a unique twist to your french bread.

But before you make your decision, let’s consider the butter vs margarine debate. While margarine is often touted as a healthier alternative, it is actually higher in trans fats and artificial ingredients. On the other hand, butter, when consumed in moderation, can provide several health benefits. It contains essential vitamins and minerals, including vitamin A, vitamin D, and iodine.

Additionally, butter is a good source of healthy saturated fats, which can help improve cholesterol levels and support brain function. So, if you’re looking for a delicious and nutritious option, consider using butter when toasting your bread.

Advertisement

Applying the Butter Mixture

Spread the butter mixture generously onto the sliced French bread. As I pick up the knife, the scent of warm, melted butter fills the air, making my mouth water in anticipation. The butter is soft, easily spreading onto the bread, creating a smooth and even coating. The key here is to ensure that every inch of the bread is covered, allowing for an indulgent and flavorful bite.

As the butter meets the bread, it begins to melt, seeping into the crevices and adding richness to each slice. The buttery aroma intensifies, promising a delightful toasting experience. I can’t help but imagine the golden crust forming in the oven, the butter enhancing the bread’s flavor and creating a heavenly combination.

✨ The benefits of applying an even coating of melted butter:

  • It helps to prevent the bread from drying out during toasting
  • It adds a rich, buttery flavor that complements the crispy texture

✨ Tips for melting the butter:

  • Use room temperature butter for easier spreading
  • Alternatively, melt the butter gently in the microwave before spreading for a more consistent coating

Now that the butter mixture is applied, it’s time to move on to the next step: toasting the French bread to perfection.

Toasting the French Bread

As I place the prepared slices onto the baking sheet, I can already imagine the satisfying crunch that awaits when they come out of the oven.

The browning process is crucial to achieving that perfect texture and flavor.

Advertisement

I preheat the oven to 375 degrees Fahrenheit and let the bread toast for about 10-12 minutes.

The edges turn a beautiful golden brown, while the center remains soft and pillowy.

The aroma of warm bread fills the kitchen, making my mouth water in anticipation.

Once the bread is toasted to perfection, I take it out of the oven and let it cool slightly before adding any toppings.

While butter is a classic choice, there are also alternative toppings such as garlic butter, olive tapenade, or melted cheese that can take this simple French bread to the next level of deliciousness.

Advertisement

Checking for Golden Perfection

Once the timer goes off, I quickly check the slices of bread for that perfect golden brown color. The anticipation builds as I carefully open the oven door, revealing the aromatic toasted French bread.

The sight of the bread, perfectly toasted and buttered, makes my mouth water in anticipation of the delicious flavors to come. As I inspect each slice, I ensure that the browning is even across the entire surface, a sign of a well-toasted bread.

The warmth of the oven has brought out the natural flavors of the bread, creating a crisp and crunchy exterior that contrasts beautifully with the soft and fluffy interior. And to add a burst of garlic flavor, I sprinkle a hint of garlic powder on top, enhancing the overall taste experience.

As I take a bite, the combination of the golden brown crust, the rich buttery spread, and the subtle garlic undertones create a truly irresistible treat.

Serving and Enjoying the Toasted French Bread

When you’re ready to enjoy, grab a plate and savor the deliciously crisp and garlicky slices of your perfectly toasted creation.

Advertisement

Now that your French bread is toasted to golden perfection, it’s time to explore the endless possibilities of pairing options and creative toppings.

For a classic option, spread a generous layer of creamy butter over the warm bread. The combination of the crispy exterior and the smooth buttery goodness is simply divine.

If you’re feeling adventurous, try topping your toast with fresh avocado slices and a sprinkle of sea salt for a creamy and savory twist.

Or, for a sweet variation, spread some Nutella and sliced strawberries on top, creating a delightful blend of rich chocolate and juicy fruit.

The possibilities are endless, so go ahead and experiment with your favorite flavors and textures. Toasted French bread is the perfect canvas for culinary creativity.

Advertisement

Frequently Asked Questions

How Do I Store French Bread to Keep It Fresh Before Toasting?

To keep French bread fresh before toasting, I store it in a paper bag at room temperature. This helps maintain its crustiness while preventing it from drying out. It’s important not to store it in plastic as it can make the bread soggy.

Can I Use a Different Type of Bread Instead of French Bread for This Recipe?

Using a different bread type can add variety to your toast. However, French bread’s crusty texture and buttery flavor make it the ideal choice. Feel free to experiment with alternative toppings for extra deliciousness.

Is It Necessary to Preheat the Oven for Toasting French Bread?

Preheating the oven for toasting French bread is necessary. It allows the bread to cook evenly and helps to achieve that perfect crispy texture. The benefits of preheating extend to baking as well, ensuring consistent results.

Can I Use Margarine or Oil Instead of Butter for the Butter Mixture?

Sure, you can use margarine or oil instead of butter for the butter mixture when toasting French bread. For example, I once used olive oil and it gave the bread a nice, savory flavor.

What Are Some Toppings or Spreads That Pair Well With Toasted French Bread?

When it comes to creative toast toppings, the possibilities are endless. Whether you prefer sweet or savory, you can’t go wrong with options like avocado and tomato, Nutella and banana, or ricotta and honey. As for cheese pairings, try creamy brie or tangy goat cheese.

Advertisement

Conclusion

As I take a bite of the golden, buttery French bread fresh out of the oven, I am transported to a quaint boulangerie on the streets of Paris. The crispy exterior gives way to a soft, pillowy center, and the rich, creamy butter melts in my mouth.

The aroma of toasted bread fills the air, enticing everyone around me. With each bite, I savor the simple yet exquisite pleasure of this delicious treat.

Toasting French bread in the oven with butter has elevated my culinary experience to new heights, and it can do the same for you. Bon appétit!

Continue Reading
Advertisement

Affiliate disclaimer

As an affiliate, we may earn a commission from qualifying purchases. We get commissions for purchases made through links on this website from Amazon and other third parties.

Advertisement

Trending