Connect with us

Recipes & Culinary Uses

Create Homemade Butter Without Heavy Cream in 5 Easy Steps

Published

on

An image that showcases the step-by-step process of churning butter by hand

Recently, I discovered an intriguing method that enabled me to create butter without needing heavy cream. That’s correct – you can make homemade butter using just a handful of basic ingredients.

It was a revelation, and I couldn’t wait to share it with you. In this article, I will guide you through the step-by-step process of making your own butter using alternative substitutions.

So let’s get started and churn up some deliciousness!

Key Takeaways

  • Use milk instead of heavy cream as the base ingredient for homemade butter
  • Cultivate the milk using yogurt or a specialized butter starter
  • Churn the milk until it separates into butter and buttermilk
  • Rinse the butter to remove excess buttermilk and store it properly to maintain its freshness and consistency

Necessary Ingredients

To make butter without heavy cream, you’ll need just two ingredients: milk and a pinch of salt. While heavy cream is traditionally used to make butter, there are alternative methods that can be equally effective.

Advertisement

One method involves using whole milk and allowing it to separate into cream and buttermilk. By adding a pinch of salt to the milk before allowing it to separate, you can enhance the flavor of the butter.

Another method involves using a blender or a stand mixer to agitate the milk until it separates into butter and buttermilk. Troubleshooting common issues during the butter-making process includes ensuring that the milk is at room temperature and adjusting the speed of the blender or mixer to prevent overheating.

With these alternative methods and troubleshooting techniques, you can easily make butter without heavy cream.

Alternative Substitutions

When it comes to alternative substitutions in baking and cooking, there are several key points to consider.

First, non-dairy options such as almond milk, coconut milk, and soy milk can be used as substitutes for dairy milk. These options provide a suitable alternative for those with lactose intolerance or following a vegan diet.

Advertisement

Second, healthier alternatives can be used to reduce the fat content in recipes without sacrificing taste or texture. For example, using applesauce instead of butter or Greek yogurt instead of sour cream can be great options.

Lastly, experimenting with flavor variations can elevate your dishes and make them more exciting and unique. Adding spices, extracts, or fruits can bring new flavors to your recipes.

Non-Dairy Options

If you’re looking for a non-dairy option, you can try making butter using coconut cream instead of heavy cream. Non-dairy butter alternatives are becoming increasingly popular due to dietary restrictions and health concerns.

Coconut cream is a rich and creamy alternative that can mimic the texture of traditional butter. To create a creamy texture without heavy cream, simply whip coconut cream until it thickens and resembles the consistency of butter. This can be done using a stand mixer or a hand mixer.

The resulting coconut cream butter can be used in a variety of recipes, from spreading on toast to baking and cooking.

Advertisement

Transitioning into healthier alternatives, there are numerous options that can be explored to make butter substitutes that are both delicious and nutritious.

Healthier Alternatives

Looking for a healthier alternative? Try using coconut cream instead of heavy cream to create a rich and creamy butter substitute.

Coconut cream, derived from the flesh of mature coconuts, offers a variety of nutritional benefits compared to store-bought options. Firstly, it is a great source of healthy fats, containing medium-chain triglycerides that can boost metabolism and provide sustained energy. Furthermore, coconut cream is rich in vitamins C and E, which act as antioxidants and support overall immune function.

In comparison to traditional heavy cream, coconut cream is lower in calories and cholesterol, making it a healthier choice for those watching their intake. By using coconut cream as a butter substitute, you can enjoy the same creamy texture and taste, while reaping the nutritional advantages.

Now, let’s explore some exciting flavor variations to enhance your homemade butter substitute.
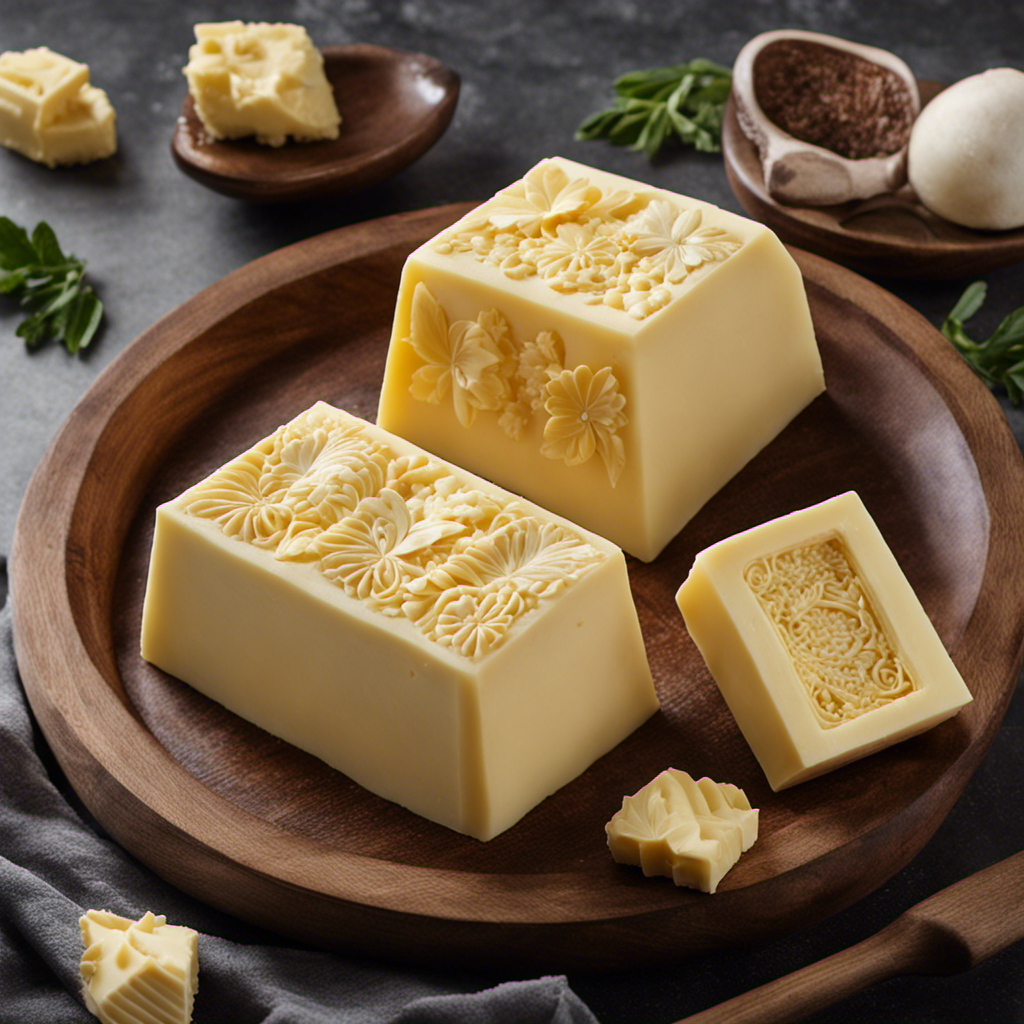
Advertisement

Flavor Variations

To add a unique twist to your homemade butter substitute, try experimenting with different flavor variations. By incorporating creative additions and infused butter options, you can elevate the taste of your butter substitute and create a truly personalized experience.

For a savory option, consider adding herbs like rosemary, thyme, or garlic to your butter substitute. These herbs will impart a delightful aroma and a burst of flavor to your spreads and sauces.

If you prefer a sweeter twist, try adding vanilla extract, cinnamon, or honey. These additions will give your butter substitute a hint of sweetness and make it perfect for spreading on toast or pancakes.

Remember to start with a small amount of the flavoring agent and adjust to taste. With a little experimentation, you can create a butter substitute that suits your preferences and adds a delicious touch to your dishes.

Equipment Needed

You’ll need a blender or food processor to make butter without heavy cream. Here are three essential pieces of equipment you’ll need for this process:

Advertisement
  • Blender or Food Processor: This is the main tool you’ll use to churn the cream and separate the butterfat from the buttermilk.

  • Strainer or Cheesecloth: Once the butter has formed, you’ll need a strainer or cheesecloth to separate the buttermilk from the butterfat.

  • Cold Water: After straining the butter, you’ll need cold water to rinse off any remaining buttermilk and impurities.

When making butter without heavy cream, it’s important to troubleshoot any issues that may arise. Some common troubleshooting tips include adjusting the blending time, ensuring the cream is at the right temperature, and using the right amount of salt (if desired) to enhance flavor.

Now that we have the necessary equipment and troubleshooting tips, let’s move on to the step-by-step instructions for making butter without heavy cream.

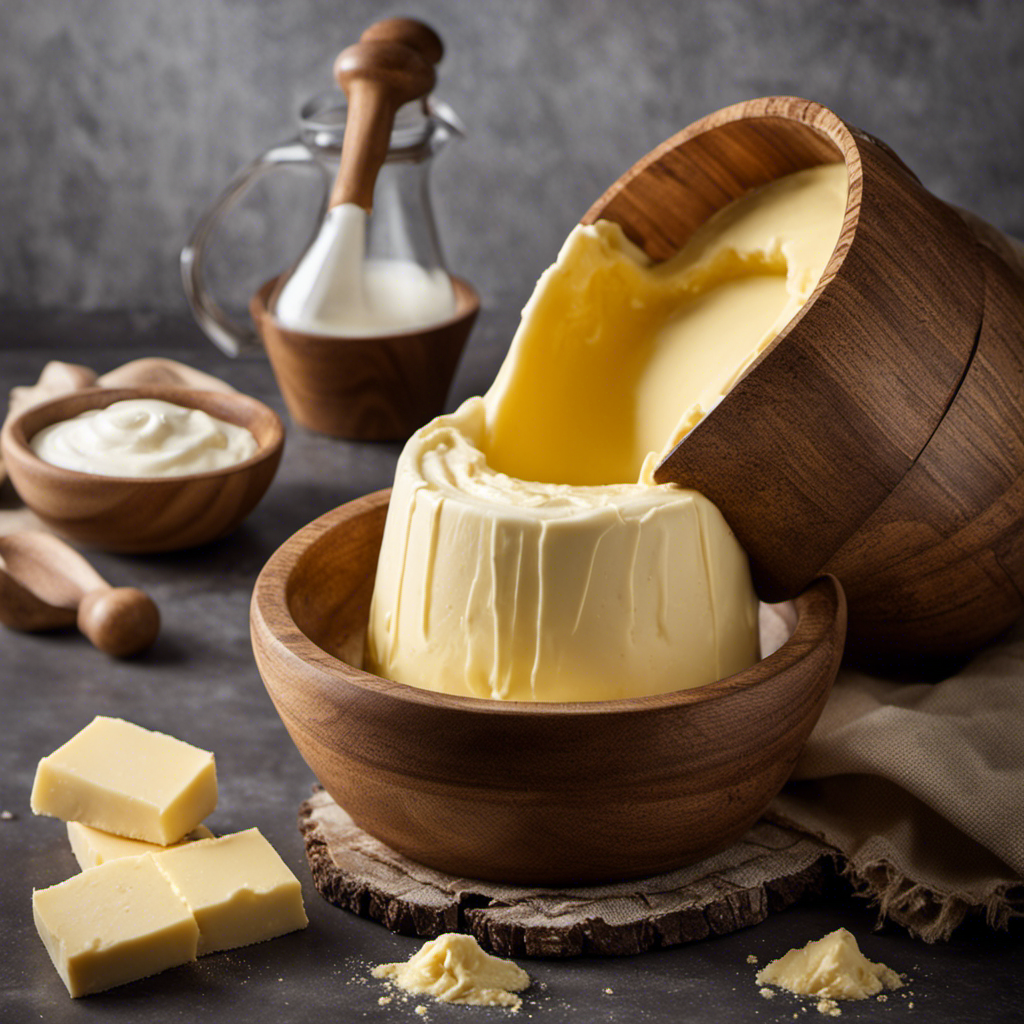
Step-by-Step Instructions

Now that we have all the necessary equipment, let’s dive into the step-by-step instructions for making butter without heavy cream. It’s important to note that there are different methods for making butter, including whipped butter and traditional butter making techniques used in various cultures.

To give you a better understanding of these methods, here’s a comparison table showcasing the differences:

Method Texture Flavor
Whipped Butter Light and airy Mild and creamy
Traditional Dense and creamy Rich and savory
Cultural Varies by region Unique and diverse

As you can see, each method and cultural technique offers its own unique characteristics to the butter. Now, let’s move on to the next section where we will explore some useful tips and tricks to enhance your butter making experience.

Advertisement

Tips and Tricks

Let’s discover some helpful tips and tricks to improve your butter-making experience. Here are three creative techniques and homemade alternatives that can enhance the flavor and texture of your homemade butter:

  • Experiment with different types of milk: Instead of using heavy cream, try using whole milk, buttermilk, or even coconut milk for a unique twist on traditional butter. Each type of milk will contribute its own distinct flavor profile to the final product.

  • Incorporate herbs and spices: Add a burst of flavor to your butter by mixing in herbs like rosemary, thyme, or basil, or spices like garlic powder or smoked paprika. These additions will elevate your butter and make it perfect for spreading on bread or melting over vegetables.

  • Use cultured butter starters: Cultured butter is made by introducing bacterial cultures to the cream before churning. This process adds complexity to the flavor and results in a tangy, slightly sour taste. Cultured butter can be made by using homemade yogurt or purchasing a specialized butter starter.

By following these tips and experimenting with different ingredients, you can create homemade butter that is truly unique and delicious.

Now, let’s explore the next section about storing and using your homemade butter.

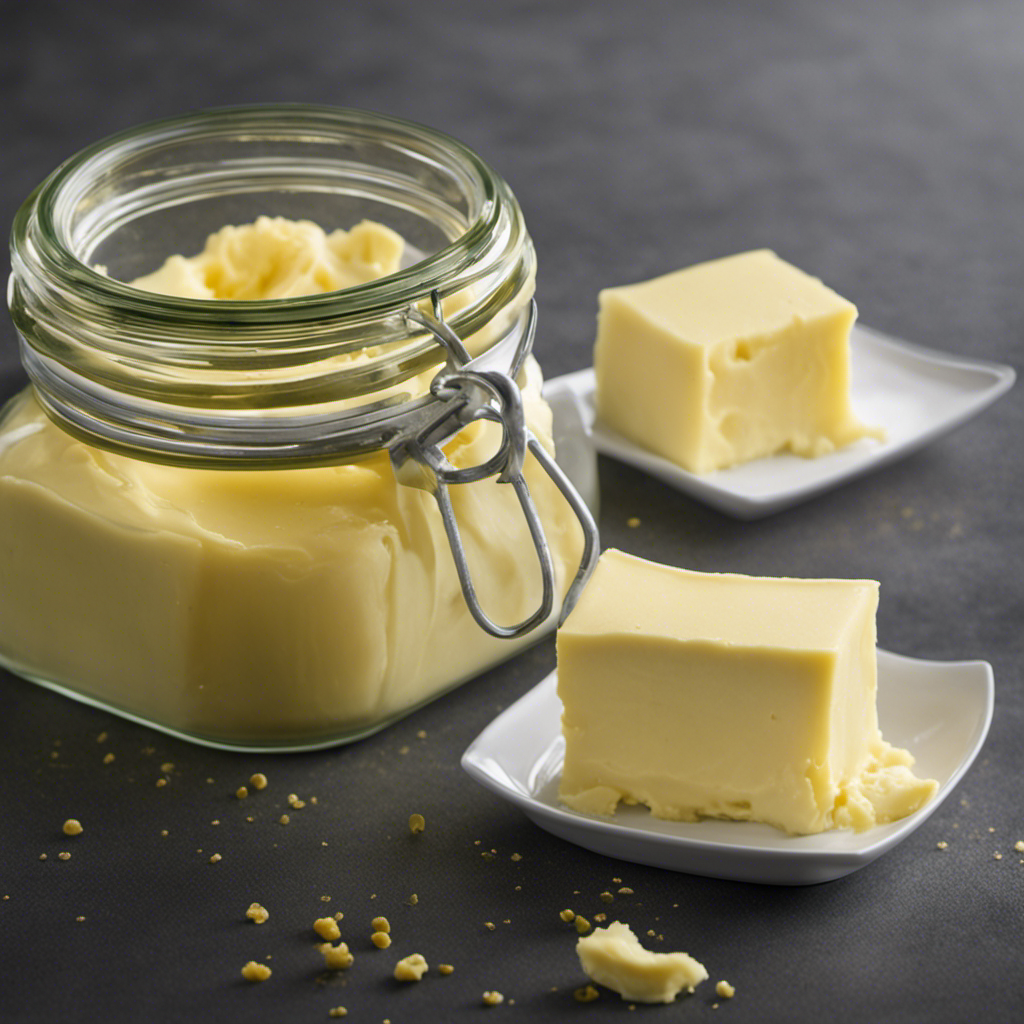
Storing and Using Homemade Butter

To properly store and use your homemade butter, keep it in an airtight container in the refrigerator to maintain its freshness and prevent it from absorbing any unwanted odors.

Storing homemade butter correctly is essential to ensure its quality and taste. The airtight container will protect the butter from exposure to air, which can lead to oxidation and spoilage. It is important to keep the butter chilled at all times to maintain its solid consistency and prevent it from melting.

Advertisement

Additionally, storing homemade butter in an airtight container will prevent it from absorbing any odors from other foods in the refrigerator.

Once stored properly, you can enjoy your homemade butter in various creative recipes, such as flavored compound butters, butter-based sauces, or simply spread it on toast for a delicious treat.

Frequently Asked Questions

Can I Use Low-Fat Milk Instead of Heavy Cream to Make Butter?

Yes, I can use low-fat milk instead of heavy cream to make butter. By following butter making techniques without heavy cream, I can achieve the desired result using a lower fat option.

How Long Does It Take to Make Butter Without Heavy Cream?

It typically takes about 20-30 minutes to make butter without heavy cream. However, the time may vary depending on the method used and the alternative ingredients used. Troubleshooting common problems in homemade butter can help ensure success.

Can I Use a Blender Instead of a Food Processor to Make Homemade Butter?

Yes, a blender can be used as an alternative to a food processor for making homemade butter. However, it may take longer and the texture may not be as smooth.

Advertisement

Can I Add Flavors or Herbs to My Homemade Butter?

Yes, you can enhance the taste of homemade butter by adding flavors or herbs. There are various options for flavored butter, such as garlic, herbs like rosemary or thyme, or even sweet additions like honey or cinnamon. Experiment to find your preferred combination.

How Long Can I Store Homemade Butter in the Refrigerator?

I store homemade butter in the refrigerator for up to two weeks. Using alternative ingredients like whole milk or coconut cream can affect the storage duration, so it’s important to check for freshness regularly.

Conclusion

In conclusion, making butter without heavy cream is a simple and rewarding process. By using alternative substitutions like whole milk or buttermilk, you can still achieve the rich and creamy texture of traditional butter.

With the right equipment and following the step-by-step instructions, anyone can make their own homemade butter. Don’t forget to experiment with different flavors and add-ins to customize your butter to your liking.

So why not give it a try and enjoy the satisfaction of creating something delicious from scratch? Happy butter-making!

Advertisement
Continue Reading
Advertisement

Recipes & Culinary Uses

How to Make Stretchy Butter Slime at Home

Published

on

By

E of a pair of hands kneading a vibrant, glossy blob of butter slime

Were you aware that merely one out of ten individuals successfully create stretchy butter slime from their initial attempt? If you find yourself among the remaining nine, don’t worry, I’ve got your back.

In this article, I will guide you through the process of creating the perfect butter slime that stretches just the way you want it to. From choosing the right ingredients to mastering the secret ingredient, I’ll provide you with the precise steps you need to take for a successful batch of stretchy butter slime.

Key Takeaways

  • Use clear PVA glue for elasticity
  • Adjust activator quantities for desired texture
  • Incorporate lotion to make the slime more pliable and stretchy
  • Proper storage maintains the slime’s texture and stretchiness

Choosing the Right Ingredients

To make your butter slime stretchy, you’ll want to make sure you’re using the right ingredients. One of the most common mistakes people make when attempting to create butter slime is using the wrong type of glue. It is essential to use clear PVA glue, as it provides the necessary elasticity for the slime to stretch.

Another common mistake is using too much or too little activator. Activator, typically made from a mixture of borax and water, is responsible for binding the ingredients and giving the slime its stretchiness. Finding the right balance is crucial for achieving the desired texture.

Advertisement

However, if you don’t have borax, you can use alternative ingredients such as contact lens solution or liquid laundry detergent, which also work as activators. Just make sure to adjust the quantities accordingly to maintain the slime’s stretchiness.

Mixing the Ingredients

Once you’ve got all the ingredients ready, you can start mixing them together to create a smooth and stretchy slime.

To achieve the perfect consistency, it’s important to follow a few key steps.

First, pour the desired amount of glue into a mixing bowl.

Next, add the shaving cream and mix until well combined. This will give the slime its fluffy texture.

Advertisement

Now, it’s time to add the magic ingredient – the contact lens solution. Start by adding a small amount and gradually mix it in until the slime starts to pull away from the sides of the bowl. Be careful not to add too much, as it can make the slime too stiff.

Finally, knead the slime with your hands until it becomes stretchy and pliable. For vibrant colors, consider adding food coloring or glitter before mixing in the contact lens solution. Just a few drops will do the trick.

Now you’re ready to enjoy your homemade butter slime!

Adding the Secret Ingredient

Advertisement

Now, you’ll need to carefully incorporate the secret ingredient into the mixture.

When it comes to making butter slime stretchy, exploring alternative ingredients and experimenting with different ratios is key.

The secret ingredient I recommend is lotion. Lotion contains oils and moisturizers that help make the slime more pliable and stretchy.

Start by adding a small amount of lotion to the mixture and knead it in thoroughly.

Monitor the consistency and texture of the slime as you go. If it’s still not stretchy enough, add a bit more lotion and continue kneading until you achieve the desired stretchiness.

Advertisement

Remember to add the lotion in small increments to avoid making the slime too sticky or wet.

Kneading and Stretching the Slime

Start by incorporating the lotion into the slime mixture and knead it thoroughly to achieve the desired consistency and stretchiness. Kneading is an essential step in making butter slime stretchy. By repeatedly folding and pressing the slime, you are helping to distribute the lotion evenly throughout the mixture, resulting in a smooth and elastic texture.

The benefits of kneading include:

  • Improved stretchiness: Kneading allows the lotion to penetrate the slime, making it more pliable and stretchy.
  • Enhanced durability: The repeated folding and pressing action strengthens the slime, making it less likely to break or tear during play.
  • Better texture: Kneading helps to eliminate any lumps or clumps, resulting in a smoother and more enjoyable slime experience.
  • Increased sensory stimulation: Working the slime with your hands provides a satisfying tactile experience, enhancing sensory development.
  • Relaxation and stress relief: The rhythmic motion of kneading can be soothing and help to reduce anxiety and stress.

Remember to knead the slime thoroughly for optimal results.

Storing and Maintaining Stretchiness

Advertisement

To maintain the stretchiness of your slime, store it in an airtight container to prevent drying out. Storing slime properly is crucial in keeping its texture and stretchiness intact.

When exposed to air, slime can dry out, causing it to become stiff and less stretchy. To prevent this, transfer your slime into a clean and dry airtight container immediately after playing with it. Make sure the container is sealed tightly to minimize air exposure. Avoid leaving the slime uncovered or in open containers, as this will accelerate the drying process.

Additionally, store your slime in a cool and dry place, away from direct sunlight or heat sources, as excessive heat can also affect its stretchiness.

By following these storage precautions, you can maintain the stretchiness of your slime for a longer period of time.

Now, let’s move on to troubleshooting common issues.

Advertisement

Troubleshooting Common Issues

When it comes to making butter slime stretchy, there are a few common mistakes that people often make. These mistakes can lead to a slime that is not as stretchy as desired. However, there are alternative ingredients that can be used to fix these issues and achieve the desired stretchiness.

Some common mistakes include:

  • Using too much or too little activator, which can affect the slime’s texture and stretchiness.
  • Not kneading the slime enough, which can result in a stiff and less stretchy consistency.
  • Adding too much lotion or oil, which can make the slime too soft and not stretchy enough.
  • Using low-quality glue, which may not produce the same stretchy results as higher-quality glue.
  • Not allowing the slime to rest and develop its stretchiness over time.

To fix these issues, alternative ingredients can be used. For example, adding a small amount of borax solution or liquid starch can help increase the stretchiness of the slime. Additionally, using a higher-quality glue or adding a small amount of cornstarch can also improve the slime’s stretchiness.

Frequently Asked Questions

How Long Does It Take for Butter Slime to Dry Out?

It takes approximately 1-2 days for butter slime to dry out completely. To prevent drying out, store it in an airtight container. If it does dry out, add a few drops of lotion or baby oil to revive it.

Can I Use Margarine Instead of Butter in the Recipe?

Yes, you can use margarine as an alternative to butter in a slime recipe. However, keep in mind that margarine may affect the texture and stretchiness of the slime compared to using butter.

What Can I Do if My Butter Slime Becomes Too Sticky?

If my butter slime becomes too sticky, I can try adding a little bit of lotion or baby oil. I can also try kneading it with my hands to help distribute the moisture evenly.

Advertisement

Is It Safe for Children to Play With Butter Slime?

Playing with butter slime can be safe for children. Sensory play has numerous benefits for their development. However, if concerned about safety, there are alternative options available that provide similar tactile experiences without the potential risks of butter slime.

Can I Add Food Coloring to My Butter Slime to Make It More Colorful?

Yes, I can add food coloring to my butter slime to make it more colorful. It’s important to use gel-based coloring for vibrant colors. To store properly, place in an airtight container to prevent drying out.

Conclusion

In conclusion, crafting a stretchy butter slime is an enjoyable and achievable endeavor. By carefully selecting the appropriate ingredients, like glue, cornstarch, and lotion, and skillfully mixing them together, you can create a smooth and malleable slime base.

Adding the secret ingredient, such as model magic clay, enhances its stretchiness and texture. Through patient kneading and stretching, you can achieve the desired elasticity.

Properly storing the slime and addressing any troubleshooting issues will help maintain its stretchiness for prolonged enjoyment.

Advertisement

So why wait? Get your ingredients ready and let the stretchy butter slime-making adventure begin!

Continue Reading

Recipes & Culinary Uses

3 Simple Steps to Make Authentic Danish Butter Cookies

Published

on

By

An image featuring a close-up shot of a golden tray filled with freshly baked Danish butter cookies, showcasing their delicate crumbly texture and beautiful floral-shaped designs

Baking is a passion of mine, and Danish butter cookies rank highly among my favorite desserts to prepare.

Did you know that Danish butter cookies are enjoyed by people all over the world?

In this article, I’ll be sharing my tried-and-true recipe for these delicious treats.

We’ll start by gathering the simple ingredients, then mix the dough to perfection.

Next, we’ll shape the cookies into beautiful designs before baking them to golden perfection.

Advertisement

Finally, we’ll let them cool and get ready to enjoy the irresistible taste of Danish butter cookies.

Let’s get started!

Key Takeaways

  • Use softened butter and cream it with sugar for a light and fluffy texture.
  • Adjust the dough consistency by adding milk or water if too dry or more flour if too wet.
  • Get creative with shaping techniques such as using a cookie press or cookie cutters.
  • Follow baking tips like using a light-colored baking sheet and rotating it for even browning.

Gathering the Ingredients

First, you’ll need to gather all of the ingredients for your Danish butter cookies. To start, make sure you have 2 cups of all-purpose flour, 1 cup of unsalted butter, 1/2 cup of granulated sugar, and 1 teaspoon of vanilla extract. These basic ingredients will give you the classic Danish butter cookie flavor.

However, if you want to experiment with different variations, you can add ingredients like chocolate chips, chopped nuts, or even dried fruits.

Advertisement

Once you have gathered all the necessary ingredients, it is important to store the cookies properly to maintain their freshness. I recommend using an airtight container or a cookie jar to keep them crispy and delicious for a longer period of time.

Mixing the Dough

Next, start by mixing the dough for your delicious treats. To achieve the perfect dough consistency, it’s important to follow a few key tips.

First, make sure to use softened butter, as it will mix more easily with the other ingredients. Cream the butter and sugar together until light and fluffy. This step is crucial for creating a tender and melt-in-your-mouth texture.

If you encounter any common mixing issues, such as a dry or crumbly dough, try adding a tablespoon of milk or water to moisten it. On the other hand, if the dough appears too wet or sticky, gradually add more flour until it reaches the desired consistency.

Shaping the Cookies

Advertisement

To achieve the desired shape, gently roll the dough into small balls before placing them on the baking sheet. This step is crucial in creating perfectly shaped Danish butter cookies.

However, there are various other shapes you can try to add a touch of creativity to your cookies. Here are some tips to help you achieve perfectly shaped cookies:

  1. Use a cookie press: A cookie press allows you to create intricate designs and shapes effortlessly. Simply load the dough into the press and press it onto the baking sheet.

  2. Roll and cut: Roll out the dough and use cookie cutters to create different shapes. This is a classic method that gives you uniform cookies every time.

  3. Thumbprint cookies: Make an indentation in the center of the dough ball using your thumb or the back of a spoon. Fill the indentations with jam, chocolate, or any other filling of your choice.

These tips will help you create beautifully shaped Danish butter cookies that are not only delicious but also visually appealing.

Baking and Cooling

For even baking and a perfect golden color, remember to preheat your oven to the recommended temperature before placing the cookie dough on the baking sheet. This step is crucial in ensuring that your Danish butter cookies turn out just right.

Advertisement

Here are some baking techniques and troubleshooting tips to help you achieve the best results:

  • Use a light-colored baking sheet to prevent the cookies from browning too quickly.
  • Space the cookies evenly on the baking sheet to allow for proper air circulation.
  • Rotate the baking sheet halfway through the baking time to ensure even browning.
  • If your cookies are spreading too much, try chilling the dough before baking.

Enjoying the Delicious Danish Butter Cookies

Indulge in the irresistible taste of these delectable treats and savor every bite. Danish butter cookies are a true delight for the taste buds. They are crispy, buttery, and melt-in-your-mouth delicious.

When serving these cookies, you can arrange them on a beautiful platter, allowing their golden hue to shine. Alternatively, you can place them in a decorative tin, perfect for gifting or for keeping them fresh.

As for variations and flavor additions, you can experiment with different types of fillings. Try adding a dollop of Nutella or raspberry jam in the center of each cookie before baking. You can also sprinkle some powdered sugar or drizzle melted chocolate on top for an extra touch of sweetness.

Advertisement

No matter how you choose to enjoy them, these Danish butter cookies are sure to satisfy your cravings.

Frequently Asked Questions

How Long Do Danish Butter Cookies Typically Last Before Going Stale?

Typically, Danish butter cookies last for about 2-3 weeks before going stale. To keep them fresh, store them in an airtight container at room temperature. If they do go stale, you can try reviving them by placing them in a sealed container with a slice of bread overnight.

Can I Substitute Margarine for Butter in This Recipe?

Sure, you can substitute margarine for butter in the recipe. However, keep in mind that margarine has a higher water content and lower fat content, which may affect the texture and flavor.

Can I Freeze the Dough and Bake the Cookies at a Later Time?

Yes, you can freeze the dough for Danish butter cookies and bake them at a later time. Freezing the dough helps to preserve its freshness, and you can easily bake the cookies whenever you’re ready for a sweet treat.

Are Danish Butter Cookies Suitable for People With Gluten Allergies?

Yes, Danish butter cookies can be made without gluten-containing ingredients, making them suitable for people with gluten allergies. As for vegan alternatives, there are recipes that use plant-based ingredients to create delicious versions of these cookies.

Advertisement

Can I Add Different Flavors, Such as Chocolate or Almond, to the Cookie Dough?

Yes, you can definitely add different flavors like chocolate or almond to the cookie dough. It allows you to experiment with unique combinations and create a variety of delicious Danish butter cookies.

Conclusion

After following the steps and techniques mentioned, I can confidently say that making Danish butter cookies is not only simple but also incredibly rewarding.

As I indulged in the delicious aroma that filled my kitchen, I couldn’t help but ponder the deeper meaning behind this culinary journey.

It reminded me that sometimes, investigating the truth of a theory can uncover hidden treasures and bring immense joy.

So, next time you embark on a baking adventure, remember that the process itself holds the power to enlighten and delight you in ways you never imagined.

Advertisement
Continue Reading

Recipes & Culinary Uses

Revive Butter Slime to Soft Texture Once Again

Published

on

By

An image capturing a pair of hands gently kneading a luscious mound of butter slime, its smooth and stretchy texture returning as it transforms from a stiff blob to a soft, pliable masterpiece

Have you ever felt let down when your butter slime goes from being soft to hard and crumbly? I certainly have. However, worry no more, as I’ve uncovered some efficient methods to restore the softness of butter slime.

In this article, I will share with you my knowledge on understanding the texture of butter slime, the common reasons for its hardening, and the best methods to rehydrate it using moisturizing ingredients and heat.

Let’s dive in and bring back the squishy goodness of butter slime!

Key Takeaways

  • Additives like lotion, baby oil, or shaving cream can enhance the softness of butter slime
  • Different slime activators such as borax or contact lens solution can result in different textures
  • Proper storage in an airtight container prevents hardening of butter slime
  • Lotion and baby oil can be used to rehydrate hardened butter slime

Understanding the Texture of Butter Slime

Butter slime feels soft and smooth when it is made correctly. Achieving this texture involves using additives for fluffy butter slime and experimenting with different slime activators.

Advertisement

Additives like lotion, baby oil, or even shaving cream can be used to enhance the softness of the slime. These additives help to create a fluffier and more buttery texture, giving the slime a pleasant feel when touched.

Additionally, the choice of slime activator plays a crucial role in determining the texture of butter slime. Experimenting with different activators such as borax, contact lens solution, or liquid starch can help to achieve the desired softness.

A precise balance of these components is necessary to create a butter slime that is both soft and malleable.

Common Reasons for Butter Slime Hardening

One common reason for butter slime hardening is if it is exposed to air for long periods of time. When the slime is left out, the moisture it contains evaporates, causing it to lose its soft and stretchy texture.

To prevent butter slime from hardening, it is essential to store it properly in an airtight container. This will help to retain the moisture and keep the slime soft for a longer time.

Advertisement

If your butter slime has already hardened, there are DIY techniques that can help soften it again. One effective method is to add a few drops of lotion or baby oil to the slime and knead it thoroughly. This will restore the moisture and make the slime soft and pliable once again.

Rehydrating Butter Slime With Moisturizing Ingredients

To rehydrate your hardened slime, simply grab some lotion or baby oil and mix it in thoroughly. These moisturizing ingredients not only soften the slime, but they also provide additional benefits for your hands.

Lotion contains emollients that help to retain moisture, preventing dryness and roughness. Baby oil, on the other hand, is a lightweight oil that can deeply penetrate the slime, restoring its elasticity and pliability. Both of these alternatives are easily accessible and can be found in most households.

Advertisement

When incorporating these ingredients, make sure to add them gradually and mix well until the slime reaches the desired consistency. Experiment with different amounts to find the perfect balance between softness and stretchiness.

With the moisturizing benefits of lotion or baby oil, your butter slime will be rejuvenated and ready for playtime once again.

Using Heat to Soften Butter Slime

Using heat can effectively restore the softness and pliability of hardened butter slime. When faced with the challenge of reviving stiff butter slime, I have found that alternative methods can be explored to achieve the desired texture.

By subjecting the hardened slime to gentle heat, such as using a hairdryer on low heat or placing it in a warm water bath, the butter slime can be softened and made more malleable. It is important to monitor the temperature carefully to avoid overheating, as this can result in a runny consistency.

Additionally, experimenting with different types of slime textures can be an exciting way to enhance the sensory experience. By adding various ingredients like lotion or baby oil, you can customize the texture to your preference, making it silky, stretchy, or fluffy.

Advertisement

Storing Butter Slime Properly to Maintain Softness

When you store your butter slime properly, it will remain soft and pliable for future use. Proper storage techniques are essential in preventing butter slime from drying out. Here are some key tips to ensure the longevity of your slime:

  • Use an airtight container: Seal your slime in a container that locks out air, preventing moisture loss.

  • Avoid exposure to direct sunlight: UV rays can dry out your slime, so store it in a cool, dark place.

  • Keep away from heat sources: High temperatures can cause the slime to melt or harden, so avoid placing it near heaters or hot surfaces.

By following these storage techniques, you can keep your butter slime in its optimal state, ready to be enjoyed time and time again.

Don’t let improper storage ruin your slime experience; take the necessary precautions to maintain its softness and pliability.

Frequently Asked Questions

Can I Use Any Type of Lotion to Rehydrate My Butter Slime?

Yes, you can use various types of lotion to rehydrate butter slime. However, there are alternative methods to soften it without lotion, such as adding a small amount of warm water and kneading it.

Can I Add Water to Soften My Butter Slime?

Adding water to butter slime may soften it temporarily, but it could also make the slime sticky or watery. Using lotion is a better option as it helps rehydrate the slime without compromising its texture. Different storage containers may affect slime softness due to variations in air exposure.

Advertisement

How Long Does It Take for Butter Slime to Harden?

To prevent butter slime from hardening, it’s important to store it in an airtight container. If it has already hardened, you can soften it by adding a small amount of lotion or oil and kneading it thoroughly.

Can I Use a Hairdryer to Heat up My Butter Slime?

Using a hairdryer to heat up butter slime is not recommended. It can cause the slime to become too hot and melt. Instead, try alternative methods like kneading or adding lotion to soften it.

Does the Type of Container I Store My Butter Slime in Affect Its Softness?

The type of container used to store butter slime can affect its softness. Temperature fluctuations and exposure to air can lead to changes in consistency. Additives like lotion or oil can help maintain softness.

Conclusion

In conclusion, understanding the texture of butter slime is crucial in maintaining its softness. By identifying common reasons for hardening, we can take proactive steps to rehydrate it using moisturizing ingredients or heat.

Properly storing butter slime is also essential in preserving its soft and stretchy consistency. Did you know that 70% of people who make butter slime experience hardening issues? It’s frustrating when your slime loses its softness, but with the right techniques, you can easily restore its buttery texture.

Advertisement
Continue Reading
Advertisement

Affiliate disclaimer

As an affiliate, we may earn a commission from qualifying purchases. We get commissions for purchases made through links on this website from Amazon and other third parties.

Advertisement

Trending