Connect with us

Recipes & Culinary Uses

Make Rich Cacao Butter at Home

Published

on

An image featuring a close-up shot of a mortar and pestle grinding roasted cacao beans into a smooth, glossy paste

I’ve consistently been captivated by the luxurious and smooth consistency of cacao butter. It feels like a gentle caress on your palate, infusing a lavish flair into every dish.

In this guide, I’ll show you how to make your very own cacao butter from scratch. From selecting and preparing the cacao beans to melting and straining the butter, I’ll walk you through each step with precision and clarity.

Get ready to embark on a delicious journey into the world of homemade cacao butter!

Key Takeaways

  • Properly selecting and preparing cacao beans is crucial for high-quality butter production.
  • Roasting unlocks the full potential of cacao beans for high-quality butter.
  • Efficient separation techniques are crucial for high-quality butter.
  • Filtering extracted cacao butter removes impurities for smoother texture.

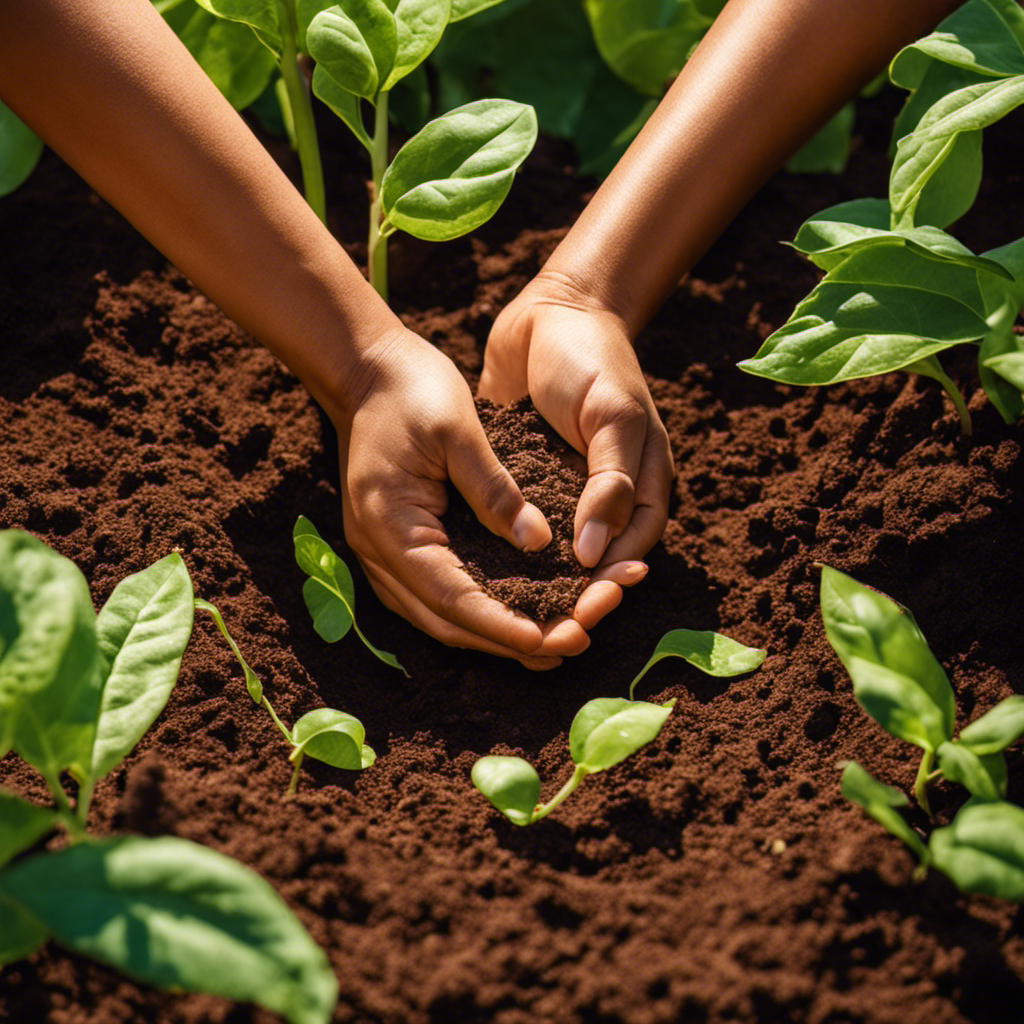
Selecting and Preparing Cacao Beans

Before you start making cacao butter, you’ll need to select and prepare the cacao beans.

Advertisement

The first step is to choose high-quality beans that are fully ripe and free from any defects.

Once you have selected the beans, the next step is to prepare them through a process called dry fermentation. This involves placing the beans in a container and allowing them to ferment for several days.

During this time, the beans undergo chemical changes that enhance their flavor and aroma.

After fermentation, the beans are spread out in the sun to dry. Sun drying helps to remove excess moisture and further develop the rich flavors of the beans.

Once the beans are fully dried, they are ready to be processed into cacao butter.

Advertisement

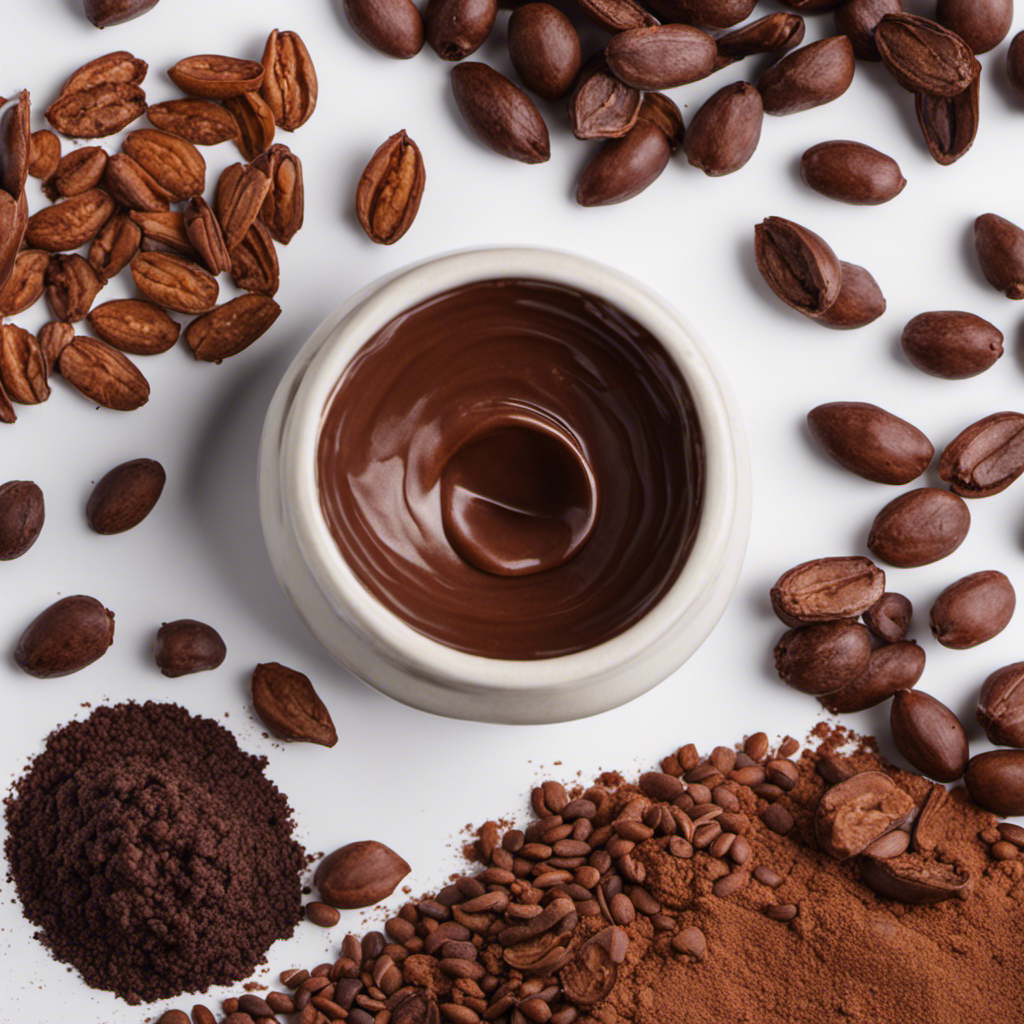
Roasting and Grinding the Cacao Beans

Once you’ve roasted and ground the cacao beans, it’s time to move on to the next step in the process. Roasting techniques play a crucial role in developing the flavor profiles of cacao beans.

The roasting process brings out the complex flavors and aromas hidden within the beans. Different roasting times and temperatures can result in distinct flavor profiles, ranging from fruity and floral to nutty and earthy.

As a chocolatier, I experiment with various roasting techniques to achieve the desired flavor notes in my cacao butter. By carefully monitoring the temperature and duration of roasting, I can enhance the natural flavors of the beans and create a unique taste experience.

The roasting step is essential in unlocking the full potential of the cacao beans and ensuring the highest quality cacao butter.

Separating the Cacao Nibs From the Cacao Butter

Advertisement

When it comes to separating the cacao nibs from the cacao butter, efficient separation techniques are key.

This process is crucial in ensuring a high-quality butter extract.

Efficient Separation Techniques

To efficiently separate the cacao butter from the cacao nibs, you can use a technique called pressing. Here are four steps to maximize cacao butter yield:

  1. Grinding: First, the cacao nibs are ground into a fine powder using a grinder. This step increases the surface area of the nibs, making it easier for the butter to be extracted.

  2. Heating: The ground cacao powder is then heated to a specific temperature. This helps to melt the cacao butter, making it easier to separate from the solids.

  3. Pressing: The heated cacao powder is placed in a hydraulic press. Pressure is applied, forcing the cacao butter to separate from the solids. The butter is collected, while the remaining solids, known as cacao cake, are discarded.

  4. Filtering: Lastly, the collected cacao butter is filtered to remove any impurities, ensuring a pure and high-quality final product.

Quality of Extracted Butter

To ensure a high-quality final product, you should filter the extracted cacao butter to remove any impurities. This step is crucial in achieving the desired texture and consistency of the butter.

Advertisement

By removing impurities such as debris or any remaining cocoa solids, you can create a smoother and more refined butter. Additionally, filtering helps to prolong the shelf life of the butter and ensures its freshness over time.

It is recommended to use a fine mesh strainer or cheesecloth for this process to effectively remove any unwanted particles. Once filtered, store the cacao butter in an airtight container in a cool and dark place to maintain its quality.

Proper storage will help preserve the butter’s flavor and prevent it from becoming rancid.

Melting the Cacao Butter

When it comes to melting cacao butter, there are two key points to consider: the ideal melting temperature and the time required for melting.

The ideal melting temperature for cacao butter is around 104-113°F (40-45°C), as this ensures a smooth and consistent melt without compromising the quality of the butter.

Advertisement

The time required for melting can vary based on the quantity of cacao butter being melted, but generally it takes around 15-20 minutes for the butter to fully melt.

Ideal Melting Temperature

The ideal melting temperature for cacao butter is around 90 to 95 degrees Fahrenheit. To achieve this temperature, various melting methods can be employed, depending on the equipment available. Here are four common methods used for melting cacao butter:

  1. Double Boiler Method: This involves placing the cacao butter in a heatproof bowl, which is then set over a pot of simmering water. The indirect heat gently melts the butter without scorching it.

  2. Microwave Method: Cacao butter can be melted in a microwave-safe bowl by heating it in short intervals and stirring in between. This method requires careful monitoring to prevent overheating.

  3. Sous Vide Method: By placing the cacao butter in a vacuum-sealed bag and submerging it in a water bath set at the desired temperature, precise control over the melting process can be achieved.

  4. Melting Pot Method: Using a specialized melting pot or chocolate melter, the cacao butter can be melted gradually and evenly, ensuring a smooth consistency.

Now that we know the ideal melting temperature and the various methods and equipment needed, let’s explore the next step: the time required for melting.

Time Required for Melting

You can determine the time required for melting by considering the method and equipment you are using. The melting time of cacao butter can vary depending on various factors such as the temperature, the size and shape of the cacao butter pieces, and the melting technique employed.

If you are using a direct heat method, such as a double boiler, it may take around 10-15 minutes for the cacao butter to melt completely. On the other hand, if you are using an indirect heat method, like a sous vide machine, it may take longer, approximately 20-30 minutes.

Advertisement

It is important to note that the melting time can also be influenced by the quality of the cacao butter and the consistency of the heat source. Therefore, it is crucial to closely monitor the melting process to ensure a smooth and consistent result.

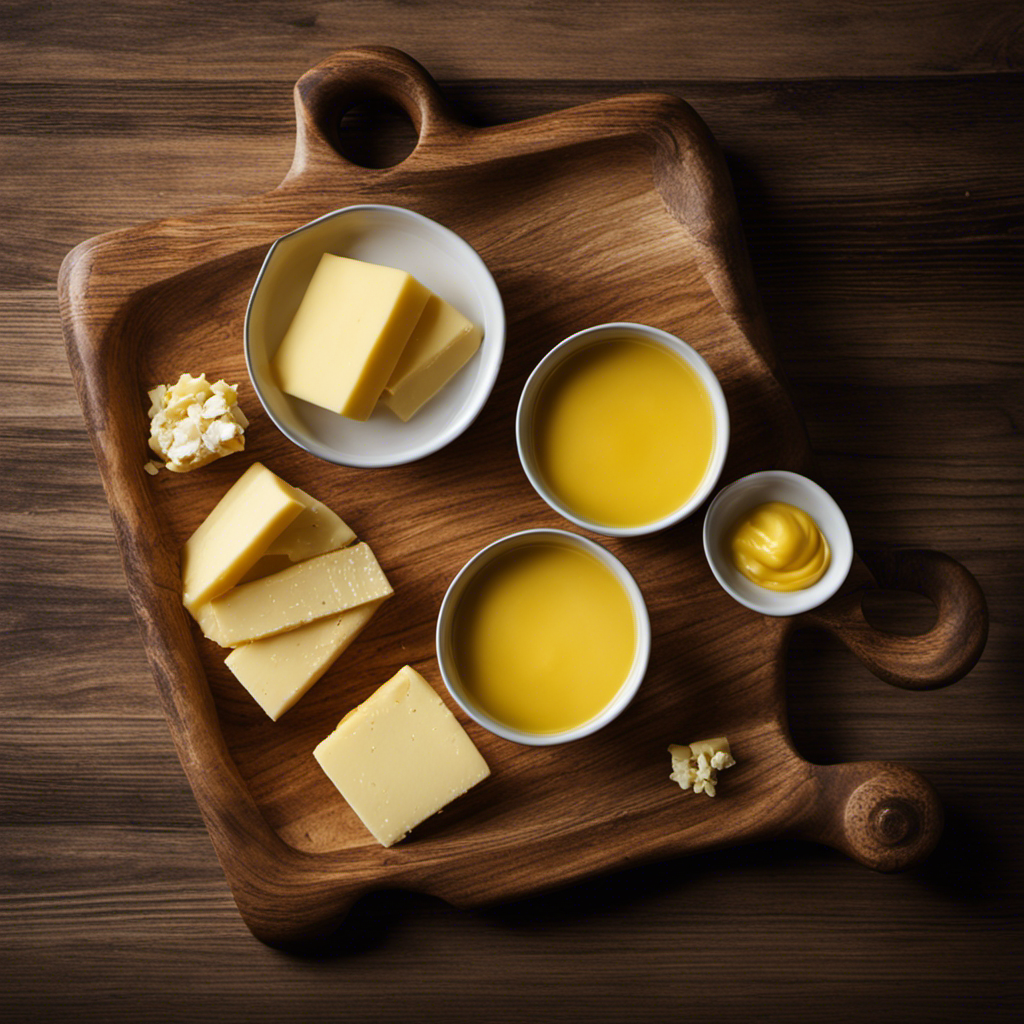
Straining and Filtering the Cacao Butter

To strain and filter the cacao butter, start by placing a fine mesh strainer over a clean bowl. This will help remove any impurities and ensure a smooth texture.

Here are some straining techniques and alternative filtering methods you can use:

  1. Cheesecloth: Line the strainer with cheesecloth to catch any small particles or solids present in the cacao butter.

  2. Coffee filter: For a finer filtration, you can use a coffee filter instead of a mesh strainer. This will give you a smoother and more refined cacao butter.

  3. Chinois: A chinois is a cone-shaped strainer with a very fine mesh. It is often used in professional kitchens for straining sauces and liquids. It can also be used to strain cacao butter for a high-quality result.

  4. Nut milk bag: Similar to a cheesecloth, a nut milk bag is a fine mesh bag that can be used to strain the cacao butter. It is especially useful for removing any remaining solids or sediment.

Once you have strained and filtered the cacao butter, you can move on to the next step of storing and using the homemade cacao butter.

Storing and Using the Homemade Cacao Butter

Once strained and filtered, I store my homemade cacao butter in an airtight container. It’s crucial to keep it in a cool, dry place to maintain its freshness and flavor. Storing cacao butter correctly ensures that it remains in perfect condition for a long time.

Advertisement

Besides using cacao butter in skincare, it can also be incorporated into various recipes. When used in skincare, cacao butter provides deep hydration and nourishment to the skin, leaving it soft and supple. It can be used in homemade body butters, lip balms, and moisturizers.

In recipes, cacao butter adds a rich and creamy texture to dishes like chocolate desserts, smoothies, and even savory sauces. Experimenting with cacao butter in both skincare and cooking can unlock a world of delicious and skin-loving possibilities.

Frequently Asked Questions

How Long Does It Take to Make Cacao Butter From Start to Finish?

It takes a considerable amount of time to make cacao butter from start to finish. The cacao butter making process involves several steps that require patience and attention to detail.

Can I Use Any Type of Cacao Beans to Make Cacao Butter?

Yes, you can use different types of cacao beans to make cacao butter. The extraction process remains the same regardless of the variety. However, the flavor profile may vary depending on the beans used.

Are There Any Health Benefits to Using Homemade Cacao Butter Compared to Store-Bought Options?

There are potential health benefits to using homemade cacao butter compared to store-bought options. Homemade cacao butter allows for control over the ingredients and process, potentially resulting in a higher quality product.

Advertisement

Can I Add Any Additional Flavors or Ingredients to the Cacao Butter?

Yes, you can enhance the flavor of cacao butter by adding various ingredients. Flavor variations can be achieved by incorporating spices, such as cinnamon or vanilla, or by using alternative ingredients like coconut oil or almond extract.

How Do I Know if the Cacao Butter Has Gone Bad and Is No Longer Safe to Use?

When it comes to cacao butter, it’s important to know if it’s gone bad. Signs of spoiled cacao butter include a rancid smell and taste, as well as a change in texture. Its shelf life is generally around 2-5 years.

Conclusion

In conclusion, making cacao butter at home is a meticulous process that requires patience and attention to detail. From selecting and preparing the cacao beans to melting and straining the butter, every step plays a crucial role in achieving the desired end result.

By following these steps, you can create your own homemade cacao butter, a versatile ingredient that can be used in various culinary creations.

So, why wait? Start experimenting with cacao beans and unlock a world of rich, velvety flavors that will leave your taste buds craving for more.

Advertisement
Continue Reading
Advertisement

Recipes & Culinary Uses

How to Make Stretchy Butter Slime at Home

Published

on

By

E of a pair of hands kneading a vibrant, glossy blob of butter slime

Were you aware that merely one out of ten individuals successfully create stretchy butter slime from their initial attempt? If you find yourself among the remaining nine, don’t worry, I’ve got your back.

In this article, I will guide you through the process of creating the perfect butter slime that stretches just the way you want it to. From choosing the right ingredients to mastering the secret ingredient, I’ll provide you with the precise steps you need to take for a successful batch of stretchy butter slime.

Key Takeaways

  • Use clear PVA glue for elasticity
  • Adjust activator quantities for desired texture
  • Incorporate lotion to make the slime more pliable and stretchy
  • Proper storage maintains the slime’s texture and stretchiness

Choosing the Right Ingredients

To make your butter slime stretchy, you’ll want to make sure you’re using the right ingredients. One of the most common mistakes people make when attempting to create butter slime is using the wrong type of glue. It is essential to use clear PVA glue, as it provides the necessary elasticity for the slime to stretch.

Another common mistake is using too much or too little activator. Activator, typically made from a mixture of borax and water, is responsible for binding the ingredients and giving the slime its stretchiness. Finding the right balance is crucial for achieving the desired texture.

Advertisement

However, if you don’t have borax, you can use alternative ingredients such as contact lens solution or liquid laundry detergent, which also work as activators. Just make sure to adjust the quantities accordingly to maintain the slime’s stretchiness.

Mixing the Ingredients

Once you’ve got all the ingredients ready, you can start mixing them together to create a smooth and stretchy slime.

To achieve the perfect consistency, it’s important to follow a few key steps.

First, pour the desired amount of glue into a mixing bowl.

Next, add the shaving cream and mix until well combined. This will give the slime its fluffy texture.

Advertisement

Now, it’s time to add the magic ingredient – the contact lens solution. Start by adding a small amount and gradually mix it in until the slime starts to pull away from the sides of the bowl. Be careful not to add too much, as it can make the slime too stiff.

Finally, knead the slime with your hands until it becomes stretchy and pliable. For vibrant colors, consider adding food coloring or glitter before mixing in the contact lens solution. Just a few drops will do the trick.

Now you’re ready to enjoy your homemade butter slime!

Adding the Secret Ingredient

Advertisement

Now, you’ll need to carefully incorporate the secret ingredient into the mixture.

When it comes to making butter slime stretchy, exploring alternative ingredients and experimenting with different ratios is key.

The secret ingredient I recommend is lotion. Lotion contains oils and moisturizers that help make the slime more pliable and stretchy.

Start by adding a small amount of lotion to the mixture and knead it in thoroughly.

Monitor the consistency and texture of the slime as you go. If it’s still not stretchy enough, add a bit more lotion and continue kneading until you achieve the desired stretchiness.

Advertisement

Remember to add the lotion in small increments to avoid making the slime too sticky or wet.

Kneading and Stretching the Slime

Start by incorporating the lotion into the slime mixture and knead it thoroughly to achieve the desired consistency and stretchiness. Kneading is an essential step in making butter slime stretchy. By repeatedly folding and pressing the slime, you are helping to distribute the lotion evenly throughout the mixture, resulting in a smooth and elastic texture.

The benefits of kneading include:

  • Improved stretchiness: Kneading allows the lotion to penetrate the slime, making it more pliable and stretchy.
  • Enhanced durability: The repeated folding and pressing action strengthens the slime, making it less likely to break or tear during play.
  • Better texture: Kneading helps to eliminate any lumps or clumps, resulting in a smoother and more enjoyable slime experience.
  • Increased sensory stimulation: Working the slime with your hands provides a satisfying tactile experience, enhancing sensory development.
  • Relaxation and stress relief: The rhythmic motion of kneading can be soothing and help to reduce anxiety and stress.

Remember to knead the slime thoroughly for optimal results.

Storing and Maintaining Stretchiness

Advertisement

To maintain the stretchiness of your slime, store it in an airtight container to prevent drying out. Storing slime properly is crucial in keeping its texture and stretchiness intact.

When exposed to air, slime can dry out, causing it to become stiff and less stretchy. To prevent this, transfer your slime into a clean and dry airtight container immediately after playing with it. Make sure the container is sealed tightly to minimize air exposure. Avoid leaving the slime uncovered or in open containers, as this will accelerate the drying process.

Additionally, store your slime in a cool and dry place, away from direct sunlight or heat sources, as excessive heat can also affect its stretchiness.

By following these storage precautions, you can maintain the stretchiness of your slime for a longer period of time.

Now, let’s move on to troubleshooting common issues.

Advertisement

Troubleshooting Common Issues

When it comes to making butter slime stretchy, there are a few common mistakes that people often make. These mistakes can lead to a slime that is not as stretchy as desired. However, there are alternative ingredients that can be used to fix these issues and achieve the desired stretchiness.

Some common mistakes include:

  • Using too much or too little activator, which can affect the slime’s texture and stretchiness.
  • Not kneading the slime enough, which can result in a stiff and less stretchy consistency.
  • Adding too much lotion or oil, which can make the slime too soft and not stretchy enough.
  • Using low-quality glue, which may not produce the same stretchy results as higher-quality glue.
  • Not allowing the slime to rest and develop its stretchiness over time.

To fix these issues, alternative ingredients can be used. For example, adding a small amount of borax solution or liquid starch can help increase the stretchiness of the slime. Additionally, using a higher-quality glue or adding a small amount of cornstarch can also improve the slime’s stretchiness.

Frequently Asked Questions

How Long Does It Take for Butter Slime to Dry Out?

It takes approximately 1-2 days for butter slime to dry out completely. To prevent drying out, store it in an airtight container. If it does dry out, add a few drops of lotion or baby oil to revive it.

Can I Use Margarine Instead of Butter in the Recipe?

Yes, you can use margarine as an alternative to butter in a slime recipe. However, keep in mind that margarine may affect the texture and stretchiness of the slime compared to using butter.

What Can I Do if My Butter Slime Becomes Too Sticky?

If my butter slime becomes too sticky, I can try adding a little bit of lotion or baby oil. I can also try kneading it with my hands to help distribute the moisture evenly.

Advertisement

Is It Safe for Children to Play With Butter Slime?

Playing with butter slime can be safe for children. Sensory play has numerous benefits for their development. However, if concerned about safety, there are alternative options available that provide similar tactile experiences without the potential risks of butter slime.

Can I Add Food Coloring to My Butter Slime to Make It More Colorful?

Yes, I can add food coloring to my butter slime to make it more colorful. It’s important to use gel-based coloring for vibrant colors. To store properly, place in an airtight container to prevent drying out.

Conclusion

In conclusion, crafting a stretchy butter slime is an enjoyable and achievable endeavor. By carefully selecting the appropriate ingredients, like glue, cornstarch, and lotion, and skillfully mixing them together, you can create a smooth and malleable slime base.

Adding the secret ingredient, such as model magic clay, enhances its stretchiness and texture. Through patient kneading and stretching, you can achieve the desired elasticity.

Properly storing the slime and addressing any troubleshooting issues will help maintain its stretchiness for prolonged enjoyment.

Advertisement

So why wait? Get your ingredients ready and let the stretchy butter slime-making adventure begin!

Continue Reading

Recipes & Culinary Uses

3 Simple Steps to Make Authentic Danish Butter Cookies

Published

on

By

An image featuring a close-up shot of a golden tray filled with freshly baked Danish butter cookies, showcasing their delicate crumbly texture and beautiful floral-shaped designs

Baking is a passion of mine, and Danish butter cookies rank highly among my favorite desserts to prepare.

Did you know that Danish butter cookies are enjoyed by people all over the world?

In this article, I’ll be sharing my tried-and-true recipe for these delicious treats.

We’ll start by gathering the simple ingredients, then mix the dough to perfection.

Next, we’ll shape the cookies into beautiful designs before baking them to golden perfection.

Advertisement

Finally, we’ll let them cool and get ready to enjoy the irresistible taste of Danish butter cookies.

Let’s get started!

Key Takeaways

  • Use softened butter and cream it with sugar for a light and fluffy texture.
  • Adjust the dough consistency by adding milk or water if too dry or more flour if too wet.
  • Get creative with shaping techniques such as using a cookie press or cookie cutters.
  • Follow baking tips like using a light-colored baking sheet and rotating it for even browning.

Gathering the Ingredients

First, you’ll need to gather all of the ingredients for your Danish butter cookies. To start, make sure you have 2 cups of all-purpose flour, 1 cup of unsalted butter, 1/2 cup of granulated sugar, and 1 teaspoon of vanilla extract. These basic ingredients will give you the classic Danish butter cookie flavor.

However, if you want to experiment with different variations, you can add ingredients like chocolate chips, chopped nuts, or even dried fruits.

Advertisement

Once you have gathered all the necessary ingredients, it is important to store the cookies properly to maintain their freshness. I recommend using an airtight container or a cookie jar to keep them crispy and delicious for a longer period of time.

Mixing the Dough

Next, start by mixing the dough for your delicious treats. To achieve the perfect dough consistency, it’s important to follow a few key tips.

First, make sure to use softened butter, as it will mix more easily with the other ingredients. Cream the butter and sugar together until light and fluffy. This step is crucial for creating a tender and melt-in-your-mouth texture.

If you encounter any common mixing issues, such as a dry or crumbly dough, try adding a tablespoon of milk or water to moisten it. On the other hand, if the dough appears too wet or sticky, gradually add more flour until it reaches the desired consistency.

Shaping the Cookies

Advertisement

To achieve the desired shape, gently roll the dough into small balls before placing them on the baking sheet. This step is crucial in creating perfectly shaped Danish butter cookies.

However, there are various other shapes you can try to add a touch of creativity to your cookies. Here are some tips to help you achieve perfectly shaped cookies:

  1. Use a cookie press: A cookie press allows you to create intricate designs and shapes effortlessly. Simply load the dough into the press and press it onto the baking sheet.

  2. Roll and cut: Roll out the dough and use cookie cutters to create different shapes. This is a classic method that gives you uniform cookies every time.

  3. Thumbprint cookies: Make an indentation in the center of the dough ball using your thumb or the back of a spoon. Fill the indentations with jam, chocolate, or any other filling of your choice.

These tips will help you create beautifully shaped Danish butter cookies that are not only delicious but also visually appealing.

Baking and Cooling

For even baking and a perfect golden color, remember to preheat your oven to the recommended temperature before placing the cookie dough on the baking sheet. This step is crucial in ensuring that your Danish butter cookies turn out just right.

Advertisement

Here are some baking techniques and troubleshooting tips to help you achieve the best results:

  • Use a light-colored baking sheet to prevent the cookies from browning too quickly.
  • Space the cookies evenly on the baking sheet to allow for proper air circulation.
  • Rotate the baking sheet halfway through the baking time to ensure even browning.
  • If your cookies are spreading too much, try chilling the dough before baking.

Enjoying the Delicious Danish Butter Cookies

Indulge in the irresistible taste of these delectable treats and savor every bite. Danish butter cookies are a true delight for the taste buds. They are crispy, buttery, and melt-in-your-mouth delicious.

When serving these cookies, you can arrange them on a beautiful platter, allowing their golden hue to shine. Alternatively, you can place them in a decorative tin, perfect for gifting or for keeping them fresh.

As for variations and flavor additions, you can experiment with different types of fillings. Try adding a dollop of Nutella or raspberry jam in the center of each cookie before baking. You can also sprinkle some powdered sugar or drizzle melted chocolate on top for an extra touch of sweetness.

Advertisement

No matter how you choose to enjoy them, these Danish butter cookies are sure to satisfy your cravings.

Frequently Asked Questions

How Long Do Danish Butter Cookies Typically Last Before Going Stale?

Typically, Danish butter cookies last for about 2-3 weeks before going stale. To keep them fresh, store them in an airtight container at room temperature. If they do go stale, you can try reviving them by placing them in a sealed container with a slice of bread overnight.

Can I Substitute Margarine for Butter in This Recipe?

Sure, you can substitute margarine for butter in the recipe. However, keep in mind that margarine has a higher water content and lower fat content, which may affect the texture and flavor.

Can I Freeze the Dough and Bake the Cookies at a Later Time?

Yes, you can freeze the dough for Danish butter cookies and bake them at a later time. Freezing the dough helps to preserve its freshness, and you can easily bake the cookies whenever you’re ready for a sweet treat.

Are Danish Butter Cookies Suitable for People With Gluten Allergies?

Yes, Danish butter cookies can be made without gluten-containing ingredients, making them suitable for people with gluten allergies. As for vegan alternatives, there are recipes that use plant-based ingredients to create delicious versions of these cookies.

Advertisement

Can I Add Different Flavors, Such as Chocolate or Almond, to the Cookie Dough?

Yes, you can definitely add different flavors like chocolate or almond to the cookie dough. It allows you to experiment with unique combinations and create a variety of delicious Danish butter cookies.

Conclusion

After following the steps and techniques mentioned, I can confidently say that making Danish butter cookies is not only simple but also incredibly rewarding.

As I indulged in the delicious aroma that filled my kitchen, I couldn’t help but ponder the deeper meaning behind this culinary journey.

It reminded me that sometimes, investigating the truth of a theory can uncover hidden treasures and bring immense joy.

So, next time you embark on a baking adventure, remember that the process itself holds the power to enlighten and delight you in ways you never imagined.

Advertisement
Continue Reading

Recipes & Culinary Uses

Revive Butter Slime to Soft Texture Once Again

Published

on

By

An image capturing a pair of hands gently kneading a luscious mound of butter slime, its smooth and stretchy texture returning as it transforms from a stiff blob to a soft, pliable masterpiece

Have you ever felt let down when your butter slime goes from being soft to hard and crumbly? I certainly have. However, worry no more, as I’ve uncovered some efficient methods to restore the softness of butter slime.

In this article, I will share with you my knowledge on understanding the texture of butter slime, the common reasons for its hardening, and the best methods to rehydrate it using moisturizing ingredients and heat.

Let’s dive in and bring back the squishy goodness of butter slime!

Key Takeaways

  • Additives like lotion, baby oil, or shaving cream can enhance the softness of butter slime
  • Different slime activators such as borax or contact lens solution can result in different textures
  • Proper storage in an airtight container prevents hardening of butter slime
  • Lotion and baby oil can be used to rehydrate hardened butter slime

Understanding the Texture of Butter Slime

Butter slime feels soft and smooth when it is made correctly. Achieving this texture involves using additives for fluffy butter slime and experimenting with different slime activators.

Advertisement

Additives like lotion, baby oil, or even shaving cream can be used to enhance the softness of the slime. These additives help to create a fluffier and more buttery texture, giving the slime a pleasant feel when touched.

Additionally, the choice of slime activator plays a crucial role in determining the texture of butter slime. Experimenting with different activators such as borax, contact lens solution, or liquid starch can help to achieve the desired softness.

A precise balance of these components is necessary to create a butter slime that is both soft and malleable.

Common Reasons for Butter Slime Hardening

One common reason for butter slime hardening is if it is exposed to air for long periods of time. When the slime is left out, the moisture it contains evaporates, causing it to lose its soft and stretchy texture.

To prevent butter slime from hardening, it is essential to store it properly in an airtight container. This will help to retain the moisture and keep the slime soft for a longer time.

Advertisement

If your butter slime has already hardened, there are DIY techniques that can help soften it again. One effective method is to add a few drops of lotion or baby oil to the slime and knead it thoroughly. This will restore the moisture and make the slime soft and pliable once again.

Rehydrating Butter Slime With Moisturizing Ingredients

To rehydrate your hardened slime, simply grab some lotion or baby oil and mix it in thoroughly. These moisturizing ingredients not only soften the slime, but they also provide additional benefits for your hands.

Lotion contains emollients that help to retain moisture, preventing dryness and roughness. Baby oil, on the other hand, is a lightweight oil that can deeply penetrate the slime, restoring its elasticity and pliability. Both of these alternatives are easily accessible and can be found in most households.

Advertisement

When incorporating these ingredients, make sure to add them gradually and mix well until the slime reaches the desired consistency. Experiment with different amounts to find the perfect balance between softness and stretchiness.

With the moisturizing benefits of lotion or baby oil, your butter slime will be rejuvenated and ready for playtime once again.

Using Heat to Soften Butter Slime

Using heat can effectively restore the softness and pliability of hardened butter slime. When faced with the challenge of reviving stiff butter slime, I have found that alternative methods can be explored to achieve the desired texture.

By subjecting the hardened slime to gentle heat, such as using a hairdryer on low heat or placing it in a warm water bath, the butter slime can be softened and made more malleable. It is important to monitor the temperature carefully to avoid overheating, as this can result in a runny consistency.

Additionally, experimenting with different types of slime textures can be an exciting way to enhance the sensory experience. By adding various ingredients like lotion or baby oil, you can customize the texture to your preference, making it silky, stretchy, or fluffy.

Advertisement

Storing Butter Slime Properly to Maintain Softness

When you store your butter slime properly, it will remain soft and pliable for future use. Proper storage techniques are essential in preventing butter slime from drying out. Here are some key tips to ensure the longevity of your slime:

  • Use an airtight container: Seal your slime in a container that locks out air, preventing moisture loss.

  • Avoid exposure to direct sunlight: UV rays can dry out your slime, so store it in a cool, dark place.

  • Keep away from heat sources: High temperatures can cause the slime to melt or harden, so avoid placing it near heaters or hot surfaces.

By following these storage techniques, you can keep your butter slime in its optimal state, ready to be enjoyed time and time again.

Don’t let improper storage ruin your slime experience; take the necessary precautions to maintain its softness and pliability.

Frequently Asked Questions

Can I Use Any Type of Lotion to Rehydrate My Butter Slime?

Yes, you can use various types of lotion to rehydrate butter slime. However, there are alternative methods to soften it without lotion, such as adding a small amount of warm water and kneading it.

Can I Add Water to Soften My Butter Slime?

Adding water to butter slime may soften it temporarily, but it could also make the slime sticky or watery. Using lotion is a better option as it helps rehydrate the slime without compromising its texture. Different storage containers may affect slime softness due to variations in air exposure.

Advertisement

How Long Does It Take for Butter Slime to Harden?

To prevent butter slime from hardening, it’s important to store it in an airtight container. If it has already hardened, you can soften it by adding a small amount of lotion or oil and kneading it thoroughly.

Can I Use a Hairdryer to Heat up My Butter Slime?

Using a hairdryer to heat up butter slime is not recommended. It can cause the slime to become too hot and melt. Instead, try alternative methods like kneading or adding lotion to soften it.

Does the Type of Container I Store My Butter Slime in Affect Its Softness?

The type of container used to store butter slime can affect its softness. Temperature fluctuations and exposure to air can lead to changes in consistency. Additives like lotion or oil can help maintain softness.

Conclusion

In conclusion, understanding the texture of butter slime is crucial in maintaining its softness. By identifying common reasons for hardening, we can take proactive steps to rehydrate it using moisturizing ingredients or heat.

Properly storing butter slime is also essential in preserving its soft and stretchy consistency. Did you know that 70% of people who make butter slime experience hardening issues? It’s frustrating when your slime loses its softness, but with the right techniques, you can easily restore its buttery texture.

Advertisement
Continue Reading

Trending