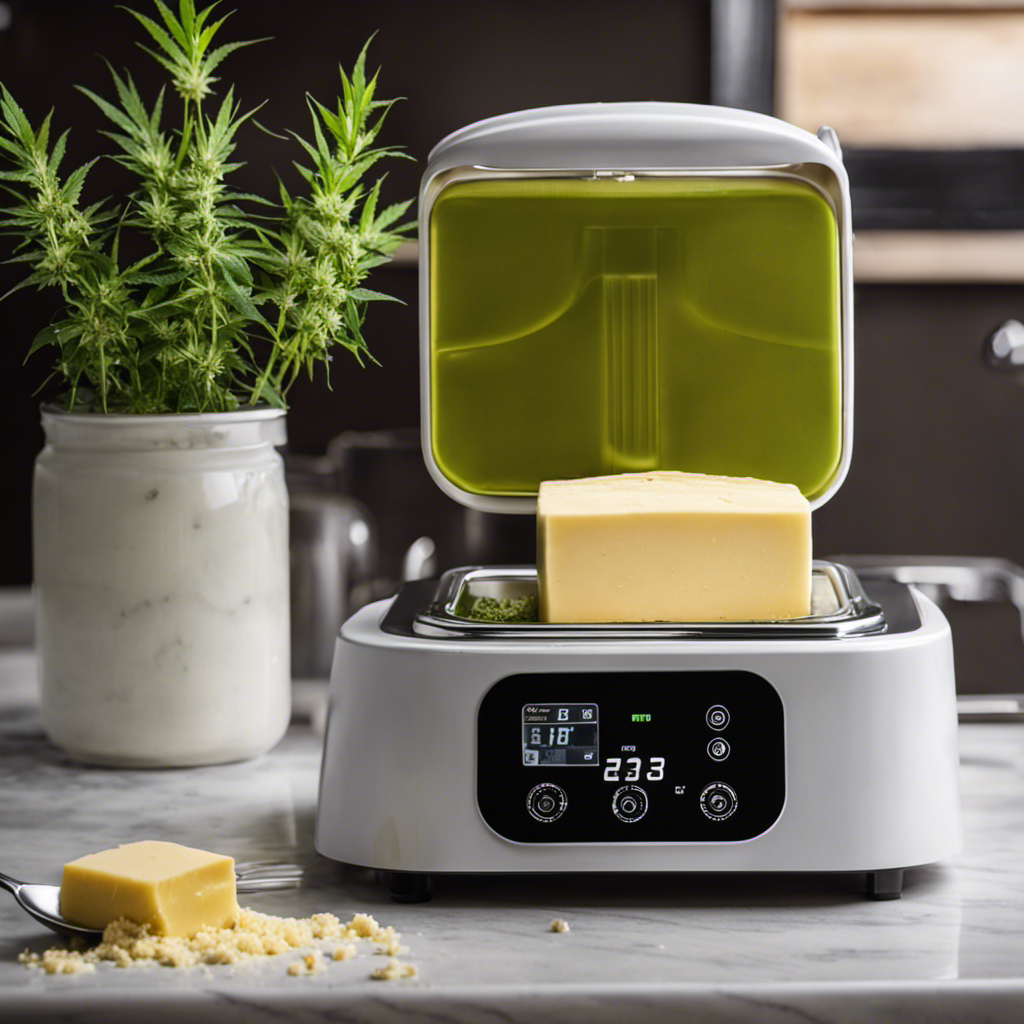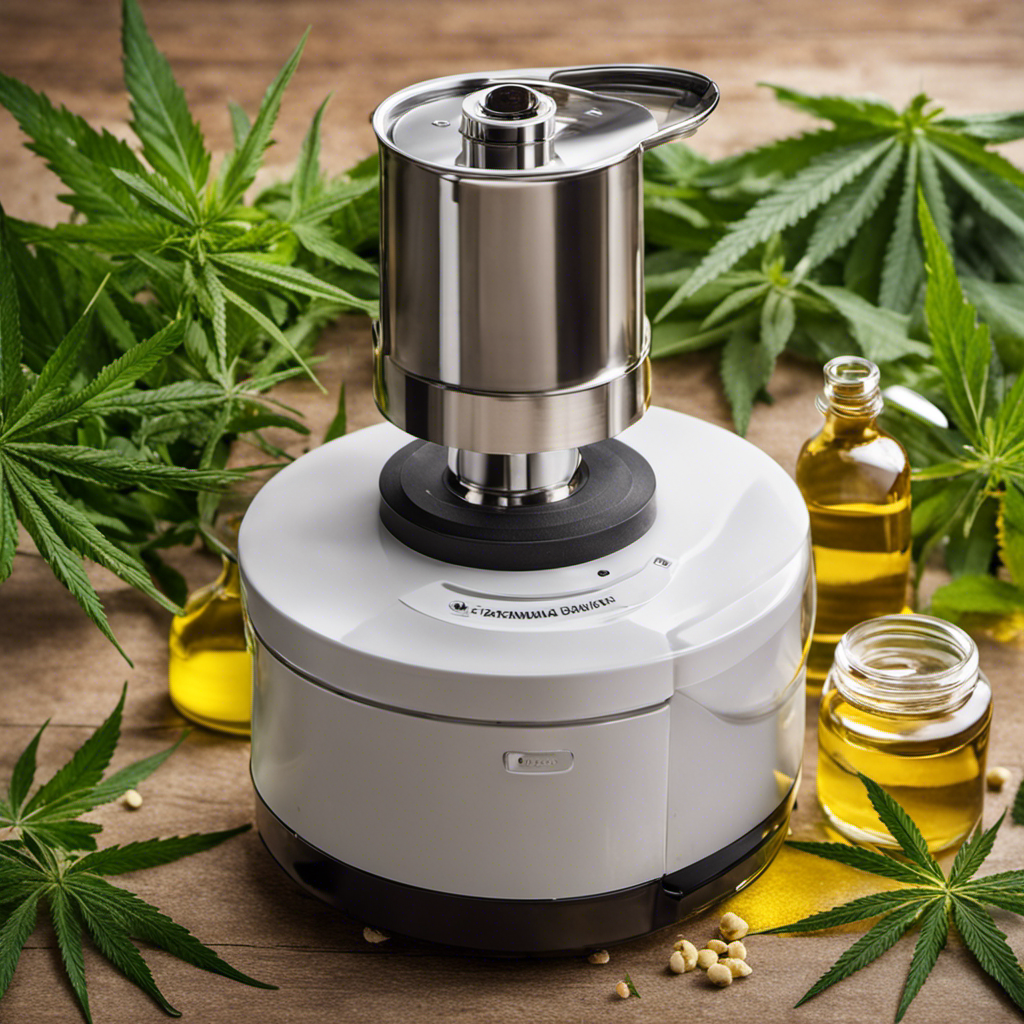
I will demonstrate how to clean the upper portion of the Easy Butter Maker because everyone appreciates a bit of irony, right? It is important to clean this important part to ensure the device remains in good condition and lasts longer.
With a few simple steps and the right tools, you’ll have it looking as good as new. Get ready to say goodbye to residue and hello to a clean, efficient butter maker.
Let’s dive in and get this cleaning party started!
Key Takeaways
- Cleaning the top part of the Easy Butter Maker is important to prevent contamination and maintain the quality of butter.
- Tools and materials needed for cleaning include a soft cloth or sponge, eco-friendly cleaning solution, toothbrush or small brush, and following manufacturer’s instructions.
- The step-by-step guide to disassembling and reassembling the top part ensures easy and efficient use of the Easy Butter Maker.
- Cleaning techniques for the top part include tips for removing residue, cleaning the filter screen, proper drying techniques, and maintenance tips for longevity.

Cosori 9-in-1 TurboBlaze Air Fryer 6 Qt, Smart Control, 90°–450°F, Shake Reminders, Precise Heating for Even Results, Air Fry, Roast, Bake, Broil, Dry, Frozen, Proof, Reheat, Keep Warm, 120V, Cream
𝘼𝙞𝙧 𝙁𝙧𝙮𝙚𝙧 𝙐𝙥𝙜𝙧𝙖𝙙𝙚: Innovative TurboBlaze Technology delivers a powerful 3600 rpm fan speed and temperatures up to 450℉,...
As an affiliate, we earn on qualifying purchases.
Why Cleaning the Top Part of Your Easy Butter Maker Is Important
Cleaning the top part of your Easy Butter Maker is important because it ensures that no residue or build-up will contaminate your future batches of butter. To maintain the quality of your butter and prevent any unwanted flavors or odors, it is essential to clean the top part thoroughly.
Stain removal techniques can be used to remove any stubborn stains or residue that may have accumulated over time. Proper drying methods, such as air-drying or using a clean towel, should be employed to ensure that all moisture is removed from the top part before reassembly.
BIG HORN 12" Multi-Fuel Outdoor Pizza Oven Reach up to 1110℉– 3-in-1 Wood,Gas&Electric Compatible(Burners Sold Separately),Pellet Pizza Oven Portable Pizza Maker for Backyard,Camping&Tailgating,Silver
【Premium & Safe Stainless Steel】Outdoor pizza oven is constructed with high-quality stainless steel. This sturdy and compact oven...
As an affiliate, we earn on qualifying purchases.
Tools and Materials Needed for Cleaning
To tackle the task at hand, you’ll need a few tools and materials. Here are three items that will help you clean the top part of your Easy Butter Maker:
-
Soft cloth or sponge: This will be used to wipe away any residue or dirt from the surface of the top part.
-
Eco-friendly cleaning solution: Opt for a natural cleaning solution, such as vinegar and water or baking soda paste, to avoid harsh chemicals and reduce your environmental impact.
-
Toothbrush or small brush: This will be useful for reaching and scrubbing any hard-to-reach areas or crevices.
When cleaning the top part of your Easy Butter Maker, it’s important to consider alternative cleaning methods and eco-friendly options. These not only help to protect the environment but also ensure the longevity of your equipment.
Remember to always follow the manufacturer’s instructions for cleaning and maintenance.

Cosori Iconic Stainless Steel 6.5 Qt Smart Air Fryer, PFAS-Free Ceramic Coating, Max 450°F, Consistent Cooking, Air Fry, Roast, Bake, Dry, Proof, Reheat, Dishwasher-Safe Basket, Chef-Crafted Recipes
𝘼𝙧𝙩 𝙤𝙛 𝙄𝙘𝙤𝙣𝙞𝙘: Rooted in mastery and the relentless pursuit of perfection. Iconic crafted with uncompromising standards to...
As an affiliate, we earn on qualifying purchases.
Step-by-Step Guide to Disassembling the Top Part of the Easy Butter Maker
When you’re ready to disassemble the top portion of your Easy Butter Maker, start by carefully removing the lid. This will expose the inside of the machine, allowing you to clean it thoroughly.
To continue the disassembling process, gently twist and remove the blade from the center of the top part. Be cautious not to cut yourself, as the blade can be sharp.
Once the blade is removed, you can easily detach the silicone gasket by pulling it away from the lid.
Now that the top part is disassembled, you can proceed with cleaning techniques to remove any residue or buildup.

ALJ 3PCS Air Fryer Oven Mesh Rack for COSORI 10QT Air Fryer Toaster Oven, Premium Dehydrator Rack Shelf Grid Grill Pan Crisper Cooking Plate Tray Insert Grate for COSORI 13QT Oven, Dishwasher Safe
Air Fryer Oven Shelf for COSORI Air Fryer Oven: Our air fryer oven mesh rack is fit for...
As an affiliate, we earn on qualifying purchases.
Tips for Removing Residue From the Top Part
After disassembling the top portion, you can easily remove any residue by using a soft cloth or sponge. Start by dampening the cloth or sponge with warm water. Gently wipe the surface of the top part, making sure to focus on any stubborn residue.
For particularly tough residue, you can add a small amount of mild dish soap to the cloth or sponge. Rinse the cloth or sponge thoroughly and continue wiping until the residue is completely gone.
To ensure an eco-friendly cleaning process, you can also try using natural cleaning solutions such as vinegar or lemon juice mixed with water. These options are effective in removing residue while being environmentally friendly.
How to Clean the Filter Screen on the Top Part
The filter screen on the top portion can easily be cleaned by rinsing it with warm water. However, if you’re looking for alternative cleaning methods or want to ensure proper maintenance, there are a few other options you can try. Here is a table outlining different ways to clean the filter screen:
| Cleaning Method | Steps |
|---|---|
| Vinegar | 1. Mix equal parts vinegar and warm water. 2. Soak the filter screen in the mixture for 30 minutes. 3. Rinse with warm water. |
| Baking Soda | 1. Create a paste using baking soda and water. 2. Apply the paste to the filter screen. 3. Let it sit for 10 minutes. 4. Scrub gently with a soft brush. 5. Rinse with warm water. |
| Lemon Juice | 1. Squeeze fresh lemon juice onto the filter screen. 2. Let it sit for 15 minutes. 3. Scrub gently with a soft brush. 4. Rinse with warm water. |
Removing Stains and Odors From the Top Part
When it comes to cleaning the top part of the Easy Butter Maker, there are a few key points to keep in mind.
First, effective stain removal is crucial in order to maintain the cleanliness of the machine.
Secondly, odor-neutralizing techniques can help eliminate any lingering smells that may be present.
Lastly, having the right cleaning tools and supplies on hand is essential for a thorough and efficient cleaning process.
Effective Stain Removal
To effectively remove stains from the top part of your easy butter maker, try using a mixture of vinegar and baking soda. This powerful combination works wonders in breaking down tough stains and leaving your easy butter maker looking clean and fresh. Here are three effective stain removal techniques that you can try:
-
Mix equal parts vinegar and baking soda to form a paste. Apply the paste to the stained areas and let it sit for a few minutes. Scrub gently with a brush or sponge, then rinse thoroughly.
-
Another method is to soak the stained parts in a solution of vinegar and warm water for about 30 minutes. After soaking, scrub the stains with a brush and rinse well.
-
For stubborn stains, you can try using a mild dish soap along with the vinegar and baking soda mixture. This will help break down the stain and make it easier to remove.
By using these effective cleaning methods, you can ensure that your easy butter maker stays in pristine condition and ready for your next use.
Now, let’s move on to the next section and explore some odor-neutralizing techniques.
Odor-Neutralizing Techniques
For fresher-smelling results, try using a mixture of vinegar and baking soda to eliminate odors from your easy butter maker. Odor neutralizing products can be expensive and filled with harsh chemicals, but natural cleaning solutions like vinegar and baking soda are a great alternative.
To get rid of any lingering smells, simply mix equal parts vinegar and baking soda in a bowl. Then, pour the mixture into the top part of the easy butter maker and let it sit for about 30 minutes. The vinegar will help neutralize any odors, while the baking soda will absorb them.
After the allotted time, rinse the easy butter maker thoroughly with warm water, and you’ll be left with a fresh, odor-free appliance.
Cleaning Tools and Supplies
To ensure a thorough cleaning, follow these cleaning techniques and sanitizing methods:
- Use a sponge and dish soap to scrub away any residue from your appliance.
- Rinse the sponge under running water to remove any loose dirt or debris before using it on the appliance.
- Apply a small amount of dish soap directly onto the sponge and gently scrub the surface of the easy butter maker.
- Pay extra attention to areas with stubborn residue, using circular motions to help loosen and remove it.
By using these cleaning techniques and sanitizing methods, you can effectively remove any buildup or residue from your easy butter maker, ensuring it remains clean and ready for use.
Once you have finished cleaning, it’s important to dry and reassemble the top part of the easy butter maker, which will be discussed in the next section.
Drying and Reassembling the Top Part of the Easy Butter Maker
When it comes to drying the top part of the Easy Butter Maker, proper techniques are essential for achieving optimal results.
I will discuss the best methods for ensuring thorough drying, such as air drying or using a clean towel.
Additionally, reassembling the top part correctly is crucial for easy and efficient use of the Easy Butter Maker, and I will provide step-by-step instructions on how to do so.
Proper Drying Techniques
To prevent moisture buildup, it’s important to thoroughly dry the top part of the Easy Butter Maker. After cleaning, make sure to remove any excess water by following these alternative drying methods:
-
Use a clean towel to pat the top part dry. Gently press the towel against the surface to absorb any remaining moisture.
-
Place the top part of the Easy Butter Maker in a well-ventilated area. Allow it to air dry completely before reassembling.
-
Utilize a hairdryer on low heat setting to expedite the drying process. Hold the hairdryer a few inches away from the surface and move it around to evenly distribute the heat.
Properly drying the top part of the Easy Butter Maker is crucial in preventing mold growth and ensuring its longevity.
Reassembling for Easy Use
Now that we’ve discussed proper drying techniques for the top part of the Easy Butter Maker, let’s move on to reassembling the device for easy use.
After the parts have dried completely, it’s time to put everything back together. Start by reattaching the lid to the bottom container, making sure it fits snugly.
Then, carefully insert the filter into the bottom container, ensuring it is properly aligned.
Next, place the top container onto the bottom container, making sure the tabs line up and lock securely.
Finally, twist the handle back into place until it is tightly secured.
These reassembling techniques will ensure that your Easy Butter Maker is ready for use whenever you need it.
Maintenance Tips for Longevity
Remember to regularly check the components of your device, such as the filter and handle, to ensure their proper functioning and longevity. Taking care of these small details can prevent rust and extend the life of your easy butter maker.
Here are some maintenance tips to keep your device in top condition:
-
Clean the filter: Remove the filter and soak it in warm soapy water to remove any residue or buildup. Rinse well and let it dry completely before reattaching it.
-
Wipe down the handle: Use a damp cloth with mild detergent to clean the handle. Be sure to dry it thoroughly afterwards to prevent rust.
-
Removing tough stains: For stubborn stains, mix baking soda with water to make a paste. Apply the paste to the stained area and scrub gently with a soft brush. Rinse thoroughly and dry.
Preventative Maintenance for the Top Part
Make sure you regularly wipe down the top part of the Easy Butter Maker to prevent any buildup of residue. Cleaning frequency is important to maintain the efficiency and longevity of the machine.
While the Easy Butter Maker comes with its own cleaning instructions, there are alternative cleaning methods you can try. For routine cleaning, simply use a damp cloth or sponge with mild detergent to wipe away any residue. For tougher buildup, you can soak the top part in warm soapy water for a few minutes before scrubbing with a brush. Remember to rinse thoroughly and dry completely before reassembling.
By incorporating these cleaning practices into your routine, you can ensure the Easy Butter Maker operates at its best.
Now, let’s move on to cleaning troubleshooting: common issues and solutions.
Cleaning Troubleshooting: Common Issues and Solutions
When it comes to cleaning troubleshooting for the easy butter maker, there are two key points to focus on: sticky residue removal and odor elimination techniques.
Sticky residue can build up over time and make it difficult to use the machine effectively, so knowing how to remove it is crucial.
Additionally, eliminating any lingering odors can help ensure that your butter maker is clean and ready for use.
Sticky Residue Removal
To remove the sticky residue on the top part of your easy butter maker, simply wipe it down with a damp cloth. This quick and easy method will help keep your easy butter maker clean and ready to use.
However, for more stubborn residue, you may need to try some deeper cleaning techniques. Here are three effective methods to consider:
-
Vinegar Solution: Mix equal parts of white vinegar and water in a spray bottle. Spray the solution onto the sticky residue and let it sit for a few minutes. Then, wipe it off with a cloth or sponge.
-
Baking Soda Paste: Make a paste by mixing baking soda with a small amount of water. Apply the paste to the sticky residue and gently scrub with a sponge or brush. Rinse thoroughly with water.
-
Rubbing Alcohol: Dampen a cloth with rubbing alcohol and gently rub the sticky residue. The alcohol will help dissolve the residue, making it easier to remove.
These residue removal techniques and deep cleaning methods will ensure that your easy butter maker stays in top condition for a long time.
Odor Elimination Techniques
Now that we’ve discussed the effective removal of sticky residue from the top part of the easy butter maker, let’s move on to another important aspect of cleaning: odor elimination techniques. When using the easy butter maker, it’s common for it to develop unpleasant odors, especially if it hasn’t been cleaned frequently. To tackle this issue, there are a few tried and tested methods for odor elimination that you can try.
Here is a table summarizing different odor elimination techniques and their effectiveness:
| Technique | Effectiveness |
|---|---|
| Vinegar | High |
| Baking Soda | Medium |
| Lemon Juice | Low |
| Activated Charcoal | High |
How Often Should You Clean the Top Part of Your Easy Butter Maker
Make sure you’re regularly cleaning the top part of your Easy Butter Maker to maintain optimal performance. It’s important to remove any residue effectively to ensure that your butter maker continues to work efficiently. Here are the best cleaning techniques that I recommend:
-
Use warm, soapy water: Start by disassembling the top part of your Easy Butter Maker. Then, soak it in warm, soapy water for a few minutes to loosen any residue.
-
Scrub with a soft brush: After soaking, use a soft brush or sponge to scrub away any remaining residue. Be gentle to avoid damaging the surface.
-
Rinse thoroughly: Once you’ve scrubbed away all the residue, make sure to rinse the top part of your Easy Butter Maker thoroughly with clean water. This will ensure that no soap or residue is left behind.
Following these cleaning techniques regularly will help keep your Easy Butter Maker in top condition and prevent any buildup that could affect its performance.
Alternative Cleaning Methods for the Top Part of the Easy Butter Maker
If you’re looking for other ways to keep your Easy Butter Maker’s upper component clean, consider trying alternative cleaning methods.
These methods can help remove tough stains and keep your Easy Butter Maker in great condition.
One option is to use a mixture of baking soda and water. Simply make a paste with the baking soda and water, apply it to the stained areas, and let it sit for a few minutes. Then, scrub the stains gently with a soft brush or sponge.
Another alternative method is to use white vinegar. Mix equal parts white vinegar and water, and use a cloth or sponge to wipe down the stained areas. The acidity of the vinegar can help break down and remove tough stains.
These alternative cleaning methods can be effective and help keep your Easy Butter Maker looking its best.
Frequently Asked Questions
Can I Wash the Top Part of the Easy Butter Maker in the Dishwasher?
Sure, you can wash the top part of the Easy Butter Maker in the dishwasher. However, for dishwasher safety and to preserve the longevity of the product, alternative cleaning methods like hand washing are recommended.
Is It Necessary to Clean the Top Part of the Easy Butter Maker After Every Use?
It’s important to clean the top part of the Easy Butter Maker after each use to maintain hygiene. I’ve found that using warm soapy water and a sponge works well, but there may be alternative methods.
What Should I Do if the Filter Screen on the Top Part of the Easy Butter Maker Becomes Clogged?
If the filter screen on the top part of my easy butter maker gets clogged, I can try alternative methods to unclog it. To prevent clogging, I should regularly clean the screen after each use.
How Can I Remove Stubborn Stains and Odors From the Top Part of the Easy Butter Maker?
To remove tough stains and eliminate stubborn odors from the top part of the Easy Butter Maker, I recommend using a mixture of vinegar and baking soda. It’s a powerful solution that works wonders.
Are There Any Specific Cleaning Products That Are Recommended for Cleaning the Top Part of the Easy Butter Maker?
I recommend using a mild dish soap and warm water to clean the top part of the easy butter maker. Alternatively, you can also try using vinegar or baking soda for a more natural cleaning approach.
Conclusion
In conclusion, cleaning the top part of your Easy Butter Maker is an absolute game changer! Trust me, you won’t believe the difference it makes until you try it yourself.
With just a few simple steps, you can remove residue and keep your filter screen in pristine condition. Plus, the preventative maintenance tips will ensure your Easy Butter Maker stays in top shape for years to come.
Don’t underestimate the power of a clean top part – it’s the secret to butter-making success!