Connect with us

Production & Processing

How to Get Marijuana Oil From a Easy Butter Maker

Published

on

An image showcasing the step-by-step process of extracting marijuana oil using an Easy Butter Maker

So, you want to know how to get marijuana oil from an Easy Butter Maker? Well, you’ve come to the right place! In this article, I’ll guide you through the step-by-step process of extracting marijuana oil using this handy device.

From choosing the right Easy Butter Maker to troubleshooting common issues, I’ve got you covered. Whether you’re a seasoned cannabis enthusiast or a curious beginner, this informative and detailed guide will help you become an expert at making your own marijuana oil.

Let’s get started!

Key Takeaways

  • Consider the size and capacity of the Easy Butter Maker that suits your needs
  • Choose the right marijuana strain for extraction based on desired effects
  • Follow the instructions provided with the Easy Butter Maker for optimal results
  • Use fine mesh strainer or cheesecloth for filtering the marijuana oil before storage

[bulkimporter_image id=’2′]

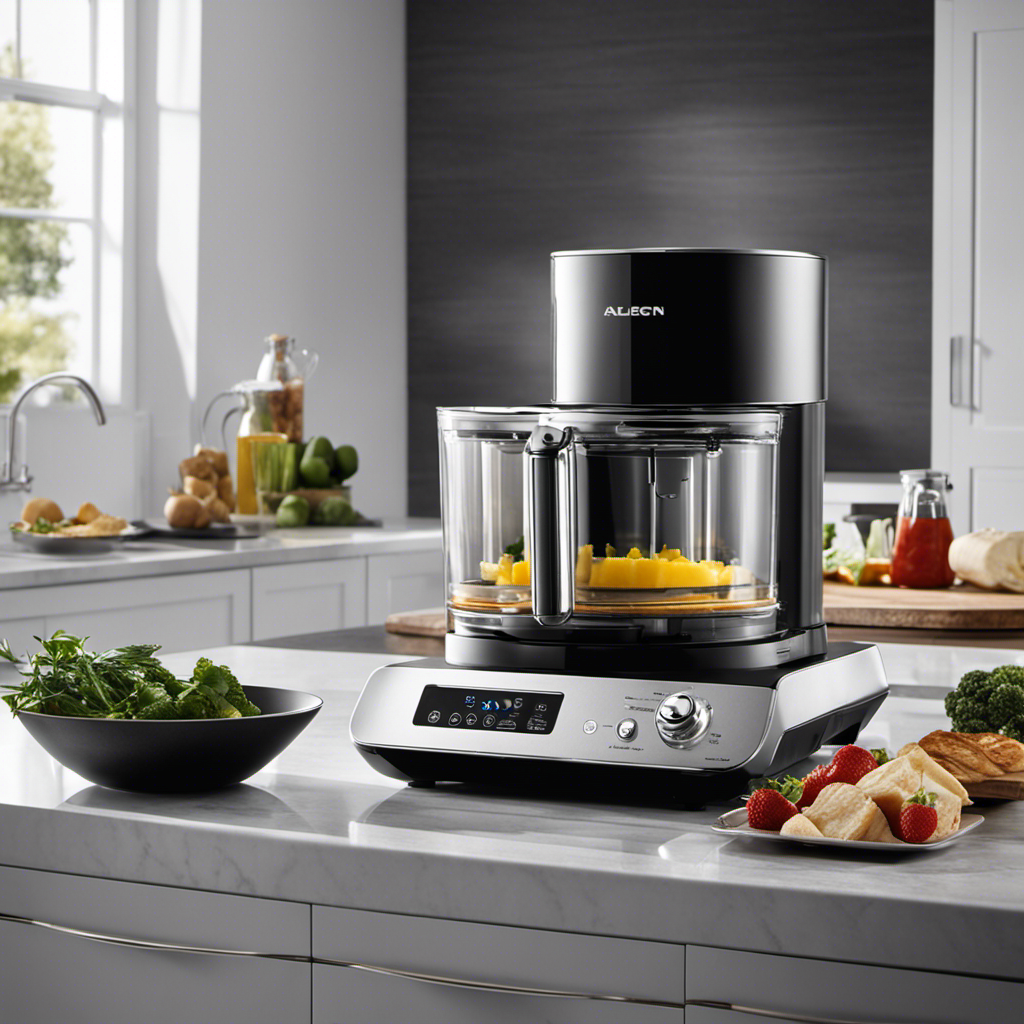
Choosing the Right Easy Butter Maker

When choosing the right easy butter maker, you’ll want to consider the size and capacity that best suits your needs. The optimal temperature and infusion techniques are also crucial factors to consider.

Size and capacity are important because they determine how much marijuana oil you can make at once. If you plan on making large batches of oil, you’ll want a butter maker with a larger capacity. However, if you only need small amounts of oil for personal use, a smaller capacity will suffice.

In terms of temperature, it is essential to find an easy butter maker that allows you to set the optimal temperature for infusion. Different infusion techniques require different temperatures to extract the maximum amount of cannabinoids from the marijuana. Look for a butter maker that offers precise temperature control for consistent and efficient results.

Furthermore, infusion techniques vary from person to person. Some prefer using the traditional method of infusing butter with marijuana, while others may prefer using oils or other ingredients. Consider your preferred infusion technique and ensure that the easy butter maker you choose supports it.

[bulkimporter_image id=’3′]

Gathering the Necessary Ingredients

To make marijuana-infused oil, you’ll need all the necessary ingredients. First and foremost, you need to choose the right marijuana strain. Different strains have varying levels of cannabinoids, such as THC and CBD, which will determine the potency and effects of your oil. Sativa strains are known for their uplifting and energizing effects, while indica strains provide a more relaxing and sedating experience. Hybrid strains offer a combination of both. Consider your desired outcome and select a strain accordingly.

Once you have chosen the right strain, you need to understand the extraction process. There are various methods to extract the cannabinoids from the marijuana plant, but one popular method is using an easy butter maker. This device simplifies the process by providing a controlled temperature and agitation to extract the cannabinoids efficiently.

Now that you have gathered your marijuana strain and easy butter maker, you are ready to proceed with making marijuana-infused oil. Remember to follow the instructions provided with your easy butter maker to ensure a successful extraction.

It is important to note that homemade marijuana-infused oils should be consumed responsibly and in moderation, as their potency can vary. Always start with a small dose and wait to assess the effects before consuming more.

[bulkimporter_image id=’4′]

Preparing the Marijuana for Extraction

Once you’ve chosen the right strain and understand the extraction process, it’s time to prepare the marijuana for extraction.

The first step in this process is decarboxylation. Decarboxylation is the process of heating the marijuana to activate its compounds, such as THC and CBD. This step is crucial because raw marijuana does not have the same psychoactive effects as decarboxylated marijuana.

To decarboxylate the marijuana, preheat your oven to 230°F (110°C). Break up the marijuana buds into smaller pieces and spread them evenly on a baking sheet. Place the baking sheet in the oven and let the marijuana bake for about 40-45 minutes. This process converts the THCA (tetrahydrocannabinolic acid) into THC, which is the compound responsible for the marijuana’s psychoactive effects.

Once the marijuana is properly decarboxylated, it’s ready for extraction. There are various infusion techniques that you can use to extract the desired compounds from the marijuana. Some popular methods include using a butter machine, a slow cooker, or a double boiler. These methods involve combining the decarboxylated marijuana with a carrier oil, such as coconut oil or olive oil, and heating it over a low temperature for a certain period of time.

[bulkimporter_image id=’5′]

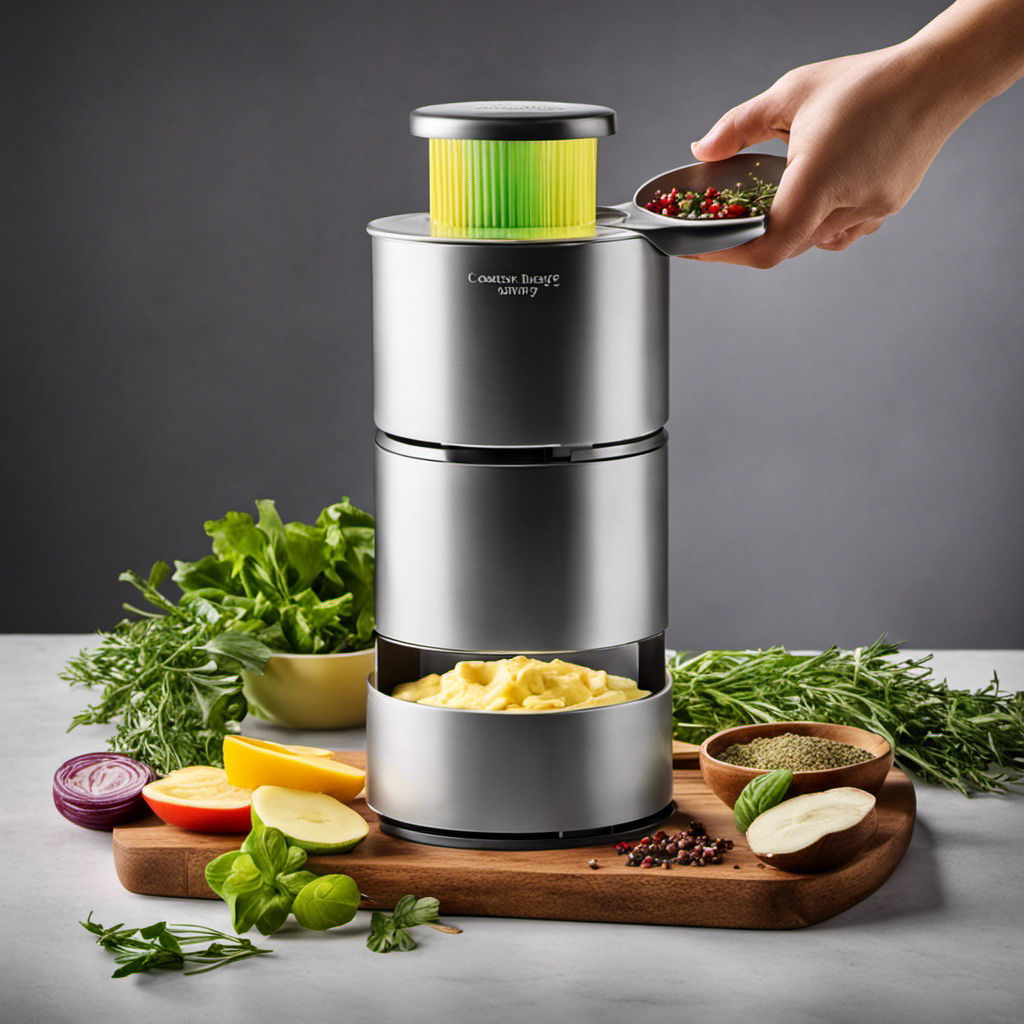
Adding the Marijuana to the Easy Butter Maker

After decarboxylating the marijuana, it’s time to add it to the Easy Butter Maker for extraction. This step is crucial in infusing the marijuana’s active compounds into the oil. The Easy Butter Maker simplifies the process, ensuring a hassle-free experience. Here’s how to add the marijuana to the Easy Butter Maker:

  1. Break down the decarboxylated marijuana into small pieces. This will help with efficient extraction.

  2. Place the broken down marijuana into the Easy Butter Maker’s chamber. Make sure not to overfill it, as it may affect the extraction process.

  3. Securely close the Easy Butter Maker’s lid, ensuring a tight seal. This will prevent any leakage during the extraction process.

  4. Turn on the Easy Butter Maker and select the desired extraction time and temperature. Different infusing techniques may require different settings, so refer to the manufacturer’s instructions or recipes for dosage recommendations.

To give you a better understanding, below is a table summarizing the recommended dosage for different infusing techniques:

Infusing Technique Dosage Recommendations
Low Dose 5-10 mg
Medium Dose 10-20 mg
High Dose 20-40 mg
Customized Dose Varies

[bulkimporter_image id=’6′]

Decarboxylating the Marijuana

When decarboxylating your marijuana, make sure to break it down into small pieces for efficient extraction. Decarboxylation is a crucial step in the process of making marijuana oil as it activates the cannabinoids in the plant material, making them bioavailable and ready for extraction.

Here are some decarboxylation techniques that can help maximize cannabinoid extraction:

  • Preheat your oven to 240°F (115°C).
  • Break down the marijuana into small pieces, ensuring even heat distribution.
  • Spread the marijuana evenly on a baking sheet lined with parchment paper.
  • Place the baking sheet in the preheated oven and bake for 40-60 minutes.
  • Stir the marijuana every 10-15 minutes to prevent uneven heating.

During the decarboxylation process, the heat converts the non-psychoactive THCA (tetrahydrocannabinolic acid) into the psychoactive THC (tetrahydrocannabinol). This is why decarboxylation is essential for unlocking the full potential of your marijuana for medicinal or recreational use.

[bulkimporter_image id=’7′]

Infusing the Butter With Marijuana

When it comes to infusing butter with marijuana, it’s important to consider the optimal infusion techniques and dosage considerations for potency.

The infusion technique you choose can greatly impact the final product’s flavor, texture, and potency. It’s crucial to find the right balance between extracting the cannabinoids from the marijuana and infusing them into the butter to achieve the desired potency level.

Optimal Infusion Techniques

To achieve optimal infusion techniques, you should begin by finely grinding your marijuana before placing it in the easy butter maker. This ensures that the marijuana is evenly distributed throughout the butter, allowing for better extraction of cannabinoids. Additionally, finely grinding the marijuana increases the surface area, facilitating a faster infusion process.

Here are some tips for dosage accuracy and infusion time optimization:

  • Use a kitchen scale to measure the exact amount of marijuana needed for your desired dosage.
  • Experiment with different infusion times to find the perfect balance between potency and flavor.
  • Stir the mixture regularly during the infusion process to promote even distribution of cannabinoids.
  • Consider using a thermometer to monitor the temperature and prevent overheating, which can degrade the potency of the final product.
  • Allow the infused butter to cool and solidify before straining, this will make the process easier and more efficient.

Dosage Considerations for Potency

For accurate potency in your infusions, it’s important to consider dosage when using finely ground marijuana. Dosage accuracy plays a crucial role in achieving the desired effects and avoiding any potential side effects.

When it comes to using marijuana for infusion, it’s essential to start with a small dosage and gradually increase it as needed. This allows for better control over the potency of your final product.

Additionally, alternative extraction methods can also impact dosage accuracy. Different methods, such as using an easy butter maker, may require adjustments in dosage calculations due to variations in extraction efficiency.

It’s important to research and understand the specific extraction method you are using to ensure accurate dosing and achieve the desired potency in your marijuana infusions.

[bulkimporter_image id=’8′]

Setting the Temperature and Time on the Easy Butter Maker

The temperature and time settings on the Easy Butter Maker can be adjusted to achieve the desired potency and consistency of the marijuana oil. This versatile machine allows you to have full control over the infusion process, ensuring optimal results every time.

Here’s how to set the temperature and time on the Easy Butter Maker:

  • Choose the optimal temperature: The Easy Butter Maker offers a temperature range of 160-220°F (71-104°C). Experiment with different temperatures to find the one that works best for your desired potency and flavor profile.

  • Determine the infusion time: Infusion time varies depending on the desired strength of the marijuana oil. The Easy Butter Maker allows for infusion times ranging from 45 minutes to 4 hours. Longer infusion times typically result in a more potent oil.

  • Set the temperature: Once you’ve determined the optimal temperature, simply turn the dial on the Easy Butter Maker to the desired setting.

  • Set the infusion time: Adjust the timer on the Easy Butter Maker according to your desired infusion time. The machine will automatically shut off once the set time has elapsed.

  • Monitor and adjust as needed: Throughout the infusion process, keep an eye on the Easy Butter Maker to ensure that the temperature and time settings are working as intended. Adjust as necessary to achieve the desired potency and consistency.

[bulkimporter_image id=’9′]

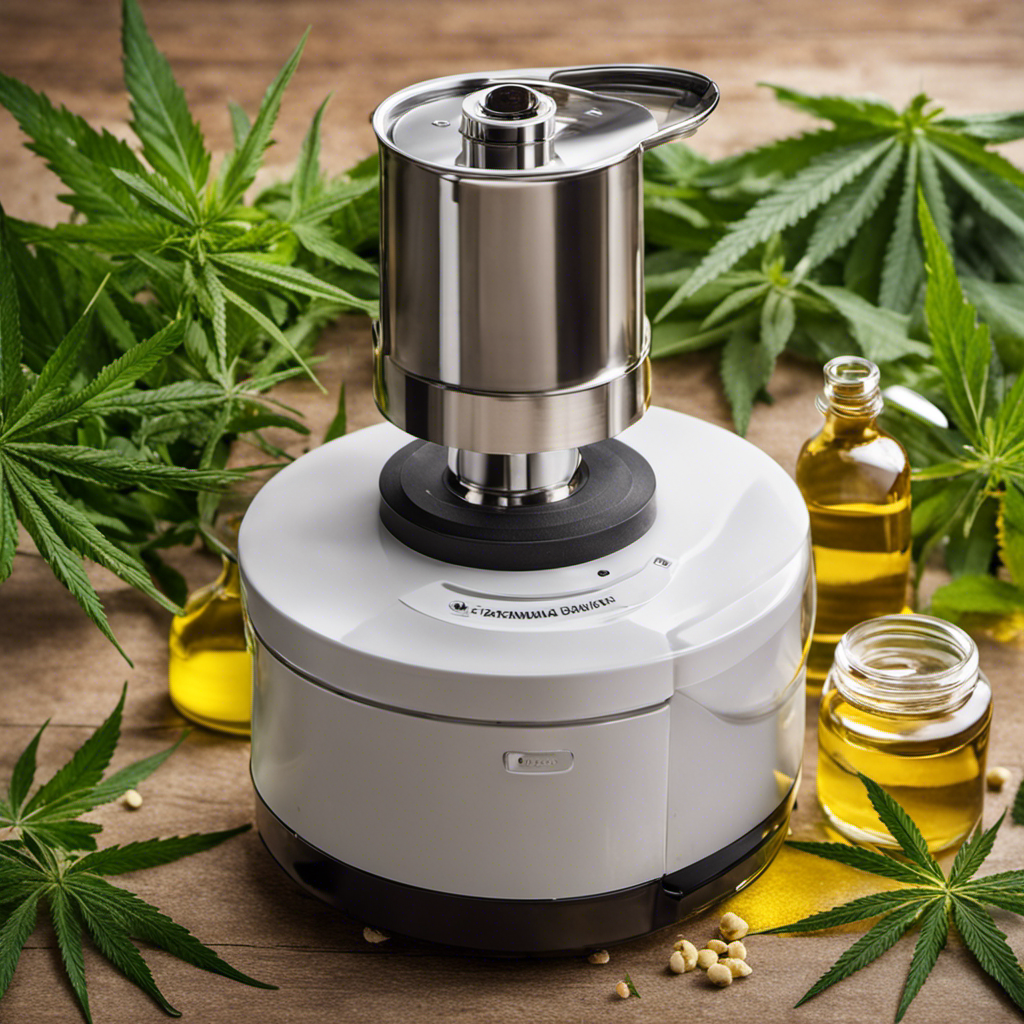
Extracting the Marijuana Oil From the Easy Butter Maker

Once you’ve adjusted the temperature and time settings on the Easy Butter Maker, you’ll be ready to extract the infused oil. The decarboxylation process has already taken place during the heating phase, so now it’s time to separate the oil from the plant material. The Easy Butter Maker uses a simple and efficient method to do this.

To extract the marijuana oil, start by allowing the mixture to cool down for a few minutes. This will make it easier to handle. Once it has cooled, place the provided filter bag over a heat-resistant container. Slowly pour the mixture into the filter bag, being careful not to spill any.

Next, gently squeeze the filter bag to separate the oil from the plant material. The infused oil will pass through the filter and collect in the container below. This method ensures that you are left with a clean and pure oil.

While the Easy Butter Maker offers a convenient way to extract marijuana oil, there are alternative extraction methods available. Some people prefer using solvents like alcohol or butane to extract the oil. However, these methods can be dangerous and should only be attempted by experienced individuals in a well-ventilated area.

[bulkimporter_image id=’10’]

Straining the Oil for a Smooth Consistency

When it comes to filtering the marijuana oil for a smooth consistency, there are a few tips that I have found to be very helpful.

First, using a fine mesh strainer or cheesecloth can help remove any plant material or impurities from the oil.

Secondly, gently pressing the oil through the strainer can help ensure that you get the most out of your extraction.

Lastly, once the oil is strained, you can enhance its texture and flavor by adding a few drops of your favorite essential oil or flavor extract.

Filtering Process Tips

To enhance the filtering process, you can start by using a fine mesh strainer or cheesecloth. These tools are essential for removing any plant matter or impurities from your marijuana oil, resulting in a smoother and cleaner final product. Here are some additional filtering techniques and alternative extraction methods to consider:

  • Use activated charcoal to further purify the oil and remove any remaining contaminants.
  • Try using a French press or coffee filter for a more precise filtration process.
  • Consider using a vacuum filtration system to expedite the filtering process.
  • Experiment with different filter sizes to achieve the desired consistency and clarity.
  • If you’re looking for a more potent oil, consider using a winterization process to remove unwanted fats and lipids.

By employing these filtering techniques and alternative extraction methods, you can ensure that your marijuana oil is of the highest quality.

Now, let’s explore how to enhance the texture and flavor of your oil.

Texture and Flavor Enhancements

Enhancing the texture and flavor of your marijuana oil can be achieved by infusing it with various herbs and spices. By incorporating these aromatic ingredients, you can elevate the overall taste profile of your oil, making it more enjoyable to consume.

When it comes to enhancing the aroma, consider adding herbs like lavender, rosemary, or mint. These herbs can add a pleasant and soothing scent to your oil, creating a more pleasant experience.

To enhance the flavor profile, spices like cinnamon, nutmeg, or cloves can be used. These spices can provide a warm and subtle taste that complements the natural flavors of the marijuana oil.

Experimenting with different combinations of herbs and spices can help you create a customized and delightful marijuana oil that suits your preferences.

[bulkimporter_image id=’11’]

Storing the Marijuana Oil Properly

Make sure you store the marijuana oil in a cool and dark place to maintain its potency and quality. Proper storage techniques are crucial for ensuring that your marijuana oil remains fresh and effective for as long as possible. Here are some tips to help you store your marijuana oil properly:

  • Keep it in an airtight container: Transfer your marijuana oil into a dark glass container with a tight-fitting lid to prevent air and light from degrading its quality.

  • Store it in a cool place: Heat can degrade the potency of marijuana oil, so it’s important to store it in a cool location, like a pantry or refrigerator.

  • Avoid direct sunlight: UV rays can break down the cannabinoids in marijuana oil, so keep it away from direct sunlight.

  • Keep it away from moisture: Moisture can lead to mold or mildew growth, which can ruin your marijuana oil. Make sure the storage area is dry and free from any moisture.

  • Label and date your containers: To keep track of the shelf life of your marijuana oil, label each container with the date it was made. This will help you estimate its freshness and potency.

By following these storing techniques, you can ensure that your marijuana oil retains its potency and quality for a longer shelf life.

Now, let’s move on to calculating the THC content of the oil.

[bulkimporter_image id=’12’]

Calculating the THC Content of the Oil

If you’re curious about the THC content of your oil, a simple and effective way to calculate it is by using a THC testing kit. These kits are specifically designed to measure the potency of THC in marijuana oil. By following the instructions provided with the kit, you can accurately determine the amount of THC present in your oil.

Calculating the potency of your marijuana oil is important for dosage accuracy. Knowing the THC content allows you to tailor your consumption to your desired effects. Whether you’re using the oil for medicinal purposes or recreational use, understanding the potency will ensure that you achieve the desired results without overdoing it.

To calculate the THC content, you’ll need to collect a small sample of your oil and follow the instructions provided in the THC testing kit. These kits typically involve mixing the oil with a reagent and observing the color change to determine the THC concentration. The results will give you a clear understanding of the potency of your oil.

Understanding the potency of your marijuana oil is crucial for achieving the desired effects and ensuring dosage accuracy. Once you have calculated the THC content, you can move on to understanding the different uses for marijuana oil.

[bulkimporter_image id=’13’]

Understanding the Different Uses for Marijuana Oil

When it comes to marijuana oil, there are several key points to consider.

First, there are numerous health benefits associated with its use, including pain relief, reduced anxiety, and improved sleep.

Additionally, cooking with marijuana oil has become increasingly popular, as it allows for the infusion of cannabis into various dishes, providing both flavor and potential therapeutic effects.

However, it is important to be aware of the legal considerations surrounding the use of marijuana oil, as the laws differ from state to state and country to country.

Health Benefits of Marijuana Oil

To fully experience the health benefits of marijuana oil, you’ll want to ensure that you’re using a high-quality easy butter maker. The benefits of CBD oil, a component of marijuana oil, are vast and have been recognized for their medical applications. Here are some key benefits:

  • Pain relief: CBD oil has been known to alleviate chronic pain and reduce inflammation.
  • Anxiety and depression management: Studies have shown that CBD oil can help reduce symptoms of anxiety and depression.
  • Epilepsy treatment: CBD oil has been proven to effectively treat seizures in individuals with epilepsy.
  • Cancer symptom relief: Marijuana oil can help alleviate nausea, vomiting, and pain associated with cancer treatments.
  • Neuroprotective properties: CBD oil may have neuroprotective properties, which can help protect the brain from degenerative diseases like Alzheimer’s.

Using a high-quality easy butter maker ensures that you’re getting the most potent and pure marijuana oil, maximizing its health benefits.

Cooking With Marijuana Oil

Using marijuana oil in your cooking can add a unique flavor and potential health benefits to your dishes. Cooking with marijuana oil has recently gained popularity due to its versatility and alternative uses.

When it comes to cooking techniques, marijuana oil can be used in various ways. You can infuse it into butter or oil to use as a base for baking or sautéing. It can also be added directly to dishes like soups, sauces, or dressings, providing an extra layer of flavor. Additionally, marijuana oil can be used to make homemade edibles, such as brownies or cookies.

However, it is important to remember that the potency of marijuana oil can vary, so it’s crucial to start with a small amount and gradually increase if desired.

Overall, cooking with marijuana oil allows you to explore new flavors and experiment with alternative uses in the kitchen.

Legal Considerations for Marijuana Oil

If you’re considering cooking with marijuana oil, it’s important to be aware of the legal considerations surrounding its use. Here are some key points to keep in mind:

  • Dosage Guidelines: It’s crucial to understand the recommended dosage when using marijuana oil in cooking. Start with a low dose and gradually increase as needed, keeping in mind that the effects can be stronger when ingested compared to smoking.

  • Legal Regulations: Before using marijuana oil in your cooking, familiarize yourself with the legal regulations in your area. Laws regarding the possession, purchase, and use of marijuana products can vary from state to state and country to country.

  • Consult with a Professional: If you have any doubts or questions regarding the legal aspects of cooking with marijuana oil, it’s always a good idea to consult with a legal professional who specializes in cannabis regulations.

  • Labeling and Storage: Ensure that your marijuana oil is properly labeled and stored in a secure place to prevent unauthorized access and to comply with legal requirements.

  • Responsible Use: Always use marijuana oil responsibly and in accordance with the laws in your area. Be aware of the potential effects and risks associated with its use, and make informed decisions to ensure your safety and the safety of others.

[bulkimporter_image id=’14’]

Exploring Recipes to Use Marijuana Oil In

You can experiment with various recipes to incorporate marijuana oil into your cooking. Cooking with marijuana oil opens up a world of possibilities, allowing you to explore new flavors and alternative uses for this potent ingredient. When it comes to cooking techniques, there are a few important things to keep in mind.

First, it’s crucial to properly infuse the oil with marijuana to ensure the desired effects. This can be done using a variety of methods, such as using a slow cooker or a double boiler. Additionally, it’s important to note that marijuana oil has a lower smoke point than other cooking oils, so it’s best to use it in low-heat cooking methods such as sautéing or baking.

Now, let’s dive into the exciting world of recipes that can be made with marijuana oil. From sweet treats like brownies and cookies to savory dishes like pasta sauces and salad dressings, the possibilities are endless. Start by substituting marijuana oil for regular oil or butter in your favorite recipes, making sure to adjust the dosage according to your desired potency. You can also try creating new recipes specifically designed to highlight the unique flavors and effects of marijuana oil.

Transitioning into the next section, experimenting with different strains of marijuana can add a whole new dimension to your cooking. Each strain has its own distinct flavor profile and effects, so by trying out different strains, you can create unique and personalized dishes. So, let’s explore the world of marijuana strains and discover the endless flavors and possibilities they bring to our cooking.

[bulkimporter_image id=’15’]

Experimenting With Different Strains for Unique Flavors

When experimenting with different strains, it’s fascinating to discover the unique flavors they bring to your cooking. Each strain of marijuana has its own distinct taste profile, and incorporating them into your recipes can elevate the flavors to a whole new level.

Here are some ways to experiment with different strains and extraction methods for unique flavors:

  • Try using different strains in your infusions: Whether you’re making butter, oil, or tinctures, using different strains can result in different flavors. Some strains have a citrusy taste, while others have a more earthy or floral flavor.

  • Use different extraction methods: There are several extraction methods you can try, such as cold pressing, heat infusion, or using a butter maker. Each method can yield different flavors and aromas, so don’t be afraid to experiment.

  • Consider the terpene profiles: Terpenes are the compounds responsible for the unique aromas and flavors of different strains. Pay attention to the terpene profiles of the strains you’re using, as they can greatly influence the final taste of your infused products.

  • Start with small batches: When experimenting with different strains, it’s best to start with small batches to see how the flavors develop. This way, you can adjust the flavors accordingly and find the perfect balance for your recipes.

  • Keep a record: Keep track of the strains you’re using, the extraction methods, and the flavors you’re getting. This will help you understand which combinations work best and allow you to recreate your favorite flavors in future cooking experiments.

[bulkimporter_image id=’16’]

Troubleshooting Common Issues With the Easy Butter Maker

When it comes to troubleshooting common issues with the Easy Butter Maker, there are a few key points to consider.

First, uneven heating can be a frustrating problem, but there are solutions available.

Second, a leaking butter reservoir can cause a mess and waste valuable ingredients, but there are steps you can take to address this issue.

Lastly, inconsistent potency problems can be a concern, but with the right techniques, you can ensure that your marijuana oil is consistently potent.

In this discussion, I will provide detailed solutions for these common problems, so you can enjoy a smooth and successful butter making process.

Uneven Heating Solutions

To prevent uneven heating, it’s important to properly distribute the heat throughout the easy butter maker. This ensures that all parts of the marijuana oil receive the same amount of heat, resulting in a consistent and high-quality product. Here are some tips to achieve even heat and temperature control:

  • Place the easy butter maker on a flat surface to ensure even heat distribution.
  • Stir the mixture regularly to prevent hot spots and ensure all ingredients are evenly heated.
  • Use a thermometer to monitor the temperature and make adjustments as needed.
  • Avoid overfilling the easy butter maker, as this can lead to uneven heating.
  • Consider using a double boiler setup to provide gentle and controlled heat.

By following these tips, you can achieve a more consistent and even heat distribution in your easy butter maker, resulting in better quality marijuana oil.

Now, let’s move on to addressing the issue of a leaking butter reservoir.

Leaking Butter Reservoir

One common issue with the machine is that the butter reservoir may leak, which can be frustrating for users. To prevent leaks, there are a few strategies you can try.

First, ensure that the reservoir is securely fastened to the machine. Check for any loose or damaged parts that may be causing the leak. Additionally, make sure that the gasket or seal around the reservoir is in good condition and properly aligned. If the gasket is worn or damaged, it may need to be replaced.

Another troubleshooting tip is to avoid overfilling the reservoir. This can put excess pressure on the seals and cause leaks.

If you are still experiencing leaking issues, it may be helpful to contact the manufacturer for further assistance.

Inconsistent Potency Problems

The inconsistent potency of the final product can be a frustrating issue for users of this machine. When it comes to making marijuana oil with an easy butter maker, achieving consistent dosage accuracy and extraction efficiency is crucial.

Here are some key factors to consider:

  • Strain selection: Different strains of marijuana have varying levels of cannabinoids, such as THC and CBD. Choosing the right strain with the desired potency can help ensure consistent results.

  • Decarboxylation: Properly decarboxylating the marijuana before extraction is essential for activating the cannabinoids and maximizing their potency.

  • Extraction time: Finding the optimal extraction time is important to achieve the desired potency. Over-extraction can lead to a stronger product, while under-extraction may result in a weaker one.

  • Stirring technique: Ensuring thorough and consistent stirring during the extraction process can help distribute the cannabinoids evenly, leading to more accurate dosing.

  • Temperature control: Maintaining a stable temperature throughout the extraction process is critical for preserving the potency of the cannabinoids.

Frequently Asked Questions

Can I Use Any Type of Marijuana Strain to Make Marijuana Oil?

Yes, you can use different marijuana strains to make marijuana oil. Each strain has unique properties and benefits, so it’s important to choose one that suits your needs. The specific strain you choose can affect the flavor, potency, and overall effects of the oil.

How Long Does It Take to Extract the Marijuana Oil Using the Easy Butter Maker?

To speed up the extraction process with the easy butter maker, I recommend using finely ground marijuana and stirring frequently. To maximize potency, use high-quality marijuana and let it steep for at least 2 hours.

Can I Use the Easy Butter Maker to Extract Oil From Other Herbs or Plants?

Yes, you can use the Easy Butter Maker to extract oil from other herbs or plants. It offers the benefits of easy extraction and efficient processing. Cleaning and maintaining the device regularly ensures maximum efficiency.

Is It Possible to Reuse the Leftover Marijuana After Extraction?

Yes, you can reuse the leftover marijuana after extraction. There are different extraction methods that can be used to further extract the remaining cannabinoids and terpenes for other purposes.

Can I Adjust the Temperature and Time Settings on the Easy Butter Maker for Different Extraction Results?

Yes, you can adjust the temperature and time settings on the Easy Butter Maker to customize the extraction process. This allows you to achieve different results depending on your preferences and desired potency.

Conclusion

In conclusion, using the Easy Butter Maker to extract marijuana oil is a simple and efficient process. By following the steps outlined in this article, you can create your own high-quality oil for various uses.

Remember the adage, ‘Practice makes perfect,’ as you may need to experiment with different strains and recipes to find your desired flavors and effects. Don’t be discouraged by any common issues that may arise; troubleshooting is part of the learning process.

So go ahead and enjoy the benefits of homemade marijuana oil with the help of the Easy Butter Maker!

Continue Reading

Production & Processing

Will Magic Butter Maker Stop Lighting up When Its Done a Cylce

Published

on

By

An image that showcases the Magic Butter Maker's sleek design, with its LED display illuminating in a vibrant green hue, indicating the completion of a cycle

You might be wondering if the Magic Butter Maker will stop lighting up when it’s done a cycle. Well, let me assure you that this innovative device has a cycle completion indicator that will let you know when your butter-making process is complete.

In this article, I will explain how to determine if the Magic Butter Maker has finished its cycle and what to expect from its lighting system when the cycle is complete.

So, let’s dive into the details and discover how this technology can optimize your butter-making experience.

Table of Contents

Key Takeaways

  • The cycle completion indicator of the Magic Butter Maker stops lighting up when the machine is done with a cycle.
  • The lighting system and cycle completion indicator work together seamlessly to provide a user-friendly experience.
  • Some models of the Magic Butter Maker emit an audible sound to signal completion in addition to the indicator lights.
  • The indicator lights and audible sound ensure timely retrieval of the finished product and prevent overrunning the machine.

Understanding the Magic Butter Maker’s Cycle Completion Indicator

You’ll know when the Magic Butter Maker is done with its cycle because the indicator stops lighting up. The Magic Butter Maker’s cycle completion indicator is an essential part of its lighting system.

This indicator lights up at the beginning of the cycle to let you know that it is in progress. As the machine goes through its various stages, the indicator remains lit, providing a visual cue of its ongoing operation.

However, once the cycle is complete and your butter is ready, the indicator will stop lighting up. This serves as a clear signal that the Magic Butter Maker has finished its task and you can now remove your finished product.

The lighting system and the cycle completion indicator work together seamlessly to ensure that you are aware of the machine’s progress and can easily determine when it is done.

How to Determine if the Magic Butter Maker Has Finished Its Cycle

When it comes to determining if the Magic Butter Maker has finished its cycle, two key indicators can be used: indicator lights and audible sound.

The indicator lights on the machine will typically change or turn off once the cycle is complete, providing a visual cue that the process has finished.

Additionally, some models of the Magic Butter Maker also emit an audible sound, such as a beep or a chime, to further signal the completion of the cycle.

These indicators can be useful in ensuring that the butter maker is not left running longer than necessary and helps to maintain the quality of the final product.

Indicator Lights for Completion

The magic butter maker’s lights will stop lighting up once it’s finished a cycle. This is a key feature of its user-friendly design. The indicator lights serve as a visual cue, allowing users to easily determine when the machine has completed its task.

When the butter maker has finished processing, the lights will automatically turn off, indicating that it is safe to open and retrieve the finished product.

In the event that the lights do not turn off after a cycle, there are a few troubleshooting tips to consider. First, ensure that the machine is properly plugged in and the power supply is functioning. If the lights still do not turn off, try resetting the machine by unplugging it for a few minutes and then plugging it back in.

If the issue persists, consult the user manual or contact customer support for further assistance.

Audible Sound When Finished?

There’s an audible beep that signals the completion of a cycle on the magic butter maker. This user-friendly audio signal is one of the key benefits of this device.

Not only does it provide convenience, but it also ensures that you don’t miss the moment when your butter is ready. The audible notification eliminates the need for constantly checking the machine or setting timers. With just a simple beep, you can go about your other tasks and be alerted when the cycle is finished.

This feature is especially helpful for busy individuals who may have multiple things going on in the kitchen. The magic butter maker’s audible notification is a small but significant detail that enhances the overall user experience.

The Significance of the Magic Butter Maker’s Lighting System During Operation

The lighting system on the Magic Butter Maker serves a crucial purpose during operation. It not only indicates the progress of the automatic cycle completion, but also provides a user-friendly visual indicator.

The purpose of this lighting system is to ensure that users are aware of the machine’s status and can easily determine when their desired process has been completed.

Lighting System Purpose

Yes, the lighting system on the Magic Butter Maker is designed to indicate when a cycle is complete. The lights will illuminate during operation to show the progress of the cycle. When the cycle is finished, the lights will stop lighting up, letting the user know that the process is done. This feature eliminates any guesswork and ensures that the user knows when their butter or oil is ready. The lighting system also serves as a troubleshooting indicator, alerting the user to any potential issues or errors during the cycle. This makes the Magic Butter Maker a reliable and efficient kitchen appliance.

Automatic Cycle Completion

During the magic butter maker’s automatic cycle, it is programmed to run for a specific duration to ensure proper extraction and infusion of ingredients. The length of the cycle may vary depending on the recipe or desired outcome.

Once the cycle is completed, the magic butter maker will notify you through a cycle completion notification. This notification can be in the form of a beep, a change in the lighting system, or both.

The purpose of this notification is to let you know that the extraction or infusion process is finished and your magic butter is ready to be used. It is important to pay attention to this notification to avoid overcooking or undercooking your ingredients.

User-Friendly Visual Indicator?

Once the automatic cycle finishes, you’ll be alerted by a visual indicator that lets you know your magic butter is ready.

The magic butter maker has been designed with the user in mind, ensuring a user-friendly experience from start to finish. Instead of relying solely on traditional lights to indicate the completion of the cycle, this innovative device offers alternative indicators that are both intuitive and easy to understand.

The visual indicator, which could be a light or a symbol, will clearly show when the magic butter is ready for use. This user-friendly design eliminates any confusion and ensures that you can confidently proceed to the next step in your butter-making process.

Now, let’s explore what to expect from the magic butter maker’s lights when the cycle is complete.

What to Expect From the Magic Butter Maker’s Lights When the Cycle Is Complete

The lights on the Magic Butter Maker will stop lighting up when it’s finished a cycle. This user-friendly design feature ensures that you can easily determine when your butter is ready.

Here are some troubleshooting tips to keep in mind:

  • Check the power source: Make sure the Magic Butter Maker is properly plugged in and receiving power.

  • Verify the ingredients: Ensure that you have followed the recipe and added the correct ingredients in the right proportions.

  • Clean the machine: A buildup of residue or debris can affect the functionality of the lights. Clean the Magic Butter Maker thoroughly before starting a new cycle.

  • Contact customer support: If the lights still don’t turn off after completing a cycle, reach out to the manufacturer for assistance.

  • Read the manual: Familiarize yourself with the Magic Butter Maker’s operation and troubleshooting guidelines to troubleshoot any issues effectively.

Tips for Interpreting the Magic Butter Maker’s Lighting Patterns

When it comes to using the Magic Butter Maker, understanding the meanings behind its lighting patterns is crucial. Different light signals indicate various stages of the process, such as blending, heating, and infusion.

Troubleshooting light signals is also important in case any issues arise, ensuring a smooth operation.

Furthermore, comprehending cycle completion is essential to know when the Magic Butter Maker has finished its job and is ready for use.

Lighting Pattern Meanings

You can tell what the Magic Butter Maker is doing based on its lighting pattern meanings. The different light signals serve as a way to communicate the current status of the machine and guide the user through the process. Here are the meanings behind the lighting patterns:

  • Steady Green: This indicates that the machine is powered on and ready to use.
  • Blinking Red: This suggests that there is an error or issue with the machine. Troubleshooting may be required to resolve the problem.
  • Alternating Blue and Green: This signifies that the machine is currently in the infusion process, where it is extracting the flavors and nutrients from the ingredients.
  • Slow Blinking Yellow: This indicates that the infusing process has completed, and the machine is now in the cooling phase.
  • Solid Yellow: This means that the machine is in standby mode, waiting for further instructions.

Troubleshooting Light Signals

To troubleshoot any issues with the machine, simply refer to the meanings behind the different lighting patterns. The Magic Butter Maker is designed to be user-friendly, making troubleshooting a breeze.

Interpreting the lighting patterns is key to identifying and resolving any problems that may arise during the machine’s operation. Each lighting pattern corresponds to a specific function or status of the machine.

For example, a steady green light indicates that the machine is ready to begin a cycle, while a flashing red light signals an error or issue that needs attention.

Understanding Cycle Completion

After the machine has finished its cycle, it’ll emit a series of beeps to indicate that it’s done. This feature ensures that users are aware of the completion of the process without having to constantly check the machine.

The Magic Butter Maker is designed with a user-friendly interface, making it easy to understand and operate. However, in case of any issues, there are troubleshooting techniques that can be employed. Here are some key points to consider:

  • Properly following the instructions provided in the user manual.
  • Checking the power source and ensuring it is properly connected.
  • Verifying that the ingredients are added in the correct proportions.
  • Cleaning and maintaining the machine regularly to prevent any clogs or malfunctions.
  • Contacting customer support for further assistance, if needed.

Common Misconceptions About the Magic Butter Maker’s Cycle Completion Indicator

Don’t be fooled by common misconceptions about the Magic Butter Maker’s cycle completion indicator. Many users mistakenly believe that the indicator will stop lighting up once the cycle is done. However, this is not necessarily true.

The Magic Butter Maker’s cycle completion indicator is designed to inform users about the progress of the cycle, but it does not always indicate that the process is complete.

One common misconception is that the indicator will turn off as soon as the cycle is finished. In reality, the indicator may continue to light up even after the cycle is done. This is because the Magic Butter Maker goes through a cooling phase after the cycle is complete, which can take some time.

If you are troubleshooting the Magic Butter Maker and the cycle completion indicator is still lit, even after waiting for a reasonable amount of time, there are a few tips you can try. First, make sure that the lid is securely closed, as an open lid can prevent the indicator from turning off. Additionally, double-check that you have followed the instructions correctly and that all ingredients are properly measured and added.

Troubleshooting: What to Do if the Magic Butter Maker’s Lights Don’t Turn off After a Cycle

If the lights on your Magic Butter Maker’s cycle completion indicator do not turn off after a cycle, try troubleshooting with these tips:

  • Check the power source: Ensure that the Magic Butter Maker is properly plugged in and receiving power.

  • Reset the machine: Turn off the Magic Butter Maker, unplug it, and wait for a few minutes before plugging it back in and turning it on again.

  • Clean the machine: Remove any residue or buildup from the cycle completion indicator and the surrounding area.

  • Contact customer support: If the issue persists, reach out to the manufacturer’s customer support for further assistance.

  • Consider professional repair: If all else fails, consult a professional technician who specializes in Magic Butter Maker repairs.

Exploring the Technology Behind the Magic Butter Maker’s Lighting System

To understand how the lighting system in your Magic Butter Maker works, take a closer look at its technological features.

The Magic Butter Maker is equipped with a user-friendly lighting design that serves multiple purposes. The lights not only indicate the current stage of the cycle but also provide valuable information for interpreting light patterns.

For example, when the machine is in operation, the lights will illuminate to show that the infusion process is underway. As the cycle progresses, the lights may change color or intensity to indicate different stages, such as blending or straining.

By observing and understanding these light patterns, you can easily keep track of the progress and ensure optimal results.

Transitioning into the next section, let’s explore how the Magic Butter Maker’s lights can help maximize efficiency and optimize your cycles.

Maximizing Efficiency: How the Magic Butter Maker’s Lights Can Help Optimize Your Cycles

By understanding and utilizing the light patterns in the Magic Butter Maker, you can maximize efficiency and optimize your infusion cycles. The Magic Butter Maker’s user-friendly interface allows for easy navigation and control over the lights, enabling you to customize your infusion process.

Here are five ways the lights can help optimize your cycle times:

  • The lights indicate the different stages of the infusion process, ensuring you know exactly where you are in the cycle.
  • By monitoring the lights, you can adjust the settings to achieve the desired potency and flavor of your infusions.
  • The lights provide real-time feedback, allowing you to make any necessary adjustments to optimize the extraction process.
  • With the help of the lights, you can avoid over-infusing or under-infusing your ingredients, resulting in a consistently high-quality end product.
  • The intuitive light system makes it easier to track and manage multiple infusion cycles simultaneously, saving you time and effort.

With the Magic Butter Maker’s advanced lighting system and user-friendly interface, optimizing your infusion cycles has never been easier.

Understanding the Benefits of the Magic Butter Maker’s Automatic Cycle Completion Notification

Understanding the benefits of the Magic Butter Maker’s automatic cycle completion notification is essential for optimizing your infusion process. This user-friendly notification feature is designed to let you know when your infusion cycle is complete, ensuring that you can achieve the perfect results every time.

When the cycle is finished, the Magic Butter Maker’s lights will stop lighting up, indicating that it is time to remove your infusion. This simple yet effective notification system eliminates the need for constant monitoring and guesswork, allowing you to focus on other tasks while your infusion is being prepared.

However, if you encounter any issues with the notification, there are troubleshooting tips available in the instruction manual or online resources. These tips can help you resolve any potential problems and ensure a smooth and successful infusion process.

Frequently Asked Questions

Can the Magic Butter Maker’s Cycle Completion Indicator Be Turned Off?

Yes, the Magic Butter Maker’s cycle completion indicator can be turned off. It is a versatile device that can be used for various purposes. Alternatives for making infused butter include using a slow cooker or stove top method.

How Long Does It Typically Take for the Magic Butter Maker’s Lights to Turn off After a Cycle?

The optimal butter infusion time in the Magic Butter Maker varies depending on several factors. These factors can affect the duration of a cycle and the time it takes for the lights to turn off once it’s done.

What Should I Do if the Magic Butter Maker’s Lights Don’t Turn off After a Cycle?

If the Magic Butter Maker’s lights don’t turn off after a cycle, try these troubleshooting tips. Check for alternative indicators that the cycle is complete, such as a sound or a change in the display.

Can I Manually Override the Magic Butter Maker’s Lighting System to Indicate the End of a Cycle?

Yes, you can manually adjust the cycle settings on the Magic Butter Maker to stop the lighting system when the cycle is done. Additionally, there are alternative indicators available to signify the completion of a cycle.

Are There Any Safety Concerns Associated With Relying Solely on the Magic Butter Maker’s Lighting System to Determine if a Cycle Is Complete?

When relying solely on the Magic Butter Maker’s lighting system, there may be reliability concerns. It’s important to consider alternative indicators, such as checking the consistency of the mixture or using a timer, to ensure a complete cycle.

Conclusion

In conclusion, the Magic Butter Maker’s lighting system serves as a helpful indicator to determine when the cycle is complete. The lights will stop lighting up once the machine has finished its cycle, providing a convenient notification for users.

By understanding the different lighting patterns and interpreting them correctly, users can optimize their cycles and maximize efficiency.

Remember the old saying, ‘A watched pot never boils.’ With the Magic Butter Maker’s automatic cycle completion notification, you can confidently step away and let the machine do its magic.

Continue Reading

Production & Processing

Why Does My Magical Butter Maker Have Different Temps

Published

on

By

An image showcasing a sleek Magical Butter Maker with an LED display, radiating a soft blue light, while two distinct temperature settings, labeled "Infuse" and "Decarb," are selected, revealing its versatility

As a proud owner of a Magical Butter Maker, I couldn’t help but wonder why this incredible machine has different temperature settings.

Take a moment to imagine this scenario: you’re infusing your favorite herbs and oils, and suddenly you notice that the temperature fluctuates. Frustrating, right?

Well, fear not! In this article, we will delve into the importance of temperature control, understand the different temperature settings, and explore how temperature affects the extraction process.

Get ready to unlock the secrets behind achieving consistent temperatures and maximizing the flavor and potency of your infusions.

Key Takeaways

  • Temperature control is crucial for extracting desired flavors and compounds.
  • Different ingredients require different temperatures for optimal infusion.
  • The magical butter maker offers a range of temperature settings to choose from.
  • Experimenting with temperature options optimizes the flavor of infusions.

The Importance of Temperature Control

You’ll want to pay attention to temperature control because it plays a crucial role in the magical butter maker’s functionality.

The benefits of temperature control are numerous. First and foremost, it helps in extracting the desired flavors and compounds from the ingredients. By regulating the temperature, you can ensure that the butter or oil is infused with the perfect amount of flavor and potency.

Additionally, temperature control allows for precise and consistent results. Different ingredients require different temperatures for optimal infusion, and the magical butter maker gives you the flexibility to adjust the temperature according to your needs. It uses advanced temperature regulation techniques to maintain a steady and accurate temperature throughout the infusion process, ensuring that you achieve the desired results every time.

Understanding the Different Temperature Settings

When it comes to temperature options for extraction, it is crucial to understand the different settings available.

The magical butter maker offers a range of temperatures to choose from, each serving a specific purpose in the extraction process.

In this discussion, I will delve into the temperature options explained, as well as explore the optimal temperature for extraction.

Temperature Options Explained

To understand the temperature options on your magical butter maker, it’s helpful to know what each setting represents. The temperature control techniques used in the magical butter maker are crucial for achieving the desired potency in your infusions.

Here are the temperature options explained:

  • Low Setting: This setting maintains a temperature between 130°F and 160°F, which is ideal for delicate herbs and flowers. It allows for gentle extraction of flavors and aromas without degrading the potency.

  • High Setting: The high setting maintains a temperature between 160°F and 200°F. This temperature range is suitable for more robust herbs and spices, providing a stronger infusion and extracting a higher potency.

Understanding the impact of temperature on potency is essential. Higher temperatures can lead to a more potent infusion, but also risk degrading the cannabinoids and terpenes. Lower temperatures preserve the delicate compounds but may result in a less potent infusion. It’s vital to find the right balance based on your desired outcome and the specific herbs or flowers you are using.

Optimal Temperature for Extraction

The optimal temperature for extraction depends on the specific herbs or flowers being used and the desired potency of the infusion. Different botanicals have different chemical compositions, and extracting their beneficial compounds requires precise temperature control.

For example, some herbs may require a lower temperature range of 160-180 degrees Fahrenheit to preserve delicate flavors and aromas, while others may need a higher range of 200-220 degrees Fahrenheit to release their potent medicinal properties.

Temperature control techniques, such as using a thermometer or a specialized infusion device like the Magical Butter Maker, allow for accurate and consistent temperature regulation during the extraction process.

How Temperature Affects the Extraction Process

When it comes to extracting cannabinoids from plant material, the optimal extraction temperature is a crucial factor to consider.

The heat applied during extraction plays a significant role in activating the cannabinoids and enhancing their bioavailability.

Additionally, the temperature also has a direct impact on the flavor profile of the final product, as certain terpenes and volatile compounds can be lost or altered at higher temperatures.

Optimal Extraction Temperature

The optimal extraction temperature for the magical butter maker varies depending on the desired results. Achieving the perfect temperature is crucial for maximizing the potency and flavor of your infusions. The magical butter maker offers precise temperature control with its temperature settings, allowing you to customize the extraction process to meet your specific needs.

Here are two key factors to consider when determining the optimal temperature for your magical butter maker:

  1. Desired Potency:

    • Lower temperatures (around 160°F to 180°F) are ideal for preserving the delicate flavors and aromas of herbs, resulting in a milder potency.
    • Higher temperatures (around 190°F to 220°F) can enhance the extraction process, producing a more potent infusion with stronger effects.
  2. Extraction Time:

    • Longer extraction times at lower temperatures can yield a more comprehensive extraction, allowing for a more thorough release of cannabinoids and other desirable compounds.
    • Shorter extraction times at higher temperatures can expedite the process, but may result in a less complete extraction.

Heat and Cannabinoid Activation

Achieving the perfect temperature is crucial for maximizing the potency and flavor of your infusions in the magical butter maker. When it comes to cannabinoid activation techniques, temperature plays a vital role in extraction efficiency.

The magical butter maker offers different temperature options to cater to varying needs and preferences. By selecting the appropriate temperature, you can optimize the extraction process and ensure that you’re getting the most out of your herbs or ingredients.

Higher temperatures, such as 160°F (71°C), can lead to faster extraction but may result in a slightly different taste profile. On the other hand, lower temperatures, like 130°F (54°C), can provide a gentler extraction, preserving the delicate flavors and aromas of your botanicals.

Understanding the relationship between temperature and extraction efficiency is key to achieving the desired potency and flavor in your infusions.

Impact on Flavor Profile

To optimize the flavor of your infusions, try experimenting with different temperature options in the magical butter maker. Temperature plays a crucial role in flavor preservation, as it affects the extraction of compounds from the botanicals.

Here are two ways temperature experimentation can impact the flavor profile:

  • High Temperature:

  • Enhances the extraction of cannabinoids, resulting in a stronger flavor.

  • May lead to a more pronounced herbal or grassy taste.

  • Low Temperature:

  • Preserves the delicate terpenes, which contribute to the aroma and taste.

  • Can result in a smoother and more nuanced flavor profile.

Exploring the Benefits of Low Temperature Infusion

By using lower temperatures, you can extract more beneficial compounds from your herbs and infuse them into your butter using the magical butter maker. This low temperature infusion technique has numerous benefits and advantages, making it a popular choice among culinary enthusiasts. The magical butter maker allows for precise temperature control, ensuring optimal extraction of desired compounds while minimizing the degradation of sensitive ingredients.

One of the key advantages of low temperature infusion is the preservation of delicate flavors and aromas. By avoiding high heat, the magical butter maker helps retain the natural essence of the herbs, resulting in a more flavorful and aromatic butter. Additionally, this method allows for the extraction of a wider range of beneficial compounds, such as cannabinoids and terpenes, which are known for their therapeutic properties.

The table below highlights some of the benefits and advantages of low temperature infusion using the magical butter maker:

Benefits Advantages
Preserves delicate flavors Allows for precise control
Maximizes compound extraction Minimizes ingredient degradation
Enhances therapeutic properties Ensures consistent results

Overall, low temperature infusion with the magical butter maker offers a superior way to extract beneficial compounds from herbs and infuse them into butter, resulting in a more flavorful and potent end product.

High Temperature Infusion: When and Why to Use It

After exploring the benefits of low temperature infusion in my previous subtopic, I want to now discuss high temperature infusion and when it is appropriate to use it.

High temperature infusion refers to the process of infusing ingredients at higher temperatures, typically above 212°F (100°C). While low temperature infusion is known for its ability to preserve delicate flavors and aromas, there are certain situations where high temperature infusion can be advantageous.

Some benefits of high temperature infusion include:

  • Enhanced extraction: Higher temperatures can accelerate the extraction of flavors and compounds from ingredients, resulting in a more intense infusion.
  • Sterilization: Infusing at high temperatures can help kill bacteria and other microorganisms, ensuring the safety of the final product.

To achieve high temperature infusion, temperature control techniques such as using a double boiler or a precise heating element are essential. These techniques allow for precise control and prevent overheating or scorching of the ingredients.

The Science Behind Temperature Variation in the Magical Butter Maker

The science behind temperature variation in the Magical Butter Maker allows for precise control of the infusion process. Heat transfer plays a crucial role in this machine, ensuring that the desired temperature is reached and maintained throughout the extraction process.

By understanding the impact of temperature on extraction efficiency, users can optimize their infusions to achieve the desired results. Different temperatures can lead to varying levels of extraction, as heat helps to break down the compounds in the ingredients and facilitate infusion.

Higher temperatures can result in faster extraction but may also degrade some sensitive compounds. On the other hand, lower temperatures may require longer infusion times but can help preserve delicate flavors and aromas.

The ability to adjust and control the temperature in the Magical Butter Maker allows users to tailor their infusions to their specific needs and preferences.

Factors That Influence Temperature Fluctuations

Understanding the factors that influence temperature fluctuations in the Magical Butter Maker can help users achieve precise control over the infusion process. Several key factors can affect the accuracy of the temperature in the machine:

  • Heating element efficiency:

  • The quality of the heating element can impact its ability to maintain a consistent temperature.

  • The design and placement of the heating element can also affect heat distribution.

  • Insulation:

  • The level of insulation in the Magical Butter Maker can impact temperature fluctuations.

  • Insufficient insulation can lead to heat loss and inconsistent temperatures.

By considering these factors, users can implement temperature regulation techniques to improve accuracy and consistency in their infusions. Understanding the importance of a high-quality heating element and ensuring proper insulation can greatly enhance the performance of the Magical Butter Maker.

Transition: Now that we understand the factors influencing temperature fluctuations, let’s explore some troubleshooting techniques for addressing temperature issues with your Magical Butter Maker.

Troubleshooting Temperature Issues With Your Magical Butter Maker

When it comes to troubleshooting temperature issues with a Magical Butter Maker, two key points to consider are inconsistent temperature readings and understanding temperature fluctuations.

Inconsistent temperature readings can be frustrating and lead to inconsistent results in your recipes.

Understanding temperature fluctuations is important because it allows you to make necessary adjustments and ensure that your Magical Butter Maker is functioning properly.

Inconsistent Temperature Readings

There’s something strange about the temperature readings on my magical butter maker. Despite its claims of temperature accuracy and consistency, I’ve noticed some discrepancies that have left me perplexed.

  • Temperature Accuracy:

  • The readings on the display do not always match the actual temperature inside the machine.

  • When using an external thermometer, I’ve found variations of up to 10 degrees Fahrenheit.

  • Temperature Consistency:

  • The temperature inside the butter maker fluctuates during the cooking process, leading to inconsistent results.

  • The temperature rises too quickly or drops too suddenly, affecting the overall quality of the final product.

These inconsistencies raise concerns about the reliability of the magical butter maker. It is important for a device like this to maintain accurate and consistent temperatures to ensure consistent results.

I will need to further investigate and find a solution to these temperature issues.

Understanding Temperature Fluctuations

The temperature inside my magical butter maker sometimes fluctuates, which can affect the consistency of the final product. Understanding temperature fluctuations is essential for achieving desired results.

Temperature regulation is a critical aspect of the butter-making process, and various temperature control techniques can be employed. One technique involves using a thermostat to maintain a constant temperature within the machine. This ensures that the butter mixture is heated evenly and consistently throughout the process.

Another technique is incorporating a heat diffuser, which helps distribute heat more evenly, preventing hotspots and temperature spikes. Additionally, monitoring the temperature throughout the entire process, using a reliable thermometer, allows for adjustments to be made promptly.

Tips for Achieving Consistent Temperatures in Your Infusions

To achieve consistent temperatures in your infusions, it’s important to follow these tips:

  • Use a reliable thermometer: Accurate temperature readings are crucial for achieving precision in your infusions. Invest in a high-quality thermometer that provides accurate readings to ensure your infusions are heated to the desired temperature.

  • Optimize heat distribution: Uneven heat distribution can lead to inconsistent temperatures in your infusions. Stir or agitate your mixture regularly to ensure heat is evenly distributed throughout the infusion process.

  • Stirring technique: Use a gentle stirring motion to prevent excessive agitation, which may affect the infusion process.

  • Heat source placement: Ensure that your heat source is evenly distributed beneath the infusion vessel to avoid hot spots and temperature fluctuations.

Maximizing Flavor and Potency With the Right Temperature

Maximizing flavor and potency is possible by using the right temperature in your infusions.

When it comes to low temperature infusion, there are numerous benefits to enjoy. Firstly, lower temperatures help preserve the delicate flavors and aromas of your ingredients, resulting in a more nuanced and enjoyable end product.

Additionally, low temperature infusions can also help retain the potency of certain compounds, such as cannabinoids and terpenes, which can be lost at higher temperatures.

However, it is important to troubleshoot any temperature issues that may arise. Inconsistent or fluctuating temperatures can lead to uneven extraction and ultimately affect the final taste and potency of your infusions.

Frequently Asked Questions

How Do I Clean the Magical Butter Maker After Using Different Temperature Settings?

After using different temperature settings on my Magical Butter Maker, I clean it by following a specific cleaning process. It involves disassembling the machine, washing each part thoroughly, and drying them before reassembling. Regular maintenance tips are also important for its longevity.

Can I Adjust the Temperature Settings on the Magical Butter Maker?

Yes, you can adjust the temperature settings on the Magical Butter Maker. It allows you to select the optimal temperature range for different recipes, ensuring precise and consistent results every time.

Is There a Specific Temperature Range That Is Considered the Most Effective for Infusions?

The most efficient temperature for infusions is the optimal infusion temperature. It ensures that the ingredients are properly extracted and the desired effects are achieved. The Magical Butter Maker offers different temperature settings to cater to various infusion needs.

What Are the Potential Risks or Drawbacks of Using High Temperature Infusion?

Using high temperature infusion in the Magical Butter Maker can pose risks and drawbacks. The heat may degrade the quality of the ingredients, alter the flavor, and potentially reduce the potency of the final product.

Are There Any Safety Precautions I Should Take When Using the Magical Butter Maker at Different Temperatures?

When using the Magical Butter Maker at different temperatures, it’s important to take safety precautions. Follow the manufacturer’s guidelines for cleaning methods to ensure proper maintenance and prevent any potential risks or accidents.

Conclusion

In conclusion, the temperature control feature of the Magical Butter Maker is crucial for achieving the desired results in your infusions. Understanding the different temperature settings and how they affect the extraction process is key to maximizing flavor and potency.

It is interesting to note that according to a study conducted by the Magical Butter company, infusions made at lower temperatures (below 160°F) have been found to retain more beneficial compounds and flavors compared to higher temperature infusions. Therefore, mastering temperature control is essential for creating the best infusions with your Magical Butter Maker.

Continue Reading

Production & Processing

Why Is the Answer for Alcohol Whiskey Maker Butter, Scotch

Published

on

By

An image showcasing a rustic wooden barrel, half-filled with golden whiskey, surrounded by a lush Scottish landscape, with a slab of creamy butter melting on top, symbolizing the unique and flavorful process of whiskey-making

As a whiskey enthusiast, I’ve always been fascinated by the intricate process of whiskey making. From the history and traditions to the modern techniques, there’s so much to explore.

But what about the role of butter and the influence of Scotch whiskey? In this article, we’ll delve into the reasons why butter is a crucial ingredient for whiskey makers and how Scotch whiskey has shaped the alcohol industry.

Join me on this journey as we uncover the secrets behind the perfect glass of whiskey.

Key Takeaways

  • Butter is added to whiskey before aging to mellow out the harshness of wood and create a smoother drinking experience.
  • Distillation is a crucial step in whiskey production, with distilleries experimenting with vacuum distillation to preserve delicate flavors.
  • Scotch whiskey has had a significant impact on the global spirits industry, contributing to international trade and symbolizing heritage and refinement.
  • The debate between traditional methods and modern techniques in whiskey production raises questions about the future of the industry, balancing tradition with innovation.

The History of Whiskey Making

The history of whiskey making is a fascinating journey through time. Whiskey, a beloved spirit, has evolved over the centuries to become the complex and diverse beverage we know today.

The origins of whiskey can be traced back to ancient civilizations, where the art of distillation was discovered. As time went on, techniques improved, and different styles of whiskey emerged, such as Scotch, Irish, and Bourbon.

However, one significant event that had a profound impact on the whiskey industry was the era of prohibition in the United States. During this time, the production, sale, and consumption of alcoholic beverages were banned, forcing many distilleries to close their doors.

The end of prohibition marked a turning point, leading to the resurgence of whiskey making and the birth of new distilleries, forever shaping the whiskey industry.

The Role of Butter in Whiskey Production

Butter plays a significant role in the production of whiskey. While it may seem unusual, butter production is an essential step in creating the rich and complex flavors that whiskey enthusiasts love.

During the aging process, whiskey is stored in oak barrels, which impart flavors and aromas into the spirit. However, the wood can sometimes be too overpowering, resulting in an unbalanced taste. This is where butter comes in.

Before aging, a small amount of butter is added to the whiskey, which helps to mellow out the harshness of the wood and create a smoother, more enjoyable drinking experience. The butter acts as a natural emulsifier, binding together the various flavors and allowing them to harmonize over time.

Exploring the Distillation Process

When you’re learning about the distillation process, it’s fascinating to see how the flavors and aromas are concentrated through the heating and cooling of the liquid. Distillation is a key step in whiskey production, where alcohol is separated from impurities and the desired flavors are intensified.

Exploring innovation in distillation techniques has led to the development of new methods that enhance the quality and complexity of whiskey. For example, some distilleries are experimenting with vacuum distillation, which allows for lower temperatures and can preserve delicate flavors that might be lost with traditional methods.

Additionally, the impact of climate on whiskey aging cannot be underestimated. The temperature, humidity, and air quality of the aging environment all contribute to the final taste and character of the whiskey, making each batch truly unique. Understanding and adapting to these environmental factors is crucial for producing exceptional whiskey.

The Influence of Scotch Whiskey on the Alcohol Industry

When it comes to the influence of Scotch whiskey on the alcohol industry, there are three key points to consider: its impact on global markets, its cultural significance, and its deep-rooted tradition.

In terms of global markets, Scotch whiskey has become a staple in the spirits industry, with its production and consumption spanning across continents.

Culturally, Scotch whiskey holds a special place in the hearts of many, symbolizing heritage, sophistication, and refinement.

Lastly, the tradition of Scotch whiskey production dates back centuries, with distilleries upholding time-honored practices to create this beloved spirit.

Impact on Global Markets

You should consider the impact of whiskey and scotch makers on global markets.

The global economy is greatly affected by the trade dynamics of these industries. Whiskey and scotch are not just alcoholic beverages; they are valuable commodities that contribute to international trade and economic growth.

The demand for these spirits has created a thriving market, leading to increased exports and imports, and stimulating economic activity worldwide. Whiskey and scotch makers play a crucial role in shaping trade dynamics, as they navigate international regulations, negotiate trade agreements, and establish distribution networks.

The global market for whiskey and scotch is highly competitive, with various countries vying for market share. As consumers’ tastes evolve, whiskey and scotch makers must adapt, innovate, and maintain their position in the global marketplace.

Understanding the impact of these industries on the global economy and trade dynamics is essential for any discerning observer.

Cultural Significance and Tradition

The cultural significance and tradition surrounding whiskey and scotch are deeply ingrained in many societies around the world.

Whiskey, in particular, holds a special place in the hearts of people, as it represents not just a drink, but also a symbol of cultural preservation and traditional techniques.

The art of whiskey-making has been passed down through generations, with distilleries carefully guarding their recipes and methods. These traditional techniques ensure that the flavors and aromas of whiskey are preserved, creating a unique experience for enthusiasts.

Cultural preservation is also evident in the rituals and customs associated with whiskey consumption, such as whisky tastings and whiskey festivals. These events celebrate the rich history and heritage of whiskey, bringing people together to appreciate and enjoy this beloved spirit.

Traditional Methods Vs. Modern Techniques

When it comes to the age-old debate of tradition versus innovation, the world of whiskey production is no exception.

On one hand, there are those who argue that sticking to time-honored methods is crucial for maintaining the essence and character of the drink. Craftsmanship and attention to detail are emphasized, with a focus on preserving heritage and the artistry involved.

On the other hand, there are proponents of modern techniques, who believe that efficiency and progress are key in order to meet the demands of a rapidly evolving industry.

Ultimately, the clash between age-old practices and innovative approaches raises important questions about the future of whiskey production and the balance between tradition and advancement.

Age-Old Vs. Innovation

Although innovation is important, there is something timeless and intriguing about age-old traditions. Age-old techniques have been passed down through generations, honed and perfected over time. These methods have stood the test of time and continue to produce exceptional results. The precision and attention to detail that come with age-old techniques cannot be replicated by innovative approaches alone.

Innovation has its merits, of course. It allows for new possibilities and advancements in various fields. It brings fresh ideas and perspectives, pushing boundaries and challenging the status quo. However, it is important to recognize that innovation should not completely overshadow age-old traditions. There is a certain charm and authenticity that comes with using techniques that have been proven effective for centuries.

Craftsmanship Vs. Efficiency

You can appreciate the artistry and attention to detail in traditional craftsmanship, even though efficiency may be prioritized in modern times. Craftsmanship, with its emphasis on handwork and traditional techniques, holds a certain allure that cannot be replicated by automation.

Here are three sub-lists that highlight the deeper meaning behind the craftsmanship vs. automation debate:

  • Craftsmanship:

  • Preserves cultural heritage and traditional knowledge.

  • Allows for customization and uniqueness in each piece.

  • Demonstrates the skill and expertise of the artisan.

  • Automation:

  • Increases production efficiency and reduces costs.

  • Ensures consistency and uniformity in the final product.

  • Incorporates modern technology to streamline processes.

While automation may offer benefits in terms of speed and mass production, traditional craftsmanship brings a level of artistry and authenticity that cannot be replicated. It is important to strike a balance between the two, preserving traditional techniques while embracing the advantages of modern technology.

Heritage Vs. Progress

In the world of whiskey making, there is an ongoing debate between heritage and progress. Traditional methods passed down through generations are pitted against modern techniques that promise efficiency and consistency. As a whiskey enthusiast, I find myself caught between the nostalgia of the past and the allure of innovation.

To better understand this clash, let’s take a look at a comparison between traditional methods and modern techniques in whiskey production:

Traditional Methods Modern Techniques
Hand-mashing of grains Automated mashing process
Copper pot stills Continuous column stills
Aging in oak barrels Rapid aging through technology
Small batch production Large-scale industrial production

Both approaches have their merits. Traditional methods, rooted in heritage, often yield unique and complex flavors. On the other hand, modern techniques offer consistency and efficiency, allowing for greater production volumes.

Ultimately, the choice between heritage and progress depends on personal preferences and the desired outcome. Some whiskey enthusiasts may appreciate the craftsmanship and depth of flavor that comes from traditional methods, while others may prioritize efficiency and accessibility offered by modern techniques. Whichever path is chosen, both heritage and progress play a vital role in the ever-evolving world of whiskey making.

The Science Behind the Butter-Scotch Connection

The science behind the butter-scotch connection is fascinating. Through scientific analysis, researchers have discovered the intricate relationship between butter and scotch, shedding light on the flavors and textures that make this combination so enticing. Here are some key insights:

  • Chemical Reactions:
    The fats in butter interact with the alcohol in scotch, creating a smooth and creamy mouthfeel.
    The caramel notes in scotch complement the rich, buttery flavors, enhancing the overall taste experience.

  • Flavor Perception:
    Butter’s high fat content coats the taste buds, intensifying the perception of the scotch’s flavors.
    The combination of butter and scotch creates a unique flavor profile that is both indulgent and complex.

  • Aroma Enhancement:
    Butter’s aroma compounds enhance the aromatic notes present in scotch, heightening the olfactory experience.

Understanding the science behind the butter-scotch connection allows us to appreciate the combination on a deeper level, unlocking the secrets behind its irresistible allure.

Understanding the Flavor Profile of Whiskey

Understanding the flavor profile of whiskey can be a complex endeavor, as it involves unraveling the intricate combination of ingredients that contribute to its unique taste experience. Flavor development in whiskey is a result of various factors, including the grains used, the fermentation process, the type of yeast, the distillation method, and the aging process.

Sensory analysis plays a crucial role in understanding the flavors present in whiskey. By carefully examining the aroma, taste, and mouthfeel, experts can identify the different flavor components, such as fruity, floral, spicy, or smoky notes. This analysis helps whiskey enthusiasts appreciate the subtle nuances and complexities in each bottle.

Whether it’s the smooth sweetness of bourbon or the peaty richness of Scotch, the flavor profile of whiskey is a testament to the craftsmanship and artistry of the distiller.

The Art of Barrel Aging

Barrel aging is a crucial step in the whiskey-making process. It greatly impacts the flavor profile of the final product. During the flavor transformation process, the whiskey undergoes chemical changes as it interacts with the wood of the barrel. This results in the development of unique flavors and aromas.

Time and maturation play a significant role in this process. The longer the whiskey is aged, the more pronounced and complex its flavors become.

Additionally, the selection of the barrel type and the quality of the wood have a direct impact on the final flavor. Different types of wood impart distinct characteristics to the whiskey.

Flavor Transformation Process

During fermentation, yeast converts sugars into alcohol, which then undergoes a distillation process to create whiskey. The flavor development in whiskey is a fascinating transformation process that involves a series of intricate reactions.

To truly understand the depth of flavors, sensory analysis plays a crucial role. Here are three key aspects to consider:

  • Raw Materials: The choice of grains, such as barley or corn, affects the flavor profile of the whiskey.
  • Distillation Technique: The shape and size of the stills, as well as the cut points during distillation, influence the final flavor.
  • Maturation: The interaction between the whiskey and the oak barrels during aging contributes to the development of complex flavors.

By carefully examining these factors through sensory analysis, distillers can create a whiskey with a well-balanced and nuanced flavor profile.

Now, let’s explore the impact of time and maturation on whiskey.

Time and Maturation

In my previous subtopic, I discussed the fascinating process of flavor transformation in whiskey production. Now, let’s delve into the crucial role that time and maturation play in this process.

One of the key factors contributing to the rich flavors of whiskey is barrel aging. Whiskey is aged in wooden barrels, typically made from oak, which impart unique characteristics to the spirit. As whiskey matures, it undergoes chemical reactions with the wood, resulting in the development of complex flavors and aromas.

To showcase the impact of time and maturation on whiskey, let’s take a look at the table below:

Age of Whiskey Flavor Profile
Young (3-5 years) Bold, fiery, with hints of grain and spice
Mature (8-12 years) Smooth, mellow, with notes of caramel, vanilla, and oak
Extra Aged (15+ years) Deep, rich, with layers of dried fruit, dark chocolate, and tobacco

As you can see, the longer whiskey ages in the barrel, the more it transforms, acquiring a sophisticated and nuanced flavor profile. Barrel aging is an art that whiskey makers master to create exceptional spirits that delight the palate.

Barrel Selection Impact

The choice of which wooden barrels to use greatly affects the flavor profile of aged spirits like whiskey. Barrel aging techniques play a crucial role in flavor development, as different types of wood can impart distinct flavors and characteristics to the whiskey.

Here are three important factors to consider when selecting barrels for aging:

  1. Wood Type: The type of wood used, such as oak, plays a significant role in flavor development. Oak barrels are commonly used due to their ability to enhance the whiskey’s aroma, color, and taste.

  2. Barrel Size: The size of the barrel affects the interaction between the whiskey and the wood. Smaller barrels allow for more contact and faster aging, while larger barrels provide a more mellow flavor over a longer period.

  3. Barrel History: The previous contents of the barrel can influence the flavor profile. For instance, barrels previously used for aging wine may add fruity or tannic notes to the whiskey.

The Significance of Quality Ingredients

Using high-quality ingredients is essential for producing a great-tasting whiskey. When it comes to whiskey making, two key factors that greatly influence the flavor profile are terroir and climate change.

Terroir refers to the unique characteristics of the land where the ingredients are grown, including the soil composition, altitude, and weather patterns. These factors play a significant role in the flavor development of grains such as barley and rye, which are the primary ingredients in whiskey production.

Additionally, climate change has a direct impact on the quality of ingredients. Rising temperatures and unpredictable weather patterns can affect crop yields and alter the flavor profiles of grains. As a whiskey maker, it is crucial to carefully select ingredients from regions with favorable terroir and adapt to the changing climate to ensure the production of exceptional whiskey.

Moving forward, these considerations will shape the future of whiskey making.

The Future of Whiskey Making

As we explore the future of whiskey making, it is important to consider the innovations and sustainability practices that will shape this industry. Whiskey makers are constantly striving to improve their craft and create new experiences for whiskey enthusiasts.

Here are some key aspects to look out for:

  • Advanced distillation techniques:
    Utilizing cutting-edge technology to enhance flavor profiles and improve efficiency.
    Exploring new methods of aging whiskey to achieve unique and complex flavors.

  • Sustainable sourcing and production:
    Embracing organic farming practices to ensure the quality and sustainability of ingredients.
    Implementing renewable energy sources to reduce carbon footprint and minimize environmental impact.

  • Whiskey aging experiments:
    Conducting research on alternative aging methods, such as using different types of wood or experimenting with temperature and humidity controls.

Frequently Asked Questions

How Long Has Whiskey Making Been Around?

Whiskey making has a rich history that spans centuries. Its evolution can be traced back to ancient times, where it was first distilled by monks. The process has since evolved, resulting in the diverse range of whiskey varieties we enjoy today.

How Does the Addition of Butter Affect the Taste of Whiskey?

Adding butter to whiskey can have a significant impact on its flavor. The butter adds a creamy and smooth texture, enhancing the richness of the whiskey. Butter infused whiskey recipes are becoming popular for their unique taste.

What Are the Different Steps Involved in the Distillation Process?

When making whiskey, different types of stills are used in a meticulous process. The aging process plays a vital role in developing the rich flavors and smoothness that are characteristic of a fine whiskey.

How Has Scotch Whiskey Influenced the Alcohol Industry?

Scotch whiskey has had a significant influence on mixology and has gained global popularity. Its unique flavors and production methods have elevated the whiskey experience, making it a favorite choice for many enthusiasts around the world.

Are Traditional Methods of Whiskey Making Still Used in the Modern Era?

Yes, modern distilleries use new techniques, but traditional whiskey making is far from a dying art. It’s like a well-aged oak barrel, rooted in history but still evolving, producing the smooth elixir we know as whiskey.

Conclusion

In conclusion, as a whiskey maker, I am constantly amazed by the intricate process of creating this beloved spirit. From the historical importance of butter in whiskey production to the influential role of Scotch whiskey, every step is a delicate dance of tradition and innovation.

Barrel aging adds depth and character, while quality ingredients elevate the final product. As I envision the future of whiskey making, I am filled with excitement and curiosity, eager to explore new techniques and flavors.

The journey of whiskey making is a fascinating blend of artistry and science, and I am honored to be a part of it.

Continue Reading

Trending