Connect with us

Product Care & Storage

Good Butter Storage: Freezer Longevity Tips

Published

on

An image featuring a neatly organized freezer shelf, showcasing a wrapped stick of butter with frost crystals forming on its surface

As someone who loves butter, I frequently ponder about how long this creamy delight can stay fresh and flavorful when stored in the freezer.

In this article, we will delve into the fascinating world of freezing butter, exploring the factors that impact its shelf life, recommended freezing times, and the telltale signs of spoilage.

Get ready to unlock the secrets of storing and thawing frozen butter, as well as discover handy tips for incorporating it into your favorite recipes.

Key Takeaways

  • Freezing butter extends its shelf life and allows for bulk buying and cost savings.
  • Proper temperature and packaging are crucial for maintaining the freshness and quality of butter during freezing.
  • Butter should be stored in a cool environment to slow down the oxidation process and prevent rancidity.
  • Thawing methods and tips for using frozen butter in recipes can help incorporate it effectively.

Freezing Butter: An Overview

If you’re wondering how long butter stays good in the freezer, it can typically last for up to 6 months. Freezing butter is a great way to extend its shelf life and ensure you always have some on hand.

Advertisement

There are a few different methods for freezing butter, but the most common is to simply wrap it tightly in plastic wrap or aluminum foil and place it in a freezer bag. This helps to protect the butter from freezer burn and maintain its quality.

The benefits of freezing butter include convenience, as you can buy it in bulk and freeze it for later use, and cost savings, as butter can be expensive and freezing allows you to take advantage of sales or bulk discounts. Additionally, freezing butter helps to reduce food waste, as you can keep it in the freezer until you need it, preventing it from going bad.

Factors Affecting Butter’s Shelf Life in the Freezer

When it comes to freezing butter, there are several factors that can affect its shelf life.

Firstly, the temperature at which the butter is stored plays a crucial role. Too high or too low temperatures can lead to quality degradation and shorten the butter’s lifespan in the freezer.

Additionally, the type of packaging used is also important. Improper packaging can result in freezer burn and affect the overall quality of the butter.

Advertisement

Lastly, it is recommended to freeze butter for a maximum duration of six months to ensure optimal taste and texture upon thawing.

Temperature and Packaging Impact

To keep butter fresh in the freezer, you should ensure that it is stored at the proper temperature and in a well-sealed packaging.

Temperature control is crucial in preserving the quality of butter. It is recommended to store butter in the freezer at a temperature of 0°F (-18°C) or below. At this temperature, the moisture content of the butter is maintained, preventing the formation of ice crystals and freezer burn.

Additionally, it is essential to use a packaging that is airtight and moisture resistant to prevent the absorption of odors and the loss of moisture. Proper temperature control and packaging will help maintain the freshness and quality of butter during freezing.

Now, let’s explore the factors that contribute to butter quality degradation.

Advertisement

Butter Quality Degradation

Maintaining the proper temperature and using effective packaging are key factors in preventing the degradation of butter quality.

When it comes to butter storage tips, it is important to store butter in a cool environment, ideally at a temperature between 30-40°F (-1 to 4°C). This helps slow down the natural process of oxidation, which can lead to rancidity and off-flavors.

Additionally, using airtight and opaque containers or wrapping the butter in wax paper can help preserve its freshness. Exposure to light and air can accelerate the breakdown of the butter’s fats, resulting in a decrease in quality.

Recommended Freezing Duration

The recommended time to freeze butter is typically three to four months for optimal quality. When freezing butter, it is important to use recommended freezing containers to maintain its freshness. Airtight containers or freezer bags are ideal for this purpose as they prevent the butter from absorbing any odors or flavors from other foods in the freezer.

Additionally, the temperature of the freezer also plays a crucial role in preserving the quality of the butter. It is recommended to set the freezer temperature at or below 0°F (-18°C) to ensure the butter remains in good condition. Freezing butter for longer periods or at higher temperatures may result in a decline in its quality, such as changes in taste, texture, and overall freshness.

Advertisement

Now that we understand the importance of freezing containers and freezer temperature, let’s explore the recommended freezing time for butter.

Recommended Freezing Time for Butter

When it comes to optimal freezer storage for butter, there are a few key points to consider.

First, it’s important to ensure that the butter is properly wrapped or sealed to prevent any air from entering the packaging. This will help maintain its quality and prevent freezer burn.

Additionally, it is recommended to store butter in the coldest part of the freezer, such as the back or bottom shelf, to maintain a consistent temperature and prevent any fluctuations that could affect its texture and taste.

Lastly, when it comes to thawing techniques, it is best to thaw butter in the refrigerator rather than at room temperature to ensure a slow and even thaw, minimizing the risk of bacterial growth.

Advertisement

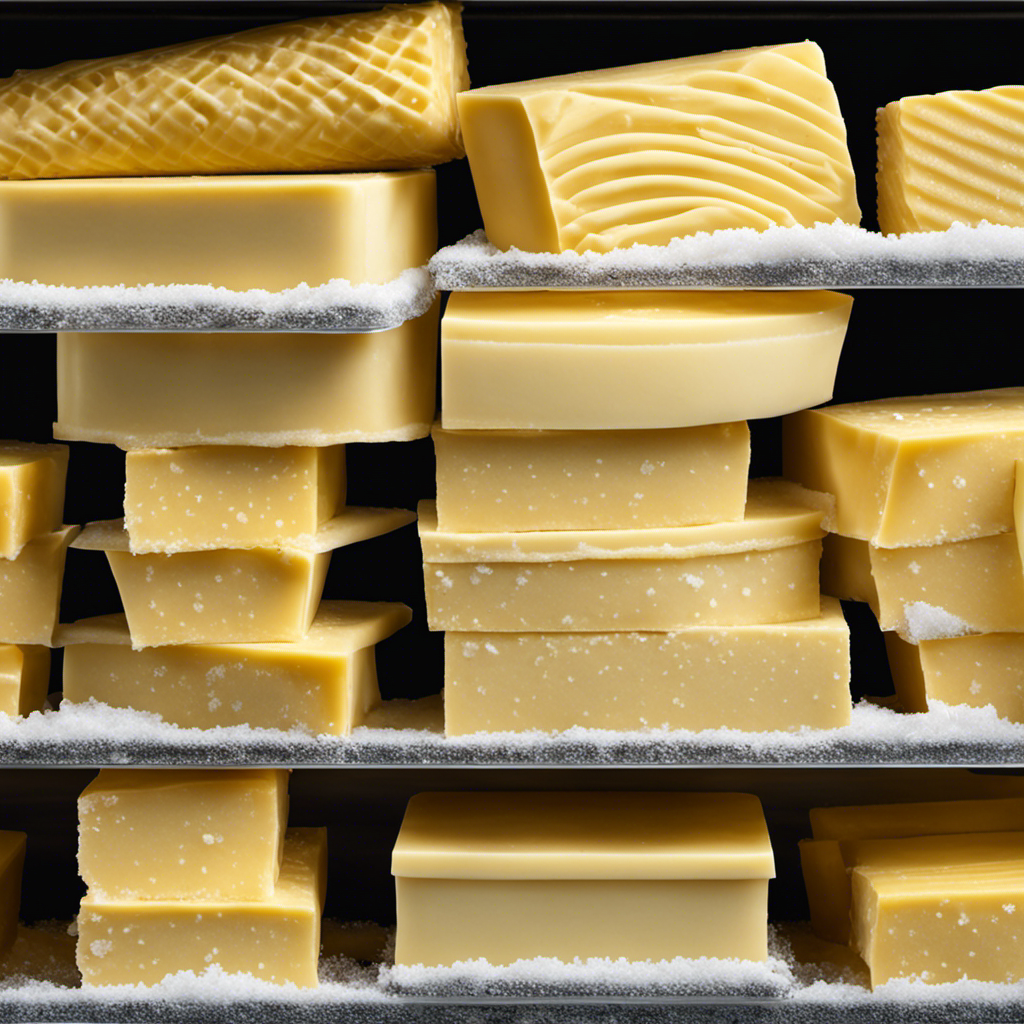
Optimal Freezer Storage

Storing butter in the freezer helps it last longer. When it comes to optimal storage conditions, it is important to store butter in an airtight container to prevent freezer burn and maintain its quality. Freezing butter can extend its shelf life for up to 6-9 months. However, it is essential to note that while freezing butter may prolong its freshness, it does not eliminate the potential health risks associated with consuming expired or contaminated butter. It is crucial to check for any signs of spoilage, such as off smells or discoloration, before using frozen butter. Additionally, always practice proper food safety measures and thaw frozen butter in the refrigerator to minimize the risk of bacterial growth. Remember, freezing butter can be a convenient way to extend its usability, but it is essential to prioritize food safety.

Optimal Storage Conditions Potential Health Risks
Store in an airtight container Check for signs of spoilage
Freeze for 6-9 months Practice proper food safety
Thaw in the refrigerator Prioritize food safety

Butter Thawing Techniques?

When it comes to thawing butter, there are a few techniques that can ensure optimal results. Here are three methods to consider:

  1. Refrigerator Thawing: The safest and most recommended method is to transfer the frozen butter from the freezer to the refrigerator. Allow it to thaw slowly over a period of 24 to 48 hours. This method ensures that the butter thaws evenly and maintains its texture.

  2. Room Temperature Thawing: If you’re in a hurry, you can thaw butter at room temperature. Simply place the wrapped butter on a plate and leave it on the counter for about 30 minutes. However, keep in mind that this method may result in softer butter.

  3. Microwave Thawing: For immediate use, you can thaw butter in the microwave. Use the defrost setting or low power setting in short bursts of 15-20 seconds, flipping the butter in between each burst. Be cautious not to overheat or melt the butter.

Signs of Spoiled Butter in the Freezer

If you notice any off smells or discoloration, it’s a sign that your butter may have spoiled in the freezer. Proper freezer storage is crucial to maintaining the quality and freshness of butter.

Freezing butter can extend its shelf life for up to 6-9 months, but it is important to take precautions to prevent spoilage. When storing butter in the freezer, make sure it is tightly sealed in an airtight container or wrapped in heavy-duty foil or freezer-safe plastic wrap. This will help to prevent freezer burn and maintain the flavor and texture of the butter.

Additionally, try to use the oldest butter first to ensure that none goes to waste. Regularly checking for any signs of spoilage, such as off smells or discoloration, will help you identify and discard any spoiled butter before using it.

Advertisement

Storing Butter Properly in the Freezer

When it comes to storing butter properly in the freezer, there are a few key points to keep in mind. Here are three important tips to help you store your butter effectively:

  1. Use airtight containers: To prevent freezer burn and maintain the freshness of your butter, it’s crucial to store it in airtight containers or freezer bags. This will help protect the butter from absorbing any unwanted odors or flavors.

  2. Label and date your butter: It’s always a good idea to label your butter containers with the date of storage. This way, you can keep track of how long the butter has been in the freezer and ensure you use it within the recommended time frame.

  3. Consider alternative storage options: If you don’t want to freeze your butter, there are alternative storage options. You can store it in the refrigerator for short-term use, keeping in mind that it may harden and lose some of its flavor over time.

Now that we’ve covered proper butter storage in the freezer, let’s move on to the next section and discuss how to safely thaw frozen butter.

Thawing Frozen Butter Safely

To safely thaw frozen butter, you’ll want to take it out of the freezer and let it sit at room temperature for a few hours. This method allows the butter to gradually come to its natural state without compromising its texture or taste. However, if you’re in a hurry, there are other thawing methods you can use. One option is to place the butter in a microwave-safe dish and use the defrost setting in short intervals, checking and turning the butter frequently. Another method is to submerge the butter in cold water, ensuring it is tightly sealed in a plastic bag. Change the water every 30 minutes until the butter is thawed. Regardless of the method used, it is important to remember that thawed butter should be used immediately and not refrozen.

Thawing Methods Pros Cons
Room Temperature Gradual thawing maintains quality Takes a few hours
Microwave Quick thawing Can partially melt if not careful
Cold Water Faster than room temperature Requires changing water regularly

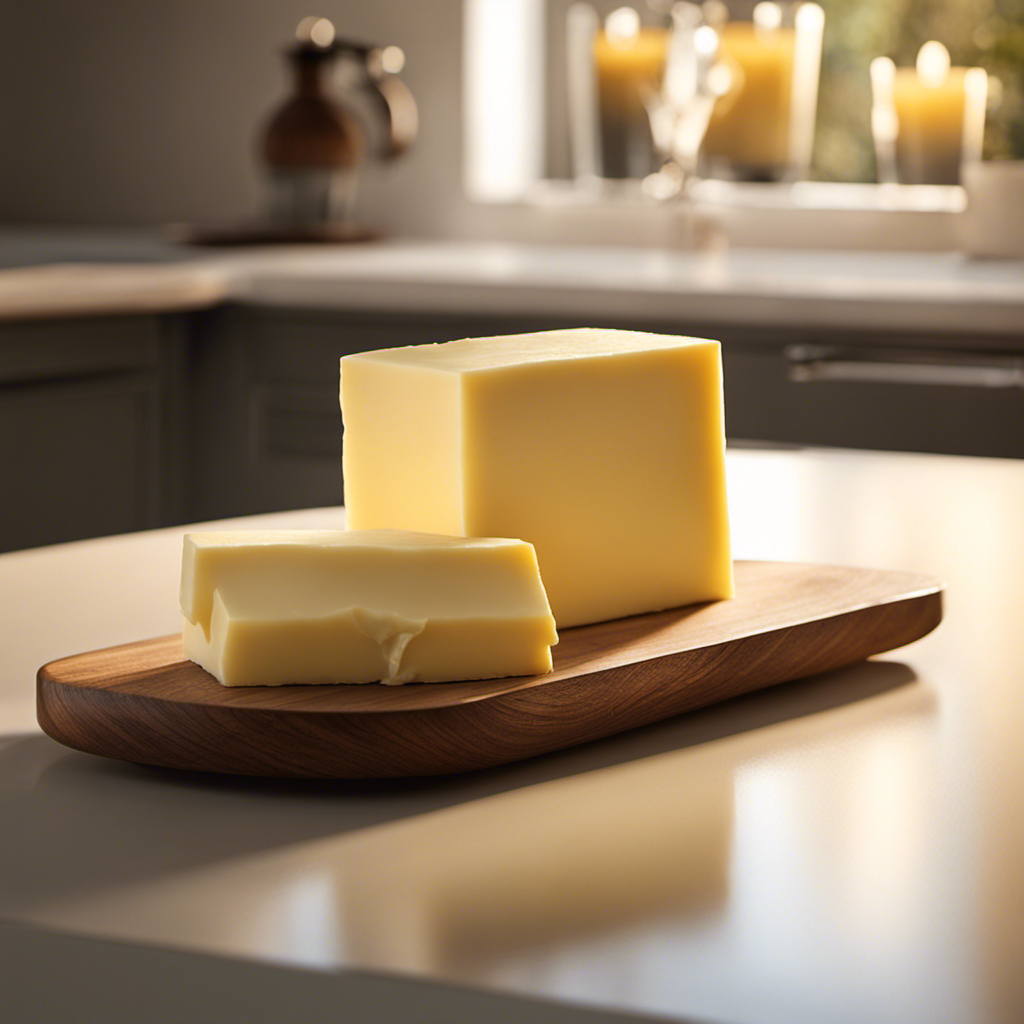
Tips for Using Frozen Butter in Recipes

Using frozen butter in recipes can add a creamy and rich texture to baked goods. When baking with frozen butter, it’s important to properly thaw it first.

Here are three tips for using frozen butter in recipes:

Advertisement
  1. Grate the frozen butter: To easily incorporate frozen butter into your recipe, grate it using a box grater. This will ensure even distribution and prevent large chunks of butter in your baked goods.

  2. Cut the frozen butter into small cubes: If grating the butter is not an option, another method is to cut it into small cubes. This will help the butter to soften and incorporate into the dough more quickly.

  3. Chill the dough before baking: After incorporating the frozen butter into the dough, it’s important to chill it before baking. This will help the butter solidify again and create flaky and tender baked goods.

Frequently Asked Questions

Can I Freeze Butter That Has Already Been Opened?

Yes, you can freeze opened butter. It is one of the best ways to store it for an extended period. Freezing butter helps to preserve its freshness and prevent spoilage, serving as an alternative to other storage methods.

Can I Freeze Butter in Its Original Packaging?

Yes, you can freeze butter in its original packaging. However, for long term storage, it’s best to wrap it in airtight packaging to maintain its quality. The benefits of freezing butter include extended shelf life and convenience.

Can I Freeze Butter in a Glass Container?

Yes, you can freeze butter in a glass container. However, it is important to note that freezing butter in plastic containers or silicone molds is more ideal for long-term storage and preservation.

Can I Freeze Flavored or Seasoned Butter?

Yes, you can freeze flavored or seasoned butter. However, the added herbs or spices may lose some of their potency during freezing. Sweeteners or flavorings may also change in texture.

Can I Freeze Butter in Small Portions for Convenience?

Yes, I freeze butter in small portions for convenience when baking. The benefits of freezing butter include extended shelf life and easy measurement. It’s a time-saving technique that ensures I always have butter on hand.

Advertisement

Conclusion

In conclusion, freezing butter is a convenient way to extend its shelf life. By understanding the factors that affect its quality, we can ensure that our frozen butter remains fresh and delicious.

It is important to store butter properly in the freezer, and to thaw it safely before use. By following these guidelines, we can confidently incorporate frozen butter into our recipes, adding a touch of richness and flavor.

So go ahead, let your culinary creations soar with the alluring taste of properly stored frozen butter.

Continue Reading
Advertisement

Product Care & Storage

How Long to Blanch Butter Beans for Perfect Texture

Published

on

By

An image showcasing a pot of plump butter beans gently boiling in salted water, their creamy white skins glistening, as a timer sits nearby, capturing the anticipation of the precise blanching time

Hey there! Have you ever thought about how much time it takes to blanch butter beans?

Well, I’ve got you covered. In this article, I’ll walk you through the basics of blanching these delicious beans, including all the equipment you’ll need and a step-by-step guide for perfect results.

I’ll also share some tips and tricks to ensure your butter beans come out just right, and point out common mistakes to avoid.

So, let’s get started and master the art of blanching butter beans together!

Key Takeaways

  • Blanching butter beans for 2-3 minutes ensures they are tender yet firm.
  • Immediately transferring blanched beans to ice water helps retain their color and crispness.
  • Adding salt, herbs, or spices to the cooking water enhances the flavor of butter beans.
  • Blanching butter beans is crucial for preserving their color, texture, and flavor.

The Basics of Blanching Butter Beans

Advertisement

I’ll start by explaining the basics of blanching butter beans. Blanching is a cooking technique where the beans are briefly boiled and then immediately plunged into ice water to stop the cooking process. It helps to preserve the bright green color and crisp texture of the beans. Blanching is also beneficial for removing the outer skins of butter beans, making them more tender and easier to digest.

In addition to being delicious, butter beans offer several health benefits. They’re a good source of dietary fiber, which aids in digestion and helps to maintain a healthy weight. They’re also packed with essential vitamins and minerals like folate, iron, and potassium.

There are various ways to cook butter beans. You can steam them, sauté them with butter and garlic for added flavor, or even roast them in the oven for a crispy texture. Another popular method is to boil them until tender and then toss them with olive oil, lemon juice, and herbs for a refreshing salad.

Overall, blanching butter beans is a simple and effective way to enhance their taste, texture, and nutritional value.

Required Equipment for Blanching Butter Beans

To prepare butter beans, I’ll need a pot, a colander, and a timer. These essential pieces of equipment are crucial for blanching butter beans to perfection.

Advertisement

Here’s a breakdown of the equipment needed:

  1. Pot: Choose a pot that’s large enough to hold the butter beans and allow them to move freely in boiling water. A pot with a lid is ideal for maintaining the heat and reducing cooking time.

  2. Colander: A colander is essential for draining the blanched butter beans. Make sure to choose a colander with small holes to prevent the beans from falling through.

  3. Timer: Accurate timing is crucial when blanching butter beans. Use a timer to ensure that the beans are blanched for the recommended time, which is typically around 2 to 3 minutes.

Step-by-Step Guide to Blanching Butter Beans

First, gather the necessary equipment for blanching the butter beans. You’ll need a large pot, a colander, a bowl of ice water, and a slotted spoon.

To blanch the butter beans, there are a few different methods you can choose from. One method is to bring a pot of water to a boil and add the beans, cooking them for about 2 minutes. Then, quickly transfer them to the bowl of ice water to stop the cooking process.

Advertisement

Another method is to steam the beans for about 4-5 minutes until they’re tender but still crisp.

Once the butter beans are blanched, they can be used in a variety of ways. They can be added to salads, soups, or stews. They can also be seasoned and eaten as a side dish.

The blanched beans can even be pureed and used as a base for dips or spreads. The possibilities are endless!

Tips and Tricks for Perfectly Blanching Butter Beans

After gathering the necessary equipment, I can achieve perfectly blanched butter beans by carefully monitoring the cooking time and immediately transferring them to ice water. Here are three tips and tricks for achieving the best results:

  1. Timing is key: It’s crucial to blanch the butter beans for just the right amount of time. Overcooking can lead to mushy beans, while undercooking may result in a raw taste. Aim for a cooking time of about 2-3 minutes, until the beans are tender but still firm.

  2. Ice water bath: Once the beans are cooked to perfection, immediately transfer them to a bowl of ice water. This stops the cooking process and helps retain their vibrant green color and crispness.

  3. Seasoning options: While blanching butter beans, you can add a touch of flavor by seasoning the cooking water with salt, herbs, or spices. This will infuse the beans with a subtle taste, enhancing their overall flavor.

By following these blanching techniques and exploring different seasoning options, you can elevate the taste and texture of your butter beans.

Advertisement

Now, let’s delve into the common mistakes to avoid when blanching butter beans.

Common Mistakes to Avoid When Blanching Butter Beans

One mistake I often make when blanching butter beans isn’t properly blanching them for the right amount of time. Blanching is an essential step in cooking butter beans as it helps to preserve their color, texture, and flavor.

There are a few common blanching techniques that can be used, such as boiling the beans for a short period of time and then quickly cooling them in ice water. This helps to stop the cooking process and maintain the beans’ vibrant green color.

Advertisement

Another technique is to steam the beans until they’re just tender and then shock them in ice water. This method helps to retain their nutrients and natural sweetness.

It’s important to blanch the beans for the recommended time specified in the recipe to ensure they’re cooked evenly and have the desired texture.

One alternative use for butter beans is to include them in salads, soups, or stews for added protein and fiber. They can also be pureed and used as a base for dips or spreads.

Frequently Asked Questions

Can I Use Frozen Butter Beans for Blanching?

Yes, you can use frozen butter beans for blanching. Blanching is a common method used to cook vegetables before freezing them. It helps to preserve their flavor, color, and texture.

To blanch frozen butter beans, bring a pot of water to a boil, add the beans, and cook for 2-3 minutes. Then, drain and immediately transfer them to an ice bath to stop the cooking process.

Advertisement

This will ensure that your frozen butter beans retain their quality.

How Long Does It Take to Blanch Butter Beans in a Pressure Cooker?

Blanching butter beans in a pressure cooker is a quick and efficient method. It eliminates the need for a stovetop, making it faster.

The pressure cooker traps steam, allowing the beans to cook in a shorter amount of time.

The texture and flavor of butter beans can be affected by blanching versus steaming.

Blanching gives them a softer texture and a slightly milder flavor, while steaming retains more of their natural crunch and taste.

Advertisement

Can I Skip the Blanching Step and Cook Butter Beans Directly?

I haven’t tried skipping the blanching step when cooking butter beans directly, but it isn’t recommended. Blanching helps to soften the beans and remove any impurities.

However, there are alternative methods of cooking butter beans that you can try, such as simmering or pressure cooking. These methods may take longer than blanching, but they’ll ensure that the beans are cooked thoroughly and have a nice texture.

Can I Reuse the Blanching Water for Cooking the Butter Beans?

Reusing the blanching water for cooking the butter beans isn’t recommended. While it may seem like a convenient idea, blanching water contains impurities and can affect the flavor and texture of the beans.

Blanching is an important step in cooking butter beans as it helps remove dirt, impurities, and enzymes. It also helps preserve their color and nutrients.

Is It Necessary to Peel the Outer Skin of Butter Beans After Blanching?

It isn’t necessary to peel the outer skin of butter beans after blanching. Blanching butter beans has several benefits, such as preserving their vibrant color and enhancing their texture.

Advertisement

However, if you prefer to remove the outer skin, there are a few tips to make it easier. First, blanch the beans for about 2-3 minutes, then transfer them to an ice bath to cool quickly. Gently squeeze each bean between your fingers to pop them out of their skins.

Conclusion

Blanching butter beans is a simple and rewarding process that ensures they maintain their vibrant color and crisp texture. With the right equipment and following a step-by-step guide, you can achieve perfectly blanched butter beans every time.

Remember to avoid common mistakes like overcooking or undercooking, as they can result in a less enjoyable eating experience.

So, grab your beans, get blanching, and enjoy these delicious and visually appealing treats!

Advertisement
Continue Reading

Product Care & Storage

Preserving the Goodness: How to Store Browned Butter

Published

on

By

An image capturing a glass jar filled with warm, golden-brown liquid butter

Hello, fans of butter! Have you ever thought about how to properly store the tasty browned butter you put so much effort into making? Well, look no further because I have all the information you need right here.

In this article, I’m going to show you the ins and outs of properly storing browned butter. We’ll dive into the shelf life, the best containers to use, and even discuss the dos and don’ts of refrigerating and freezing this golden goodness.

So grab your spatula and let’s get started!

Key Takeaways

  • Properly storing browned butter is important to prevent spoilage and maintain its flavor.
  • Browned butter can last up to two weeks in the refrigerator when stored in an airtight container.
  • Freezing browned butter can extend its shelf life up to three months.
  • Glass containers are recommended for storing browned butter as they are non-reactive, airtight, and retain the original taste and aroma.

Why Browned Butter Should Be Stored Properly

You should know why browned butter needs to be stored properly.

Advertisement

When it comes to shelf life concerns, browned butter is quite delicate. It has a tendency to go rancid quickly if not stored correctly. Proper storage is essential to maintain its flavor and prevent any spoilage.

Browned butter has a rich and nutty taste that can enhance the flavor of various dishes. However, if it is not stored properly, its flavor can deteriorate, becoming bitter or unpleasant.

By storing browned butter in an airtight container and keeping it in the refrigerator, you can extend its shelf life and preserve its delicious flavor.

Understanding the shelf life of browned butter is crucial for anyone who wants to enjoy its unique taste in their culinary creations.

Understanding the Shelf Life of Browned Butter

Understanding the shelf life of browned butter can help determine how long it will stay fresh.

Advertisement

Browned butter, with its rich and nutty flavor, is a versatile ingredient that adds depth to various dishes.

However, it is important to store it properly to preserve its aroma and extend its shelf life.

When stored in an airtight container, browned butter can last for up to two weeks in the refrigerator. To ensure its freshness, it is recommended to label the container with the date it was made.

If you want to extend its shelf life further, browned butter can also be frozen for up to three months. Just make sure to thaw it in the refrigerator before using.

Following these shelf life tips will help you enjoy the delicious taste of browned butter for longer.

Advertisement

The Best Containers for Storing Browned Butter

When it comes to storing browned butter, there are a few key considerations to keep in mind.

First, the choice between glass and plastic containers can impact the longevity and flavor of the butter.

Secondly, it’s important to determine whether an airtight container is necessary to maintain the freshness of the butter.

Lastly, if you plan on freezing your browned butter, it’s crucial to choose a container that is freezer safe to prevent freezer burn and maintain the quality of the butter.

Glass Vs. Plastic

If storing browned butter, opt for glass containers instead of plastic. Glass containers provide several advantages over plastic when it comes to storing browned butter. Firstly, glass is non-reactive, meaning it won’t absorb or transfer any odors or flavors to the butter. This ensures that the butter retains its original taste and aroma. Secondly, glass containers are more airtight compared to plastic, preventing any air from entering and oxidizing the butter. This helps to maintain the butter’s freshness and quality for a longer period. However, one drawback of glass containers is that they are more prone to breakage compared to plastic. Therefore, it’s important to handle them with care. Overall, the pros of using glass containers for storing browned butter outweigh the cons.

Advertisement
Pros of Glass Containers Cons of Glass Containers
Non-reactive Prone to breakage
Airtight
Retains freshness

Airtight or Not

To keep your browned butter fresh and prevent oxidation, opt for a glass container that is airtight. Airtight storage provides numerous benefits for proper storage of browned butter.

Firstly, it prevents air from entering the container and coming into contact with the butter, thereby reducing the risk of oxidation. This is important because when butter oxidizes, it can develop an off-putting flavor and aroma.

Secondly, an airtight container helps to maintain the moisture content in the butter, preventing it from drying out and becoming rancid.

Lastly, by keeping the butter in an airtight container, you can protect it from absorbing any unwanted odors or flavors from the environment.

Freezer Safe Options?

Glass containers that are freezer safe are a great option for preserving the freshness of your browned butter. Freezing browned butter is a common practice to extend its shelf life and maintain its flavor.

Advertisement

Here are some freezing techniques and alternative storage methods to consider:

  • Use glass containers with tight-fitting lids to prevent freezer burn.
  • Allow the browned butter to cool completely before transferring it to the container.
  • Leave some headspace in the container to allow for expansion during freezing.
  • Label the container with the date of freezing for easy reference.
  • Consider portioning the browned butter into smaller containers to thaw only what you need.

Refrigerating Browned Butter: Dos and Don’ts

When it comes to refrigerating browned butter, it’s important to consider the proper storage temperature to maintain its quality.

Additionally, shelf life concerns should be taken into account to ensure that the butter does not spoil.

Lastly, preserving the flavor and texture of the browned butter is crucial for its intended use in recipes.

Proper Storage Temperature

Make sure you store your browned butter at the right temperature to maintain its quality. Proper storage temperature is crucial for preserving the rich flavor and aroma of browned butter.

Here are some guidelines for storing browned butter:

Advertisement
  • Storing in the fridge: Browned butter can be stored in the refrigerator for up to 2 weeks. Make sure to transfer it to an airtight container to prevent absorption of odors. The lower temperature of the fridge helps to slow down the oxidation process, keeping the butter fresh.

  • Storing in the pantry: If you plan to use the browned butter within a week, storing it in a cool, dark pantry is an option. However, be cautious as warmer temperatures can cause the butter to spoil quickly. Keep the container tightly sealed to prevent any air exposure.

Shelf Life Concerns

Now that we’ve discussed the proper storage temperature for browned butter, let’s address the shelf life concerns.

Extending the shelf life of browned butter is essential to prevent spoilage and maintain its quality over time. Browned butter has a shorter shelf life compared to regular butter due to the caramelization process, which introduces new flavors and compounds that can degrade over time.

To extend the shelf life, it is crucial to store browned butter in an airtight container and refrigerate it. The cool temperature of the refrigerator slows down the oxidation process, preventing the butter from going rancid. Additionally, keeping it away from strong odors and light exposure can further help in preserving its freshness.

By following these storage practices, you can ensure that your browned butter stays safe to use for a longer period.

Now, let’s move on to the next section and explore how to maintain its flavor and texture.

Advertisement

Maintaining Flavor and Texture

To keep the flavor and texture of your browned butter intact, it’s important to regularly check for any signs of spoilage. Maintaining freshness is crucial in preventing rancidity and ensuring that your browned butter stays delicious and usable for a longer period of time.

Here are some tips to help you maintain the freshness of your browned butter:

  • Store it in an airtight container to prevent oxidation.
  • Keep it in the refrigerator to slow down the process of rancidity.
  • Use a clean utensil every time you scoop out butter to avoid introducing contaminants.
  • Avoid exposing the butter to direct sunlight or heat, as it can accelerate spoilage.
  • Regularly check for any off smells or discoloration, which are signs of spoilage.

Freezing Browned Butter: Step-by-Step Guide

You can easily freeze browned butter to extend its shelf life and keep it on hand for future recipes. Freezing browned butter is a great way to preserve its rich, nutty flavor and creamy texture.

To freeze browned butter, first let it cool completely. Then transfer it to an airtight container, leaving some space at the top for expansion. Label the container with the date and store it in the freezer for up to 6 months.

When you’re ready to use the frozen browned butter, there are a couple of thawing techniques you can use. You can either let it thaw in the refrigerator overnight or gently heat it in a saucepan over low heat until melted.

Alternatively, you can freeze browned butter in ice cube trays for individual portions or even use silicone molds for fun shapes. These alternative storage methods make it easy to portion out the browned butter as needed for your recipes.

Advertisement

How to Thaw and Reuse Frozen Browned Butter

When thawing and reusing frozen browned butter, it’s important to gently heat it in a saucepan over low heat until melted. This ensures that the butter retains its flavor and texture.

Here are some tips for a successful thawing process and reusing frozen butter:

  • Place the frozen browned butter in a saucepan.
  • Heat the saucepan over low heat, stirring occasionally.
  • Avoid using high heat to prevent the butter from burning.
  • Once the butter is completely melted, remove it from the heat.
  • Allow the melted butter to cool slightly before using it in your recipes.

Frequently Asked Questions

Can I Reuse Browned Butter Multiple Times?

Yes, you can reuse browned butter multiple times, but it’s important to follow best practices for storing it. Properly store it in an airtight container in the refrigerator to maintain its flavor and quality.

Can I Store Browned Butter at Room Temperature?

No, you shouldn’t store browned butter at room temperature. It is best to store it in the fridge to extend its shelf life. This helps to prevent spoilage and maintain its quality for longer.

Can I Store Browned Butter in a Plastic Container?

I can store browned butter in a plastic container. It’s important to use airtight containers to keep the butter fresh. Proper storage techniques include refrigerating or freezing the butter to extend its shelf life.

Can I Freeze Browned Butter in an Ice Cube Tray?

Sure, I can freeze browned butter in an ice cube tray. It’s a convenient way to portion and store. However, if you don’t have an ice cube tray, other options include using a silicone mold or freezer-safe bags.

Advertisement

Can I Use Frozen Browned Butter Directly in Recipes Without Thawing It First?

Yes, you can use frozen browned butter directly in recipes without thawing it first. It adds a rich, nutty flavor to baked goods. If you don’t have frozen browned butter, you can use regular butter as an alternative.

Conclusion

In conclusion, properly storing browned butter is essential to maintain its quality and extend its shelf life. By understanding the best containers and techniques for refrigerating and freezing, you can ensure that your browned butter remains delicious and ready to use whenever needed.

Treat it like a precious treasure, carefully protecting its rich and nutty flavor, just like a delicate butterfly preserved in a glass case.

So go ahead, store your browned butter with confidence, knowing that a world of culinary possibilities awaits you.

Advertisement
Continue Reading

Product Care & Storage

How to Find Apple Butter in Your Local Grocery Store

Published

on

By

An image featuring a spacious grocery store aisle, neatly stacked with rows of colorful jars

As someone who frequently shops for groceries, I often have to search through the large aisles of the store to find specific items. One product that I have had difficulty locating in the past is apple butter. If you are also struggling to find this delicious spread, you have come to the right place.

In this article, I will provide you with the inside scoop on the different sections of the grocery store where you can find apple butter, popular brands to look out for, and some helpful tips to make your search a breeze.

So let’s dive in and uncover the secrets of finding apple butter in the grocery store!

Key Takeaways

  • Apple butter is usually located near jams and spreads in the condiment or breakfast food aisle of a grocery store.
  • Availability of apple butter may vary depending on the season, but it can often be found in glass jars or plastic containers.
  • Some grocery stores may have a dedicated section for specialty spreads, where apple butter can also be found.
  • To find apple butter, it is recommended to read product reviews and compare prices online, store it properly for freshness, and check the condiment aisle or consider checking the baking section as an alternative.

Different Sections in a Grocery Store

You can find apple butter in the condiments section of the grocery store.

Advertisement

Shopping in different sections of a grocery store offers several benefits. Firstly, it allows for better organization and a more efficient shopping experience. By separating items into specific sections, it becomes easier to locate and purchase the items you need.

Secondly, shopping in different sections helps you discover new products and ingredients. It exposes you to a wider variety of options and encourages you to try new things.

Lastly, it can save you time and money. By navigating the different sections, you can compare prices and find the best deals on the items you’re looking for.

To make navigating grocery store sections easier, it’s helpful to create a shopping list beforehand, familiarize yourself with the store layout, and take advantage of any signage or aisle markers provided.

Aisle Locations for Apple Butter

The aisle with apple butter is usually located near the jams and spreads. This aisle organization makes it convenient for shoppers to find all their favorite spreads in one place. When it comes to apple butter, its availability may vary depending on the season.

Advertisement

Here are some key points to consider:

  • Apple butter is typically available year-round in most grocery stores.
  • However, it may be more abundant during the fall season when apples are in peak harvest.
  • Look for apple butter in glass jars or plastic containers.
  • It can be found in the condiments or breakfast food aisle.
  • Some stores may also have a dedicated section for specialty spreads.

Remember to check the store’s layout or ask a store associate for assistance if you are having trouble finding apple butter.

Popular Brands of Apple Butter

If you’re looking for popular brands of apple butter, there are several options to choose from.

When it comes to flavors of apple butter, you’ll find a variety of choices that cater to different tastes. Some popular brands offer classic apple butter with a smooth and sweet flavor, while others may have added spices like cinnamon or nutmeg for a more aromatic experience.

Advertisement

Homemade apple butter recipes often use a combination of apples, sugar, and spices to create a personalized flavor profile. These recipes allow for customization, so you can experiment with different types of apples or adjust the sweetness level to suit your preferences.

Whether you prefer the convenience of store-bought or the homemade touch, there’s an apple butter option out there for everyone.

Tips for Finding Apple Butter

When searching for apple butter, it’s helpful to read product reviews and compare prices online. This way, you can find the best quality apple butter at the most affordable price.

Here are some tips for storing apple butter:

  • Keep it in a cool, dry place: Apple butter should be stored in a pantry or cupboard away from heat and sunlight.
  • Use airtight containers: Transfer the apple butter into airtight jars or containers to keep it fresh for longer.
  • Refrigerate after opening: Once opened, apple butter should be stored in the refrigerator to maintain its flavor and consistency.
  • Check for mold or spoilage: Before using apple butter, always check for any signs of mold or spoilage. If it looks or smells off, it’s best to discard it.
  • Consider homemade apple butter recipes: Making your own apple butter allows you to control the ingredients and customize the flavor to your liking.

Store Layout and Apple Butter Placement

Advertisement

To find the apple butter quickly in the store, look for the condiment aisle near the jams and jellies.

Grocery stores often have a specific layout that is designed to make shopping more efficient for customers. The placement of items is carefully thought out to ensure that customers can easily find what they are looking for.

When it comes to apple butter, it is typically placed in the condiment aisle because it is considered a spread or topping. This aisle is usually located near the jams and jellies, as these items are often used in a similar way.

Alternative Places to Find Apple Butter in Grocery Stores

You might also want to check out the baking section for possible alternative places to find it.

Here are some other places where you might find apple butter in a grocery store:

Advertisement
  • Jams and spreads aisle: Apple butter is often located near other fruit spreads and jams, as it is a popular spread for toast and biscuits.

  • Natural and organic section: If you’re looking for homemade apple butter recipes or organic options, this section is worth exploring.

  • Ethnic food aisle: Some grocery stores categorize apple butter as a specialty item and place it in the ethnic food section, particularly if it is imported.

  • Local or regional products section: If your grocery store supports local or regional products, you may find apple butter from nearby farms or producers.

  • Seasonal displays: During autumn and winter, grocery stores often create seasonal displays that feature apple butter along with other seasonal items.

In addition to being a delicious spread, apple butter also offers health benefits. It is a good source of dietary fiber and contains vitamins and minerals like vitamin C, potassium, and iron.

Frequently Asked Questions

How Many Different Sections Are There in a Typical Grocery Store?

There are usually different sections in a typical grocery store, such as produce, dairy, meat, and pantry. When it comes to apple butter, you can find it in the condiments or spreads aisle. Look for different types and choose the best one for your recipes.

Are There Any Other Popular Fruit Butters Available in Grocery Stores?

There are many popular fruit butters available in grocery stores. They are a delicious way to enjoy the flavors of different fruits. Fruit butter recipes can be found online, and they offer various health benefits.

Can You Provide Tips on How to Make Homemade Apple Butter?

To make homemade apple butter, here are some tips: choose the best apples like Granny Smith or McIntosh, peel and core them, cook with sugar, cinnamon, and lemon juice, and let it simmer until thick and spreadable.

What Are Some Common Store Layouts for Grocery Stores?

Common grocery store layouts vary, but most follow a similar organization. Sections are typically arranged by type of product, such as produce, dairy, and meat. This helps customers easily navigate the store and find what they need.

Advertisement

Are There Any Online Retailers That Sell Apple Butter?

There are several online retailers where you can find apple butter. When choosing the best brand, consider factors like ingredients, reviews, and price. Personally, I love shopping for apple butter online for convenience and variety.

Conclusion

In conclusion, finding apple butter in a grocery store can be a bit of a challenge if you’re not sure where to look. However, with some knowledge of the store layout and the popular brands, it becomes much easier.

For example, I recently had a customer who was desperately searching for apple butter to make a special apple pie for her daughter’s birthday. After giving her some tips and guiding her to the correct aisle, she was overjoyed and grateful for the assistance.

So don’t give up, apple butter is out there waiting for you!

Advertisement
Continue Reading

Trending