Connect with us

Recipes & Culinary Uses

Make Your Own Pumpkin Seed Butter Recipe

Published

on

An image of a wooden cutting board with fresh roasted pumpkin seeds scattered around, a mortar and pestle, and a jar of creamy pumpkin seed butter being spread on a slice of bread

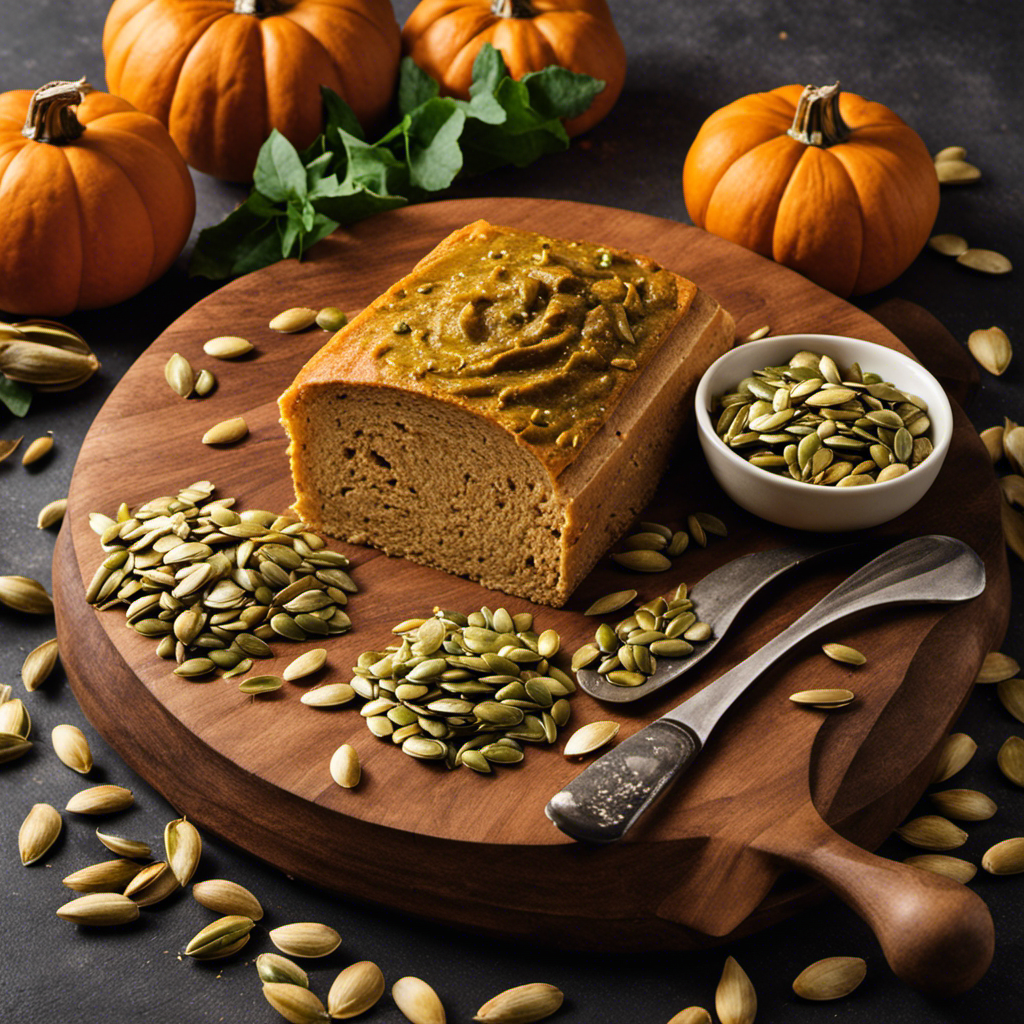
Do you find yourself bored of regular nut butters? Prepare to be amazed by a flavorful, creamy, and healthy option – pumpkin seed butter!

Making your own is easier than you think, and the results are absolutely mind-blowing. In this article, we’ll guide you through the simple steps of gathering the ingredients, roasting the pumpkin seeds to perfection, blending them into a velvety spread, and adding your favorite flavorings.

Get ready to elevate your toast game to a whole new level!

Key Takeaways

  • Pumpkin seeds are a nutritional powerhouse, packed with protein, healthy fats, fiber, magnesium, and zinc.
  • Roasting pumpkin seeds enhances their flavor and makes them easier to blend into a butter.
  • Pumpkin seed butter is a great source of plant-based protein and essential vitamins and minerals.
  • Proper storage and usage of pumpkin seed butter ensure its freshness and maximize its longevity and versatility.

Gathering the Ingredients

First, gather the ingredients needed to make pumpkin seed butter. Pumpkin seeds are not only delicious but also packed with nutritional value and health benefits. They are a rich source of protein, healthy fats, fiber, magnesium, and zinc.

Advertisement

To make pumpkin seed butter, you will need:

  • Two cups of raw pumpkin seeds
  • A pinch of salt
  • One tablespoon of oil (such as olive oil or coconut oil)

The oil helps in achieving a smooth and creamy consistency. Once you have gathered these ingredients, you can move on to the next step of roasting the pumpkin seeds. Roasting the seeds enhances their flavor and makes them easier to blend into a buttery consistency.

Roasting the Pumpkin Seeds

Once you’ve cleaned and dried your pumpkin seeds, you can start roasting them to bring out their nutty flavor. Roasting pumpkin seeds is a simple process that can be done in your own kitchen. Here are some roasting techniques to help you achieve the perfect batch of roasted pumpkin seeds:

  • Preheat your oven to 350°F.
  • Toss the cleaned and dried pumpkin seeds with a little bit of olive oil or melted butter.
  • Spread the seeds in a single layer on a baking sheet.
  • Season the seeds with salt, or add your favorite spices for extra flavor.

Roasting pumpkin seeds not only enhances their taste, but it also offers several health benefits. Pumpkin seeds are a good source of protein, fiber, and healthy fats. They are also packed with important nutrients like magnesium, zinc, and antioxidants.

Incorporating roasted pumpkin seeds into your diet can help support heart health, boost immunity, and promote overall well-being. So, don’t let those pumpkin seeds go to waste – roast them up and enjoy their deliciousness and health benefits!

Blending the Pumpkin Seeds

Advertisement

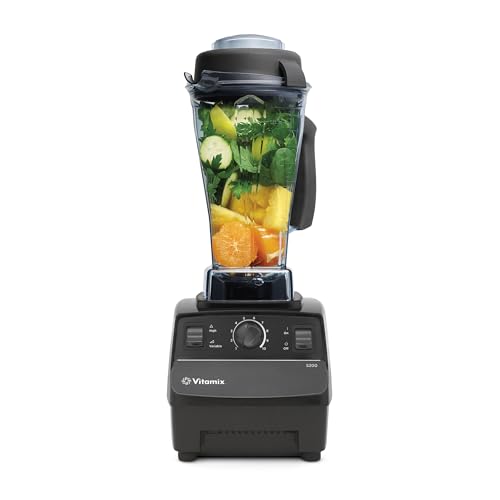
When it comes to blending pumpkin seeds into a smooth and creamy butter, you have a few options for blenders to use. High-speed blenders, such as a Vitamix or Blendtec, are recommended for their powerful motor and ability to pulverize the seeds into a silky texture.

Additionally, you can enhance the flavor of your pumpkin seed butter by adding various spices and flavorings, such as cinnamon, vanilla extract, or even a touch of maple syrup. Experimenting with different combinations will allow you to create a unique and delicious pumpkin seed butter that suits your taste preferences.

Blender Options for Seeds

There are many blender options you can use to grind up the seeds into a creamy butter-like consistency. Here are some options for you to consider:

  • High-speed blender: These blenders are powerful and can easily break down tough seeds into a smooth butter. They are great for larger quantities.

  • Nutribullet: This compact blender is perfect for making smaller batches of seed butter. It has a strong motor that can handle the seeds well.

  • Food processor: While not as powerful as a high-speed blender, a food processor can still do a decent job at grinding up the seeds. It may require more time and effort, but it gets the job done.

  • Immersion blender: This handheld blender is convenient for small quantities and easy to clean. It may not be as effective as other options, but it can still produce a decent seed butter.

When choosing a blender, it’s important to consider any seed allergies you or others may have. Make sure to thoroughly clean the blender after each use to avoid cross-contamination.

Adding Flavorings and Spices

To enhance the flavor of your seed butter, you can experiment with various spices and flavorings. Not only will this add a delicious twist to your butter, but it can also provide additional health benefits.

Advertisement

One popular option is adding cinnamon, which not only adds a warm and comforting flavor, but also has anti-inflammatory properties that can help reduce inflammation in the body.

Another flavorful choice is vanilla extract, which adds a subtle sweetness to your butter. Additionally, you can try adding a pinch of sea salt to enhance the overall taste.

Other options include nutmeg, ginger, or even a sprinkle of cocoa powder for a chocolatey twist. Remember to start with small amounts and adjust to your taste preferences.

Experimenting with different flavorings can truly take your seed butter to the next level while providing a range of health benefits.

Consistency and Texture Achieved

Achieving the desired consistency and texture is key to making your seed butter enjoyable and easy to spread. Here are some tips to help you achieve smoothness and adjust the thickness of your pumpkin seed butter:

Advertisement
  • Roast the pumpkin seeds before blending to enhance their flavor and make them easier to grind into a smooth paste.
  • Add a small amount of oil, such as coconut or avocado oil, to help create a creamy texture.

If your seed butter is too thick, gradually add a bit of oil or water until you reach the desired consistency. On the other hand, if your seed butter is too thin, you can add more roasted pumpkin seeds or nuts to thicken it up.

Adding Flavorings and Sweeteners

Adding flavorings and sweeteners can enhance the taste of your pumpkin seed butter. While pumpkin seed butter has a naturally nutty flavor, you can experiment with different ingredients to elevate its taste. If you prefer a sweeter version, consider using sweetener alternatives like honey, maple syrup, or coconut sugar. These options not only add sweetness but also contribute additional depth of flavor.

For a savory twist, you can try adding ingredients like garlic powder, onion powder, or even a pinch of salt. These savory options can complement the natural earthiness of the pumpkin seeds and create a unique flavor profile. Whether you choose sweet or savory additions, make sure to adjust the quantities to your preference and taste as you go.

Now that you have enhanced the taste of your pumpkin seed butter, let’s move on to learn about storing and using it.

Storing and Using Pumpkin Seed Butter

When it comes to storing and using pumpkin seed butter, there are a few key points to keep in mind.

First, let’s talk about shelf life and storage. Pumpkin seed butter can be stored in an airtight container in the refrigerator for up to three months, or in the freezer for up to six months.

Advertisement

Now, let’s move on to culinary applications. Pumpkin seed butter can be used in a variety of ways, such as a spread on toast or as an ingredient in smoothies, sauces, and baked goods.

Shelf Life and Storage

To ensure your pumpkin seed butter stays fresh, store it in an airtight container in the refrigerator. Proper storage is essential for maintaining the longevity of your homemade spread.

Here are some tips to help you store your pumpkin seed butter correctly:

  • Keep it in an airtight container: This prevents exposure to air and moisture, which can cause the butter to spoil.
  • Refrigerate it: The cool temperature of the refrigerator slows down the oxidation process and helps to preserve the flavor and texture.
  • Avoid light exposure: Store the container in a dark place or use an opaque container to protect the butter from light, which can lead to degradation.
  • Check for signs of spoilage: If you notice any off smells, mold growth, or changes in texture and taste, it’s time to discard the butter.

Now that you know how to store your pumpkin seed butter properly, let’s explore its culinary applications.

Culinary Applications

Now that you know how to properly store your pumpkin seed butter, let’s explore the various culinary applications of this delicious spread. Pumpkin seed butter can be used in a wide range of recipes, adding a nutty and creamy flavor to both sweet and savory dishes. Here are some culinary techniques and ideas to incorporate pumpkin seed butter into your cooking:

Culinary Techniques Culinary Ideas
Spread Use pumpkin seed butter as a spread on toast, bagels, or crackers.
Dressing Make a pumpkin seed butter dressing by combining it with vinegar, oil, and spices for a unique salad dressing.
Smoothies Add a spoonful of pumpkin seed butter to your smoothies for a protein and nutrient boost.

Not only does pumpkin seed butter enhance the taste of your meals, but it also provides several health benefits. It is rich in essential nutrients like protein, healthy fats, fiber, and vitamins. Additionally, it contains antioxidants that support immune function and may help reduce inflammation. Now, let’s dive into the nutritional benefits of pumpkin seed butter.

Advertisement

Nutritional Benefits

You’ll be pleased to know that incorporating pumpkin seed butter into your diet can provide you with a range of nutritional benefits. Here are some key reasons why you should consider adding this delicious spread to your meals:

  • Plant-based protein: Pumpkin seed butter is a great source of plant-based protein, making it an excellent choice for vegans and vegetarians who may struggle to meet their protein needs. Just two tablespoons of pumpkin seed butter contain around 7 grams of protein.

  • Omega 3 fatty acids: Pumpkin seed butter is rich in omega 3 fatty acids, which are essential for heart health and brain function. These healthy fats can help reduce inflammation, lower blood pressure, and support cognitive function.

  • Vitamins and minerals: Pumpkin seed butter is packed with essential vitamins and minerals, including magnesium, iron, zinc, and vitamin E. These nutrients play vital roles in supporting a healthy immune system, promoting good bone health, and maintaining healthy skin.

  • Fiber: Pumpkin seed butter is a good source of dietary fiber, which can help regulate digestion, promote feelings of fullness, and support healthy weight management.

Incorporating pumpkin seed butter into your diet is an easy and delicious way to boost your intake of plant-based protein, omega 3 fatty acids, vitamins, minerals, and fiber. So go ahead and enjoy this nutritious spread on toast, in smoothies, or as a tasty dip for fruits and vegetables. Your body will thank you!

Troubleshooting Tips

If your pumpkin seed butter is too thick, try adding a little bit of oil to achieve a smoother consistency. Common issues when blending pumpkin seeds can include the butter being too thick or grainy, resulting in an unsatisfying texture. To avoid this, make sure to blend the seeds for a sufficient amount of time to break them down completely.

Additionally, adding a small amount of oil, such as coconut or vegetable oil, can help achieve a smoother and creamier texture. You can also try roasting the pumpkin seeds before blending them, as this can enhance their flavor and make them easier to blend.

Another tip is to add a pinch of salt or a sweetener like honey or maple syrup to enhance the taste. By following these troubleshooting tips, you can create a delicious and smooth pumpkin seed butter.

Advertisement

Conclusion

So there you have it, your very own homemade pumpkin seed butter! By following these simple steps, you’ve transformed plain pumpkin seeds into a creamy and delicious spread that’s packed with nutrients.

Just like a warm embrace on a chilly autumn evening, this pumpkin seed butter will bring comfort and satisfaction to your taste buds.

With its versatility and health benefits, you can enjoy it on toast, in smoothies, or even as a dip for your favorite fruits and vegetables.

So go ahead, give it a try and let the pumpkin seed butter embrace you with its delightful flavor and nourishing goodness.

Advertisement
Continue Reading
Advertisement

Recipes & Culinary Uses

How to Make Creamy Butter Garlic Pasta

Published

on

By

An image of a steaming plate of al dente pasta twirled with a rich, golden butter garlic sauce

I am going to reveal to you the secret to making the most delicious butter garlic pasta you have ever tried.

Get ready to indulge in a symphony of flavors as tender pasta gets enveloped in a rich, velvety butter garlic sauce.

This recipe is simple yet sophisticated, perfect for impressing guests or treating yourself to a truly decadent meal.

So grab your apron and let’s dive into the magic of homemade butter garlic pasta.

Trust me, you won’t be able to resist.

Advertisement

Key Takeaways

  • Choose long and thin pasta like spaghetti or linguine for the best texture.
  • Cook the pasta al dente to prevent mushiness and allow the sauce to cling to the strands.
  • Prepare a well-seasoned and fragrant garlic butter sauce with sautéed minced garlic and optional herbs and spices.
  • Combine the cooked pasta with the simmered sauce, ensuring every strand is coated, and garnish with Parmesan cheese and parsley.

Choosing the Right Pasta

I’ll pick out the perfect type of pasta for my butter garlic pasta. When it comes to choosing the right pasta, there are so many options to consider. Different types of pasta shapes can greatly impact the overall texture and taste of the dish.

For a butter garlic pasta, I’d opt for a long and thin pasta shape like spaghetti or linguine. These types of pasta allow the butter garlic sauce to cling onto the strands, ensuring each bite is full of flavor.

Additionally, the importance of cooking the pasta until it’s al dente can’t be understated. Al dente pasta has a slight bite to it, providing a satisfying texture and preventing it from becoming mushy when combined with the butter garlic sauce.

Preparing the Garlic Butter Sauce

To start, I’ll heat up the olive oil in a skillet and sauté the minced garlic until it becomes fragrant. This step is crucial as it will infuse the sauce with a rich, savory flavor.

Advertisement

Once the garlic is golden and aromatic, I’ll enhance the garlic butter sauce by adding a handful of fresh herbs, such as chopped parsley or basil. These herbs not only add a burst of freshness but also contribute to the overall visual appeal of the dish.

Next, I’ll pour in a splash of white wine to the garlic butter sauce. The wine adds a subtle tanginess and complexity that elevates the flavors. This step is optional, but it truly takes the sauce to another level.

With the garlic butter sauce now perfectly seasoned and fragrant, it’s time to move on to boiling the pasta.

Boiling the Pasta

Advertisement

Once the water reaches a rolling boil, I add a generous amount of salt before adding the pasta. Achieving the perfect al dente texture is essential for a delicious butter garlic pasta. I carefully follow the instructions on the pasta package, cooking it for the recommended time minus a minute or two. This ensures that the pasta is cooked, but still firm to the bite.

To add a twist to the traditional garlic butter pasta, I sometimes incorporate a variety of herbs and spices into the boiling water. A pinch of red pepper flakes adds a subtle kick, while a handful of fresh basil leaves brings a refreshing aroma. These additions elevate the flavors and take the dish to a whole new level.

Cooking the Garlic Butter Sauce

While simmering the sauce, I stir in a knob of butter until it melts and blends seamlessly with the other ingredients. This step is crucial for creating a rich and flavorful garlic butter sauce that will elevate your pasta dish to new heights.

Here are three cooking techniques and flavor variations that you can experiment with to enhance the taste of your butter garlic pasta:

  • Sautéing the garlic: Instead of simply adding minced garlic to the sauce, try sautéing it in the butter until fragrant and golden brown. This will bring out the natural sweetness and depth of flavor in the garlic.

  • Adding herbs and spices: To take your sauce to the next level, consider incorporating herbs like parsley or basil, and spices like red pepper flakes or black pepper. These additions will add complexity and a touch of heat to your butter garlic pasta.

  • Using flavored butter: If you want to get creative with your flavor profile, try using flavored butter. You can find a wide variety of options at the grocery store or make your own by mixing in herbs, spices, or even cheese. This will infuse your sauce with a unique and delicious taste.

Combining the Pasta and Sauce

Advertisement

After the sauce has simmered to perfection, I pour it over the cooked pasta and toss until every strand is coated in the creamy goodness.

The combination of the rich butter and aromatic garlic creates a delectable flavor that’s hard to resist.

To enhance the dish even further, I like to garnish it with a sprinkle of freshly grated Parmesan cheese and a handful of chopped parsley. This adds a touch of freshness and brings out the flavors of the sauce.

As for serving suggestions, this butter garlic pasta pairs well with a simple green salad or some crusty garlic bread on the side.

Advertisement

For variations and substitutions, you can experiment with different types of pasta, such as spaghetti or fettuccine, and add in ingredients like sautéed mushrooms or grilled chicken for added protein.

The possibilities are endless, but one thing is for sure: this butter garlic pasta is a crowd-pleaser that will leave everyone wanting more.

Frequently Asked Questions

How Can I Make This Recipe Vegan-Friendly?

To make this recipe vegan-friendly, you can use vegan substitutes for butter, such as plant-based margarine or coconut oil. Additionally, opt for dairy-free options like almond milk or cashew cream instead of regular milk or cream.

Can I Use Gluten-Free Pasta for This Recipe?

Sure, you can use gluten-free pasta for this recipe. Just remember to follow the cooking instructions for gluten-free pasta and consider alternatives like rice or quinoa pasta for a delicious, gluten-free version.

Can I Substitute Olive Oil for Butter in the Garlic Butter Sauce?

Substituting olive oil or vegan butter in the garlic butter sauce can alter the taste and texture of the dish. Olive oil adds a rich, fruity flavor, while vegan butter provides a creamy and buttery texture.

Advertisement

How Can I Make This Dish Spicier?

To make this dish spicier, there are several ways to add heat. You can incorporate hot chili flakes, spicy red pepper sauce, or even diced jalapeños. Another alternative to garlic could be using ginger for a flavorful twist.

Can I Add Vegetables or Protein to This Pasta Dish?

Adding vegetables and protein to this pasta dish is a great idea. It not only enhances the nutritional value but also adds texture and flavor. I recommend sautéing some bell peppers and adding cooked chicken for a delicious and balanced meal.

Conclusion

In conclusion, making butter garlic pasta is a simple yet delicious dish that can be enjoyed by everyone.

The rich and creamy garlic butter sauce perfectly coats the al dente pasta, creating a mouthwatering combination of flavors.

This recipe allows you to indulge in a culinary experience that’s both satisfying and comforting, like a warm embrace on a chilly evening.

Advertisement

So why not give it a try and treat yourself to a delightful meal?

Continue Reading

Recipes & Culinary Uses

Easy Steps to Make Butter from Raw Milk Using a Mixer

Published

on

By

An image showcasing the step-by-step process of transforming creamy raw milk into luscious butter using a mixer

As I immerse myself in the realm of culinary exploration, I came across a hidden treasure: crafting butter from raw milk using a mixer. With just a few basic ingredients and my reliable mixer, I unveiled the key to producing smooth, homemade butter that would impress any chef.

In this article, I will guide you through the precise steps, from gathering the ingredients to storing the final product. Get ready to churn and savor the rich rewards of your own creation.

Let’s butter up!

Key Takeaways

  • Choose a mixer with a powerful motor and sturdy construction
  • Strain and pasteurize the raw milk before churning
  • Use a high-speed setting on the mixer for faster butter formation
  • Store homemade butter in airtight containers to maintain flavor and freshness

Gathering the Ingredients and Equipment

I’m gathering the ingredients and equipment needed to make butter from raw milk in my mixer.

Advertisement

To ensure a successful butter-making process, it’s crucial to choose the right mixer. Look for a mixer with a powerful motor and a sturdy construction that can handle the thick consistency of the cream. A high-speed setting is also desirable to expedite the churning process.

When it comes to sourcing raw milk, it’s important to prioritize safety and quality. Look for local farms or dairies that follow strict hygiene practices and ensure the cows are healthy and well-cared for. Freshness is key, so opt for milk that has been recently produced and stored properly.

Preparing the Raw Milk for Churning

To start preparing the raw milk for churning, I’ll first need to strain out any impurities. This ensures that the milk is clean and safe for consumption.

Before churning, it’s important to pasteurize the raw milk to eliminate any harmful bacteria that may be present. Pasteurization involves heating the milk to a specific temperature and holding it there for a set period of time. This process helps to destroy any potential pathogens without significantly altering the taste or nutritional composition of the milk.

Once the raw milk is pasteurized, there are different methods of churning it into butter. One method involves using a mixer, which agitates the milk until the fat globules separate from the liquid, forming butter.

Advertisement

Churning the Raw Milk in the Mixer

Using a high-speed setting, I’ll let the mixer agitate the milk until the fat globules separate and butter forms. The speed of the mixer plays a crucial role in the churning process. A higher speed will help the fat globules to separate more quickly, resulting in butter formation. The churning time will vary depending on the mixer speed and the amount of milk being churned. It is important to monitor the process closely to avoid over-churning, which can lead to a grainy texture. To give you an idea of the correlation between mixer speed and churning time, here is a table that summarizes the approximate time required for butter formation at different speeds:

Mixer Speed Churning Time (minutes)
Low 20-30
Medium 15-20
High 10-15
Very High 5-10
Turbo 2-5

Separating the Butter From the Buttermilk

After the churning process, I strain the mixture through a fine-mesh sieve to separate the butter from the buttermilk. The creamy liquid slowly drips down, leaving behind the beautiful golden butter. It’s a delicate process, requiring patience and precision.

As I watch the buttermilk flow through the sieve, I can’t help but appreciate the benefits of using raw milk for making butter. The rich and complex flavors of raw milk add depth and character to the final product. It’s like tasting a piece of the farm, with its grassy undertones and hints of sweetness.

Advertisement

To further enhance the butter’s taste, there are various methods for flavoring homemade butter. From the simplicity of sprinkling salt to the creativity of adding herbs and spices, the possibilities are endless.

Storing and Using Your Homemade Butter

When storing my homemade butter, I prefer to use airtight containers to keep it fresh and prevent any unwanted odors from seeping in. It’s important to protect the butter’s flavor and texture, as well as extend its shelf life. Additionally, I like to experiment with different flavors to add a unique twist to my butter. Some creative ways to flavor homemade butter include incorporating herbs like rosemary or thyme, adding spices like cinnamon or garlic powder, or mixing in sweet ingredients like honey or maple syrup. This allows me to customize my butter based on my preferences and the dishes I plan to use it in. Speaking of which, homemade butter has a multitude of uses in cooking and baking. It can be spread on toast, melted over vegetables, used as a base for sauces, or incorporated into pastry dough for flakier results. The possibilities are endless!

Flavor Ingredients Recommended Uses
Herb-infused Rosemary, thyme Mashed potatoes, roasted vegetables
Spiced Cinnamon, garlic powder Toast, pancakes
Sweet Honey, maple syrup Baked goods, waffles

Frequently Asked Questions

How Long Does It Take for the Raw Milk to Turn Into Butter in the Mixer?

To speed up the process of turning raw milk into butter in a mixer, you can increase the speed and duration of mixing. It is not possible to make butter in a mixer without using raw milk.

Advertisement

Can I Use Pasteurized Milk Instead of Raw Milk for Making Butter in a Mixer?

Using raw milk instead of pasteurized milk for making butter in a mixer has several benefits. It enhances the flavor and nutritional value of the butter. To achieve the best consistency, ensure the milk is fresh and at room temperature before churning.

What Is the Ideal Temperature for the Raw Milk Before Churning It in the Mixer?

The ideal temperature for raw milk before churning it in the mixer is around 50-55°F. This ensures proper fat separation and reduces churning time. It’s crucial to maintain the correct temperature for the best results.

Can I Add Flavorings or Herbs to the Butter While Churning It in the Mixer?

Yes, you can add flavorings or herbs to the butter while churning it in the mixer. This is a great way to incorporate flavor into homemade butter and experiment with different tastes.

Can I Use a Hand Mixer Instead of a Stand Mixer to Churn the Raw Milk Into Butter?

Using a hand mixer for churning raw milk into butter has its pros and cons. It can be more convenient and easier to handle, but may take longer and require more effort compared to a stand mixer. Other methods without a mixer include shaking in a jar or using a food processor.

Conclusion

In conclusion, making butter from raw milk in a mixer is a simple and rewarding process. By following the steps outlined above and using the right ingredients and equipment, you can transform fresh raw milk into delicious homemade butter.

Advertisement

Remember, practice makes perfect, so don’t be discouraged if your first attempt isn’t perfect. With a little patience and perseverance, you’ll be churning out creamy butter in no time, and soon you’ll be able to spread it on toast and enjoy the fruits of your labor.

Continue Reading

Recipes & Culinary Uses

Make Rich Butter from Raw Milk

Published

on

By

An image capturing the process of making butter from raw milk

Hey! Have you ever thought about how to turn raw milk into homemade butter? Look no further, I’ve got the solution for you.

In this article, I’ll take you through the step-by-step process of turning that creamy goodness into delicious homemade butter.

We’ll explore the benefits of using raw milk, learn how to separate the cream, and even discover different flavors you can infuse into your butter.

So, grab your apron and let’s get churning!

Key Takeaways

  • Raw milk contains essential vitamins, minerals, and enzymes that are destroyed during pasteurization.
  • Separating the cream from raw milk can be done through gravity separation, centrifugal separation, or cold separation.
  • Churning the cream into butter can be done through hand churning, using a stand mixer with a whisk attachment, or using a food processor with a blade attachment.
  • Washing and storing the freshly made butter involves cleaning the butter container and preserving its freshness by wrapping it tightly in wax paper or using an airtight container.

Understanding the Benefits of Raw Milk

Advertisement

Raw milk has numerous health benefits that are not found in pasteurized milk. Understanding the nutritional value of raw milk is important for those seeking a natural and wholesome source of nutrients.

Contrary to popular belief, raw milk is not a dangerous product when handled and consumed properly. In fact, it contains essential vitamins, minerals, and enzymes that are destroyed during the pasteurization process.

Raw milk is rich in beneficial bacteria and probiotics, which can support a healthy gut microbiome and enhance digestion. Additionally, raw milk is a good source of bioavailable nutrients such as calcium, protein, and healthy fats.

Debunking myths about raw milk is crucial to prevent misinformation and promote informed choices regarding our food.

Preparing the Raw Milk for Butter Making

To prepare the milk for butter making, it’s important to first skim off the cream. This step is crucial as it allows us to separate the high-fat cream from the milk, which is necessary for obtaining a good quality butter.

Advertisement

Here are three separating techniques to help you achieve the best results:

  1. Gravity separation: After allowing the milk to stand undisturbed for a few hours, the cream naturally rises to the top, making it easy to skim off with a spoon or ladle.

  2. Centrifugal separation: Using a cream separator machine, the milk is spun at high speeds, causing the heavier cream to separate from the lighter milk. This method is efficient and yields a higher cream quality.

  3. Cold separation: By refrigerating the milk overnight, the cream becomes denser and easier to separate. Skimming off the cold cream results in a richer and creamier butter.

Separating the Cream From the Raw Milk

If you want to achieve the best results when separating the cream from the milk, try using gravity separation, centrifugal separation, or cold separation techniques.

Gravity separation involves allowing the milk to sit undisturbed in a container for a period of time, allowing the cream to rise to the top.

Advertisement

Centrifugal separation utilizes a machine that spins the milk at high speeds, forcing the cream to separate from the milk.

Cold separation involves chilling the milk to a low temperature, causing the cream to solidify and separate from the milk.

These techniques are beneficial because consuming raw dairy has numerous health benefits, such as improved digestion, increased nutrient absorption, and enhanced immune function.

Additionally, if you don’t have access to a churn, these separation methods provide alternatives for obtaining cream for making butter.

Churning the Cream Into Butter

Once the cream has separated from the milk, you can start churning it into delicious butter. Churning is the process of agitating the cream until it transforms into butter.

Advertisement

Here are three techniques to help you achieve the perfect consistency:

  1. Hand Churning: This traditional method involves using a small churn or jar and physically shaking or rocking it back and forth until the cream turns into butter.

  2. Stand Mixer: If you have a stand mixer with a whisk attachment, you can use it to churn the cream. Start at a low speed and gradually increase until the butter forms.

  3. Food Processor: Another option is to use a food processor with a blade attachment. Pulse the cream until it separates into butter and buttermilk.

Troubleshooting common butter making problems:

  • If the cream isn’t thickening, ensure it is at the right temperature (around 50-55°F) and give it more time to churn.
  • If the butter is too soft, refrigerate it for a while before churning again.
  • If the butter is too hard, let it soften at room temperature or add a small amount of buttermilk to adjust the consistency.

After churning the cream into butter, it’s time to move on to the next step of washing and storing the freshly made butter.

Washing and Storing the Freshly Made Butter

When it comes to washing and storing freshly made butter, there are a few key points to consider.

Advertisement

First, cleaning the butter container is essential to maintain the quality of the butter. I recommend using warm soapy water and a soft sponge to remove any residue before drying it thoroughly.

Second, preserving the butter’s freshness is crucial to prolong its shelf life. To do this, I suggest wrapping the butter tightly in wax paper or placing it in an airtight container to protect it from air and odors.

Lastly, it’s important to store butter at the proper temperature. The recommended storage temperature for butter is between 32-40°F (0-4°C), as this helps to maintain its texture and prevent spoilage.

Cleaning the Butter Container

Before cleaning the butter container, make sure to remove any leftover butter residue. Cleaning the butter container is essential to maintain its freshness and prevent any cross-contamination. Here are three effective cleaning techniques to ensure a clean and sanitized container:

  1. Soak in hot, soapy water: Fill the container with hot water and add a few drops of dish soap. Let it sit for a few minutes to loosen any residue, then scrub with a sponge or brush.

  2. Use vinegar solution: Mix equal parts white vinegar and water in the container. Let it sit for about 15 minutes to dissolve any stubborn residue. Scrub with a sponge or brush, then rinse thoroughly.

  3. Bleach solution: Mix 1 tablespoon of bleach with 1 gallon of water. Let the container soak in the solution for 10 minutes, then scrub and rinse well.

Preserving Butter’s Freshness

After cleaning the butter container, the next step is to ensure that the butter stays fresh and maintains its texture for as long as possible. This is important because nobody wants to end up with rancid butter. To preserve the butter’s freshness, there are a few key things you can do. Firstly, storing the butter in an airtight container or wrapping it tightly in wax paper will help prevent it from being exposed to air and developing off flavors. Secondly, keeping the butter refrigerated at a consistent temperature, ideally around 40°F (4°C), will slow down the process of it going rancid. Lastly, if you want to store butter for an extended period of time, freezing it is a great option as it can extend its shelf life for several months. By following these steps, you can enjoy fresh and flavorful butter for all your culinary needs.

Advertisement
Preserving Butter’s Freshness
Store butter in an airtight container or wrap tightly in wax paper.
Refrigerate butter at a consistent temperature of around 40°F (4°C).
Freeze butter for extended storage, which can extend its shelf life for several months.
Follow these steps to enjoy fresh and flavorful butter for all your culinary needs.

Recommended Storage Temperature

Storing butter in the refrigerator at a consistent temperature of around 40°F (4°C) helps to maintain its freshness and prevent it from going rancid. Here are three recommended storage methods and the ideal temperature range for butter:

  1. Wrap it properly: Use parchment paper or airtight containers to wrap the butter. This will protect it from absorbing odors and prevent it from drying out.

  2. Keep it away from light: Exposure to light can cause butter to spoil faster. Store it in a cool, dark place, like the refrigerator’s butter compartment or a covered butter dish.

  3. Avoid temperature fluctuations: Butter can easily absorb flavors and odors from other foods in the fridge. To maintain its quality, store it away from strong-smelling foods and make sure the temperature remains constant.

Following these recommended storage methods and keeping the butter at the ideal temperature range will help to preserve its freshness and taste for longer periods.

Using Leftover Buttermilk in Recipes

You can easily use leftover buttermilk in recipes to add a tangy flavor. Buttermilk is a versatile ingredient that can enhance the taste and texture of various baked goods. It’s a great substitute for regular milk in recipes because it adds a unique tanginess and richness. Here are some creative uses for leftover buttermilk in baking:

Row Buttermilk Recipe Result
1 Pancakes Fluffy and Light and
tender texture fluffy pancakes
2 Biscuits Tender and Flaky and
flaky texture buttery biscuits
3 Cakes Moist and Moist and
tender texture tender cakes
4 Fried chicken Crispy and Juicy and
flavorful coating flavorful chicken

Exploring Variations and Flavors in Homemade Butter

When it comes to homemade butter, there are endless possibilities for adding unique flavors and enhancing its taste.

One way to do this is through unique butter infusions, where you can mix in various ingredients like garlic, herbs, or even fruit zest to create a personalized flavor profile.

Advertisement

Another option is to enhance the taste of your homemade butter by incorporating herbs such as rosemary, thyme, or basil, which can add a delightful aroma and taste.

Lastly, experimenting with flavored salts like smoked sea salt or truffle salt can take your butter to a whole new level, adding a burst of flavor that will elevate any dish.

Unique Butter Infusions

To add unique flavors to your butter, try infusing it with herbs or spices. Butter infusion techniques offer a creative way to elevate the taste of your homemade butter. Here are three ideas to get you started:

  1. Garlic and Herb Butter: Melt your butter, then add minced garlic and chopped fresh herbs like rosemary, thyme, or parsley. Let the flavors infuse for a few hours before refrigerating.

  2. Citrus Zest Butter: Grate the zest of an orange, lemon, or lime into your softened butter. Mix well and let it sit in the fridge for a while to let the citrus flavors infuse.

  3. Spiced Butter: Add a pinch of your favorite spices, such as cinnamon, nutmeg, or cardamom, to your softened butter. Mix thoroughly and let it sit in the fridge to develop the flavors.

Enhancing Taste With Herbs

Adding herbs to your butter is a simple and effective way to enhance the taste of your culinary creations. Not only does it add a burst of flavor, but it also adds a touch of freshness and complexity to your dishes. Experimenting with different herbal blends can elevate your butter to a whole new level. Whether you prefer a savory blend of rosemary and thyme or a more exotic combination of cilantro and lime, the possibilities are endless. To help you get started, here is a table showcasing some popular herb and spice combinations that you can try in your butter:

Herb/Spice Flavor Profile Best Pairings
Rosemary Earthy, piney Potatoes, lamb
Basil Sweet, peppery Tomatoes, mozzarella
Dill Fresh, tangy Fish, cucumbers
Cinnamon Warm, sweet Apples, baked goods

Experimenting With Flavored Salts

After experimenting with herbs to enhance the taste of my homemade butter, I decided to take my flavor exploration to the next level by experimenting with flavored salts. Flavored salts can add a unique and exciting twist to butter, elevating its taste and making it even more delicious.

Advertisement

Here are three ways I incorporated different salts into my flavored butter recipes:

  1. Smoked Salt Butter: I mixed smoked salt into softened butter, creating a smoky and savory spread that pairs perfectly with grilled meats and vegetables.

  2. Truffle Salt Butter: By combining truffle salt with butter, I created a luxurious and indulgent spread that adds a hint of earthy and aromatic flavor to any dish.

  3. Citrus Salt Butter: I zested some fresh citrus fruits and mixed the zest with sea salt before incorporating it into butter. The result was a bright and tangy butter that adds a burst of freshness to baked goods and seafood.

Frequently Asked Questions

Can I Make Butter From Pasteurized Milk?

Yes, you can make butter from pasteurized milk. It’s a simple process of churning the cream until it separates into butter and buttermilk. Homemade butter can be healthier than store-bought due to its freshness and lack of additives.

How Long Does It Take to Separate the Cream From the Raw Milk?

Separating cream from raw milk depends on various factors, such as temperature and milk fat content. Once separated, the cream can be churned into butter. The churning process can take anywhere from 10 to 30 minutes.

Can I Use an Electric Mixer Instead of a Churn to Make Butter?

Yes, you can use an electric mixer to make butter. However, it’s important to note that the process may differ slightly between churning raw milk and pasteurized milk.

How Long Can I Store Freshly Made Butter?

Freshly made butter can be stored in the refrigerator for up to two weeks. However, its shelf life can be extended by freezing it. Proper storage is essential to maintain its freshness and quality.

Advertisement

What Other Uses Are There for Leftover Buttermilk Besides Using It in Recipes?

Leftover buttermilk can be used in pancakes, biscuits, or even as a marinade for fried chicken. As for alternative methods for making butter, you can also use heavy cream and a mixer.

Conclusion

In conclusion, making butter from raw milk is a delightful and rewarding process. The benefits of raw milk are numerous, as it contains valuable enzymes and nutrients that are lost during pasteurization.

By separating the cream from the raw milk and churning it vigorously, you can easily transform it into creamy and delicious homemade butter.

Don’t forget to wash and store the butter properly to ensure its freshness. And don’t discard the leftover buttermilk! It can be used in various recipes to add flavor and moisture.

So, grab some raw milk and start your butter-making adventure today!

Advertisement
Continue Reading

Trending