Butter Tips and Tricks
How to Create Laminated Butter Dough
With this guide, discover the secrets to crafting perfect laminated butter dough that will elevate your baking—learn the essential techniques inside!
To create laminated butter dough, start by mixing 4 cups of all-purpose flour with a pinch of salt. Gradually add 1 cup of ice-cold water until the dough forms. Chill this dough for at least 30 minutes. While it's chilling, prepare your cold, cubed unsalted butter by shaping it into a flat rectangle. Roll out the dough into a larger rectangle, place the butter in the center, and fold the dough over to encapsulate it. Use folding techniques like the envelope or book fold to create layers. Keeping everything cold is key, and there's more to master on this journey!
Key Takeaways
- Measure and mix dry ingredients accurately, then gradually add ice-cold water until the dough just comes together.
- Use cold butter to create a butter block and encapsulate it within the rolled-out dough.
- Perform folding techniques, like envelope or book folds, to create distinct layers for flakiness.
- Keep the dough chilled throughout the process to maintain the integrity of the butter layers.
- Preheat the oven and apply an egg wash before baking to achieve a golden finish.
Ingredients Needed
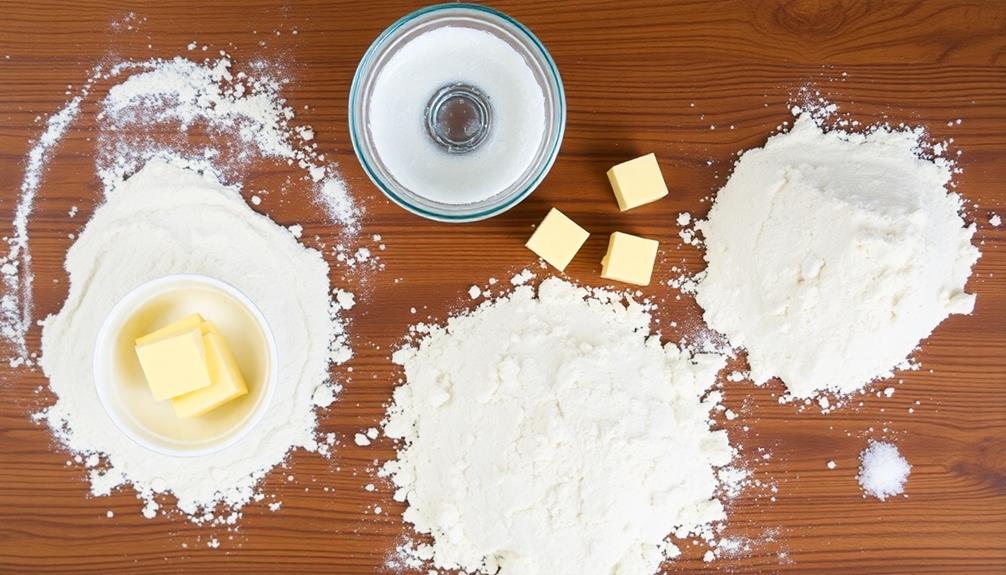
To create laminated butter dough, you'll need a few essential ingredients that work together to achieve that flaky, tender texture.
First, grab all-purpose flour; it provides the necessary structure. You'll want about four cups to start, ensuring your dough can hold its shape as you fold and roll.
Next, you'll need unsalted butter—typically a full pound. Cold butter is critical; it helps create those distinct layers, so don't soften it before use. Cut the butter into small cubes to make it easier to incorporate.
You'll also need water, around one cup, which should be ice-cold. This helps keep the dough chilled, promoting better layering during the lamination process. A pinch of salt is significant too, enhancing flavor and controlling gluten development.
Lastly, consider adding a little vinegar or lemon juice. This tiny bit of acid strengthens the dough, giving it a better texture.
Once you've gathered these ingredients, you're ready to prepare the dough. Each component plays a key role in achieving that perfectly flaky pastry, so don't skip or substitute any!
Enjoy the process as you begin creating your laminated butter dough masterpiece.
Preparing the Dough
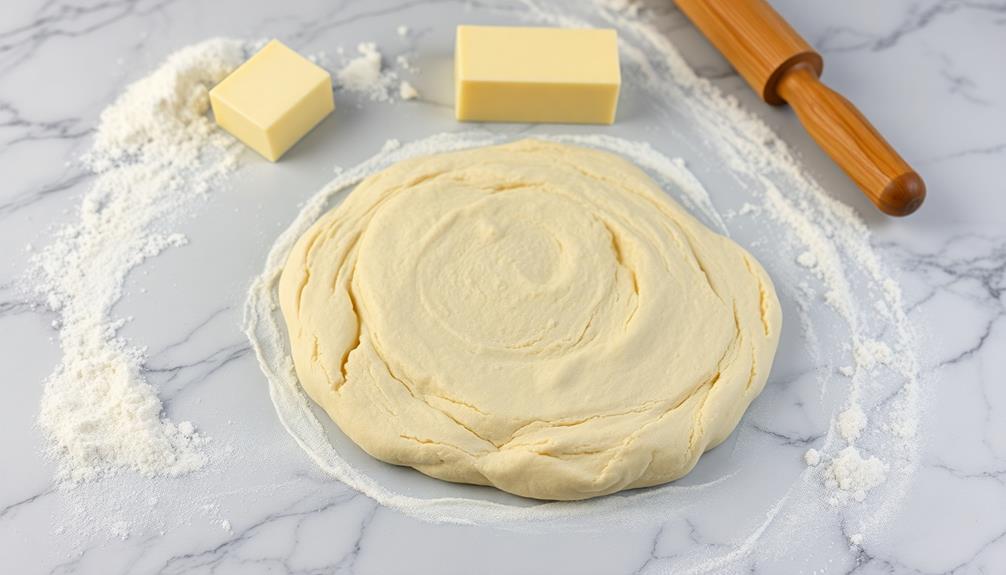
Creating laminated butter dough starts with properly mixing your ingredients. Begin by measuring your flour, salt, and sugar accurately. In a large mixing bowl, whisk these dry ingredients together until well combined. Next, add cold water gradually while mixing with a fork or your hands. You'll want to stop when the dough just comes together, so avoid overworking it. Wrap the dough in plastic wrap and chill it in the refrigerator for at least 30 minutes.
While your dough is chilling, prepare a clean workspace. This will help you roll out the dough evenly later. Once the resting period is over, take the dough out and gently flatten it into a rectangle. To keep things organized, refer to the table below for a quick guide on ingredient proportions and temperature:
Ingredient | Amount | Temperature |
---|---|---|
All-purpose flour | 2 ½ cups | Cold |
Salt | 1 tsp | N/A |
Sugar | 1 tbsp | N/A |
Water | ¾ cup | Cold |
Now you're ready to move on to the next step in creating your laminated butter dough!
Incorporating the Butter
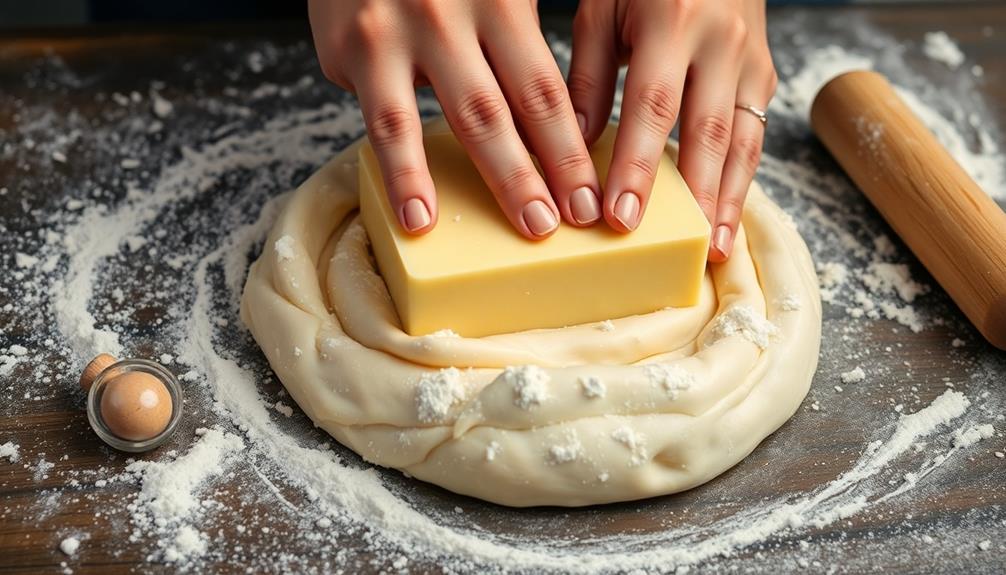
Incorporating the butter is an essential step in achieving that flaky, layered texture in your laminated dough. To do this effectively, you'll want to follow these straightforward guidelines:
- Use cold butter: Start with chilled butter, ideally around 50°F (10°C). This helps maintain its structure during the lamination process.
- Create a butter block: Shape the cold butter into a flat rectangle, about 1/2 inch thick. This uniformity guarantees even distribution throughout your dough.
- Roll your dough: After preparing your base dough, roll it out into a rectangle that's approximately twice the size of your butter block. This gives you enough space to encase the butter properly.
- Encase the butter: Place the butter block in the center of the rolled-out dough and fold the edges over it, sealing it completely. Make sure there are no gaps, as this can lead to butter leaking during the lamination process.
Folding Techniques
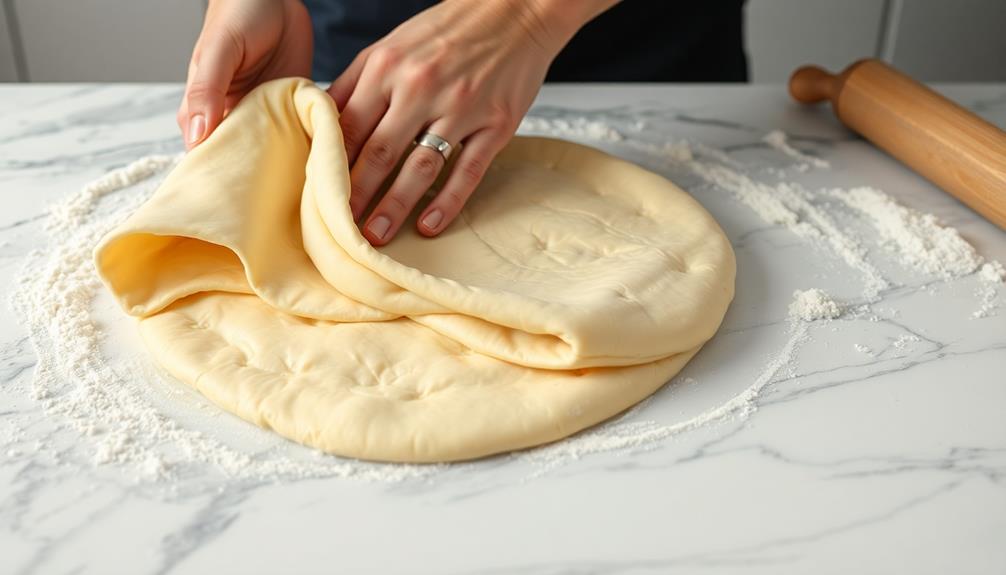
Mastering folding techniques is essential for achieving those beautiful layers in laminated butter dough. You'll want to focus on two main folds: the envelope and the book fold. These methods help you create that flaky, airy texture.
Start with the envelope fold. Roll out your dough into a rectangle, then fold the top and bottom edges toward the center, like closing an envelope. This technique creates many layers quickly. Next, try the book fold. Roll your dough into a rectangle again, but this time, fold one side over to the center and then the other side over the first. This method will give you even more layers.
To visualize these techniques, take a look at the following table:
Folding Technique | Description |
---|---|
Envelope Fold | Fold top and bottom to center |
Book Fold | Fold sides to the center |
Layer Count | Increases with each fold |
Baking Tips
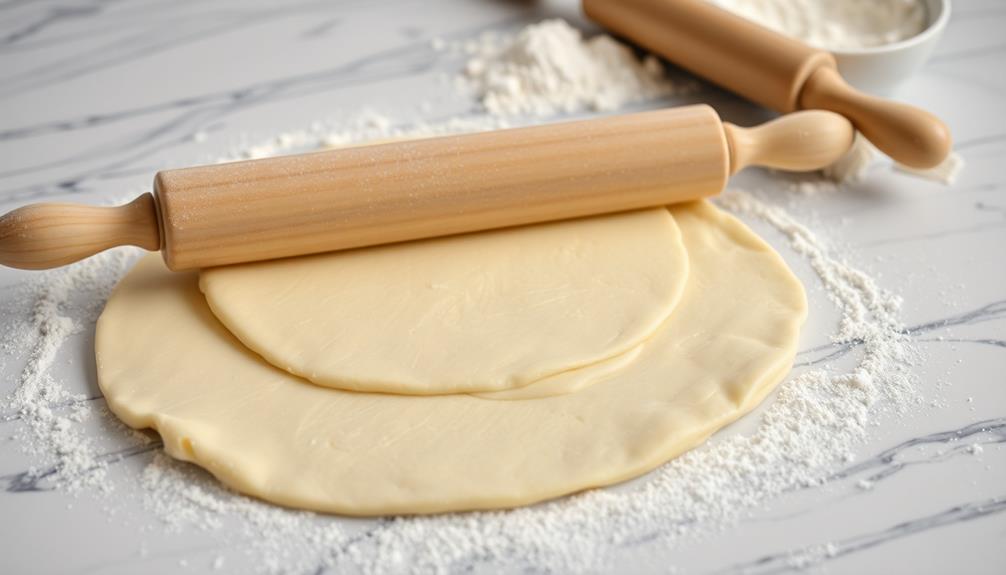
When it comes to baking laminated butter dough, a few key tips can make all the difference in achieving that perfect flaky texture. Follow these simple guidelines to guarantee your pastries turn out just right.
- Chill Your Dough: Keep your dough cold throughout the process. This helps maintain those distinct layers of butter, which create flakiness. If you notice your dough getting warm, pop it back in the fridge for a few minutes.
- Preheat Your Oven: Always preheat your oven to the right temperature before baking. A hot oven is essential for proper puffing and browning, so don't skip this step!
- Use Parchment Paper: Line your baking sheets with parchment paper. This prevents sticking and allows for even heat distribution, resulting in a beautifully baked pastry.
- Egg Wash: Brush your pastries with an egg wash before baking. This gives them a shiny, golden finish that's visually appealing and enhances flavor.
Frequently Asked Questions
Can I Use Margarine Instead of Butter for Laminated Dough?
You can use margarine instead of butter for laminated dough, but it won't yield the same flaky texture or rich flavor. Butter's fat content and water levels create better layers and taste in pastries.
How Do I Know if My Dough Is Overworked?
If you've ever ended up with tough cookies, you know overworking dough's a problem. You'll know your dough's overworked when it becomes sticky, loses elasticity, and feels dry instead of smooth and supple.
What Type of Flour Is Best for Laminated Dough?
For laminated dough, you'll want to use a high-protein flour, like bread flour. It gives your dough strength and elasticity, ensuring those perfect layers. All-purpose flour works too, but may yield slightly less flaky results.
How Long Can I Refrigerate Laminated Dough Before Using It?
You can refrigerate laminated dough for up to 2 days before using it. Just make sure to wrap it tightly to prevent drying out. If you need longer, consider freezing it for future use.
Can I Freeze Laminated Dough for Later Use?
Yes, you can freeze laminated dough for later use. Just wrap it tightly in plastic wrap and place it in an airtight container. When you're ready, thaw it in the fridge before rolling and baking.
Conclusion
Creating laminated butter dough is like mastering a delicate dance; each fold and turn builds harmony between layers of dough and butter. Just as a skilled dancer knows how to maintain rhythm and grace, you'll learn to balance patience and precision. With practice, you'll transform simple ingredients into flaky pastries that rise beautifully in the oven. So roll up your sleeves, embrace the process, and soon you'll be crafting delicious treats that impress everyone at the table.
From sneaky childhood butter licks to penning some of our most popular articles, Jamie’s journey with butter has been lifelong. His culinary background gives him a unique perspective, allowing him to craft mouthwatering articles that educate and tantalize equally. Jamie’s travel adventures revolve around finding the world’s best buttery treats when he isn’t writing.
Butter Tips and Tricks
Butter vs. Margarine: Latest Health Research
Unlock the latest insights on butter versus margarine and discover which option might be healthier for you—your diet may depend on this choice.
When choosing between butter and margarine, consider their health impacts carefully. Butter, rich in essential nutrients and healthy fats, can benefit your health when used in moderation. It even contains compounds that may reduce inflammation. On the other hand, some margarines can pose health risks due to trans fats and additives, which might increase your cholesterol levels and inflammation. If you opt for margarine, choose varieties free from harmful fats. A balanced diet that includes both options, along with other healthy fats, is key. If you'd like to explore more nuances of this topic, there's plenty more to uncover.
Key Takeaways
- Recent studies highlight butter's natural nutrients and healthy fats, making it a beneficial choice when consumed in moderation.
- Margarine often contains trans fats, which can negatively impact heart health and raise bad cholesterol levels.
- Grass-fed butter provides higher omega-3 fatty acids and CLA, offering additional heart health benefits compared to margarine.
- Some margarine varieties include artificial additives and preservatives that may pose long-term health risks.
- Experts recommend reading labels carefully to choose healthier margarine options and balancing fats in the diet.
Overview of Butter
Butter, a staple in kitchens around the world, is made by churning cream until it thickens and separates from buttermilk. This simple process creates a rich, creamy product that's crucial for cooking and baking. You might love the way butter enhances flavors, adds moisture, and creates that delightful texture in your favorite dishes.
Rich in essential fatty acids and vitamins, butter provides important nutrients that contribute to overall health.
There are various types of butter available, including unsalted, salted, and cultured, each with its unique qualities. Unsalted butter allows you to control the salt levels in your recipes, while salted butter adds a hint of flavor that many enjoy on its own.
Cultured butter, made from fermented cream, offers a tangy taste that can elevate your culinary creations.
Nutrition-wise, butter is high in saturated fats, which can be a concern for some. However, it also contains essential vitamins like A, D, E, and K, which are crucial for your health.
You might find that using butter in moderation can be part of a balanced diet. So, whether you spread it on toast, use it in baking, or incorporate it into sauces, butter remains a beloved ingredient that adds richness and depth to countless recipes.
Overview of Margarine
Margarine serves as a popular alternative to butter, designed to mimic its creamy texture and versatility in cooking and baking. This spread has evolved over the years, initially created as a cost-effective option for households.
Nowadays, you'll find margarine in various forms, each catering to different culinary needs and preferences.
Here are four key aspects of margarine:
- Ingredients: Margarine is typically made from vegetable oils, water, and emulsifiers. Some brands even fortify their products with vitamins A and D.
- Types: You can find margarine in stick, tub, or liquid forms, allowing you to choose what best suits your cooking style.
- Flavor Profiles: Depending on the brand, margarine can have a range of flavors, from plain to herb-infused, adding a unique twist to dishes.
- Cooking Versatility: Margarine works well for baking, sautéing, and spreading, making it a handy option in your kitchen.
Health Benefits of Butter
When it comes to health benefits, butter offers unique advantages that many people appreciate.
For starters, butter is a natural source of essential nutrients. It contains fat-soluble vitamins like A, D, E, and K, which are essential for various bodily functions, including immune support, bone health, and skin vitality. Additionally, butter is rich in antioxidants, which combat oxidative stress, further enhancing its health profile.
You'll also find that butter is rich in healthy fats. The medium-chain fatty acids in butter can provide a quick source of energy and may even support metabolism. Unlike some processed fats, butter comes from whole food sources, making it easier for your body to digest and utilize effectively.
Furthermore, butter contains butyrate, a short-chain fatty acid linked to reduced inflammation and improved gut health. This can contribute to better digestion and overall well-being.
In addition, when you choose high-quality, grass-fed butter, you gain access to higher levels of omega-3 fatty acids and conjugated linoleic acid (CLA), both known for their potential health benefits, including heart health support.
Health Risks of Margarine
While butter boasts numerous health benefits, margarine presents a different picture, often raising concerns among health-conscious consumers. Many people choose margarine as a butter substitute, but it's crucial to be aware of the potential health risks associated with its consumption, especially when considering the importance of a balanced diet rich in fruits, vegetables, and whole grains for overall health.
- Trans Fats: Some margarines contain trans fats, which can raise bad cholesterol levels and lower good cholesterol, increasing the risk of heart disease.
- Artificial Ingredients: Many brands use artificial colors and flavors to mimic the taste and appearance of butter, which can contribute to various health issues over time.
- Omega-6 Fatty Acids: Margarine often contains high levels of omega-6 fatty acids, leading to an imbalance in your omega-3 to omega-6 ratio. This imbalance can promote inflammation and other chronic health problems.
- Additives and Preservatives: Margarine may contain additives and preservatives that can have adverse effects on your body, especially if you consume them in large quantities over time.
Being informed about these risks allows you to make better choices for your health, weighing the benefits of butter against the drawbacks of margarine.
Expert Recommendations
Experts often recommend opting for butter in moderation due to its natural ingredients and health benefits compared to margarine. When you choose butter, you're getting a product that's minimally processed and contains fat-soluble vitamins like A, D, E, and K. These nutrients are vital for various bodily functions, including immune support and bone health.
On the other hand, if you decide to use margarine, select varieties that are free from trans fats and made with healthy oils, like olive or canola. It's important to read labels carefully, as many margarines contain additives that may not align with a healthy diet.
In general, balance is key. You don't need to eliminate either option completely, but focus on using them wisely. Incorporate a variety of healthy fats into your meals, such as avocados, nuts, and seeds, to guarantee you're meeting your nutritional needs.
Ultimately, whether you choose butter or margarine, moderation is vital. Consult with a healthcare professional or nutritionist to tailor these recommendations to your specific health goals and dietary requirements.
Frequently Asked Questions
Can I Use Butter or Margarine for Baking?
You can use either butter or margarine for baking, but butter usually gives a richer flavor and flakier texture. Margarine can work too, especially if you prefer a lower-fat option. Just adjust your recipe accordingly.
Are There Vegan Margarine Options Available?
You might think margarine's just for non-vegans, but there are plenty of delicious vegan margarine options out there. Brands like Earth Balance and Miyoko's offer plant-based spreads that taste great and cater to your needs.
How Do Butter and Margarine Affect Cholesterol Levels?
Butter and margarine can influence your cholesterol levels differently. Butter typically raises LDL cholesterol, while some margarine options can lower it. It's crucial to choose wisely based on your health goals and dietary needs.
What Is the Environmental Impact of Butter Versus Margarine?
When considering the environmental impact, you'll find butter typically requires more land and resources for dairy farming. Margarine often uses vegetable oils, which can still harm ecosystems, but generally has a lower carbon footprint.
Can Children Consume Butter or Margarine Safely?
As you navigate the culinary landscape, know that both butter and margarine can safely grace your children's plates in moderation. Each offers unique flavors, but balance is key to a healthy, vibrant diet for them.
Conclusion
In the grand culinary ballet between butter and margarine, you'll find that each has its own rhythm and flavor. While butter brings a rich, creamy embrace, margarine often dances in a different, heart-health-conscious direction. Ultimately, it's about finding balance on your plate. Listen to your body and trust expert guidance, letting your taste buds lead the way. So, whether you choose to spread the golden goodness or the softer alternative, savor every bite with mindful delight.
From sneaky childhood butter licks to penning some of our most popular articles, Jamie’s journey with butter has been lifelong. His culinary background gives him a unique perspective, allowing him to craft mouthwatering articles that educate and tantalize equally. Jamie’s travel adventures revolve around finding the world’s best buttery treats when he isn’t writing.
Butter Tips and Tricks
Advanced Butter Sauce Techniques
Create exquisite butter sauces with advanced techniques that enhance flavor and texture—discover the secrets that will elevate your culinary skills.
To master advanced butter sauce techniques, start with understanding emulsification. Melt high-quality unsalted butter over low heat and gradually add liquids like stock or wine while whisking vigorously. Experiment with flavor layering by sautéing shallots or garlic in the butter for depth. Incorporate acidity from lemon juice or vinegar at the end for brightness. You can also infuse fresh herbs for unique flavors. Be mindful of temperature; avoid high heat to prevent separation. Finally, explore creative variations to keep your sauces exciting. Stay tuned for more tips on perfecting your butter sauce skills.
Key Takeaways
- Emulsification is crucial; gradually whisk melted butter with acids like lemon juice or stock to create a stable sauce.
- Choose high-fat unsalted butter for rich flavor and control over seasoning, and consider clarified butter for high-heat cooking.
- Sauté aromatics like garlic or shallots in butter for a flavorful base, and add fresh herbs towards the end of cooking for brightness.
- Incorporate acids like vinegar or citrus juice at the end to balance richness and enhance flavor without overpowering the sauce.
- Experiment with different flavor profiles by adjusting base ingredients, acids, and incorporating seasonal or regional elements for unique variations.
Understanding Emulsification
Emulsification is the process that brings together two ingredients that typically don't mix, like oil and water.
When you're making a butter sauce, it's essential to understand this technique because it allows you to achieve that silky, cohesive texture you crave.
To emulsify, you need to introduce one ingredient into another gradually while whisking vigorously. This action disperses tiny droplets of one ingredient throughout the other, creating a stable mixture.
Start with melted butter as your base; then, add your chosen liquid—like stock, wine, or lemon juice—slowly. As you pour, keep whisking to maintain an even blend.
If you pour too fast, the mixture can separate, and that's something you want to avoid.
Choosing the Right Butter
When it comes to making a great butter sauce, choosing the right butter is essential.
You'll want to take into account the type of butter you use, as well as its quality, since these factors can greatly impact the flavor and texture of your sauce.
For instance, using higher fat content butter enhances richness and flavor, making it an excellent choice for sauces.
Additionally, opting for unsalted butter allows you to control the salt levels in your dish, ensuring a perfectly balanced sauce.
Let's explore how to select the best butter for your culinary creations.
Types of Butter
Choosing the right butter can make all the difference in your sauce's flavor and texture. With so many options available, it's important to know which type to use for your culinary creations. Each butter type brings unique qualities to your dishes, enhancing or altering the overall taste.
Here's a quick comparison to help you decide:
Butter Type | Flavor Profile | Best For |
---|---|---|
Unsalted Butter | Clean, pure flavor | Sauces, baking, sautéing |
Salted Butter | Rich, savory taste | Spreading, finishing dishes |
Clarified Butter | Nutty, concentrated | High-heat cooking, frying |
Unsalted butter is your go-to for precise control over seasoning, while salted butter is great for a quick flavor boost. Clarified butter shines in high-heat applications, giving your sauces that extra depth.
Quality Matters
Selecting high-quality butter is essential for elevating your sauce to the next level. The type of butter you choose can greatly affect the flavor, texture, and overall success of your dish. When shopping for butter, look for brands that use natural ingredients and avoid additives.
European-style butters, for example, have a higher fat content, which contributes to a richer, creamier sauce.
Pay attention to the flavor profile of the butter. Some butters are salted, while others are unsalted. For most sauces, unsalted butter allows you to control the seasoning better.
Don't forget to check for freshness; always choose butter with a recent expiration date.
If you're feeling adventurous, consider specialty butters infused with herbs, spices, or even truffles. These options can add a unique twist to your sauce, enhancing its complexity.
Ultimately, your choice of butter can make or break your sauce. So, invest a little time into selecting the best butter available, and you'll reap the rewards in both flavor and presentation.
Quality matters, and with the right butter, your sauces will shine.
Flavor Layering Techniques
Mastering flavor layering techniques is essential for creating a butter sauce that truly stands out. Start by selecting your base flavors. You can use aromatics like shallots, garlic, or herbs to build a rich foundation.
Sauté these ingredients in your butter until they're fragrant, but don't let them brown too much; you want to retain their fresh taste. Butter enhances flavor and binds ingredients in various dishes, making it a versatile choice for your sauce.
Next, think about acidity. A splash of lemon juice, vinegar, or a splash of white wine can brighten the sauce and balance the richness of the butter. Add this after your aromatics have cooked down, allowing the flavors to meld without overpowering them.
Don't forget about seasoning. Taste as you go, and adjust with salt and pepper. Consider adding spices like paprika or cayenne for a kick, or even a touch of honey for sweetness.
Mastering Temperature Control
When it comes to creating a butter sauce, understanding temperature control is key to achieving the perfect texture and flavor.
Start with low heat to melt your butter gently. This helps to prevent it from breaking down and losing that rich, creamy consistency you're aiming for. As you melt the butter, keep an eye on it; you want it to become a clear, golden liquid without browning.
Once melted, you can raise the temperature slightly if you're adding other ingredients, but avoid high heat. High temperatures can cause the butter to separate, leading to an unappetizing sauce. Instead, aim for a simmering temperature, where the sauce gently bubbles without boiling.
If you're emulsifying your sauce, like with a beurre blanc, add your acids slowly while whisking vigorously. This helps to maintain a stable emulsion, ensuring your sauce remains smooth and velvety.
Infusing Aromatics and Herbs
You can elevate your butter sauce by infusing it with aromatics and herbs, which adds depth and complexity to the flavor.
Start with the basics: garlic and shallots. Sauté them gently in your melted butter until they're fragrant but not browned. This creates a rich base that enhances your sauce.
Next, think about herbs. Fresh herbs like thyme, rosemary, or parsley can transform your sauce. Add them towards the end of cooking to preserve their vibrant flavors. If you're using dried herbs, incorporate them a bit earlier to allow their flavor to meld into the butter.
For a more robust infusion, consider using spices like black pepper, red pepper flakes, or even a hint of smoked paprika. These can bring an exciting kick to your sauce. You can experiment with combinations to find what you love best.
Remember to strain the sauce if you prefer a smooth texture, keeping the infused flavors while removing solid bits.
Whether you're drizzling it over vegetables, pasta, or seafood, infusing your butter sauce with aromatics and herbs will take your dish to the next level, creating a memorable dining experience.
Incorporating Acid for Balance
A splash of acid can transform your butter sauce, bringing bright flavor and balance to the richness of the fat. When you incorporate acid, such as lemon juice, vinegar, or even a splash of wine, you cut through the heaviness, elevating the entire dish.
Start by adding a small amount of acid towards the end of your cooking process. This helps retain its brightness and prevents it from becoming too muted.
You'll want to taste as you go. Add a teaspoon of lemon juice, for instance, and stir. Taste your sauce; if it feels flat, add a bit more. Balance is key here. The goal is to enhance the flavors, not overpower them.
If you're using vinegar, consider the type—white wine vinegar offers a gentler touch, while balsamic can add depth.
Don't forget about using citrus zest as well. It adds a fragrant layer that works beautifully alongside your chosen acid.
Remember that the right acidity can elevate your butter sauce, making it a perfect companion for seafood, vegetables, or pasta. Embrace the art of balance, and you'll create a sauce that's truly unforgettable.
Creating Variations and Twists
Building on the balance achieved through acidity, experimenting with different ingredients can elevate your butter sauce to new heights.
You've got a solid foundation, so let's get creative! Here are four twists you can try:
- Herbs: Fresh herbs like tarragon, dill, or basil can infuse your sauce with vibrant flavors. Chop them finely and stir them in just before serving to keep their freshness.
- Spices: A pinch of smoked paprika or cayenne can add depth and a hint of heat. Just be cautious—start with a small amount and adjust to your taste.
- Citrus Zest: Lemon or orange zest adds a bright, fragrant note that complements the rich butter. Use a microplane to incorporate zest without adding too much juice.
- Nuts: Toasted nuts like pine nuts or hazelnuts can bring a pleasing crunch and earthy flavor. Roughly chop them and fold them in at the end for texture.
Presentation and Plating Tips
When plating your dish, think about the importance of color contrast to make your butter sauce pop.
The rich, velvety texture of the butter sauce can be complemented by colorful vegetables or herbs, enhancing both visual appeal and flavor.
Use strategic plate composition to guide the eye and create a balanced presentation.
Adding a touch of butter's unique varieties can also elevate the overall taste experience.
Color Contrast Importance
Creating a visually appealing plate starts with understanding the importance of color contrast. When you plate your dish, the colors you choose can elevate the dining experience, making it not only delicious but also visually stunning.
A well-balanced color palette draws the eye and enhances the overall presentation.
Here are four key tips to achieve effective color contrast:
- Balance Light and Dark: Pair lighter sauces, like a lemon butter, with darker proteins or vegetables. This creates a striking visual difference that captures attention.
- Use Complementary Colors: Think about the color wheel. For example, a vibrant green herb sauce can pop against a rich red tomato or white seafood.
- Incorporate Variety: Combine different textures and colors in your ingredients. A mix of bright vegetables can create a lively plate.
- Garnish Wisely: Don't underestimate the power of garnishes. A sprinkle of colorful microgreens or edible flowers can add the finishing touch and enhance contrast.
Plate Composition Strategies
Effective plate composition goes hand in hand with color contrast to elevate your culinary presentations. The way you arrange food on a plate can greatly enhance its appeal. Aim for balance by distributing elements evenly, creating a visual harmony that draws the eye. Consider using the rule of thirds, positioning your main item off-center for a more dynamic look.
To help you visualize effective plate composition strategies, here's a quick reference table:
Element | Tip |
---|---|
Main Protein | Use height or stacking |
Vegetables | Arrange in a fan or circle |
Sauce or Butter | Drizzle artistically |
When you plate your dish, think about the negative space as well. Leaving some empty space can help your food stand out and prevent the plate from looking cluttered. Finally, remember to incorporate textures and shapes; they add depth and interest to your presentation. By applying these strategies, you'll create visually stunning plates that not only look good but also entice the palate.
Garnishing for Elegance
Garnishing plays an essential role in elevating the elegance of your dishes. It's not just about adding flair; it's about enhancing the overall experience.
When you're ready to plate your butter sauce masterpiece, consider these tips to make your presentation shine:
- Color Contrast: Use colorful garnishes, like fresh herbs or edible flowers, to create visual interest against the rich tones of your butter sauce.
- Texture Variety: Incorporate elements with different textures, such as toasted nuts or crispy shallots, to engage the palate and provide an appealing crunch.
- Sauce Drizzle: Instead of pouring your sauce directly over the dish, drizzle it artistically around the plate. This technique not only looks sophisticated but also allows diners to control how much sauce they want with each bite.
- Symmetry and Balance: Aim for a balanced arrangement when placing your garnishes. Symmetrical designs often feel more refined, while asymmetrical compositions can evoke a casual elegance.
Common Mistakes to Avoid
When crafting the perfect butter sauce, it's easy to slip up on a few key details. One common mistake is overheating the butter. If you let it sizzle or brown too much, you'll lose that smooth, creamy texture and end up with a burnt flavor. Instead, keep the heat low to medium and melt it gently.
Another pitfall is neglecting to season properly. Don't forget that butter can be quite mild on its own. Incorporate salt, lemon juice, or herbs to enhance the flavor profile. Just remember to taste as you go.
You might also rush the emulsification process. If you're adding other ingredients, like cream or stock, do it slowly while whisking vigorously. This guarantees a harmonious blend rather than a greasy separation.
Lastly, be cautious with your choice of butter. Using margarine or low-quality butter can compromise the sauce's taste. Always opt for high-quality unsalted butter for the best results.
Frequently Asked Questions
Can I Use Margarine Instead of Butter for Sauces?
You can use margarine instead of butter for sauces, but the flavor and texture might differ. Margarine often has added water, which can affect the sauce's consistency, so adjust your recipe accordingly.
How Can I Make Butter Sauce Vegan-Friendly?
Did you know that over 20% of Americans are now choosing plant-based diets? To make a vegan-friendly butter sauce, substitute coconut oil or vegan butter, and add garlic, herbs, or nutritional yeast for flavor.
What Types of Dishes Pair Best With Butter Sauce?
You'll find butter sauce pairs wonderfully with seafood like lobster or scallops, grilled vegetables, and pasta dishes. It adds richness to chicken and enhances the flavors of fresh herbs and spices in your dishes. Enjoy experimenting!
How Long Can I Store Leftover Butter Sauce?
You can store leftover butter sauce in the fridge for up to a week. Just make sure it's in an airtight container. If you freeze it, it'll last up to three months. Reheat gently before using.
Is It Possible to Freeze Butter Sauce for Later Use?
Yes, you can freeze butter sauce for later use. Just let it cool completely, then transfer it to an airtight container. When you're ready, thaw it in the fridge before reheating gently. Enjoy!
Conclusion
You might think making a perfect butter sauce is all about the butter itself, but the real secret lies in mastering emulsification and balancing flavors. By experimenting with aromatics, acids, and temperature, you can elevate your sauce from ordinary to extraordinary. Don't shy away from creating unique twists—your taste buds will thank you! So, grab your ingredients and start experimenting; you'll soon discover that the art of butter sauce is a delicious journey worth taking.
From sneaky childhood butter licks to penning some of our most popular articles, Jamie’s journey with butter has been lifelong. His culinary background gives him a unique perspective, allowing him to craft mouthwatering articles that educate and tantalize equally. Jamie’s travel adventures revolve around finding the world’s best buttery treats when he isn’t writing.
Butter Tips and Tricks
How to Make Traditional Butter Roux
In this guide, discover the secrets to making a perfect traditional butter roux that enhances your dishes; the right techniques await you inside!
To make traditional butter roux, start by measuring equal parts of unsalted butter and all-purpose flour by weight. Melt the butter in a heavy-bottomed saucepan over medium heat until fully melted. Next, whisk in the flour gradually while stirring constantly to prevent lumps. Cook the mixture for 2-3 minutes for a light roux or 5-10 minutes for a darker version, which adds more flavor. Remember to keep the heat medium to avoid burning the butter, and stir continuously for a smooth consistency. Stick around, and you'll discover more tips to perfect your roux!
Key Takeaways
- Measure equal parts of unsalted butter and all-purpose flour by weight for proper thickening.
- Melt the butter in a heavy-bottomed saucepan over medium heat until fully liquid.
- Gradually whisk in the flour, stirring constantly to prevent lumps from forming.
- Cook the mixture for 2-3 minutes for a light roux or 5-10 minutes for a darker, flavorful roux.
- Avoid high heat and ensure continuous stirring to prevent burning and achieve a smooth texture.
Understanding Roux Basics
Roux is often the foundation of many sauces and soups, providing both flavor and thickness. Understanding roux basics is crucial for anyone looking to elevate their cooking.
You're fundamentally creating a mixture of fat and flour, which acts as a thickening agent. The key here is the ratio: equal parts fat and flour by weight. This balance guarantees your roux achieves the desired consistency without clumping.
Using infused butter from a Butter Infuser can enhance the flavor profile of your roux, adding unique tastes that complement your dish.
You'll typically start by melting the fat over medium heat. Once it's fully melted, gradually whisk in the flour, stirring continuously to prevent any lumps from forming.
As you cook the roux, you'll notice it changes color, which indicates its flavor development. A white roux cooks for just a few minutes, while a blonde roux takes a bit longer, and a brown roux requires even more time.
Each stage offers a different flavor profile, allowing you to customize your sauces and soups.
Ingredients You Need
To create a delicious butter roux, you'll need just a few key ingredients. First up is unsalted butter, which serves as the foundation for your roux. Aim for about half a cup, or one stick, to achieve the perfect consistency. Unsalted butter allows for better control over saltiness in your dish, making it a versatile ingredient that adds richness, as noted in varieties of butter.
Next, you'll want all-purpose flour. You'll need an equal amount to the butter, so if you're using half a cup of butter, grab half a cup of flour. This combination is what thickens your sauces and soups, giving them that rich, velvety texture.
Finally, consider having some salt on hand. While it's not strictly necessary for the roux itself, adding a pinch can enhance the flavor of your final dish.
That's it! With just butter, flour, and a little salt, you're ready to start making a roux that will elevate your cooking.
Make sure you have these ingredients prepped and measured before you begin, as that'll make the process smoother and more enjoyable. Happy cooking!
Step-by-Step Preparation
Making butter roux is straightforward and rewarding. First, gather your ingredients: unsalted butter and all-purpose flour. You'll want to use equal parts by weight for the best results.
Start by measuring out your butter and flour. The choice of unsalted sweet cream butter is preferred by chefs for precise flavor control in recipes, ensuring your roux has a clean taste.
Next, melt the butter in a heavy-bottomed saucepan over medium heat. Stir it gently until it's completely melted but not browned.
Once the butter is melted, gradually whisk in the flour. Keep stirring constantly to avoid lumps.
Continue to cook the mixture, stirring regularly. You'll notice it will start to thicken and bubble. For a light roux, cook it for about 2-3 minutes, until it's a pale golden color.
If you prefer a darker roux, extend the cooking time to about 5-10 minutes, stirring continuously until you achieve a rich, nutty color. This process enhances the flavor, creating a foundation for many dishes that will benefit from the butter's unique characteristics.
Common Mistakes to Avoid
When preparing butter roux, it's easy to overlook a few key details that can lead to disappointing results. One common mistake is not using the right heat. If your heat's too high, you risk burning the butter, while too low won't cook the flour properly. Another issue is not stirring enough; neglecting to stir can create lumps and uneven cooking.
Additionally, be careful with your flour-to-fat ratio. Too much flour can make your roux too thick, while too little can lead to a runny consistency. Finally, timing is essential; overcooking your roux can change its flavor and color, while undercooking it won't achieve that rich, nutty taste you desire.
Here's a handy table summarizing these mistakes:
Mistake | Consequence | Solution |
---|---|---|
High Heat | Burnt butter | Use medium heat |
Not Stirring | Lumps in roux | Stir constantly |
Wrong Flour-to-Fat Ratio | Incorrect consistency | Measure accurately |
Overcooking | Bitter flavor | Monitor cooking time |
Under-cooking | Lack of flavor | Cook until golden brown |
Tips for Perfecting Roux
Perfecting roux is all about attention to detail and technique. Start by choosing the right fat; butter is ideal for a rich flavor. Melt it over medium-low heat, making sure it doesn't brown too quickly. You want a gentle simmer, not a vigorous boil. As you add your flour, whisk continuously to prevent lumps. The mixture should be smooth and glossy.
Timing is essential. For a light roux, cook it just a few minutes until it's bubbly and slightly thickened. For a darker roux, allow it to cook longer, stirring constantly, until it reaches your desired color. Remember, the longer you cook it, the deeper the flavor, but be careful not to burn it.
Use a heavy-bottomed pan to guarantee even heat distribution, and if you notice any scorching, lower the heat immediately. Patience pays off; don't rush the process.
Frequently Asked Questions
Can I Use Margarine Instead of Butter for Roux?
Yes, you can use margarine instead of butter for your roux. Just melt it in the pan, then whisk in your flour. The texture might change slightly, but it'll still work well in your dishes.
How Long Can I Store Leftover Roux?
Like a well-kept secret, leftover roux can last up to a month in the fridge or even longer if frozen. Just make sure it's sealed tightly, and you'll preserve that flavor for future dishes!
Is Roux Gluten-Free if Made With Gluten-Free Flour?
Yes, roux can be gluten-free if you use gluten-free flour. Just verify all your ingredients are gluten-free, and you'll create a delicious roux that works well for your favorite dishes without gluten concerns.
What Dishes Commonly Use Butter Roux as a Base?
You'll commonly find butter roux in dishes like gumbo, macaroni and cheese, and creamy soups. It adds a rich flavor and thick texture, enhancing everything from gravies to sauces, making your meals truly delicious.
Can I Make Roux in Advance and Freeze It?
Yes, you can make roux in advance and freeze it. Just let it cool completely, then store it in an airtight container. When you're ready to use it, thaw and reheat before adding to your dish.
Conclusion
Mastering the art of roux is like weaving a tapestry of flavor, where each strand of butter and flour intertwines to create a foundation for your culinary creations. As you stir and simmer, remember that patience is your secret ingredient. With practice, your roux will transform dishes from ordinary to extraordinary, adding depth and richness that dances on the palate. So embrace the process, and let your kitchen become a canvas for deliciousness, one roux at a time.
From sneaky childhood butter licks to penning some of our most popular articles, Jamie’s journey with butter has been lifelong. His culinary background gives him a unique perspective, allowing him to craft mouthwatering articles that educate and tantalize equally. Jamie’s travel adventures revolve around finding the world’s best buttery treats when he isn’t writing.
-
Recipes & Culinary Uses5 months ago
Make Homemade Butter from Milk at Home
-
Shopping Guides5 months ago
Where to Buy Raw Butter
-
Butter Tips and Tricks7 months ago
Churn Butter the Old Fashioned Way: 3 Traditional Steps
-
Butter Tips and Tricks8 months ago
How Many Tablespoons of Butter in 3/4 Cup: A Simple Guide
-
Butter Basics5 months ago
Quick Conversion: How Many Tablespoons of Butter Is 1/4 Cup?
-
Butter Tips and Tricks7 months ago
How Much Heavy Cream to Make Butter: A Step-by-Step Guide
-
Recipes & Culinary Uses7 months ago
How Many Sticks of Butter Equals a Pound: A Handy Guide
-
Recipes & Culinary Uses5 months ago
Make Creamy Butter From Buttermilk