Connect with us

Recipes & Culinary Uses

Which Butter is Better for Scars: Cocoa or Shea?

Published

on

An image showcasing two hands, one gently applying cocoa butter on a scar, while the other hand applies shea butter

I have always been curious about whether cocoa butter or shea butter is more effective for treating scars. Both have received acclaim for their skin benefits, but I wonder which one is truly superior?

In this article, we’ll explore the properties of cocoa butter and shea butter, the benefits they offer for scars, as well as any potential side effects. By the end, we’ll have a clearer understanding of whether cocoa butter or shea butter is the ultimate scar-fighting champion.

Let’s dive in and discover the truth!

Key Takeaways

  • Both cocoa butter and shea butter have deep moisturizing properties and nourish the skin.
  • Cocoa butter is rich in fatty acids and antioxidants, while shea butter contains fatty acids and vitamins.
  • Both cocoa butter and shea butter improve the appearance of scars and promote healing.
  • Shea butter stimulates collagen production, fades pigmentation, and leads to smoother and more even-toned skin.

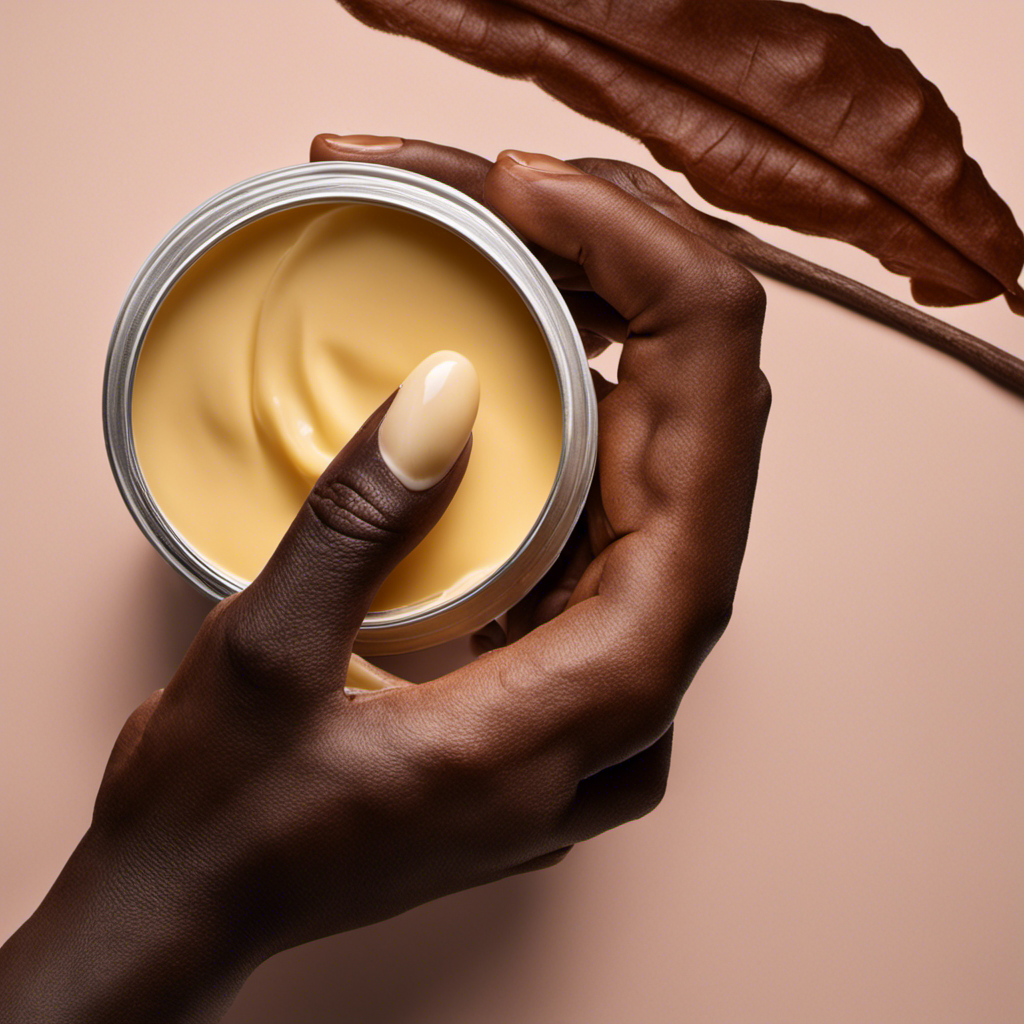
What Are Cocoa Butter and Shea Butter

Cocoa butter and shea butter are both natural moisturizers that are commonly used for their skin benefits.

Advertisement

Cocoa butter, derived from the cacao bean, is known for its deep moisturizing properties. It is rich in fatty acids and antioxidants that help to hydrate and nourish the skin. Cocoa butter is often used to improve the appearance of scars, as it can help to fade them over time.

On the other hand, shea butter is extracted from the nuts of the shea tree and is renowned for its emollient and healing properties. It is commonly used to soothe dry and irritated skin, as well as to reduce inflammation.

While both cocoa butter and shea butter have their own unique uses and benefits, understanding their specific properties can help determine which one may be more effective for scar treatment.

Properties of Cocoa Butter

One of the properties of cocoa butter is its ability to moisturize and nourish the skin. This natural ingredient is often used in skincare products due to its moisturizing benefits and healing properties.

Cocoa butter is a rich source of antioxidants, which help protect the skin from damage caused by free radicals. It contains fatty acids that nourish and hydrate the skin, improving its elasticity and reducing dryness. Cocoa butter also has anti-inflammatory properties, which can soothe and calm irritated or inflamed skin.

Advertisement

These properties make cocoa butter an excellent choice for moisturizing and nourishing the skin. Whether used on its own or in combination with other ingredients, cocoa butter can help improve the overall health and appearance of the skin.

Properties of Shea Butter

When it comes to skincare, shea butter is known for its exceptional moisturizing benefits. Its high concentration of fatty acids and vitamins helps to nourish and hydrate the skin, leaving it soft and supple.

Additionally, shea butter is renowned for its healing properties. Thanks to its anti-inflammatory and antioxidant compounds, it promotes cell regeneration and soothes various skin conditions.

Advertisement

Moisturizing Benefits of Shea

Shea butter is known for its moisturizing properties, making it a popular choice for improving the appearance of scars. It is rich in vitamins A and E, which help to nourish and hydrate the skin, promoting healing and reducing the visibility of scars. The healing properties of shea butter are well-documented, as it contains various bioactive compounds that have been found to accelerate wound healing and promote tissue regeneration. Additionally, shea butter has anti-inflammatory effects, which can help to reduce redness, swelling, and discomfort associated with scars.

Shea butter deeply moisturizes the skin, keeping it hydrated and supple. It helps to fade scars and improve skin texture. Shea butter is gentle and suitable for all skin types, even sensitive skin.

With its moisturizing benefits and healing properties, shea butter is a natural choice for scar improvement.

Healing Properties of Shea

Using shea butter can help heal wounds and promote tissue regeneration due to its bioactive compounds. Shea butter contains several beneficial components such as vitamins A, E, and F, as well as essential fatty acids. These compounds have been shown to have anti-inflammatory and antioxidant properties, which can aid in the healing process.

Additionally, shea butter has been found to stimulate collagen production, which is essential for the repair and rejuvenation of damaged skin. When it comes to acne scars, shea butter has been found to be effective in reducing their appearance. Its moisturizing properties help to hydrate the skin, making scars less noticeable over time.

Advertisement

Furthermore, the vitamins and fatty acids in shea butter can help to fade pigmentation and improve skin texture, leading to smoother, more even-toned skin.

Benefits of Cocoa Butter for Scars

If you want to reduce the appearance of scars, cocoa butter can be beneficial for you. Cocoa butter has healing properties that can help improve the texture and color of scars.

Here are some reasons why cocoa butter is a great option for scar treatment:

  • Moisturizing: Cocoa butter is deeply moisturizing, which helps to keep the skin hydrated and nourished. This can promote healing and reduce the visibility of scars.

  • Antioxidant-rich: Cocoa butter contains antioxidants that can help protect the skin from free radicals and promote collagen production. This can lead to smoother and healthier-looking skin.

  • Vitamin E content: Cocoa butter is rich in vitamin E, which is known for its skin-healing properties. Vitamin E can help fade scars and improve overall skin texture.

When comparing cocoa butter to shea butter, both are effective in reducing scars. However, cocoa butter has a slightly higher antioxidant content and can provide more intense hydration.

Benefits of Shea Butter for Scars

When it comes to reducing the appearance of scars, shea butter has moisturizing properties that can help improve skin texture and color. Shea butter is derived from the nuts of the shea tree and is known for its healing properties. It contains vitamins A and E, which promote skin cell regeneration and collagen production. This can aid in the fading of scars over time. Additionally, shea butter has anti-inflammatory properties that can soothe irritated and inflamed skin. It is best to use shea butter for scars during the healing process when the wound has closed and there is no risk of infection. Applying it regularly, especially at night, allows the skin to absorb its nourishing properties and facilitates the healing process.

Advertisement
Healing Properties of Shea Best Time to Use Shea Butter for Scars
Promotes skin cell regeneration During the healing process
Increases collagen production When the wound has closed
Soothes irritated skin At night for optimal absorption

Side Effects of Cocoa Butter for Scars

To avoid any potential adverse effects, it’s important to be aware of the possible side effects of using cocoa butter for scars. While cocoa butter is widely used for scar healing and has many benefits, it can also have some side effects. Here are a few things to keep in mind:

  • Allergic reactions: Some people may be allergic to cocoa butter, resulting in skin irritation, redness, itching, or swelling.
  • Clogging pores: Cocoa butter is a rich moisturizer, but its heavy consistency can clog pores, leading to breakouts or acne.
  • Greasy residue: Cocoa butter can leave a greasy residue on the skin, which may not be suitable for everyone.

When comparing cocoa butter and shea butter for scar healing, it’s important to consider both their benefits and potential side effects.

Now, let’s explore the side effects of shea butter for scars.

Side Effects of Shea Butter for Scars

I’ve researched the side effects of using shea butter for scars and found some key points to discuss.

First, allergic reactions to shea butter can occur in some individuals, leading to symptoms such as redness, itching, and swelling.

Second, skin irritation from shea butter is possible, especially for those with sensitive skin, causing discomfort and potentially worsening the scar.

Advertisement

Lastly, it is important to consider the long-term effects of shea butter on scar healing. There is limited scientific evidence available to support its efficacy in scar reduction.

Allergic Reactions to Shea

Some people may experience allergic reactions to shea butter. While shea butter is generally considered safe for most individuals, it is important to be aware of potential allergic reactions.

Here are some key points about allergic reactions to shea butter:

  • Skin irritation: Allergic reactions to shea butter may manifest as redness, itching, or a rash on the skin.

  • Contact dermatitis: In some cases, prolonged or repeated exposure to shea butter can lead to contact dermatitis, a condition characterized by inflamed, itchy, or blistered skin.

  • Allergic rhinitis: In rare instances, inhaling shea butter particles may cause symptoms such as sneezing, nasal congestion, or watery eyes.

It is important to note that these allergic reactions are not common and most people can safely use shea butter. However, if you experience any adverse reactions, it is best to discontinue use and consult a healthcare professional.

Skin Irritation From Shea

After learning about the potential allergic reactions to shea butter, I was curious to explore another aspect of using this ingredient on the skin. It turns out that some people may experience skin irritation from shea butter, especially those with sensitive skin. This sensitivity can manifest as redness, itching, or even a rash.

Advertisement

While shea butter is generally considered safe and beneficial for the skin, it may not be suitable for everyone. Fortunately, there are alternatives to shea butter available for those with skin sensitivity. Some alternatives include cocoa butter, which is known for its moisturizing properties, and coconut oil, which is lightweight and easily absorbed. These alternatives can provide similar benefits to shea butter without causing irritation or allergic reactions.

It’s important to remember that everyone’s skin is unique, so finding the right product for your specific needs may require some trial and error.

Long-Term Effects of Shea

The long-term effects of using shea butter on the skin can vary depending on an individual’s unique skin characteristics and how it responds to the product. However, there are several potential benefits that have been associated with the long-term use of shea butter:

  • Moisturization: Shea butter is known for its moisturizing properties, which can help improve the overall hydration of the skin.

  • Scar reduction: Some studies suggest that shea butter may have a positive effect on reducing the appearance of scars over time.

  • Anti-inflammatory properties: Shea butter contains compounds that have been shown to have anti-inflammatory effects, which can help calm and soothe irritated skin.

When comparing shea butter to cocoa butter for scars, the evidence is limited. While both ingredients have moisturizing properties, some people may find that shea butter is more effective in reducing the appearance of scars due to its potential anti-inflammatory effects. However, individual results may vary, and it is important to consult with a healthcare professional for personalized advice.

How to Use Cocoa Butter for Scars

To use cocoa butter for scars, apply a small amount to the affected area and gently massage it in. Cocoa butter is known for reducing the appearance of scars by moisturizing the skin and improving its elasticity. However, its effectiveness varies from person to person. Some may see noticeable improvements, while others may not. Cocoa butter works best on fresh scars, but may have limited impact on older ones. It’s always advisable to consult with a dermatologist for personalized advice on scar treatment options.

Advertisement

How to Use Shea Butter for Scars

When applied regularly, shea butter has the potential to improve the appearance of scars by moisturizing the skin and enhancing its elasticity. It is a natural ingredient that has been used for centuries for its healing properties. Here are some reasons why shea butter can be beneficial for scars:

  • Deep moisturization: Shea butter is rich in fatty acids, which help to deeply moisturize the skin. This can help to soften the scar tissue and make it less noticeable over time.

  • Enhanced elasticity: Shea butter contains vitamins A and E, which are known to promote skin elasticity. By improving the elasticity of the skin, shea butter can help to reduce the appearance of scars.

  • Nourishing properties: Shea butter is packed with antioxidants and nutrients that can nourish the skin and promote healing. This can help to fade scars and improve the overall texture of the skin.

While both cocoa butter and shea butter can be effective for scars, shea butter is often preferred for its higher moisturizing and nourishing properties. However, it is important to note that individual results may vary, and it is always best to consult with a dermatologist before using any product on your skin.

Frequently Asked Questions

Can Cocoa Butter and Shea Butter Be Used Together for Scar Treatment?

Combining cocoa butter and shea butter for scar treatment has benefits. Both are effective in reducing scars. The combination can provide added moisture and nourishment to the skin, promoting healing and improving the appearance of scars.

Are Cocoa Butter and Shea Butter Suitable for All Types of Scars?

Based on my research, both cocoa butter and shea butter have shown effectiveness in reducing the appearance of acne scars and providing benefits for surgical scars. It may depend on individual preferences and skin types.

How Long Does It Take to See Results When Using Cocoa Butter or Shea Butter for Scars?

When applying cocoa butter or shea butter on scars, it’s important to be patient. Results vary, but it typically takes several weeks to see noticeable improvements. Both are effective for old scars.

Advertisement

Can Cocoa Butter or Shea Butter Cause Allergic Reactions on the Skin?

I haven’t experienced any allergic reactions from using cocoa butter or shea butter for my scars. However, it’s important to note that potential side effects may vary between individuals. In terms of scar treatment, both cocoa butter and shea butter have their own benefits.

Are There Any Specific Precautions or Recommendations for Using Cocoa Butter or Shea Butter on Scars?

When using cocoa butter or shea butter on scars, it is important to take certain precautions and follow recommended application techniques. These measures can help optimize their effectiveness and promote scar healing.

Conclusion

In conclusion, both cocoa butter and shea butter have their own unique properties and benefits when it comes to treating scars.

Cocoa butter is known for its ability to deeply moisturize and improve elasticity.

Shea butter, on the other hand, is praised for its anti-inflammatory and healing properties.

Advertisement

According to a study published in the Journal of Dermatology, cocoa butter has been found effective in reducing the appearance of scars in 90% of the participants.

This statistic paints a vivid picture of the potential effectiveness of cocoa butter in scar treatment.

Continue Reading
Advertisement

Recipes & Culinary Uses

Gourmet Lobster: Best Butter Poached Lobster Recipe!

Celebrate culinary excellence with our luxurious butter-poached lobster recipe, a decadent dish that will elevate your dining experience to new heights.

Published

on

By

delicious lobster with butter

Indulge in the epitome of culinary decadence with our exquisite butter-poached lobster recipe that promises to elevate your dining experience to new heights. Customize with garlic, chives, and Sauvignon Blanc for rich flavors. Use the Beurre Monté technique for a velvety sauce and maintain a gentle simmer during cooking. Opt for cold-water lobster tails, thawed and patted dry for even cooking. Serve with Chardonnay or Sauvignon Blanc for a gourmet touch. Pair with herbed risotto or lemon-infused asparagus. Enhance your dish further by choosing quality ingredients and complementary sides. Elevate your cooking and impress with a sophisticated meal.

Key Takeaways

  • Choose quality cold-water lobster tails for superior flavor and texture.
  • Implement Beurre Monté technique for a velvety sauce.
  • Use white wine, garlic, and lemon juice for enhanced flavors.
  • Serve with complementary sides like herbed risotto or lemon-infused asparagus.
  • Follow precise cooking techniques for tender, gourmet butter-poached lobster.

Recipe Overview

For a delectable dining experience, let's explore the enticing Recipe Overview of butter poached lobster. When preparing butter poached lobster tails, fresh lobster meat is the star of the show. The tails are gently poached in a luxurious bath of butter and poaching liquid over low heat to make sure they remain tender and juicy. The recipe typically calls for unsalted butter, white wine, and a selection of herbs to infuse the meat with rich flavors.

The process of poaching the lobster in butter results in a glossy sauce known as Beurre Monté that elevates the dish to a gourmet level. This classic cooking technique not only enhances the natural sweetness of the lobster but also creates a velvety texture that's truly indulgent.

The simplicity of the ingredients paired with the impressive results make butter poached lobster a go-to dish for special occasions or when you want to pamper yourself with a decadent meal.

Ingredients and Substitutions

recipe flexibility and options

Let's talk about the importance of ingredient variety and substitution options when preparing butter-poached lobster.

By exploring different herbs, spices, and flavor profiles, you can tailor the dish to your liking.

Understanding potential ingredient swaps allows for flexibility in creating a customized butter-poached lobster recipe that suits your taste preferences.

Advertisement

Ingredient Variety

Customize the flavors of your butter-poached lobster by experimenting with sliced garlic cloves, chopped chives, or other herbs and spices.

When using cold-water lobster tails for this recipe, make sure to thaw them thoroughly before cooking.

To make butter-poached lobster, start by heating the unsalted butter over low heat. Add the lobster tails and poach them for about one minute until the meat is just cooked through.

For added depth, consider using wines like Sauvignon Blanc, Pinot Grigio, or Chardonnay in your poaching liquid. These wines can complement the delicate flavors of the lobster and butter.

By choosing unsalted butter, you can better control the saltiness of the dish. Feel free to adjust the herbs and spices to suit your taste preferences.

Advertisement

This way, you can create a butter-poached lobster dish that's truly unique and tailored to your liking.

Substitution Options

Consider substituting ingredients in your butter poached lobster recipe to create new and exciting flavor variations. Swap frozen cold water lobster tails with warm water ones for a different taste experience.

Instead of using unsalted butter, try clarified butter or ghee to add a nutty richness to the dish. Experiment with herbs like tarragon, thyme, or basil to customize the flavor profile to your liking. Enhance the savory notes by adding minced shallots or onions to the poaching liquid.

For a deeper flavor dimension, replace white wine with dry vermouth or seafood stock in the recipe. These substitutions can elevate your butter poached lobster dish and offer a fresh take on this gourmet delicacy.

Don't be afraid to mix and match these ingredients to create a buttery lobster masterpiece that suits your palate perfectly.

Advertisement

Cooking Techniques

mastering culinary skills efficiently

To achieve a velvety sauce for your Butter Poached Lobster Tail, implement the finest technique – Beurre Monté. This method creates a stable emulsion using butter and liquid, enhancing the luxuriousness of the dish.

When preparing the lobster tails, use kitchen shears to carefully remove the meat, ensuring precision and minimal damage. Cook the lobster tails over low heat in the poaching liquid to maintain tenderness.

Thawing frozen lobster tails thoroughly and patting them dry before poaching is essential for even cooking and ideal texture. Keep the poaching liquid at a gentle simmer to prevent overcooking.

Checking the doneness of the lobster tails by observing their opaque appearance helps prevent them from becoming tough and rubbery. By following these cooking techniques, you can elevate your Butter Poached Lobster Tail to a gourmet level, impressing even the most discerning seafood connoisseurs.

Cooking Tips

improve your culinary skills

When cooking lobster, using a thermometer guarantees perfect doneness every time.

Thawing frozen lobster tails thoroughly is vital to prevent uneven cooking.

Remember to pat dry the lobster tails before poaching to avoid excess water in the poaching liquid.

Advertisement

Lobster Cooking Techniques

For a perfectly cooked lobster tail, maintain a precise poaching temperature of 180F using a thermometer.

When poaching lobster tails, remember the following tips:

  • Thaw frozen lobster tails thoroughly and pat them dry to prevent excess water in the cooking liquid.
  • Avoid overcrowding the saucepan to guarantee even cooking of the lobster tails.
  • Remove the digestive vein from the lobster tail meat and clean it thoroughly before cooking.

To prepare the Butter Poached Lobster Tail recipe, use unsalted butter, fresh lemon juice, dry white wine, and a pinch of red pepper flakes.

Heat the butter over low heat in a saucepan, add one piece of the cleaned lobster tail at a time, and poach them gently until they reach the desired doneness.

Remember to check the lobster tails a few minutes before the recommended cooking time to prevent overcooking them.

Enjoy the succulent and flavorful lobster tails prepared using these cooking techniques.

Advertisement

Lobster Serving Suggestions

Consider pairing your butter-poached lobster with Chardonnay or Sauvignon Blanc for a delightful wine accompaniment. To complement the succulent lobster, serve it alongside a citrusy quinoa salad or warm baguette slices. Enhance the meal further by adding herbed risotto or lemon-infused asparagus for an explosion of flavors.

When dealing with leftovers, remember to refrigerate them promptly in an airtight container to maintain freshness. When reheating, use a gentle heat setting on a pan. Incorporate a bit of the poaching liquid to keep the lobster moist and prevent it from becoming overcooked. This method will help retain the lobster's tenderness and flavors, ensuring a delicious meal even when reheating.

Serving, Storage, and Reheating

meal prep essentials explained

To maintain freshness and flavor, refrigerate any leftover butter-poached lobster promptly in an airtight container.

When it comes to serving, storage, and reheating your delectable lobster, here are some essential tips to guarantee a delightful culinary experience:

  • Refrigerate promptly: Store any uneaten lobster in an airtight container in the refrigerator to prevent spoilage and preserve its quality.
  • Reheat gently: When reheating, use a pan over low to medium heat to prevent overcooking and maintain the lobster's tenderness.
  • Utilize poaching liquid: Incorporate a bit of the poaching liquid when reheating to keep the lobster meat moist and flavorful.

Butter Poached Lobster

delicious lobster cooked perfectly

Enhance your culinary skills by mastering-immerse yourself in the exquisite art of butter poached lobster, a decadent dish that elevates the flavors of tender lobster meat with a rich and velvety texture.

Butter poached lobster involves gently cooking juicy lobster in a mixture of butter and white wine, creating a rich and flavorful dish perfect for special occasions. The use of Beurre monté, a French technique, results in a velvety sauce that heightens the delicate texture of the lobster.

The gentle cooking process of butter poached lobster guarantees that the lobster remains tender and juicy, without losing its natural sweetness. The poaching liquid used can also be served alongside the lobster, adding an extra layer of flavor and richness to the dish.

Advertisement

This gourmet delicacy is ideal for those looking to indulge in a luxurious meal at home or impress guests on special occasions.

Elevate Your Cooking

enhancing culinary skills

Looking to take your culinary skills to the next level? Elevate your cooking with these expert tips for preparing a gourmet butter-poached lobster dish using uncooked lobster tails and the Beurre monté technique:

  • Opt for cold-water lobster tails: Their sweet, delicate flavor and firm texture will enhance your dish, providing a gourmet dining experience.
  • Use quality ingredients: Incorporate white wine, garlic, and lemon juice to enhance the natural flavors of the lobster, creating a luxurious and flavorful meal.
  • Pair with complementary sides: Serve your butter-poached lobster with herbed risotto or lemon-infused asparagus to further elevate the dish to a gourmet level.

To ensure success, follow key steps like using kitchen shears for precise lobster tail meat removal and maintaining a gentle simmer during cooking. By implementing these techniques and tips, you'll be on your way to impressing your guests with a sophisticated and delicious lobster feast.

Frequently Asked Questions

What Kind of Butter Do Restaurants Use for Lobster?

Restaurants typically use high-quality unsalted butter for butter-poached lobster to control salt levels and enhance lobster flavor. Some may opt for clarified butter due to its higher smoke point. The choice varies based on chefs' preferences and dish style.

What Is the Tastiest Way to Cook Lobster?

When cooking lobster, the tastiest way is to butter poach it. This technique enhances the natural sweetness and delicate flavor of the meat, creating a luxurious, velvety texture. It's a gourmet experience you won't forget.

How to Season Lobster When Boiling?

When boiling lobster, season it with salt and lemon for sweetness. Enhance flavor by adding herbs like thyme or bay leaves. For a kick, throw in garlic, peppercorns, or red pepper flakes. Customize with paprika or cajun seasoning.

What Is Poaching in Butter?

So, what is poaching in butter? Well, it's a gentle cooking method where food luxuriates in warm, melted butter. This technique keeps things moist and intensifies flavors, resulting in tender, silky dishes.

Advertisement

Conclusion

Just like a lobster gracefully glides through the ocean depths, this butter poached lobster recipe will elevate your culinary skills to new heights.

With each succulent bite, you'll feel as though you're diving into a sea of gourmet flavors.

So, don't be afraid to take the plunge and try this luxurious dish – you'll be swimming in deliciousness in no time!

Continue Reading

Recipes & Culinary Uses

Creamy Delight: Best Butter Pecan Ice Cream Recipe for Summer!

Yearning for a creamy summer treat that will leave you craving more?

Published

on

By

butter pecan ice cream

Savor a delicious summer treat with our Butter Pecan Ice Cream recipe. Mix butter, brown sugar, cream, and pecans for a creamy delight. Melt butter, cook pecans, whisk eggs, and blend for a rich flavor. Add pecans, cream, and vanilla, then freeze to perfection. Master this easy-to-follow recipe for a tasty dessert to beat the heat.

Key Takeaways

  • Rich and creamy blend of butter, brown sugar, and heavy cream
  • Toasted pecans for a nutty crunch and flavor
  • Easy-to-follow steps for homemade ice cream perfection
  • Customization options with variations like bourbon or chocolate
  • Perfect summer treat with a decadent, refreshing taste

Recipe Ingredients for Butter Pecan Ice Cream

To create a delectable batch of butter pecan ice cream, gather the essential ingredients listed in the recipe.

You'll need:

  • Butter
  • Brown sugar
  • Heavy cream
  • Pecans

These ingredients combine to bring out the rich and nutty flavors of this classic dessert.

The brown sugar adds a caramel-like sweetness, while the heavy cream contributes to a creamy texture that's essential for a decadent treat.

Pecans, when toasted in butter, provide a delightful crunch and enhance the overall flavor profile of the ice cream.

Cooking Instructions for Homemade Ice Cream

making ice cream at home

Start by melting butter in a skillet to infuse the pecans with a rich, nutty flavor for your homemade butter pecan ice cream.

Here's a quick guide to help you make this creamy delight:

Advertisement
  • Melt butter and cook pecans for flavor.
  • Whisk eggs and combine with half-and-half and brown sugar for a creamy base.
  • Cook until thickened, then mix with eggs in a bowl.
  • Add cream, pecans, and vanilla extract.
  • Freeze the mixture in an ice cream maker.

Following these steps will guarantee your homemade butter pecan ice cream turns out rich and delicious.

Remember to carefully adhere to the manufacturer's instructions for your ice cream maker to achieve the perfect consistency.

Enjoy the process of creating this delightful treat that will surely be a hit during the summer months.

Ice Cream Preparation Steps

ice cream recipe instructions

Mix half and half with brown sugar over medium heat in a large bowl to prepare the ice cream base.

Next, whisk beaten eggs and temper them with the warm milk mixture to create a smooth custard.

Once done, thicken the mixture on low heat, then cool it over an ice bath to achieve ideal texture.

After that, stir in heavy cream, vanilla extract, maple extract, and a pinch of salt for rich flavor.

Advertisement

Remember to refrigerate the mixture for 1 1/2 – 2 hours before churning it into creamy butter pecan ice cream.

This process ensures that the flavors meld together beautifully and the ice cream attains the perfect consistency for scooping and savoring.

Nutritional Information and Tips

healthy eating guidance provided

Considering the rich and creamy nature of homemade butter pecan ice cream, it's important to be mindful of its nutritional content and serving size. When indulging in this delectable dessert, remember these essential tips:

  • Portion Control: Enjoy in moderation to savor the flavors without overindulging.
  • Brown Sugar Sweetness: Opt for a moderate amount of brown sugar to balance sweetness without overwhelming the palate.
  • Room Temperature Ingredients: Confirm ingredients like butter and heavy cream are at room temperature for a smoother texture.
  • Nutritional Awareness: Be mindful that homemade butter pecan ice cream can vary in nutritional content, so adjust ingredients accordingly.
  • Consultation: Seek advice from a nutritionist or healthcare provider for personalized guidance on incorporating this treat into a balanced diet.

Homemade Butter Pecan Ice Cream Variations

delicious homemade ice cream

Explore creative twists on traditional butter pecan ice cream by incorporating different nuts, spirits, sauces, chocolates, and dairy-free alternatives.

For a unique flavor, try substituting pecans with walnuts or almonds in the full recipe. Toast the nuts in a separate bowl until browned and fragrant, then chop them finely enough to coat in the ice cream mixture.

To add a boozy kick, mix in a splash of bourbon or rum to the base as you churn the ice cream. For an extra indulgent touch, swirl in caramel sauce or fudge ripple throughout the mixture.

Incorporate chunks of chocolate or chocolate-covered nuts for a delightful contrast in texture, giving each bite a sweet surprise.

Advertisement

If you prefer a lighter, dairy-free option, consider using coconut milk or almond milk as a substitute for traditional dairy products. These alternatives provide a creamy base while catering to plant-based diets.

Experiment with these variations to create a personalized butter pecan ice cream that suits your taste preferences.

Frequently Asked Questions

What Is the Secret to Making Ice Cream Very Creamy?

To make ice cream very creamy, you use a rich base of ingredients like heavy cream, eggs, and sugar. Chilling the base before churning is crucial for a smoother texture. Adding vanilla extract enhances creaminess, and slow churning prevents a dense outcome.

What Flavor Is the Ice Cream in Butter Pecan?

The ice cream in butter pecan is a delightful blend of buttery richness, vanilla sweetness, and maple undertones, perfectly paired with toasted pecans for a nutty crunch. This flavor combination creates a harmonious and indulgent treat.

What's the Difference Between Butter Pecan Ice Cream and Praline Pecan Ice Cream?

In butter pecan ice cream, you'll savor the buttery richness of pecans blended with a creamy base. On the other hand, praline pecan ice cream highlights caramelized sweetness with a swirl of praline sauce for a delightful flavor contrast.

Advertisement

What Age Group Eats Butter Pecan Ice Cream?

You'll find that adults and older individuals, typically in the 30-60 age group, enjoy butter pecan ice cream. It's a favorite among those with a more refined palate, drawn to its rich and nutty flavor.

Conclusion

So there you have it, folks! Whip up this buttery, nutty delight for a taste of summer in every scoop.

Don't cry over spilled milk – grab a cone and enjoy this creamy treat that's sure to satisfy your sweet tooth.

Get churning and indulge in the best butter pecan ice cream you've ever tasted!

Advertisement
Continue Reading

Recipes & Culinary Uses

Festive Favorites: Best Peanut Butter Blossoms Recipe for Holidays!

Unleash the ultimate holiday baking magic with the best Peanut Butter Blossoms recipe – an irresistible treat that will elevate your festive celebrations!

Published

on

By

holiday baking with flair

Elevate your holiday baking with the ultimate Peanut Butter Blossoms recipe. Cream together peanut butter, butter, sugars, and salt, then add egg and vanilla. Roll dough into balls, coat in brown sugar, bake until golden, then press a Hershey's kiss on top. Adjust baking time as needed. Explore ingredient swaps for a personalized touch. Enjoy with hot cocoa or pair with savory dishes. For more tips, ideas, and customization options, the recipe holds more festive surprises.

Key Takeaways

  • Cream together peanut butter, butter, sugars for rich flavor.
  • Bake at 375°F for 8-10 minutes for soft, chewy cookies.
  • Customize with ingredient swaps like almond butter or maple syrup.
  • Pair with savory dishes or hot cocoa for holiday enjoyment.
  • Press Hershey kisses onto warm cookies for a classic finish.

Ingredients for Peanut Butter Blossoms

For the classic Peanut Butter Blossoms recipe, gather peanut butter, butter, sugar, an egg, and Hershey's kisses as your essential ingredients.

Peanut butter is the star, offering a rich flavor that blends perfectly with the sweetness of the cookies.

Butter plays a pivotal role by adding moisture and richness to the dough, ensuring a soft and chewy texture.

The sugar not only sweetens the cookies but also contributes to their festive appeal, making them a perfect treat for any occasion.

Finally, the Hershey's kisses on top provide a delightful chocolatey finish that elevates these cookies to a whole new level of deliciousness.

Advertisement

Together, these ingredients create a harmonious blend of flavors and textures that make Peanut Butter Blossoms a beloved classic for holiday baking or any time you crave a sweet and satisfying treat.

Recipe Steps for Peanut Butter Blossoms

bake peanut butter cookies

To make Peanut Butter Blossoms, start by creaming together peanut butter, butter, sugars, and salt until light and fluffy.

Next, add in the egg and vanilla extract, making sure to mix well to combine all the ingredients thoroughly.

Then, gradually incorporate the dry ingredients into the wet mixture until a smooth dough forms.

Once the dough is ready, roll it into balls and coat each ball generously in brown sugar.

Place the sugar-coated dough balls on a baking sheet, making sure to leave enough space between them for spreading during baking.

Advertisement

Bake the cookies in a preheated oven until they turn a beautiful golden brown.

As soon as the cookies are out of the oven, press a Hershey's kiss into the center of each cookie gently.

The heat from the freshly baked cookies will melt the chocolate just enough to adhere it to the cookie.

These Peanut Butter Blossoms are a delightful treat perfect for Christmas celebrations!

Pro Tips for Making Peanut Butter Blossoms

baking perfect peanut blossoms

To enhance your peanut butter blossom baking experience, consider adjusting the baking time based on your oven's performance for best results.

Additionally, explore ingredient substitutions to cater to dietary preferences or allergies without compromising the flavor or texture of the cookies.

Advertisement

These pro tips can help you customize your peanut butter blossoms while ensuring delicious outcomes.

Baking Time Recommendations

Achieving the ideal texture for your peanut butter blossoms involves baking them at 375°F for 8-10 minutes. This baking duration guarantees that the cookies have a soft and chewy consistency while allowing the Hershey kisses on top to be softened but not completely melted.

Once out of the oven, remember to press the Hershey kisses onto the cookies immediately to secure them in place for that classic appearance.

For the best outcomes, chill the cookie dough for about 30 minutes before baking. This step helps the cookies maintain their shape and prevents excessive spreading during baking, ensuring your peanut butter blossom cookies are perfectly formed and ready to impress during your holiday baking.

Shortening or extending the baking time can alter the texture of the cookies. A quick bake of 6-8 minutes produces softer and chewier cookies, while longer baking times yield a slightly crispier consistency. Stick to the recommended 8-10 minutes for the best soft and chewy peanut butter blossoms.

Advertisement

Ingredient Substitutions

Consider incorporating different ingredients to elevate the flavor and nutritional profile of your peanut butter blossoms. For a healthier option, swap out shortening with unsalted butter to achieve a unique texture and taste in your cookies.

Try using natural peanut butter instead of creamy to add a wholesome twist to the classic recipe. If you're looking to reduce the glycemic impact, substitute brown sugar with coconut sugar in your baking. For a natural sweetener alternative, replace regular granulated sugar with maple syrup in the cookie dough mixture.

Additionally, for a distinct flavor experience, experiment with almond butter as a substitute for peanut butter in your blossoms. These ingredient substitutions can bring a new dimension to your peanut butter blossoms, making them not only delicious but also tailored to your dietary preferences.

Upgrade your baking game this holiday season with these creative twists on a beloved recipe!

Serving Suggestions for Peanut Butter Blossoms

peanut butter cookie recipe

Enhance the enjoyment of your peanut butter blossoms by pairing them with savory dishes like lasagna tortellini soup for a satisfying meal. These classic cookies also complement family-friendly dinners such as easy ground beef shepherd's pie and creamy broccoli cheddar soup, making for a delightful combination. The holiday season calls for cozy treats, and the sweet nuttiness of peanut butter blossoms pairs perfectly with a warm cup of hot cocoa. Whether you're participating in a cookie exchange or looking for a festive touch to your holiday dessert spread, consider rolling the cookies in red, green, and white sugar sprinkles to add a pop of color and fun.

Serving Suggestions Pairing Ideas
Lasagna Tortellini Soup Comforting and hearty meal alongside the cookies
Easy Ground Beef Shepherd's Pie Delicious combination for a family dinner
Creamy Broccoli Cheddar Soup Perfect accompaniment to the nutty cookie flavors

12 Days of Christmas Cookies Recipes

baking traditions for the holidays

Indulge in a variety of delightful Christmas cookie recipes each day during the holiday season. One standout choice is the classic Peanut Butter Blossoms. These holiday cookies feature a peanut butter base topped with a Hershey's kiss, making them a beloved treat for cookie exchanges and festive gatherings.

The process of making these cookies is simple yet rewarding. Start by rolling the dough balls in sugar before baking to add a sweet crunch to each bite. The combination of rich peanut butter flavor and the chocolatey goodness of the Hershey's kiss creates a perfect balance of sweetness.

Advertisement

When enjoying these Christmas cookies, consider pairing them with a glass of milk for a classic and satisfying treat.

Whether you're baking them for your family, a cookie exchange, or a holiday party, Peanut Butter Blossoms are sure to be a hit. Make each day of the holiday season a little sweeter with these delicious cookies.

User Engagement Features

user interaction enhancements

Let's talk about how user interaction features and personalization options enhance your experience with the Peanut Butter Blossoms recipe.

You can engage with others by leaving comments and sharing your results, creating a sense of community around this holiday treat.

Personalization options like name and email entry fields help tailor the experience to your preferences, making it more engaging and enjoyable.

User Interaction Features

Utilizing user engagement features on the website allows for increased participation and feedback from visitors. The comment section enables users to interact with each other and provide valuable feedback on the Peanut Butter Blossoms recipe or share their experiences with Hershey's kisses. By incorporating a reply option, users can engage in conversations, fostering a sense of community around baking these delightful peanut butter cookies.

Advertisement

Moreover, the inclusion of name and email fields not only allows for personalization but also facilitates communication between the website and its visitors. This data storage feature guarantees that users can conveniently access their information for future visits, enhancing their overall user experience.

These user engagement features play an essential role in creating an interactive platform where users can engage, provide feedback, and communicate effectively. Such interaction not only enriches the user experience but also encourages visitors to actively participate in the community surrounding the Peanut Butter Blossoms recipe.

Personalization Options

Enhance your website's user engagement by incorporating personalized options such as commenting, replying, and sharing feedback on the Peanut Butter Blossoms recipe. This level of user interaction not only fosters a sense of community building but also encourages customization and feedback. By allowing users to share their thoughts, results, and experiences with the festive favorites, you create a more engaging and interactive user experience. Additionally, providing users with the option to save their data for future visits and encouraging them to tag @preppykitchen and use #preppykitchen when trying the recipe further enhances their engagement.

Personalization Options Description Benefits
Commenting Users can leave comments on the Peanut Butter Blossoms recipe, sharing their thoughts and experiences. Fosters community building and user engagement.
Replying Users can reply to comments and engage in discussions with other users about the recipe. Encourages active participation and interaction.
Feedback Sharing Users can share feedback on the recipe, providing valuable insights for improvement. Enhances user experience and customization.

Additional Information

clarifying specific details provided

You may find it interesting to know more about the history of the Peanut Butter Blossoms recipe and its cultural significance during the holidays.

  • The Peanut Butter Blossoms recipe's popularity is backed by IRI MULO data, making it a sought-after choice for holiday baking.
  • Copyright for this beloved recipe belongs to The J.M. Smucker Company, a reputable name in the food industry known for quality products.
  • These delightful cookies aren't only perfect for serving at holiday parties but also make excellent gifts due to their festive appeal.

Frequently Asked Questions

Why Are My Peanut Butter Blossoms Dry?

If your peanut butter blossoms are dry, it could be due to using too much flour, overbaking, using natural peanut butter that requires stirring, or not enough butter/shortening. Guarantee precise measurements and follow the recipe closely to maintain moisture.

Why Did My Peanut Butter Blossoms Go Flat?

When making peanut butter blossoms, going flat happens due to overmixing, too much flour, insufficient chilling, or low oven temperature. Remember to avoid these pitfalls. Preheat the oven properly and follow the recipe for perfect blossoms!

What Is America's Favorite Christmas Cookie?

America's favorite Christmas cookie is Peanut Butter Blossoms. Loved for their peanut butter-chocolate combo and nostalgic Hershey's Kiss center, these easy-to-make treats are a holiday staple at parties and gatherings. They're a must-have during the festive season.

Advertisement

What Is Baskin Robbins Peanut Butter Blossom?

You asked about Baskin Robbins Peanut Butter Blossom. It's a delectable seasonal ice cream flavor featuring creamy peanut butter ice cream with a ribbon of more peanut butter and chocolate cookie pieces. Indulge in this festive treat!

Conclusion

Indulge in the warm, gooey goodness of these peanut butter blossoms this holiday season. With the perfect blend of creamy peanut butter and rich chocolate, these cookies are sure to bring joy to your festivities.

Picture yourself surrounded by loved ones, sharing laughter and memories as you enjoy these delicious treats. Let the aroma of freshly baked cookies fill your home and create a cozy, festive atmosphere.

Happy baking and happy holidays!

Advertisement
Continue Reading
Advertisement

Affiliate disclaimer

As an affiliate, we may earn a commission from qualifying purchases. We get commissions for purchases made through links on this website from Amazon and other third parties.

Advertisement

Trending