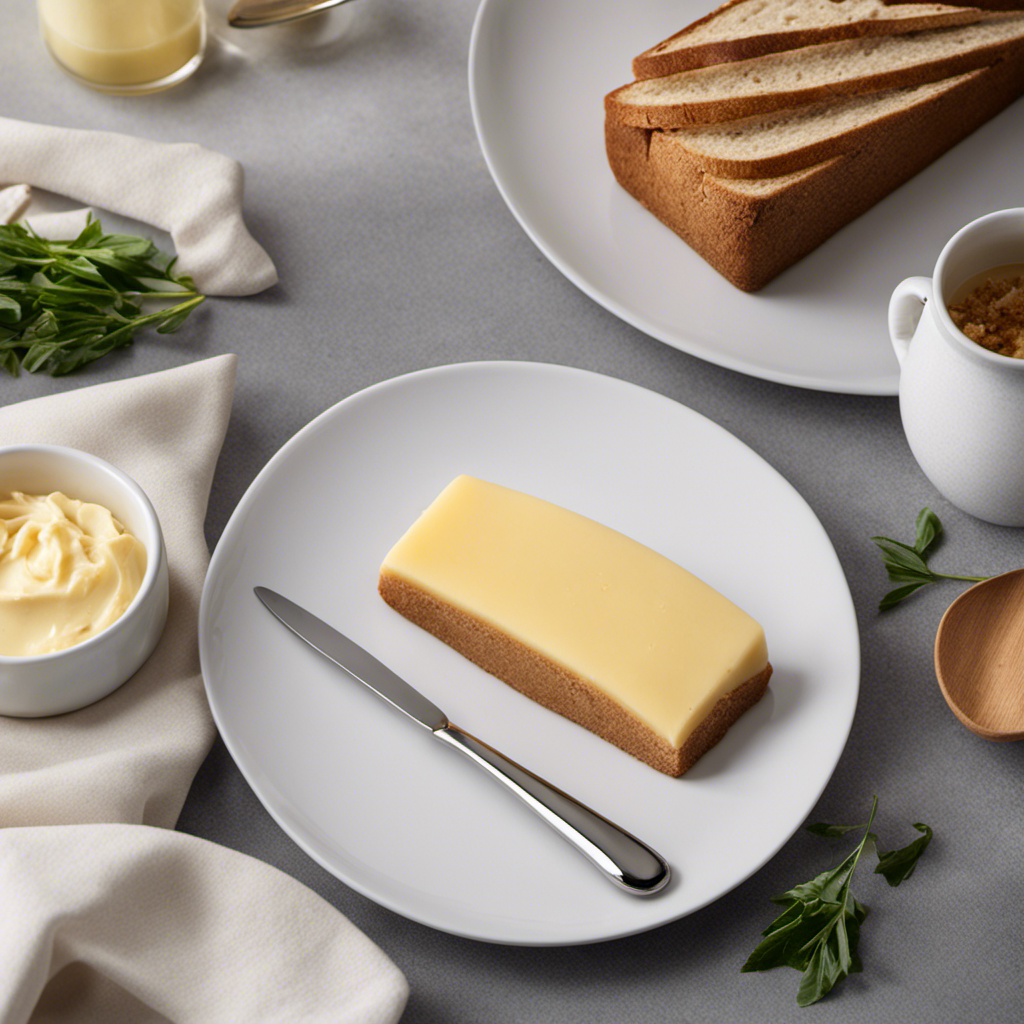
Connect with us

Recipes & Culinary Uses

What Does a Butter Knife Look Like

Published

on

An image showcasing a sleek, stainless steel butter knife with a rounded handle and a slightly curved, wide blade tapering to a blunt edge, perfect for effortlessly spreading creamy butter onto a warm slice of toast

As I spread creamy butter onto warm toast each morning, I’m reminded of the unsung hero in my kitchen – the butter knife. This humble utensil, with its slender blade and rounded tip, effortlessly glides through the golden goodness, making it the ideal companion for any breakfast lover.

In this article, I’ll take you on a journey to explore the history, types, materials, and features of butter knives, as well as share tips on how to use and care for them.

So, let’s embark on this buttery adventure together!

Key Takeaways

  • Butter knives have evolved over time, from being made from bone or wood to silver and stainless steel, with the addition of a serrated edge for cutting through refrigerated butter.
  • There are different types of butter knives with various blade shapes, including curved, straight, and serrated, to accommodate different spreading and cutting preferences.
  • Butter knives can have handles made from a variety of materials such as wood, stainless steel, and plastic, offering different textures and aesthetics.
  • To maintain butter knives, they should be stored in a dry place, kept away from moisture and humidity, and regularly cleaned and oiled to prevent rust.
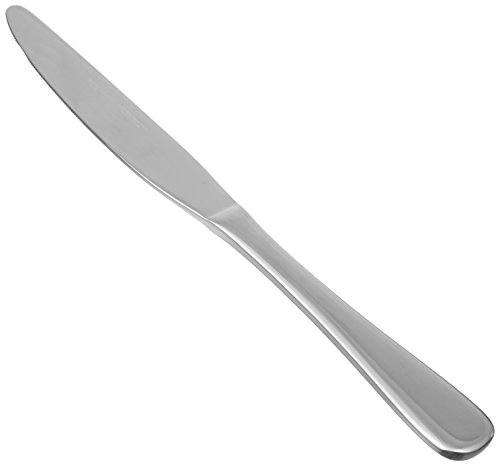
History of Butter Knives

If you’re interested in the history of butter knives, you might be surprised to learn that they have been used for centuries. The origins of butter knives can be traced back to ancient civilizations, where they were used as a tool to spread butter onto bread or other food items.

These early butter knives were typically made from natural materials such as bone or wood. As time went on, the evolution of butter knives saw the introduction of new materials like silver and stainless steel, making them more durable and elegant. The design of butter knives also evolved, with the addition of a serrated edge to easily cut through butter straight from the refrigerator.

Today, butter knives come in various shapes and sizes, but their purpose remains the same – to effortlessly spread butter onto our favorite foods.

Types of Butter Knives

When it comes to butter knives, there is more to consider than just their history and appearance.

Two key factors that can greatly affect your butter knife experience are blade shape preferences and handle material options.

The shape of the blade can determine how easily you can spread butter, while the material of the handle can impact the knife’s durability and comfort in your hand.

Let’s dive deeper into these aspects to help you find the perfect butter knife for your needs.

Blade Shape Preferences

You might prefer a butter knife with a curved blade shape for easier spreading. The curved blade allows you to effortlessly glide through butter, making it a popular choice among many.

However, blade shape preferences vary from person to person. Some may prefer a straight blade for precision cutting, while others may opt for a serrated blade for easily spreading thick spreads like peanut butter.

When it comes to handle material variations, there are countless options available. From traditional wooden handles to modern stainless steel ones, the choice is ultimately a matter of personal preference.

Some may prefer the warmth and natural feel of wood, while others may appreciate the durability and sleekness of stainless steel. The handle material can greatly affect the overall look and feel of the butter knife, so choose wisely based on your own preferences and needs.

Handle Material Options

For a classic and timeless look, consider opting for a butter knife with a handle made of polished wood. Wood handles add warmth and elegance to the table setting, making them a popular choice for traditional and rustic-themed occasions. They also provide a comfortable and secure grip, ensuring a smooth and controlled spread of butter or jam.

In comparison, plastic handles may lack the same level of sophistication, but they offer practicality and affordability. On the other hand, metal handles exude a sleek and modern aesthetic, while ceramic handles can add a touch of whimsy and uniqueness.

Ultimately, the choice between wood, plastic, metal, or ceramic handles depends on personal preference and the desired atmosphere for the dining experience.

Materials Used in Butter Knives

Butter knives are typically made from stainless steel or silver. Precision and attention to detail are key in the manufacturing process. Here are some materials used in butter knife production that contribute to their durability and functionality:

  • Stainless Steel: This popular material is known for its resistance to corrosion and rust, making it perfect for everyday use.
  • Silver: Often used for luxury butter knives, silver adds an elegant touch to the dining experience.
  • Handle Materials: From wood to plastic, the handle of a butter knife can vary in material, providing different textures and aesthetics.

Using a butter knife has several benefits. It allows for easy spreading of butter or other spreads on bread or toast. The smooth, rounded edge prevents tearing or squishing of delicate baked goods. Additionally, the flat blade enables even distribution of the spread for a consistent taste in every bite.

Now that we’ve covered the materials used in butter knives, let’s delve into the features and design that make them essential tools in the kitchen.

Features and Design of Butter Knives

When it comes to butter knives, there are a variety of options to consider. Blade shape is one factor to think about, with options ranging from the classic rounded tip to the more modern pointed tip. Each shape offers its own advantages and style.

In addition to blade shape, handle materials also vary. There is a wide range available, including wood, stainless steel, and even plastic. This allows for customization and personal preference when choosing a butter knife.

For those looking to add a touch of elegance to their butter knife, there are many decorative embellishments available. Engraved patterns or ornate handle designs can make the knife not just a functional tool, but a beautiful one as well.

Blade Shape Options

Have you ever considered what options there are for the shape of a butter knife blade? When it comes to butter knives, blade shape options are surprisingly diverse.

Here are three examples to help you visualize the possibilities:

  • Straight Blade: The classic choice, with a straight and flat blade, perfect for spreading butter or jam evenly on your toast.

  • Pointed Blade: This blade shape features a pointed tip, which allows for easy piercing of bread or pastries, making it ideal for cutting and spreading.

  • Serrated Blade: With a saw-like edge, this blade shape effortlessly glides through crusty bread, while still providing a smooth spreading surface for your butter or toppings.

Now that we’ve explored the various blade shape options, let’s move on to another important aspect of butter knives: handle material variations.

Handle Material Variations

Now that we’ve explored the different blade shapes available for butter knives, let’s shift our focus to another important aspect: handle material variations.

The handle of a butter knife not only contributes to its overall aesthetics but also plays a crucial role in its durability.

When it comes to handle materials, there are several options to choose from. Common materials include stainless steel, wood, plastic, and even bone or ivory for more luxurious options. Each material offers its own unique set of benefits.

Stainless steel handles are known for their strength and durability, while wooden handles add a touch of natural beauty. Plastic handles are often lightweight and easy to clean.

Finding the perfect handle material is essential for both functionality and style. As we delve into the world of butter knife design, it’s important to consider the handle material’s durability and aesthetics.

Now that we have covered handle materials, let’s move on to the next exciting aspect: the decorative embellishments available.

Decorative Embellishments Available

Let’s explore the various decorative embellishments available for butter knives, adding a touch of elegance and personal style to these essential kitchen tools. When it comes to decorative handle options, the possibilities are endless. Here are a few ideas to spark your imagination:

  • Intricate carvings: Imagine a butter knife with a beautifully carved handle, featuring delicate patterns and motifs. It adds a touch of sophistication to your table setting.

  • Embossed designs: Picture a butter knife with a raised design on its handle, such as floral patterns or geometric shapes. It creates a tactile and visually appealing experience.

  • Inlay work: Visualize a butter knife with inlaid materials like mother-of-pearl or wood, adding a unique and luxurious touch to the handle.

In addition to decorative handles, unique blade designs can also make a statement. From serrated edges to scalloped blades, these variations offer both functionality and aesthetic appeal. So why settle for a plain butter knife when you can elevate your dining experience with these decorative options?

How to Use a Butter Knife

Using a butter knife, you can easily spread butter or jam onto your toast. However, there are alternatives to a traditional butter knife that can make your spreading experience even better.

One option is a cheese spreader, which has a wider and flatter blade, perfect for spreading butter smoothly. Another alternative is a silicone spatula, which is flexible and can easily glide over your toast.

When using any type of knife for spreading, it’s important to follow some safety tips. Always hold the knife with a firm grip and be mindful of your fingers. Avoid using excessive force that could cause the knife to slip.

Additionally, make sure to clean and dry your knife properly after use to prevent any potential accidents.

Proper Care and Maintenance of Butter Knives

To keep your butter knife in good condition, it’s important to regularly clean and dry it after each use. Here are some tips on how to properly care for and maintain your butter knife:

  • Store your butter knife in a dry place, away from moisture and humidity.
  • Avoid leaving your butter knife in the sink or dishwasher for extended periods of time.
  • To remove rust from your butter knife, soak it in a mixture of vinegar and water for a few hours, then scrub it gently with a sponge or brush.
  • After cleaning, make sure to dry your butter knife thoroughly to prevent any moisture from causing rust.
  • Regularly oil your butter knife with a food-safe oil to keep it lubricated and prevent rust.

Taking these simple steps will ensure that your butter knife stays in pristine condition and is always ready for spreading butter or other delicious toppings.

Now, let’s move on to some fun facts about butter knives.

Fun Facts About Butter Knives

Did you know that butter knives were originally designed to help spread butter on bread? It’s a fun fact about butter knives that many people may not be aware of. These versatile kitchen tools have been around for centuries and have evolved over time. Today, butter knives come in various shapes, sizes, and materials, but their purpose remains the same – to make spreading butter easier and more efficient.

Using a butter knife offers several benefits. Firstly, its blunt edge prevents accidents and injuries while spreading butter on bread. Additionally, the flat and wide blade allows for a smooth and even distribution of butter, ensuring each bite is perfectly buttered. Furthermore, butter knives can also be used for other purposes in the kitchen, such as spreading condiments, frosting cakes, or even cutting soft cheeses. So, next time you reach for a butter knife, remember its humble beginnings and enjoy the convenience and versatility it brings to your culinary adventures.

Fun Facts About Butter Knives Benefits of Using a Butter Knife Did you know that butter knives were originally designed to help spread butter on bread? It’s a fun fact about butter knives that many people may not be aware of. These versatile kitchen tools have been around for centuries and have evolved over time. Today, butter knives come in various shapes, sizes, and materials, but their purpose remains the same – to make spreading butter easier and more efficient. Using a butter knife offers several benefits. Firstly, its blunt edge prevents accidents and injuries while spreading butter on bread. Additionally, the flat and wide blade allows for a smooth and even distribution of butter, ensuring each bite is perfectly buttered. Furthermore, butter knives can also be used for other purposes in the kitchen, such as spreading condiments, frosting cakes, or even cutting soft cheeses. So, next time you reach for a butter knife, remember its humble beginnings and enjoy the convenience and versatility it brings to your culinary adventures.

Frequently Asked Questions

Can a Butter Knife Be Used for Anything Other Than Spreading Butter?

A butter knife can be used for more than just spreading butter. It has many creative uses, such as slicing through soft cheeses, spreading condiments, or even cutting delicate cakes. It’s a versatile tool in the kitchen.

Are There Any Safety Precautions to Keep in Mind When Using a Butter Knife?

When using a butter knife, it’s important to take safety precautions and handle it properly to avoid accidents. Always hold it by the handle and avoid applying excessive force to prevent injuries.

Can a Butter Knife Be Used as a Substitute for Other Kitchen Utensils?

Sure, a butter knife can be used as a substitute for other kitchen utensils in a pinch. I’ve used it to spread mayo, cut soft fruits, and even open packages. It’s a versatile tool!

Are There Any Specific Guidelines for Choosing the Right Butter Knife for Different Types of Butter?

Choosing the right butter knife for different types of butter can enhance your dining experience. From spreading cold butter to slicing through soft butter, a good butter knife should be versatile and comfortable to use.

Are There Any Alternative Materials Used in the Making of Butter Knives That Are More Sustainable or Eco-Friendly?

Sustainable alternatives to traditional butter knives are becoming more popular. Eco-friendly materials like bamboo or recycled stainless steel are being used, reducing environmental impact. These knives are not only functional but also visually appealing.

Conclusion

In conclusion, butter knives are essential tools in any kitchen. They come in various types, materials, and designs, each serving its unique purpose.

From the history of butter knives to the proper care and maintenance, we’ve covered it all.

So, the next time you reach for that trusty butter knife, remember its humble beginnings and the incredible versatility it offers. It’s like a magical wand, effortlessly spreading butter on toast, making your breakfast experience out of this world!

Get ready to embrace the butter knife’s power and elevate your culinary adventures.

Continue Reading

Recipes & Culinary Uses

How to Make Butter Balls

Published

on

By

An image that showcases the step-by-step process of shaping smooth, round butter balls

Do you crave a dollop of flavor to enhance your dining experience? Look no further!

In this article, we will guide you through the magical process of creating delectable butter balls. With just a few simple ingredients and tools, you’ll be able to craft these little balls of creamy goodness in no time.

So, put on your apron, grab your whisk, and prepare to embark on a buttery adventure that will leave your taste buds dancing with delight.

Key Takeaways

  • Experiment with different combinations of herbs and spices to create unique flavors in the butter balls.
  • Chilling the butter mixture in the refrigerator helps firm it up and allows the flavors to meld together for a more harmonious taste.
  • Roll the chilled butter mixture into small, bite-sized spheres and optionally roll them in finely chopped herbs, spices, or edible flowers for added flavor and presentation.
  • Store the butter balls in an airtight container in the refrigerator and let them come to room temperature before serving to enhance their versatility in various dishes and spreads.

Gathering the Ingredients and Tools

First, you’ll need to gather the ingredients and tools necessary for making butter balls. To begin, gather 1 cup of softened butter, 1 ¼ cups of powdered sugar, 1 teaspoon of vanilla extract, and a pinch of salt. These ingredients will create a smooth and flavorful base for your butter balls.

Additionally, you’ll need a mixing bowl, an electric mixer, a spatula, and a baking sheet lined with parchment paper. If you’re feeling adventurous, you can also experiment with alternative ingredients such as almond or coconut extract to add a unique twist to your butter balls.

Once you have everything ready, it’s time to move on to preparing the butter mixture.

Preparing the Butter Mixture

Next, you’ll need to mix together the softened butter, your choice of herbs and spices, and a pinch of salt in a bowl. This step is crucial for adding flavor to your butter balls.

As you mix in the herbs and spices, imagine the burst of savory goodness they will bring to each bite. Experiment with different combinations like garlic and rosemary, or perhaps a hint of lemon zest and thyme.

Once everything is well incorporated, cover the bowl with plastic wrap and place it in the refrigerator to chill. This will help the butter mixture firm up, making it easier to shape into balls later on. The chilling process also allows the flavors to meld together, resulting in a more harmonious taste.

Get ready to elevate your butter balls to a whole new level of deliciousness.

Shaping the Butter Balls

Now it’s time to take the chilled butter mixture and roll it into small, bite-sized spheres. Shaping butter balls requires some techniques to achieve the perfect form.

Start by scooping a small amount of the butter mixture with a spoon or a melon baller. Then, gently roll it between your palms, applying light pressure to create a smooth and round shape.

For a more decorative touch, you can roll the butter balls in finely chopped herbs, spices, or even edible flowers. Arrange them on a serving plate, or place them in a decorative butter dish for a stunning presentation.

These butter balls can be a delightful addition to a cheese platter or served alongside warm bread.

Now, let’s move on to the next step – adding flavors and variations to your butter balls.

Adding Flavors and Variations

To enhance the taste and create unique variations, you can experiment with different ingredients and seasonings for your butter balls. By adding different flavors, you can elevate your butter balls to a whole new level. Here are some ideas to get you started:

Flavor Ingredients Creative Uses
Garlic and Herb Garlic, parsley, thyme Spread on bread or use in pasta dishes
Citrus Lemon or orange zest Use in baking or melt over grilled fish
Spicy Chili flakes, paprika Add a kick to roasted vegetables or steaks
Sweet Honey, cinnamon Delicious on pancakes or toast

There are endless possibilities when it comes to flavored butter balls. Get creative and experiment with different combinations to find your favorites. Once you have made your butter balls, it’s time to move on to storing and serving them.

TRANSITION: Now that you have created your delicious flavored butter balls, let’s talk about the best way to store and serve them.

Storing and Serving the Butter Balls

When it comes to storing and serving your flavorful creations, remember to keep your butter balls chilled in an airtight container to maintain their freshness. Storing butter balls properly is essential to preserve their taste and texture.

After shaping your butter into small balls, place them in the refrigerator for at least an hour to firm up. Once chilled, transfer the butter balls to an airtight container to prevent them from absorbing any odors or flavors from the fridge. This will ensure that your butter balls stay fresh and delicious.

When it’s time to serve, take out the desired amount and let them come to room temperature for a few minutes. Butter balls are versatile and can be used in various ways – spread them on toast, melt them on steamed vegetables, or use them to enhance the flavor of your favorite dishes. Get creative and enjoy the rich, creamy goodness of your homemade butter balls!

Conclusion

So there you have it, a step-by-step guide on how to make butter balls.

Now that you know the secrets to creating these delectable delights, you can impress your friends and family with your culinary skills.

Imagine the look on their faces as they bite into these creamy, flavorful bites of heaven.

The possibilities are endless when it comes to adding your own unique twist to the recipe.

So go ahead, gather your ingredients and tools, and embark on this buttery adventure.

Get ready to indulge in the buttery goodness that awaits!

Continue Reading

Recipes & Culinary Uses

How to Make Brownies With Weed Butter

Published

on

By

An image showcasing a close-up of fudgy, decadent brownies with a subtle hint of green peeking through the rich chocolate, enticing readers to learn the secret behind their magical ingredient

Hey there, fellow baking enthusiasts! Ever wondered how to take your brownie recipe to a whole new level? Well, I’ve got a little secret ingredient that’ll surely elevate your baking game: weed butter.

Now, before you start raising eyebrows, let me assure you that this article is all about responsible and informed baking. I’ll guide you through the process of making your very own batch of deliciously potent weed brownies.

So, get ready to embark on a mouthwatering journey that combines the best of baking and cannabis. Let’s dive in!

Key Takeaways

  • Different weed strains have different effects, so choose a balanced strain with a combination of THC and CBD for making weed butter.
  • Decarboxylate cannabis in the oven to activate THC before making weed butter.
  • Use proper dosing techniques and start with a lower dose to avoid overconsumption and unpleasant side effects.
  • Store weed brownies properly in a cool, dark place and consume within a week for optimal freshness and potency.

Selecting the Right Strain for Weed Butter

To make the best brownies with weed butter, you’ll need to choose the right strain of cannabis. When it comes to selecting the best cannabis strain for edibles, it’s important to understand the effects that different weed strains can have.

Some strains are known for their uplifting and energizing effects, while others are more relaxing and calming. For edibles, you’ll want to choose a strain that has a balanced combination of THC and CBD. THC is responsible for the psychoactive effects, while CBD provides a more calming and therapeutic experience. Finding the right balance will ensure that your brownies have the desired effects.

Now that you know the importance of choosing the right strain, let’s move on to making weed butter from scratch.

Making Weed Butter From Scratch

First, you’ll need to gather the necessary ingredients for making weed butter from scratch. To make weed butter, you’ll need unsalted butter, ground cannabis, and water. Start by decarboxylating your cannabis in the oven to activate the THC.

Next, melt the butter and add the ground cannabis. Simmer the mixture on low heat for a few hours, stirring occasionally. The alternative method of making weed-infused butter involves using a slow cooker, which can simplify the process.

The benefits of using weed butter in other recipes are numerous. Not only does it add a unique flavor to your dishes, but it also allows for a more controlled and precise dosage of cannabis.

Once the butter has cooled, strain out the plant matter, and you’re left with homemade weed butter ready to be used in all sorts of delicious recipes.

Infusing Weed Butter Into Your Brownie Mix

Once you’ve infused your homemade weed butter into your brownie mix, the rich and potent flavors will elevate your brownies to a whole new level of deliciousness. Infusing weed butter into your brownie mix is a simple and effective way to create alternative edibles that pack a punch.

Here are three infusing techniques to help you make the most of your weed butter brownies:

  1. Double Boiler Method: Place a heatproof bowl over a pot of simmering water, and melt your weed butter in the bowl. Once melted, add it to your brownie mix and stir well to ensure even distribution.

  2. Stovetop Method: Melt your weed butter in a saucepan on low heat, stirring continuously to prevent burning. Once melted, add it to your brownie mix and mix thoroughly.

  3. Microwave Method: Melt your weed butter in a microwave-safe bowl, heating in short bursts and stirring in between. Once melted, add it to your brownie mix and mix well.

With these infusing techniques, you can create delectable weed butter brownies that are sure to impress. Enjoy responsibly!

Baking Perfectly Potent Weed Brownies

For perfectly potent weed brownies, ensure you mix the infused butter thoroughly into the brownie batter. This step is crucial to evenly distribute the cannabis throughout the mixture, ensuring each bite is infused with the desired dose.

When it comes to dosing techniques, it’s important to note that the potency of your brownies will depend on the strength of your infused butter. To control the dosage, start by calculating the total amount of THC in your butter and divide it by the number of servings. This will give you an idea of how much THC is in each brownie.

If you’re looking for alternative cannabis-infused desserts, consider trying recipes like cannabis-infused cookies, cakes, or even ice cream. Just remember to adjust the dosage accordingly and always label your edibles clearly.

Happy baking!

Dos and Don’ts of Dosing Weed Brownies

When it comes to making weed brownies, proper dosage of weed butter is crucial. Overconsumption can lead to unpleasant experiences, so it’s important to know how much weed butter to use for the desired effect.

To ensure consistent potency, there are a few tips to keep in mind. First, use a reliable recipe that provides specific instructions on the amount of weed butter needed. This will help you avoid using too much or too little.

Second, properly measure the weed butter. Use a kitchen scale to weigh the butter accurately, as eyeballing it can result in inaccurate dosing. This step is crucial for achieving the desired effect and avoiding any potential negative experiences.

Proper Weed Butter Dosage

To determine the proper dosage of weed butter for your brownies, it’s essential to consider the potency and desired effects. Here are three important things to consider:

  1. Weed butter infusion methods: The potency of your weed butter depends on how you infuse it. Common methods include using a stovetop, slow cooker, or a specialized cannabis-infused butter machine. Each method may result in varying levels of THC extraction, so it’s important to choose a method that suits your desired potency.

  2. Calculating THC content: To accurately calculate the THC content in your weed butter, you need to know the percentage of THC in your starting cannabis material. This information can usually be found on the packaging of your cannabis product. From there, you can use a simple formula to determine the approximate THC content in your infused butter.

  3. Desired effects: Understanding your desired effects is crucial in determining the proper dosage of weed butter. If you’re a beginner or have a low tolerance, it’s recommended to start with a lower dose and gradually increase as needed. It’s important to remember that the effects of edibles can take longer to kick in and can be more potent, so patience is key.

Avoid Overconsumption Risks

Understanding the potential risks of overconsumption is crucial in ensuring a safe and enjoyable experience with cannabis-infused edibles. While edibles can provide a longer-lasting and more intense high compared to smoking or vaping, it’s important to consume them responsibly.

Overconsumption can lead to unpleasant side effects such as anxiety, paranoia, and even hallucinations. To avoid these risks, it is recommended to start with a low dose, especially if you are a beginner. Give your body enough time to process the edible before consuming more.

It’s also important to be aware of the potency of the edible you are consuming, as different products can have varying levels of THC. By practicing responsible consumption practices and being aware of the risks, you can have a safe and enjoyable experience with cannabis-infused edibles.

Tips for Consistent Potency

When it comes to making weed butter brownies, maintaining consistent effects can be a challenge. However, there are a few tips that can help you adjust the potency levels and ensure a consistent experience every time. Here’s what you need to know:

  1. Use precise measurements: To achieve consistent potency, it’s crucial to measure your ingredients accurately. This applies not only to the amount of weed butter you use but also to the other ingredients in your recipe.

  2. Test potency before baking: Before adding the weed butter to your brownie mix, try a small amount to gauge its potency. This will give you an idea of how strong the final product will be and allow you to adjust the amount of weed butter accordingly.

  3. Keep notes: Maintaining a record of your recipes and the effects they produce can help you fine-tune the potency levels over time. By noting the amount of weed butter used and the resulting effects, you can make adjustments to achieve your desired experience.

Following these tips will help you create consistently potent weed butter brownies that deliver the desired effects every time.

Storing and Enjoying Your Weed Brownies

Once they’ve cooled, you can store your weed brownies in an airtight container to keep them fresh. Proper storage techniques are essential to maintain the potency and flavor of your infused brownies. Here are some tips for storing and enjoying your weed brownies:

Technique Description
Store in a cool, dark place Heat and light can degrade the potency of the cannabinoids in your brownies. Keep them away from direct sunlight or high temperatures.
Separate from regular brownies To avoid confusion or accidental consumption, it’s best to store your weed brownies separately from regular ones. Label the container clearly.
Use within a week Although the brownies can last longer, it’s recommended to consume them within a week to ensure optimal freshness and potency.
Freeze for long-term storage If you have a large batch or want to save them for later, you can freeze your weed brownies in an airtight container. Thaw them before serving.
Best serving methods Enjoy your weed brownies by cutting them into small, manageable pieces. Start with a low dosage and wait at least an hour before consuming more. Remember to always store them securely and out of reach of children or pets.

Frequently Asked Questions

Can I Use Any Strain of Weed to Make Weed Butter, or Are There Specific Strains That Work Best?

Any strain of weed can be used to make weed butter, but there are specific strains that work best for making edibles. When infusing weed butter, consider the potency, flavor profile, and desired effects of the strain.

How Long Does It Take to Make Weed Butter From Scratch?

To make weed butter from scratch, it typically takes a few hours. After infusing the butter with cannabis, you can use it to enhance various recipes. Remember to store the weed butter properly to maintain its potency.

Can I Use Store-Bought Brownie Mix or Do I Have to Make the Mix From Scratch?

I can use store-bought brownie mix for weed brownies, but it’s important to properly dose them. The homemade mix gives more control over the ingredients, but store-bought is convenient.

How Do I Know if My Weed Brownies Are Potent Enough?

To properly dose weed brownies, start by using a reliable recipe and accurately measuring the amount of weed butter. Test the potency by starting with a small piece and waiting for the effects. Adjust the dosage accordingly for future batches.

How Long Can I Store My Weed Brownies Before They Go Bad?

The shelf life of weed brownies depends on how they are stored. To ensure the best quality, store them in an airtight container in a cool, dark place. They can last up to a week, but it’s best to consume them within a few days for optimal freshness.

Conclusion

In conclusion, making brownies with weed butter is a fun and delicious way to enjoy the benefits of marijuana. By selecting the right strain for your weed butter and infusing it into your brownie mix, you can create perfectly potent treats.

However, it is important to be mindful of dosing to avoid any unwanted effects. Did you know that a recent survey found that 42% of cannabis users prefer edibles as their preferred method of consumption?

So why not try making your own weed brownies and join the growing number of people who enjoy this tasty and alternative way of experiencing the effects of marijuana.

Continue Reading

Recipes & Culinary Uses

How to Make Brown Sugar Butter

Published

on

By

An image showcasing a rustic wooden bowl filled with smooth, creamy brown sugar butter, glistening with hints of golden caramel

Deliciously decadent and delightfully creamy, making homemade brown sugar butter is a culinary endeavor that is both easy and rewarding. With just a few simple ingredients and a touch of creativity, you can whip up a batch of this delectable spread that will elevate any dish it graces.

In this article, I will guide you through each step of the process, from selecting the perfect ingredients to achieving the ideal texture. Get ready to embark on a buttery journey like no other!

Key Takeaways

  • Consider coconut sugar, maple syrup, and honey as substitutes for brown sugar
  • Proper ingredient ratios are crucial for consistency and flavor
  • Spices like cinnamon and nutmeg can elevate the taste
  • Thoroughly cream together softened butter and brown sugar

Choosing the Right Ingredients

To make brown sugar butter, you’ll want to start by choosing the right ingredients.

When it comes to brown sugar substitutes and alternative sweeteners, there are a few options to consider. One popular substitute for brown sugar is coconut sugar. It has a similar flavor profile and can be used in equal amounts as a replacement.

Another alternative sweetener is maple syrup, which adds a rich and distinct taste to the butter. Honey is also a great option, with its natural sweetness and smooth texture.

Depending on your preference, you can experiment with different combinations of these substitutes to find the perfect balance of flavor. Remember to carefully measure the amount of substitute you use to ensure the right consistency and taste in your brown sugar butter.

Measuring and Mixing the Ingredients

When it comes to baking, getting the right ingredient ratios is crucial for achieving the perfect consistency and flavor in your finished product.

In this discussion, I will delve into the importance of proper ingredient ratios and how they can affect the outcome of your recipe.

Additionally, I will explore various mixing techniques that can help you achieve consistency in your batter or dough, ensuring that every bite is just as delicious as the last.

Proper Ingredient Ratios

The proper ingredient ratios for making brown sugar butter are essential for achieving the perfect balance of sweetness and richness. When it comes to ingredient substitutions, it’s important to note that while you can use white sugar instead of brown sugar, it will alter the flavor and color of the butter.

To troubleshoot common issues, such as the butter being too sweet or not sweet enough, you can adjust the amount of brown sugar used. If the butter is too sweet, try using less brown sugar or adding a pinch of salt to balance out the sweetness. On the other hand, if the butter is not sweet enough, you can increase the amount of brown sugar or add a teaspoon of vanilla extract for extra flavor.

Mixing Techniques for Consistency

For a consistent texture, try gently folding the mixture instead of vigorously stirring it.

When making brown sugar butter, the whisking method and temperature control are crucial for achieving the desired texture.

Begin by whisking the softened butter until it becomes smooth and creamy. This can be done using an electric mixer or by hand with a whisk.

Next, gradually add the brown sugar, ensuring that it is fully incorporated before moving on. Whisking slowly and evenly will prevent clumps from forming and create a smooth consistency.

Additionally, maintaining the temperature of the butter throughout the process is essential. If the butter becomes too warm, it can cause the mixture to separate or become greasy. To avoid this, work with softened butter at room temperature and avoid overheating.

Adding Flavor Enhancements

When it comes to adding flavor to a dish, spices are my go-to choice. They have the power to elevate the taste and take a recipe from ordinary to extraordinary.

In addition to spices, I also love infusing my dishes with aromatic herbs, like rosemary or thyme, to impart a subtle yet distinctive flavor.

Together, these flavor enhancements can transform a simple meal into a culinary masterpiece.

Spices for Added Taste

Spice up your brown sugar butter by adding a pinch of cinnamon or a dash of nutmeg for added taste. These warm and comforting spices will elevate the flavor profile of your butter, giving it a delightful twist.

But why stop there? You can also experiment with other aromatic spices like vanilla and cardamom to take your brown sugar butter to the next level. The combination of these flavors will create a harmonious blend that is both sweet and fragrant.

Whether you’re spreading it on toast, using it in baking, or simply enjoying it on its own, this spiced brown sugar butter will add a burst of flavor to any dish.

Now, let’s explore how infusing it with aromatic herbs can take it even further.

Infusing With Aromatic Herbs

After exploring the use of spices to enhance the taste of brown sugar butter, I decided to take it a step further and infuse it with aromatic herbs. Infusing the butter with citrus and experimenting with different herbs can elevate its flavor profile and add a refreshing twist. To help you understand the possibilities, I’ve created a table to showcase some exciting herb and citrus combinations:

Citrus Herbs Flavor Profile
Lemon Rosemary Fresh, tangy, and herbaceous
Orange Thyme Sweet, citrusy, and savory
Lime Basil Zesty, bright, and aromatic
Grapefruit Mint Tangy, refreshing, and cool

Achieving the Perfect Texture

To achieve the perfect texture for your brown sugar butter, make sure you thoroughly cream together the softened butter and brown sugar. This step is crucial in creating a smooth and spreadable consistency.

Here are three tips to improve spreadability and enhance shelf life:

  1. Gradually add the brown sugar to the softened butter while mixing. This ensures that the sugar is evenly distributed throughout the butter, resulting in a smooth texture.

  2. Beat the mixture on medium-high speed for a few minutes until it becomes light and fluffy. This incorporates air into the butter, making it easier to spread.

  3. Store the brown sugar butter in an airtight container in the refrigerator. This helps to preserve its freshness and extend its shelf life.

Storing and Preserving Brown Sugar Butter

Now that you’ve achieved the perfect texture for your brown sugar butter, it’s important to know how to store and preserve it to ensure its freshness and extend its shelf life.

There are several techniques that can help you in this process.

First, transfer the butter into an airtight container, ensuring that there is no excess air inside. This will prevent oxidation and maintain its flavor.

Secondly, store the butter in the refrigerator, as the cool temperature will slow down the growth of bacteria and maintain its quality.

Lastly, if you want to extend the shelf life even further, you can consider freezing the brown sugar butter. Simply wrap it tightly in plastic wrap or place it in a freezer-safe container.

Following these preserving techniques will help you enjoy your delicious brown sugar butter for a longer period of time.

Creative Ways to Use Brown Sugar Butter

If you’re feeling adventurous in the kitchen, try incorporating this delectable spread into your favorite baked goods or breakfast recipes for a unique and irresistible twist.

Here are three creative ways to use brown sugar butter:

  1. Baked Goods: Add a dollop of brown sugar butter to your cookie dough or cake batter for an extra burst of flavor. The rich and caramel-like taste of the butter will complement the sweetness of your treats, making them even more indulgent.

  2. Breakfast Delights: Spread brown sugar butter on your toast, pancakes, or waffles for a sweet and creamy topping. The warm and buttery notes of the spread will melt into your breakfast, adding a delightful richness to every bite.

  3. Savory Dishes: Don’t limit brown sugar butter to just sweet treats! Use it as a glaze for roasted vegetables or grilled meats. The hint of sweetness from the brown sugar will balance out the savory flavors, creating a harmonious and mouthwatering dish.

Frequently Asked Questions

Can I Use Salted Butter Instead of Unsalted Butter in This Recipe?

Yes, you can use salted butter instead of unsalted butter in this recipe. However, it will impact the taste as salted butter already has salt in it, which may make the brown sugar butter slightly saltier.

Can I Use Coconut Sugar Instead of Brown Sugar?

Yes, you can use coconut sugar instead of brown sugar. It will give the brown sugar butter a slightly different taste, with a hint of coconut flavor.

Can I Substitute Another Type of Sweetener, Like Honey or Maple Syrup, for the Brown Sugar?

Yes, you can substitute honey or maple syrup for the brown sugar in brown sugar butter. However, keep in mind that the flavor profile will change. Honey adds a floral sweetness, while maple syrup adds a rich, caramel-like taste.

How Long Can I Store Brown Sugar Butter in the Refrigerator?

The shelf life of brown sugar butter stored in the refrigerator varies, but it typically lasts for several weeks. To ensure proper storage, keep it in an airtight container or wrap it tightly in plastic wrap.

Can I Freeze Brown Sugar Butter for Long-Term Storage?

Yes, you can freeze brown sugar butter for long-term storage. To do so, put it in an airtight container or freezer bag. This freezing technique will preserve its flavor and texture.

Conclusion

In conclusion, making brown sugar butter is a simple and delicious way to add flavor to your dishes. By using the right ingredients, measuring and mixing them properly, and adding flavor enhancements, you can achieve the perfect texture and taste.

One interesting statistic to consider is that the average American consumes about 23 pounds of butter per year, showing just how popular this ingredient is in our diets.

So why not elevate your recipes with the rich and sweet taste of homemade brown sugar butter? Give it a try and enjoy the delightful results!

Continue Reading

Trending