Recipes & Culinary Uses
One Stick Butter Equals How Many Cups

I’ve always wondered about the elusive relationship between a stick of butter and its measurement in cups. It’s like trying to unravel a culinary mystery!
Well, fret no more, because in this article, I’ll dive deep into the world of butter measurements and unravel the secrets behind converting one stick of butter to cups.
So, if you’re ready to solve this buttery enigma and become a master in the kitchen, let’s get started!
Key Takeaways
- One stick of butter is equal to half a cup.
- Accurate measurements of butter are essential for successful recipes.
- Precise measurements maintain consistency in taste, texture, and appearance.
- A standard stick of butter can be converted to cups by dividing the number of sticks by 2.
Understanding the Measurement
You’ll need to understand the measurement in order to determine how many cups are equivalent to one stick of butter. When it comes to measuring equivalents, it’s important to know that one stick of butter is equal to half a cup. This is a standard conversion used in many recipes.
So, if a recipe calls for two sticks of butter, you’ll need one cup. Likewise, if a recipe asks for one cup of butter, you’ll need two sticks. Understanding this conversion will help you accurately measure and convert butter measurements in your recipes.
It’s a simple yet essential piece of knowledge for any baker or cook. So, next time you’re in the kitchen, confidently convert your butter measurements with ease.
The Importance of Accurate Measurements
Accurate measurements are crucial for ensuring the success of your recipe. When it comes to cooking and especially baking, precise measurements are a must. Here are a few reasons why accurate measurements are so important:
-
Consistency: Accurate measurements ensure that you get the same results every time you make a recipe. This is important for maintaining consistency in taste, texture, and appearance.
-
Chemical reactions: Baking is a science, and accurate measurements of ingredients are necessary for the chemical reactions that occur during the baking process. Too much or too little of an ingredient can throw off these reactions and result in a failed recipe.
-
Balance of flavors: Accurate measurements help maintain the balance of flavors in a dish. Too much or too little of an ingredient can overpower or underwhelm the taste buds, affecting the overall enjoyment of the meal.
Butter Conversion Chart
When converting butter measurements in recipes, it’s helpful to know that a standard stick of butter is equivalent to 1/2 cup. This knowledge is essential for achieving accurate and delicious results in your baking endeavors. To further aid in your understanding of butter measurements, here is a handy butter conversion chart:
Butter Measurement | Cup Equivalent |
---|---|
1 stick | 1/2 cup |
1/2 stick | 1/4 cup |
1/4 stick | 1/8 cup |
1/8 stick | 1/16 cup |
With this chart, you can easily convert butter measurements in your recipes and ensure the perfect balance of flavors and moisture in your baked goods. So, next time you find a recipe calling for butter in a different form, refer to this chart for a seamless and successful baking experience.
How Much Butter in a Stick
It’s useful to know that a standard stick of butter is equivalent to 1/2 cup or 8 tablespoons. This measurement is important to keep in mind when following recipes that require specific amounts of butter.
However, there are alternative butter measurements that can be used if you don’t have a stick of butter on hand. Here are two options to consider:
-
Butter cubes: 1 stick of butter is equal to 4 cubes, which is approximately 1/4 cup or 4 tablespoons.
-
Weight measurements: 1 stick of butter weighs about 1/4 pound or 113 grams.
Converting Sticks of Butter to Cups
To convert sticks of butter to cups, you can simply divide the number of sticks by 2. Understanding butter measurements is essential for accurate butter conversions in recipes. Here are some tips to help you with this process:
-
Always check the recipe for the specific measurement required. Some recipes may call for butter in cups, while others may use sticks.
-
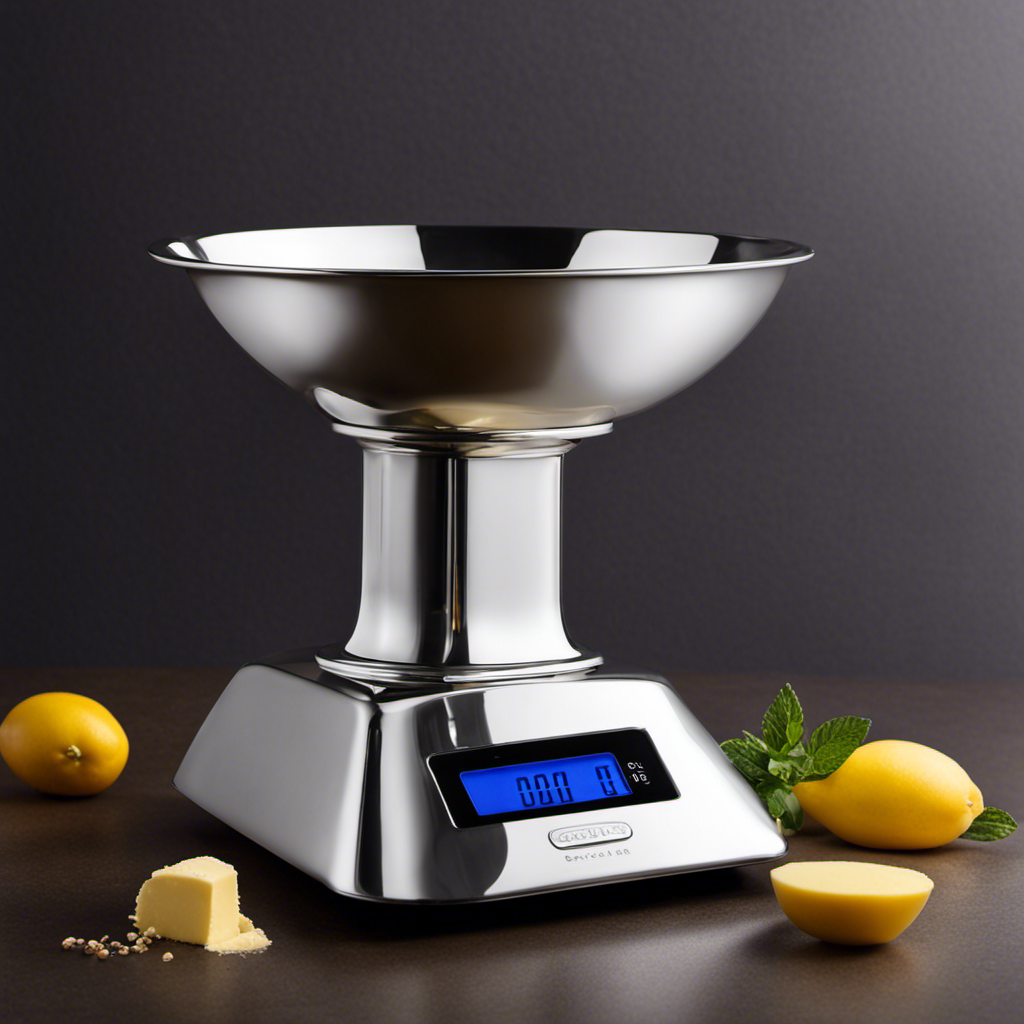
Use a kitchen scale for precise measurements. Weighing the butter will give you the most accurate results.
-
If you don’t have a scale, refer to a conversion chart like the one below:
Sticks of Butter | Cups |
---|---|
1 | 1/2 |
2 | 1 |
3 | 1 1/2 |
4 | 2 |
- Remember that butter is sold in 1/4 pound sticks, which equals 1/2 cup.
Calculating Butter Equivalents
When it comes to baking, accurate measurements are crucial, especially when it comes to butter. Understanding butter measurement conversions and cup equivalents can make all the difference in your recipes.
In this discussion, we will dive into the topic of butter measurement conversions and explore the cup equivalents for butter, providing you with the knowledge you need to confidently navigate your way through any baking recipe.
Butter Measurement Conversions
Did you know that one stick of butter is equal to 1/2 cup? Understanding butter measurements can be confusing, especially when you come across recipes that require butter to be measured in weight rather than volume. Converting butter measurements to weight is essential for accurate baking.
Here are some key points to help you navigate through the world of butter measurements:
-
When converting butter measurements to weight, one stick of butter weighs approximately 113 grams or 4 ounces. If a recipe calls for a specific weight of butter, use a kitchen scale to measure it precisely.
-
Understanding the different butter measurements, butter is commonly sold in sticks, with each stick measuring 1/2 cup or 8 tablespoons. Butter can also be measured in tablespoons, with 1 stick being equal to 8 tablespoons.
Cup Equivalents for Butter
Understanding butter measurement conversions is important for accurately following recipes. It’s helpful to know that a stick of butter is equivalent to half a cup.
When it comes to measuring butter, precision is key. Here are some tips for accurate butter measurements.
First, ensure that the butter is at room temperature for easy measuring. Use a sharp knife to cut the butter into tablespoon-sized slices or cubes.
If a recipe calls for a specific amount of butter, use a measuring cup or scale to get the exact measurement. For recipes that require smaller amounts of butter, such as teaspoons or tablespoons, use measuring spoons.
Converting Recipes With Butter Measurements
When it comes to baking, sometimes we find ourselves in situations where we need to substitute butter or convert grams to cups in our recipes. In this discussion, I will share some helpful tips for butter substitutions and guide you on how to convert grams to cups accurately.
These key points will ensure that your baked goods turn out just right, even when faced with ingredient challenges.
Butter Substitution Tips
You can easily substitute butter with margarine or oil in your recipes to achieve a similar texture and taste. When it comes to butter alternatives, there are a few options to consider:
-
Margarine: This is a common substitute for butter, and is made from vegetable oils. It has a similar texture to butter and can be used in equal amounts in most recipes.
-
Oil: Another option is to use oil, such as canola or vegetable oil. This is a great choice for recipes that require melted butter, as it can be easily substituted in a 1:1 ratio.
When it comes to butter storage tips, here are a couple of things to keep in mind:
-
Refrigeration: Butter should be stored in the refrigerator to keep it fresh and prevent it from spoiling.
-
Freezing: If you have extra butter that you won’t be using right away, you can freeze it for later use. Just make sure to wrap it tightly in plastic wrap or aluminum foil to prevent freezer burn.
With these butter alternatives and storage tips, you can confidently adapt your recipes and ensure the same delicious results.
Converting Grams to Cups
Converting grams to cups can be tricky, but there are online conversion tools that can help simplify the process.
When it comes to understanding butter measurements, it’s important to know how to convert grams to ounces, as this is commonly used in many recipes. To convert grams to ounces, you can divide the grams by 28.35. Once you have the measurement in ounces, you can easily convert it to cups using a conversion chart or an online tool.
For example, if you have 226 grams of butter, which is equal to 8 ounces, you would then convert it to 1 cup.
Understanding these conversions can make it easier to follow recipes and ensure accurate measurements.
Now, let’s move on to some helpful tips for measuring butter.
Tips for Measuring Butter
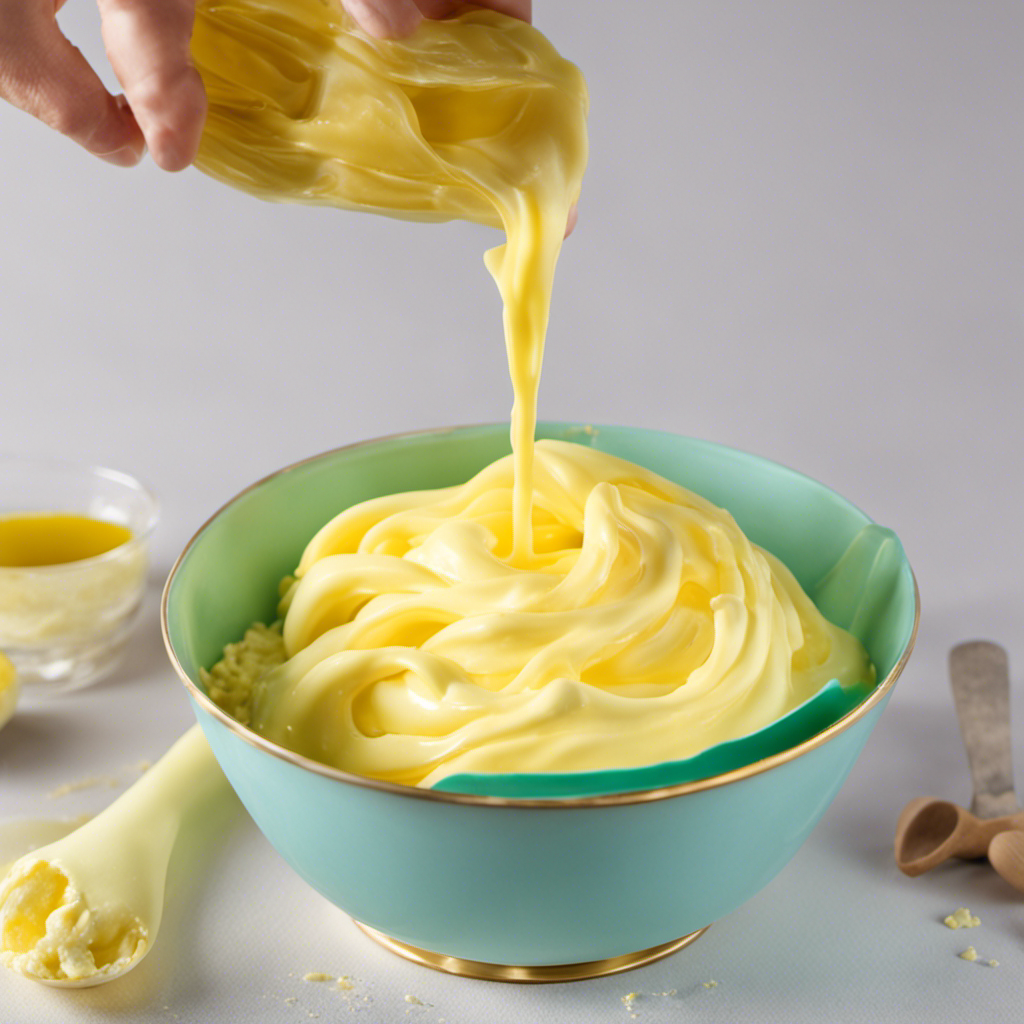
To accurately measure butter, it’s helpful to soften it first. Softening the butter allows for easier and more precise measurements. Here are some tips for measuring butter accurately:
-
Softening Methods:
-
Leave the butter at room temperature for 30-60 minutes.
-
Microwave the butter for 5-10 seconds, checking frequently to avoid melting.
-
Measuring Techniques:
-
Use a kitchen scale to measure the exact weight of butter required in a recipe.
-
If a scale is not available, use measuring spoons or a butter dish with markings for different measurements.
Understanding measurements and following these tips will ensure that you add the right amount of butter to your recipes, resulting in delicious and consistent dishes every time.
Common Baking Measurements and Conversions
When baking, it’s important to understand common measurements and conversions for ingredients. Having a good grasp of these measurements ensures accuracy and consistency in your baking.
Here are some key tips for accurate measuring. Firstly, always use the correct measuring tools for dry and liquid ingredients. A liquid measuring cup has a spout for pouring, while dry measuring cups have straight edges for leveling off ingredients.
Secondly, when measuring dry ingredients like flour, spoon it into the measuring cup and level it off with a straight edge. Avoid packing the flour, as it can lead to a dense and dry baked good.
Lastly, remember that conversions are crucial. For example, one stick of butter equals half a cup or 8 tablespoons.
Understanding these measurements and following these tips will help you achieve delicious and successful baking results.
Frequently Asked Questions
Can I Use Margarine or Other Butter Substitutes in Place of a Stick of Butter?
Sure, you can use margarine or other butter substitutes in place of a stick of butter. However, there are pros and cons to consider. Different types of butter substitutes have varying uses in baking.
How Can I Measure Butter if I Don’t Have Measuring Cups or a Kitchen Scale?
To measure butter without measuring cups, you can use common household objects. For example, a stick of butter is equal to 1/2 cup, so you can cut it in half or use a tablespoon.
Can I Substitute Oil for Butter in a Recipe That Calls for a Stick of Butter?
Yes, you can substitute oil for butter in a recipe that calls for a stick of butter. However, keep in mind the different ratios and consider using measuring tools or these tips for measuring butter without tools.
How Can I Convert a Recipe That Uses Grams or Ounces of Butter to Cups?
To convert butter measurements in a recipe to cups, I would use a conversion chart or online tool. It’s important to accurately measure the butter to ensure the recipe turns out as intended.
Are There Any Tricks or Hacks for Easily Measuring a Stick of Butter Without Having to Cut It?
I’ve got a great trick for measuring butter without cutting it! No need for tools. Just use the markings on the paper wrapper to divide the stick into tablespoons or teaspoons. Easy peasy!
Conclusion
In conclusion, it’s crucial to understand the measurement of butter when following recipes. Accurate measurements can make a significant difference in the outcome of your baked goods.
By using a butter conversion chart, you can easily determine how many cups are equivalent to one stick of butter. This knowledge allows you to convert recipes with butter measurements effortlessly and ensure the perfect balance of ingredients.
Remember to always measure butter properly to achieve consistent and delicious results in your baking endeavors.
From sneaky childhood butter licks to penning some of our most popular articles, Jamie’s journey with butter has been lifelong. His culinary background gives him a unique perspective, allowing him to craft mouthwatering articles that educate and tantalize equally. Jamie’s travel adventures revolve around finding the world’s best buttery treats when he isn’t writing.
Recipes & Culinary Uses
How to Make Butter Balls

Do you crave a dollop of flavor to enhance your dining experience? Look no further!
In this article, we will guide you through the magical process of creating delectable butter balls. With just a few simple ingredients and tools, you’ll be able to craft these little balls of creamy goodness in no time.
So, put on your apron, grab your whisk, and prepare to embark on a buttery adventure that will leave your taste buds dancing with delight.
Key Takeaways
- Experiment with different combinations of herbs and spices to create unique flavors in the butter balls.
- Chilling the butter mixture in the refrigerator helps firm it up and allows the flavors to meld together for a more harmonious taste.
- Roll the chilled butter mixture into small, bite-sized spheres and optionally roll them in finely chopped herbs, spices, or edible flowers for added flavor and presentation.
- Store the butter balls in an airtight container in the refrigerator and let them come to room temperature before serving to enhance their versatility in various dishes and spreads.
Gathering the Ingredients and Tools
First, you’ll need to gather the ingredients and tools necessary for making butter balls. To begin, gather 1 cup of softened butter, 1 ¼ cups of powdered sugar, 1 teaspoon of vanilla extract, and a pinch of salt. These ingredients will create a smooth and flavorful base for your butter balls.
Additionally, you’ll need a mixing bowl, an electric mixer, a spatula, and a baking sheet lined with parchment paper. If you’re feeling adventurous, you can also experiment with alternative ingredients such as almond or coconut extract to add a unique twist to your butter balls.
Once you have everything ready, it’s time to move on to preparing the butter mixture.
Preparing the Butter Mixture
Next, you’ll need to mix together the softened butter, your choice of herbs and spices, and a pinch of salt in a bowl. This step is crucial for adding flavor to your butter balls.
As you mix in the herbs and spices, imagine the burst of savory goodness they will bring to each bite. Experiment with different combinations like garlic and rosemary, or perhaps a hint of lemon zest and thyme.
Once everything is well incorporated, cover the bowl with plastic wrap and place it in the refrigerator to chill. This will help the butter mixture firm up, making it easier to shape into balls later on. The chilling process also allows the flavors to meld together, resulting in a more harmonious taste.
Get ready to elevate your butter balls to a whole new level of deliciousness.
Shaping the Butter Balls
Now it’s time to take the chilled butter mixture and roll it into small, bite-sized spheres. Shaping butter balls requires some techniques to achieve the perfect form.
Start by scooping a small amount of the butter mixture with a spoon or a melon baller. Then, gently roll it between your palms, applying light pressure to create a smooth and round shape.
For a more decorative touch, you can roll the butter balls in finely chopped herbs, spices, or even edible flowers. Arrange them on a serving plate, or place them in a decorative butter dish for a stunning presentation.
These butter balls can be a delightful addition to a cheese platter or served alongside warm bread.
Now, let’s move on to the next step – adding flavors and variations to your butter balls.
Adding Flavors and Variations
To enhance the taste and create unique variations, you can experiment with different ingredients and seasonings for your butter balls. By adding different flavors, you can elevate your butter balls to a whole new level. Here are some ideas to get you started:
Flavor | Ingredients | Creative Uses |
---|---|---|
Garlic and Herb | Garlic, parsley, thyme | Spread on bread or use in pasta dishes |
Citrus | Lemon or orange zest | Use in baking or melt over grilled fish |
Spicy | Chili flakes, paprika | Add a kick to roasted vegetables or steaks |
Sweet | Honey, cinnamon | Delicious on pancakes or toast |
There are endless possibilities when it comes to flavored butter balls. Get creative and experiment with different combinations to find your favorites. Once you have made your butter balls, it’s time to move on to storing and serving them.
TRANSITION: Now that you have created your delicious flavored butter balls, let’s talk about the best way to store and serve them.
Storing and Serving the Butter Balls
When it comes to storing and serving your flavorful creations, remember to keep your butter balls chilled in an airtight container to maintain their freshness. Storing butter balls properly is essential to preserve their taste and texture.
After shaping your butter into small balls, place them in the refrigerator for at least an hour to firm up. Once chilled, transfer the butter balls to an airtight container to prevent them from absorbing any odors or flavors from the fridge. This will ensure that your butter balls stay fresh and delicious.
When it’s time to serve, take out the desired amount and let them come to room temperature for a few minutes. Butter balls are versatile and can be used in various ways – spread them on toast, melt them on steamed vegetables, or use them to enhance the flavor of your favorite dishes. Get creative and enjoy the rich, creamy goodness of your homemade butter balls!
Conclusion
So there you have it, a step-by-step guide on how to make butter balls.
Now that you know the secrets to creating these delectable delights, you can impress your friends and family with your culinary skills.
Imagine the look on their faces as they bite into these creamy, flavorful bites of heaven.
The possibilities are endless when it comes to adding your own unique twist to the recipe.
So go ahead, gather your ingredients and tools, and embark on this buttery adventure.
Get ready to indulge in the buttery goodness that awaits!
Diana’s meticulous nature and editorial prowess set the gold standard for our content. With over a decade in the culinary and publishing industries, her guidance ensures that every article perfectly blends information and entertainment. A culinary experimenter, Diana loves whipping up new butter-based concoctions in her kitchen.
Recipes & Culinary Uses
How to Make Brownies With Weed Butter

Hey there, fellow baking enthusiasts! Ever wondered how to take your brownie recipe to a whole new level? Well, I’ve got a little secret ingredient that’ll surely elevate your baking game: weed butter.
Now, before you start raising eyebrows, let me assure you that this article is all about responsible and informed baking. I’ll guide you through the process of making your very own batch of deliciously potent weed brownies.
So, get ready to embark on a mouthwatering journey that combines the best of baking and cannabis. Let’s dive in!
Key Takeaways
- Different weed strains have different effects, so choose a balanced strain with a combination of THC and CBD for making weed butter.
- Decarboxylate cannabis in the oven to activate THC before making weed butter.
- Use proper dosing techniques and start with a lower dose to avoid overconsumption and unpleasant side effects.
- Store weed brownies properly in a cool, dark place and consume within a week for optimal freshness and potency.
Selecting the Right Strain for Weed Butter
To make the best brownies with weed butter, you’ll need to choose the right strain of cannabis. When it comes to selecting the best cannabis strain for edibles, it’s important to understand the effects that different weed strains can have.
Some strains are known for their uplifting and energizing effects, while others are more relaxing and calming. For edibles, you’ll want to choose a strain that has a balanced combination of THC and CBD. THC is responsible for the psychoactive effects, while CBD provides a more calming and therapeutic experience. Finding the right balance will ensure that your brownies have the desired effects.
Now that you know the importance of choosing the right strain, let’s move on to making weed butter from scratch.
Making Weed Butter From Scratch
First, you’ll need to gather the necessary ingredients for making weed butter from scratch. To make weed butter, you’ll need unsalted butter, ground cannabis, and water. Start by decarboxylating your cannabis in the oven to activate the THC.
Next, melt the butter and add the ground cannabis. Simmer the mixture on low heat for a few hours, stirring occasionally. The alternative method of making weed-infused butter involves using a slow cooker, which can simplify the process.
The benefits of using weed butter in other recipes are numerous. Not only does it add a unique flavor to your dishes, but it also allows for a more controlled and precise dosage of cannabis.
Once the butter has cooled, strain out the plant matter, and you’re left with homemade weed butter ready to be used in all sorts of delicious recipes.
Infusing Weed Butter Into Your Brownie Mix
Once you’ve infused your homemade weed butter into your brownie mix, the rich and potent flavors will elevate your brownies to a whole new level of deliciousness. Infusing weed butter into your brownie mix is a simple and effective way to create alternative edibles that pack a punch.
Here are three infusing techniques to help you make the most of your weed butter brownies:
-
Double Boiler Method: Place a heatproof bowl over a pot of simmering water, and melt your weed butter in the bowl. Once melted, add it to your brownie mix and stir well to ensure even distribution.
-
Stovetop Method: Melt your weed butter in a saucepan on low heat, stirring continuously to prevent burning. Once melted, add it to your brownie mix and mix thoroughly.
-
Microwave Method: Melt your weed butter in a microwave-safe bowl, heating in short bursts and stirring in between. Once melted, add it to your brownie mix and mix well.
With these infusing techniques, you can create delectable weed butter brownies that are sure to impress. Enjoy responsibly!
Baking Perfectly Potent Weed Brownies
For perfectly potent weed brownies, ensure you mix the infused butter thoroughly into the brownie batter. This step is crucial to evenly distribute the cannabis throughout the mixture, ensuring each bite is infused with the desired dose.
When it comes to dosing techniques, it’s important to note that the potency of your brownies will depend on the strength of your infused butter. To control the dosage, start by calculating the total amount of THC in your butter and divide it by the number of servings. This will give you an idea of how much THC is in each brownie.
If you’re looking for alternative cannabis-infused desserts, consider trying recipes like cannabis-infused cookies, cakes, or even ice cream. Just remember to adjust the dosage accordingly and always label your edibles clearly.
Happy baking!
Dos and Don’ts of Dosing Weed Brownies
When it comes to making weed brownies, proper dosage of weed butter is crucial. Overconsumption can lead to unpleasant experiences, so it’s important to know how much weed butter to use for the desired effect.
To ensure consistent potency, there are a few tips to keep in mind. First, use a reliable recipe that provides specific instructions on the amount of weed butter needed. This will help you avoid using too much or too little.
Second, properly measure the weed butter. Use a kitchen scale to weigh the butter accurately, as eyeballing it can result in inaccurate dosing. This step is crucial for achieving the desired effect and avoiding any potential negative experiences.
Proper Weed Butter Dosage
To determine the proper dosage of weed butter for your brownies, it’s essential to consider the potency and desired effects. Here are three important things to consider:
-
Weed butter infusion methods: The potency of your weed butter depends on how you infuse it. Common methods include using a stovetop, slow cooker, or a specialized cannabis-infused butter machine. Each method may result in varying levels of THC extraction, so it’s important to choose a method that suits your desired potency.
-
Calculating THC content: To accurately calculate the THC content in your weed butter, you need to know the percentage of THC in your starting cannabis material. This information can usually be found on the packaging of your cannabis product. From there, you can use a simple formula to determine the approximate THC content in your infused butter.
-
Desired effects: Understanding your desired effects is crucial in determining the proper dosage of weed butter. If you’re a beginner or have a low tolerance, it’s recommended to start with a lower dose and gradually increase as needed. It’s important to remember that the effects of edibles can take longer to kick in and can be more potent, so patience is key.
Avoid Overconsumption Risks
Understanding the potential risks of overconsumption is crucial in ensuring a safe and enjoyable experience with cannabis-infused edibles. While edibles can provide a longer-lasting and more intense high compared to smoking or vaping, it’s important to consume them responsibly.
Overconsumption can lead to unpleasant side effects such as anxiety, paranoia, and even hallucinations. To avoid these risks, it is recommended to start with a low dose, especially if you are a beginner. Give your body enough time to process the edible before consuming more.
It’s also important to be aware of the potency of the edible you are consuming, as different products can have varying levels of THC. By practicing responsible consumption practices and being aware of the risks, you can have a safe and enjoyable experience with cannabis-infused edibles.
Tips for Consistent Potency
When it comes to making weed butter brownies, maintaining consistent effects can be a challenge. However, there are a few tips that can help you adjust the potency levels and ensure a consistent experience every time. Here’s what you need to know:
-
Use precise measurements: To achieve consistent potency, it’s crucial to measure your ingredients accurately. This applies not only to the amount of weed butter you use but also to the other ingredients in your recipe.
-
Test potency before baking: Before adding the weed butter to your brownie mix, try a small amount to gauge its potency. This will give you an idea of how strong the final product will be and allow you to adjust the amount of weed butter accordingly.
-
Keep notes: Maintaining a record of your recipes and the effects they produce can help you fine-tune the potency levels over time. By noting the amount of weed butter used and the resulting effects, you can make adjustments to achieve your desired experience.
Following these tips will help you create consistently potent weed butter brownies that deliver the desired effects every time.
Storing and Enjoying Your Weed Brownies
Once they’ve cooled, you can store your weed brownies in an airtight container to keep them fresh. Proper storage techniques are essential to maintain the potency and flavor of your infused brownies. Here are some tips for storing and enjoying your weed brownies:
Technique | Description |
---|---|
Store in a cool, dark place | Heat and light can degrade the potency of the cannabinoids in your brownies. Keep them away from direct sunlight or high temperatures. |
Separate from regular brownies | To avoid confusion or accidental consumption, it’s best to store your weed brownies separately from regular ones. Label the container clearly. |
Use within a week | Although the brownies can last longer, it’s recommended to consume them within a week to ensure optimal freshness and potency. |
Freeze for long-term storage | If you have a large batch or want to save them for later, you can freeze your weed brownies in an airtight container. Thaw them before serving. |
Best serving methods | Enjoy your weed brownies by cutting them into small, manageable pieces. Start with a low dosage and wait at least an hour before consuming more. Remember to always store them securely and out of reach of children or pets. |
Frequently Asked Questions
Can I Use Any Strain of Weed to Make Weed Butter, or Are There Specific Strains That Work Best?
Any strain of weed can be used to make weed butter, but there are specific strains that work best for making edibles. When infusing weed butter, consider the potency, flavor profile, and desired effects of the strain.
How Long Does It Take to Make Weed Butter From Scratch?
To make weed butter from scratch, it typically takes a few hours. After infusing the butter with cannabis, you can use it to enhance various recipes. Remember to store the weed butter properly to maintain its potency.
Can I Use Store-Bought Brownie Mix or Do I Have to Make the Mix From Scratch?
I can use store-bought brownie mix for weed brownies, but it’s important to properly dose them. The homemade mix gives more control over the ingredients, but store-bought is convenient.
How Do I Know if My Weed Brownies Are Potent Enough?
To properly dose weed brownies, start by using a reliable recipe and accurately measuring the amount of weed butter. Test the potency by starting with a small piece and waiting for the effects. Adjust the dosage accordingly for future batches.
How Long Can I Store My Weed Brownies Before They Go Bad?
The shelf life of weed brownies depends on how they are stored. To ensure the best quality, store them in an airtight container in a cool, dark place. They can last up to a week, but it’s best to consume them within a few days for optimal freshness.
Conclusion
In conclusion, making brownies with weed butter is a fun and delicious way to enjoy the benefits of marijuana. By selecting the right strain for your weed butter and infusing it into your brownie mix, you can create perfectly potent treats.
However, it is important to be mindful of dosing to avoid any unwanted effects. Did you know that a recent survey found that 42% of cannabis users prefer edibles as their preferred method of consumption?
So why not try making your own weed brownies and join the growing number of people who enjoy this tasty and alternative way of experiencing the effects of marijuana.
Sunny’s articles radiate enthusiasm, much like her sunny disposition. As our resident “Butter Geek”, she delves deep into the latest butter trends, ensuring our readers are always in the know. Beyond her writing, Sunny’s passion lies in exploring vegan butter alternatives and hosting butter-tasting soirées.
Recipes & Culinary Uses
How to Make Brown Sugar Butter

Deliciously decadent and delightfully creamy, making homemade brown sugar butter is a culinary endeavor that is both easy and rewarding. With just a few simple ingredients and a touch of creativity, you can whip up a batch of this delectable spread that will elevate any dish it graces.
In this article, I will guide you through each step of the process, from selecting the perfect ingredients to achieving the ideal texture. Get ready to embark on a buttery journey like no other!
Key Takeaways
- Consider coconut sugar, maple syrup, and honey as substitutes for brown sugar
- Proper ingredient ratios are crucial for consistency and flavor
- Spices like cinnamon and nutmeg can elevate the taste
- Thoroughly cream together softened butter and brown sugar
Choosing the Right Ingredients
To make brown sugar butter, you’ll want to start by choosing the right ingredients.
When it comes to brown sugar substitutes and alternative sweeteners, there are a few options to consider. One popular substitute for brown sugar is coconut sugar. It has a similar flavor profile and can be used in equal amounts as a replacement.
Another alternative sweetener is maple syrup, which adds a rich and distinct taste to the butter. Honey is also a great option, with its natural sweetness and smooth texture.
Depending on your preference, you can experiment with different combinations of these substitutes to find the perfect balance of flavor. Remember to carefully measure the amount of substitute you use to ensure the right consistency and taste in your brown sugar butter.
Measuring and Mixing the Ingredients
When it comes to baking, getting the right ingredient ratios is crucial for achieving the perfect consistency and flavor in your finished product.
In this discussion, I will delve into the importance of proper ingredient ratios and how they can affect the outcome of your recipe.
Additionally, I will explore various mixing techniques that can help you achieve consistency in your batter or dough, ensuring that every bite is just as delicious as the last.
Proper Ingredient Ratios
The proper ingredient ratios for making brown sugar butter are essential for achieving the perfect balance of sweetness and richness. When it comes to ingredient substitutions, it’s important to note that while you can use white sugar instead of brown sugar, it will alter the flavor and color of the butter.
To troubleshoot common issues, such as the butter being too sweet or not sweet enough, you can adjust the amount of brown sugar used. If the butter is too sweet, try using less brown sugar or adding a pinch of salt to balance out the sweetness. On the other hand, if the butter is not sweet enough, you can increase the amount of brown sugar or add a teaspoon of vanilla extract for extra flavor.
Mixing Techniques for Consistency
For a consistent texture, try gently folding the mixture instead of vigorously stirring it.
When making brown sugar butter, the whisking method and temperature control are crucial for achieving the desired texture.
Begin by whisking the softened butter until it becomes smooth and creamy. This can be done using an electric mixer or by hand with a whisk.
Next, gradually add the brown sugar, ensuring that it is fully incorporated before moving on. Whisking slowly and evenly will prevent clumps from forming and create a smooth consistency.
Additionally, maintaining the temperature of the butter throughout the process is essential. If the butter becomes too warm, it can cause the mixture to separate or become greasy. To avoid this, work with softened butter at room temperature and avoid overheating.
Adding Flavor Enhancements
When it comes to adding flavor to a dish, spices are my go-to choice. They have the power to elevate the taste and take a recipe from ordinary to extraordinary.
In addition to spices, I also love infusing my dishes with aromatic herbs, like rosemary or thyme, to impart a subtle yet distinctive flavor.
Together, these flavor enhancements can transform a simple meal into a culinary masterpiece.
Spices for Added Taste
Spice up your brown sugar butter by adding a pinch of cinnamon or a dash of nutmeg for added taste. These warm and comforting spices will elevate the flavor profile of your butter, giving it a delightful twist.
But why stop there? You can also experiment with other aromatic spices like vanilla and cardamom to take your brown sugar butter to the next level. The combination of these flavors will create a harmonious blend that is both sweet and fragrant.
Whether you’re spreading it on toast, using it in baking, or simply enjoying it on its own, this spiced brown sugar butter will add a burst of flavor to any dish.
Now, let’s explore how infusing it with aromatic herbs can take it even further.
Infusing With Aromatic Herbs
After exploring the use of spices to enhance the taste of brown sugar butter, I decided to take it a step further and infuse it with aromatic herbs. Infusing the butter with citrus and experimenting with different herbs can elevate its flavor profile and add a refreshing twist. To help you understand the possibilities, I’ve created a table to showcase some exciting herb and citrus combinations:
Citrus | Herbs | Flavor Profile |
---|---|---|
Lemon | Rosemary | Fresh, tangy, and herbaceous |
Orange | Thyme | Sweet, citrusy, and savory |
Lime | Basil | Zesty, bright, and aromatic |
Grapefruit | Mint | Tangy, refreshing, and cool |
Achieving the Perfect Texture
To achieve the perfect texture for your brown sugar butter, make sure you thoroughly cream together the softened butter and brown sugar. This step is crucial in creating a smooth and spreadable consistency.
Here are three tips to improve spreadability and enhance shelf life:
-
Gradually add the brown sugar to the softened butter while mixing. This ensures that the sugar is evenly distributed throughout the butter, resulting in a smooth texture.
-
Beat the mixture on medium-high speed for a few minutes until it becomes light and fluffy. This incorporates air into the butter, making it easier to spread.
-
Store the brown sugar butter in an airtight container in the refrigerator. This helps to preserve its freshness and extend its shelf life.
Storing and Preserving Brown Sugar Butter
Now that you’ve achieved the perfect texture for your brown sugar butter, it’s important to know how to store and preserve it to ensure its freshness and extend its shelf life.
There are several techniques that can help you in this process.
First, transfer the butter into an airtight container, ensuring that there is no excess air inside. This will prevent oxidation and maintain its flavor.
Secondly, store the butter in the refrigerator, as the cool temperature will slow down the growth of bacteria and maintain its quality.
Lastly, if you want to extend the shelf life even further, you can consider freezing the brown sugar butter. Simply wrap it tightly in plastic wrap or place it in a freezer-safe container.
Following these preserving techniques will help you enjoy your delicious brown sugar butter for a longer period of time.
Creative Ways to Use Brown Sugar Butter
If you’re feeling adventurous in the kitchen, try incorporating this delectable spread into your favorite baked goods or breakfast recipes for a unique and irresistible twist.
Here are three creative ways to use brown sugar butter:
-
Baked Goods: Add a dollop of brown sugar butter to your cookie dough or cake batter for an extra burst of flavor. The rich and caramel-like taste of the butter will complement the sweetness of your treats, making them even more indulgent.
-
Breakfast Delights: Spread brown sugar butter on your toast, pancakes, or waffles for a sweet and creamy topping. The warm and buttery notes of the spread will melt into your breakfast, adding a delightful richness to every bite.
-
Savory Dishes: Don’t limit brown sugar butter to just sweet treats! Use it as a glaze for roasted vegetables or grilled meats. The hint of sweetness from the brown sugar will balance out the savory flavors, creating a harmonious and mouthwatering dish.
Frequently Asked Questions
Can I Use Salted Butter Instead of Unsalted Butter in This Recipe?
Yes, you can use salted butter instead of unsalted butter in this recipe. However, it will impact the taste as salted butter already has salt in it, which may make the brown sugar butter slightly saltier.
Can I Use Coconut Sugar Instead of Brown Sugar?
Yes, you can use coconut sugar instead of brown sugar. It will give the brown sugar butter a slightly different taste, with a hint of coconut flavor.
Can I Substitute Another Type of Sweetener, Like Honey or Maple Syrup, for the Brown Sugar?
Yes, you can substitute honey or maple syrup for the brown sugar in brown sugar butter. However, keep in mind that the flavor profile will change. Honey adds a floral sweetness, while maple syrup adds a rich, caramel-like taste.
How Long Can I Store Brown Sugar Butter in the Refrigerator?
The shelf life of brown sugar butter stored in the refrigerator varies, but it typically lasts for several weeks. To ensure proper storage, keep it in an airtight container or wrap it tightly in plastic wrap.
Can I Freeze Brown Sugar Butter for Long-Term Storage?
Yes, you can freeze brown sugar butter for long-term storage. To do so, put it in an airtight container or freezer bag. This freezing technique will preserve its flavor and texture.
Conclusion
In conclusion, making brown sugar butter is a simple and delicious way to add flavor to your dishes. By using the right ingredients, measuring and mixing them properly, and adding flavor enhancements, you can achieve the perfect texture and taste.
One interesting statistic to consider is that the average American consumes about 23 pounds of butter per year, showing just how popular this ingredient is in our diets.
So why not elevate your recipes with the rich and sweet taste of homemade brown sugar butter? Give it a try and enjoy the delightful results!
Sunny’s articles radiate enthusiasm, much like her sunny disposition. As our resident “Butter Geek”, she delves deep into the latest butter trends, ensuring our readers are always in the know. Beyond her writing, Sunny’s passion lies in exploring vegan butter alternatives and hosting butter-tasting soirées.
-
Recipes & Culinary Uses3 weeks ago
What Can I Make With Butter Milk
-
Butter Tips and Tricks3 weeks ago
How Much Salt in 1/2 Cup Salted Butter
-
Recipes & Culinary Uses3 weeks ago
What Goes Good With Butter Beans
-
Recipes & Culinary Uses3 weeks ago
How to Season Popcorn Without Butter
-
Recipes & Culinary Uses3 weeks ago
How to Scramble Eggs Without Butter or Oil
-
Butter Basics3 weeks ago
How to Cut Butter Lettuce
-
Recipes & Culinary Uses3 weeks ago
How to Make Pecan Butter
-
Specialized Equipment3 weeks ago
Easy Butter Infuser Machine