Connect with us

Butter Basics

How to Quickly Soften Butter with Glass Method

Published

on

An image showcasing a glass bowl filled with cold, hard butter cubes immersed in a bath of warm water

As a baking enthusiast, I know how frustrating it can be to need softened butter in a hurry. But fear not! I’ve discovered a clever technique for quickly softening butter using a glass.

In this article, I will guide you through the science behind this method, the right glass container to use, and a step-by-step guide for achieving perfectly softened butter. Say goodbye to waiting and hello to baking bliss!

Key Takeaways

  • Softening butter with glass is an effective and traditional method that has been used for centuries.
  • Glass efficiently conducts heat and transfers it to the butter, leading to faster and more even softening.
  • Using glass containers for softening butter is a sustainable choice that reduces the need for single-use plastics.
  • Glassware is versatile, easy to clean, non-reactive, and preserves the flavor and quality of the butter.

The Science Behind Softening Butter With Glass

The science behind softening butter with glass is fascinating. When butter is cold, its structure consists of fat molecules tightly packed together, making it hard and difficult to spread. However, when exposed to gentle heat, the fat molecules start to loosen up and become more pliable.

This is where glass comes in. Glass has the unique property of efficiently conducting heat. When a piece of glass is placed on top of cold butter, it absorbs heat from the surrounding environment and transfers it to the butter. As a result, the butter gradually warms up and softens, making it easier to spread.

Advertisement

This method has been used for centuries, with historical records dating back to ancient Egypt. The combination of the chemistry of butter softening and the heat-conducting properties of glass makes this technique an effective and convenient way to soften butter quickly.

Choosing the Right Glass Container for Softening Butter

To choose the right glass container for this, you’ll want to consider its size and shape.

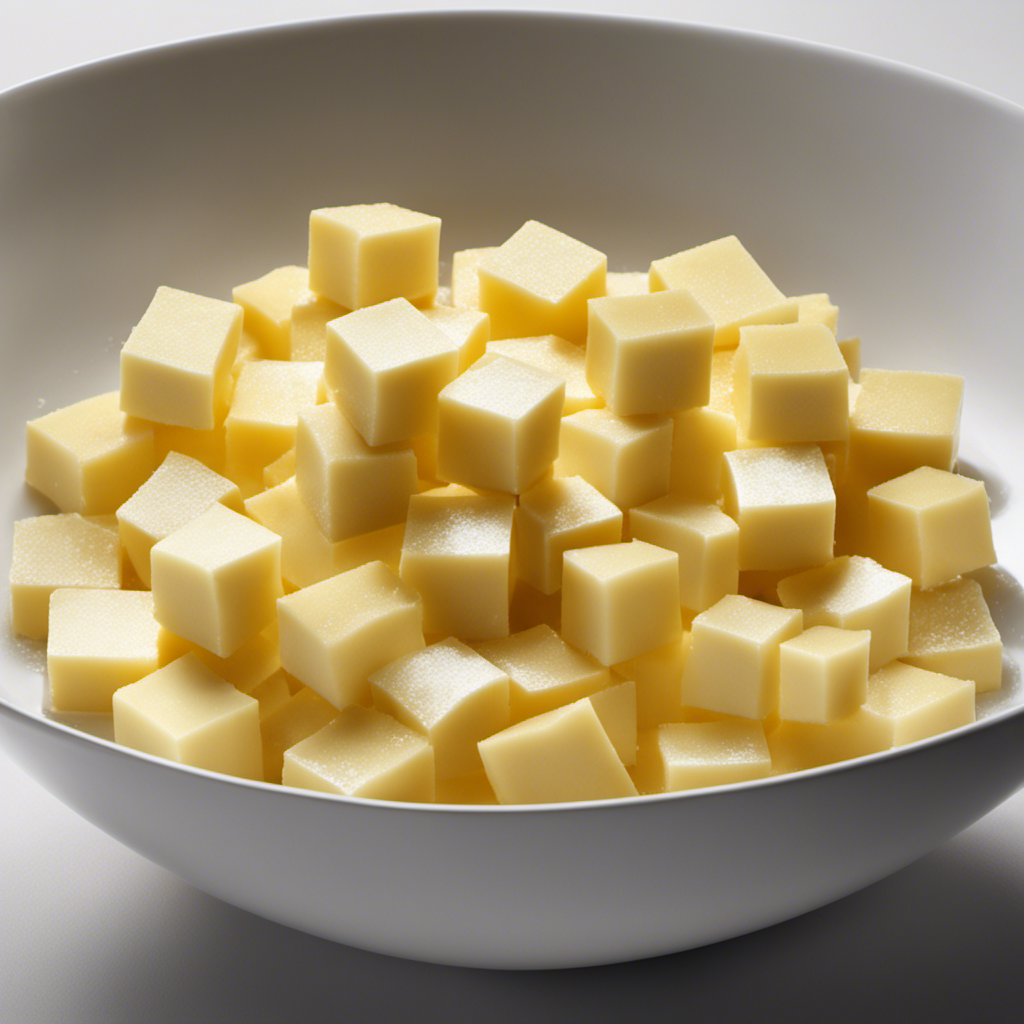
When it comes to softening butter with glass, selecting the appropriate container is essential. The size of the container should be large enough to accommodate the amount of butter you need to soften, while leaving enough room for the butter to expand as it warms up. The shape of the container is also important, as a wide and shallow dish will allow the butter to soften more evenly and quickly compared to a tall and narrow container.

Using glass containers for softening butter has several benefits. Glass is non-reactive, meaning it won’t interact with the butter and alter its taste or quality. Glass also retains heat well, helping the butter soften faster and more evenly.

Now that you know the importance of choosing the right glass container, let’s move on to the step-by-step guide to softening butter with glass.

Advertisement

Step-By-Step Guide to Softening Butter With Glass

When it comes to softening butter, there are a few methods to choose from. In this discussion, I will compare the use of glass versus the microwave for achieving the perfect softened butter.

Additionally, I will share a time-saving butter hack that will make your baking endeavors a breeze.

Glass Vs. Microwave

Did you know that using glass is a safer option than using a microwave to soften butter quickly? Not only does it eliminate the risk of hot spots and potential explosions, but it also offers health benefits. Here are five reasons why using glass is the better choice:

Advertisement
  • Glass is non-toxic and doesn’t release harmful chemicals when heated.
  • It retains heat evenly, ensuring a uniform softening process without overcooking.
  • Glass is easy to clean and doesn’t absorb odors or flavors like plastic containers.
  • It is a sustainable and eco-friendly option, as glass is 100% recyclable.
  • Glass containers can be used for multiple purposes, reducing the need for single-use plastics.

Time-Saving Butter Hack

If you’re looking for a time-saving hack in the kitchen, try using a microwave-safe dish. When it comes to softening butter quickly, choosing the right container is essential. One of the best options is using a glass dish, which offers several benefits.

Glass is microwave-safe and heats more evenly than plastic or ceramic containers. This ensures that the butter softens uniformly and prevents any hot spots. Glass also retains heat for a longer period, allowing the butter to stay soft and spreadable for a longer time.

Additionally, glass is easy to clean and doesn’t absorb odors or flavors like plastic containers can. By using a glass dish, you can save time and achieve perfectly softened butter in no time.

Now, let’s explore the other benefits of using glass in the kitchen.

Benefits of Using Glass

When it comes to softening butter quickly, using glassware has its advantages. Not only is glassware durable, but it also offers a range of benefits that make it an excellent choice for this task.

Here are a few reasons why glassware is a great option:

Advertisement
  • Heat distribution: Glassware heats up quickly and evenly, allowing the butter to soften uniformly.
  • Versatility: Glassware can be used in various kitchen appliances such as microwaves and ovens, making it a versatile option for softening butter.
  • Easy to clean: Glassware is generally dishwasher-safe, making it effortless to clean up after use.
  • Non-reactive: Glassware does not react with the butter or any other ingredients, ensuring that the flavor and quality of the butter remain intact.
  • Eco-friendly: Glassware is a sustainable choice as it is reusable and does not contribute to single-use waste.

Preparing the Butter for Quick Softening

When it comes to softening butter quickly, there are two main methods that I always rely on: the glass bowl method and the microwave method.

The glass bowl method involves placing the butter in a glass bowl and covering it with a glass lid or plate, allowing the butter to soften at room temperature.

On the other hand, the microwave method involves heating the butter in short bursts in the microwave until it reaches the desired softness.

Both methods have their pros and cons, and in this discussion, I will delve into the details and compare the two to help you decide which method is best for you.
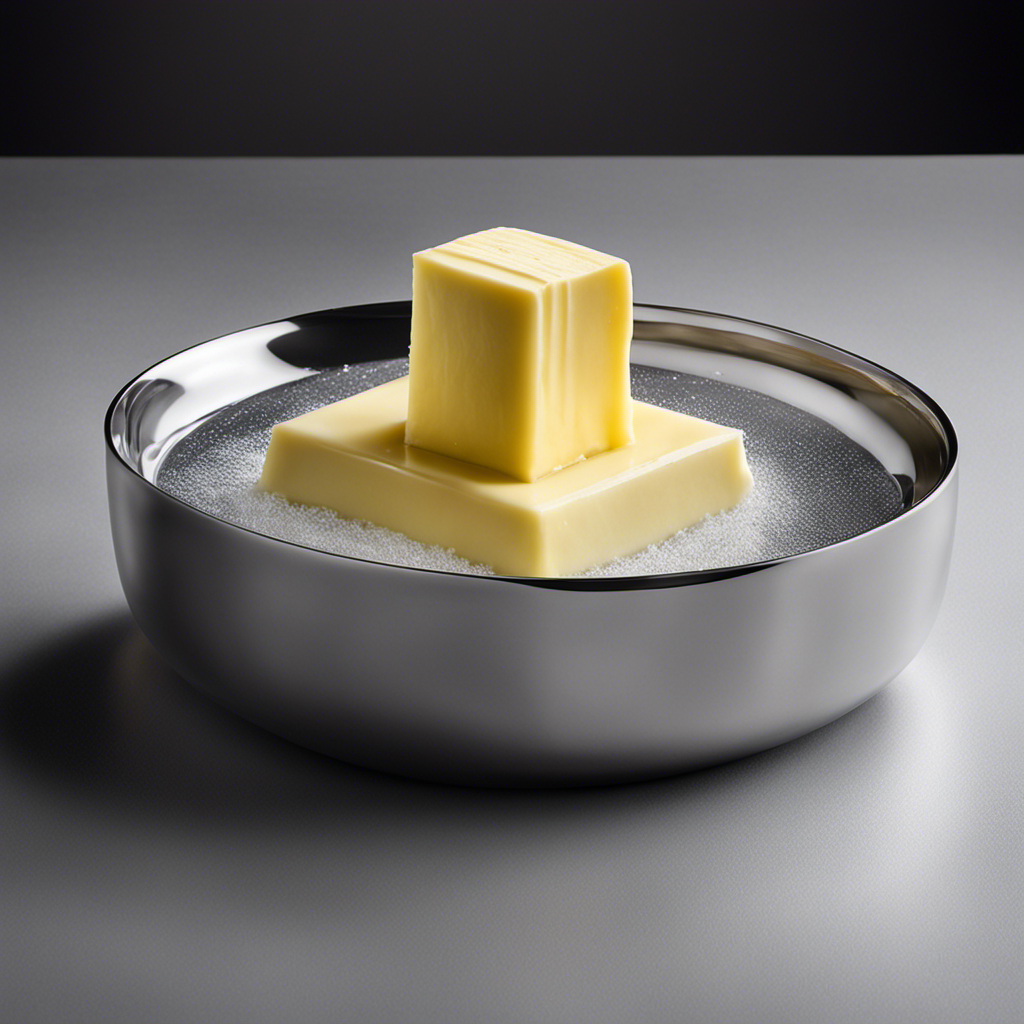
Glass Bowl Method

To soften butter quickly with glass, place the butter in a glass bowl and microwave it for a few seconds. The glass bowl method has several advantages for quick butter softening:

  • Even Heating: Glass bowls distribute heat evenly, ensuring that the butter softens uniformly.
  • No Splattering: Unlike plastic containers, glass bowls prevent splattering and messes in the microwave.
  • Non-reactive: Glass is non-reactive, meaning it won’t absorb any odors or flavors from the butter.
  • Easy to Clean: Glass bowls are dishwasher safe and easy to clean after use.
  • Versatile: Glass bowls can be used for various other cooking and baking purposes, making them a multi-functional kitchen tool.

Using a glass bowl is a quick and efficient way to soften butter, saving time and effort in the kitchen. However, another option is to use the microwave directly, which will be discussed in the next section.

Microwave Vs Glass

If you’re deciding between the microwave and a glass bowl, consider the pros and cons of each method.

Advertisement

When it comes to softening butter, the microwave is a quick and convenient option. However, there are some safety concerns to keep in mind. Microwaving butter can cause it to melt unevenly, leading to hot spots that can burn your hands or create a mess in your microwave. Additionally, if the butter is wrapped in foil or stored in a metal container, it can cause sparks or even a fire.

On the other hand, using a glass bowl allows for more controlled softening. You can place the butter in the bowl and let it sit at room temperature for a while until it reaches your desired consistency. This method eliminates the risk of uneven melting or potential microwave accidents.

If you’re looking for alternative butter softening methods, using a glass bowl is a safe and effective option.

Using Room Temperature Glass for Better Results

Simply place your room temperature glass over the butter for better results. When it comes to softening butter, choosing the appropriate glassware is key. Here are some benefits of using room temperature glass:

  • Evenly distributes heat: Glass retains and distributes heat evenly, allowing the butter to soften uniformly.
  • Avoids overheating: Unlike the microwave, glass doesn’t generate excessive heat, preventing the butter from melting or becoming too soft.
  • Preserves flavor and texture: Room temperature glass gently softens the butter without altering its taste or texture.
  • Versatility: Glassware can be used for various quantities of butter, making it suitable for different recipes.
  • Eco-friendly: Using glass instead of plastic or disposable containers reduces waste and is better for the environment.

Time-Saving Tips for Softening Butter With Glass

I love using the glass bowl method to quickly soften butter. It’s a time-saving technique that has numerous benefits.

Not only does using glass help distribute heat evenly, but it also allows the butter to soften at a faster rate.

Advertisement

Glass Bowl Method

To soften butter quickly using the glass bowl method, place the cold butter in a microwave-safe glass bowl. It’s a simple and efficient way to achieve soft butter in no time.

Here are some alternative methods and butter softening hacks for when you don’t have a glass bowl on hand:

  • Use a ceramic dish: Similar to a glass bowl, a ceramic dish can be heated in the microwave to soften butter effectively.

  • Grate the butter: If you have a grater, you can grate the cold butter into small pieces, which will soften much faster.

  • Place it near a warm appliance: Put the butter near a warm oven or stovetop to gently soften it over time.

  • Use a warm water bath: Fill a bowl with warm water and place the cold butter in a sealable plastic bag. Submerge the bag in the warm water, and the butter will soften gradually.

  • Slice it thinly: Cut the cold butter into thin slices and leave it at room temperature. The increased surface area will speed up the softening process.

These glass bowl alternatives and butter softening hacks can come in handy when you need softened butter quickly. Experiment with these methods to find the one that works best for you.

Benefits of Using Glass

One of the advantages of using a glass bowl method for softening butter is that it can be done quickly and efficiently. Using a glass bowl allows for better control over the softening process compared to using a microwave. The glass bowl evenly distributes the heat, ensuring that the butter softens uniformly without any hot spots. Additionally, glass is a non-reactive material, which means that it won’t interact with the butter and alter its taste or quality.

In contrast, microwaving butter can sometimes result in uneven softening, with the edges melting while the center remains solid. Moreover, microwaving can cause the butter to splatter or become partially melted, making it difficult to achieve the desired softness.

Advertisement

Overall, using a glass bowl for butter softening offers greater precision and better results compared to the microwave method. This is especially beneficial when recipes require softened butter to be incorporated seamlessly.

Moving on to the next section, let’s explore a quick and effective method for softening butter.

Quick Butter Softening

When using the microwave to soften butter, it’s important to be cautious of potential uneven melting and splattering. However, there is a quick and efficient method to soften butter without any mess. Here’s how you can do it:

  • Cut the butter into smaller pieces to promote even and faster melting.
  • Place the butter in a microwave-safe glass dish.
  • Place a microwave-safe glass of water next to the butter to absorb excess energy and prevent splattering.
  • Microwave the butter in short intervals, around 5-10 seconds at a time, checking after each interval to prevent over-melting.
  • Rotate the dish and stir the butter occasionally to ensure even softening.

By using this method, you can enjoy the benefits of quick softening while avoiding any potential mishaps.

Now, let’s move on to the next section to learn about avoiding common mistakes when softening butter with glass.

Avoiding Common Mistakes When Softening Butter With Glass

Avoiding common mistakes when softening butter with glass can help ensure a smooth and successful process. When it comes to softening butter, room temperature is key. It is important to allow the butter to naturally come to room temperature before attempting to soften it with a glass. This ensures that the butter will soften evenly and prevent any unwanted melting.

Advertisement

To achieve this, simply take the butter out of the fridge and let it sit on the counter for about 30 minutes. Once the butter is at room temperature, place it in a glass bowl and cover it with a glass plate or lid. This method allows the butter to soften gently without melting.

Now, let’s explore alternative methods for softening butter in a pinch.

Alternative Methods for Softening Butter in a Pinch

If you’re in a pinch, there are other ways to quickly soften butter without using glass. Here are some time-saving methods and alternative tools to consider:

  • Microwave method: Cut the butter into small pieces and microwave it for 10-second intervals, checking and stirring in between until it reaches the desired softness.

  • Grater method: Use a cheese grater to grate cold butter into fine shreds, which will soften faster at room temperature.

  • Rolling pin method: Place the cold butter between sheets of parchment paper and gently pound it with a rolling pin until it becomes pliable.

  • Warm water method: Fill a bowl with warm water and place the wrapped butter on top, ensuring the water doesn’t touch the butter. Wait for a few minutes until it softens.

  • Food processor method: Cut the butter into small cubes and pulse in a food processor until it softens.

These alternative methods can save you time when you need softened butter quickly, providing you with flexibility and options beyond using glass.

Maximizing the Efficiency of Butter Softening With Glass

To maximize efficiency, you can use a microwave-safe glass container for a faster butter softening process. When it comes to softening butter, using a glass container has its advantages over plastic.

Advertisement

Glass is a better conductor of heat, allowing the butter to soften more quickly and evenly. Unlike plastic, glass does not leach any harmful chemicals into the butter, ensuring that it remains safe for consumption.

Softening butter at room temperature has its own benefits. It makes the butter easier to spread, resulting in smoother and more even coverage on bread or toast. Additionally, room temperature butter blends more easily into batters and doughs, resulting in a better texture and consistency in baked goods.

Storing Softened Butter in Glass Containers

When storing your softened butter, you’ll find that glass containers are ideal for preserving its freshness and flavor. Glass containers offer several advantages over other storage options, such as plastic or metal containers.

Here are five reasons why glass containers are great for storing butter:

  • Glass containers are non-reactive, so they won’t absorb any odors or flavors from the butter.
  • Glass containers provide airtight seals, preventing air from entering and affecting the butter’s quality.
  • Glass containers are transparent, allowing you to easily see the amount of butter left.
  • Glass containers can be easily cleaned and sanitized, ensuring the butter stays hygienic.
  • Glass containers are durable and long-lasting, making them a reliable choice for butter storage.

By using glass containers to store your softened butter, you can ensure that it remains fresh and flavorful for longer periods.

Now, let’s explore some common troubleshooting techniques for butter softening issues with glass containers.

Advertisement

Troubleshooting Butter Softening Issues With Glass

One way to address butter softening issues with glass containers is by adjusting the room temperature where the glass container is stored.

When I encounter problems with my butter not softening properly in a glass container, I find that choosing alternative methods can be quite helpful. For example, instead of relying solely on room temperature, I often place the glass container near a warm stove or in a slightly heated oven for a few minutes. This helps to soften the butter more quickly without compromising its texture.

Additionally, I have learned to avoid common mistakes such as microwaving the butter in a glass container, as it can cause uneven heating and lead to melted spots.

Frequently Asked Questions

Can I Use Any Type of Glass Container to Soften Butter Quickly?

I prefer using a glass container to quickly soften butter. It works well because the glass holds and transfers heat effectively. However, there are alternative methods like using a microwave or grating frozen butter.

How Long Does It Typically Take to Soften Butter Using the Glass Method?

Typically, it takes about 10-15 minutes to soften butter using the glass method. However, there are alternative methods for butter temperature control, such as grating the butter or using a microwave.

Advertisement

Can I Use a Microwave-Safe Glass Container to Soften Butter?

Yes, you can use a microwave-safe glass container to soften butter quickly. It’s important to note that using glass versus plastic may result in faster heating, but be cautious as glass can get hot.

Are There Any Health Risks Associated With Using Glass to Soften Butter?

Using glass to soften butter quickly is a sustainable choice, as it avoids the use of plastic or disposable materials. However, alternatives like leaving butter at room temperature or using a grater may also be effective.

Can I Reuse the Glass Container for Other Purposes After Softening Butter in It?

Yes, you can definitely reuse the glass container for other purposes after softening butter in it. There are numerous alternative uses for glass containers, such as storing leftovers, organizing small items, or even making homemade candles.

Conclusion

In conclusion, using glass to soften butter quickly is a simple and effective method. By following the step-by-step guide and choosing the right glass container, you can achieve perfectly softened butter in no time.

The science behind this technique is fascinating, and it allows you to have soft butter whenever you need it. So, why struggle with hard butter when you can easily soften it with glass?

Advertisement

Give it a try and experience the convenience for yourself.

Continue Reading
Advertisement

Butter Basics

What if You Buttered Up Your Life with “Butter”?

Published

on

By

An image of a slice of toast with melted butter, oozing with richness and flavor

Have you thought about the idea of making your own delicious and nutritious butter at home? Imagine being able to create that rich, creamy delicacy right in your own kitchen!

In this article, we will delve into the world of butter, exploring its various types and culinary uses. We will also uncover the science behind making perfect butter at home and dive into the fascinating history of this beloved ingredient.

Get ready to embark on a buttery adventure that will leave you craving for more.

Key Takeaways

  • Grass-fed butter is rich in essential vitamins and fatty acids, promoting healthy skin, bones, and immune system.
  • Homemade butter allows for control over ingredients, avoiding unhealthy additives or preservatives.
  • Flavored butter options and vegan alternatives offer diverse culinary exploration and cater to different dietary preferences.
  • Proper temperature during the butter-making process is crucial for achieving the desired consistency and yield.

The Health Benefits of Homemade Butter

If you make your own butter, you’ll enjoy the health benefits that come with it. One of the main benefits of grass-fed butter is its high nutrient content. Grass-fed cows produce milk that is rich in vitamins A, D, E, and K. These vitamins are essential for maintaining healthy skin, strong bones, and a properly functioning immune system.

Advertisement

Grass-fed butter also contains a healthy balance of omega-3 and omega-6 fatty acids, which are important for brain health and reducing inflammation in the body.

Additionally, making your own butter at home allows you to control the ingredients, giving you the freedom to create flavored butter using herbs, spices, or even fruits. This allows you to add extra flavor and nutrients to your dishes without relying on store-bought options that may contain unhealthy additives or preservatives.

Exploring Different Types of Butter

There are various types of butter available for exploration. When it comes to flavored butter, the options are endless. From savory garlic butter to sweet cinnamon butter, these variations add a burst of flavor to any dish.

Additionally, for those following a vegan lifestyle, there are plenty of vegan butter alternatives to choose from. Made from plant-based oils like coconut or olive, these spreads provide a similar creamy texture and taste. They are perfect for baking or spreading on toast.

Exploring different types of butter can be a fun and delicious journey, allowing you to elevate your meals and cater to different dietary preferences. So go ahead and indulge in the world of flavored butter and vegan alternatives to discover new and exciting flavors.

Advertisement

Butter as a Culinary Ingredient: Tips and Tricks

To enhance your culinary skills, try incorporating butter into your recipes using these helpful tips and tricks.

Butter is not only a rich and creamy ingredient, but it can also be used as a vegan alternative. For those who follow a plant-based diet, there are several substitutes available such as vegan butter or margarine made from plant oils. These alternatives can be used in baking, cooking, or spreading on toast.

Additionally, using flavored butter can elevate your dishes to a whole new level. Get creative with flavor combinations like garlic and herb butter for roasted vegetables or lemon and dill butter for grilled fish. The possibilities are endless, and flavored butter can add depth and complexity to your favorite recipes.

Advertisement

The Science Behind Making Perfect Butter at Home

Creating homemade butter is a fascinating process that involves churning cream until it separates into butter and buttermilk. The chemistry of churning butter is a delicate balance of fat and water molecules. Temperature plays a crucial role in butter making.

Here are some key points to consider:

  • Cream should be at a slightly warmer temperature, around 50-55°F, to ensure proper separation.
  • Churning at too low a temperature can result in a longer process and less yield.
  • Conversely, churning at too high a temperature can cause the butter to become greasy and not hold its shape well.
  • The ideal temperature range allows for the fat globules to coalesce and form a solid mass.
  • The process can be accelerated by using colder cream or a colder churning environment.

Understanding the chemistry and temperature requirements of butter making ensures a successful outcome.

Now, let’s uncover the history of butter: from ancient times to today.

Uncovering the History of Butter: From Ancient Times to Today

Advertisement

Let’s delve into the fascinating history of butter, from ancient times to today.

Butter has played a significant role in the cultural traditions of various regions around the world. In Europe, for example, butter has been a staple in cooking and baking for centuries, symbolizing richness and indulgence.

In India, ghee, a form of clarified butter, holds great cultural and religious significance and is used in traditional ceremonies and rituals.

The environmental impact of butter production, however, is a growing concern. The dairy industry contributes to greenhouse gas emissions and deforestation, as well as water pollution from runoff.

Sustainable practices, such as organic farming and reducing food waste, are being implemented to mitigate these effects.

Advertisement

It is crucial to balance the cultural importance of butter with sustainable production methods for a better future.

Frequently Asked Questions

How Many Calories Are in a Serving of Homemade Butter?

A serving of homemade butter typically contains around 100-120 calories. It is important to note that butter is high in saturated fat and should be consumed in moderation. However, it does provide some nutritional benefits, such as being a good source of vitamin A.

What Is the Shelf Life of Homemade Butter?

The shelf life of homemade butter varies depending on storage methods. It can last up to two weeks in the refrigerator and up to six months in the freezer. Proper storage is crucial to maintain its freshness.

Can Homemade Butter Be Used as a Substitute for Margarine in Baking Recipes?

If I were to use homemade butter as a substitute for margarine in baking, I would ensure it’s properly chilled and the moisture content is controlled. This way, the butter can provide a richer flavor and better texture to the baked goods.

Are There Any Potential Allergens in Homemade Butter?

There are potential health risks associated with homemade butter, including the possibility of allergens. It’s important to consider the source of ingredients and proper hygiene practices. Store-bought butter may offer more safety assurances.

Advertisement

Can Homemade Butter Be Frozen for Long-Term Storage?

Yes, you can freeze homemade butter for long-term storage. It’s important to wrap it tightly to prevent freezer burn. There are many homemade butter recipes available online that can guide you through the process.

Conclusion

As I churned the cream, a sense of satisfaction washed over me. The process of making homemade butter had not only given me a delicious spread for my toast, but also a deeper understanding of its health benefits and culinary versatility.

Each rich, golden pat symbolized the nourishment and creativity that butter brings to our lives. Delving into its history, I saw how this humble ingredient has stood the test of time, evolving with us.

So, next time you see a stick of butter, remember the power it holds and the possibilities it offers.

Advertisement
Continue Reading

Butter Basics

What Happens if You Use Expired Shea Butter on Your Skin?

Published

on

By

An image of a cracked, discolored jar of expired shea butter, oozing with a rancid odor

As someone who is passionate about taking care of my skin, I have learned the importance of using high-quality products. But what happens if we accidentally use expired shea butter? Let me tell you, the results are not good.

Signs of expired shea butter include changes in texture, loss of nutritional benefits, and potential skin irritation. Plus, there’s a risk of mold or bacteria growth.

In this article, I’ll delve into the potential dangers and safety concerns of using expired shea butter, so you can make informed decisions for your skincare routine.

Key Takeaways

  • Using expired shea butter can lead to reduced skin softness and decreased skin elasticity.
  • Expired shea butter may cause dry and rough skin, as well as a lack of natural glow.
  • There is a potential risk of mold or bacteria growth on expired shea butter, which can result in skin irritations, infections, and allergic reactions.
  • To ensure safety and effectiveness, it is important to check the expiration date, store shea butter properly, and avoid using expired products to prevent bacterial or fungal contamination.

Signs of Expired Shea Butter

If you’re wondering how to tell if your shea butter has expired, you can look for changes in texture and smell. Shea butter typically has a shelf life of about two years, but it can start to deteriorate over time.

Advertisement

When shea butter expires, it may become grainy or lumpy instead of smooth and creamy. The texture can be a clear indicator that the shea butter is past its prime. Additionally, the smell of expired shea butter can change, becoming rancid or unpleasant.

It’s important to note that using expired shea butter may not be harmful to your skin, but it may not provide the same beneficial effects as fresh shea butter.

Now, let’s dive into the changes in texture and consistency that can occur when shea butter expires.

Changes in Texture and Consistency

To change the texture and consistency of your expired shea butter, simply store it in a warm environment. When shea butter expires, it can become dry, hard, or grainy. However, by subjecting it to heat, you can bring it back to its original smoothness.

Here are some changes you may notice in the appearance of expired shea butter:

Advertisement
  • Loss of its creamy consistency
  • Formation of lumps or clumps
  • Development of a rancid smell

It’s important to note that expired shea butter may not be as effective as fresh shea butter in providing the same nourishing benefits for your skin. Additionally, the shelf life of shea butter can vary depending on how it is stored. Properly stored shea butter can last up to two years, but exposure to air, heat, and light can shorten its lifespan.

Loss of Nutritional Benefits

When shea butter expires, it loses its nutritional benefits and may not provide the same nourishing effects for your skin. As the expiration date approaches, the effectiveness of shea butter decreases, leading to weakened nourishing properties. The natural vitamins and fatty acids that make shea butter so beneficial gradually break down over time, resulting in a diminished ability to moisturize and protect the skin.

The expiration process causes the shea butter to become less potent, reducing its ability to soothe dryness, heal damaged skin, and improve elasticity. Using expired shea butter may not only be less effective but could also potentially cause skin irritations or allergic reactions.

To ensure maximum benefits, it’s essential to check the expiration date and replace your shea butter when needed.

Advertisement

Potential Skin Irritation

Allergic reactions are possible when using expired shea butter, as the quality and potency of the ingredients may have degraded over time. It is important to note that everyone’s skin reacts differently, so what may cause an allergic reaction in one person may not affect another.

Additionally, expired shea butter can also lead to increased bacterial growth, which can further irritate the skin and potentially cause infections.

Allergic Reactions Possible

Using expired shea butter can potentially cause allergic reactions. It is important to be aware of the potential side effects that can occur when using expired skincare products.

Here are some key points to consider:

  • Skin irritation: Expired shea butter may contain harmful bacteria or mold, which can irritate the skin and cause redness, itching, or rashes.

  • Decreased effectiveness: Over time, shea butter can lose its beneficial properties, such as its moisturizing and healing abilities. Using expired shea butter may not provide the desired results.

  • Risk of infection: Expired shea butter can harbor increased bacterial growth, which can lead to skin infections or other complications.

Therefore, it is crucial to always check the expiration dates on skincare products and avoid using expired shea butter to prevent potential allergic reactions and other negative effects on the skin.

Advertisement

Increased Bacterial Growth

The risk of infection can significantly increase due to the increased bacterial growth in expired shea butter. When shea butter expires, it becomes more susceptible to increased microbial contamination. Bacteria can thrive in expired shea butter, leading to a higher chance of contamination when it is applied to the skin. This increased bacterial growth can pose a serious risk to our health.

Additionally, expired shea butter may also have diminished efficacy. Over time, the beneficial properties of shea butter, such as its moisturizing and healing abilities, can deteriorate, making it less effective in providing the desired results.

It is important to check the expiration date of shea butter before using it to ensure its safety and efficacy.

Decreased Effectiveness for Moisturizing

When shea butter expires, its hydration properties become weakened, resulting in a decreased effectiveness for moisturizing the skin.

Additionally, the nourishing benefits of expired shea butter diminish, causing a loss in its ability to provide essential nutrients to the skin.

Advertisement

As a result, the skin may experience reduced softness and a lack of moisture retention, leading to potential dryness and discomfort.

Weakened Hydration Properties

Expired shea butter may not have its full hydration properties intact. When shea butter expires, it can lead to weakened hydration properties, resulting in decreased moisturizing effectiveness. This means that using expired shea butter on your skin may not provide the same level of hydration and moisture as fresh shea butter.

Here are some emotional responses that may arise from using expired shea butter:

  • Frustration: Feeling disappointed that the shea butter you were counting on for hydration is not as effective as expected.
  • Discomfort: Experiencing dryness and roughness on your skin due to the weakened hydration properties.
  • Wasted effort: Realizing that you have been using expired shea butter and the time and money spent on it have gone to waste.

Using expired shea butter not only results in weakened hydration properties but also leads to a loss of nourishing benefits for your skin.

Loss of Nourishing Benefits

Using expired shea butter can result in a loss of the nourishing benefits it provides to your skin. Shea butter is known for its moisturizing and healing properties, but these qualities diminish over time. The expiration date on the packaging indicates the period during which the shea butter is at its best.

Once it has expired, the butter may start to oxidize and degrade, leading to a decrease in its effectiveness. The nourishing vitamins and fatty acids present in shea butter may become less potent, making it less beneficial for your skin. It’s important to check the expiration date and use fresh shea butter to ensure you are receiving all the nourishing benefits it has to offer.

Advertisement

Reduced Skin Softness

When shea butter expires, not only does it lose its nourishing benefits, but it can also lead to reduced skin softness. Expired shea butter may not provide the same level of hydration and moisture to the skin as fresh shea butter does. This can result in several negative effects on the skin, including reduced skin elasticity and decreased moisturization.

Using expired shea butter can leave your skin feeling dry, rough, and lacking the natural glow it once had. The decreased moisturization can also lead to the development of fine lines and wrinkles, making you appear older than you actually are. To ensure optimal skin softness and health, it is important to use fresh shea butter that hasn’t expired.

Potential Mold or Bacteria Growth

If shea butter is expired, there’s a chance that mold or bacteria could grow on it. Using expired shea butter can pose potential health risks as these microorganisms can cause skin irritations, infections, or allergic reactions. It is crucial to properly store shea butter to maintain its freshness and extend its shelf life. Here are some recommended storage methods to prevent the growth of mold or bacteria:

Storage Method Description
Keep it sealed Ensure the shea butter container is tightly sealed after each use to prevent air and moisture from entering, creating an environment conducive to bacterial growth.
Store in a cool place Shea butter should be stored in a cool, dry place away from direct sunlight and heat sources. Elevated temperatures can accelerate the growth of bacteria and mold.
Avoid contamination Do not touch the shea butter directly with your fingers. Instead, use a clean, dry spoon or spatula to scoop out the desired amount to minimize the risk of introducing bacteria.

Safety Concerns and Allergic Reactions

To avoid potential health risks and allergic reactions, it’s important to check the expiration date of your shea butter and store it properly. Expired shea butter can lead to various skin reactions, such as rashes, itching, and redness. The shelf life of shea butter can vary depending on the processing and storage conditions.

Here are a few key points to keep in mind:

Advertisement
  • Expired shea butter may lose its effectiveness and may not provide the desired benefits for your skin.
  • Using expired shea butter can increase the risk of bacterial or fungal contamination, which can lead to infections.
  • Allergic reactions can occur when using expired shea butter, especially if you have sensitive skin or existing allergies.

To ensure your safety and get the most out of your shea butter, always check the expiration date and store it in a cool, dry place away from direct sunlight.

Frequently Asked Questions

Can Expired Shea Butter Be Harmful if Used on the Skin?

Expired shea butter can be harmful if used on the skin. It may lose its effectiveness for hair care and can cause potential side effects on sensitive skin. It’s important to check the expiration date and avoid using expired products.

How Long Does Shea Butter Usually Last Before It Expires?

Shea butter typically lasts up to two years before it expires. To ensure its longevity, store it in a cool, dry place away from direct sunlight. Signs of expiration include a rancid smell and a change in texture.

Can Using Expired Shea Butter Cause Skin Allergies or Irritation?

Using expired shea butter can potentially cause skin allergies or irritation. It’s important to note that expired skincare products may lose their effectiveness and could harbor harmful bacteria, posing risks to skin health.

Can Expired Shea Butter Still Be Effective for Treating Dry Skin?

Using expired shea butter on hair may not provide the same benefits as fresh shea butter. However, it can still be effective for treating dry skin, including eczema.

Is It Safe to Use Shea Butter That Has Mold or Bacteria Growth on It?

Using shea butter with mold or bacteria growth can pose potential health risks. To prevent this, store shea butter in a clean, airtight container in a cool, dry place. Always check for expiration dates to ensure safety.

Advertisement

Conclusion

In conclusion, using expired shea butter can have negative effects on your skin and overall health. The signs of expired shea butter include changes in texture and consistency, as well as a loss of nutritional benefits. It may also cause potential skin irritation and decrease its effectiveness for moisturizing.

Furthermore, there is a risk of mold or bacteria growth, which can be harmful to your skin. To ensure safety and avoid allergic reactions, it’s important to check the expiration date and use fresh shea butter.

So remember, don’t let your skin suffer, and always use fresh shea butter to keep it nourished and healthy.

Continue Reading

Butter Basics

What Does Indian Butter Chicken Taste Like: A Flavorful Experience

Published

on

By

An image that showcases the rich, creamy texture of Indian Butter Chicken, with tender chunks of marinated chicken, immersed in a vibrant orange sauce, infused with a medley of aromatic spices

Curious about trying Indian butter chicken? Get ready for a burst of delicious flavors!

This mouthwatering dish is a symphony of traditional Indian flavors, packed with a creamy and rich sauce that will make your taste buds dance with delight.

The combination of aromatic spices creates a perfect balance of sweet and savory, while the tender and juicy chicken takes it to a whole new level.

Get ready to be transported to a world of delectable aromas and flavors that will leave you craving more.

Key Takeaways

  • Indian butter chicken embodies the essence of Indian cuisine, combining spices and ingredients from diverse regional variations.
  • The creamy and rich sauce in Indian butter chicken creates a symphony of flavors that complement the chicken, leaving you completely satisfied.
  • The flavorful spice blend in Indian butter chicken, including spices like cumin, coriander, turmeric, and garam masala, creates a harmonious balance of heat, sweetness, and creaminess.
  • The succulent and tender chicken in Indian butter chicken is infused with flavor through the marinade and cooking techniques, enhancing the overall taste of the dish.

Traditional Indian Flavors

Advertisement

If you’re craving traditional Indian flavors, you’ll love the rich and aromatic taste of Indian butter chicken. This dish perfectly embodies the essence of Indian cuisine with its unique blend of spices and ingredients.

Indian butter chicken has been influenced by the diverse regional variations found across India, resulting in a dish that is both familiar and distinct. From the fiery flavors of North Indian cuisine to the subtle and delicate tastes of South Indian cuisine, every bite of butter chicken is a journey through the diverse culinary landscape of India.

The combination of tender chicken, marinated in a flavorful blend of spices and cooked in a creamy and rich sauce, creates a harmonious balance of flavors that will leave you craving for more.

Creamy and Rich Sauce

Get ready to indulge in a culinary experience like no other with this discussion on the flavorful spice blend and succulent chicken pieces that make up this mouthwatering dish.

The aroma of the spices will instantly transport you to the bustling streets of India, while the tender chicken pieces will melt in your mouth, leaving you craving for more.

Advertisement

Each bite is a symphony of flavors, with the spices perfectly complementing the juicy chicken, creating a harmonious blend that will leave you completely satisfied.

Flavorful Spice Blend

You’ll love the flavorful spice blend in Indian butter chicken. This popular Indian dish is known for its aromatic and rich taste, thanks to the spice-infused marinade.

The combination of spices like cumin, coriander, turmeric, and garam masala creates a symphony of flavors that will tantalize your taste buds. The marinade not only adds depth to the chicken but also helps to tenderize it, resulting in succulent and juicy pieces of meat.

As the chicken cooks in the creamy and buttery tomato sauce, the flavors meld together, creating a harmonious balance of heat, sweetness, and creaminess. The spices add a subtle kick that is not overpowering but still provides a delightful warmth.

Get ready to savor the explosion of flavors in every bite as the succulent chicken pieces are coated in the fragrant and spiced sauce.

Advertisement

Succulent Chicken Pieces

The succulent chicken pieces become incredibly tender as they cook in the creamy tomato sauce. The juicy marinade penetrates the meat, infusing it with a burst of flavor. The chicken takes on a rich, savory taste that is enhanced by the spices and herbs in the marinade.

The cooking techniques used in Indian butter chicken are essential in achieving the perfect texture and taste. The chicken is first marinated in a mixture of yogurt, lemon juice, and various spices for several hours. This allows the flavors to develop and tenderize the meat.

Then, the chicken is cooked in a buttery tomato sauce, allowing it to absorb the creamy goodness. The result is a dish that is succulent and full of flavor, with the chicken practically melting in your mouth.

Mouthwatering Spices

Advertisement

Experience the explosion of flavors in each bite as the mouthwatering spices in Indian butter chicken tantalize your taste buds. Indian butter chicken is known for its sensational flavor combination and tantalizing aroma that will leave you craving for more. The rich and creamy tomato-based sauce is infused with a blend of aromatic spices, creating a harmonious balance of heat and tanginess. The use of spices like cumin, coriander, turmeric, and garam masala adds depth and complexity to the dish. The tender chicken pieces are marinated in a yogurt-based marinade, which helps to tenderize the meat and enhance the flavors. Each bite is a burst of flavors, with the spices dancing on your palate and leaving a lingering warmth. It is a culinary experience that is truly unforgettable.

Flavor Description
Spicy The spices in Indian butter chicken add a kick of heat, creating a satisfying spicy flavor.
Tangy The tomato-based sauce provides a tangy and slightly acidic taste that balances out the spices.
Creamy The richness of the creamy sauce adds a smooth and velvety texture to the dish.

Perfect Balance of Sweet and Savory

Now that we’ve explored the mouthwatering spices that make up Indian butter chicken, let’s dive into its perfect balance of sweet and savory flavors. When you take that first bite, you’ll be greeted with a symphony of tastes that will leave you craving for more.

The sweet and tangy notes dance on your tongue, creating a delightful explosion of flavors. The complex flavor profile of Indian butter chicken is a result of the carefully selected spices, such as garam masala, fenugreek leaves, and yogurt, which all come together to create a harmonious blend.

The sweetness comes from the caramelized onions and the richness of the cream, while the tanginess is provided by the tomato-based gravy. This combination creates a dish that is both comforting and exciting, making Indian butter chicken a true culinary masterpiece.

Tender and Juicy Chicken

When you take that first bite, you’ll be amazed by how tender and juicy the chicken in Indian butter chicken is. The succulent pieces of chicken are perfectly cooked, with a melt-in-your-mouth texture that is truly satisfying.

Advertisement

The flavors seep into every crevice of the meat, creating a taste explosion in your mouth. The chicken is marinated in a blend of aromatic spices, yogurt, and lemon juice, which not only tenderizes the meat but also infuses it with a myriad of delicious flavors.

As you chew, you can taste the subtle hints of cumin, coriander, and garam masala, along with the rich creaminess of the buttery tomato sauce. The combination of tender chicken and juicy flavors is what makes Indian butter chicken a true culinary delight.

Aromatic and Fragrant Dish

When it comes to Indian butter chicken, you’re in for a flavor explosion. The bold flavors and spices used in this dish will tantalize your taste buds and leave you craving for more.

The creamy tomato-based sauce adds a luscious and rich element to the dish, perfectly complementing the succulent and tender chicken.

Trust me, once you try this dish, you won’t be able to get enough of its delectable combination of flavors and textures.

Advertisement

Bold Flavors and Spices

Bold flavors and spices are what give Indian butter chicken its distinct taste. This classic dish is known for its explosion of flavors that will tantalize your taste buds. The combination of traditional spices like cumin, coriander, and garam masala creates a rich and aromatic profile that is truly unforgettable. The use of these bold flavors elevates the dish to a whole new level, making it a favorite among Indian food enthusiasts. The table below highlights some of the key spices used in Indian butter chicken:

Spice Flavor Profile
Cumin Earthy and nutty
Coriander Citrusy and floral
Garam Masala Warm and pungent

These spices work harmoniously together, creating a symphony of flavors that will make your taste buds dance. As you indulge in the bold flavors of Indian butter chicken, you’ll soon discover why it has become a beloved dish worldwide. And while the spices play a crucial role in its taste, it’s the creamy tomato-based sauce that takes this dish to the next level. [Transition to subsequent section: ‘creamy tomato-based sauce’]

Creamy Tomato-Based Sauce

The creamy tomato-based sauce in Indian butter chicken is what adds a luscious and velvety texture to the dish. This sauce is made by simmering tomatoes, onions, garlic, ginger, and a blend of aromatic spices such as cumin, coriander, and turmeric. The result is a rich and flavorful sauce that coats the tender pieces of chicken, infusing them with a burst of Indian spices.

The creaminess comes from the addition of butter and cream, which adds a luxurious and indulgent touch to the dish. The combination of the tangy tomatoes, aromatic spices, and creamy texture creates a harmonious balance of flavors.

Indian butter chicken is a beloved dish in Indian cuisine, known for its rich, comforting, and satisfying taste.

Advertisement

Succulent, Tender Chicken

The succulent, tender chicken in this dish is cooked to perfection, resulting in a melt-in-your-mouth texture that is incredibly satisfying.

The marinated chicken is packed with flavor, infusing every bite with a burst of aromatic spices.

The juicy meat is so tender that it practically falls off the bone, making it a delight to eat.

The marinade adds an extra layer of richness, ensuring that each piece of chicken is well-seasoned and packed with deliciousness.

The cooking process seals in the moisture, resulting in a juicy and succulent texture that is hard to resist.

Advertisement

Whether you’re a fan of chicken or not, this dish will captivate your taste buds and leave you craving for more.

Conclusion

So, now you know what Indian butter chicken tastes like! It’s a culinary delight that combines the traditional flavors of India with a creamy and rich sauce. The mouthwatering spices create a perfect balance of sweet and savory, making every bite a treat for your taste buds.

The tender and juicy chicken adds a satisfying texture to the dish. And let’s not forget about the aromatic and fragrant aroma that fills the air when this dish is being prepared. In fact, did you know that butter chicken is one of the most popular Indian dishes worldwide? It’s no surprise considering its irresistible flavors and delightful combination of ingredients.

So why not give it a try and experience the magic of Indian butter chicken for yourself?

Advertisement
Continue Reading

Trending