Recipes & Culinary Uses
How to Make Walnut Butter

Have you ever wondered how to make your own delicious walnut butter? Well, let me tell you, it’s easier than you think!
In this guide, I’ll walk you through the simple steps to create creamy, homemade walnut butter that will have your taste buds singing with delight.
From gathering the ingredients to grinding the walnuts, I’ll provide detailed instructions to ensure your walnut butter turns out perfect every time.
So, let’s get started and dive into the world of homemade walnut butter!
Key Takeaways
- Select fresh walnuts and ensure they are free from mold or rancidity.
- Consider toasting the walnuts for enhanced flavor and crunch.
- Experiment with different flavor variations and toasting alternatives.
- Store walnut butter in an airtight container in the refrigerator to extend its shelf life.
Gathering the Ingredients
First, you’ll need to gather all of the ingredients for making walnut butter.
When it comes to selecting fresh walnuts, there are a few different types to choose from. English walnuts, also known as Persian walnuts, are the most common and widely available. They have a mild flavor and are perfect for making walnut butter.
Black walnuts, on the other hand, have a stronger, more robust flavor. They can add a unique and intense taste to your walnut butter.
Another option is the California walnut, which has a slightly sweeter taste compared to English walnuts. Whichever type you choose, make sure they are fresh and free from any mold or rancidity.
Selecting the Right Walnuts
To ensure you choose the best walnuts, look for ones that are fresh and have a rich, nutty aroma. There are various walnut varieties available, such as English, black, and Persian walnuts.
English walnuts are the most common and have a mild flavor, while black walnuts have a stronger, earthy taste. Persian walnuts are smaller in size but pack a flavorful punch.
When selecting walnuts, make sure they feel heavy for their size, indicating they are plump and filled with oils. Avoid walnuts that are discolored, shriveled, or have a rancid smell.
To maintain their freshness, store walnuts in an airtight container in a cool, dry place. Alternatively, you can refrigerate them to extend their shelf life. Proper storage is essential to preserve the quality and flavor of the walnuts.
Preparing the Walnuts
When it comes to preparing walnuts for a recipe, one of the first choices you’ll need to make is whether to use shelled or unshelled walnuts.
Shelled walnuts are convenient and save you the time and effort of cracking open each nut, but unshelled walnuts offer a fresher taste and longer shelf life.
Additionally, toasting the walnuts can enhance their flavor and add a delightful crunch to your dish.
Shelling or Unshelled Walnuts
You can choose whether to use shelled or unshelled walnuts for making walnut butter. Shelled walnuts are already removed from their hard outer shell, making them a convenient choice. However, unshelled walnuts have their benefits too. Here are five reasons to consider using shelled walnuts:
- Shelled walnuts save you time and effort, as you don’t have to crack open each nut.
- Shelled walnuts have a longer shelf life, as the shell protects the nut from oxidation.
- Shelled walnuts are easier to measure, as you can simply scoop out the desired amount.
- Shelled walnuts have a smoother texture when blended, resulting in a creamier walnut butter.
- Shelled walnuts are more versatile, as they can be used in various recipes without the need for shelling.
Now that you’ve chosen your walnuts, let’s move on to toasting them for enhanced flavor and aroma.
Toasting the Walnuts?
Once the walnuts have been toasted, their flavor and aroma will be enhanced. Toasting walnuts is a crucial step in making walnut butter as it brings out their natural oils and intensifies their nutty taste.
There are a few toasting techniques you can use to achieve the perfect result. One method is to toast them in the oven. Preheat your oven to 350°F (175°C) and spread the walnuts evenly on a baking sheet. Toast them for about 8-10 minutes, turning them halfway through to ensure even browning.
Another option is to toast them on the stovetop. Heat a dry skillet over medium heat and add the walnuts. Stir them constantly for about 5-7 minutes until they turn golden brown.
If you want to explore alternative nut options, you can also try toasting almonds, pecans, or cashews to create unique and delicious nut butter flavors.
Roasting the Walnuts
To roast the walnuts, preheat your oven to 350 degrees Fahrenheit. Place the walnuts on a baking sheet in a single layer, ensuring they have enough space to evenly roast.
Here are some toasting techniques I recommend:
- Keep a close eye on the walnuts as they can burn quickly.
- Shake the baking sheet occasionally to promote even toasting.
- Toast the walnuts until they are fragrant and slightly golden, usually around 8-10 minutes.
- Allow the roasted walnuts to cool completely before using them in your walnut butter.
- Experiment with flavor variations by adding a sprinkle of salt, a drizzle of honey, or a dash of cinnamon before roasting.
Roasting the walnuts enhances their nutty flavor and adds depth to your walnut butter. So, don’t skip this step!
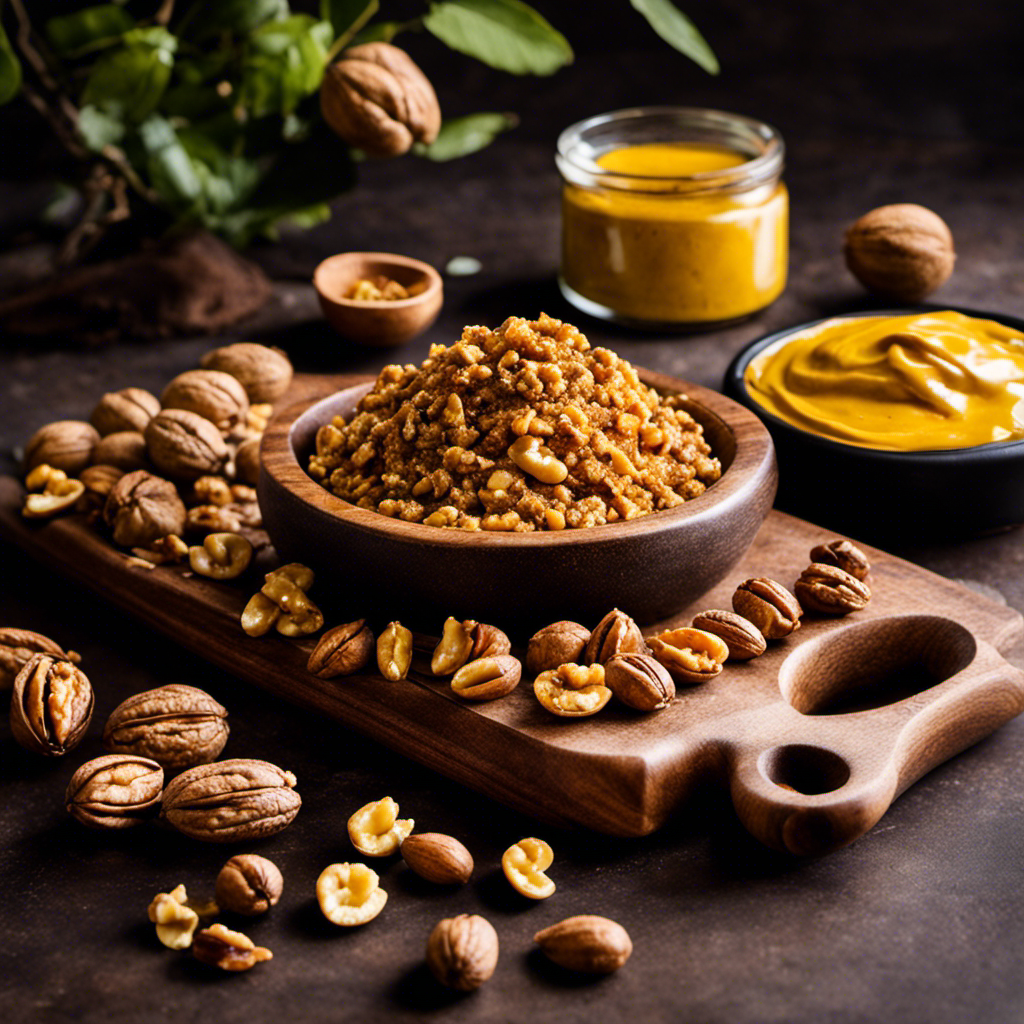
Grinding the Walnuts
Grinding the walnuts is a crucial step in creating a smooth and creamy texture for your homemade walnut butter. After roasting the walnuts to enhance their flavor, it’s time to transform them into a spreadable delight. I prefer to use a food processor for this task as it ensures even grinding and allows me to control the consistency. Simply place the roasted walnuts into the processor and pulse until they reach your desired texture. The benefits of homemade walnut butter are numerous – it’s free from additives, preservatives, and unnecessary sugars. Plus, you have the freedom to experiment with different flavor variations. If you’re looking for toasting alternatives, you can try using raw walnuts or even soaking them beforehand to soften the texture. It’s all about finding the method that suits your taste and preferences.
Toasting Alternatives | Benefits of Homemade Walnut Butter |
---|---|
Raw walnuts | Free from additives and preservatives |
Soaked walnuts | Customizable flavors and textures |
———————– | ———————————— |
Adding Flavor Enhancements
When it comes to enhancing the flavor of my walnut butter, I am always torn between adding a touch of spice or a hint of sweetness. Both options have their own unique appeal and can completely transform the taste profile of the butter.
In addition to adding flavor, these enhancements also offer nutritional benefits, such as antioxidants from spices or natural sugars from sweeteners, that can further boost the overall healthiness of the walnut butter.
Spice or Sweeten
You can easily add spices or sweeteners to enhance the flavor of your walnut butter. By experimenting with different spice variations and sweetening methods, you can create a truly unique and delicious spread.
Here are some ideas to get you started:
-
Spice Variations:
-
Cinnamon: adds warmth and a hint of sweetness to the walnut butter.
-
Nutmeg: enhances the nutty flavor of the walnuts.
-
Cardamom: adds a subtle, floral note to the butter.
-
Ginger: gives a pleasant, spicy kick to the spread.
-
Vanilla extract: adds a touch of sweetness and depth to the flavor.
-
Sweetening Methods:
-
Honey: adds a natural sweetness and a hint of floral flavor.
-
Maple syrup: lends a rich, caramel-like sweetness to the butter.
-
Brown sugar: adds a deeper, molasses-like sweetness.
-
Agave nectar: provides a mild, neutral sweetness.
-
Coconut sugar: adds a subtle caramel flavor to the walnut butter.
With these spice variations and sweetening methods, you can elevate the taste of your walnut butter and enjoy a truly delightful treat.
Nutritional Benefits of Enhancements
To fully appreciate the nutritional benefits of these enhancements, it’s important to understand their impact on your overall well-being.
Adding enhancements such as honey, cinnamon, or even a pinch of sea salt to your walnut butter not only enhances the flavor but also boosts its nutritional value. For example, honey is a natural sweetener that is rich in antioxidants and has antimicrobial properties.
Cinnamon, on the other hand, is loaded with antioxidants and has anti-inflammatory effects. Incorporating these enhancements into your walnut butter not only makes it more delicious but also provides you with additional health benefits.
Now that we’ve explored the nutritional benefits of these enhancements, let’s move on to the next step: achieving the desired consistency.
Achieving the Desired Consistency
The key to achieving the desired consistency for your walnut butter is to blend the nuts until they’re smooth and creamy. This process may take a few minutes, but it’s worth it for the perfect texture.
However, if you want to take your walnut butter to the next level, you can experiment with adding additional ingredients. Here are some ideas to enhance the flavor and texture:
- A pinch of sea salt to bring out the nuttiness
- A drizzle of honey for a touch of sweetness
- A splash of vanilla extract for a hint of warmth
- A sprinkle of cinnamon for a cozy, autumnal flavor
- A dollop of coconut oil to add richness and silkiness
By incorporating these ingredients, you can elevate your walnut butter from good to extraordinary. It’s all about finding the right balance and experimenting with flavors that complement the natural taste of walnuts.
Storing and Preserving Walnut Butter
When storing your homemade walnut butter, it’s important to keep it in an airtight container to maintain its freshness and prevent it from going rancid. To ensure the best preservation, I recommend using glass jars with tight-fitting lids. The airtight seal will protect the butter from exposure to air, moisture, and light, which can lead to oxidation and spoilage.
Additionally, storing walnut butter in the refrigerator will extend its shelf life even further. Properly stored, walnut butter can last for up to 3 months in the fridge.
Aside from its delicious taste on toast or in recipes, walnut butter has alternative uses that you may not have considered. It can be used as a substitute for other nut butters in baking recipes, adding a unique flavor and richness. You can also incorporate walnut butter into smoothies or use it as a topping for pancakes or waffles. The possibilities are endless!
Creative Ways to Use Walnut Butter
One creative way to use walnut butter is by incorporating it into your morning smoothie for an added boost of flavor and nutrition. Not only does it give your smoothie a creamy and nutty taste, but it also provides you with the health benefits of walnuts, such as omega-3 fatty acids and antioxidants.
Here are five unique recipes using walnut butter to incorporate it into your daily meals:
- Spread it on toast or rice cakes and top with sliced bananas or strawberries for a delicious and nutritious snack.
- Mix it with Greek yogurt and honey for a protein-packed and satisfying dip for your fruits or pretzels.
- Drizzle it over grilled vegetables or roasted sweet potatoes for a savory twist.
- Blend it into your favorite salad dressing for a nutty and flavorful addition.
- Use it as a substitute for peanut butter in baking recipes, like cookies or energy bars, to add a rich and nutty taste.
Health Benefits of Walnut Butter
When it comes to maintaining a healthy heart, incorporating heart-healthy omega-3 fatty acids into your diet is crucial. These essential fatty acids found in walnut butter have been shown to reduce the risk of heart disease and lower blood pressure.
Additionally, walnut butter is packed with brain-boosting antioxidants that can improve cognitive function and protect against age-related decline.
Heart-Healthy Omega-3 Fatty Acids
To incorporate heart-healthy omega-3 fatty acids into your diet, you can make walnut butter using this simple recipe.
Walnuts are a great source of omega-3s, which have been shown to support heart health and reduce inflammation.
Here’s how to make walnut butter:
-
Start by roasting the walnuts in the oven at 350°F for about 10 minutes. This brings out their natural oils and enhances their flavor.
-
Once the walnuts have cooled, place them in a food processor or blender. You can also add a pinch of salt or honey for extra flavor if desired.
-
Blend the walnuts until they form a smooth and creamy consistency. This may take a few minutes, so be patient.
-
Transfer the walnut butter to an airtight container and store it in the refrigerator. It will keep for up to two weeks.
-
Use your homemade walnut butter in a variety of recipes, such as spreading it on toast, adding it to smoothies, or using it as a dip for fruits and vegetables.
Incorporating walnut butter into your diet is an easy and delicious way to boost your intake of heart-healthy omega-3 fatty acids. It’s a versatile ingredient that can be used in a variety of dishes, making it a great addition to your heart-healthy cooking methods.
Brain-Boosting Antioxidants
Incorporating foods rich in brain-boosting antioxidants, like blueberries and dark chocolate, into your diet can support cognitive function and overall brain health. Antioxidants help protect our brain cells from damage caused by free radicals, unstable molecules that can contribute to aging and diseases like Alzheimer’s and Parkinson’s.
Blueberries are packed with antioxidants called flavonoids that have been shown to improve memory and cognitive function. Dark chocolate, especially the ones with high cocoa content, contains antioxidants called flavanols that can increase blood flow to the brain and enhance cognitive performance.
Including these foods in your diet can help maintain brain health and improve cognitive function, allowing you to stay sharp and focused as you age. So, why not indulge in a delicious treat that’s good for your brain too?
Troubleshooting and Common Mistakes
One common mistake when making walnut butter is not properly roasting the walnuts before blending them. Roasting the walnuts brings out their natural oils and enhances their flavors, resulting in a richer and creamier butter. To avoid this mistake, follow these troubleshooting tips and common mistakes to avoid:
- Ensure the oven is preheated to the correct temperature (350°F or 175°C) before roasting the walnuts.
- Spread the walnuts evenly on a baking sheet and roast them for about 10-12 minutes, or until they turn golden brown.
- Allow the roasted walnuts to cool completely before blending them in a food processor or blender.
Avoid over-blending the walnuts, as this can cause them to release excess oils and become too greasy. Add a pinch of salt or a drizzle of honey to enhance the flavor of the walnut butter.
Frequently Asked Questions
Can I Use Any Type of Walnuts for Making Walnut Butter?
Yes, you can use any type of walnuts for making walnut butter. Different types may result in slightly different flavors and textures, so experiment to find your favorite. Check out the best recipes online for inspiration!
How Long Can I Store Walnut Butter?
I store walnut butter in an airtight container in the refrigerator. It can last for up to three months. The shelf life can be extended by storing it in the freezer.
Can I Use Raw Walnuts Instead of Roasted Walnuts?
Using raw walnuts in walnut butter is a great alternative to roasted walnuts. They give the butter a more subtle flavor and slightly different texture. Here are some tips for making creamy walnut butter with raw walnuts.
Can I Add Sweeteners to Walnut Butter?
I can definitely add sweeteners to walnut butter, but there are pros and cons. Sweeteners like honey or maple syrup can enhance the flavor, but they also add extra calories. It’s all about finding the right balance!
Can I Use Walnut Butter in Savory Dishes or Is It Only for Sweet Recipes?
Walnut butter is incredibly versatile and can be used in both sweet and savory dishes. Its rich and creamy texture adds depth to savory recipes, while also providing the nutritional benefits of walnuts, such as omega-3 fatty acids and antioxidants.
Conclusion
As I carefully stored my freshly made walnut butter in a glass jar, a sense of anticipation filled the air. I couldn’t wait to taste the rich, creamy goodness that I had created from scratch.
The aroma of roasted walnuts lingered in the kitchen, tempting me to dive into a culinary adventure. With each spoonful, I knew I was nourishing my body with the incredible health benefits of walnut butter.
So, go ahead, embark on this delicious journey and let the tantalizing flavors transport you to a world of culinary delight!
From sneaky childhood butter licks to penning some of our most popular articles, Jamie’s journey with butter has been lifelong. His culinary background gives him a unique perspective, allowing him to craft mouthwatering articles that educate and tantalize equally. Jamie’s travel adventures revolve around finding the world’s best buttery treats when he isn’t writing.
Recipes & Culinary Uses
How to Make Butter Balls

Do you crave a dollop of flavor to enhance your dining experience? Look no further!
In this article, we will guide you through the magical process of creating delectable butter balls. With just a few simple ingredients and tools, you’ll be able to craft these little balls of creamy goodness in no time.
So, put on your apron, grab your whisk, and prepare to embark on a buttery adventure that will leave your taste buds dancing with delight.
Key Takeaways
- Experiment with different combinations of herbs and spices to create unique flavors in the butter balls.
- Chilling the butter mixture in the refrigerator helps firm it up and allows the flavors to meld together for a more harmonious taste.
- Roll the chilled butter mixture into small, bite-sized spheres and optionally roll them in finely chopped herbs, spices, or edible flowers for added flavor and presentation.
- Store the butter balls in an airtight container in the refrigerator and let them come to room temperature before serving to enhance their versatility in various dishes and spreads.
Gathering the Ingredients and Tools
First, you’ll need to gather the ingredients and tools necessary for making butter balls. To begin, gather 1 cup of softened butter, 1 ¼ cups of powdered sugar, 1 teaspoon of vanilla extract, and a pinch of salt. These ingredients will create a smooth and flavorful base for your butter balls.
Additionally, you’ll need a mixing bowl, an electric mixer, a spatula, and a baking sheet lined with parchment paper. If you’re feeling adventurous, you can also experiment with alternative ingredients such as almond or coconut extract to add a unique twist to your butter balls.
Once you have everything ready, it’s time to move on to preparing the butter mixture.
Preparing the Butter Mixture
Next, you’ll need to mix together the softened butter, your choice of herbs and spices, and a pinch of salt in a bowl. This step is crucial for adding flavor to your butter balls.
As you mix in the herbs and spices, imagine the burst of savory goodness they will bring to each bite. Experiment with different combinations like garlic and rosemary, or perhaps a hint of lemon zest and thyme.
Once everything is well incorporated, cover the bowl with plastic wrap and place it in the refrigerator to chill. This will help the butter mixture firm up, making it easier to shape into balls later on. The chilling process also allows the flavors to meld together, resulting in a more harmonious taste.
Get ready to elevate your butter balls to a whole new level of deliciousness.
Shaping the Butter Balls
Now it’s time to take the chilled butter mixture and roll it into small, bite-sized spheres. Shaping butter balls requires some techniques to achieve the perfect form.
Start by scooping a small amount of the butter mixture with a spoon or a melon baller. Then, gently roll it between your palms, applying light pressure to create a smooth and round shape.
For a more decorative touch, you can roll the butter balls in finely chopped herbs, spices, or even edible flowers. Arrange them on a serving plate, or place them in a decorative butter dish for a stunning presentation.
These butter balls can be a delightful addition to a cheese platter or served alongside warm bread.
Now, let’s move on to the next step – adding flavors and variations to your butter balls.
Adding Flavors and Variations
To enhance the taste and create unique variations, you can experiment with different ingredients and seasonings for your butter balls. By adding different flavors, you can elevate your butter balls to a whole new level. Here are some ideas to get you started:
Flavor | Ingredients | Creative Uses |
---|---|---|
Garlic and Herb | Garlic, parsley, thyme | Spread on bread or use in pasta dishes |
Citrus | Lemon or orange zest | Use in baking or melt over grilled fish |
Spicy | Chili flakes, paprika | Add a kick to roasted vegetables or steaks |
Sweet | Honey, cinnamon | Delicious on pancakes or toast |
There are endless possibilities when it comes to flavored butter balls. Get creative and experiment with different combinations to find your favorites. Once you have made your butter balls, it’s time to move on to storing and serving them.
TRANSITION: Now that you have created your delicious flavored butter balls, let’s talk about the best way to store and serve them.
Storing and Serving the Butter Balls
When it comes to storing and serving your flavorful creations, remember to keep your butter balls chilled in an airtight container to maintain their freshness. Storing butter balls properly is essential to preserve their taste and texture.
After shaping your butter into small balls, place them in the refrigerator for at least an hour to firm up. Once chilled, transfer the butter balls to an airtight container to prevent them from absorbing any odors or flavors from the fridge. This will ensure that your butter balls stay fresh and delicious.
When it’s time to serve, take out the desired amount and let them come to room temperature for a few minutes. Butter balls are versatile and can be used in various ways – spread them on toast, melt them on steamed vegetables, or use them to enhance the flavor of your favorite dishes. Get creative and enjoy the rich, creamy goodness of your homemade butter balls!
Conclusion
So there you have it, a step-by-step guide on how to make butter balls.
Now that you know the secrets to creating these delectable delights, you can impress your friends and family with your culinary skills.
Imagine the look on their faces as they bite into these creamy, flavorful bites of heaven.
The possibilities are endless when it comes to adding your own unique twist to the recipe.
So go ahead, gather your ingredients and tools, and embark on this buttery adventure.
Get ready to indulge in the buttery goodness that awaits!
Diana’s meticulous nature and editorial prowess set the gold standard for our content. With over a decade in the culinary and publishing industries, her guidance ensures that every article perfectly blends information and entertainment. A culinary experimenter, Diana loves whipping up new butter-based concoctions in her kitchen.
Recipes & Culinary Uses
How to Make Brownies With Weed Butter

Hey there, fellow baking enthusiasts! Ever wondered how to take your brownie recipe to a whole new level? Well, I’ve got a little secret ingredient that’ll surely elevate your baking game: weed butter.
Now, before you start raising eyebrows, let me assure you that this article is all about responsible and informed baking. I’ll guide you through the process of making your very own batch of deliciously potent weed brownies.
So, get ready to embark on a mouthwatering journey that combines the best of baking and cannabis. Let’s dive in!
Key Takeaways
- Different weed strains have different effects, so choose a balanced strain with a combination of THC and CBD for making weed butter.
- Decarboxylate cannabis in the oven to activate THC before making weed butter.
- Use proper dosing techniques and start with a lower dose to avoid overconsumption and unpleasant side effects.
- Store weed brownies properly in a cool, dark place and consume within a week for optimal freshness and potency.
Selecting the Right Strain for Weed Butter
To make the best brownies with weed butter, you’ll need to choose the right strain of cannabis. When it comes to selecting the best cannabis strain for edibles, it’s important to understand the effects that different weed strains can have.
Some strains are known for their uplifting and energizing effects, while others are more relaxing and calming. For edibles, you’ll want to choose a strain that has a balanced combination of THC and CBD. THC is responsible for the psychoactive effects, while CBD provides a more calming and therapeutic experience. Finding the right balance will ensure that your brownies have the desired effects.
Now that you know the importance of choosing the right strain, let’s move on to making weed butter from scratch.
Making Weed Butter From Scratch
First, you’ll need to gather the necessary ingredients for making weed butter from scratch. To make weed butter, you’ll need unsalted butter, ground cannabis, and water. Start by decarboxylating your cannabis in the oven to activate the THC.
Next, melt the butter and add the ground cannabis. Simmer the mixture on low heat for a few hours, stirring occasionally. The alternative method of making weed-infused butter involves using a slow cooker, which can simplify the process.
The benefits of using weed butter in other recipes are numerous. Not only does it add a unique flavor to your dishes, but it also allows for a more controlled and precise dosage of cannabis.
Once the butter has cooled, strain out the plant matter, and you’re left with homemade weed butter ready to be used in all sorts of delicious recipes.
Infusing Weed Butter Into Your Brownie Mix
Once you’ve infused your homemade weed butter into your brownie mix, the rich and potent flavors will elevate your brownies to a whole new level of deliciousness. Infusing weed butter into your brownie mix is a simple and effective way to create alternative edibles that pack a punch.
Here are three infusing techniques to help you make the most of your weed butter brownies:
-
Double Boiler Method: Place a heatproof bowl over a pot of simmering water, and melt your weed butter in the bowl. Once melted, add it to your brownie mix and stir well to ensure even distribution.
-
Stovetop Method: Melt your weed butter in a saucepan on low heat, stirring continuously to prevent burning. Once melted, add it to your brownie mix and mix thoroughly.
-
Microwave Method: Melt your weed butter in a microwave-safe bowl, heating in short bursts and stirring in between. Once melted, add it to your brownie mix and mix well.
With these infusing techniques, you can create delectable weed butter brownies that are sure to impress. Enjoy responsibly!
Baking Perfectly Potent Weed Brownies
For perfectly potent weed brownies, ensure you mix the infused butter thoroughly into the brownie batter. This step is crucial to evenly distribute the cannabis throughout the mixture, ensuring each bite is infused with the desired dose.
When it comes to dosing techniques, it’s important to note that the potency of your brownies will depend on the strength of your infused butter. To control the dosage, start by calculating the total amount of THC in your butter and divide it by the number of servings. This will give you an idea of how much THC is in each brownie.
If you’re looking for alternative cannabis-infused desserts, consider trying recipes like cannabis-infused cookies, cakes, or even ice cream. Just remember to adjust the dosage accordingly and always label your edibles clearly.
Happy baking!
Dos and Don’ts of Dosing Weed Brownies
When it comes to making weed brownies, proper dosage of weed butter is crucial. Overconsumption can lead to unpleasant experiences, so it’s important to know how much weed butter to use for the desired effect.
To ensure consistent potency, there are a few tips to keep in mind. First, use a reliable recipe that provides specific instructions on the amount of weed butter needed. This will help you avoid using too much or too little.
Second, properly measure the weed butter. Use a kitchen scale to weigh the butter accurately, as eyeballing it can result in inaccurate dosing. This step is crucial for achieving the desired effect and avoiding any potential negative experiences.
Proper Weed Butter Dosage
To determine the proper dosage of weed butter for your brownies, it’s essential to consider the potency and desired effects. Here are three important things to consider:
-
Weed butter infusion methods: The potency of your weed butter depends on how you infuse it. Common methods include using a stovetop, slow cooker, or a specialized cannabis-infused butter machine. Each method may result in varying levels of THC extraction, so it’s important to choose a method that suits your desired potency.
-
Calculating THC content: To accurately calculate the THC content in your weed butter, you need to know the percentage of THC in your starting cannabis material. This information can usually be found on the packaging of your cannabis product. From there, you can use a simple formula to determine the approximate THC content in your infused butter.
-
Desired effects: Understanding your desired effects is crucial in determining the proper dosage of weed butter. If you’re a beginner or have a low tolerance, it’s recommended to start with a lower dose and gradually increase as needed. It’s important to remember that the effects of edibles can take longer to kick in and can be more potent, so patience is key.
Avoid Overconsumption Risks
Understanding the potential risks of overconsumption is crucial in ensuring a safe and enjoyable experience with cannabis-infused edibles. While edibles can provide a longer-lasting and more intense high compared to smoking or vaping, it’s important to consume them responsibly.
Overconsumption can lead to unpleasant side effects such as anxiety, paranoia, and even hallucinations. To avoid these risks, it is recommended to start with a low dose, especially if you are a beginner. Give your body enough time to process the edible before consuming more.
It’s also important to be aware of the potency of the edible you are consuming, as different products can have varying levels of THC. By practicing responsible consumption practices and being aware of the risks, you can have a safe and enjoyable experience with cannabis-infused edibles.
Tips for Consistent Potency
When it comes to making weed butter brownies, maintaining consistent effects can be a challenge. However, there are a few tips that can help you adjust the potency levels and ensure a consistent experience every time. Here’s what you need to know:
-
Use precise measurements: To achieve consistent potency, it’s crucial to measure your ingredients accurately. This applies not only to the amount of weed butter you use but also to the other ingredients in your recipe.
-
Test potency before baking: Before adding the weed butter to your brownie mix, try a small amount to gauge its potency. This will give you an idea of how strong the final product will be and allow you to adjust the amount of weed butter accordingly.
-
Keep notes: Maintaining a record of your recipes and the effects they produce can help you fine-tune the potency levels over time. By noting the amount of weed butter used and the resulting effects, you can make adjustments to achieve your desired experience.
Following these tips will help you create consistently potent weed butter brownies that deliver the desired effects every time.
Storing and Enjoying Your Weed Brownies
Once they’ve cooled, you can store your weed brownies in an airtight container to keep them fresh. Proper storage techniques are essential to maintain the potency and flavor of your infused brownies. Here are some tips for storing and enjoying your weed brownies:
Technique | Description |
---|---|
Store in a cool, dark place | Heat and light can degrade the potency of the cannabinoids in your brownies. Keep them away from direct sunlight or high temperatures. |
Separate from regular brownies | To avoid confusion or accidental consumption, it’s best to store your weed brownies separately from regular ones. Label the container clearly. |
Use within a week | Although the brownies can last longer, it’s recommended to consume them within a week to ensure optimal freshness and potency. |
Freeze for long-term storage | If you have a large batch or want to save them for later, you can freeze your weed brownies in an airtight container. Thaw them before serving. |
Best serving methods | Enjoy your weed brownies by cutting them into small, manageable pieces. Start with a low dosage and wait at least an hour before consuming more. Remember to always store them securely and out of reach of children or pets. |
Frequently Asked Questions
Can I Use Any Strain of Weed to Make Weed Butter, or Are There Specific Strains That Work Best?
Any strain of weed can be used to make weed butter, but there are specific strains that work best for making edibles. When infusing weed butter, consider the potency, flavor profile, and desired effects of the strain.
How Long Does It Take to Make Weed Butter From Scratch?
To make weed butter from scratch, it typically takes a few hours. After infusing the butter with cannabis, you can use it to enhance various recipes. Remember to store the weed butter properly to maintain its potency.
Can I Use Store-Bought Brownie Mix or Do I Have to Make the Mix From Scratch?
I can use store-bought brownie mix for weed brownies, but it’s important to properly dose them. The homemade mix gives more control over the ingredients, but store-bought is convenient.
How Do I Know if My Weed Brownies Are Potent Enough?
To properly dose weed brownies, start by using a reliable recipe and accurately measuring the amount of weed butter. Test the potency by starting with a small piece and waiting for the effects. Adjust the dosage accordingly for future batches.
How Long Can I Store My Weed Brownies Before They Go Bad?
The shelf life of weed brownies depends on how they are stored. To ensure the best quality, store them in an airtight container in a cool, dark place. They can last up to a week, but it’s best to consume them within a few days for optimal freshness.
Conclusion
In conclusion, making brownies with weed butter is a fun and delicious way to enjoy the benefits of marijuana. By selecting the right strain for your weed butter and infusing it into your brownie mix, you can create perfectly potent treats.
However, it is important to be mindful of dosing to avoid any unwanted effects. Did you know that a recent survey found that 42% of cannabis users prefer edibles as their preferred method of consumption?
So why not try making your own weed brownies and join the growing number of people who enjoy this tasty and alternative way of experiencing the effects of marijuana.
Sunny’s articles radiate enthusiasm, much like her sunny disposition. As our resident “Butter Geek”, she delves deep into the latest butter trends, ensuring our readers are always in the know. Beyond her writing, Sunny’s passion lies in exploring vegan butter alternatives and hosting butter-tasting soirées.
Recipes & Culinary Uses
How to Make Brown Sugar Butter

Deliciously decadent and delightfully creamy, making homemade brown sugar butter is a culinary endeavor that is both easy and rewarding. With just a few simple ingredients and a touch of creativity, you can whip up a batch of this delectable spread that will elevate any dish it graces.
In this article, I will guide you through each step of the process, from selecting the perfect ingredients to achieving the ideal texture. Get ready to embark on a buttery journey like no other!
Key Takeaways
- Consider coconut sugar, maple syrup, and honey as substitutes for brown sugar
- Proper ingredient ratios are crucial for consistency and flavor
- Spices like cinnamon and nutmeg can elevate the taste
- Thoroughly cream together softened butter and brown sugar
Choosing the Right Ingredients
To make brown sugar butter, you’ll want to start by choosing the right ingredients.
When it comes to brown sugar substitutes and alternative sweeteners, there are a few options to consider. One popular substitute for brown sugar is coconut sugar. It has a similar flavor profile and can be used in equal amounts as a replacement.
Another alternative sweetener is maple syrup, which adds a rich and distinct taste to the butter. Honey is also a great option, with its natural sweetness and smooth texture.
Depending on your preference, you can experiment with different combinations of these substitutes to find the perfect balance of flavor. Remember to carefully measure the amount of substitute you use to ensure the right consistency and taste in your brown sugar butter.
Measuring and Mixing the Ingredients
When it comes to baking, getting the right ingredient ratios is crucial for achieving the perfect consistency and flavor in your finished product.
In this discussion, I will delve into the importance of proper ingredient ratios and how they can affect the outcome of your recipe.
Additionally, I will explore various mixing techniques that can help you achieve consistency in your batter or dough, ensuring that every bite is just as delicious as the last.
Proper Ingredient Ratios
The proper ingredient ratios for making brown sugar butter are essential for achieving the perfect balance of sweetness and richness. When it comes to ingredient substitutions, it’s important to note that while you can use white sugar instead of brown sugar, it will alter the flavor and color of the butter.
To troubleshoot common issues, such as the butter being too sweet or not sweet enough, you can adjust the amount of brown sugar used. If the butter is too sweet, try using less brown sugar or adding a pinch of salt to balance out the sweetness. On the other hand, if the butter is not sweet enough, you can increase the amount of brown sugar or add a teaspoon of vanilla extract for extra flavor.
Mixing Techniques for Consistency
For a consistent texture, try gently folding the mixture instead of vigorously stirring it.
When making brown sugar butter, the whisking method and temperature control are crucial for achieving the desired texture.
Begin by whisking the softened butter until it becomes smooth and creamy. This can be done using an electric mixer or by hand with a whisk.
Next, gradually add the brown sugar, ensuring that it is fully incorporated before moving on. Whisking slowly and evenly will prevent clumps from forming and create a smooth consistency.
Additionally, maintaining the temperature of the butter throughout the process is essential. If the butter becomes too warm, it can cause the mixture to separate or become greasy. To avoid this, work with softened butter at room temperature and avoid overheating.
Adding Flavor Enhancements
When it comes to adding flavor to a dish, spices are my go-to choice. They have the power to elevate the taste and take a recipe from ordinary to extraordinary.
In addition to spices, I also love infusing my dishes with aromatic herbs, like rosemary or thyme, to impart a subtle yet distinctive flavor.
Together, these flavor enhancements can transform a simple meal into a culinary masterpiece.
Spices for Added Taste
Spice up your brown sugar butter by adding a pinch of cinnamon or a dash of nutmeg for added taste. These warm and comforting spices will elevate the flavor profile of your butter, giving it a delightful twist.
But why stop there? You can also experiment with other aromatic spices like vanilla and cardamom to take your brown sugar butter to the next level. The combination of these flavors will create a harmonious blend that is both sweet and fragrant.
Whether you’re spreading it on toast, using it in baking, or simply enjoying it on its own, this spiced brown sugar butter will add a burst of flavor to any dish.
Now, let’s explore how infusing it with aromatic herbs can take it even further.
Infusing With Aromatic Herbs
After exploring the use of spices to enhance the taste of brown sugar butter, I decided to take it a step further and infuse it with aromatic herbs. Infusing the butter with citrus and experimenting with different herbs can elevate its flavor profile and add a refreshing twist. To help you understand the possibilities, I’ve created a table to showcase some exciting herb and citrus combinations:
Citrus | Herbs | Flavor Profile |
---|---|---|
Lemon | Rosemary | Fresh, tangy, and herbaceous |
Orange | Thyme | Sweet, citrusy, and savory |
Lime | Basil | Zesty, bright, and aromatic |
Grapefruit | Mint | Tangy, refreshing, and cool |
Achieving the Perfect Texture
To achieve the perfect texture for your brown sugar butter, make sure you thoroughly cream together the softened butter and brown sugar. This step is crucial in creating a smooth and spreadable consistency.
Here are three tips to improve spreadability and enhance shelf life:
-
Gradually add the brown sugar to the softened butter while mixing. This ensures that the sugar is evenly distributed throughout the butter, resulting in a smooth texture.
-
Beat the mixture on medium-high speed for a few minutes until it becomes light and fluffy. This incorporates air into the butter, making it easier to spread.
-
Store the brown sugar butter in an airtight container in the refrigerator. This helps to preserve its freshness and extend its shelf life.
Storing and Preserving Brown Sugar Butter
Now that you’ve achieved the perfect texture for your brown sugar butter, it’s important to know how to store and preserve it to ensure its freshness and extend its shelf life.
There are several techniques that can help you in this process.
First, transfer the butter into an airtight container, ensuring that there is no excess air inside. This will prevent oxidation and maintain its flavor.
Secondly, store the butter in the refrigerator, as the cool temperature will slow down the growth of bacteria and maintain its quality.
Lastly, if you want to extend the shelf life even further, you can consider freezing the brown sugar butter. Simply wrap it tightly in plastic wrap or place it in a freezer-safe container.
Following these preserving techniques will help you enjoy your delicious brown sugar butter for a longer period of time.
Creative Ways to Use Brown Sugar Butter
If you’re feeling adventurous in the kitchen, try incorporating this delectable spread into your favorite baked goods or breakfast recipes for a unique and irresistible twist.
Here are three creative ways to use brown sugar butter:
-
Baked Goods: Add a dollop of brown sugar butter to your cookie dough or cake batter for an extra burst of flavor. The rich and caramel-like taste of the butter will complement the sweetness of your treats, making them even more indulgent.
-
Breakfast Delights: Spread brown sugar butter on your toast, pancakes, or waffles for a sweet and creamy topping. The warm and buttery notes of the spread will melt into your breakfast, adding a delightful richness to every bite.
-
Savory Dishes: Don’t limit brown sugar butter to just sweet treats! Use it as a glaze for roasted vegetables or grilled meats. The hint of sweetness from the brown sugar will balance out the savory flavors, creating a harmonious and mouthwatering dish.
Frequently Asked Questions
Can I Use Salted Butter Instead of Unsalted Butter in This Recipe?
Yes, you can use salted butter instead of unsalted butter in this recipe. However, it will impact the taste as salted butter already has salt in it, which may make the brown sugar butter slightly saltier.
Can I Use Coconut Sugar Instead of Brown Sugar?
Yes, you can use coconut sugar instead of brown sugar. It will give the brown sugar butter a slightly different taste, with a hint of coconut flavor.
Can I Substitute Another Type of Sweetener, Like Honey or Maple Syrup, for the Brown Sugar?
Yes, you can substitute honey or maple syrup for the brown sugar in brown sugar butter. However, keep in mind that the flavor profile will change. Honey adds a floral sweetness, while maple syrup adds a rich, caramel-like taste.
How Long Can I Store Brown Sugar Butter in the Refrigerator?
The shelf life of brown sugar butter stored in the refrigerator varies, but it typically lasts for several weeks. To ensure proper storage, keep it in an airtight container or wrap it tightly in plastic wrap.
Can I Freeze Brown Sugar Butter for Long-Term Storage?
Yes, you can freeze brown sugar butter for long-term storage. To do so, put it in an airtight container or freezer bag. This freezing technique will preserve its flavor and texture.
Conclusion
In conclusion, making brown sugar butter is a simple and delicious way to add flavor to your dishes. By using the right ingredients, measuring and mixing them properly, and adding flavor enhancements, you can achieve the perfect texture and taste.
One interesting statistic to consider is that the average American consumes about 23 pounds of butter per year, showing just how popular this ingredient is in our diets.
So why not elevate your recipes with the rich and sweet taste of homemade brown sugar butter? Give it a try and enjoy the delightful results!
Sunny’s articles radiate enthusiasm, much like her sunny disposition. As our resident “Butter Geek”, she delves deep into the latest butter trends, ensuring our readers are always in the know. Beyond her writing, Sunny’s passion lies in exploring vegan butter alternatives and hosting butter-tasting soirées.
-
Recipes & Culinary Uses3 weeks ago
How to Scramble Eggs Without Butter or Oil
-
Specialized Equipment3 weeks ago
Best Butter Infuser for Cannabis
-
Product Care & Storage3 weeks ago
How Long Is Butter Good in the Freezer
-
Butter Basics3 weeks ago
What Is Whipped Butter Used for
-
Butter Basics3 weeks ago
Why Is It Called Apple Butter
-
Butter Tips and Tricks3 weeks ago
How Many Ounces Is 1 Stick of Butter
-
Butter Basics3 weeks ago
Why Am I Craving Bread and Butter
-
Butter Tips and Tricks3 weeks ago
How Many Calories in an Ear of Corn With Butter