Connect with us

Recipes & Culinary Uses

How to Achieve a Peanut Butter Swirl in an Old Fashioned Ice Cream Maker

Published

on

An image showcasing an old-fashioned ice cream maker filled with creamy peanut butter ice cream, elegantly swirled with ribbons of rich chocolate fudge

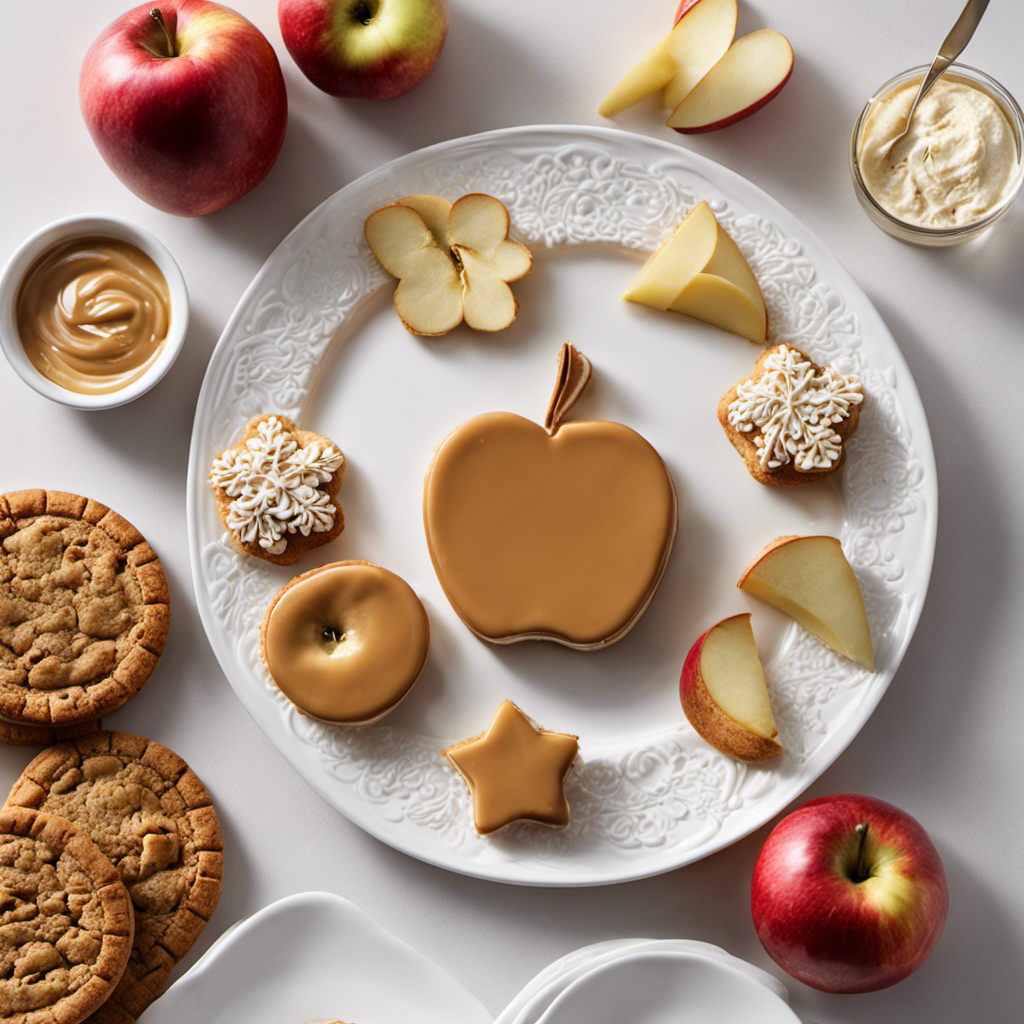
I have always enjoyed treating myself to a rich and decadent dessert, particularly when it includes the irresistible duo of peanut butter and ice cream.

If you’re like me and appreciate the nostalgia of an old fashioned ice cream maker, then get ready to learn how to create the perfect peanut butter swirl.

In this article, I’ll guide you through the step-by-step process of churning, swirling, and freezing your homemade creation, so you can savor every delightful bite.

Let’s dive in and satisfy our sweet tooth together!

Key Takeaways

  • Choosing the right ice cream base (vanilla or chocolate) is important to balance flavors and create the desired taste.
  • Preparing the peanut butter swirl mixture involves heating it until smooth and pourable, then cooling it slightly before adding to the ice cream maker.
  • Churning the ice cream base at a slow or fast speed will result in different textures (creamy or fluffy).
  • Troubleshooting common issues during churning includes checking the temperature of the mixture, ensuring proper assembly of the ice cream maker, increasing churning time, and adjusting the fat content and cooling elements.

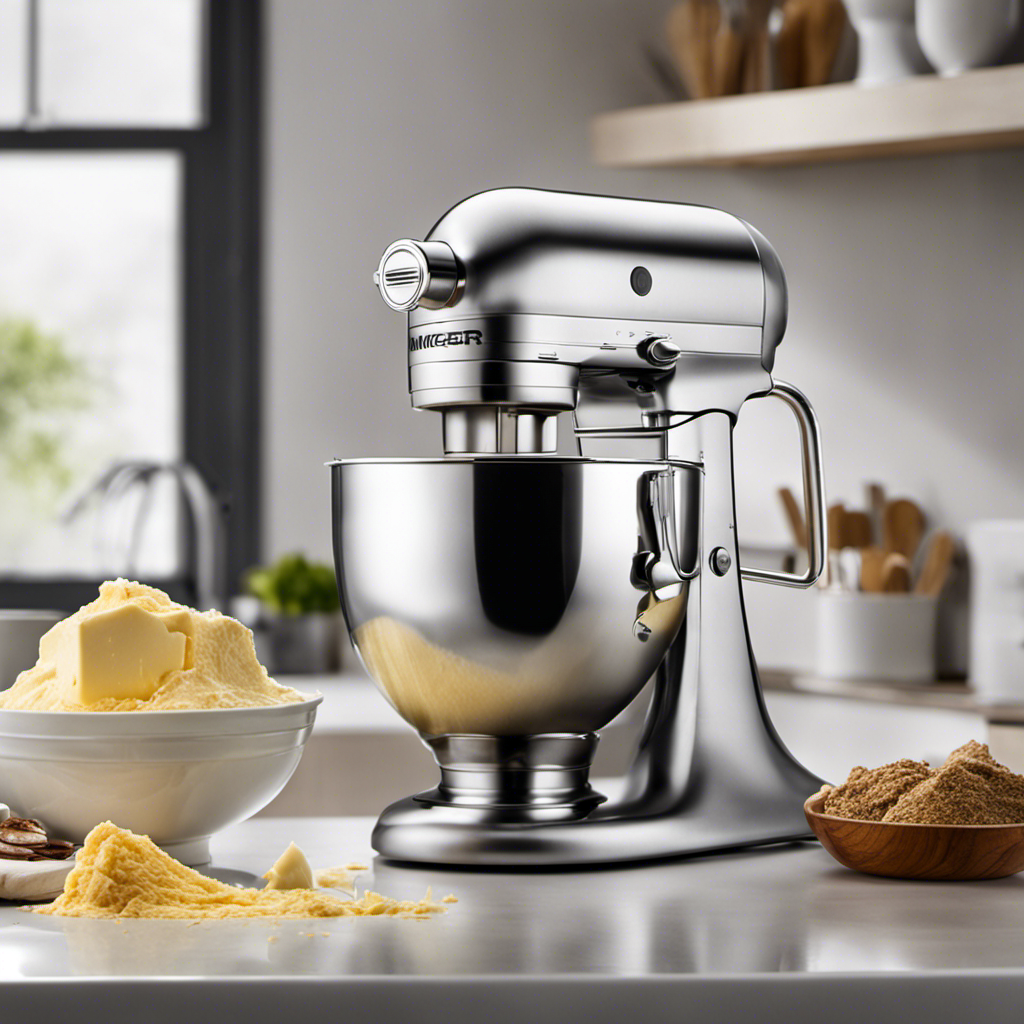
Choosing the Right Ice Cream Base

Advertisement

You’ll want to make sure you choose the right ice cream base for a perfect peanut butter swirl in your old fashioned ice cream maker.

When it comes to choosing the right ingredients, it’s important to consider the flavors you want to balance. A traditional vanilla ice cream base works well as a blank canvas for the peanut butter swirl to shine. Its creamy and neutral taste allows the peanut butter flavor to come through without overpowering the entire dessert.

If you prefer a richer and more indulgent ice cream, a chocolate base can be a great choice. The combination of chocolate and peanut butter creates a decadent and irresistible treat.

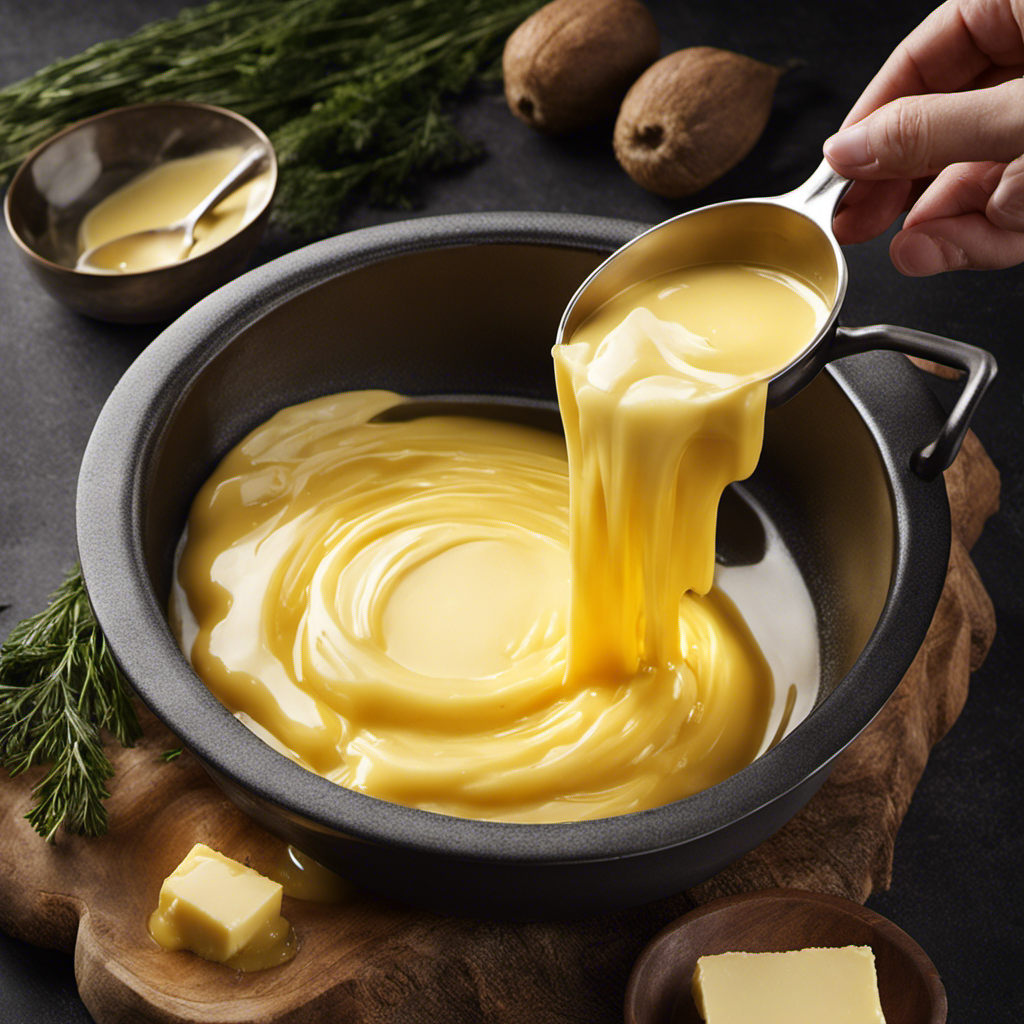
Preparing the Peanut Butter Swirl Mixture

Once the ingredients are mixed together, it’s important to slowly pour the peanut butter swirl mixture into the ice cream maker. Here’s a step-by-step guide on preparing the perfect peanut butter swirl for your homemade ice cream:

  1. Choose your favorite peanut butter swirl recipe or try a different alternative such as almond butter or cookie butter for a unique twist.

  2. In a microwave-safe bowl, heat the peanut butter swirl mixture until it becomes smooth and pourable.

  3. Allow the mixture to cool slightly before pouring it into the ice cream maker. This will prevent the swirl from melting too quickly and blending into the ice cream.

  4. Using a spoon or spatula, gently drizzle the peanut butter swirl mixture into the churning ice cream base. Aim for even distribution throughout the mixture.

By following these steps, you’ll achieve a delectable and visually appealing peanut butter swirl in your homemade ice cream.

Advertisement

Now, let’s move on to the next step – churning the ice cream base in the old fashioned ice cream maker.

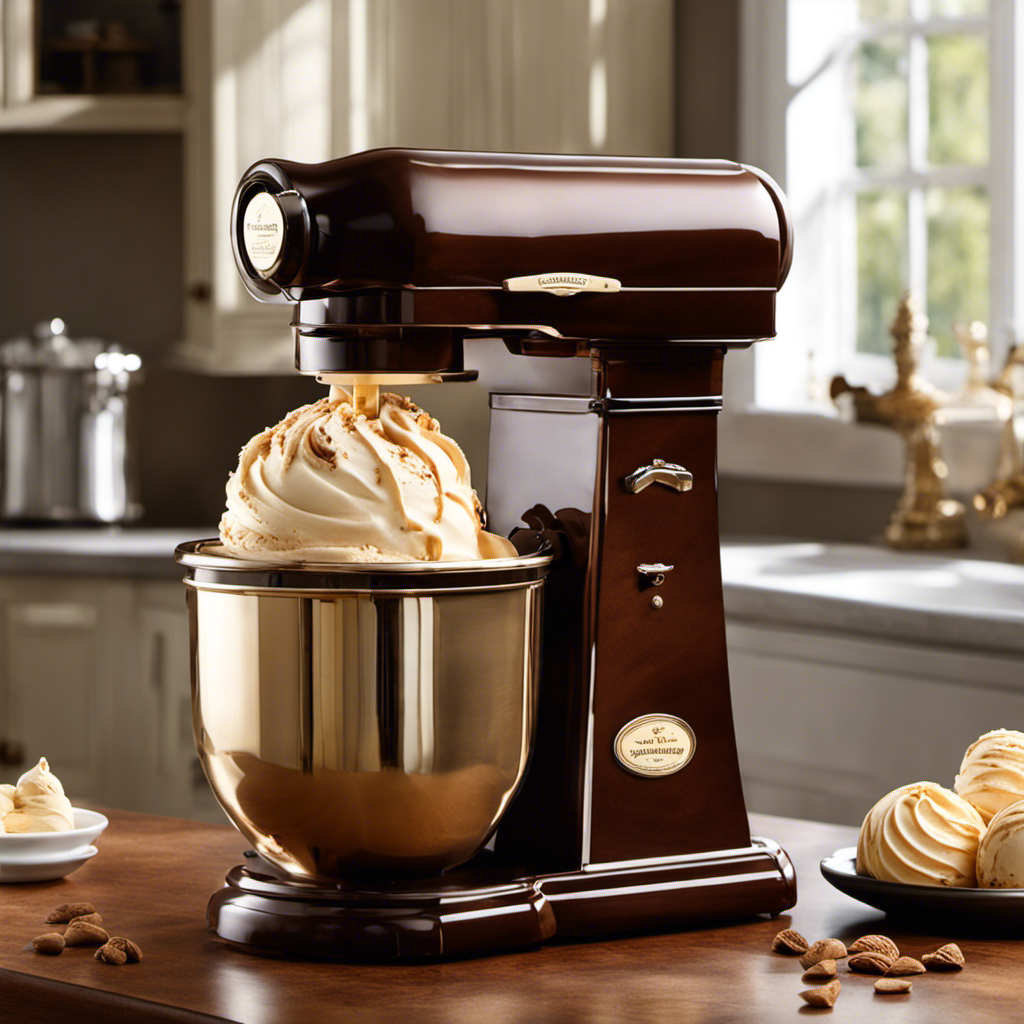
Churning the Ice Cream Base in the Old Fashioned Ice Cream Maker

After pouring the cooled mixture into the churning ice cream base, it’s time to start the old fashioned ice cream maker. I carefully place the metal canister into the wooden bucket, making sure it fits snugly. Next, I attach the motor to the top of the canister, ensuring it’s securely fastened. Once everything is set up, I turn on the machine and let it start churning. The churning process is crucial for creating a smooth and creamy texture in the ice cream. It incorporates air into the mixture, preventing ice crystals from forming and giving the ice cream a light and fluffy consistency. To help you understand the importance of churning, here’s a table outlining the different ice cream churning techniques and their effects:

Technique Effect
Slow churning Creamier texture
Fast churning Lighter and fluffier texture
Intermittent churning Enhanced flavor infusion

Troubleshooting common issues during churning:

Advertisement
  1. Ice cream not freezing: Check if the ice cream mixture is cold enough before churning. If not, chill it further in the refrigerator.
  2. Ice cream not thickening: Make sure the ice cream maker is properly assembled and the canister is securely in place. If necessary, add more ice and salt to the bucket for better cooling.
  3. Ice cream too icy: Increase the churning time to incorporate more air and break down ice crystals. Also, make sure to use a higher fat content in the base mixture.

Adding the Peanut Butter Swirl

When it comes to creating the perfect peanut butter swirl in your ice cream, there are a few key points to keep in mind.

First and foremost, the technique you use to create the swirl can greatly impact the final result. I’ll be sharing some tips and tricks to help you achieve a beautiful and evenly distributed swirl throughout your ice cream.

Additionally, the quality of the peanut butter you choose can make a big difference in taste and texture. I’ll be discussing the best types of peanut butter to use for the perfect swirl.

Lastly, the amount of time you mix the peanut butter into the ice cream base can also affect the final outcome. I’ll be giving recommendations on the optimal mixing time to achieve the desired swirl effect.

Swirl Technique Tips

To achieve a perfect peanut butter swirl, you’ll need to carefully layer the peanut butter into the ice cream mixture as it churns. Here are some tips to master the swirl technique and create delightful flavor combinations:

  1. Consistency is key: Ensure that your peanut butter is soft and easily spreadable to achieve a smooth swirl throughout the ice cream.

  2. Layering technique: Start by pouring a layer of ice cream mixture into the container. Then, dollop spoonfuls of peanut butter on top. Repeat this process, alternating between layers of ice cream and peanut butter until you’ve used all the ingredients.

  3. Swirling motion: Use a knife or spatula to gently swirl the peanut butter into the ice cream mixture. Avoid overmixing to maintain distinct swirls.

  4. Troubleshooting: If the swirls are not distinct enough, try swirling more vigorously. If the peanut butter sinks to the bottom, freeze the ice cream for a few hours before swirling to prevent it from sinking.

Get creative with your swirl flavor combinations! Experiment with chocolate fudge, caramel, or even fruit preserves to add a burst of flavor to your homemade ice cream.

Advertisement

Best Peanut Butter

Your taste buds will thank you when you choose a high-quality, creamy peanut butter for your homemade swirl ice cream.

When it comes to peanut butter brands, there are a few that stand out for their smooth texture and rich flavor. One popular choice is Jif, which has a creamy consistency that blends effortlessly into your ice cream base.

Another option is Skippy, known for its slightly sweet taste and velvety texture.

For a more natural option, try Adams, which is made with just peanuts and a touch of salt.

When incorporating peanut butter into your ice cream recipes, be sure to soften it slightly before swirling it into the base. This will ensure a smooth and evenly distributed swirl throughout your frozen treat.

Advertisement

Mixing Time Recommendations

For optimal results, mix the ingredients until they are well combined and smooth. Here are some recommendations for mixing times to achieve the perfect peanut butter swirl in your old fashioned ice cream maker:

  1. Start by mixing the ice cream base for 15 minutes. This will ensure that the mixture is well blended and all the ingredients are fully incorporated.

  2. After the initial mixing, add in the peanut butter swirl. Gently fold it into the ice cream base using a spatula or a wooden spoon. Be careful not to overmix, as you want to create ribbons of peanut butter throughout the ice cream.

  3. Continue mixing for an additional 5 minutes. This will help distribute the peanut butter evenly and create a smooth texture.

  4. Once the desired consistency is reached, transfer the mixture to a container and freeze for at least 4 hours to allow the ice cream to set.

Troubleshooting common mixing issues:

  • If the peanut butter is not spreading evenly, try warming it slightly before adding it to the ice cream base.

  • If the ice cream is too soft or runny, mix for an additional 5 minutes and then freeze for a longer period of time.

  • If the ice cream becomes too hard, let it sit at room temperature for a few minutes before serving to soften it slightly.

Incorporating the Swirl Into the Ice Cream

Mix the peanut butter swirl into the ice cream base until well combined. To achieve the perfect peanut butter swirl consistency, it is crucial to incorporate swirl techniques effectively. This ensures that every bite of the ice cream is filled with delightful swirls of peanut butter goodness. To help you visualize the process, here is a table illustrating the steps involved in incorporating the swirl into the ice cream:

Step Technique Description
1 Ribbon Swirl Pour the peanut butter in a thin, continuous stream while slowly stirring the ice cream base.
2 Layering Alternate layers of peanut butter and ice cream, then gently swirl with a spoon or spatula.
3 Marbling Use a knife or skewer to create swirls by gently dragging it through the ice cream and peanut butter.

Freezing and Firming up the Ice Cream

Now that we have incorporated the swirl into the ice cream, it’s time to focus on freezing and firming up the mixture. This step is crucial in achieving the perfect texture for your homemade peanut butter swirl ice cream.

To ensure that your ice cream turns out smooth and creamy, follow these freezing techniques:

Advertisement
  1. Chill the ice cream mixture in the refrigerator for at least 4 hours before freezing. This allows the flavors to meld together and creates a smoother texture.

  2. Set up your old fashioned ice cream maker according to the manufacturer’s instructions. Make sure the freezing canister is properly chilled.

  3. Pour the chilled mixture into the canister and attach the dasher.

  4. Begin churning the ice cream, following the recommended time in the instruction manual. This will freeze the mixture and create a velvety texture.

Serving and Enjoying Your Peanut Butter Swirl Ice Cream

To fully savor the delightful flavors of your homemade treat, scoop a generous portion of the peanut butter-swirled ice cream into a bowl and relish each creamy bite.

The peanut butter swirl adds a rich and nutty taste to the velvety smoothness of the ice cream.

For an extra indulgence, drizzle some warm chocolate sauce over the top or sprinkle crushed peanuts for a crunchy texture.

Another serving suggestion is to sandwich the peanut butter swirl ice cream between two chocolate cookies, creating a delectable ice cream sandwich.

To enhance the peanut butter flavor, you can also add a dollop of peanut butter on top or mix in some chunks of chocolate for a delightful twist.

Advertisement

No matter how you choose to enjoy it, the peanut butter swirl ice cream is sure to satisfy your sweet tooth.

Storing and Preserving the Ice Cream

When storing your homemade peanut butter swirl ice cream, make sure to seal the container tightly to prevent freezer burn. Proper storage is essential to maintain the flavor and texture of your delicious creation.

Here are some storage tips and preserving techniques to help you keep your ice cream in perfect condition:

  1. Use an airtight container: Choose a container that seals tightly to prevent air from entering and causing freezer burn.

  2. Place it in the coldest part of the freezer: Store your ice cream at the back of the freezer where temperatures are the most consistent.

  3. Avoid temperature fluctuations: Keep your freezer at a constant temperature to prevent melting and refreezing, which can affect the quality of the ice cream.

  4. Use freezer-safe materials: Opt for containers made specifically for freezing, such as plastic or glass, to ensure the best preservation.

Tips and Variations for Your Peanut Butter Swirl Creation

For optimal results, make sure you have all the necessary ingredients and equipment ready before you begin creating your peanut butter swirl ice cream.

In addition to traditional peanut butter, there are several peanut butter alternatives available that can add a unique twist to your creation. Almond butter, cashew butter, or even sunflower seed butter can be used to create a different flavor profile while still maintaining that creamy, nutty goodness.

Advertisement

When it comes to mix-ins, get creative! Crushed cookies, chopped nuts, or swirls of caramel can add texture and depth to your ice cream. Experiment with different combinations to find your favorite.

Remember to freeze your ice cream maker bowl ahead of time, and be patient while churning. The end result will be a deliciously creamy and satisfying peanut butter swirl ice cream. Enjoy!

Conclusion

In conclusion, making a peanut butter swirl in an old-fashioned ice cream maker is a delightful and rewarding experience.

By choosing the right ice cream base and preparing the peanut butter swirl mixture, you can create a creamy and flavorful treat.

Churning the ice cream base in the old-fashioned ice cream maker helps achieve the perfect texture.

Advertisement

Adding the peanut butter swirl and incorporating it into the ice cream creates a beautiful and delicious pattern.

Finally, freezing and firming up the ice cream ensures it is ready to be served and enjoyed.

With these tips and variations, you can create a truly irresistible peanut butter swirl creation.

Continue Reading
Advertisement

Recipes & Culinary Uses

Gourmet Lobster: Best Butter Poached Lobster Recipe!

Celebrate culinary excellence with our luxurious butter-poached lobster recipe, a decadent dish that will elevate your dining experience to new heights.

Published

on

By

delicious lobster with butter

Indulge in the epitome of culinary decadence with our exquisite butter-poached lobster recipe that promises to elevate your dining experience to new heights. Customize with garlic, chives, and Sauvignon Blanc for rich flavors. Use the Beurre Monté technique for a velvety sauce and maintain a gentle simmer during cooking. Opt for cold-water lobster tails, thawed and patted dry for even cooking. Serve with Chardonnay or Sauvignon Blanc for a gourmet touch. Pair with herbed risotto or lemon-infused asparagus. Enhance your dish further by choosing quality ingredients and complementary sides. Elevate your cooking and impress with a sophisticated meal.

Key Takeaways

  • Choose quality cold-water lobster tails for superior flavor and texture.
  • Implement Beurre Monté technique for a velvety sauce.
  • Use white wine, garlic, and lemon juice for enhanced flavors.
  • Serve with complementary sides like herbed risotto or lemon-infused asparagus.
  • Follow precise cooking techniques for tender, gourmet butter-poached lobster.

Recipe Overview

For a delectable dining experience, let's explore the enticing Recipe Overview of butter poached lobster. When preparing butter poached lobster tails, fresh lobster meat is the star of the show. The tails are gently poached in a luxurious bath of butter and poaching liquid over low heat to make sure they remain tender and juicy. The recipe typically calls for unsalted butter, white wine, and a selection of herbs to infuse the meat with rich flavors.

The process of poaching the lobster in butter results in a glossy sauce known as Beurre Monté that elevates the dish to a gourmet level. This classic cooking technique not only enhances the natural sweetness of the lobster but also creates a velvety texture that's truly indulgent.

The simplicity of the ingredients paired with the impressive results make butter poached lobster a go-to dish for special occasions or when you want to pamper yourself with a decadent meal.

Ingredients and Substitutions

recipe flexibility and options

Let's talk about the importance of ingredient variety and substitution options when preparing butter-poached lobster.

By exploring different herbs, spices, and flavor profiles, you can tailor the dish to your liking.

Understanding potential ingredient swaps allows for flexibility in creating a customized butter-poached lobster recipe that suits your taste preferences.

Advertisement

Ingredient Variety

Customize the flavors of your butter-poached lobster by experimenting with sliced garlic cloves, chopped chives, or other herbs and spices.

When using cold-water lobster tails for this recipe, make sure to thaw them thoroughly before cooking.

To make butter-poached lobster, start by heating the unsalted butter over low heat. Add the lobster tails and poach them for about one minute until the meat is just cooked through.

For added depth, consider using wines like Sauvignon Blanc, Pinot Grigio, or Chardonnay in your poaching liquid. These wines can complement the delicate flavors of the lobster and butter.

By choosing unsalted butter, you can better control the saltiness of the dish. Feel free to adjust the herbs and spices to suit your taste preferences.

Advertisement

This way, you can create a butter-poached lobster dish that's truly unique and tailored to your liking.

Substitution Options

Consider substituting ingredients in your butter poached lobster recipe to create new and exciting flavor variations. Swap frozen cold water lobster tails with warm water ones for a different taste experience.

Instead of using unsalted butter, try clarified butter or ghee to add a nutty richness to the dish. Experiment with herbs like tarragon, thyme, or basil to customize the flavor profile to your liking. Enhance the savory notes by adding minced shallots or onions to the poaching liquid.

For a deeper flavor dimension, replace white wine with dry vermouth or seafood stock in the recipe. These substitutions can elevate your butter poached lobster dish and offer a fresh take on this gourmet delicacy.

Don't be afraid to mix and match these ingredients to create a buttery lobster masterpiece that suits your palate perfectly.

Advertisement

Cooking Techniques

mastering culinary skills efficiently

To achieve a velvety sauce for your Butter Poached Lobster Tail, implement the finest technique – Beurre Monté. This method creates a stable emulsion using butter and liquid, enhancing the luxuriousness of the dish.

When preparing the lobster tails, use kitchen shears to carefully remove the meat, ensuring precision and minimal damage. Cook the lobster tails over low heat in the poaching liquid to maintain tenderness.

Thawing frozen lobster tails thoroughly and patting them dry before poaching is essential for even cooking and ideal texture. Keep the poaching liquid at a gentle simmer to prevent overcooking.

Checking the doneness of the lobster tails by observing their opaque appearance helps prevent them from becoming tough and rubbery. By following these cooking techniques, you can elevate your Butter Poached Lobster Tail to a gourmet level, impressing even the most discerning seafood connoisseurs.

Cooking Tips

improve your culinary skills

When cooking lobster, using a thermometer guarantees perfect doneness every time.

Thawing frozen lobster tails thoroughly is vital to prevent uneven cooking.

Remember to pat dry the lobster tails before poaching to avoid excess water in the poaching liquid.

Advertisement

Lobster Cooking Techniques

For a perfectly cooked lobster tail, maintain a precise poaching temperature of 180F using a thermometer.

When poaching lobster tails, remember the following tips:

  • Thaw frozen lobster tails thoroughly and pat them dry to prevent excess water in the cooking liquid.
  • Avoid overcrowding the saucepan to guarantee even cooking of the lobster tails.
  • Remove the digestive vein from the lobster tail meat and clean it thoroughly before cooking.

To prepare the Butter Poached Lobster Tail recipe, use unsalted butter, fresh lemon juice, dry white wine, and a pinch of red pepper flakes.

Heat the butter over low heat in a saucepan, add one piece of the cleaned lobster tail at a time, and poach them gently until they reach the desired doneness.

Remember to check the lobster tails a few minutes before the recommended cooking time to prevent overcooking them.

Enjoy the succulent and flavorful lobster tails prepared using these cooking techniques.

Advertisement

Lobster Serving Suggestions

Consider pairing your butter-poached lobster with Chardonnay or Sauvignon Blanc for a delightful wine accompaniment. To complement the succulent lobster, serve it alongside a citrusy quinoa salad or warm baguette slices. Enhance the meal further by adding herbed risotto or lemon-infused asparagus for an explosion of flavors.

When dealing with leftovers, remember to refrigerate them promptly in an airtight container to maintain freshness. When reheating, use a gentle heat setting on a pan. Incorporate a bit of the poaching liquid to keep the lobster moist and prevent it from becoming overcooked. This method will help retain the lobster's tenderness and flavors, ensuring a delicious meal even when reheating.

Serving, Storage, and Reheating

meal prep essentials explained

To maintain freshness and flavor, refrigerate any leftover butter-poached lobster promptly in an airtight container.

When it comes to serving, storage, and reheating your delectable lobster, here are some essential tips to guarantee a delightful culinary experience:

  • Refrigerate promptly: Store any uneaten lobster in an airtight container in the refrigerator to prevent spoilage and preserve its quality.
  • Reheat gently: When reheating, use a pan over low to medium heat to prevent overcooking and maintain the lobster's tenderness.
  • Utilize poaching liquid: Incorporate a bit of the poaching liquid when reheating to keep the lobster meat moist and flavorful.

Butter Poached Lobster

delicious lobster cooked perfectly

Enhance your culinary skills by mastering-immerse yourself in the exquisite art of butter poached lobster, a decadent dish that elevates the flavors of tender lobster meat with a rich and velvety texture.

Butter poached lobster involves gently cooking juicy lobster in a mixture of butter and white wine, creating a rich and flavorful dish perfect for special occasions. The use of Beurre monté, a French technique, results in a velvety sauce that heightens the delicate texture of the lobster.

The gentle cooking process of butter poached lobster guarantees that the lobster remains tender and juicy, without losing its natural sweetness. The poaching liquid used can also be served alongside the lobster, adding an extra layer of flavor and richness to the dish.

Advertisement

This gourmet delicacy is ideal for those looking to indulge in a luxurious meal at home or impress guests on special occasions.

Elevate Your Cooking

enhancing culinary skills

Looking to take your culinary skills to the next level? Elevate your cooking with these expert tips for preparing a gourmet butter-poached lobster dish using uncooked lobster tails and the Beurre monté technique:

  • Opt for cold-water lobster tails: Their sweet, delicate flavor and firm texture will enhance your dish, providing a gourmet dining experience.
  • Use quality ingredients: Incorporate white wine, garlic, and lemon juice to enhance the natural flavors of the lobster, creating a luxurious and flavorful meal.
  • Pair with complementary sides: Serve your butter-poached lobster with herbed risotto or lemon-infused asparagus to further elevate the dish to a gourmet level.

To ensure success, follow key steps like using kitchen shears for precise lobster tail meat removal and maintaining a gentle simmer during cooking. By implementing these techniques and tips, you'll be on your way to impressing your guests with a sophisticated and delicious lobster feast.

Frequently Asked Questions

What Kind of Butter Do Restaurants Use for Lobster?

Restaurants typically use high-quality unsalted butter for butter-poached lobster to control salt levels and enhance lobster flavor. Some may opt for clarified butter due to its higher smoke point. The choice varies based on chefs' preferences and dish style.

What Is the Tastiest Way to Cook Lobster?

When cooking lobster, the tastiest way is to butter poach it. This technique enhances the natural sweetness and delicate flavor of the meat, creating a luxurious, velvety texture. It's a gourmet experience you won't forget.

How to Season Lobster When Boiling?

When boiling lobster, season it with salt and lemon for sweetness. Enhance flavor by adding herbs like thyme or bay leaves. For a kick, throw in garlic, peppercorns, or red pepper flakes. Customize with paprika or cajun seasoning.

What Is Poaching in Butter?

So, what is poaching in butter? Well, it's a gentle cooking method where food luxuriates in warm, melted butter. This technique keeps things moist and intensifies flavors, resulting in tender, silky dishes.

Advertisement

Conclusion

Just like a lobster gracefully glides through the ocean depths, this butter poached lobster recipe will elevate your culinary skills to new heights.

With each succulent bite, you'll feel as though you're diving into a sea of gourmet flavors.

So, don't be afraid to take the plunge and try this luxurious dish – you'll be swimming in deliciousness in no time!

Continue Reading

Recipes & Culinary Uses

Creamy Delight: Best Butter Pecan Ice Cream Recipe for Summer!

Yearning for a creamy summer treat that will leave you craving more?

Published

on

By

butter pecan ice cream

Savor a delicious summer treat with our Butter Pecan Ice Cream recipe. Mix butter, brown sugar, cream, and pecans for a creamy delight. Melt butter, cook pecans, whisk eggs, and blend for a rich flavor. Add pecans, cream, and vanilla, then freeze to perfection. Master this easy-to-follow recipe for a tasty dessert to beat the heat.

Key Takeaways

  • Rich and creamy blend of butter, brown sugar, and heavy cream
  • Toasted pecans for a nutty crunch and flavor
  • Easy-to-follow steps for homemade ice cream perfection
  • Customization options with variations like bourbon or chocolate
  • Perfect summer treat with a decadent, refreshing taste

Recipe Ingredients for Butter Pecan Ice Cream

To create a delectable batch of butter pecan ice cream, gather the essential ingredients listed in the recipe.

You'll need:

  • Butter
  • Brown sugar
  • Heavy cream
  • Pecans

These ingredients combine to bring out the rich and nutty flavors of this classic dessert.

The brown sugar adds a caramel-like sweetness, while the heavy cream contributes to a creamy texture that's essential for a decadent treat.

Pecans, when toasted in butter, provide a delightful crunch and enhance the overall flavor profile of the ice cream.

Cooking Instructions for Homemade Ice Cream

making ice cream at home

Start by melting butter in a skillet to infuse the pecans with a rich, nutty flavor for your homemade butter pecan ice cream.

Here's a quick guide to help you make this creamy delight:

Advertisement
  • Melt butter and cook pecans for flavor.
  • Whisk eggs and combine with half-and-half and brown sugar for a creamy base.
  • Cook until thickened, then mix with eggs in a bowl.
  • Add cream, pecans, and vanilla extract.
  • Freeze the mixture in an ice cream maker.

Following these steps will guarantee your homemade butter pecan ice cream turns out rich and delicious.

Remember to carefully adhere to the manufacturer's instructions for your ice cream maker to achieve the perfect consistency.

Enjoy the process of creating this delightful treat that will surely be a hit during the summer months.

Ice Cream Preparation Steps

ice cream recipe instructions

Mix half and half with brown sugar over medium heat in a large bowl to prepare the ice cream base.

Next, whisk beaten eggs and temper them with the warm milk mixture to create a smooth custard.

Once done, thicken the mixture on low heat, then cool it over an ice bath to achieve ideal texture.

After that, stir in heavy cream, vanilla extract, maple extract, and a pinch of salt for rich flavor.

Advertisement

Remember to refrigerate the mixture for 1 1/2 – 2 hours before churning it into creamy butter pecan ice cream.

This process ensures that the flavors meld together beautifully and the ice cream attains the perfect consistency for scooping and savoring.

Nutritional Information and Tips

healthy eating guidance provided

Considering the rich and creamy nature of homemade butter pecan ice cream, it's important to be mindful of its nutritional content and serving size. When indulging in this delectable dessert, remember these essential tips:

  • Portion Control: Enjoy in moderation to savor the flavors without overindulging.
  • Brown Sugar Sweetness: Opt for a moderate amount of brown sugar to balance sweetness without overwhelming the palate.
  • Room Temperature Ingredients: Confirm ingredients like butter and heavy cream are at room temperature for a smoother texture.
  • Nutritional Awareness: Be mindful that homemade butter pecan ice cream can vary in nutritional content, so adjust ingredients accordingly.
  • Consultation: Seek advice from a nutritionist or healthcare provider for personalized guidance on incorporating this treat into a balanced diet.

Homemade Butter Pecan Ice Cream Variations

delicious homemade ice cream

Explore creative twists on traditional butter pecan ice cream by incorporating different nuts, spirits, sauces, chocolates, and dairy-free alternatives.

For a unique flavor, try substituting pecans with walnuts or almonds in the full recipe. Toast the nuts in a separate bowl until browned and fragrant, then chop them finely enough to coat in the ice cream mixture.

To add a boozy kick, mix in a splash of bourbon or rum to the base as you churn the ice cream. For an extra indulgent touch, swirl in caramel sauce or fudge ripple throughout the mixture.

Incorporate chunks of chocolate or chocolate-covered nuts for a delightful contrast in texture, giving each bite a sweet surprise.

Advertisement

If you prefer a lighter, dairy-free option, consider using coconut milk or almond milk as a substitute for traditional dairy products. These alternatives provide a creamy base while catering to plant-based diets.

Experiment with these variations to create a personalized butter pecan ice cream that suits your taste preferences.

Frequently Asked Questions

What Is the Secret to Making Ice Cream Very Creamy?

To make ice cream very creamy, you use a rich base of ingredients like heavy cream, eggs, and sugar. Chilling the base before churning is crucial for a smoother texture. Adding vanilla extract enhances creaminess, and slow churning prevents a dense outcome.

What Flavor Is the Ice Cream in Butter Pecan?

The ice cream in butter pecan is a delightful blend of buttery richness, vanilla sweetness, and maple undertones, perfectly paired with toasted pecans for a nutty crunch. This flavor combination creates a harmonious and indulgent treat.

What's the Difference Between Butter Pecan Ice Cream and Praline Pecan Ice Cream?

In butter pecan ice cream, you'll savor the buttery richness of pecans blended with a creamy base. On the other hand, praline pecan ice cream highlights caramelized sweetness with a swirl of praline sauce for a delightful flavor contrast.

Advertisement

What Age Group Eats Butter Pecan Ice Cream?

You'll find that adults and older individuals, typically in the 30-60 age group, enjoy butter pecan ice cream. It's a favorite among those with a more refined palate, drawn to its rich and nutty flavor.

Conclusion

So there you have it, folks! Whip up this buttery, nutty delight for a taste of summer in every scoop.

Don't cry over spilled milk – grab a cone and enjoy this creamy treat that's sure to satisfy your sweet tooth.

Get churning and indulge in the best butter pecan ice cream you've ever tasted!

Advertisement
Continue Reading

Recipes & Culinary Uses

Festive Favorites: Best Peanut Butter Blossoms Recipe for Holidays!

Unleash the ultimate holiday baking magic with the best Peanut Butter Blossoms recipe – an irresistible treat that will elevate your festive celebrations!

Published

on

By

holiday baking with flair

Elevate your holiday baking with the ultimate Peanut Butter Blossoms recipe. Cream together peanut butter, butter, sugars, and salt, then add egg and vanilla. Roll dough into balls, coat in brown sugar, bake until golden, then press a Hershey's kiss on top. Adjust baking time as needed. Explore ingredient swaps for a personalized touch. Enjoy with hot cocoa or pair with savory dishes. For more tips, ideas, and customization options, the recipe holds more festive surprises.

Key Takeaways

  • Cream together peanut butter, butter, sugars for rich flavor.
  • Bake at 375°F for 8-10 minutes for soft, chewy cookies.
  • Customize with ingredient swaps like almond butter or maple syrup.
  • Pair with savory dishes or hot cocoa for holiday enjoyment.
  • Press Hershey kisses onto warm cookies for a classic finish.

Ingredients for Peanut Butter Blossoms

For the classic Peanut Butter Blossoms recipe, gather peanut butter, butter, sugar, an egg, and Hershey's kisses as your essential ingredients.

Peanut butter is the star, offering a rich flavor that blends perfectly with the sweetness of the cookies.

Butter plays a pivotal role by adding moisture and richness to the dough, ensuring a soft and chewy texture.

The sugar not only sweetens the cookies but also contributes to their festive appeal, making them a perfect treat for any occasion.

Finally, the Hershey's kisses on top provide a delightful chocolatey finish that elevates these cookies to a whole new level of deliciousness.

Advertisement

Together, these ingredients create a harmonious blend of flavors and textures that make Peanut Butter Blossoms a beloved classic for holiday baking or any time you crave a sweet and satisfying treat.

Recipe Steps for Peanut Butter Blossoms

bake peanut butter cookies

To make Peanut Butter Blossoms, start by creaming together peanut butter, butter, sugars, and salt until light and fluffy.

Next, add in the egg and vanilla extract, making sure to mix well to combine all the ingredients thoroughly.

Then, gradually incorporate the dry ingredients into the wet mixture until a smooth dough forms.

Once the dough is ready, roll it into balls and coat each ball generously in brown sugar.

Place the sugar-coated dough balls on a baking sheet, making sure to leave enough space between them for spreading during baking.

Advertisement

Bake the cookies in a preheated oven until they turn a beautiful golden brown.

As soon as the cookies are out of the oven, press a Hershey's kiss into the center of each cookie gently.

The heat from the freshly baked cookies will melt the chocolate just enough to adhere it to the cookie.

These Peanut Butter Blossoms are a delightful treat perfect for Christmas celebrations!

Pro Tips for Making Peanut Butter Blossoms

baking perfect peanut blossoms

To enhance your peanut butter blossom baking experience, consider adjusting the baking time based on your oven's performance for best results.

Additionally, explore ingredient substitutions to cater to dietary preferences or allergies without compromising the flavor or texture of the cookies.

Advertisement

These pro tips can help you customize your peanut butter blossoms while ensuring delicious outcomes.

Baking Time Recommendations

Achieving the ideal texture for your peanut butter blossoms involves baking them at 375°F for 8-10 minutes. This baking duration guarantees that the cookies have a soft and chewy consistency while allowing the Hershey kisses on top to be softened but not completely melted.

Once out of the oven, remember to press the Hershey kisses onto the cookies immediately to secure them in place for that classic appearance.

For the best outcomes, chill the cookie dough for about 30 minutes before baking. This step helps the cookies maintain their shape and prevents excessive spreading during baking, ensuring your peanut butter blossom cookies are perfectly formed and ready to impress during your holiday baking.

Shortening or extending the baking time can alter the texture of the cookies. A quick bake of 6-8 minutes produces softer and chewier cookies, while longer baking times yield a slightly crispier consistency. Stick to the recommended 8-10 minutes for the best soft and chewy peanut butter blossoms.

Advertisement

Ingredient Substitutions

Consider incorporating different ingredients to elevate the flavor and nutritional profile of your peanut butter blossoms. For a healthier option, swap out shortening with unsalted butter to achieve a unique texture and taste in your cookies.

Try using natural peanut butter instead of creamy to add a wholesome twist to the classic recipe. If you're looking to reduce the glycemic impact, substitute brown sugar with coconut sugar in your baking. For a natural sweetener alternative, replace regular granulated sugar with maple syrup in the cookie dough mixture.

Additionally, for a distinct flavor experience, experiment with almond butter as a substitute for peanut butter in your blossoms. These ingredient substitutions can bring a new dimension to your peanut butter blossoms, making them not only delicious but also tailored to your dietary preferences.

Upgrade your baking game this holiday season with these creative twists on a beloved recipe!

Serving Suggestions for Peanut Butter Blossoms

peanut butter cookie recipe

Enhance the enjoyment of your peanut butter blossoms by pairing them with savory dishes like lasagna tortellini soup for a satisfying meal. These classic cookies also complement family-friendly dinners such as easy ground beef shepherd's pie and creamy broccoli cheddar soup, making for a delightful combination. The holiday season calls for cozy treats, and the sweet nuttiness of peanut butter blossoms pairs perfectly with a warm cup of hot cocoa. Whether you're participating in a cookie exchange or looking for a festive touch to your holiday dessert spread, consider rolling the cookies in red, green, and white sugar sprinkles to add a pop of color and fun.

Serving Suggestions Pairing Ideas
Lasagna Tortellini Soup Comforting and hearty meal alongside the cookies
Easy Ground Beef Shepherd's Pie Delicious combination for a family dinner
Creamy Broccoli Cheddar Soup Perfect accompaniment to the nutty cookie flavors

12 Days of Christmas Cookies Recipes

baking traditions for the holidays

Indulge in a variety of delightful Christmas cookie recipes each day during the holiday season. One standout choice is the classic Peanut Butter Blossoms. These holiday cookies feature a peanut butter base topped with a Hershey's kiss, making them a beloved treat for cookie exchanges and festive gatherings.

The process of making these cookies is simple yet rewarding. Start by rolling the dough balls in sugar before baking to add a sweet crunch to each bite. The combination of rich peanut butter flavor and the chocolatey goodness of the Hershey's kiss creates a perfect balance of sweetness.

Advertisement

When enjoying these Christmas cookies, consider pairing them with a glass of milk for a classic and satisfying treat.

Whether you're baking them for your family, a cookie exchange, or a holiday party, Peanut Butter Blossoms are sure to be a hit. Make each day of the holiday season a little sweeter with these delicious cookies.

User Engagement Features

user interaction enhancements

Let's talk about how user interaction features and personalization options enhance your experience with the Peanut Butter Blossoms recipe.

You can engage with others by leaving comments and sharing your results, creating a sense of community around this holiday treat.

Personalization options like name and email entry fields help tailor the experience to your preferences, making it more engaging and enjoyable.

User Interaction Features

Utilizing user engagement features on the website allows for increased participation and feedback from visitors. The comment section enables users to interact with each other and provide valuable feedback on the Peanut Butter Blossoms recipe or share their experiences with Hershey's kisses. By incorporating a reply option, users can engage in conversations, fostering a sense of community around baking these delightful peanut butter cookies.

Advertisement

Moreover, the inclusion of name and email fields not only allows for personalization but also facilitates communication between the website and its visitors. This data storage feature guarantees that users can conveniently access their information for future visits, enhancing their overall user experience.

These user engagement features play an essential role in creating an interactive platform where users can engage, provide feedback, and communicate effectively. Such interaction not only enriches the user experience but also encourages visitors to actively participate in the community surrounding the Peanut Butter Blossoms recipe.

Personalization Options

Enhance your website's user engagement by incorporating personalized options such as commenting, replying, and sharing feedback on the Peanut Butter Blossoms recipe. This level of user interaction not only fosters a sense of community building but also encourages customization and feedback. By allowing users to share their thoughts, results, and experiences with the festive favorites, you create a more engaging and interactive user experience. Additionally, providing users with the option to save their data for future visits and encouraging them to tag @preppykitchen and use #preppykitchen when trying the recipe further enhances their engagement.

Personalization Options Description Benefits
Commenting Users can leave comments on the Peanut Butter Blossoms recipe, sharing their thoughts and experiences. Fosters community building and user engagement.
Replying Users can reply to comments and engage in discussions with other users about the recipe. Encourages active participation and interaction.
Feedback Sharing Users can share feedback on the recipe, providing valuable insights for improvement. Enhances user experience and customization.

Additional Information

clarifying specific details provided

You may find it interesting to know more about the history of the Peanut Butter Blossoms recipe and its cultural significance during the holidays.

  • The Peanut Butter Blossoms recipe's popularity is backed by IRI MULO data, making it a sought-after choice for holiday baking.
  • Copyright for this beloved recipe belongs to The J.M. Smucker Company, a reputable name in the food industry known for quality products.
  • These delightful cookies aren't only perfect for serving at holiday parties but also make excellent gifts due to their festive appeal.

Frequently Asked Questions

Why Are My Peanut Butter Blossoms Dry?

If your peanut butter blossoms are dry, it could be due to using too much flour, overbaking, using natural peanut butter that requires stirring, or not enough butter/shortening. Guarantee precise measurements and follow the recipe closely to maintain moisture.

Why Did My Peanut Butter Blossoms Go Flat?

When making peanut butter blossoms, going flat happens due to overmixing, too much flour, insufficient chilling, or low oven temperature. Remember to avoid these pitfalls. Preheat the oven properly and follow the recipe for perfect blossoms!

What Is America's Favorite Christmas Cookie?

America's favorite Christmas cookie is Peanut Butter Blossoms. Loved for their peanut butter-chocolate combo and nostalgic Hershey's Kiss center, these easy-to-make treats are a holiday staple at parties and gatherings. They're a must-have during the festive season.

Advertisement

What Is Baskin Robbins Peanut Butter Blossom?

You asked about Baskin Robbins Peanut Butter Blossom. It's a delectable seasonal ice cream flavor featuring creamy peanut butter ice cream with a ribbon of more peanut butter and chocolate cookie pieces. Indulge in this festive treat!

Conclusion

Indulge in the warm, gooey goodness of these peanut butter blossoms this holiday season. With the perfect blend of creamy peanut butter and rich chocolate, these cookies are sure to bring joy to your festivities.

Picture yourself surrounded by loved ones, sharing laughter and memories as you enjoy these delicious treats. Let the aroma of freshly baked cookies fill your home and create a cozy, festive atmosphere.

Happy baking and happy holidays!

Advertisement
Continue Reading
Advertisement

Affiliate disclaimer

As an affiliate, we may earn a commission from qualifying purchases. We get commissions for purchases made through links on this website from Amazon and other third parties.

Advertisement

Trending