I enjoy the sensation of soft, nourished skin, don’t you?
If you’re tired of spending money on store-bought creams filled with questionable ingredients, why not try making your own shea butter cream?
In this article, I’ll guide you through the process step by step, sharing my tried-and-true techniques for creating a luxurious cream that will leave your skin feeling soft and hydrated.
So, let’s gather our ingredients and get started on this exciting DIY adventure!
Key Takeaways
- Consider different carrier oil options such as jojoba oil, almond oil, or coconut oil.
- Use a double boiler or alternative melting methods to properly melt shea butter.
- Choose essential oils like lavender oil or tea tree oil for fragrance and therapeutic benefits.
- Mix carrier oils and shea butter well for a smooth and creamy texture.

KitchenAid Artisan, 5-Qt Tilt Head Stand Mixer, KSM150PS, Milkshake
- Durable Metal Construction: Built to last with 59 touchpoints
- 5 Quart Stainless Steel Bowl: Handles small or large batches, dishwasher safe
- Tilt-Head Design: Easy ingredient addition and access to bowl
As an affiliate, we earn on qualifying purchases.
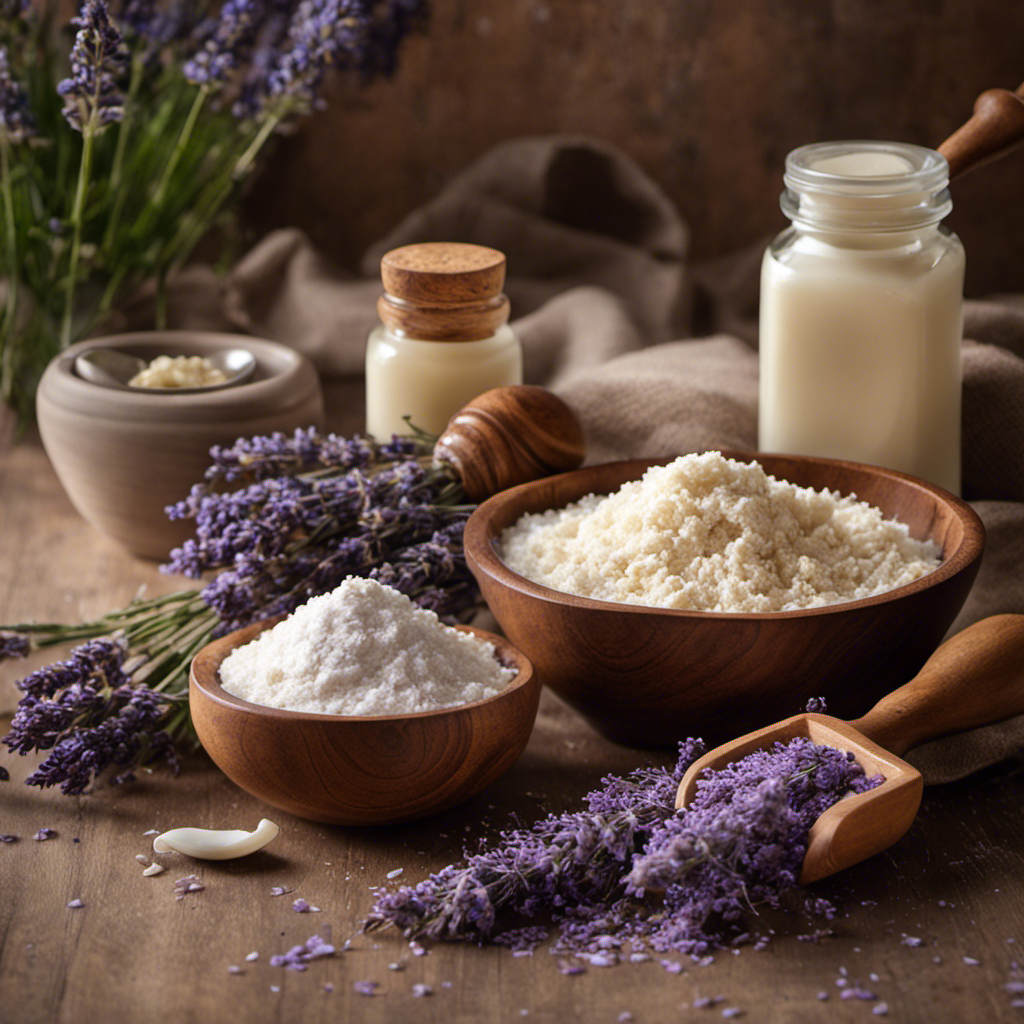
Gathering the Ingredients
Before you can start making shea butter cream, you’ll need to gather all of the necessary ingredients.
One important ingredient to consider is the carrier oil. There are several carrier oil options available, such as jojoba oil, almond oil, or coconut oil. These oils not only help to dilute the shea butter, but they also provide additional benefits for the skin.
Jojoba oil, for example, is known for its moisturizing properties, while almond oil helps to soothe and nourish the skin. In addition to the carrier oil, you’ll also want to choose some essential oils to add fragrance and therapeutic benefits to your shea butter cream.
Lavender oil is great for relaxation, while tea tree oil is known for its antibacterial properties. Once you have gathered all of your ingredients, it’s time to move on to the next step: melting the shea butter.
Melting the Shea Butter
While melting the shea butter, it’s important to keep a close eye on the temperature to avoid overheating. Shea butter has a low melting point, so it can easily burn if not handled properly.
Here are some tips for melting shea butter effectively:
- Use a double boiler: This gentle heating method ensures even melting and prevents scorching.
- Slow and steady: Heat the shea butter on low to medium heat to avoid overheating.
- Stir occasionally: Stirring helps distribute the heat evenly and prevents hot spots.
- Use alternative melting methods: If you don’t have a double boiler, you can also melt shea butter in the microwave using short bursts of heat or by placing it in a heat-resistant container immersed in hot water.
By following these melting techniques, you can safely melt shea butter without compromising its quality or effectiveness.
Once the shea butter is fully melted, it’s time to move on to the next step: adding essential oils.
Adding Essential Oils
Once you’ve melted the shea butter, it’s time to add essential oils for a fragrant touch. Essential oils not only add a delightful scent to your shea butter cream, but they also offer various benefits for your skin and overall well-being.
When choosing essential oils, consider your specific needs and preferences. Lavender essential oil is known for its calming properties, making it ideal for a relaxing cream. Tea tree essential oil has antibacterial and antifungal properties, making it a great option for those with acne-prone or blemished skin. Frankincense essential oil is excellent for promoting healthy, youthful-looking skin.
Remember, essential oils are highly concentrated, so a little goes a long way. Add a few drops to your melted shea butter and mix well to ensure even distribution.
Now, let’s move on to mixing in carrier oils to enhance the benefits of your shea butter cream.
Mixing in Carrier Oils
When it comes to creating your own skincare products, incorporating carrier oils can offer a range of benefits.
Not only do carrier oils provide nourishment and hydration to the skin, but they also help to dilute and distribute essential oils effectively.
The best carrier oil options depend on your specific skincare needs, with popular choices including jojoba oil, sweet almond oil, and coconut oil.
To achieve the desired results, it’s important to understand the mixing ratios and techniques that will ensure a well-balanced and effective product.
Benefits of Carrier Oils
One of the benefits of using carrier oils in shea butter cream is that they help to nourish and moisturize the skin. Carrier oils are derived from various plants and have their own unique properties that can enhance the benefits of shea butter.
Here are some different carrier oil options and their benefits:
- Jojoba oil: Known for its moisturizing properties and ability to regulate oil production in the skin.
- Coconut oil: Highly moisturizing and helps to strengthen the skin’s natural barrier.
- Sweet almond oil: Rich in vitamins A and E, it helps to soothe and nourish the skin.
- Argan oil: Packed with antioxidants and fatty acids, it can help reduce inflammation and promote a youthful appearance.
Best Carrier Oil Options
Using carrier oils in your skincare routine can provide a range of benefits. These benefits include moisturizing, strengthening the skin’s natural barrier, soothing inflammation, and promoting a youthful appearance.
When it comes to choosing a carrier oil, shea butter stands out as a great option. It not only possesses excellent moisturizing properties but also contains vitamins A and E. These vitamins help nourish and rejuvenate the skin. Shea butter has a thicker consistency compared to other carrier oils, making it ideal for dry or mature skin. It can also provide relief for conditions like eczema and psoriasis.
Other popular carrier oils include jojoba oil and rosehip oil. Jojoba oil closely resembles the skin’s natural sebum, making it a good choice for many skin types. Rosehip oil is known for its ability to reduce scars and promote skin regeneration.
Ultimately, the choice of carrier oil depends on your skin type and specific skincare needs.
Mixing Ratios and Techniques
To achieve the desired consistency and maximize the benefits of carrier oils, it’s important to experiment with different mixing ratios and techniques. Finding the right balance can make a significant difference in the effectiveness of your shea butter cream.
Here are some key tips to help you master the art of mixing:
-
Start with a small batch: Begin by making a small amount of cream to test different ratios and techniques without wasting ingredients.
-
Gradually add carrier oils: Start with a small amount of carrier oil and gradually increase it until you reach the desired consistency.
-
Use alternative ratios: Don’t be afraid to try different ratios of carrier oils to shea butter. This can help you customize the cream to suit your specific needs.
-
Mix thoroughly: Whether you prefer hand mixing or using a blender, make sure to mix the oils and butter thoroughly to ensure a smooth and creamy texture.
Incorporating Other Nourishing Ingredients
When it comes to making homemade skincare products, incorporating essential oils can bring a multitude of benefits. Essential oils not only add fragrance but also possess unique properties that can address specific skin concerns such as acne, aging, or dryness.
Additionally, there are various hydrating ingredients that can be added to your homemade creams or lotions to boost their moisturizing power. Some examples of these ingredients include aloe vera gel, hyaluronic acid, or glycerin.
Essential Oil Benefits
You can enhance the benefits of your shea butter cream by adding essential oils. Essential oils have various properties that can improve the effectiveness of your cream and provide additional benefits for your skin.
Here are some key points to consider when selecting and using essential oils in your shea butter cream:
-
Choose oils based on your skin type and concerns. For example, lavender oil is soothing and great for sensitive skin, while tea tree oil is antibacterial and helpful for acne-prone skin.
-
Dilute essential oils properly before adding them to your cream. Most oils require a 1-2% dilution, meaning you should add only a few drops for every ounce of shea butter cream.
-
Incorporate essential oils during the cooling phase of your cream making process to preserve their therapeutic properties.
-
Remember to patch test the final product on a small area of your skin before applying it all over your body.
Hydrating Ingredients to Add?
Adding hydrating ingredients, such as aloe vera or hyaluronic acid, can boost the moisturizing properties of your homemade lotion. These ingredients are known for their exceptional hydrating properties and are commonly used in DIY skincare.
Aloe vera is a natural humectant, which means it attracts and retains moisture, keeping your skin hydrated and supple. It also has soothing and cooling properties, making it perfect for dry or irritated skin.
Hyaluronic acid, on the other hand, is a powerful humectant that can hold up to 1000 times its weight in water. This ingredient helps to replenish and retain moisture in the skin, resulting in a plump and youthful appearance.
Whipping the Mixture
After melting the shea butter and oils together, it’s time to start whipping the mixture. Whipping the mixture is an essential step in creating a luxurious and creamy shea butter cream. Here are some techniques to achieve the perfect cream consistency:
- Use an electric mixer: This will help incorporate air into the mixture, resulting in a light and fluffy texture.
- Start on low speed: Begin whipping the mixture on low speed to prevent any splattering.
- Increase speed gradually: As the mixture thickens, gradually increase the speed to achieve the desired consistency.
- Whip for 5-10 minutes: Continue whipping until the mixture becomes smooth and creamy.
Adding Preservatives (Optional
If desired, preservatives can be added to extend the shelf life of the shea butter cream mixture. Preservatives are commonly used in skincare products to prevent the growth of bacteria, mold, and other microorganisms that can cause spoilage.
When choosing a preservative, it is important to consider its effectiveness and whether it aligns with natural alternatives. Some commonly used preservatives in skincare products include phenoxyethanol, potassium sorbate, and sodium benzoate. However, if you prefer to use natural alternatives, there are options available such as grapefruit seed extract, rosemary extract, and vitamin E oil, which have antimicrobial properties.
These natural alternatives can help preserve your shea butter cream while minimizing exposure to potentially harmful chemicals.
Now that we have discussed adding preservatives, let’s move on to the next step: packaging and storing the shea butter cream.
Packaging and Storing the Shea Butter Cream
To properly preserve and store your shea butter cream, you’ll need suitable packaging that ensures its freshness and longevity. Here are some storage options and tips to help you maximize the shelf life of your homemade shea butter cream:
-
Use airtight containers: Opt for jars or containers with airtight lids to prevent air and moisture from entering and spoiling your shea butter cream.
-
Avoid clear or transparent packaging: Light can degrade the quality of shea butter cream, so choose opaque or dark-colored containers to shield it from sunlight.
-
Store in a cool, dry place: Keep your shea butter cream away from direct heat and sunlight, as high temperatures can cause it to melt or become rancid.
-
Consider refrigeration: If you live in a hot and humid climate, storing your shea butter cream in the refrigerator can help extend its shelf life.
Tips for Using and Customizing the Cream
Now that you have learned how to package and store your homemade shea butter cream, let’s discuss some tips for using and customizing the cream to suit your needs.
First, it’s important to know that shea butter cream can be used on both the body and the face. However, the recommended usage may vary depending on your skin type. Those with dry or sensitive skin can use the cream daily, while those with oily or acne-prone skin may benefit from using it less frequently.
To customize your shea butter cream, you can add essential oils or other natural ingredients to enhance its properties. For example, lavender oil can provide a calming effect, while tea tree oil has antibacterial properties. Be sure to do some research on the recommended usage and dilution ratios for these additives.
To help you understand how to use and customize your shea butter cream, here is a table outlining some popular options:
| Customizing Options | Recommended Usage |
|---|---|
| Adding essential oils | 5-10 drops per 30g of shea butter cream |
| Mixing in carrier oils (e.g., jojoba, almond) | 1-2 tsp per 30g of shea butter cream |
| Incorporating natural exfoliants (e.g., sugar, coffee grounds) | 1-2 tsp per 30g of shea butter cream |
| Blending in other butters (e.g., cocoa, mango) | 1-2 tsp per 30g of shea butter cream |
Frequently Asked Questions
How Long Does It Take for the Shea Butter to Melt?
It takes about 20-30 minutes for shea butter to fully melt. This melting time is crucial for achieving the desired consistency of shea butter cream.
Can I Use Any Type of Essential Oil in the Shea Butter Cream?
Yes, you can use any type of essential oil in the shea butter cream. However, it’s important to consider the compatibility of the oil with other ingredients to ensure a harmonious blend.
What Are Some Common Carrier Oils That Can Be Used in the Cream?
Some common carrier oils that can be used in shea butter cream are jojoba oil, almond oil, and coconut oil. These oils have various benefits for different skin types, such as moisturizing, soothing, and nourishing the skin.
Are There Any Specific Nourishing Ingredients That Work Well With Shea Butter?
Yes, there are specific nourishing ingredients that work well with shea butter. Essential oils, like lavender and frankincense, can be beneficial as they provide added hydration and soothing properties to the cream.
How Long Does It Take for the Cream to Whip up Into a Fluffy Texture?
Whipping time is crucial to achieve a fluffy texture. Depending on the ingredients and equipment used, it can take anywhere from 5 to 15 minutes to whip shea butter cream into a light and airy consistency.
Conclusion
In conclusion, creating your own shea butter cream is a delightful adventure that will transport you to a world of silky smoothness. By following the steps outlined in this guide, you will become the master of your own skincare destiny.
Imagine yourself as a mad scientist, concocting a potion of nourishing oils and aromatic essences. With each whip of the mixture, you are one step closer to unlocking the secret to radiant skin.
So go forth, my fellow cream-makers, and embark on this luxurious journey to self-care. Your skin will thank you.