Connect with us

Recipes & Culinary Uses

Crafting Apple Butter the Old Fashioned Way

Published

on

A visually captivating image that showcases the traditional process of making apple butter

Have you ever thought about how to make tasty apple butter using traditional methods? Well, you’re in luck! In this article, I will walk you through the detailed process of making this sweet and tangy spread from scratch.

From selecting the perfect apples to sterilizing the jars, I’ll provide detailed instructions to ensure your homemade apple butter turns out perfectly every time.

So, are you ready to dive into the world of homemade apple butter and savor its rich flavors? Let’s get started!

Key Takeaways

  • Select ripe and flavorful apples for the best apple butter
  • Peel and core the apples for a smooth and creamy texture
  • Experiment with different spices to enhance the flavor profile
  • Achieve the desired consistency through slow cooking and regular stirring

Selecting the Perfect Apples

To make the best apple butter, you should start by choosing apples that are ripe and flavorful. When it comes to apple varieties, there are numerous options to consider. Some popular choices for making apple butter include Granny Smith, Honeycrisp, and Jonathan apples. These varieties have the perfect balance of sweetness and tartness, which adds depth of flavor to the final product.

Advertisement

When it comes to apple picking, it’s important to choose apples that are at their peak ripeness. Look for apples that are firm to the touch, have a vibrant color, and a strong apple aroma. Avoid apples that are bruised, discolored, or have soft spots, as these may affect the quality of your apple butter.

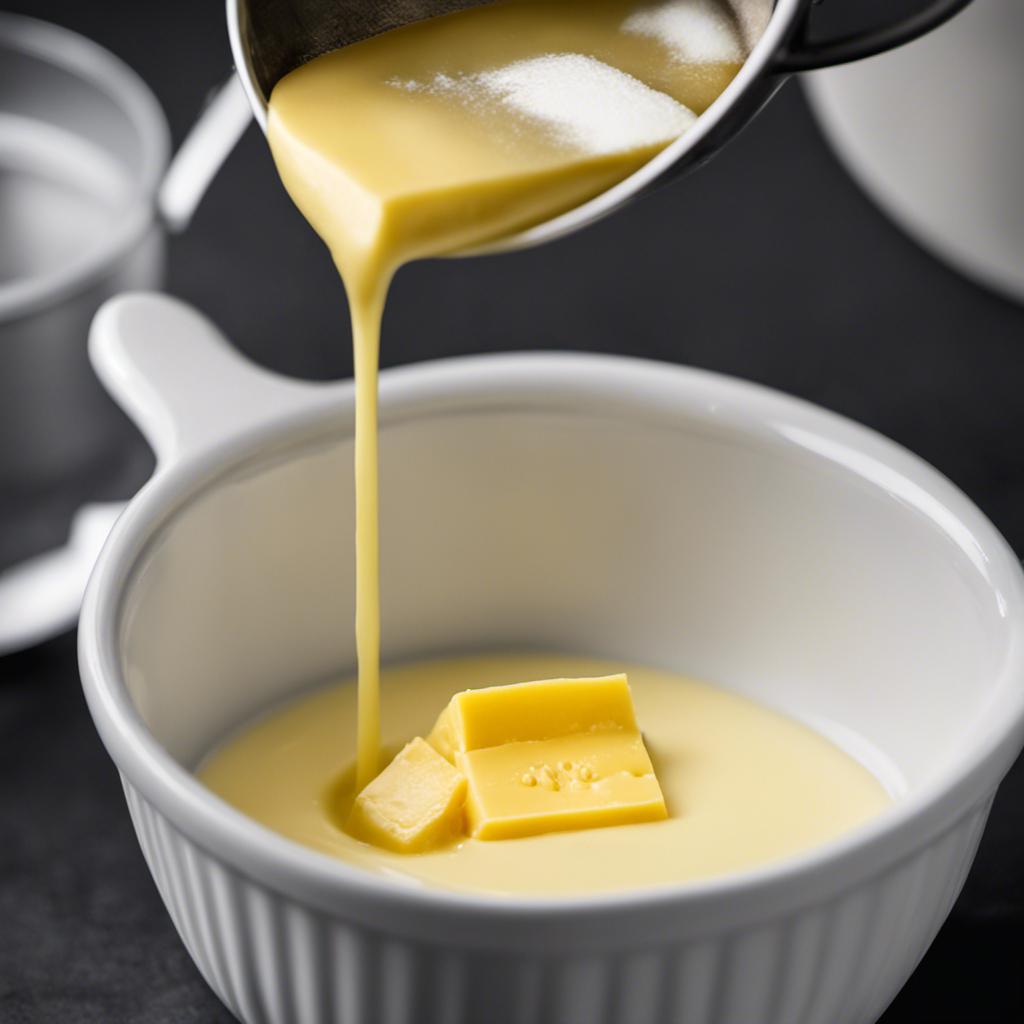
Gathering the Necessary Ingredients

First, you’ll need to collect all the ingredients necessary for this recipe. In order to make the best apple butter, it’s crucial to select ripe apples. Look for apples that are firm, without any bruises or blemishes. Popular varieties for apple butter include Granny Smith, Gala, and Honeycrisp.

Now, let’s talk about the types of sweeteners you can use. Traditional apple butter is often sweetened with brown sugar or molasses for a rich flavor. However, you can also use honey or maple syrup for a natural sweetness. Experiment with different sweeteners to find the taste that suits your preference.

Once you have gathered all the ingredients, it’s time to move on to the next step: preparing the apples for cooking.

Transition: Now that we have all the necessary ingredients, let’s dive into the process of preparing the apples for cooking.

Advertisement

Preparing the Apples for Cooking

Now that you’ve gathered all the necessary ingredients, it’s time to start preparing the apples for cooking. Apple butter recipes can vary, and the type of apple you choose to use will greatly impact the flavor and texture of the final product. Here are three things to consider when preparing your apples:

  • Choose the right apple variety: Different apple varieties have varying levels of sweetness, tartness, and texture. Some popular choices for apple butter include Granny Smith, Fuji, and Jonathan apples. Experiment with different varieties to find the flavor profile you prefer.

  • Peel and core the apples: To ensure a smooth and creamy apple butter, it’s important to remove the peels and cores. You can use a peeler and corer or simply peel and core the apples by hand with a knife.

  • Cut the apples into small pieces: To speed up the cooking process and ensure even cooking, it’s best to cut the apples into small, uniform pieces. This will help them break down and soften more quickly.

Now that the apples are prepared, it’s time to move on to the next step: cooking them to make delicious apple butter.

Cooking the Apples

When it comes to cooking with apples, choosing the right variety is crucial for achieving the best flavor and texture in your dishes. In this discussion, we will explore the best apple varieties for cooking, taking into consideration their sweetness, tartness, and ability to hold their shape during cooking.

Advertisement

Additionally, we will delve into the cooking time required for different apple dishes, such as pies, sauces, and baked goods, to ensure that you have the perfect apple-cooking technique at your fingertips.

Best Apple Varieties

To find the best apple varieties for making apple butter, you’ll want to look for ones that are naturally sweet and have a firm texture. These are the key characteristics that will give your apple butter the perfect balance of flavor and consistency.

After researching various apple varieties and experimenting with different recipes, I have found that the following three varieties are particularly well-suited for making apple butter:

  • Honeycrisp: Known for its crispness and sweetness, the Honeycrisp apple adds a delicious complexity to your apple butter.

  • Granny Smith: With its tartness and firm texture, Granny Smith apples provide a refreshing contrast to the sweetness of the other ingredients in your apple butter.

  • Jonagold: This apple variety combines the best of both worlds, offering a balanced blend of sweetness and tartness that creates a harmonious flavor in your apple butter.

Cooking Time Required?

If you’re looking to reduce the cooking time required for your apple butter, try using a slow cooker instead of the traditional stovetop method. Slow cookers are a convenient and efficient way to prepare apple butter, allowing you to set it and forget it while it cooks to perfection. The low and slow cooking technique helps to intensify the flavors and create a rich and creamy texture.

Here is a simple recipe variation you can try using a slow cooker:

Advertisement
Ingredients Instructions
10 apples Peel, core, and slice the apples. Place them in the slow cooker.
1 cup sugar Sprinkle the sugar over the apples.
1 tsp cinnamon Add the cinnamon to the slow cooker.
1/4 tsp nutmeg Sprinkle the nutmeg over the apples.
1/4 tsp cloves Add the cloves to the slow cooker.
Cook on low for 8-10 hours Stir occasionally to prevent sticking.
Blend until smooth Use an immersion blender or transfer to a blender.
Store in jars Allow the apple butter to cool before sealing and storing in the fridge.

Using a slow cooker not only saves you time, but it also allows the flavors to develop more fully. Experiment with different ingredients and cooking techniques to find your perfect apple butter recipe.

Adding the Spices

Once you’ve finished cooking the apples down, you’ll want to start adding the spices. This is where the real magic happens and the flavor profile of your apple butter starts to come alive.

Here are three spice combinations that will take your apple butter to the next level:

  • Cinnamon and nutmeg: This classic combination adds warmth and depth to the apple butter, giving it that cozy, autumnal flavor.

  • Allspice and cloves: These spices bring a hint of earthiness and a touch of sweetness to the apple butter, creating a complex and flavorful profile.

  • Ginger and cardamom: For a more exotic twist, try adding ginger and cardamom. The spicy and slightly floral notes of these spices complement the sweetness of the apples beautifully.

Experiment with different spice combinations to find your favorite flavor profile. Don’t be afraid to get creative and make it your own!

Simmering the Mixture

When it comes to simmering the apple butter mixture, there are a few important factors to consider.

Advertisement

First, the optimal simmering time can greatly impact the final taste and texture of the apple butter.

Second, temperature control techniques are crucial for ensuring that the mixture cooks evenly and doesn’t burn.

Finally, experimenting with flavor-enhancing ingredient combinations can take your apple butter to the next level, adding depth and complexity to the overall taste.

Optimal Simmering Time

The optimal simmering time for apple butter is typically around two to three hours. This allows the flavors to meld together and the mixture to thicken to the desired consistency. Simmering techniques play a crucial role in achieving the perfect apple butter.

Here are some tips to help you along the way:

Advertisement
  • Use a heavy-bottomed pot to ensure even heat distribution.
  • Stir the mixture regularly to prevent scorching and promote even cooking.
  • Adjust the sweetness by adding sugar or other sweeteners to taste.

By following these simmering techniques, you can create a delicious batch of apple butter with just the right balance of flavors.

Now, let’s move on to the next step: temperature control techniques.

Temperature Control Techniques

To achieve the desired consistency of your apple butter, you’ll want to focus on controlling the temperature throughout the cooking process.

Temperature control is crucial in ensuring that your apple butter turns out perfectly smooth and creamy.

One technique you can use is to start cooking the apples at a high temperature to break them down quickly. Once they have softened, reduce the heat to a gentle simmer.

This slow and steady simmer will allow the flavors to develop and the apples to caramelize without burning.

Advertisement

Another technique is to use a candy thermometer to monitor the temperature. Ideally, you want to maintain a temperature of around 220°F (104°C) to achieve the perfect consistency.

Flavor-Enhancing Ingredient Combinations

Using a combination of cinnamon, nutmeg, and cloves can enhance the flavor of your apple butter. These spices are known for their warm and aromatic qualities, making them the perfect complementing flavors for the sweet and tangy taste of apples. Traditional recipes often include these spices to create a rich and flavorful apple butter that is reminiscent of homemade goodness.

To fully enjoy the flavor of your apple butter, consider the following tips:

  • Use freshly ground spices for a more intense and fragrant flavor.
  • Experiment with the ratios of cinnamon, nutmeg, and cloves to find the perfect balance that suits your taste.
  • Add a hint of vanilla extract to enhance the overall flavor profile.

Monitoring the Consistency

Check if your apple butter is the desired consistency by spooning a small amount onto a plate and seeing if it holds its shape. This is one of the testing techniques that can help you determine if your apple butter is done cooking. If it holds its shape and doesn’t spread out on the plate, then congratulations, you have achieved the perfect consistency!

However, if it’s too runny and spreads out, it means that your apple butter needs more cooking time. Troubleshooting tips include continuing to cook the apple butter over low heat, stirring frequently to prevent scorching, and adding a small amount of lemon juice or pectin to help thicken it. Remember, the consistency of apple butter should be thick and spreadable, similar to peanut butter.

Now that you know how to test the consistency, let’s move on to testing for doneness in the next section.

Advertisement

Testing for Doneness

When it comes to determining if a dish is done cooking, there are several reliable methods that can be used.

One common indicator is cooking time, which can be helpful in giving a general idea of when the dish should be finished.

However, it is also important to pay attention to color and texture cues, as these can provide more accurate information about doneness.

Additionally, the spoon or plate test can be a useful tool in assessing the readiness of a dish, as it allows you to see the consistency and texture firsthand.

Cooking Time Indicators

To gauge the cooking time, rely on visual cues like the deepening color and thickening consistency of the apple butter. These indicators will help determine when the apple butter is ready to be taken off the heat and cooled.

Advertisement

Here are some cooking techniques and recipe variations to consider:

  • Slow Cooker Method: Cook the apples on low heat for 8-10 hours, stirring occasionally, until the apple butter reaches the desired consistency.

  • Stovetop Method: Simmer the apples on low heat for 2-3 hours, stirring regularly, until the apple butter thickens and turns a deep brown color.

  • Oven Method: Bake the apples in a covered dish at 250°F for 3-4 hours, stirring every hour, until the apple butter is dark and thick.

Color and Texture Cues

To achieve the desired color and texture of your apple butter, keep an eye on the deepening color and the thickening consistency as you cook it. The color preservation of apple butter is important to maintain its visual appeal and to indicate proper cooking. As the apples cook down, they undergo a chemical process called caramelization, which gives the apple butter its rich, dark color. Traditional canning methods can help preserve this color and extend the shelf life of your apple butter. Here is a table highlighting the color and texture cues to look out for:

Color Texture Indication
Light brown Thin and runny Not cooked enough
Dark brown Thick and spreadable Cooked to perfection
Burnt or black Sticky and clumpy Overcooked

Spoon or Plate Test

After simmering the apple butter for hours, it’s time to check if it has reached the desired consistency. The spoon or plate test is a reliable method to determine if the apple butter is ready to be canned.

To perform the spoon or plate test, simply dip a spoon or plate into the apple butter and let it cool for a few seconds. If it forms a thick coating that doesn’t run off, it’s done.

Here are some troubleshooting tips to keep in mind while conducting the test:

Advertisement
  • If the apple butter is too runny, continue cooking it for a bit longer.
  • If it’s too thick, add a small amount of water or apple juice and stir until desired consistency.
  • If the apple butter tastes too sweet or tart, adjust the flavor by adding a bit of lemon juice or sugar, respectively.

Now that we have checked the apple butter’s consistency, it’s time to move on to the next step: sterilizing the jars.

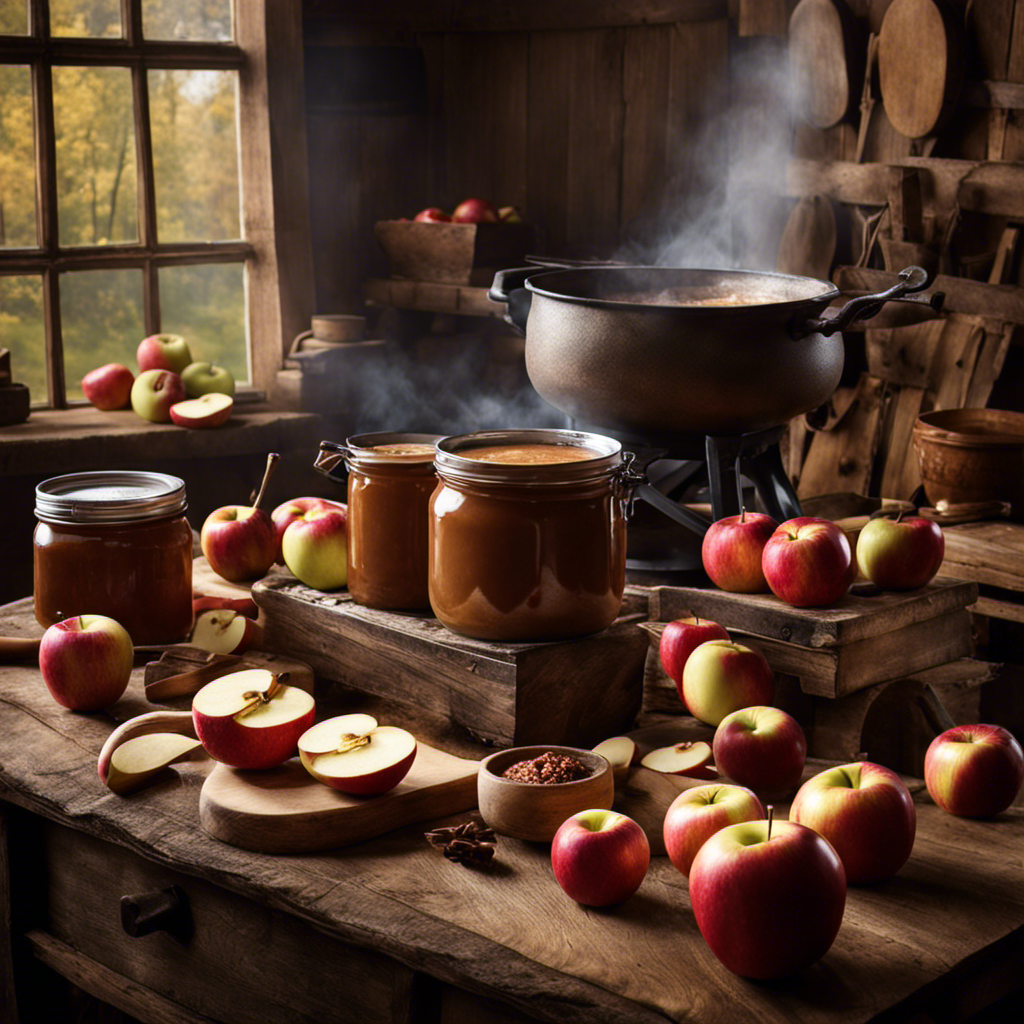
Sterilizing the Jars

First, make sure you’ve washed and dried all the jars thoroughly.

Sterilization techniques are crucial when preserving apple butter to ensure its safety and longevity.

To sterilize the jars, begin by preheating the oven to 225°F. Place the jars, lids, and bands on a baking sheet and put them in the oven for 10 minutes. This will kill any bacteria or microorganisms that may be present.

Alternatively, you can use a large pot of boiling water to sterilize the jars. Place the jars, lids, and bands in the pot and let them boil for 10 minutes.

After sterilization, remove the jars from the oven or pot using tongs and let them cool on a clean towel.

Advertisement

Now you’re ready to fill the jars with your delicious homemade apple butter.

Filling and Sealing the Jars

Now that the jars are sterilized and cooled, you can start filling them with your delicious homemade apple butter. It’s important to take care during this step to ensure the preservation of your apple butter. Here are three tips to help you enjoy the process:

  • Use a funnel: A funnel will make it easier to pour the apple butter into the jars without making a mess.
  • Leave headspace: Leave about 1/4 inch of headspace at the top of each jar to allow for expansion during the sealing process.
  • Wipe the rims: Before sealing the jars, make sure to wipe the rims clean with a damp cloth to remove any residue that could prevent a proper seal.

By following these sterilization techniques and preserving methods, you can be confident that your homemade apple butter will be safely stored for future enjoyment.

Now, let’s move on to the next step: storing and enjoying your homemade apple butter.

Storing and Enjoying Your Homemade Apple Butter

To ensure optimal flavor and longevity, it’s essential to properly store your homemade apple butter in a cool, dry place.

After you have made your delicious apple butter using your favorite homemade apple butter recipe, it’s time to think about how to store it for future enjoyment.

Advertisement

Canning equipment plays a vital role in keeping your apple butter fresh. Use glass jars with tight-fitting lids to seal your apple butter. It’s important to sterilize the jars and lids before filling them with the apple butter to prevent any bacterial growth. Once filled, make sure to tighten the lids securely to create an airtight seal.

Store the jars in a cool, dry place away from direct sunlight. This will help maintain the flavor and quality of your apple butter for a longer period.

Frequently Asked Questions

Can I Use Any Type of Apples to Make Apple Butter?

Yes, you can use any type of apples to make apple butter. However, some apple varieties are better suited for making apple butter due to their sweetness and flavor. Here are some tips for choosing the best apples for apple butter.

How Long Does It Take for the Apple Butter to Reach the Desired Consistency?

To reach the desired consistency for apple butter, it can take anywhere from 4 to 6 hours of cooking on low heat. Stir occasionally and add small amounts of water if needed.

Can I Substitute Any of the Spices in the Recipe?

Sure, you can definitely substitute spices in the recipe. Some alternative spices for apple butter could be cinnamon, nutmeg, allspice, or even cardamom. It all depends on your personal taste preferences.

Advertisement

How Long Can I Store Homemade Apple Butter?

I store homemade apple butter for up to 1 year. The shelf life can be extended by using proper preserving methods such as canning or freezing. It’s important to follow safe food storage guidelines to ensure freshness.

Can I Use Plastic Containers Instead of Glass Jars for Storing the Apple Butter?

I can use plastic containers for storing apple butter, but there are pros and cons. Plastic containers are lightweight and won’t break, but they may not provide the same airtight seal as glass jars, impacting the shelf life and quality of the apple butter.

Conclusion

As I placed the last jar of homemade apple butter on the shelf, a sense of accomplishment washed over me. The hours spent selecting the perfect apples, gathering the necessary ingredients, and carefully preparing and cooking the apples were all worth it. Now, I couldn’t wait to share this old-fashioned delight with my family and friends.

But, there was one more step to complete before indulging in the sweet, spiced goodness. I took a step back, admiring the rows of jars, filled to the brim, and wondered – how long until I can finally savor the taste of my labor?

Advertisement
Continue Reading
Advertisement

Recipes & Culinary Uses

Gourmet Lobster: Best Butter Poached Lobster Recipe!

Celebrate culinary excellence with our luxurious butter-poached lobster recipe, a decadent dish that will elevate your dining experience to new heights.

Published

on

By

delicious lobster with butter

Indulge in the epitome of culinary decadence with our exquisite butter-poached lobster recipe that promises to elevate your dining experience to new heights. Customize with garlic, chives, and Sauvignon Blanc for rich flavors. Use the Beurre Monté technique for a velvety sauce and maintain a gentle simmer during cooking. Opt for cold-water lobster tails, thawed and patted dry for even cooking. Serve with Chardonnay or Sauvignon Blanc for a gourmet touch. Pair with herbed risotto or lemon-infused asparagus. Enhance your dish further by choosing quality ingredients and complementary sides. Elevate your cooking and impress with a sophisticated meal.

Key Takeaways

  • Choose quality cold-water lobster tails for superior flavor and texture.
  • Implement Beurre Monté technique for a velvety sauce.
  • Use white wine, garlic, and lemon juice for enhanced flavors.
  • Serve with complementary sides like herbed risotto or lemon-infused asparagus.
  • Follow precise cooking techniques for tender, gourmet butter-poached lobster.

Recipe Overview

For a delectable dining experience, let's explore the enticing Recipe Overview of butter poached lobster. When preparing butter poached lobster tails, fresh lobster meat is the star of the show. The tails are gently poached in a luxurious bath of butter and poaching liquid over low heat to make sure they remain tender and juicy. The recipe typically calls for unsalted butter, white wine, and a selection of herbs to infuse the meat with rich flavors.

The process of poaching the lobster in butter results in a glossy sauce known as Beurre Monté that elevates the dish to a gourmet level. This classic cooking technique not only enhances the natural sweetness of the lobster but also creates a velvety texture that's truly indulgent.

The simplicity of the ingredients paired with the impressive results make butter poached lobster a go-to dish for special occasions or when you want to pamper yourself with a decadent meal.

Ingredients and Substitutions

recipe flexibility and options

Let's talk about the importance of ingredient variety and substitution options when preparing butter-poached lobster.

By exploring different herbs, spices, and flavor profiles, you can tailor the dish to your liking.

Understanding potential ingredient swaps allows for flexibility in creating a customized butter-poached lobster recipe that suits your taste preferences.

Advertisement

Ingredient Variety

Customize the flavors of your butter-poached lobster by experimenting with sliced garlic cloves, chopped chives, or other herbs and spices.

When using cold-water lobster tails for this recipe, make sure to thaw them thoroughly before cooking.

To make butter-poached lobster, start by heating the unsalted butter over low heat. Add the lobster tails and poach them for about one minute until the meat is just cooked through.

For added depth, consider using wines like Sauvignon Blanc, Pinot Grigio, or Chardonnay in your poaching liquid. These wines can complement the delicate flavors of the lobster and butter.

By choosing unsalted butter, you can better control the saltiness of the dish. Feel free to adjust the herbs and spices to suit your taste preferences.

Advertisement

This way, you can create a butter-poached lobster dish that's truly unique and tailored to your liking.

Substitution Options

Consider substituting ingredients in your butter poached lobster recipe to create new and exciting flavor variations. Swap frozen cold water lobster tails with warm water ones for a different taste experience.

Instead of using unsalted butter, try clarified butter or ghee to add a nutty richness to the dish. Experiment with herbs like tarragon, thyme, or basil to customize the flavor profile to your liking. Enhance the savory notes by adding minced shallots or onions to the poaching liquid.

For a deeper flavor dimension, replace white wine with dry vermouth or seafood stock in the recipe. These substitutions can elevate your butter poached lobster dish and offer a fresh take on this gourmet delicacy.

Don't be afraid to mix and match these ingredients to create a buttery lobster masterpiece that suits your palate perfectly.

Advertisement

Cooking Techniques

mastering culinary skills efficiently

To achieve a velvety sauce for your Butter Poached Lobster Tail, implement the finest technique – Beurre Monté. This method creates a stable emulsion using butter and liquid, enhancing the luxuriousness of the dish.

When preparing the lobster tails, use kitchen shears to carefully remove the meat, ensuring precision and minimal damage. Cook the lobster tails over low heat in the poaching liquid to maintain tenderness.

Thawing frozen lobster tails thoroughly and patting them dry before poaching is essential for even cooking and ideal texture. Keep the poaching liquid at a gentle simmer to prevent overcooking.

Checking the doneness of the lobster tails by observing their opaque appearance helps prevent them from becoming tough and rubbery. By following these cooking techniques, you can elevate your Butter Poached Lobster Tail to a gourmet level, impressing even the most discerning seafood connoisseurs.

Cooking Tips

improve your culinary skills

When cooking lobster, using a thermometer guarantees perfect doneness every time.

Thawing frozen lobster tails thoroughly is vital to prevent uneven cooking.

Remember to pat dry the lobster tails before poaching to avoid excess water in the poaching liquid.

Advertisement

Lobster Cooking Techniques

For a perfectly cooked lobster tail, maintain a precise poaching temperature of 180F using a thermometer.

When poaching lobster tails, remember the following tips:

  • Thaw frozen lobster tails thoroughly and pat them dry to prevent excess water in the cooking liquid.
  • Avoid overcrowding the saucepan to guarantee even cooking of the lobster tails.
  • Remove the digestive vein from the lobster tail meat and clean it thoroughly before cooking.

To prepare the Butter Poached Lobster Tail recipe, use unsalted butter, fresh lemon juice, dry white wine, and a pinch of red pepper flakes.

Heat the butter over low heat in a saucepan, add one piece of the cleaned lobster tail at a time, and poach them gently until they reach the desired doneness.

Remember to check the lobster tails a few minutes before the recommended cooking time to prevent overcooking them.

Enjoy the succulent and flavorful lobster tails prepared using these cooking techniques.

Advertisement

Lobster Serving Suggestions

Consider pairing your butter-poached lobster with Chardonnay or Sauvignon Blanc for a delightful wine accompaniment. To complement the succulent lobster, serve it alongside a citrusy quinoa salad or warm baguette slices. Enhance the meal further by adding herbed risotto or lemon-infused asparagus for an explosion of flavors.

When dealing with leftovers, remember to refrigerate them promptly in an airtight container to maintain freshness. When reheating, use a gentle heat setting on a pan. Incorporate a bit of the poaching liquid to keep the lobster moist and prevent it from becoming overcooked. This method will help retain the lobster's tenderness and flavors, ensuring a delicious meal even when reheating.

Serving, Storage, and Reheating

meal prep essentials explained

To maintain freshness and flavor, refrigerate any leftover butter-poached lobster promptly in an airtight container.

When it comes to serving, storage, and reheating your delectable lobster, here are some essential tips to guarantee a delightful culinary experience:

  • Refrigerate promptly: Store any uneaten lobster in an airtight container in the refrigerator to prevent spoilage and preserve its quality.
  • Reheat gently: When reheating, use a pan over low to medium heat to prevent overcooking and maintain the lobster's tenderness.
  • Utilize poaching liquid: Incorporate a bit of the poaching liquid when reheating to keep the lobster meat moist and flavorful.

Butter Poached Lobster

delicious lobster cooked perfectly

Enhance your culinary skills by mastering-immerse yourself in the exquisite art of butter poached lobster, a decadent dish that elevates the flavors of tender lobster meat with a rich and velvety texture.

Butter poached lobster involves gently cooking juicy lobster in a mixture of butter and white wine, creating a rich and flavorful dish perfect for special occasions. The use of Beurre monté, a French technique, results in a velvety sauce that heightens the delicate texture of the lobster.

The gentle cooking process of butter poached lobster guarantees that the lobster remains tender and juicy, without losing its natural sweetness. The poaching liquid used can also be served alongside the lobster, adding an extra layer of flavor and richness to the dish.

Advertisement

This gourmet delicacy is ideal for those looking to indulge in a luxurious meal at home or impress guests on special occasions.

Elevate Your Cooking

enhancing culinary skills

Looking to take your culinary skills to the next level? Elevate your cooking with these expert tips for preparing a gourmet butter-poached lobster dish using uncooked lobster tails and the Beurre monté technique:

  • Opt for cold-water lobster tails: Their sweet, delicate flavor and firm texture will enhance your dish, providing a gourmet dining experience.
  • Use quality ingredients: Incorporate white wine, garlic, and lemon juice to enhance the natural flavors of the lobster, creating a luxurious and flavorful meal.
  • Pair with complementary sides: Serve your butter-poached lobster with herbed risotto or lemon-infused asparagus to further elevate the dish to a gourmet level.

To ensure success, follow key steps like using kitchen shears for precise lobster tail meat removal and maintaining a gentle simmer during cooking. By implementing these techniques and tips, you'll be on your way to impressing your guests with a sophisticated and delicious lobster feast.

Frequently Asked Questions

What Kind of Butter Do Restaurants Use for Lobster?

Restaurants typically use high-quality unsalted butter for butter-poached lobster to control salt levels and enhance lobster flavor. Some may opt for clarified butter due to its higher smoke point. The choice varies based on chefs' preferences and dish style.

What Is the Tastiest Way to Cook Lobster?

When cooking lobster, the tastiest way is to butter poach it. This technique enhances the natural sweetness and delicate flavor of the meat, creating a luxurious, velvety texture. It's a gourmet experience you won't forget.

How to Season Lobster When Boiling?

When boiling lobster, season it with salt and lemon for sweetness. Enhance flavor by adding herbs like thyme or bay leaves. For a kick, throw in garlic, peppercorns, or red pepper flakes. Customize with paprika or cajun seasoning.

What Is Poaching in Butter?

So, what is poaching in butter? Well, it's a gentle cooking method where food luxuriates in warm, melted butter. This technique keeps things moist and intensifies flavors, resulting in tender, silky dishes.

Advertisement

Conclusion

Just like a lobster gracefully glides through the ocean depths, this butter poached lobster recipe will elevate your culinary skills to new heights.

With each succulent bite, you'll feel as though you're diving into a sea of gourmet flavors.

So, don't be afraid to take the plunge and try this luxurious dish – you'll be swimming in deliciousness in no time!

Continue Reading

Recipes & Culinary Uses

Creamy Delight: Best Butter Pecan Ice Cream Recipe for Summer!

Yearning for a creamy summer treat that will leave you craving more?

Published

on

By

butter pecan ice cream

Savor a delicious summer treat with our Butter Pecan Ice Cream recipe. Mix butter, brown sugar, cream, and pecans for a creamy delight. Melt butter, cook pecans, whisk eggs, and blend for a rich flavor. Add pecans, cream, and vanilla, then freeze to perfection. Master this easy-to-follow recipe for a tasty dessert to beat the heat.

Key Takeaways

  • Rich and creamy blend of butter, brown sugar, and heavy cream
  • Toasted pecans for a nutty crunch and flavor
  • Easy-to-follow steps for homemade ice cream perfection
  • Customization options with variations like bourbon or chocolate
  • Perfect summer treat with a decadent, refreshing taste

Recipe Ingredients for Butter Pecan Ice Cream

To create a delectable batch of butter pecan ice cream, gather the essential ingredients listed in the recipe.

You'll need:

  • Butter
  • Brown sugar
  • Heavy cream
  • Pecans

These ingredients combine to bring out the rich and nutty flavors of this classic dessert.

The brown sugar adds a caramel-like sweetness, while the heavy cream contributes to a creamy texture that's essential for a decadent treat.

Pecans, when toasted in butter, provide a delightful crunch and enhance the overall flavor profile of the ice cream.

Cooking Instructions for Homemade Ice Cream

making ice cream at home

Start by melting butter in a skillet to infuse the pecans with a rich, nutty flavor for your homemade butter pecan ice cream.

Here's a quick guide to help you make this creamy delight:

Advertisement
  • Melt butter and cook pecans for flavor.
  • Whisk eggs and combine with half-and-half and brown sugar for a creamy base.
  • Cook until thickened, then mix with eggs in a bowl.
  • Add cream, pecans, and vanilla extract.
  • Freeze the mixture in an ice cream maker.

Following these steps will guarantee your homemade butter pecan ice cream turns out rich and delicious.

Remember to carefully adhere to the manufacturer's instructions for your ice cream maker to achieve the perfect consistency.

Enjoy the process of creating this delightful treat that will surely be a hit during the summer months.

Ice Cream Preparation Steps

ice cream recipe instructions

Mix half and half with brown sugar over medium heat in a large bowl to prepare the ice cream base.

Next, whisk beaten eggs and temper them with the warm milk mixture to create a smooth custard.

Once done, thicken the mixture on low heat, then cool it over an ice bath to achieve ideal texture.

After that, stir in heavy cream, vanilla extract, maple extract, and a pinch of salt for rich flavor.

Advertisement

Remember to refrigerate the mixture for 1 1/2 – 2 hours before churning it into creamy butter pecan ice cream.

This process ensures that the flavors meld together beautifully and the ice cream attains the perfect consistency for scooping and savoring.

Nutritional Information and Tips

healthy eating guidance provided

Considering the rich and creamy nature of homemade butter pecan ice cream, it's important to be mindful of its nutritional content and serving size. When indulging in this delectable dessert, remember these essential tips:

  • Portion Control: Enjoy in moderation to savor the flavors without overindulging.
  • Brown Sugar Sweetness: Opt for a moderate amount of brown sugar to balance sweetness without overwhelming the palate.
  • Room Temperature Ingredients: Confirm ingredients like butter and heavy cream are at room temperature for a smoother texture.
  • Nutritional Awareness: Be mindful that homemade butter pecan ice cream can vary in nutritional content, so adjust ingredients accordingly.
  • Consultation: Seek advice from a nutritionist or healthcare provider for personalized guidance on incorporating this treat into a balanced diet.

Homemade Butter Pecan Ice Cream Variations

delicious homemade ice cream

Explore creative twists on traditional butter pecan ice cream by incorporating different nuts, spirits, sauces, chocolates, and dairy-free alternatives.

For a unique flavor, try substituting pecans with walnuts or almonds in the full recipe. Toast the nuts in a separate bowl until browned and fragrant, then chop them finely enough to coat in the ice cream mixture.

To add a boozy kick, mix in a splash of bourbon or rum to the base as you churn the ice cream. For an extra indulgent touch, swirl in caramel sauce or fudge ripple throughout the mixture.

Incorporate chunks of chocolate or chocolate-covered nuts for a delightful contrast in texture, giving each bite a sweet surprise.

Advertisement

If you prefer a lighter, dairy-free option, consider using coconut milk or almond milk as a substitute for traditional dairy products. These alternatives provide a creamy base while catering to plant-based diets.

Experiment with these variations to create a personalized butter pecan ice cream that suits your taste preferences.

Frequently Asked Questions

What Is the Secret to Making Ice Cream Very Creamy?

To make ice cream very creamy, you use a rich base of ingredients like heavy cream, eggs, and sugar. Chilling the base before churning is crucial for a smoother texture. Adding vanilla extract enhances creaminess, and slow churning prevents a dense outcome.

What Flavor Is the Ice Cream in Butter Pecan?

The ice cream in butter pecan is a delightful blend of buttery richness, vanilla sweetness, and maple undertones, perfectly paired with toasted pecans for a nutty crunch. This flavor combination creates a harmonious and indulgent treat.

What's the Difference Between Butter Pecan Ice Cream and Praline Pecan Ice Cream?

In butter pecan ice cream, you'll savor the buttery richness of pecans blended with a creamy base. On the other hand, praline pecan ice cream highlights caramelized sweetness with a swirl of praline sauce for a delightful flavor contrast.

Advertisement

What Age Group Eats Butter Pecan Ice Cream?

You'll find that adults and older individuals, typically in the 30-60 age group, enjoy butter pecan ice cream. It's a favorite among those with a more refined palate, drawn to its rich and nutty flavor.

Conclusion

So there you have it, folks! Whip up this buttery, nutty delight for a taste of summer in every scoop.

Don't cry over spilled milk – grab a cone and enjoy this creamy treat that's sure to satisfy your sweet tooth.

Get churning and indulge in the best butter pecan ice cream you've ever tasted!

Advertisement
Continue Reading

Recipes & Culinary Uses

Festive Favorites: Best Peanut Butter Blossoms Recipe for Holidays!

Unleash the ultimate holiday baking magic with the best Peanut Butter Blossoms recipe – an irresistible treat that will elevate your festive celebrations!

Published

on

By

holiday baking with flair

Elevate your holiday baking with the ultimate Peanut Butter Blossoms recipe. Cream together peanut butter, butter, sugars, and salt, then add egg and vanilla. Roll dough into balls, coat in brown sugar, bake until golden, then press a Hershey's kiss on top. Adjust baking time as needed. Explore ingredient swaps for a personalized touch. Enjoy with hot cocoa or pair with savory dishes. For more tips, ideas, and customization options, the recipe holds more festive surprises.

Key Takeaways

  • Cream together peanut butter, butter, sugars for rich flavor.
  • Bake at 375°F for 8-10 minutes for soft, chewy cookies.
  • Customize with ingredient swaps like almond butter or maple syrup.
  • Pair with savory dishes or hot cocoa for holiday enjoyment.
  • Press Hershey kisses onto warm cookies for a classic finish.

Ingredients for Peanut Butter Blossoms

For the classic Peanut Butter Blossoms recipe, gather peanut butter, butter, sugar, an egg, and Hershey's kisses as your essential ingredients.

Peanut butter is the star, offering a rich flavor that blends perfectly with the sweetness of the cookies.

Butter plays a pivotal role by adding moisture and richness to the dough, ensuring a soft and chewy texture.

The sugar not only sweetens the cookies but also contributes to their festive appeal, making them a perfect treat for any occasion.

Finally, the Hershey's kisses on top provide a delightful chocolatey finish that elevates these cookies to a whole new level of deliciousness.

Advertisement

Together, these ingredients create a harmonious blend of flavors and textures that make Peanut Butter Blossoms a beloved classic for holiday baking or any time you crave a sweet and satisfying treat.

Recipe Steps for Peanut Butter Blossoms

bake peanut butter cookies

To make Peanut Butter Blossoms, start by creaming together peanut butter, butter, sugars, and salt until light and fluffy.

Next, add in the egg and vanilla extract, making sure to mix well to combine all the ingredients thoroughly.

Then, gradually incorporate the dry ingredients into the wet mixture until a smooth dough forms.

Once the dough is ready, roll it into balls and coat each ball generously in brown sugar.

Place the sugar-coated dough balls on a baking sheet, making sure to leave enough space between them for spreading during baking.

Advertisement

Bake the cookies in a preheated oven until they turn a beautiful golden brown.

As soon as the cookies are out of the oven, press a Hershey's kiss into the center of each cookie gently.

The heat from the freshly baked cookies will melt the chocolate just enough to adhere it to the cookie.

These Peanut Butter Blossoms are a delightful treat perfect for Christmas celebrations!

Pro Tips for Making Peanut Butter Blossoms

baking perfect peanut blossoms

To enhance your peanut butter blossom baking experience, consider adjusting the baking time based on your oven's performance for best results.

Additionally, explore ingredient substitutions to cater to dietary preferences or allergies without compromising the flavor or texture of the cookies.

Advertisement

These pro tips can help you customize your peanut butter blossoms while ensuring delicious outcomes.

Baking Time Recommendations

Achieving the ideal texture for your peanut butter blossoms involves baking them at 375°F for 8-10 minutes. This baking duration guarantees that the cookies have a soft and chewy consistency while allowing the Hershey kisses on top to be softened but not completely melted.

Once out of the oven, remember to press the Hershey kisses onto the cookies immediately to secure them in place for that classic appearance.

For the best outcomes, chill the cookie dough for about 30 minutes before baking. This step helps the cookies maintain their shape and prevents excessive spreading during baking, ensuring your peanut butter blossom cookies are perfectly formed and ready to impress during your holiday baking.

Shortening or extending the baking time can alter the texture of the cookies. A quick bake of 6-8 minutes produces softer and chewier cookies, while longer baking times yield a slightly crispier consistency. Stick to the recommended 8-10 minutes for the best soft and chewy peanut butter blossoms.

Advertisement

Ingredient Substitutions

Consider incorporating different ingredients to elevate the flavor and nutritional profile of your peanut butter blossoms. For a healthier option, swap out shortening with unsalted butter to achieve a unique texture and taste in your cookies.

Try using natural peanut butter instead of creamy to add a wholesome twist to the classic recipe. If you're looking to reduce the glycemic impact, substitute brown sugar with coconut sugar in your baking. For a natural sweetener alternative, replace regular granulated sugar with maple syrup in the cookie dough mixture.

Additionally, for a distinct flavor experience, experiment with almond butter as a substitute for peanut butter in your blossoms. These ingredient substitutions can bring a new dimension to your peanut butter blossoms, making them not only delicious but also tailored to your dietary preferences.

Upgrade your baking game this holiday season with these creative twists on a beloved recipe!

Serving Suggestions for Peanut Butter Blossoms

peanut butter cookie recipe

Enhance the enjoyment of your peanut butter blossoms by pairing them with savory dishes like lasagna tortellini soup for a satisfying meal. These classic cookies also complement family-friendly dinners such as easy ground beef shepherd's pie and creamy broccoli cheddar soup, making for a delightful combination. The holiday season calls for cozy treats, and the sweet nuttiness of peanut butter blossoms pairs perfectly with a warm cup of hot cocoa. Whether you're participating in a cookie exchange or looking for a festive touch to your holiday dessert spread, consider rolling the cookies in red, green, and white sugar sprinkles to add a pop of color and fun.

Serving Suggestions Pairing Ideas
Lasagna Tortellini Soup Comforting and hearty meal alongside the cookies
Easy Ground Beef Shepherd's Pie Delicious combination for a family dinner
Creamy Broccoli Cheddar Soup Perfect accompaniment to the nutty cookie flavors

12 Days of Christmas Cookies Recipes

baking traditions for the holidays

Indulge in a variety of delightful Christmas cookie recipes each day during the holiday season. One standout choice is the classic Peanut Butter Blossoms. These holiday cookies feature a peanut butter base topped with a Hershey's kiss, making them a beloved treat for cookie exchanges and festive gatherings.

The process of making these cookies is simple yet rewarding. Start by rolling the dough balls in sugar before baking to add a sweet crunch to each bite. The combination of rich peanut butter flavor and the chocolatey goodness of the Hershey's kiss creates a perfect balance of sweetness.

Advertisement

When enjoying these Christmas cookies, consider pairing them with a glass of milk for a classic and satisfying treat.

Whether you're baking them for your family, a cookie exchange, or a holiday party, Peanut Butter Blossoms are sure to be a hit. Make each day of the holiday season a little sweeter with these delicious cookies.

User Engagement Features

user interaction enhancements

Let's talk about how user interaction features and personalization options enhance your experience with the Peanut Butter Blossoms recipe.

You can engage with others by leaving comments and sharing your results, creating a sense of community around this holiday treat.

Personalization options like name and email entry fields help tailor the experience to your preferences, making it more engaging and enjoyable.

User Interaction Features

Utilizing user engagement features on the website allows for increased participation and feedback from visitors. The comment section enables users to interact with each other and provide valuable feedback on the Peanut Butter Blossoms recipe or share their experiences with Hershey's kisses. By incorporating a reply option, users can engage in conversations, fostering a sense of community around baking these delightful peanut butter cookies.

Advertisement

Moreover, the inclusion of name and email fields not only allows for personalization but also facilitates communication between the website and its visitors. This data storage feature guarantees that users can conveniently access their information for future visits, enhancing their overall user experience.

These user engagement features play an essential role in creating an interactive platform where users can engage, provide feedback, and communicate effectively. Such interaction not only enriches the user experience but also encourages visitors to actively participate in the community surrounding the Peanut Butter Blossoms recipe.

Personalization Options

Enhance your website's user engagement by incorporating personalized options such as commenting, replying, and sharing feedback on the Peanut Butter Blossoms recipe. This level of user interaction not only fosters a sense of community building but also encourages customization and feedback. By allowing users to share their thoughts, results, and experiences with the festive favorites, you create a more engaging and interactive user experience. Additionally, providing users with the option to save their data for future visits and encouraging them to tag @preppykitchen and use #preppykitchen when trying the recipe further enhances their engagement.

Personalization Options Description Benefits
Commenting Users can leave comments on the Peanut Butter Blossoms recipe, sharing their thoughts and experiences. Fosters community building and user engagement.
Replying Users can reply to comments and engage in discussions with other users about the recipe. Encourages active participation and interaction.
Feedback Sharing Users can share feedback on the recipe, providing valuable insights for improvement. Enhances user experience and customization.

Additional Information

clarifying specific details provided

You may find it interesting to know more about the history of the Peanut Butter Blossoms recipe and its cultural significance during the holidays.

  • The Peanut Butter Blossoms recipe's popularity is backed by IRI MULO data, making it a sought-after choice for holiday baking.
  • Copyright for this beloved recipe belongs to The J.M. Smucker Company, a reputable name in the food industry known for quality products.
  • These delightful cookies aren't only perfect for serving at holiday parties but also make excellent gifts due to their festive appeal.

Frequently Asked Questions

Why Are My Peanut Butter Blossoms Dry?

If your peanut butter blossoms are dry, it could be due to using too much flour, overbaking, using natural peanut butter that requires stirring, or not enough butter/shortening. Guarantee precise measurements and follow the recipe closely to maintain moisture.

Why Did My Peanut Butter Blossoms Go Flat?

When making peanut butter blossoms, going flat happens due to overmixing, too much flour, insufficient chilling, or low oven temperature. Remember to avoid these pitfalls. Preheat the oven properly and follow the recipe for perfect blossoms!

What Is America's Favorite Christmas Cookie?

America's favorite Christmas cookie is Peanut Butter Blossoms. Loved for their peanut butter-chocolate combo and nostalgic Hershey's Kiss center, these easy-to-make treats are a holiday staple at parties and gatherings. They're a must-have during the festive season.

Advertisement

What Is Baskin Robbins Peanut Butter Blossom?

You asked about Baskin Robbins Peanut Butter Blossom. It's a delectable seasonal ice cream flavor featuring creamy peanut butter ice cream with a ribbon of more peanut butter and chocolate cookie pieces. Indulge in this festive treat!

Conclusion

Indulge in the warm, gooey goodness of these peanut butter blossoms this holiday season. With the perfect blend of creamy peanut butter and rich chocolate, these cookies are sure to bring joy to your festivities.

Picture yourself surrounded by loved ones, sharing laughter and memories as you enjoy these delicious treats. Let the aroma of freshly baked cookies fill your home and create a cozy, festive atmosphere.

Happy baking and happy holidays!

Advertisement
Continue Reading
Advertisement

Affiliate disclaimer

As an affiliate, we may earn a commission from qualifying purchases. We get commissions for purchases made through links on this website from Amazon and other third parties.

Advertisement

Trending