Connect with us

Recipes & Culinary Uses

How to Make Delicious Biscuits Without Butter

Published

on

An image showcasing the step-by-step process of making butter-free biscuits: a mixing bowl filled with flour, baking powder, and salt; a hand pouring milk into the bowl; hands kneading the dough; and finally, a tray of golden, flaky biscuits fresh out of the oven

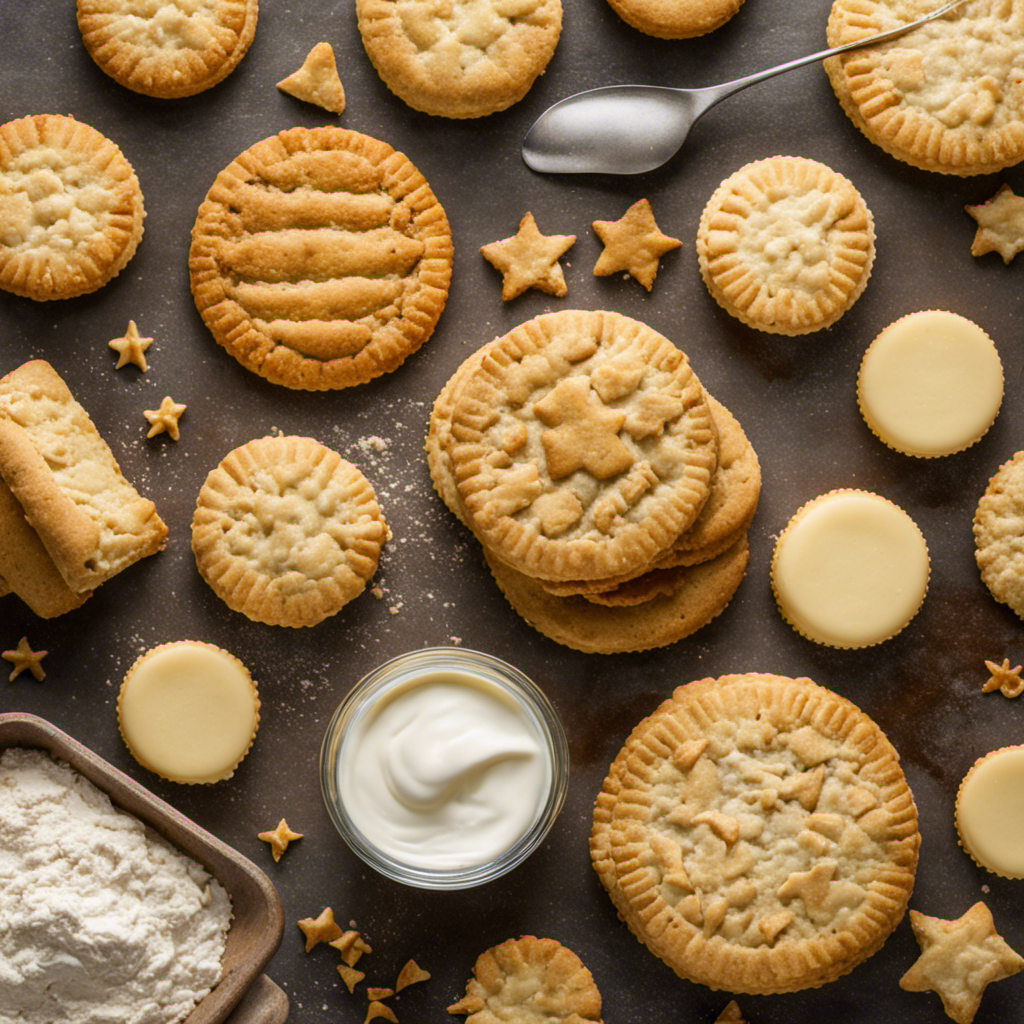
Hey everyone! I have a little secret to share with you – you can make delicious biscuits without using butter. Yes, by making a few adjustments, you can bake light and fluffy biscuits that will surely make your taste buds happy.

In this article, I’ll guide you through the ins and outs of making biscuits without butter, from essential ingredients to mixing techniques and baking tips.

So, get ready to whip up a batch of these delectable treats that are sure to impress. Let’s get started, shall we?

Key Takeaways

  • Going butter-free can lower the risk of heart disease by reducing intake of saturated fats.
  • Butter alternatives like coconut oil or vegan margarine can create delicious and flaky biscuits.
  • The right butter alternative should be cold and solid to create pockets of air for a flaky texture.
  • Creative fillings and flavor options without butter can elevate the taste of biscuits.

The Importance of Going Butter-Free

If you’re looking to make biscuits without butter, it’s important to understand the reasons behind going butter-free. Going dairy-free can have numerous health benefits, and one of them is reducing your intake of saturated fats found in butter. By eliminating butter from your biscuits, you can lower your risk of heart disease and improve your cholesterol levels.

Advertisement

Additionally, going butter-free can be beneficial for those who are lactose intolerant or have a dairy allergy. While butter does add flavor and richness to biscuits, there are alternative ingredients that can still create delicious and flaky biscuits. By using substitutes like vegetable oil, coconut oil, or dairy-free margarine, you can achieve the same texture and taste without sacrificing your health.

Now, let’s explore the essential ingredients for making butter-less biscuits.

Essential Ingredients for Butter-less Biscuits

When it comes to making biscuits without butter, there are a few key points to consider.

First, finding the right butter alternative is crucial for achieving a flaky texture. From coconut oil to vegan margarine, there are plenty of options to choose from.

Additionally, exploring flavor options without butter opens up a whole new world of possibilities. You can use olive oil for a subtle richness or incorporate herbs and spices for added depth.

Advertisement

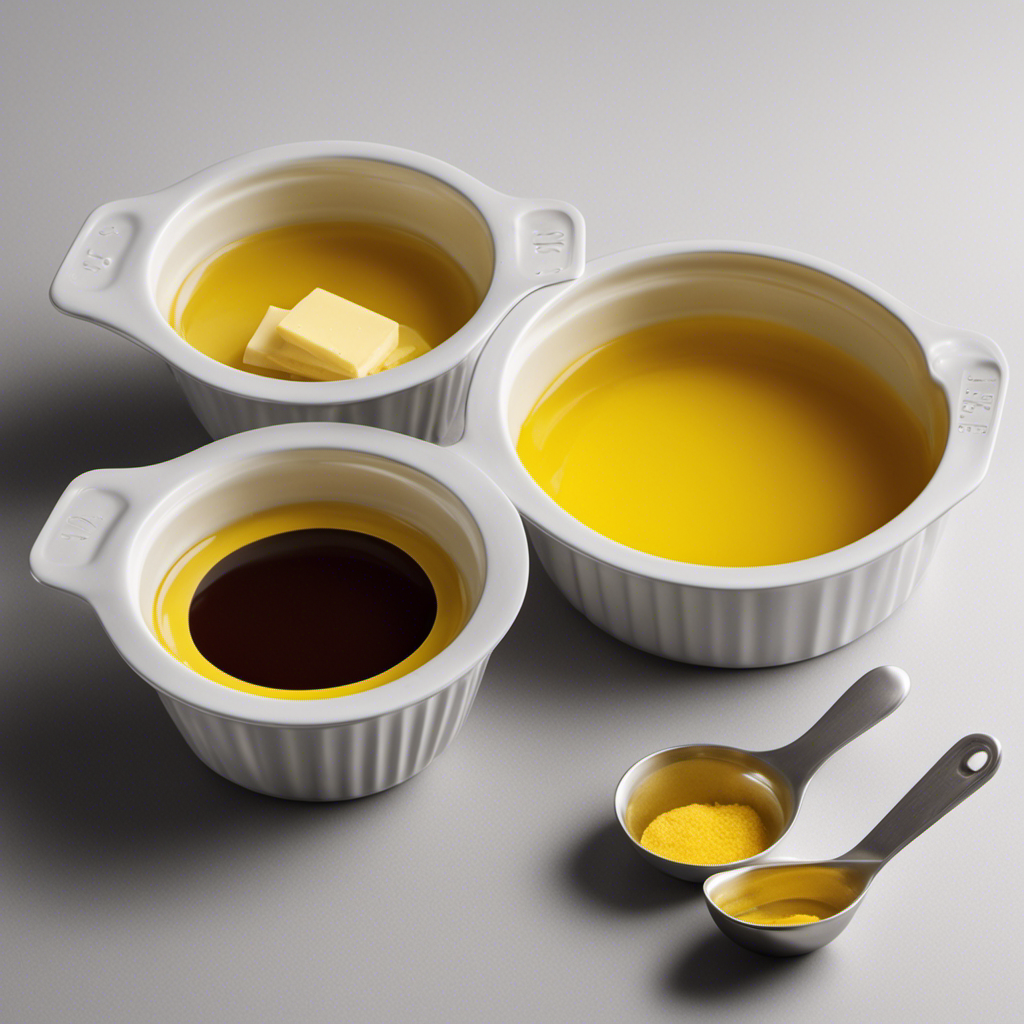
Butter Alternatives for Biscuits

Using a butter alternative can be a great option when making biscuits without butter. There are many butter substitutes available that work well in biscuit recipes.

One popular choice is coconut oil, which adds a subtle sweetness to the biscuits. Another option is vegan margarine, which has a similar texture and flavor to butter. Both coconut oil and vegan margarine can be used in equal amounts as a replacement for butter in biscuit recipes.

These butter substitutes are perfect for those who follow a vegan diet or have lactose intolerance. They provide the same rich and flaky texture that butter does, without the use of any animal products.

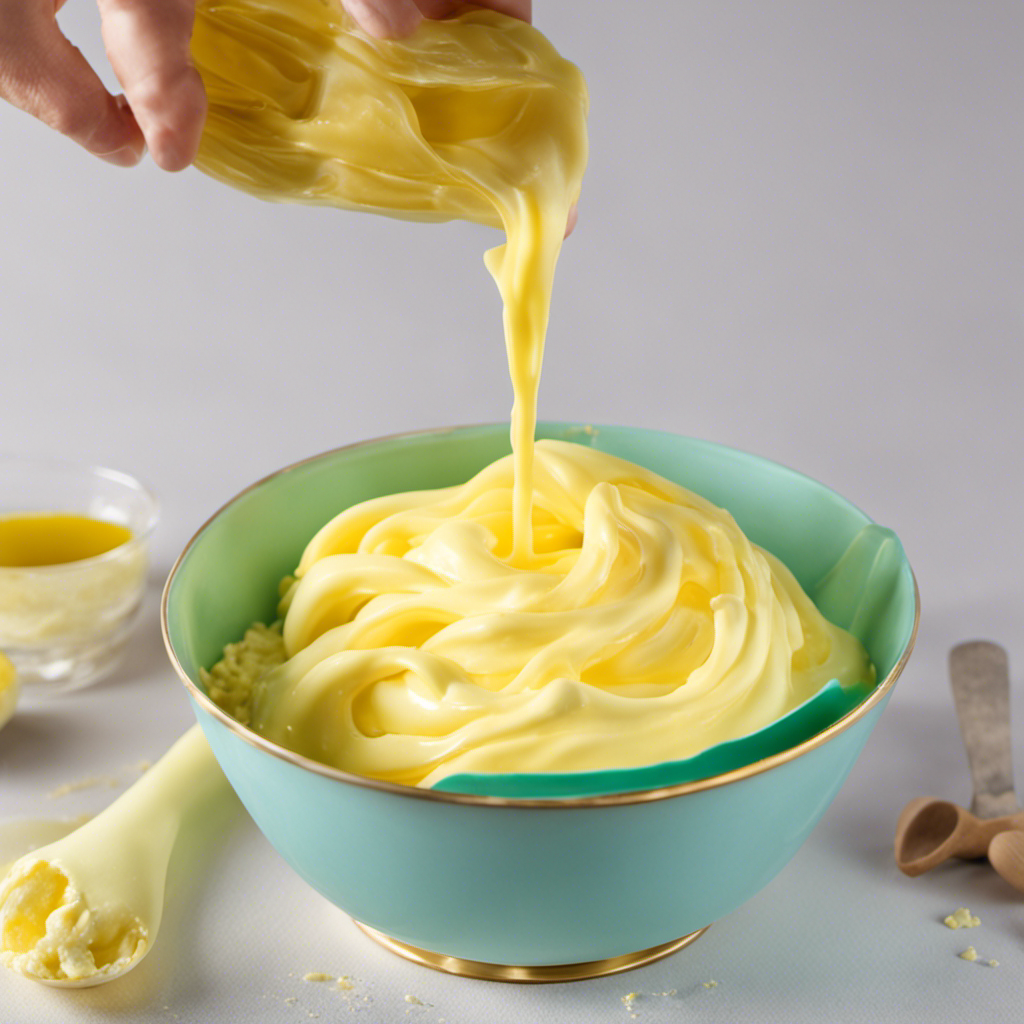
Achieving Flaky Texture

To achieve a flaky texture in your biscuits, you’ll want to ensure that your butter alternative is cold and solid when you begin preparing the dough. This is crucial because the cold fat creates pockets of air when it melts in the oven, resulting in that sought-after flakiness.

As you mix your dough, be careful not to overwork it, as this can cause the fat to melt too soon, leading to a tougher texture.

Advertisement

Once you have your biscuit dough ready, it’s time to get creative with flavorful fillings and creative toppings. Whether you prefer sweet or savory biscuits, the possibilities are endless.

From classic fillings like jam or cheese to more adventurous options like bacon and cheddar or blueberry and lemon zest, you can truly customize your biscuits to suit your taste.

Now, let’s explore the exciting world of flavor options without butter.

Flavor Options Without Butter

Flavor options without butter can add a unique twist to your biscuits. When it comes to flavor variations, the possibilities are endless. Here are some exciting ideas to try:

  • Sweet:

  • Cinnamon and sugar: Add a cozy warmth to your biscuits with a sprinkle of cinnamon and sugar before baking.

  • Vanilla and almond: A touch of vanilla extract and almond extract can lend a subtle sweetness and nuttiness to your biscuits.

  • Savory:

  • Cheddar and herbs: Shredded cheddar cheese and a blend of dried herbs like thyme, rosemary, and parsley can create a savory biscuit bursting with flavor.

  • Garlic and Parmesan: Infuse your biscuits with a garlicky kick and a sprinkle of grated Parmesan cheese for a deliciously savory treat.

These flavor variations will elevate your biscuits and surprise your taste buds.

Advertisement

But what if you don’t have butter on hand? Let’s explore substitutes for butter in biscuit recipes.

Substitutes for Butter in Biscuit Recipes

You can try using margarine as a substitute for butter in your biscuit recipe. Margarine is a common alternative to butter and can provide a similar taste and texture to your biscuits.

Not only does margarine offer a delicious flavor, but it also has some health benefits. Unlike butter, margarine is typically lower in saturated fat, making it a healthier option for those watching their cholesterol levels. Additionally, some margarines are fortified with essential vitamins and minerals, such as vitamin D and omega-3 fatty acids. These added nutrients can contribute to a well-balanced diet.

Mixing and Kneading Techniques for Butter-less Biscuits

When it comes to baking, butter is often seen as a staple ingredient. But what if you’re looking for alternatives?

In this discussion, we’ll explore some great options for replacing butter in your recipes. Furthermore, we’ll delve into the techniques that can help you achieve that perfect texture even without using butter.

Advertisement

Get ready to experiment and discover new ways to make delicious treats without compromising on taste and texture!

Alternatives to Butter

There’s no need to use butter when making biscuits; you can try using alternatives like margarine or vegetable oil instead. Not only do these butter alternatives provide a rich and flavorful taste to your biscuits, but they also offer several health benefits.

Here are some alternatives to butter that you can try:

  • Margarine:
    Margarine is made from vegetable oils and contains less saturated fat than butter. It can provide a creamy texture and a slightly different flavor to your biscuits.

  • Vegetable Oil:
    Vegetable oil is a versatile option that can be used in place of butter. It helps to create a moist and tender biscuit while adding a subtle hint of its own flavor.

Texture Without Butter

Using alternatives like margarine or vegetable oil can provide a creamy texture and rich flavor to your biscuits, even without butter. When it comes to making biscuits without butter, it’s all about finding the right substitutes that can mimic the desired qualities of butter.

To achieve a light and fluffy texture in your biscuits, consider adding flavorful add-ins like grated cheese, herbs, or spices. These additions not only enhance the taste but also contribute to the overall lightness of the biscuits.

Advertisement

Another tip for lightness is to handle the dough gently, avoiding overmixing or kneading. This helps to prevent the development of gluten, resulting in tender biscuits.

With these tips, you can create delicious biscuits without butter that are still moist, flaky, and full of flavor. Now, let’s move on to the next section for some baking tips to ensure perfectly fluffy biscuits without butter.

Baking Tips for Perfectly Fluffy Biscuits Without Butter

For perfectly fluffy biscuits without butter, it’s important to use a substitute like vegetable shortening. This helps to achieve the same texture and rise as traditional butter biscuits. Here are some tips to make your butter-less biscuits turn out golden brown and delicious:

  • Preheat the oven to the recommended temperature to ensure even baking.
  • Brush the tops of the biscuits with a little milk or egg wash before baking for a beautiful golden color.
  • To store leftover biscuits, let them cool completely and then place them in an airtight container or zip-top bag. They can be kept at room temperature for up to 2 days or refrigerated for up to a week.
  • To reheat, simply pop the biscuits in a preheated oven at 350°F for about 5-7 minutes or until warmed through.

By following these tips, you can enjoy your butter-less biscuits with a perfect golden brown color and keep them fresh for longer.

Now, let’s explore some flavorful additions to enhance these delicious treats.

Flavorful Additions to Enhance Butter-less Biscuits

After learning how to make perfectly fluffy biscuits without butter, it’s time to explore flavorful additions that will take your biscuits to the next level. The absence of butter doesn’t mean sacrificing taste, and with the right seasonings and toppings, your biscuits can still be incredibly delicious.

Advertisement

To add a burst of flavor, consider incorporating flavorful seasonings such as garlic powder, dried herbs like rosemary or thyme, or even a touch of grated Parmesan cheese into the biscuit dough. These additions will infuse your biscuits with irresistible aromas and tastes.

When it comes to creative toppings, the possibilities are endless. Brush the tops of your biscuits with a mixture of melted butter and honey for a sweet and savory twist. Or, sprinkle some shredded cheddar cheese on top before baking for a cheesy and gooey treat. You can also experiment with sesame seeds, everything bagel seasoning, or even a drizzle of maple syrup for a unique and delightful flavor combination.

Serving Suggestions for Delicious Butter-less Biscuits

To enhance the enjoyment of your delicious butter-less biscuits, consider serving them warm with a dollop of creamy honey butter on the side. This combination adds a richness and sweetness that perfectly complements the biscuit’s light and fluffy texture. But why stop there? Here are some serving suggestions and flavor options to take your biscuits to the next level:

  • Serve with savory options:

  • Top with a slice of crispy bacon and a fried egg for a hearty breakfast sandwich.

  • Spread with a tangy pimento cheese or a creamy herb-infused goat cheese for a savory twist.

  • Serve with sweet options:

  • Drizzle with warm maple syrup and dust with powdered sugar for a decadent brunch treat.

  • Pair with fresh berries and a dollop of whipped cream for a delightful dessert.

No matter how you choose to serve them, these butter-less biscuits are sure to be a crowd-pleaser!

Troubleshooting Common Issues When Making Biscuits Without Butter

If your biscuits are turning out dry and crumbly, try adding a little more liquid to the dough. Troubleshooting common issues when making biscuits without butter is essential to achieving flakiness. As someone who loves baking, I have encountered my fair share of biscuit mishaps. However, with a few simple tweaks, you can avoid these pitfalls and create perfect biscuits every time.

Advertisement

One common problem is biscuits that spread too much during baking. To prevent this, make sure your dough is properly chilled before baking. Another issue is biscuits that are too dense. To achieve a lighter texture, try using a combination of buttermilk and baking powder for leavening. Lastly, if your biscuits are lacking flakiness, consider incorporating a small amount of vegetable shortening into the dough.

Remember, troubleshooting is all about experimentation. Don’t be afraid to try different techniques until you achieve the desired results. Happy biscuit making!

Common Biscuit Issues Troubleshooting Tips
Spreading too much Chill dough before baking
Dense texture Use buttermilk and baking powder
Lack of flakiness Add a small amount of vegetable shortening

Frequently Asked Questions

Can I Use Margarine Instead of Butter in Biscuit Recipes?

Sure, you can use margarine as a substitute for butter in biscuit recipes. However, keep in mind that it may affect the taste and texture of the biscuits. Experiment and adjust the recipe accordingly to achieve the desired results.

How Do I Achieve a Flaky Texture in Biscuits Without Using Butter?

To achieve a flaky texture in biscuits without using butter, I’ve found that incorporating alternative ingredients like vegetable shortening or coconut oil can work wonders. It’s all about experimenting and finding what suits your taste buds best.

Can I Use Oil Instead of Butter in Biscuit Recipes?

Yes, you can use oil instead of butter in biscuit recipes. It’s a great alternative for those who want to avoid dairy or are looking for a healthier option. Here are some tips for substituting butter in baking.

Advertisement

What Are Some Flavorful Additions I Can Use to Enhance the Taste of Butter-Less Biscuits?

When it comes to making butter-less biscuits, you’ll be amazed at the flavorful additions you can use to enhance their taste. From aromatic spices to alternative fats, there’s no shortage of options to make your biscuits irresistibly delicious.

How Long Do Butter-Less Biscuits Typically Last Before They Go Stale?

Butter-less biscuits typically last for around 3-4 days before they start to go stale. To extend their shelf life, store them in an airtight container at room temperature or in the refrigerator.

Conclusion

In conclusion, making biscuits without butter is not only possible, but also a healthier alternative. By using substitutes like vegetable oil or coconut oil, you can still achieve that perfect flaky texture. With the right mixing and kneading techniques, you can create biscuits that are just as delicious as their butter-filled counterparts.

Remember, practice makes perfect, so don’t be discouraged if your first batch doesn’t turn out exactly as planned. Keep experimenting with flavorful additions like herbs or cheese to create a unique taste experience.

Now, go forth and conquer the world of butter-less biscuits, where the possibilities are endless!

Advertisement
Continue Reading
Advertisement

Recipes & Culinary Uses

Creamy Delight: Best Butter Pecan Ice Cream Recipe for Summer!

Yearning for a creamy summer treat that will leave you craving more?

Published

on

By

butter pecan ice cream

Savor a delicious summer treat with our Butter Pecan Ice Cream recipe. Mix butter, brown sugar, cream, and pecans for a creamy delight. Melt butter, cook pecans, whisk eggs, and blend for a rich flavor. Add pecans, cream, and vanilla, then freeze to perfection. Master this easy-to-follow recipe for a tasty dessert to beat the heat.

Key Takeaways

  • Rich and creamy blend of butter, brown sugar, and heavy cream
  • Toasted pecans for a nutty crunch and flavor
  • Easy-to-follow steps for homemade ice cream perfection
  • Customization options with variations like bourbon or chocolate
  • Perfect summer treat with a decadent, refreshing taste

Recipe Ingredients for Butter Pecan Ice Cream

To create a delectable batch of butter pecan ice cream, gather the essential ingredients listed in the recipe.

You'll need:

  • Butter
  • Brown sugar
  • Heavy cream
  • Pecans

These ingredients combine to bring out the rich and nutty flavors of this classic dessert.

The brown sugar adds a caramel-like sweetness, while the heavy cream contributes to a creamy texture that's essential for a decadent treat.

Pecans, when toasted in butter, provide a delightful crunch and enhance the overall flavor profile of the ice cream.

Cooking Instructions for Homemade Ice Cream

making ice cream at home

Start by melting butter in a skillet to infuse the pecans with a rich, nutty flavor for your homemade butter pecan ice cream.

Here's a quick guide to help you make this creamy delight:

Advertisement
  • Melt butter and cook pecans for flavor.
  • Whisk eggs and combine with half-and-half and brown sugar for a creamy base.
  • Cook until thickened, then mix with eggs in a bowl.
  • Add cream, pecans, and vanilla extract.
  • Freeze the mixture in an ice cream maker.

Following these steps will guarantee your homemade butter pecan ice cream turns out rich and delicious.

Remember to carefully adhere to the manufacturer's instructions for your ice cream maker to achieve the perfect consistency.

Enjoy the process of creating this delightful treat that will surely be a hit during the summer months.

Ice Cream Preparation Steps

ice cream recipe instructions

Mix half and half with brown sugar over medium heat in a large bowl to prepare the ice cream base.

Next, whisk beaten eggs and temper them with the warm milk mixture to create a smooth custard.

Once done, thicken the mixture on low heat, then cool it over an ice bath to achieve ideal texture.

After that, stir in heavy cream, vanilla extract, maple extract, and a pinch of salt for rich flavor.

Advertisement

Remember to refrigerate the mixture for 1 1/2 – 2 hours before churning it into creamy butter pecan ice cream.

This process ensures that the flavors meld together beautifully and the ice cream attains the perfect consistency for scooping and savoring.

Nutritional Information and Tips

healthy eating guidance provided

Considering the rich and creamy nature of homemade butter pecan ice cream, it's important to be mindful of its nutritional content and serving size. When indulging in this delectable dessert, remember these essential tips:

  • Portion Control: Enjoy in moderation to savor the flavors without overindulging.
  • Brown Sugar Sweetness: Opt for a moderate amount of brown sugar to balance sweetness without overwhelming the palate.
  • Room Temperature Ingredients: Confirm ingredients like butter and heavy cream are at room temperature for a smoother texture.
  • Nutritional Awareness: Be mindful that homemade butter pecan ice cream can vary in nutritional content, so adjust ingredients accordingly.
  • Consultation: Seek advice from a nutritionist or healthcare provider for personalized guidance on incorporating this treat into a balanced diet.

Homemade Butter Pecan Ice Cream Variations

delicious homemade ice cream

Explore creative twists on traditional butter pecan ice cream by incorporating different nuts, spirits, sauces, chocolates, and dairy-free alternatives.

For a unique flavor, try substituting pecans with walnuts or almonds in the full recipe. Toast the nuts in a separate bowl until browned and fragrant, then chop them finely enough to coat in the ice cream mixture.

To add a boozy kick, mix in a splash of bourbon or rum to the base as you churn the ice cream. For an extra indulgent touch, swirl in caramel sauce or fudge ripple throughout the mixture.

Incorporate chunks of chocolate or chocolate-covered nuts for a delightful contrast in texture, giving each bite a sweet surprise.

Advertisement

If you prefer a lighter, dairy-free option, consider using coconut milk or almond milk as a substitute for traditional dairy products. These alternatives provide a creamy base while catering to plant-based diets.

Experiment with these variations to create a personalized butter pecan ice cream that suits your taste preferences.

Frequently Asked Questions

What Is the Secret to Making Ice Cream Very Creamy?

To make ice cream very creamy, you use a rich base of ingredients like heavy cream, eggs, and sugar. Chilling the base before churning is crucial for a smoother texture. Adding vanilla extract enhances creaminess, and slow churning prevents a dense outcome.

What Flavor Is the Ice Cream in Butter Pecan?

The ice cream in butter pecan is a delightful blend of buttery richness, vanilla sweetness, and maple undertones, perfectly paired with toasted pecans for a nutty crunch. This flavor combination creates a harmonious and indulgent treat.

What's the Difference Between Butter Pecan Ice Cream and Praline Pecan Ice Cream?

In butter pecan ice cream, you'll savor the buttery richness of pecans blended with a creamy base. On the other hand, praline pecan ice cream highlights caramelized sweetness with a swirl of praline sauce for a delightful flavor contrast.

Advertisement

What Age Group Eats Butter Pecan Ice Cream?

You'll find that adults and older individuals, typically in the 30-60 age group, enjoy butter pecan ice cream. It's a favorite among those with a more refined palate, drawn to its rich and nutty flavor.

Conclusion

So there you have it, folks! Whip up this buttery, nutty delight for a taste of summer in every scoop.

Don't cry over spilled milk – grab a cone and enjoy this creamy treat that's sure to satisfy your sweet tooth.

Get churning and indulge in the best butter pecan ice cream you've ever tasted!

Advertisement
Continue Reading

Recipes & Culinary Uses

Festive Favorites: Best Peanut Butter Blossoms Recipe for Holidays!

Unleash the ultimate holiday baking magic with the best Peanut Butter Blossoms recipe – an irresistible treat that will elevate your festive celebrations!

Published

on

By

holiday baking with flair

Elevate your holiday baking with the ultimate Peanut Butter Blossoms recipe. Cream together peanut butter, butter, sugars, and salt, then add egg and vanilla. Roll dough into balls, coat in brown sugar, bake until golden, then press a Hershey's kiss on top. Adjust baking time as needed. Explore ingredient swaps for a personalized touch. Enjoy with hot cocoa or pair with savory dishes. For more tips, ideas, and customization options, the recipe holds more festive surprises.

Key Takeaways

  • Cream together peanut butter, butter, sugars for rich flavor.
  • Bake at 375°F for 8-10 minutes for soft, chewy cookies.
  • Customize with ingredient swaps like almond butter or maple syrup.
  • Pair with savory dishes or hot cocoa for holiday enjoyment.
  • Press Hershey kisses onto warm cookies for a classic finish.

Ingredients for Peanut Butter Blossoms

For the classic Peanut Butter Blossoms recipe, gather peanut butter, butter, sugar, an egg, and Hershey's kisses as your essential ingredients.

Peanut butter is the star, offering a rich flavor that blends perfectly with the sweetness of the cookies.

Butter plays a pivotal role by adding moisture and richness to the dough, ensuring a soft and chewy texture.

The sugar not only sweetens the cookies but also contributes to their festive appeal, making them a perfect treat for any occasion.

Finally, the Hershey's kisses on top provide a delightful chocolatey finish that elevates these cookies to a whole new level of deliciousness.

Advertisement

Together, these ingredients create a harmonious blend of flavors and textures that make Peanut Butter Blossoms a beloved classic for holiday baking or any time you crave a sweet and satisfying treat.

Recipe Steps for Peanut Butter Blossoms

bake peanut butter cookies

To make Peanut Butter Blossoms, start by creaming together peanut butter, butter, sugars, and salt until light and fluffy.

Next, add in the egg and vanilla extract, making sure to mix well to combine all the ingredients thoroughly.

Then, gradually incorporate the dry ingredients into the wet mixture until a smooth dough forms.

Once the dough is ready, roll it into balls and coat each ball generously in brown sugar.

Place the sugar-coated dough balls on a baking sheet, making sure to leave enough space between them for spreading during baking.

Advertisement

Bake the cookies in a preheated oven until they turn a beautiful golden brown.

As soon as the cookies are out of the oven, press a Hershey's kiss into the center of each cookie gently.

The heat from the freshly baked cookies will melt the chocolate just enough to adhere it to the cookie.

These Peanut Butter Blossoms are a delightful treat perfect for Christmas celebrations!

Pro Tips for Making Peanut Butter Blossoms

baking perfect peanut blossoms

To enhance your peanut butter blossom baking experience, consider adjusting the baking time based on your oven's performance for best results.

Additionally, explore ingredient substitutions to cater to dietary preferences or allergies without compromising the flavor or texture of the cookies.

Advertisement

These pro tips can help you customize your peanut butter blossoms while ensuring delicious outcomes.

Baking Time Recommendations

Achieving the ideal texture for your peanut butter blossoms involves baking them at 375°F for 8-10 minutes. This baking duration guarantees that the cookies have a soft and chewy consistency while allowing the Hershey kisses on top to be softened but not completely melted.

Once out of the oven, remember to press the Hershey kisses onto the cookies immediately to secure them in place for that classic appearance.

For the best outcomes, chill the cookie dough for about 30 minutes before baking. This step helps the cookies maintain their shape and prevents excessive spreading during baking, ensuring your peanut butter blossom cookies are perfectly formed and ready to impress during your holiday baking.

Shortening or extending the baking time can alter the texture of the cookies. A quick bake of 6-8 minutes produces softer and chewier cookies, while longer baking times yield a slightly crispier consistency. Stick to the recommended 8-10 minutes for the best soft and chewy peanut butter blossoms.

Advertisement

Ingredient Substitutions

Consider incorporating different ingredients to elevate the flavor and nutritional profile of your peanut butter blossoms. For a healthier option, swap out shortening with unsalted butter to achieve a unique texture and taste in your cookies.

Try using natural peanut butter instead of creamy to add a wholesome twist to the classic recipe. If you're looking to reduce the glycemic impact, substitute brown sugar with coconut sugar in your baking. For a natural sweetener alternative, replace regular granulated sugar with maple syrup in the cookie dough mixture.

Additionally, for a distinct flavor experience, experiment with almond butter as a substitute for peanut butter in your blossoms. These ingredient substitutions can bring a new dimension to your peanut butter blossoms, making them not only delicious but also tailored to your dietary preferences.

Upgrade your baking game this holiday season with these creative twists on a beloved recipe!

Serving Suggestions for Peanut Butter Blossoms

peanut butter cookie recipe

Enhance the enjoyment of your peanut butter blossoms by pairing them with savory dishes like lasagna tortellini soup for a satisfying meal. These classic cookies also complement family-friendly dinners such as easy ground beef shepherd's pie and creamy broccoli cheddar soup, making for a delightful combination. The holiday season calls for cozy treats, and the sweet nuttiness of peanut butter blossoms pairs perfectly with a warm cup of hot cocoa. Whether you're participating in a cookie exchange or looking for a festive touch to your holiday dessert spread, consider rolling the cookies in red, green, and white sugar sprinkles to add a pop of color and fun.

Serving Suggestions Pairing Ideas
Lasagna Tortellini Soup Comforting and hearty meal alongside the cookies
Easy Ground Beef Shepherd's Pie Delicious combination for a family dinner
Creamy Broccoli Cheddar Soup Perfect accompaniment to the nutty cookie flavors

12 Days of Christmas Cookies Recipes

baking traditions for the holidays

Indulge in a variety of delightful Christmas cookie recipes each day during the holiday season. One standout choice is the classic Peanut Butter Blossoms. These holiday cookies feature a peanut butter base topped with a Hershey's kiss, making them a beloved treat for cookie exchanges and festive gatherings.

The process of making these cookies is simple yet rewarding. Start by rolling the dough balls in sugar before baking to add a sweet crunch to each bite. The combination of rich peanut butter flavor and the chocolatey goodness of the Hershey's kiss creates a perfect balance of sweetness.

Advertisement

When enjoying these Christmas cookies, consider pairing them with a glass of milk for a classic and satisfying treat.

Whether you're baking them for your family, a cookie exchange, or a holiday party, Peanut Butter Blossoms are sure to be a hit. Make each day of the holiday season a little sweeter with these delicious cookies.

User Engagement Features

user interaction enhancements

Let's talk about how user interaction features and personalization options enhance your experience with the Peanut Butter Blossoms recipe.

You can engage with others by leaving comments and sharing your results, creating a sense of community around this holiday treat.

Personalization options like name and email entry fields help tailor the experience to your preferences, making it more engaging and enjoyable.

User Interaction Features

Utilizing user engagement features on the website allows for increased participation and feedback from visitors. The comment section enables users to interact with each other and provide valuable feedback on the Peanut Butter Blossoms recipe or share their experiences with Hershey's kisses. By incorporating a reply option, users can engage in conversations, fostering a sense of community around baking these delightful peanut butter cookies.

Advertisement

Moreover, the inclusion of name and email fields not only allows for personalization but also facilitates communication between the website and its visitors. This data storage feature guarantees that users can conveniently access their information for future visits, enhancing their overall user experience.

These user engagement features play an essential role in creating an interactive platform where users can engage, provide feedback, and communicate effectively. Such interaction not only enriches the user experience but also encourages visitors to actively participate in the community surrounding the Peanut Butter Blossoms recipe.

Personalization Options

Enhance your website's user engagement by incorporating personalized options such as commenting, replying, and sharing feedback on the Peanut Butter Blossoms recipe. This level of user interaction not only fosters a sense of community building but also encourages customization and feedback. By allowing users to share their thoughts, results, and experiences with the festive favorites, you create a more engaging and interactive user experience. Additionally, providing users with the option to save their data for future visits and encouraging them to tag @preppykitchen and use #preppykitchen when trying the recipe further enhances their engagement.

Personalization Options Description Benefits
Commenting Users can leave comments on the Peanut Butter Blossoms recipe, sharing their thoughts and experiences. Fosters community building and user engagement.
Replying Users can reply to comments and engage in discussions with other users about the recipe. Encourages active participation and interaction.
Feedback Sharing Users can share feedback on the recipe, providing valuable insights for improvement. Enhances user experience and customization.

Additional Information

clarifying specific details provided

You may find it interesting to know more about the history of the Peanut Butter Blossoms recipe and its cultural significance during the holidays.

  • The Peanut Butter Blossoms recipe's popularity is backed by IRI MULO data, making it a sought-after choice for holiday baking.
  • Copyright for this beloved recipe belongs to The J.M. Smucker Company, a reputable name in the food industry known for quality products.
  • These delightful cookies aren't only perfect for serving at holiday parties but also make excellent gifts due to their festive appeal.

Frequently Asked Questions

Why Are My Peanut Butter Blossoms Dry?

If your peanut butter blossoms are dry, it could be due to using too much flour, overbaking, using natural peanut butter that requires stirring, or not enough butter/shortening. Guarantee precise measurements and follow the recipe closely to maintain moisture.

Why Did My Peanut Butter Blossoms Go Flat?

When making peanut butter blossoms, going flat happens due to overmixing, too much flour, insufficient chilling, or low oven temperature. Remember to avoid these pitfalls. Preheat the oven properly and follow the recipe for perfect blossoms!

What Is America's Favorite Christmas Cookie?

America's favorite Christmas cookie is Peanut Butter Blossoms. Loved for their peanut butter-chocolate combo and nostalgic Hershey's Kiss center, these easy-to-make treats are a holiday staple at parties and gatherings. They're a must-have during the festive season.

Advertisement

What Is Baskin Robbins Peanut Butter Blossom?

You asked about Baskin Robbins Peanut Butter Blossom. It's a delectable seasonal ice cream flavor featuring creamy peanut butter ice cream with a ribbon of more peanut butter and chocolate cookie pieces. Indulge in this festive treat!

Conclusion

Indulge in the warm, gooey goodness of these peanut butter blossoms this holiday season. With the perfect blend of creamy peanut butter and rich chocolate, these cookies are sure to bring joy to your festivities.

Picture yourself surrounded by loved ones, sharing laughter and memories as you enjoy these delicious treats. Let the aroma of freshly baked cookies fill your home and create a cozy, festive atmosphere.

Happy baking and happy holidays!

Advertisement
Continue Reading

Recipes & Culinary Uses

Bite-Sized Treats: Best Peanut Butter Ball Recipe You'll Love!

Adore these heavenly peanut butter balls with a delectable mix of smooth peanut butter, powdered sugar, and vanilla—perfect for indulging in bite-sized bliss!

Published

on

By

delicious peanut butter balls

You'll adore these easy and heavenly peanut butter balls. Mix smooth peanut butter, powdered sugar, and vanilla extract for a delectable dough. Roll into small balls and chill. Dip in melted chocolate, then refrigerate to set. Enhance the flavor with rum extract, nuts, or crushed pretzels. Get creative with colorful sprinkles and different chocolate coatings. Use quality chocolate coating and adjust mix consistency. Store them in the fridge or freezer. Enjoy these mouthwatering treats alone or at gatherings. More tips and delightful variations await!

Key Takeaways

  • Creamy peanut butter, powdered sugar, and vanilla create a smooth dough.
  • Incorporate nuts, rum extract, or pretzels for flavor and texture variety.
  • Use quality chocolate coating like candy melts for best results.
  • Chill peanut butter balls before dipping for easier handling.
  • Store in the fridge or freezer for convenient snacking and serving.

Ingredients and Preparation

To create irresistible peanut butter balls, gather creamy peanut butter, powdered sugar, and vanilla extract as your key ingredients.

Begin by mixing the peanut butter, butter, sugar, and vanilla until you have a smooth dough. Roll this mixture into small balls and chill them before dipping them in melted chocolate.

The type of chocolate you use, such as dark or milk chocolate, will enhance the flavor of your peanut butter balls. After dipping, make sure to refrigerate the balls until the chocolate sets for a perfect finish.

This process guarantees that each bite-sized treat isn't only visually appealing but also bursting with delicious peanut butter and chocolate flavors.

Variations and Enhancements

creative modifications and improvements

You can elevate the flavor of your peanut butter balls by incorporating unique ingredients like chopped nuts or rum extract.

Experiment with different chocolate coatings such as white almond bark or dark chocolate candy melts for a varied taste experience.

Advertisement

Get creative by adding finishing touches like colorful sprinkles to make your peanut butter balls visually appealing.

Flavorful Ingredient Additions

Enhance the flavor of your peanut butter balls by incorporating unique ingredient variations and enhancements. While the classic combination of peanut butter, powdered sugar, and butter creates a delicious dough for your treats, you can take it up a notch by adding flavorful ingredient additions.

Consider mixing in crushed pretzels for a salty crunch that complements the sweetness of the peanut butter. Chopped nuts like almonds or pecans can also add a delightful texture and nutty taste to your chocolate-covered peanut butter balls.

For a burst of fruity flavor, try incorporating dried cranberries or raisins into the dough. These additions not only provide a contrast in texture but also introduce a hint of sweetness that pairs well with the creamy peanut butter.

Another option is to include a sprinkle of cinnamon or a dash of vanilla extract to elevate the overall taste profile of your peanut butter balls. Experiment with these flavorful ingredient additions to create a unique and delectable twist on the classic treat.

Advertisement

Chocolate Coating Options

Experiment with different types of chocolate coatings – dark, white, or milk chocolate – to suit your preferences and elevate the flavor of your peanut butter balls.

When considering the chocolate coating for your crunchy peanut butter treats, here are some options to enhance your culinary creation:

  1. Choose Candy Melts or Almond Bark: Opt for candy melts or almond bark for a smooth and firm chocolate coating that sets well on your peanut butter balls.
  2. Avoid Chocolate Chips: Steer clear of using chocolate chips for coating, as they may contain stabilizers that hinder smooth melting, affecting the overall texture.
  3. Add Colored Sprinkles: For a festive touch, sprinkle colored sprinkles on top of the chocolate coating before it sets to add a pop of color and extra crunch to your peanut butter balls.

Experimenting with different chocolate coatings and techniques can take your peanut butter balls to the next level, ensuring a delightful and indulgent treat for any occasion.

Creative Finishing Touches

To elevate the flavor profile of your peanut butter balls, consider incorporating creative finishing touches through various enhancements and unique variations.

You can enhance the texture by adding chopped nuts or crispy rice cereal to the peanut butter mixture, providing a delightful crunch with every bite.

Experiment with different flavors by using almond extract or rum extract instead of vanilla for a twist on the traditional taste.

Advertisement

For a festive touch, roll the balls in crushed graham crackers, sprinkles, or a sprinkle of sea salt to add a pop of flavor.

Drizzle white chocolate over the dark, semi-sweet, or milk chocolate coating for a visually appealing contrast that will impress your guests.

If you enjoy a crunchy element, try coating the balls in crushed pretzels or toasted coconut before the chocolate sets.

These creative enhancements will take your peanut butter balls to the next level, making them a standout treat at any gathering.

Tools and Tips

crafting with precision

Consider using a 1 tablespoon cookie scoop for consistent sizing when preparing your peanut butter balls. This tool will help guarantee all your treats are uniform in size, making for a neat presentation and even cooking.

Here are some additional tools and tips to enhance your peanut butter ball-making experience:

Advertisement
  1. Invest in Quality Chocolate Coating: Opt for candy melts or almond bark for a smooth and firm chocolate coating on your peanut butter balls. These coatings melt easily and provide a professional finish to your treats.
  2. Adjust Peanut Butter Mixture Consistency: If your peanut butter mixture is too sticky or too dry, adjust the consistency by adding more peanut butter or powdered sugar. This will help you achieve the perfect texture for shaping your balls.
  3. Refrigerate Before Dipping: Prior to dipping your peanut butter balls in chocolate, chill them in the refrigerator. This step will make the balls firmer, making them easier to handle and coat without falling apart.

Storage and Serving Suggestions

great suggestion for storage

For best freshness and presentation of your peanut butter balls, follow these storage and serving suggestions.

To keep your peanut butter balls tasting delicious, store them properly. You can store them in an airtight container in the fridge for up to 1 week or in the freezer for up to 2 months. When freezing, remember to thaw the frozen peanut butter balls before serving by bringing them to room temperature. To prevent them from sticking together, separate the layers of peanut butter balls with wax paper.

Here is a helpful table summarizing the storage and serving suggestions:

Storage Serving Frozen
Airtight container Display on festive tray Thaw before serving
Fridge – 1 week Pair with hot cocoa Bring to room temp
Freezer – 2 months Enjoy at holiday gatherings
Separate with wax paper

Additional Peanut Butter Desserts

peanut butter dessert recipes

Explore a variety of delectable peanut butter desserts to satisfy your sweet cravings.

  1. Peanut Butter Blossom Cookies: Indulge in the classic combination of peanut butter cookies topped with a chocolate kiss for a delightful treat.
  2. Peanut Butter Chocolate Mug Cake: Whip up this easy-to-make single-serving dessert that combines the rich flavors of peanut butter and chocolate in a mug for a quick fix.
  3. Peanut Butter Overload Cookies: For those who can't get enough peanut butter, these cookies are loaded with peanut butter chips, chocolate chips, and chopped peanuts for an explosion of flavor in every bite.

These additional peanut butter desserts offer a diverse selection to cater to your cravings.

Whether you're in the mood for a classic treat like Peanut Butter Blossom Cookies, a quick fix with Peanut Butter Chocolate Mug Cake, or a flavor-packed experience with Peanut Butter Overload Cookies, there's something for every peanut butter lover.

Enjoy these easy-to-make delights whenever you need a sweet pick-me-up!

Recipe Instructions and Nutritional Information

cooking guidance and facts

To create these delectable Peanut Butter Balls, start by blending peanut butter, butter, sugar, and vanilla to form a dough. Roll the mixture into small balls and place them on a baking sheet lined with parchment paper. Chill the peanut butter balls in the refrigerator for about 30 minutes until firm.

Once chilled, melt chocolate in a heatproof bowl over simmering water or in the microwave. Dip each chilled peanut butter ball into the melted chocolate, ensuring they're evenly coated. Place the coated balls back on the parchment paper and let the chocolate set.

Advertisement

Each serving of these delightful treats contains approximately 114 calories.

Store the finished peanut butter balls in the fridge for up to 2 weeks or freeze them for up to 3 months.

Enjoy these decadent bite-sized snacks whenever you crave a sweet and nutty indulgence.

Frequently Asked Questions

Can I Use Chunky Peanut Butter Instead of Creamy for This Recipe?

Yes, you can use chunky peanut butter instead of creamy for this recipe. It will add a delightful texture and extra crunch to your peanut butter balls. Enjoy experimenting with different variations!

How Long Do Chocolate Covered Peanut Butter Balls Stay Fresh?

Like a sweet memory, chocolate-covered peanut butter balls stay fresh for up to two weeks when stored in an airtight container in the fridge. Indulge in these delectable treats within that time frame for best taste.

Advertisement

Can I Freeze the Peanut Butter Balls for Later Enjoyment?

Yes, you can freeze the peanut butter balls for later enjoyment. Simply place them in an airtight container or freezer bag. When ready to indulge, let them thaw in the fridge for a few hours.

What Type of Chocolate Is Best for Coating the Peanut Butter Balls?

For coating the peanut butter balls, semi-sweet or milk chocolate works best. They provide a delicious contrast to the creamy peanut butter filling. Simply melt the chocolate, dip the balls, and enjoy the sweet treat!

Can I Add Chopped Nuts or Sprinkles to the Peanut Butter Balls for Extra Flavor?

You can definitely add chopped nuts or sprinkles to the peanut butter balls for extra flavor. It's a great way to customize your treats and add a delightful crunch or colorful touch to each bite.

Conclusion

Indulge in these irresistible peanut butter balls that are sure to satisfy your sweet tooth cravings.

With just a few simple ingredients and easy-to-follow instructions, you can enjoy these bite-sized treats in no time.

Advertisement

So go ahead, treat yourself to a little taste of heaven and experience the perfect combination of creamy peanut butter and rich chocolate.

You won't be able to resist coming back for more!

Continue Reading

Trending