Recipes & Culinary Uses
How to Make Delicious Lilikoi Butter at Home
![An image showcasing the vibrant process of making Lilikoi Butter: a golden pot simmering with ripe lilikoi fruit, their tangy yellow pulp swirling with creamy butter, a hint of steam rising](https://eatmorebutter.com/wp-content/uploads/2023/09/how-to-make-lilikoi-butter_152.png)
I have always thought of myself as a fruit enthusiast, but when I came across lilikoi, my taste buds were whisked away to a tropical paradise.
The vibrant yellow fruit, with its tangy and sweet flavor, has become a staple in my kitchen.
And what better way to savor its deliciousness than by making lilikoi butter?
In this article, I’ll share my step-by-step guide on how to create this heavenly spread that will elevate your breakfast toast, desserts, and everything in between.
Get ready to embark on a culinary adventure with me as we dive into the world of homemade lilikoi butter.
Key Takeaways
- Look for ripe lilikoi fruits with a bright yellow color
- Use a paper bag with a banana or apple to speed up the ripening process
- Blend the pulp until smooth and strain it through a fine-mesh sieve for a smooth texture
- Sweeten the lilikoi butter with sugar, honey, or maple syrup based on personal taste and dietary preferences
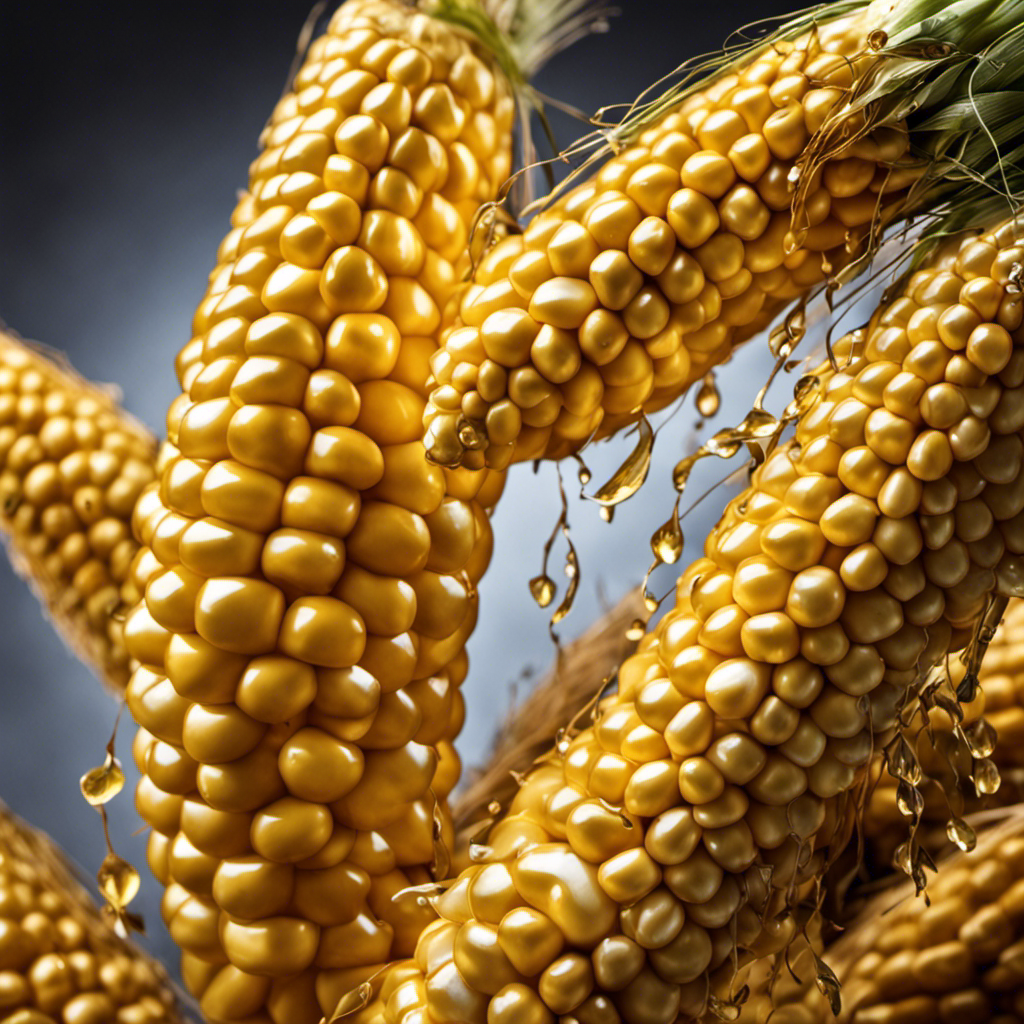
Selecting the Perfect Lilikoi Fruit
When selecting the perfect lilikoi fruit, it’s important to look for ones that are ripe and have a bright yellow color. There are several varieties of lilikoi fruit, including the yellow passion fruit and the purple passion fruit. The yellow variety is often sweeter and less tart than the purple variety.
To ensure your lilikoi fruit is ripe, gently squeeze it. If it gives slightly under pressure, it is ready to eat or use in recipes. If your lilikoi fruit is not quite ripe, you can place it in a paper bag with a banana or apple to help speed up the ripening process. The ethylene gas produced by the banana or apple will help ripen the lilikoi fruit faster.
Preparing the Lilikoi for Butter Making
First, you’ll need to gather ripe lilikoi fruits for your butter recipe. To prepare the lilikoi for butter making, follow these steps:
- Wash the lilikoi fruits thoroughly under running water to remove any dirt or debris.
- Cut the fruits in half and scoop out the juicy pulp and seeds using a spoon. Discard the seeds and keep the pulp.
- Place the pulp in a blender or food processor and blend until smooth.
- Strain the blended pulp through a fine-mesh sieve to remove any remaining seeds or fibers.
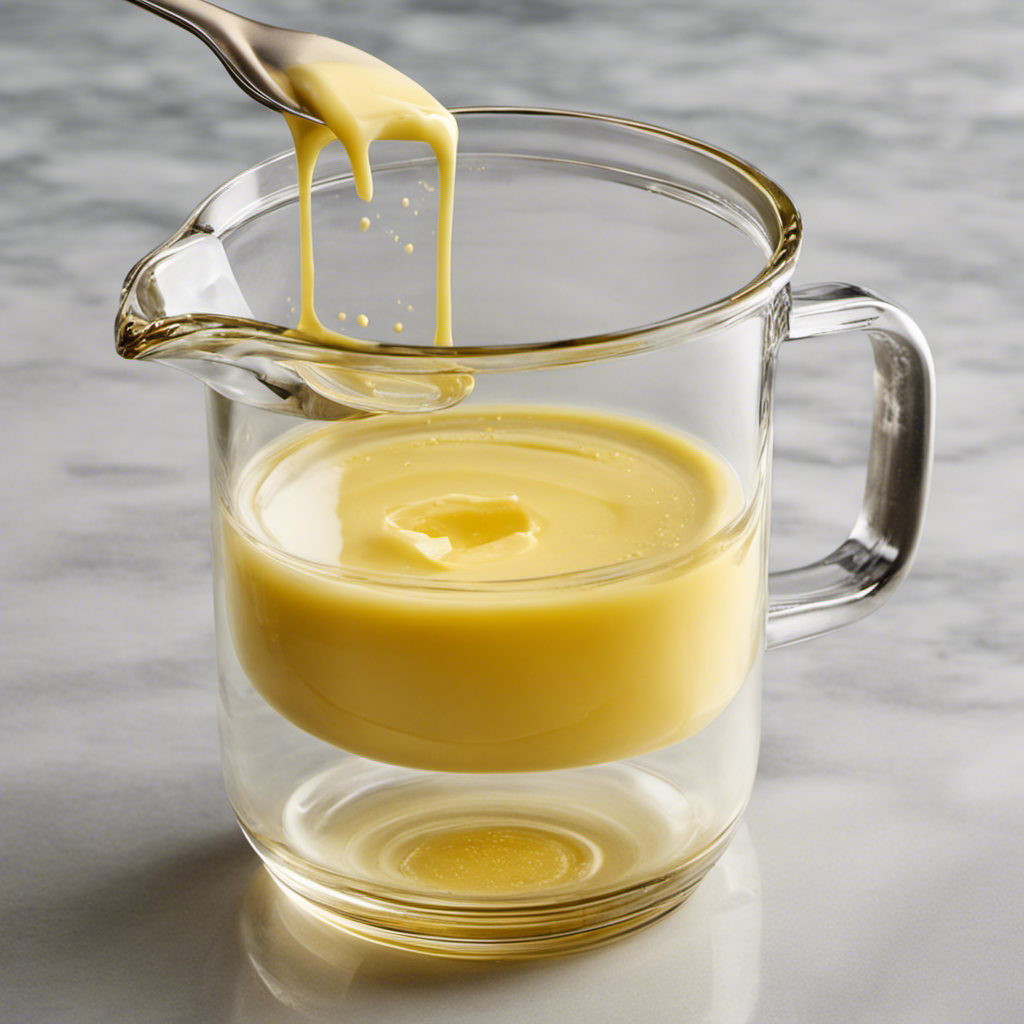
- Transfer the strained lilikoi juice to a saucepan and cook over low heat, stirring constantly, until it thickens to a butter-like consistency.
- Let the lilikoi butter cool completely before transferring it to a jar or container for storage.
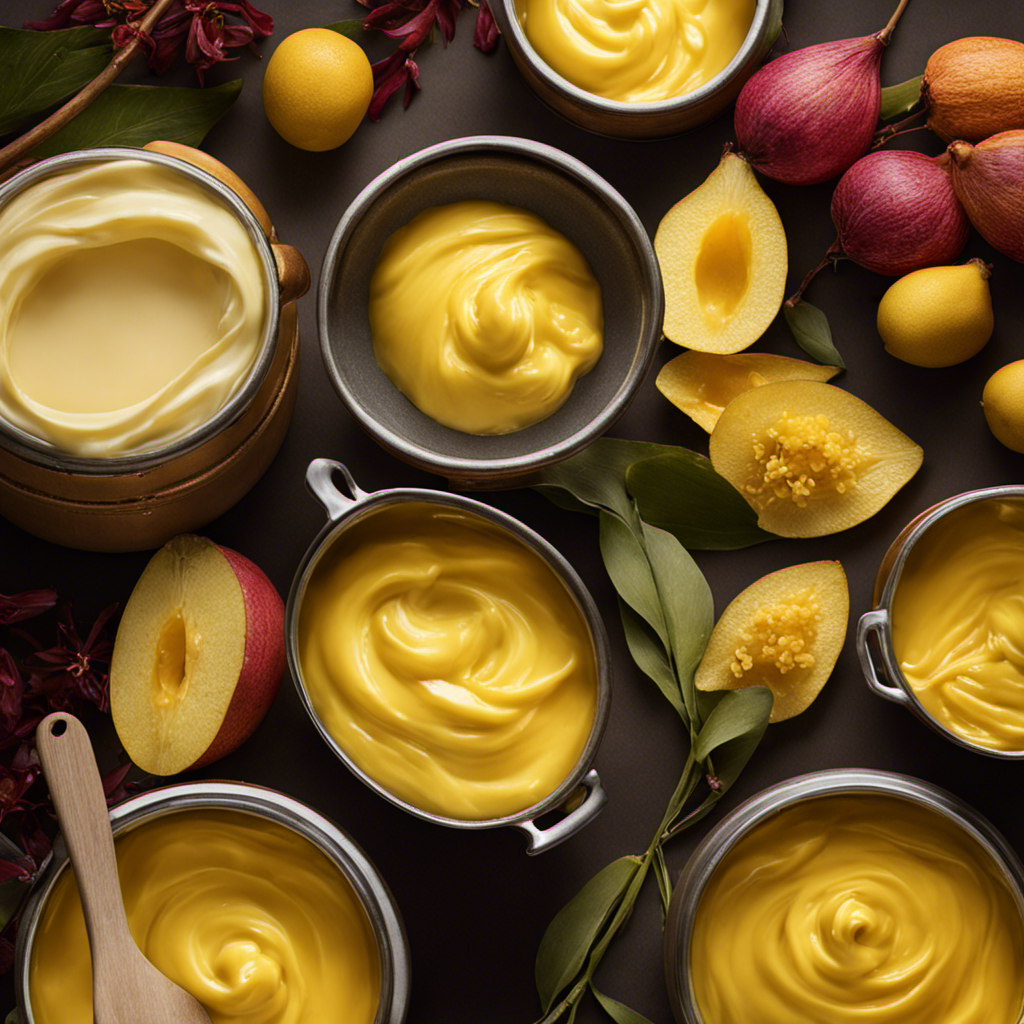
Not only is lilikoi butter delicious, but it also offers numerous health benefits. It is rich in antioxidants, vitamins A and C, and dietary fiber. Consuming lilikoi butter can boost your immune system, improve digestion, and promote healthy skin.
Cooking and Straining the Lilikoi
To cook and strain the lilikoi, you’ll need to blend the pulp until smooth and then strain it through a fine-mesh sieve. This step is crucial in creating a smooth and velvety texture for your lilikoi butter.
Once the pulp is blended, pour it into the sieve and gently press it through using a spoon or spatula. The sieve will catch any seeds or fibrous bits, ensuring a silky consistency.
Now, let’s explore some cooking techniques and recipe variations for lilikoi butter:
Technique | Description |
---|---|
Simmering | Cook the lilikoi pulp over low heat, stirring occasionally, until it thickens and reduces. |
Baking | Combine the pulp with sugar and lemon juice, then bake in the oven until it reaches a jam-like consistency. |
Slow Cooker | Place the pulp, sugar, and lemon juice in a slow cooker and cook on low for several hours, until thickened. |
Experiment with these techniques and feel free to add your own twist by incorporating different spices or fruits. Let your creativity shine through in your lilikoi butter!
Adding Sweetness: Sugar and Alternative Options
For a sweeter flavor, you can add sugar to your lilikoi butter or experiment with alternative sweeteners like honey or maple syrup. Adding sweetness to your lilikoi butter can elevate its taste and make it more enjoyable.
Here are some options to consider:
-
Honey: Not only does honey add sweetness, but it also brings a unique flavor profile to your lilikoi butter. Plus, it has health benefits such as antioxidants and antibacterial properties.
-
Maple syrup: This natural sweetener adds a rich and deep flavor to your lilikoi butter. It pairs exceptionally well with the tartness of lilikoi and can make your butter taste divine.
-
Stevia: If you’re looking for a low-calorie option, stevia is a great choice. It is a natural sweetener derived from the stevia plant and adds sweetness without any added calories.
Using lilikoi butter as a topping for desserts is a fantastic idea. Its tangy and fruity flavor complements a variety of sweet treats. You can drizzle it over pancakes, waffles, or French toast for a burst of tropical flavor. It also works wonders as a filling for pastries, such as tarts, cupcakes, or crepes. The possibilities are endless, and lilikoi butter adds a unique twist to any dessert.
Now that you’ve added the desired sweetness to your lilikoi butter, it’s time to learn about storing and using your homemade creation.
Storing and Using Your Homemade Lilikoi Butter
Once you have prepared your homemade lilikoi butter, it’s important to properly store it to maintain its freshness and flavor.
After cooling the butter, transfer it into a clean, airtight glass jar and keep it refrigerated. The cold temperature will help preserve its smooth texture and tangy taste.
Now, let’s talk about how to use this delectable lilikoi butter. One delightful way is to spread it generously over warm pancakes and waffles. The butter’s sweet and tangy flavor perfectly complements the fluffy texture of these breakfast treats.
You can also incorporate lilikoi butter into baked goods like muffins and bread. Simply substitute it for regular butter in your favorite recipes to add a tropical twist. The lilikoi’s unique taste will elevate your baked goods to a whole new level of deliciousness.
Frequently Asked Questions
Can I Use Frozen Lilikoi Fruit Instead of Fresh for Making Lilikoi Butter?
Yes, you can use frozen lilikoi fruit instead of fresh for making lilikoi butter. It’s a convenient alternative if fresh lilikoi is not available. Just make sure to thaw the fruit before using.
How Long Does It Take for Lilikoi Butter to Thicken After Cooking and Straining?
I’ve found that lilikoi butter usually takes about 1 hour to thicken after cooking and straining. It’s important to keep stirring it regularly during this process to ensure a smooth and creamy texture.
Can I Use a Blender or Food Processor to Strain the Cooked Lilikoi Fruit?
Using a blender or food processor to strain lilikoi fruit can be a convenient option. The pros include faster and easier straining. However, be cautious as it may not fully remove the seeds and pulp, affecting the texture of the butter.
Can I Use Honey Instead of Sugar to Sweeten My Lilikoi Butter?
Using honey in lilikoi butter instead of sugar adds a unique sweetness and depth of flavor. I’ll show you how to make lilikoi honey by combining fresh lilikoi juice with honey for a delicious twist on the classic recipe.
How Long Can Homemade Lilikoi Butter Be Stored in the Refrigerator?
Homemade lilikoi butter can be stored in the refrigerator for up to 2 months. To maximize its freshness, use airtight containers such as glass jars or plastic containers with tight-fitting lids.
Conclusion
Well, would you look at that! Who knew making lilikoi butter could be so easy?
With just a few simple steps, you can transform those tangy lilikoi fruits into a smooth and luscious spread that will have your taste buds dancing with joy.
It’s like capturing a burst of sunshine in a jar!
So go ahead, give it a try and indulge in the irony of making something so deliciously divine from such humble ingredients.
Your breakfast toast will never be the same again!
From sneaky childhood butter licks to penning some of our most popular articles, Jamie’s journey with butter has been lifelong. His culinary background gives him a unique perspective, allowing him to craft mouthwatering articles that educate and tantalize equally. Jamie’s travel adventures revolve around finding the world’s best buttery treats when he isn’t writing.
Recipes & Culinary Uses
Creamy Delight: Best Butter Pecan Ice Cream Recipe for Summer!
Yearning for a creamy summer treat that will leave you craving more?
![butter pecan ice cream](https://eatmorebutter.com/wp-content/uploads/2024/07/butter_pecan_ice_cream-1.jpg)
Savor a delicious summer treat with our Butter Pecan Ice Cream recipe. Mix butter, brown sugar, cream, and pecans for a creamy delight. Melt butter, cook pecans, whisk eggs, and blend for a rich flavor. Add pecans, cream, and vanilla, then freeze to perfection. Master this easy-to-follow recipe for a tasty dessert to beat the heat.
Key Takeaways
- Rich and creamy blend of butter, brown sugar, and heavy cream
- Toasted pecans for a nutty crunch and flavor
- Easy-to-follow steps for homemade ice cream perfection
- Customization options with variations like bourbon or chocolate
- Perfect summer treat with a decadent, refreshing taste
Recipe Ingredients for Butter Pecan Ice Cream
To create a delectable batch of butter pecan ice cream, gather the essential ingredients listed in the recipe.
You'll need:
- Butter
- Brown sugar
- Heavy cream
- Pecans
These ingredients combine to bring out the rich and nutty flavors of this classic dessert.
The brown sugar adds a caramel-like sweetness, while the heavy cream contributes to a creamy texture that's essential for a decadent treat.
Pecans, when toasted in butter, provide a delightful crunch and enhance the overall flavor profile of the ice cream.
Cooking Instructions for Homemade Ice Cream
![making ice cream at home](https://eatmorebutter.com/wp-content/uploads/2024/07/making_ice_cream_at_home.jpg)
Start by melting butter in a skillet to infuse the pecans with a rich, nutty flavor for your homemade butter pecan ice cream.
Here's a quick guide to help you make this creamy delight:
- Melt butter and cook pecans for flavor.
- Whisk eggs and combine with half-and-half and brown sugar for a creamy base.
- Cook until thickened, then mix with eggs in a bowl.
- Add cream, pecans, and vanilla extract.
- Freeze the mixture in an ice cream maker.
Following these steps will guarantee your homemade butter pecan ice cream turns out rich and delicious.
Remember to carefully adhere to the manufacturer's instructions for your ice cream maker to achieve the perfect consistency.
Enjoy the process of creating this delightful treat that will surely be a hit during the summer months.
Ice Cream Preparation Steps
![ice cream recipe instructions](https://eatmorebutter.com/wp-content/uploads/2024/07/ice_cream_recipe_instructions.jpg)
Mix half and half with brown sugar over medium heat in a large bowl to prepare the ice cream base.
Next, whisk beaten eggs and temper them with the warm milk mixture to create a smooth custard.
Once done, thicken the mixture on low heat, then cool it over an ice bath to achieve ideal texture.
After that, stir in heavy cream, vanilla extract, maple extract, and a pinch of salt for rich flavor.
Remember to refrigerate the mixture for 1 1/2 – 2 hours before churning it into creamy butter pecan ice cream.
This process ensures that the flavors meld together beautifully and the ice cream attains the perfect consistency for scooping and savoring.
Nutritional Information and Tips
![healthy eating guidance provided](https://eatmorebutter.com/wp-content/uploads/2024/07/healthy_eating_guidance_provided.jpg)
Considering the rich and creamy nature of homemade butter pecan ice cream, it's important to be mindful of its nutritional content and serving size. When indulging in this delectable dessert, remember these essential tips:
- Portion Control: Enjoy in moderation to savor the flavors without overindulging.
- Brown Sugar Sweetness: Opt for a moderate amount of brown sugar to balance sweetness without overwhelming the palate.
- Room Temperature Ingredients: Confirm ingredients like butter and heavy cream are at room temperature for a smoother texture.
- Nutritional Awareness: Be mindful that homemade butter pecan ice cream can vary in nutritional content, so adjust ingredients accordingly.
- Consultation: Seek advice from a nutritionist or healthcare provider for personalized guidance on incorporating this treat into a balanced diet.
Homemade Butter Pecan Ice Cream Variations
![delicious homemade ice cream](https://eatmorebutter.com/wp-content/uploads/2024/07/delicious_homemade_ice_cream.jpg)
Explore creative twists on traditional butter pecan ice cream by incorporating different nuts, spirits, sauces, chocolates, and dairy-free alternatives.
For a unique flavor, try substituting pecans with walnuts or almonds in the full recipe. Toast the nuts in a separate bowl until browned and fragrant, then chop them finely enough to coat in the ice cream mixture.
To add a boozy kick, mix in a splash of bourbon or rum to the base as you churn the ice cream. For an extra indulgent touch, swirl in caramel sauce or fudge ripple throughout the mixture.
Incorporate chunks of chocolate or chocolate-covered nuts for a delightful contrast in texture, giving each bite a sweet surprise.
If you prefer a lighter, dairy-free option, consider using coconut milk or almond milk as a substitute for traditional dairy products. These alternatives provide a creamy base while catering to plant-based diets.
Experiment with these variations to create a personalized butter pecan ice cream that suits your taste preferences.
Frequently Asked Questions
What Is the Secret to Making Ice Cream Very Creamy?
To make ice cream very creamy, you use a rich base of ingredients like heavy cream, eggs, and sugar. Chilling the base before churning is crucial for a smoother texture. Adding vanilla extract enhances creaminess, and slow churning prevents a dense outcome.
What Flavor Is the Ice Cream in Butter Pecan?
The ice cream in butter pecan is a delightful blend of buttery richness, vanilla sweetness, and maple undertones, perfectly paired with toasted pecans for a nutty crunch. This flavor combination creates a harmonious and indulgent treat.
What's the Difference Between Butter Pecan Ice Cream and Praline Pecan Ice Cream?
In butter pecan ice cream, you'll savor the buttery richness of pecans blended with a creamy base. On the other hand, praline pecan ice cream highlights caramelized sweetness with a swirl of praline sauce for a delightful flavor contrast.
What Age Group Eats Butter Pecan Ice Cream?
You'll find that adults and older individuals, typically in the 30-60 age group, enjoy butter pecan ice cream. It's a favorite among those with a more refined palate, drawn to its rich and nutty flavor.
Conclusion
So there you have it, folks! Whip up this buttery, nutty delight for a taste of summer in every scoop.
Don't cry over spilled milk – grab a cone and enjoy this creamy treat that's sure to satisfy your sweet tooth.
Get churning and indulge in the best butter pecan ice cream you've ever tasted!
Sunny’s articles radiate enthusiasm, much like her sunny disposition. As our resident “Butter Geek”, she delves deep into the latest butter trends, ensuring our readers are always in the know. Beyond her writing, Sunny’s passion lies in exploring vegan butter alternatives and hosting butter-tasting soirées.
Recipes & Culinary Uses
Festive Favorites: Best Peanut Butter Blossoms Recipe for Holidays!
Unleash the ultimate holiday baking magic with the best Peanut Butter Blossoms recipe – an irresistible treat that will elevate your festive celebrations!
![holiday baking with flair](https://eatmorebutter.com/wp-content/uploads/2024/07/holiday_baking_with_flair.jpg)
Elevate your holiday baking with the ultimate Peanut Butter Blossoms recipe. Cream together peanut butter, butter, sugars, and salt, then add egg and vanilla. Roll dough into balls, coat in brown sugar, bake until golden, then press a Hershey's kiss on top. Adjust baking time as needed. Explore ingredient swaps for a personalized touch. Enjoy with hot cocoa or pair with savory dishes. For more tips, ideas, and customization options, the recipe holds more festive surprises.
Key Takeaways
- Cream together peanut butter, butter, sugars for rich flavor.
- Bake at 375°F for 8-10 minutes for soft, chewy cookies.
- Customize with ingredient swaps like almond butter or maple syrup.
- Pair with savory dishes or hot cocoa for holiday enjoyment.
- Press Hershey kisses onto warm cookies for a classic finish.
Ingredients for Peanut Butter Blossoms
For the classic Peanut Butter Blossoms recipe, gather peanut butter, butter, sugar, an egg, and Hershey's kisses as your essential ingredients.
Peanut butter is the star, offering a rich flavor that blends perfectly with the sweetness of the cookies.
Butter plays a pivotal role by adding moisture and richness to the dough, ensuring a soft and chewy texture.
The sugar not only sweetens the cookies but also contributes to their festive appeal, making them a perfect treat for any occasion.
Finally, the Hershey's kisses on top provide a delightful chocolatey finish that elevates these cookies to a whole new level of deliciousness.
Together, these ingredients create a harmonious blend of flavors and textures that make Peanut Butter Blossoms a beloved classic for holiday baking or any time you crave a sweet and satisfying treat.
Recipe Steps for Peanut Butter Blossoms
![bake peanut butter cookies](https://eatmorebutter.com/wp-content/uploads/2024/07/bake_peanut_butter_cookies.jpg)
To make Peanut Butter Blossoms, start by creaming together peanut butter, butter, sugars, and salt until light and fluffy.
Next, add in the egg and vanilla extract, making sure to mix well to combine all the ingredients thoroughly.
Then, gradually incorporate the dry ingredients into the wet mixture until a smooth dough forms.
Once the dough is ready, roll it into balls and coat each ball generously in brown sugar.
Place the sugar-coated dough balls on a baking sheet, making sure to leave enough space between them for spreading during baking.
Bake the cookies in a preheated oven until they turn a beautiful golden brown.
As soon as the cookies are out of the oven, press a Hershey's kiss into the center of each cookie gently.
The heat from the freshly baked cookies will melt the chocolate just enough to adhere it to the cookie.
These Peanut Butter Blossoms are a delightful treat perfect for Christmas celebrations!
Pro Tips for Making Peanut Butter Blossoms
![baking perfect peanut blossoms](https://eatmorebutter.com/wp-content/uploads/2024/07/baking_perfect_peanut_blossoms.jpg)
To enhance your peanut butter blossom baking experience, consider adjusting the baking time based on your oven's performance for best results.
Additionally, explore ingredient substitutions to cater to dietary preferences or allergies without compromising the flavor or texture of the cookies.
These pro tips can help you customize your peanut butter blossoms while ensuring delicious outcomes.
Baking Time Recommendations
Achieving the ideal texture for your peanut butter blossoms involves baking them at 375°F for 8-10 minutes. This baking duration guarantees that the cookies have a soft and chewy consistency while allowing the Hershey kisses on top to be softened but not completely melted.
Once out of the oven, remember to press the Hershey kisses onto the cookies immediately to secure them in place for that classic appearance.
For the best outcomes, chill the cookie dough for about 30 minutes before baking. This step helps the cookies maintain their shape and prevents excessive spreading during baking, ensuring your peanut butter blossom cookies are perfectly formed and ready to impress during your holiday baking.
Shortening or extending the baking time can alter the texture of the cookies. A quick bake of 6-8 minutes produces softer and chewier cookies, while longer baking times yield a slightly crispier consistency. Stick to the recommended 8-10 minutes for the best soft and chewy peanut butter blossoms.
Ingredient Substitutions
Consider incorporating different ingredients to elevate the flavor and nutritional profile of your peanut butter blossoms. For a healthier option, swap out shortening with unsalted butter to achieve a unique texture and taste in your cookies.
Try using natural peanut butter instead of creamy to add a wholesome twist to the classic recipe. If you're looking to reduce the glycemic impact, substitute brown sugar with coconut sugar in your baking. For a natural sweetener alternative, replace regular granulated sugar with maple syrup in the cookie dough mixture.
Additionally, for a distinct flavor experience, experiment with almond butter as a substitute for peanut butter in your blossoms. These ingredient substitutions can bring a new dimension to your peanut butter blossoms, making them not only delicious but also tailored to your dietary preferences.
Upgrade your baking game this holiday season with these creative twists on a beloved recipe!
Serving Suggestions for Peanut Butter Blossoms
![peanut butter cookie recipe](https://eatmorebutter.com/wp-content/uploads/2024/07/peanut_butter_cookie_recipe-1.jpg)
Enhance the enjoyment of your peanut butter blossoms by pairing them with savory dishes like lasagna tortellini soup for a satisfying meal. These classic cookies also complement family-friendly dinners such as easy ground beef shepherd's pie and creamy broccoli cheddar soup, making for a delightful combination. The holiday season calls for cozy treats, and the sweet nuttiness of peanut butter blossoms pairs perfectly with a warm cup of hot cocoa. Whether you're participating in a cookie exchange or looking for a festive touch to your holiday dessert spread, consider rolling the cookies in red, green, and white sugar sprinkles to add a pop of color and fun.
Serving Suggestions | Pairing Ideas |
---|---|
Lasagna Tortellini Soup | Comforting and hearty meal alongside the cookies |
Easy Ground Beef Shepherd's Pie | Delicious combination for a family dinner |
Creamy Broccoli Cheddar Soup | Perfect accompaniment to the nutty cookie flavors |
12 Days of Christmas Cookies Recipes
![baking traditions for the holidays](https://eatmorebutter.com/wp-content/uploads/2024/07/baking_traditions_for_the_holidays.jpg)
Indulge in a variety of delightful Christmas cookie recipes each day during the holiday season. One standout choice is the classic Peanut Butter Blossoms. These holiday cookies feature a peanut butter base topped with a Hershey's kiss, making them a beloved treat for cookie exchanges and festive gatherings.
The process of making these cookies is simple yet rewarding. Start by rolling the dough balls in sugar before baking to add a sweet crunch to each bite. The combination of rich peanut butter flavor and the chocolatey goodness of the Hershey's kiss creates a perfect balance of sweetness.
When enjoying these Christmas cookies, consider pairing them with a glass of milk for a classic and satisfying treat.
Whether you're baking them for your family, a cookie exchange, or a holiday party, Peanut Butter Blossoms are sure to be a hit. Make each day of the holiday season a little sweeter with these delicious cookies.
User Engagement Features
![user interaction enhancements](https://eatmorebutter.com/wp-content/uploads/2024/07/user_interaction_enhancements.jpg)
Let's talk about how user interaction features and personalization options enhance your experience with the Peanut Butter Blossoms recipe.
You can engage with others by leaving comments and sharing your results, creating a sense of community around this holiday treat.
Personalization options like name and email entry fields help tailor the experience to your preferences, making it more engaging and enjoyable.
User Interaction Features
Utilizing user engagement features on the website allows for increased participation and feedback from visitors. The comment section enables users to interact with each other and provide valuable feedback on the Peanut Butter Blossoms recipe or share their experiences with Hershey's kisses. By incorporating a reply option, users can engage in conversations, fostering a sense of community around baking these delightful peanut butter cookies.
Moreover, the inclusion of name and email fields not only allows for personalization but also facilitates communication between the website and its visitors. This data storage feature guarantees that users can conveniently access their information for future visits, enhancing their overall user experience.
These user engagement features play an essential role in creating an interactive platform where users can engage, provide feedback, and communicate effectively. Such interaction not only enriches the user experience but also encourages visitors to actively participate in the community surrounding the Peanut Butter Blossoms recipe.
Personalization Options
Enhance your website's user engagement by incorporating personalized options such as commenting, replying, and sharing feedback on the Peanut Butter Blossoms recipe. This level of user interaction not only fosters a sense of community building but also encourages customization and feedback. By allowing users to share their thoughts, results, and experiences with the festive favorites, you create a more engaging and interactive user experience. Additionally, providing users with the option to save their data for future visits and encouraging them to tag @preppykitchen and use #preppykitchen when trying the recipe further enhances their engagement.
Personalization Options | Description | Benefits |
---|---|---|
Commenting | Users can leave comments on the Peanut Butter Blossoms recipe, sharing their thoughts and experiences. | Fosters community building and user engagement. |
Replying | Users can reply to comments and engage in discussions with other users about the recipe. | Encourages active participation and interaction. |
Feedback Sharing | Users can share feedback on the recipe, providing valuable insights for improvement. | Enhances user experience and customization. |
Additional Information
![clarifying specific details provided](https://eatmorebutter.com/wp-content/uploads/2024/07/clarifying_specific_details_provided.jpg)
You may find it interesting to know more about the history of the Peanut Butter Blossoms recipe and its cultural significance during the holidays.
- The Peanut Butter Blossoms recipe's popularity is backed by IRI MULO data, making it a sought-after choice for holiday baking.
- Copyright for this beloved recipe belongs to The J.M. Smucker Company, a reputable name in the food industry known for quality products.
- These delightful cookies aren't only perfect for serving at holiday parties but also make excellent gifts due to their festive appeal.
Frequently Asked Questions
Why Are My Peanut Butter Blossoms Dry?
If your peanut butter blossoms are dry, it could be due to using too much flour, overbaking, using natural peanut butter that requires stirring, or not enough butter/shortening. Guarantee precise measurements and follow the recipe closely to maintain moisture.
Why Did My Peanut Butter Blossoms Go Flat?
When making peanut butter blossoms, going flat happens due to overmixing, too much flour, insufficient chilling, or low oven temperature. Remember to avoid these pitfalls. Preheat the oven properly and follow the recipe for perfect blossoms!
What Is America's Favorite Christmas Cookie?
America's favorite Christmas cookie is Peanut Butter Blossoms. Loved for their peanut butter-chocolate combo and nostalgic Hershey's Kiss center, these easy-to-make treats are a holiday staple at parties and gatherings. They're a must-have during the festive season.
What Is Baskin Robbins Peanut Butter Blossom?
You asked about Baskin Robbins Peanut Butter Blossom. It's a delectable seasonal ice cream flavor featuring creamy peanut butter ice cream with a ribbon of more peanut butter and chocolate cookie pieces. Indulge in this festive treat!
Conclusion
Indulge in the warm, gooey goodness of these peanut butter blossoms this holiday season. With the perfect blend of creamy peanut butter and rich chocolate, these cookies are sure to bring joy to your festivities.
Picture yourself surrounded by loved ones, sharing laughter and memories as you enjoy these delicious treats. Let the aroma of freshly baked cookies fill your home and create a cozy, festive atmosphere.
Happy baking and happy holidays!
Sunny’s articles radiate enthusiasm, much like her sunny disposition. As our resident “Butter Geek”, she delves deep into the latest butter trends, ensuring our readers are always in the know. Beyond her writing, Sunny’s passion lies in exploring vegan butter alternatives and hosting butter-tasting soirées.
Recipes & Culinary Uses
Bite-Sized Treats: Best Peanut Butter Ball Recipe You'll Love!
Adore these heavenly peanut butter balls with a delectable mix of smooth peanut butter, powdered sugar, and vanilla—perfect for indulging in bite-sized bliss!
![delicious peanut butter balls](https://eatmorebutter.com/wp-content/uploads/2024/07/delicious_peanut_butter_balls.jpg)
You'll adore these easy and heavenly peanut butter balls. Mix smooth peanut butter, powdered sugar, and vanilla extract for a delectable dough. Roll into small balls and chill. Dip in melted chocolate, then refrigerate to set. Enhance the flavor with rum extract, nuts, or crushed pretzels. Get creative with colorful sprinkles and different chocolate coatings. Use quality chocolate coating and adjust mix consistency. Store them in the fridge or freezer. Enjoy these mouthwatering treats alone or at gatherings. More tips and delightful variations await!
Key Takeaways
- Creamy peanut butter, powdered sugar, and vanilla create a smooth dough.
- Incorporate nuts, rum extract, or pretzels for flavor and texture variety.
- Use quality chocolate coating like candy melts for best results.
- Chill peanut butter balls before dipping for easier handling.
- Store in the fridge or freezer for convenient snacking and serving.
Ingredients and Preparation
To create irresistible peanut butter balls, gather creamy peanut butter, powdered sugar, and vanilla extract as your key ingredients.
Begin by mixing the peanut butter, butter, sugar, and vanilla until you have a smooth dough. Roll this mixture into small balls and chill them before dipping them in melted chocolate.
The type of chocolate you use, such as dark or milk chocolate, will enhance the flavor of your peanut butter balls. After dipping, make sure to refrigerate the balls until the chocolate sets for a perfect finish.
This process guarantees that each bite-sized treat isn't only visually appealing but also bursting with delicious peanut butter and chocolate flavors.
Variations and Enhancements
![creative modifications and improvements](https://eatmorebutter.com/wp-content/uploads/2024/07/creative_modifications_and_improvements.jpg)
You can elevate the flavor of your peanut butter balls by incorporating unique ingredients like chopped nuts or rum extract.
Experiment with different chocolate coatings such as white almond bark or dark chocolate candy melts for a varied taste experience.
Get creative by adding finishing touches like colorful sprinkles to make your peanut butter balls visually appealing.
Flavorful Ingredient Additions
Enhance the flavor of your peanut butter balls by incorporating unique ingredient variations and enhancements. While the classic combination of peanut butter, powdered sugar, and butter creates a delicious dough for your treats, you can take it up a notch by adding flavorful ingredient additions.
Consider mixing in crushed pretzels for a salty crunch that complements the sweetness of the peanut butter. Chopped nuts like almonds or pecans can also add a delightful texture and nutty taste to your chocolate-covered peanut butter balls.
For a burst of fruity flavor, try incorporating dried cranberries or raisins into the dough. These additions not only provide a contrast in texture but also introduce a hint of sweetness that pairs well with the creamy peanut butter.
Another option is to include a sprinkle of cinnamon or a dash of vanilla extract to elevate the overall taste profile of your peanut butter balls. Experiment with these flavorful ingredient additions to create a unique and delectable twist on the classic treat.
Chocolate Coating Options
Experiment with different types of chocolate coatings – dark, white, or milk chocolate – to suit your preferences and elevate the flavor of your peanut butter balls.
When considering the chocolate coating for your crunchy peanut butter treats, here are some options to enhance your culinary creation:
- Choose Candy Melts or Almond Bark: Opt for candy melts or almond bark for a smooth and firm chocolate coating that sets well on your peanut butter balls.
- Avoid Chocolate Chips: Steer clear of using chocolate chips for coating, as they may contain stabilizers that hinder smooth melting, affecting the overall texture.
- Add Colored Sprinkles: For a festive touch, sprinkle colored sprinkles on top of the chocolate coating before it sets to add a pop of color and extra crunch to your peanut butter balls.
Experimenting with different chocolate coatings and techniques can take your peanut butter balls to the next level, ensuring a delightful and indulgent treat for any occasion.
Creative Finishing Touches
To elevate the flavor profile of your peanut butter balls, consider incorporating creative finishing touches through various enhancements and unique variations.
You can enhance the texture by adding chopped nuts or crispy rice cereal to the peanut butter mixture, providing a delightful crunch with every bite.
Experiment with different flavors by using almond extract or rum extract instead of vanilla for a twist on the traditional taste.
For a festive touch, roll the balls in crushed graham crackers, sprinkles, or a sprinkle of sea salt to add a pop of flavor.
Drizzle white chocolate over the dark, semi-sweet, or milk chocolate coating for a visually appealing contrast that will impress your guests.
If you enjoy a crunchy element, try coating the balls in crushed pretzels or toasted coconut before the chocolate sets.
These creative enhancements will take your peanut butter balls to the next level, making them a standout treat at any gathering.
Tools and Tips
![crafting with precision](https://eatmorebutter.com/wp-content/uploads/2024/07/crafting_with_precision.jpg)
Consider using a 1 tablespoon cookie scoop for consistent sizing when preparing your peanut butter balls. This tool will help guarantee all your treats are uniform in size, making for a neat presentation and even cooking.
Here are some additional tools and tips to enhance your peanut butter ball-making experience:
- Invest in Quality Chocolate Coating: Opt for candy melts or almond bark for a smooth and firm chocolate coating on your peanut butter balls. These coatings melt easily and provide a professional finish to your treats.
- Adjust Peanut Butter Mixture Consistency: If your peanut butter mixture is too sticky or too dry, adjust the consistency by adding more peanut butter or powdered sugar. This will help you achieve the perfect texture for shaping your balls.
- Refrigerate Before Dipping: Prior to dipping your peanut butter balls in chocolate, chill them in the refrigerator. This step will make the balls firmer, making them easier to handle and coat without falling apart.
Storage and Serving Suggestions
![great suggestion for storage](https://eatmorebutter.com/wp-content/uploads/2024/07/great_suggestion_for_storage.jpg)
For best freshness and presentation of your peanut butter balls, follow these storage and serving suggestions.
To keep your peanut butter balls tasting delicious, store them properly. You can store them in an airtight container in the fridge for up to 1 week or in the freezer for up to 2 months. When freezing, remember to thaw the frozen peanut butter balls before serving by bringing them to room temperature. To prevent them from sticking together, separate the layers of peanut butter balls with wax paper.
Here is a helpful table summarizing the storage and serving suggestions:
Storage | Serving | Frozen |
---|---|---|
Airtight container | Display on festive tray | Thaw before serving |
Fridge – 1 week | Pair with hot cocoa | Bring to room temp |
Freezer – 2 months | Enjoy at holiday gatherings | |
Separate with wax paper |
Additional Peanut Butter Desserts
![peanut butter dessert recipes](https://eatmorebutter.com/wp-content/uploads/2024/07/peanut_butter_dessert_recipes.jpg)
Explore a variety of delectable peanut butter desserts to satisfy your sweet cravings.
- Peanut Butter Blossom Cookies: Indulge in the classic combination of peanut butter cookies topped with a chocolate kiss for a delightful treat.
- Peanut Butter Chocolate Mug Cake: Whip up this easy-to-make single-serving dessert that combines the rich flavors of peanut butter and chocolate in a mug for a quick fix.
- Peanut Butter Overload Cookies: For those who can't get enough peanut butter, these cookies are loaded with peanut butter chips, chocolate chips, and chopped peanuts for an explosion of flavor in every bite.
These additional peanut butter desserts offer a diverse selection to cater to your cravings.
Whether you're in the mood for a classic treat like Peanut Butter Blossom Cookies, a quick fix with Peanut Butter Chocolate Mug Cake, or a flavor-packed experience with Peanut Butter Overload Cookies, there's something for every peanut butter lover.
Enjoy these easy-to-make delights whenever you need a sweet pick-me-up!
Recipe Instructions and Nutritional Information
![cooking guidance and facts](https://eatmorebutter.com/wp-content/uploads/2024/07/cooking_guidance_and_facts.jpg)
To create these delectable Peanut Butter Balls, start by blending peanut butter, butter, sugar, and vanilla to form a dough. Roll the mixture into small balls and place them on a baking sheet lined with parchment paper. Chill the peanut butter balls in the refrigerator for about 30 minutes until firm.
Once chilled, melt chocolate in a heatproof bowl over simmering water or in the microwave. Dip each chilled peanut butter ball into the melted chocolate, ensuring they're evenly coated. Place the coated balls back on the parchment paper and let the chocolate set.
Each serving of these delightful treats contains approximately 114 calories.
Store the finished peanut butter balls in the fridge for up to 2 weeks or freeze them for up to 3 months.
Enjoy these decadent bite-sized snacks whenever you crave a sweet and nutty indulgence.
Frequently Asked Questions
Can I Use Chunky Peanut Butter Instead of Creamy for This Recipe?
Yes, you can use chunky peanut butter instead of creamy for this recipe. It will add a delightful texture and extra crunch to your peanut butter balls. Enjoy experimenting with different variations!
How Long Do Chocolate Covered Peanut Butter Balls Stay Fresh?
Like a sweet memory, chocolate-covered peanut butter balls stay fresh for up to two weeks when stored in an airtight container in the fridge. Indulge in these delectable treats within that time frame for best taste.
Can I Freeze the Peanut Butter Balls for Later Enjoyment?
Yes, you can freeze the peanut butter balls for later enjoyment. Simply place them in an airtight container or freezer bag. When ready to indulge, let them thaw in the fridge for a few hours.
What Type of Chocolate Is Best for Coating the Peanut Butter Balls?
For coating the peanut butter balls, semi-sweet or milk chocolate works best. They provide a delicious contrast to the creamy peanut butter filling. Simply melt the chocolate, dip the balls, and enjoy the sweet treat!
Can I Add Chopped Nuts or Sprinkles to the Peanut Butter Balls for Extra Flavor?
You can definitely add chopped nuts or sprinkles to the peanut butter balls for extra flavor. It's a great way to customize your treats and add a delightful crunch or colorful touch to each bite.
Conclusion
Indulge in these irresistible peanut butter balls that are sure to satisfy your sweet tooth cravings.
With just a few simple ingredients and easy-to-follow instructions, you can enjoy these bite-sized treats in no time.
So go ahead, treat yourself to a little taste of heaven and experience the perfect combination of creamy peanut butter and rich chocolate.
You won't be able to resist coming back for more!
Sunny’s articles radiate enthusiasm, much like her sunny disposition. As our resident “Butter Geek”, she delves deep into the latest butter trends, ensuring our readers are always in the know. Beyond her writing, Sunny’s passion lies in exploring vegan butter alternatives and hosting butter-tasting soirées.
-
Recipes & Culinary Uses2 months ago
How Many Sticks of Butter Equals a Pound: A Handy Guide
-
Shopping Guides1 month ago
Where to Buy Raw Butter
-
Recipes & Culinary Uses4 weeks ago
Make Homemade Butter from Milk at Home
-
Recipes & Culinary Uses4 weeks ago
Make Creamy Butter From Buttermilk
-
Butter Tips and Tricks3 months ago
How Long Can You Use Butter After the Expiration Date?
-
Recipes & Culinary Uses2 months ago
Make Your Own Homemade Spray Butter
-
Butter Tips and Tricks3 months ago
How Much Butter to Use Instead of 1/3 Cup Oil
-
Butter Tips and Tricks3 months ago
How Many Calories Are in a Stick of Butter: A Comprehensive Guide