Connect with us

Recipes & Culinary Uses

Easy Steps to Make Fiora Using Butter Maker

Published

on

An image of a sleek, compact 'Easy Butter Maker' on a kitchen counter, surrounded by fresh herbs and a jar of golden, homemade Fiora butter

So, you’re keen on making Fiora with the Easy Butter Maker, huh? Well, let me tell you, you’re in for a real treat! With this handy little gadget, you’ll be able to whip up some tasty Fiora butter in no time.

I’ll walk you through the process, from choosing the right ingredients to troubleshooting common issues. Trust me, by the end of this article, you’ll be a Fiora butter-making pro!

Let’s get started, shall we?

Key Takeaways

  • High-quality ingredients and precise measurement are crucial for a successful Fiora recipe.
  • The Easy Butter Maker provides a convenient and precise method for infusing Fiora into butter.
  • Proper temperature control and timing are essential for optimal extraction of flavors and potency.
  • Straining and proper storage techniques ensure a smooth texture and preserve the freshness of Fiora butter.

Choosing the Right Ingredients

[bulkimporter_image id=’2′]

Before you start making fiora with the ‘easy butter maker, make sure you’ve got all the right ingredients on hand. The key to a successful fiora recipe is using high-quality ingredients and following precise measuring techniques.

Advertisement

Fiora, a traditional Italian pastry, comes in different types and flavors, each requiring specific ingredients.

For the classic fiora, you will need all-purpose flour, unsalted butter, sugar, eggs, vanilla extract, and lemon zest. These ingredients blend together to create a delicate and buttery pastry with a hint of citrus flavor. If you prefer a chocolate fiora, you can add cocoa powder to the mixture, giving it a rich and indulgent taste.

To ensure accurate measurements, use measuring cups and spoons. For dry ingredients like flour and sugar, spoon them into the measuring cup and level off the excess with a straight edge. When measuring liquids like vanilla extract, use a liquid measuring cup at eye level for precise amounts.

Different types of fiora can also incorporate ingredients like almond extract, orange zest, or even a touch of rum. These variations add unique flavors and aromas, allowing you to experiment and find your favorite fiora recipe.

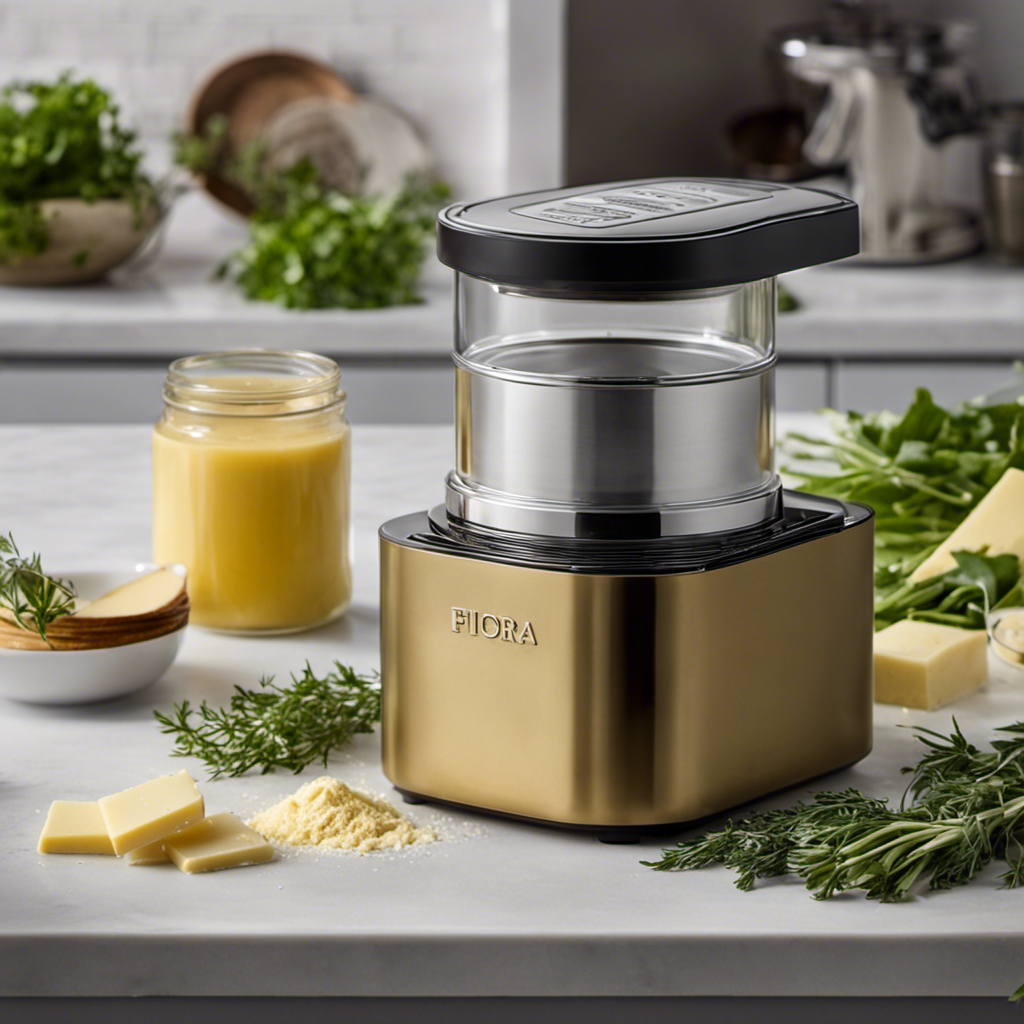
Preparing the Easy Butter Maker

Advertisement
[bulkimporter_image id=’3′]

When using the Easy Butter Maker, you’ll need to first gather all the necessary ingredients and equipment. To ensure a successful infusion process, it’s important to have the right measuring equipment and follow the instructions precisely.

Start by gathering your preferred strain of fiora and a high-quality unsalted butter. You’ll also need a saucepan, a heat-resistant spatula, and a cheesecloth or strainer for filtering the final product.

Before you begin, make sure to decarboxylate your fiora by baking it in the oven at a low temperature. This will activate the THC and ensure a potent infusion.

Once your fiora is decarboxylated, it’s time to start the infusion process. Place the Easy Butter Maker on a heat-resistant surface and add your desired amount of butter. The Easy Butter Maker comes with clear measurement lines, making it easy to determine the right quantity.

Advertisement

Now, carefully add the decarboxylated fiora to the butter, making sure it is evenly distributed. The Easy Butter Maker’s unique design allows for efficient and thorough infusion.

As the butter and fiora mixture heats up, use the heat-resistant spatula to gently stir and incorporate the ingredients. This will ensure a consistent infusion throughout.

When the infusion process is complete, carefully strain the mixture through a cheesecloth or strainer to remove any plant material. This will result in a smooth and pure fiora butter.

With the Easy Butter Maker, preparing fiora-infused butter has never been easier. Now that you’ve prepared the butter, let’s move on to measuring the fiora quantity.

Measuring the Fiora Quantity

Advertisement
[bulkimporter_image id=’4′]

To accurately measure the quantity of fiora needed, simply use the Easy Butter Maker’s clear measurement lines. This innovative device takes the guesswork out of the process, ensuring consistent and precise results every time.

Here are three measuring techniques to help you achieve the perfect fiora infusion:

  1. Follow the Easy Butter Maker’s instructions: The device comes with clear guidelines on how much fiora to use for different recipes. Simply follow these instructions for precise measurements.

  2. Use a kitchen scale: If you prefer a more precise approach, you can use a kitchen scale to weigh the fiora. This method allows for greater control over the quantity and ensures accurate results.

  3. Experiment with alternative ingredients: While fiora is the traditional choice for infusions, you can also explore alternative ingredients to create unique flavors. Consider trying herbs, spices, or even fruits to infuse with your butter.

Now that you have measured the fiora accurately, it’s time to move on to the next step: grinding the fiora. This process will help to release the flavors and aromas locked within the plant material, ensuring a potent and flavorful infusion.

Grinding the Fiora

Advertisement
[bulkimporter_image id=’5′]

When it comes to grinding fiora, consistency is key. Achieving a uniform grind ensures that the fiora will burn evenly and release its full flavor potential.

To achieve this, it is important to use the best grinding techniques that suit your personal preferences and equipment. In this discussion, I will explore the importance of consistency in ground fiora and share some of the best grinding techniques that can help you achieve the perfect result every time.

Consistency of Ground Fiora

Achieving the desired consistency of ground fiora is important, so make sure you monitor the process closely. The texture of the ground fiora plays a crucial role in the infusion process and ultimately affects the quality of your final product.

Here are three key points to consider when achieving the perfect consistency:

Advertisement
  1. Grinding techniques: Use a grinder specifically designed for herbs to ensure a consistent grind. Avoid using a coffee grinder, as it can result in uneven particles and affect the potency of your fiora.

  2. Infusion process: Once you have ground the fiora, it’s important to infuse it properly. This can be done by using a reliable infusion device or by following a trusted recipe that outlines the correct steps and timings.

  3. Monitoring the process: Keep a close eye on the grinding and infusion process to prevent over-grinding or under-infusing. This will help you achieve the ideal consistency and maximize the potency of your fiora.

Best Grinding Techniques

The best grinding techniques for achieving the desired consistency of ground fiora involve using a grinder specifically designed for herbs and avoiding a coffee grinder.

Grinding techniques play a crucial role in flavor enhancement, as they determine the texture and potency of your fiora.

Herb grinders are designed with sharp teeth that ensure a consistent grind, resulting in a smooth and even distribution of the fiora.

Coffee grinders, on the other hand, are not ideal for grinding fiora as they tend to create an uneven grind, producing chunks and powder simultaneously.

By using a dedicated herb grinder, you can maintain the integrity of your fiora, preserving its flavor and potency.

Advertisement

Now that we’ve covered the best grinding techniques, let’s move on to setting the temperature and time for extracting the maximum benefits from your fiora.

Setting the Temperature and Time

[bulkimporter_image id=’6′]

When it comes to getting the best results from your infusion techniques, it is crucial to understand the optimal heating settings and timing.

Finding the right temperature for your specific ingredients and desired outcome is key to achieving the perfect infusion.

Advertisement

Optimal Heating Settings

To make Fiora with the ‘Easy Butter Maker’, you’ll want to adjust the heating settings to ensure optimal results. Proper heating techniques and temperature control are essential for extracting the best flavors and potency from your ingredients.

Here are three key considerations when setting the temperature on your ‘Easy Butter Maker’:

  1. Start low and slow: Begin by setting the temperature to a lower setting, around 160°F (71°C). This gentle heat will slowly infuse the butter or oil with the desired compounds, without risking any burn or degradation.

  2. Gradually increase the temperature: As the infusion process progresses, gradually increase the temperature to around 185°F (85°C). This temperature allows for enhanced extraction of cannabinoids and terpenes, ensuring a potent and flavorful Fiora.

  3. Avoid high heat: While it may be tempting to crank up the heat for faster results, it’s best to avoid temperatures above 200°F (93°C). Higher temperatures can lead to a loss of potency and undesirable flavors.

Timing for Best Results

For best results, you’ll want to consider the timing of the infusion process when using the ‘Easy Butter Maker’. Timing is crucial because it determines the potency and flavor of your fiora.

To ensure accurate measurements, use precise measuring techniques. This will help you achieve the desired effects and avoid any unwanted surprises.

Infusion monitoring is also important during the process. Keep a close eye on the temperature and duration to ensure optimal extraction of cannabinoids and terpenes.

Advertisement

The ‘Easy Butter Maker’ provides an easy and efficient way to infuse your ingredients, but it’s essential to follow the recommended timings and monitoring techniques.

Temperature and Infusion Techniques

Monitoring the temperature and duration is essential to ensure optimal extraction of cannabinoids and terpenes when infusing ingredients with the Easy Butter Maker. To achieve the best results, here are three key factors to consider:

  1. Consistency Testing: It is important to consistently monitor the temperature throughout the infusion process. This ensures that the cannabinoids and terpenes are extracted at the ideal temperature range, maximizing their potency and flavor.

  2. Infusion Time Optimization: Different ingredients require varying infusion times to achieve the desired potency. By carefully monitoring the infusion time, you can ensure that the cannabinoids and terpenes are fully extracted without overcooking the ingredients.

  3. Precise Temperature Control: The Easy Butter Maker offers precise temperature control, allowing you to set the temperature according to your recipe’s requirements. This ensures that the cannabinoids and terpenes are extracted without compromising the quality of the final product.

By following these guidelines, you can achieve consistent and potent infusions with the Easy Butter Maker.

Now, let’s move on to the next step: adding the fiora to the Easy Butter Maker.

Adding the Fiora to the Easy Butter Maker

Advertisement
[bulkimporter_image id=’7′]

Start by placing the Fiora into the Easy Butter Maker and ensuring it is evenly distributed throughout. When working with cannabis-infused products like Fiora, precision is key. Measuring techniques play a crucial role in achieving the desired potency and flavor. To ensure accuracy, I recommend using a kitchen scale to weigh the Fiora before adding it to the Easy Butter Maker. This will help you determine the ideal amount based on your recipe and personal preferences.

Once the Fiora is in the Easy Butter Maker, it’s time to begin the infusion process. The Easy Butter Maker utilizes a simple yet effective method to infuse the cannabis into the butter or oil. As the Fiora is heated, the cannabinoids and terpenes are extracted and infused into the chosen fat. This infusion process is essential for activating the beneficial compounds found in cannabis, allowing them to be easily absorbed by our bodies when consumed.

As the Easy Butter Maker heats up, the Fiora undergoes a transformation. The cannabinoids and terpenes are released from the plant material, infusing the butter or oil with their unique properties. This process requires patience and attention to detail to ensure the optimal infusion. Once the infusion process is complete, the Fiora-infused butter or oil can be used in a variety of recipes, from baked goods to savory dishes.

Now that the Fiora is in the Easy Butter Maker and the infusion process is underway, we can explore the next steps to create the perfect cannabis-infused product.

Advertisement

The Infusion Process

[bulkimporter_image id=’8′]

Once the infusion process is complete, you’ll be left with a potent and flavorful cannabis-infused butter or oil ready to be used in your favorite recipes. To achieve the best results, it is important to measure the fiora accurately and choose the right infusion method for your desired outcome.

Here are three key factors to consider when infusing cannabis into butter or oil:

  1. Accurate Measurement: To ensure the potency of your infused product, it is crucial to measure the fiora accurately. Use a digital scale to weigh the desired amount of cannabis, keeping in mind the recommended dosage for your recipe.

  2. Infusion Methods: There are various infusion methods to choose from, each offering different results. Some popular methods include the stovetop method, slow cooker method, and using specialized infusion devices like the Easy Butter Maker. Research and select the method that best suits your needs and resources.

  3. Time and Temperature: The infusion process requires time and controlled temperature to activate the cannabinoids in the cannabis. Follow the recommended time and temperature guidelines provided by your chosen infusion method. This will ensure optimal extraction of cannabinoids, resulting in a potent and flavorful infusion.

Monitoring the Butter Maker

Advertisement
[bulkimporter_image id=’9′]

After setting up the infusion process, it’s important to regularly check on the butter maker to ensure everything is running smoothly. Temperature control is crucial during the infusion process to achieve the desired results. By monitoring the butter maker, you can ensure that the temperature remains consistent and the infusion techniques are working effectively.

To help you keep track of the temperature and other important factors, I have created a table below:

Time (minutes) Temperature (°F) Infusion Progress
0 160 No infusion
15 180 Mild infusion
30 200 Medium infusion
45 220 Strong infusion
60 240 Maximum infusion

As you monitor the butter maker, you should pay attention to any changes in temperature and adjust accordingly. This will ensure that the infusion process is happening at the right pace and that the butter is properly infused with the desired flavors.

Straining the Infused Butter

Advertisement
[bulkimporter_image id=’10’]

Now that we’ve monitored the butter maker, it’s time to move on to the next step: straining the infused butter. This is an essential process to ensure that our final product is smooth and free from any unwanted particles.

When infusing butter with herbs or other ingredients, it’s common to end up with small particles or sediment in the final product. Straining helps to remove these impurities and achieve a smoother texture.

Here’s how you can strain your infused butter effectively:

  1. Choose the right straining technique: Depending on the desired grain size of your butter, you can opt for different straining methods. For a more refined texture, a fine mesh strainer or cheesecloth can be used. If you prefer a slightly coarser texture, a wire mesh strainer may be more suitable.

  2. Set up your straining equipment: Place your chosen strainer over a clean container or bowl. Make sure it is stable and won’t tip over during the straining process.

  3. Pour the infused butter through the strainer: Slowly pour the butter into the strainer, allowing it to pass through while the unwanted particles are caught in the straining material.

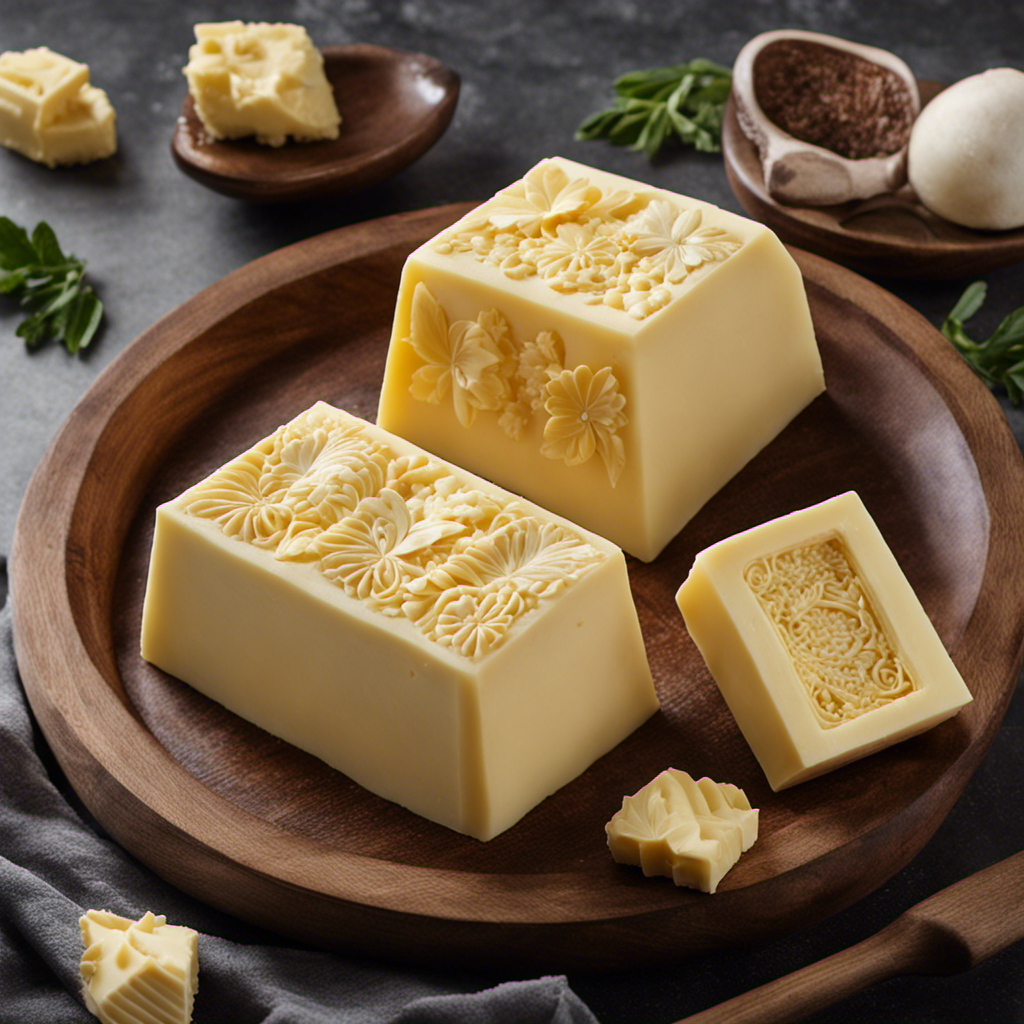
Storing the Fiora Butter

Advertisement
[bulkimporter_image id=’11’]

When it comes to storing fiora butter, there are two main options to consider: refrigeration or freezing. Refrigeration can help extend the shelf life of the butter, but freezing can preserve it for even longer periods.

As for the best storage containers, airtight containers or resealable bags are recommended to keep the butter fresh and prevent any unwanted odors or flavors from seeping in.

Refrigeration or Freezing

Refrigeration or freezing can help preserve the freshness of your homemade fiora made with the easy butter maker. Here are the benefits of each method:

  1. Refrigeration alternatives: If you don’t have access to a refrigerator, there are a few alternatives you can try. Keep your fiora in a cool, dark place, such as a pantry or cellar. Make sure the temperature is stable and doesn’t fluctuate too much. You can also use an insulated cooler with ice packs to keep the fiora cool.

  2. Benefits of freezing: Freezing your fiora can extend its shelf life even further. It helps to maintain the texture and flavor for a longer period. When freezing, make sure to use airtight containers or freezer bags to prevent freezer burn.

By using refrigeration or freezing methods, you can keep your homemade fiora fresh and delicious for an extended period.

Advertisement

Now let’s talk about the best storage containers for your fiora butter.

Best Storage Containers?

To keep your homemade fiora fresh, you’ll want to choose the best storage containers available. When it comes to preserving freshness, airtight containers are essential. Look for containers with a strong seal to keep out air and moisture, which can cause your fiora to become stale or soggy.

Glass containers with locking lids are a great option, as they are not only airtight but also allow you to see the contents inside. Additionally, glass containers are microwave-safe, making it easy to reheat your fiora without transferring it to another dish.

Plastic containers can also work well, just make sure they are BPA-free and have a reliable seal.

With the right storage containers, your homemade fiora will stay fresh and delicious for longer.

Advertisement

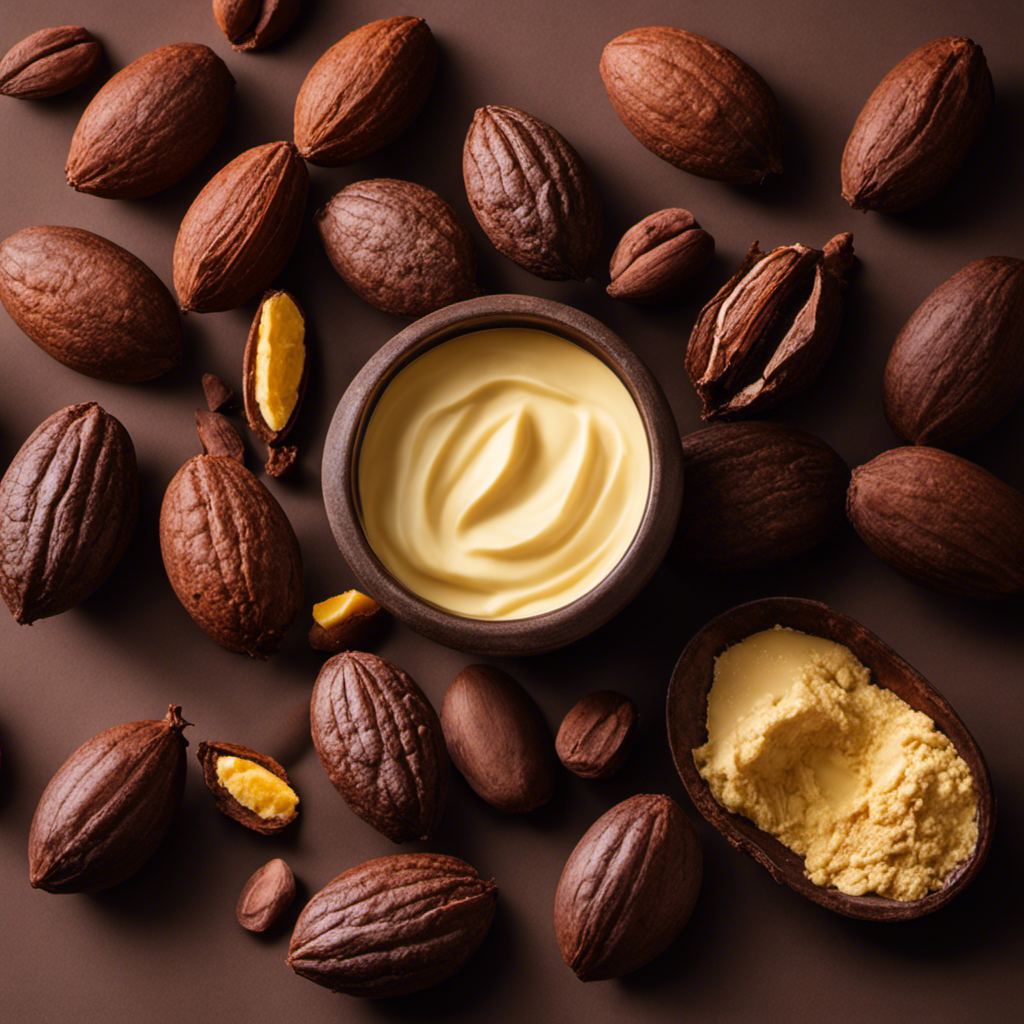
Using Fiora Butter in Recipes

[bulkimporter_image id=’12’]

You can easily incorporate Fiora butter into your favorite recipes for added richness and flavor. Not only does Fiora butter enhance the taste of your dishes, but it also offers several benefits that make it a great choice for cooking and baking.

Here are three reasons why using Fiora butter in your recipes is a game-changer:

  1. Creaminess: Fiora butter is known for its velvety texture, which adds a luxurious creaminess to your recipes. Whether you’re making a batch of homemade chocolate chip cookies or a savory garlic butter sauce, Fiora butter will lend a smooth and indulgent touch to your dishes.

  2. Rich Flavor: Fiora butter has a distinct rich and savory flavor that elevates any recipe it is used in. Its unique taste comes from the high-quality cream used to make it. Whether you’re sautéing vegetables or spreading it on warm toast, Fiora butter will impart a deliciously decadent flavor to your meals.

  3. Health Benefits: Fiora butter is made from pure, natural ingredients and is free from artificial additives. It contains essential fatty acids and vitamins A and E, which are beneficial for your overall health. Incorporating Fiora butter into your recipes allows you to enjoy the rich taste of butter while also reaping its nutritional benefits.

Making Fiora Butter Variations

Advertisement
[bulkimporter_image id=’13’]

Creating different variations of Fiora butter is a fun and delicious way to experiment in the kitchen. With the right ingredients and techniques, you can elevate the flavor of your dishes and impress your guests. One important aspect of making Fiora butter variations is measuring the ingredients accurately. This ensures that the flavors are balanced and the butter has the perfect texture.

To help you get started, here is a table showcasing three popular variations of Fiora butter:

Variation Ingredients Infusion Time
Garlic Parmesan Butter Garlic, Parmesan cheese, parsley, salt 30 minutes
Herb Butter Fresh herbs (such as thyme, rosemary, and parsley), lemon zest, salt 1 hour
Honey Cinnamon Butter Honey, ground cinnamon, vanilla extract 2 hours

The infusion time refers to the duration the ingredients are left to meld together, allowing their flavors to infuse into the butter. It is essential to follow the suggested infusion times to achieve the best results.

Tips for Enhancing the Flavor

Advertisement
[bulkimporter_image id=’14’]

For an extra burst of flavor, try experimenting with different combinations of herbs and spices in your Fiora butter variations. Adding herbs and spices to your butter not only enhances the taste but also adds depth and complexity to your dish.

Here are three flavor enhancing techniques that you can try:

  1. Blend of herbs: Create a blend of your favorite herbs like rosemary, thyme, and oregano. Chop them finely and mix them into your Fiora butter. This will give your butter a fragrant and savory taste that pairs well with grilled meats or roasted vegetables.

  2. Spicy kick: If you like a little heat, add some chili flakes or paprika to your Fiora butter. The spiciness will complement dishes like pasta or seafood, giving them an extra punch of flavor.

  3. Citrus infusion: To add a refreshing twist, try incorporating citrus zest into your Fiora butter. Grate the zest of lemon, lime, or orange and mix it with the butter. This will add a bright and zesty flavor that works well with seafood or salads.

Troubleshooting Common Issues

[bulkimporter_image id=’15’]

Advertisement

Now that we have discussed some tips for enhancing the flavor of your homemade fiora using the Easy Butter Maker, let’s move on to troubleshooting common issues that you may encounter during the process.

One common mistake that people make is not properly decarboxylating their cannabis before infusing it into butter. Decarboxylation is a crucial step that activates the cannabinoids and ensures that you get the desired effects from your fiora. To avoid this mistake, make sure to bake your cannabis at a low temperature (around 240°F) for about 30-40 minutes before infusing it into butter.

Another issue that may arise is using too much or too little butter. Using too much butter can dilute the potency of your fiora, while using too little can result in a weak infusion. It is important to follow the recommended butter to cannabis ratio provided by the Easy Butter Maker instructions to achieve the desired potency.

Additionally, not straining the butter properly can lead to a gritty or unpleasant texture in your fiora. Be sure to use a fine mesh strainer or cheesecloth to remove any plant material, ensuring a smooth and enjoyable experience.

Cleaning and Maintaining the Easy Butter Maker

Advertisement
[bulkimporter_image id=’16’]

To keep your Easy Butter Maker in optimal condition, it’s important to regularly clean and maintain the device. Cleaning and maintaining your Easy Butter Maker will not only extend its lifespan but also ensure that it continues to produce high-quality butter every time.

Here are some cleaning techniques and maintenance tips to help you keep your Easy Butter Maker in top shape:

  1. Cleaning Techniques:

    • Use warm, soapy water to clean the main body of the Easy Butter Maker.
    • Remove any excess butter or residue by wiping the parts with a soft cloth or sponge.
    • Make sure to clean the filter screen thoroughly to avoid clogging and improve the efficiency of the machine.
  2. Maintenance Tips:

    • Regularly inspect the parts for any signs of wear and tear. Replace any damaged parts to avoid any issues during the butter-making process.
    • Lubricate the moving parts with food-grade lubricant to ensure smooth operation.
    • Store your Easy Butter Maker in a clean and dry place to prevent any build-up of mold or bacteria.

Frequently Asked Questions

Can I Use Any Type of Butter Maker for This Recipe, or Does It Specifically Have to Be the Easy Butter Maker?

Yes, you can use different types of butter makers for the Fiora recipe. The Easy Butter Maker is a popular choice, but other options may have their own pros and cons. Additionally, there are alternative methods to infuse butter without using the Easy Butter Maker.

How Long Does the Infusion Process Typically Take When Using the Easy Butter Maker?

Typically, the infusion process using the Easy Butter Maker takes around 2 hours. It’s important to note that infusion times may vary depending on the type of herb used and the desired potency.

Can I Reuse the Leftover Fiora After Straining It From the Infused Butter?

Yes, you can reuse the leftover Fiora after straining it from the infused butter. There are alternative methods of straining, such as using cheesecloth or a fine-mesh strainer, to ensure a smoother texture.

Advertisement

What Are Some Common Issues That May Arise When Using the Easy Butter Maker, and How Can I Troubleshoot Them?

Common troubleshooting tips for the Easy Butter Maker include ensuring proper cleaning, using finely ground ingredients, and avoiding overfilling. To prevent clogs, it’s important to strain the mixture thoroughly and remove any excess plant material.

How Often Do I Need to Clean and Maintain the Easy Butter Maker to Ensure Optimal Performance?

Cleaning frequency and maintenance tips for the Easy Butter Maker depend on usage. Regular cleaning is recommended to ensure optimal performance. Follow the instructions provided by the manufacturer to keep it in top shape.

Conclusion

In conclusion, making fiora with the ‘Easy Butter Maker’ is a simple and enjoyable process. By following the steps outlined in this article, you can create delicious fiora butter variations that will impress your friends and family.

The easy-to-use machine takes the guesswork out of the process, allowing you to focus on the flavors and aromas that will transport you to a culinary paradise.

So, why wait? Get your hands on the ‘Easy Butter Maker’ and embark on a butter-making journey like no other! It’s the ultimate kitchen tool, guaranteed to make your taste buds dance with joy.

Advertisement
Continue Reading
Advertisement

Recipes & Culinary Uses

Creamy Delight: Best Butter Pecan Ice Cream Recipe for Summer!

Yearning for a creamy summer treat that will leave you craving more?

Published

on

By

butter pecan ice cream

Savor a delicious summer treat with our Butter Pecan Ice Cream recipe. Mix butter, brown sugar, cream, and pecans for a creamy delight. Melt butter, cook pecans, whisk eggs, and blend for a rich flavor. Add pecans, cream, and vanilla, then freeze to perfection. Master this easy-to-follow recipe for a tasty dessert to beat the heat.

Key Takeaways

  • Rich and creamy blend of butter, brown sugar, and heavy cream
  • Toasted pecans for a nutty crunch and flavor
  • Easy-to-follow steps for homemade ice cream perfection
  • Customization options with variations like bourbon or chocolate
  • Perfect summer treat with a decadent, refreshing taste

Recipe Ingredients for Butter Pecan Ice Cream

To create a delectable batch of butter pecan ice cream, gather the essential ingredients listed in the recipe.

You'll need:

  • Butter
  • Brown sugar
  • Heavy cream
  • Pecans

These ingredients combine to bring out the rich and nutty flavors of this classic dessert.

The brown sugar adds a caramel-like sweetness, while the heavy cream contributes to a creamy texture that's essential for a decadent treat.

Pecans, when toasted in butter, provide a delightful crunch and enhance the overall flavor profile of the ice cream.

Cooking Instructions for Homemade Ice Cream

making ice cream at home

Start by melting butter in a skillet to infuse the pecans with a rich, nutty flavor for your homemade butter pecan ice cream.

Here's a quick guide to help you make this creamy delight:

Advertisement
  • Melt butter and cook pecans for flavor.
  • Whisk eggs and combine with half-and-half and brown sugar for a creamy base.
  • Cook until thickened, then mix with eggs in a bowl.
  • Add cream, pecans, and vanilla extract.
  • Freeze the mixture in an ice cream maker.

Following these steps will guarantee your homemade butter pecan ice cream turns out rich and delicious.

Remember to carefully adhere to the manufacturer's instructions for your ice cream maker to achieve the perfect consistency.

Enjoy the process of creating this delightful treat that will surely be a hit during the summer months.

Ice Cream Preparation Steps

ice cream recipe instructions

Mix half and half with brown sugar over medium heat in a large bowl to prepare the ice cream base.

Next, whisk beaten eggs and temper them with the warm milk mixture to create a smooth custard.

Once done, thicken the mixture on low heat, then cool it over an ice bath to achieve ideal texture.

After that, stir in heavy cream, vanilla extract, maple extract, and a pinch of salt for rich flavor.

Advertisement

Remember to refrigerate the mixture for 1 1/2 – 2 hours before churning it into creamy butter pecan ice cream.

This process ensures that the flavors meld together beautifully and the ice cream attains the perfect consistency for scooping and savoring.

Nutritional Information and Tips

healthy eating guidance provided

Considering the rich and creamy nature of homemade butter pecan ice cream, it's important to be mindful of its nutritional content and serving size. When indulging in this delectable dessert, remember these essential tips:

  • Portion Control: Enjoy in moderation to savor the flavors without overindulging.
  • Brown Sugar Sweetness: Opt for a moderate amount of brown sugar to balance sweetness without overwhelming the palate.
  • Room Temperature Ingredients: Confirm ingredients like butter and heavy cream are at room temperature for a smoother texture.
  • Nutritional Awareness: Be mindful that homemade butter pecan ice cream can vary in nutritional content, so adjust ingredients accordingly.
  • Consultation: Seek advice from a nutritionist or healthcare provider for personalized guidance on incorporating this treat into a balanced diet.

Homemade Butter Pecan Ice Cream Variations

delicious homemade ice cream

Explore creative twists on traditional butter pecan ice cream by incorporating different nuts, spirits, sauces, chocolates, and dairy-free alternatives.

For a unique flavor, try substituting pecans with walnuts or almonds in the full recipe. Toast the nuts in a separate bowl until browned and fragrant, then chop them finely enough to coat in the ice cream mixture.

To add a boozy kick, mix in a splash of bourbon or rum to the base as you churn the ice cream. For an extra indulgent touch, swirl in caramel sauce or fudge ripple throughout the mixture.

Incorporate chunks of chocolate or chocolate-covered nuts for a delightful contrast in texture, giving each bite a sweet surprise.

Advertisement

If you prefer a lighter, dairy-free option, consider using coconut milk or almond milk as a substitute for traditional dairy products. These alternatives provide a creamy base while catering to plant-based diets.

Experiment with these variations to create a personalized butter pecan ice cream that suits your taste preferences.

Frequently Asked Questions

What Is the Secret to Making Ice Cream Very Creamy?

To make ice cream very creamy, you use a rich base of ingredients like heavy cream, eggs, and sugar. Chilling the base before churning is crucial for a smoother texture. Adding vanilla extract enhances creaminess, and slow churning prevents a dense outcome.

What Flavor Is the Ice Cream in Butter Pecan?

The ice cream in butter pecan is a delightful blend of buttery richness, vanilla sweetness, and maple undertones, perfectly paired with toasted pecans for a nutty crunch. This flavor combination creates a harmonious and indulgent treat.

What's the Difference Between Butter Pecan Ice Cream and Praline Pecan Ice Cream?

In butter pecan ice cream, you'll savor the buttery richness of pecans blended with a creamy base. On the other hand, praline pecan ice cream highlights caramelized sweetness with a swirl of praline sauce for a delightful flavor contrast.

Advertisement

What Age Group Eats Butter Pecan Ice Cream?

You'll find that adults and older individuals, typically in the 30-60 age group, enjoy butter pecan ice cream. It's a favorite among those with a more refined palate, drawn to its rich and nutty flavor.

Conclusion

So there you have it, folks! Whip up this buttery, nutty delight for a taste of summer in every scoop.

Don't cry over spilled milk – grab a cone and enjoy this creamy treat that's sure to satisfy your sweet tooth.

Get churning and indulge in the best butter pecan ice cream you've ever tasted!

Advertisement
Continue Reading

Recipes & Culinary Uses

Festive Favorites: Best Peanut Butter Blossoms Recipe for Holidays!

Unleash the ultimate holiday baking magic with the best Peanut Butter Blossoms recipe – an irresistible treat that will elevate your festive celebrations!

Published

on

By

holiday baking with flair

Elevate your holiday baking with the ultimate Peanut Butter Blossoms recipe. Cream together peanut butter, butter, sugars, and salt, then add egg and vanilla. Roll dough into balls, coat in brown sugar, bake until golden, then press a Hershey's kiss on top. Adjust baking time as needed. Explore ingredient swaps for a personalized touch. Enjoy with hot cocoa or pair with savory dishes. For more tips, ideas, and customization options, the recipe holds more festive surprises.

Key Takeaways

  • Cream together peanut butter, butter, sugars for rich flavor.
  • Bake at 375°F for 8-10 minutes for soft, chewy cookies.
  • Customize with ingredient swaps like almond butter or maple syrup.
  • Pair with savory dishes or hot cocoa for holiday enjoyment.
  • Press Hershey kisses onto warm cookies for a classic finish.

Ingredients for Peanut Butter Blossoms

For the classic Peanut Butter Blossoms recipe, gather peanut butter, butter, sugar, an egg, and Hershey's kisses as your essential ingredients.

Peanut butter is the star, offering a rich flavor that blends perfectly with the sweetness of the cookies.

Butter plays a pivotal role by adding moisture and richness to the dough, ensuring a soft and chewy texture.

The sugar not only sweetens the cookies but also contributes to their festive appeal, making them a perfect treat for any occasion.

Finally, the Hershey's kisses on top provide a delightful chocolatey finish that elevates these cookies to a whole new level of deliciousness.

Advertisement

Together, these ingredients create a harmonious blend of flavors and textures that make Peanut Butter Blossoms a beloved classic for holiday baking or any time you crave a sweet and satisfying treat.

Recipe Steps for Peanut Butter Blossoms

bake peanut butter cookies

To make Peanut Butter Blossoms, start by creaming together peanut butter, butter, sugars, and salt until light and fluffy.

Next, add in the egg and vanilla extract, making sure to mix well to combine all the ingredients thoroughly.

Then, gradually incorporate the dry ingredients into the wet mixture until a smooth dough forms.

Once the dough is ready, roll it into balls and coat each ball generously in brown sugar.

Place the sugar-coated dough balls on a baking sheet, making sure to leave enough space between them for spreading during baking.

Advertisement

Bake the cookies in a preheated oven until they turn a beautiful golden brown.

As soon as the cookies are out of the oven, press a Hershey's kiss into the center of each cookie gently.

The heat from the freshly baked cookies will melt the chocolate just enough to adhere it to the cookie.

These Peanut Butter Blossoms are a delightful treat perfect for Christmas celebrations!

Pro Tips for Making Peanut Butter Blossoms

baking perfect peanut blossoms

To enhance your peanut butter blossom baking experience, consider adjusting the baking time based on your oven's performance for best results.

Additionally, explore ingredient substitutions to cater to dietary preferences or allergies without compromising the flavor or texture of the cookies.

Advertisement

These pro tips can help you customize your peanut butter blossoms while ensuring delicious outcomes.

Baking Time Recommendations

Achieving the ideal texture for your peanut butter blossoms involves baking them at 375°F for 8-10 minutes. This baking duration guarantees that the cookies have a soft and chewy consistency while allowing the Hershey kisses on top to be softened but not completely melted.

Once out of the oven, remember to press the Hershey kisses onto the cookies immediately to secure them in place for that classic appearance.

For the best outcomes, chill the cookie dough for about 30 minutes before baking. This step helps the cookies maintain their shape and prevents excessive spreading during baking, ensuring your peanut butter blossom cookies are perfectly formed and ready to impress during your holiday baking.

Shortening or extending the baking time can alter the texture of the cookies. A quick bake of 6-8 minutes produces softer and chewier cookies, while longer baking times yield a slightly crispier consistency. Stick to the recommended 8-10 minutes for the best soft and chewy peanut butter blossoms.

Advertisement

Ingredient Substitutions

Consider incorporating different ingredients to elevate the flavor and nutritional profile of your peanut butter blossoms. For a healthier option, swap out shortening with unsalted butter to achieve a unique texture and taste in your cookies.

Try using natural peanut butter instead of creamy to add a wholesome twist to the classic recipe. If you're looking to reduce the glycemic impact, substitute brown sugar with coconut sugar in your baking. For a natural sweetener alternative, replace regular granulated sugar with maple syrup in the cookie dough mixture.

Additionally, for a distinct flavor experience, experiment with almond butter as a substitute for peanut butter in your blossoms. These ingredient substitutions can bring a new dimension to your peanut butter blossoms, making them not only delicious but also tailored to your dietary preferences.

Upgrade your baking game this holiday season with these creative twists on a beloved recipe!

Serving Suggestions for Peanut Butter Blossoms

peanut butter cookie recipe

Enhance the enjoyment of your peanut butter blossoms by pairing them with savory dishes like lasagna tortellini soup for a satisfying meal. These classic cookies also complement family-friendly dinners such as easy ground beef shepherd's pie and creamy broccoli cheddar soup, making for a delightful combination. The holiday season calls for cozy treats, and the sweet nuttiness of peanut butter blossoms pairs perfectly with a warm cup of hot cocoa. Whether you're participating in a cookie exchange or looking for a festive touch to your holiday dessert spread, consider rolling the cookies in red, green, and white sugar sprinkles to add a pop of color and fun.

Serving Suggestions Pairing Ideas
Lasagna Tortellini Soup Comforting and hearty meal alongside the cookies
Easy Ground Beef Shepherd's Pie Delicious combination for a family dinner
Creamy Broccoli Cheddar Soup Perfect accompaniment to the nutty cookie flavors

12 Days of Christmas Cookies Recipes

baking traditions for the holidays

Indulge in a variety of delightful Christmas cookie recipes each day during the holiday season. One standout choice is the classic Peanut Butter Blossoms. These holiday cookies feature a peanut butter base topped with a Hershey's kiss, making them a beloved treat for cookie exchanges and festive gatherings.

The process of making these cookies is simple yet rewarding. Start by rolling the dough balls in sugar before baking to add a sweet crunch to each bite. The combination of rich peanut butter flavor and the chocolatey goodness of the Hershey's kiss creates a perfect balance of sweetness.

Advertisement

When enjoying these Christmas cookies, consider pairing them with a glass of milk for a classic and satisfying treat.

Whether you're baking them for your family, a cookie exchange, or a holiday party, Peanut Butter Blossoms are sure to be a hit. Make each day of the holiday season a little sweeter with these delicious cookies.

User Engagement Features

user interaction enhancements

Let's talk about how user interaction features and personalization options enhance your experience with the Peanut Butter Blossoms recipe.

You can engage with others by leaving comments and sharing your results, creating a sense of community around this holiday treat.

Personalization options like name and email entry fields help tailor the experience to your preferences, making it more engaging and enjoyable.

User Interaction Features

Utilizing user engagement features on the website allows for increased participation and feedback from visitors. The comment section enables users to interact with each other and provide valuable feedback on the Peanut Butter Blossoms recipe or share their experiences with Hershey's kisses. By incorporating a reply option, users can engage in conversations, fostering a sense of community around baking these delightful peanut butter cookies.

Advertisement

Moreover, the inclusion of name and email fields not only allows for personalization but also facilitates communication between the website and its visitors. This data storage feature guarantees that users can conveniently access their information for future visits, enhancing their overall user experience.

These user engagement features play an essential role in creating an interactive platform where users can engage, provide feedback, and communicate effectively. Such interaction not only enriches the user experience but also encourages visitors to actively participate in the community surrounding the Peanut Butter Blossoms recipe.

Personalization Options

Enhance your website's user engagement by incorporating personalized options such as commenting, replying, and sharing feedback on the Peanut Butter Blossoms recipe. This level of user interaction not only fosters a sense of community building but also encourages customization and feedback. By allowing users to share their thoughts, results, and experiences with the festive favorites, you create a more engaging and interactive user experience. Additionally, providing users with the option to save their data for future visits and encouraging them to tag @preppykitchen and use #preppykitchen when trying the recipe further enhances their engagement.

Personalization Options Description Benefits
Commenting Users can leave comments on the Peanut Butter Blossoms recipe, sharing their thoughts and experiences. Fosters community building and user engagement.
Replying Users can reply to comments and engage in discussions with other users about the recipe. Encourages active participation and interaction.
Feedback Sharing Users can share feedback on the recipe, providing valuable insights for improvement. Enhances user experience and customization.

Additional Information

clarifying specific details provided

You may find it interesting to know more about the history of the Peanut Butter Blossoms recipe and its cultural significance during the holidays.

  • The Peanut Butter Blossoms recipe's popularity is backed by IRI MULO data, making it a sought-after choice for holiday baking.
  • Copyright for this beloved recipe belongs to The J.M. Smucker Company, a reputable name in the food industry known for quality products.
  • These delightful cookies aren't only perfect for serving at holiday parties but also make excellent gifts due to their festive appeal.

Frequently Asked Questions

Why Are My Peanut Butter Blossoms Dry?

If your peanut butter blossoms are dry, it could be due to using too much flour, overbaking, using natural peanut butter that requires stirring, or not enough butter/shortening. Guarantee precise measurements and follow the recipe closely to maintain moisture.

Why Did My Peanut Butter Blossoms Go Flat?

When making peanut butter blossoms, going flat happens due to overmixing, too much flour, insufficient chilling, or low oven temperature. Remember to avoid these pitfalls. Preheat the oven properly and follow the recipe for perfect blossoms!

What Is America's Favorite Christmas Cookie?

America's favorite Christmas cookie is Peanut Butter Blossoms. Loved for their peanut butter-chocolate combo and nostalgic Hershey's Kiss center, these easy-to-make treats are a holiday staple at parties and gatherings. They're a must-have during the festive season.

Advertisement

What Is Baskin Robbins Peanut Butter Blossom?

You asked about Baskin Robbins Peanut Butter Blossom. It's a delectable seasonal ice cream flavor featuring creamy peanut butter ice cream with a ribbon of more peanut butter and chocolate cookie pieces. Indulge in this festive treat!

Conclusion

Indulge in the warm, gooey goodness of these peanut butter blossoms this holiday season. With the perfect blend of creamy peanut butter and rich chocolate, these cookies are sure to bring joy to your festivities.

Picture yourself surrounded by loved ones, sharing laughter and memories as you enjoy these delicious treats. Let the aroma of freshly baked cookies fill your home and create a cozy, festive atmosphere.

Happy baking and happy holidays!

Advertisement
Continue Reading

Recipes & Culinary Uses

Bite-Sized Treats: Best Peanut Butter Ball Recipe You'll Love!

Adore these heavenly peanut butter balls with a delectable mix of smooth peanut butter, powdered sugar, and vanilla—perfect for indulging in bite-sized bliss!

Published

on

By

delicious peanut butter balls

You'll adore these easy and heavenly peanut butter balls. Mix smooth peanut butter, powdered sugar, and vanilla extract for a delectable dough. Roll into small balls and chill. Dip in melted chocolate, then refrigerate to set. Enhance the flavor with rum extract, nuts, or crushed pretzels. Get creative with colorful sprinkles and different chocolate coatings. Use quality chocolate coating and adjust mix consistency. Store them in the fridge or freezer. Enjoy these mouthwatering treats alone or at gatherings. More tips and delightful variations await!

Key Takeaways

  • Creamy peanut butter, powdered sugar, and vanilla create a smooth dough.
  • Incorporate nuts, rum extract, or pretzels for flavor and texture variety.
  • Use quality chocolate coating like candy melts for best results.
  • Chill peanut butter balls before dipping for easier handling.
  • Store in the fridge or freezer for convenient snacking and serving.

Ingredients and Preparation

To create irresistible peanut butter balls, gather creamy peanut butter, powdered sugar, and vanilla extract as your key ingredients.

Begin by mixing the peanut butter, butter, sugar, and vanilla until you have a smooth dough. Roll this mixture into small balls and chill them before dipping them in melted chocolate.

The type of chocolate you use, such as dark or milk chocolate, will enhance the flavor of your peanut butter balls. After dipping, make sure to refrigerate the balls until the chocolate sets for a perfect finish.

This process guarantees that each bite-sized treat isn't only visually appealing but also bursting with delicious peanut butter and chocolate flavors.

Variations and Enhancements

creative modifications and improvements

You can elevate the flavor of your peanut butter balls by incorporating unique ingredients like chopped nuts or rum extract.

Experiment with different chocolate coatings such as white almond bark or dark chocolate candy melts for a varied taste experience.

Advertisement

Get creative by adding finishing touches like colorful sprinkles to make your peanut butter balls visually appealing.

Flavorful Ingredient Additions

Enhance the flavor of your peanut butter balls by incorporating unique ingredient variations and enhancements. While the classic combination of peanut butter, powdered sugar, and butter creates a delicious dough for your treats, you can take it up a notch by adding flavorful ingredient additions.

Consider mixing in crushed pretzels for a salty crunch that complements the sweetness of the peanut butter. Chopped nuts like almonds or pecans can also add a delightful texture and nutty taste to your chocolate-covered peanut butter balls.

For a burst of fruity flavor, try incorporating dried cranberries or raisins into the dough. These additions not only provide a contrast in texture but also introduce a hint of sweetness that pairs well with the creamy peanut butter.

Another option is to include a sprinkle of cinnamon or a dash of vanilla extract to elevate the overall taste profile of your peanut butter balls. Experiment with these flavorful ingredient additions to create a unique and delectable twist on the classic treat.

Advertisement

Chocolate Coating Options

Experiment with different types of chocolate coatings – dark, white, or milk chocolate – to suit your preferences and elevate the flavor of your peanut butter balls.

When considering the chocolate coating for your crunchy peanut butter treats, here are some options to enhance your culinary creation:

  1. Choose Candy Melts or Almond Bark: Opt for candy melts or almond bark for a smooth and firm chocolate coating that sets well on your peanut butter balls.
  2. Avoid Chocolate Chips: Steer clear of using chocolate chips for coating, as they may contain stabilizers that hinder smooth melting, affecting the overall texture.
  3. Add Colored Sprinkles: For a festive touch, sprinkle colored sprinkles on top of the chocolate coating before it sets to add a pop of color and extra crunch to your peanut butter balls.

Experimenting with different chocolate coatings and techniques can take your peanut butter balls to the next level, ensuring a delightful and indulgent treat for any occasion.

Creative Finishing Touches

To elevate the flavor profile of your peanut butter balls, consider incorporating creative finishing touches through various enhancements and unique variations.

You can enhance the texture by adding chopped nuts or crispy rice cereal to the peanut butter mixture, providing a delightful crunch with every bite.

Experiment with different flavors by using almond extract or rum extract instead of vanilla for a twist on the traditional taste.

Advertisement

For a festive touch, roll the balls in crushed graham crackers, sprinkles, or a sprinkle of sea salt to add a pop of flavor.

Drizzle white chocolate over the dark, semi-sweet, or milk chocolate coating for a visually appealing contrast that will impress your guests.

If you enjoy a crunchy element, try coating the balls in crushed pretzels or toasted coconut before the chocolate sets.

These creative enhancements will take your peanut butter balls to the next level, making them a standout treat at any gathering.

Tools and Tips

crafting with precision

Consider using a 1 tablespoon cookie scoop for consistent sizing when preparing your peanut butter balls. This tool will help guarantee all your treats are uniform in size, making for a neat presentation and even cooking.

Here are some additional tools and tips to enhance your peanut butter ball-making experience:

Advertisement
  1. Invest in Quality Chocolate Coating: Opt for candy melts or almond bark for a smooth and firm chocolate coating on your peanut butter balls. These coatings melt easily and provide a professional finish to your treats.
  2. Adjust Peanut Butter Mixture Consistency: If your peanut butter mixture is too sticky or too dry, adjust the consistency by adding more peanut butter or powdered sugar. This will help you achieve the perfect texture for shaping your balls.
  3. Refrigerate Before Dipping: Prior to dipping your peanut butter balls in chocolate, chill them in the refrigerator. This step will make the balls firmer, making them easier to handle and coat without falling apart.

Storage and Serving Suggestions

great suggestion for storage

For best freshness and presentation of your peanut butter balls, follow these storage and serving suggestions.

To keep your peanut butter balls tasting delicious, store them properly. You can store them in an airtight container in the fridge for up to 1 week or in the freezer for up to 2 months. When freezing, remember to thaw the frozen peanut butter balls before serving by bringing them to room temperature. To prevent them from sticking together, separate the layers of peanut butter balls with wax paper.

Here is a helpful table summarizing the storage and serving suggestions:

Storage Serving Frozen
Airtight container Display on festive tray Thaw before serving
Fridge – 1 week Pair with hot cocoa Bring to room temp
Freezer – 2 months Enjoy at holiday gatherings
Separate with wax paper

Additional Peanut Butter Desserts

peanut butter dessert recipes

Explore a variety of delectable peanut butter desserts to satisfy your sweet cravings.

  1. Peanut Butter Blossom Cookies: Indulge in the classic combination of peanut butter cookies topped with a chocolate kiss for a delightful treat.
  2. Peanut Butter Chocolate Mug Cake: Whip up this easy-to-make single-serving dessert that combines the rich flavors of peanut butter and chocolate in a mug for a quick fix.
  3. Peanut Butter Overload Cookies: For those who can't get enough peanut butter, these cookies are loaded with peanut butter chips, chocolate chips, and chopped peanuts for an explosion of flavor in every bite.

These additional peanut butter desserts offer a diverse selection to cater to your cravings.

Whether you're in the mood for a classic treat like Peanut Butter Blossom Cookies, a quick fix with Peanut Butter Chocolate Mug Cake, or a flavor-packed experience with Peanut Butter Overload Cookies, there's something for every peanut butter lover.

Enjoy these easy-to-make delights whenever you need a sweet pick-me-up!

Recipe Instructions and Nutritional Information

cooking guidance and facts

To create these delectable Peanut Butter Balls, start by blending peanut butter, butter, sugar, and vanilla to form a dough. Roll the mixture into small balls and place them on a baking sheet lined with parchment paper. Chill the peanut butter balls in the refrigerator for about 30 minutes until firm.

Once chilled, melt chocolate in a heatproof bowl over simmering water or in the microwave. Dip each chilled peanut butter ball into the melted chocolate, ensuring they're evenly coated. Place the coated balls back on the parchment paper and let the chocolate set.

Advertisement

Each serving of these delightful treats contains approximately 114 calories.

Store the finished peanut butter balls in the fridge for up to 2 weeks or freeze them for up to 3 months.

Enjoy these decadent bite-sized snacks whenever you crave a sweet and nutty indulgence.

Frequently Asked Questions

Can I Use Chunky Peanut Butter Instead of Creamy for This Recipe?

Yes, you can use chunky peanut butter instead of creamy for this recipe. It will add a delightful texture and extra crunch to your peanut butter balls. Enjoy experimenting with different variations!

How Long Do Chocolate Covered Peanut Butter Balls Stay Fresh?

Like a sweet memory, chocolate-covered peanut butter balls stay fresh for up to two weeks when stored in an airtight container in the fridge. Indulge in these delectable treats within that time frame for best taste.

Advertisement

Can I Freeze the Peanut Butter Balls for Later Enjoyment?

Yes, you can freeze the peanut butter balls for later enjoyment. Simply place them in an airtight container or freezer bag. When ready to indulge, let them thaw in the fridge for a few hours.

What Type of Chocolate Is Best for Coating the Peanut Butter Balls?

For coating the peanut butter balls, semi-sweet or milk chocolate works best. They provide a delicious contrast to the creamy peanut butter filling. Simply melt the chocolate, dip the balls, and enjoy the sweet treat!

Can I Add Chopped Nuts or Sprinkles to the Peanut Butter Balls for Extra Flavor?

You can definitely add chopped nuts or sprinkles to the peanut butter balls for extra flavor. It's a great way to customize your treats and add a delightful crunch or colorful touch to each bite.

Conclusion

Indulge in these irresistible peanut butter balls that are sure to satisfy your sweet tooth cravings.

With just a few simple ingredients and easy-to-follow instructions, you can enjoy these bite-sized treats in no time.

Advertisement

So go ahead, treat yourself to a little taste of heaven and experience the perfect combination of creamy peanut butter and rich chocolate.

You won't be able to resist coming back for more!

Continue Reading

Trending