Connect with us

Butter Tips and Tricks

Create Magical CBD Coconut Oil with Butter Maker

Published

on

An image showcasing the step-by-step process of infusing CBD oil with coconut oil using a Magic Butter Maker: a jar of coconut oil, dried CBD flowers, the Magic Butter Maker, and a beautifully infused oil bottle

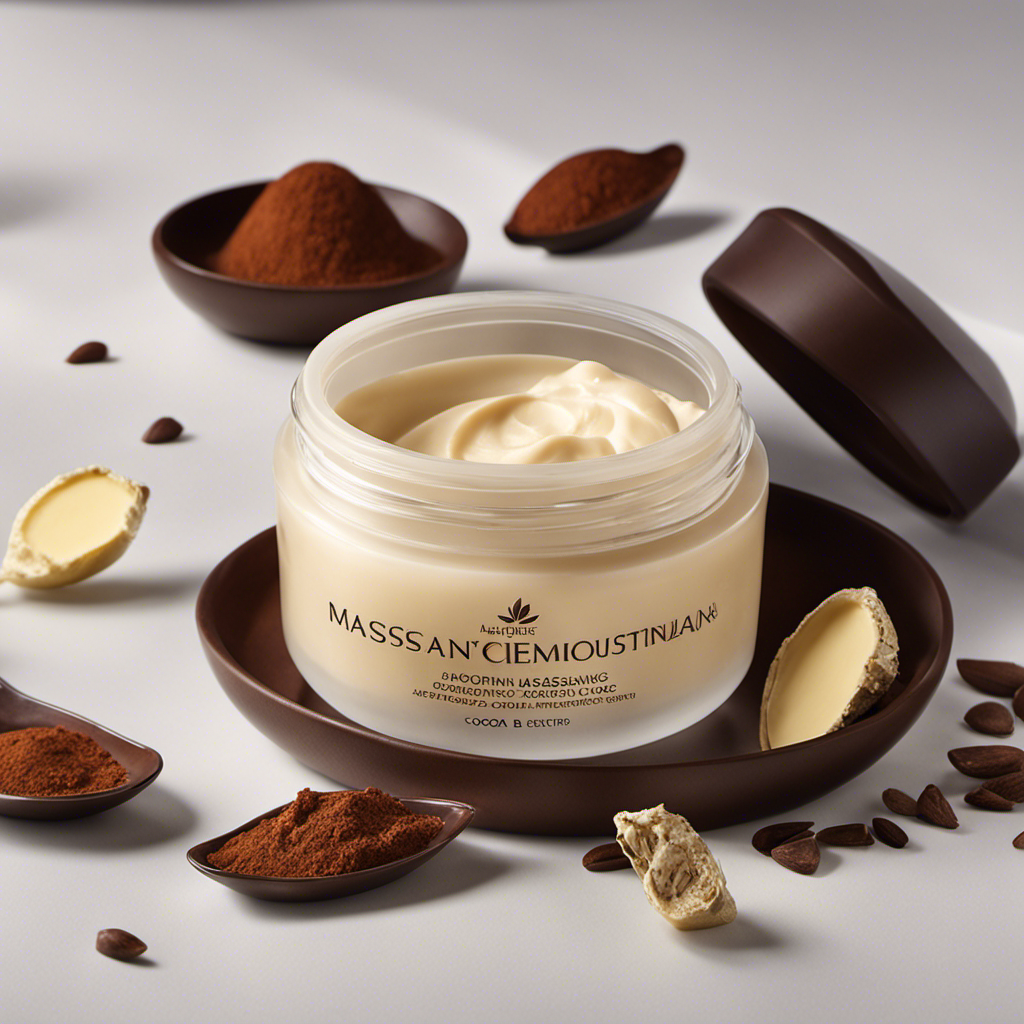
As a huge fan of CBD, I found a fantastic trick to whip up CBD oil using a Magic Butter Maker and coconut oil. This easy-peasy process lets you tap into CBD’s awesome powers and feel all its good vibes.

In this article, I’ll guide you through the step-by-step process, from choosing the right strain of cannabis to infusing coconut oil with cannabis.

Get ready to embark on a journey of knowledge and learn how to create your very own CBD oil with ease.

Key Takeaways

  • CBD oil made with coconut oil in a magic butter maker can provide numerous health benefits
  • Making your own CBD oil allows you to control the ingredients and ensure quality
  • CBD interacts with the body’s endocannabinoid system to reduce anxiety
  • CBD oil can offer pain relief by reducing inflammation and interacting with neurotransmitters

[bulkimporter_image id=’2′]

Equipment and Ingredients Needed

Advertisement

To make CBD oil with a coconut oil magic butter maker, you’ll need a few key ingredients and equipment. Equipment selection is crucial to ensure that you have everything you need for a successful process.

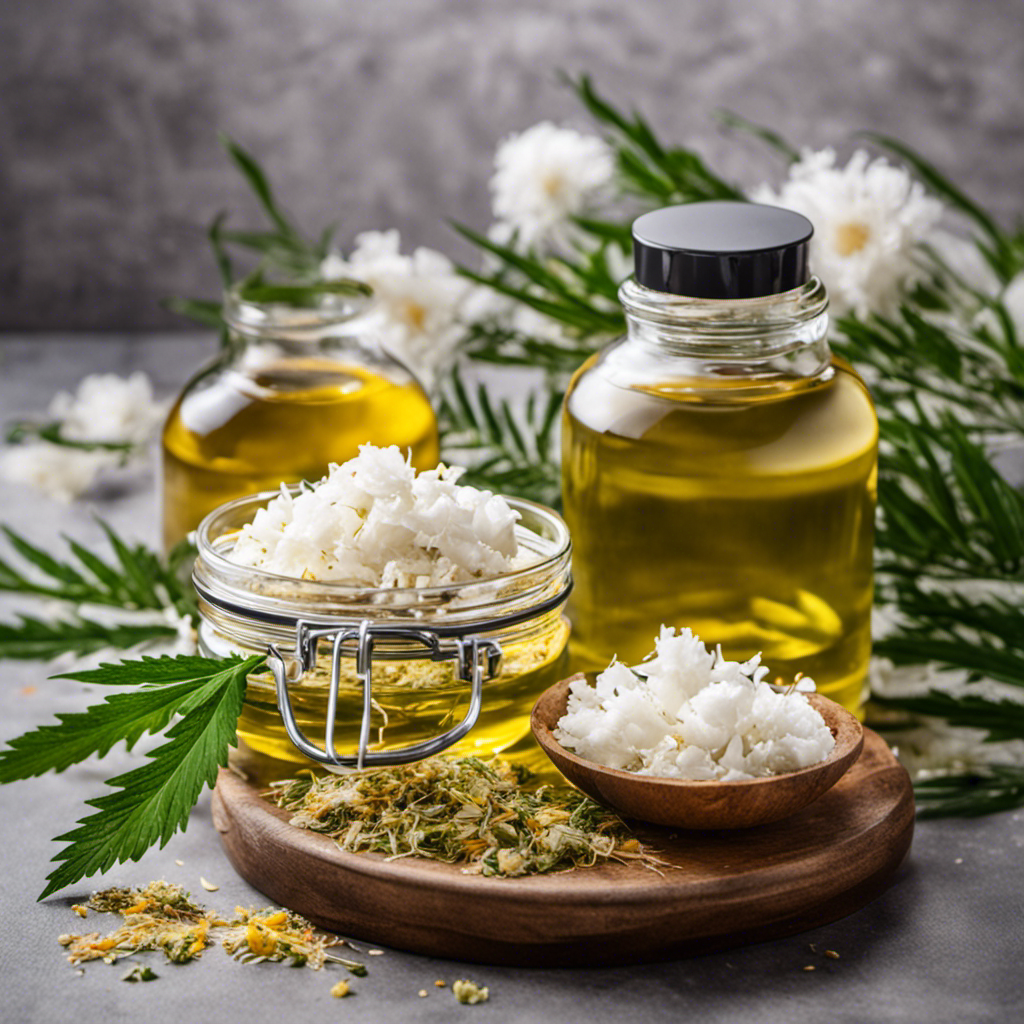
Firstly, you will need a high-quality coconut oil magic butter maker, which is specifically designed to infuse oils with herbs or botanicals. This device will make the entire process much easier and more efficient.

Next, you will need a reliable source of CBD-rich cannabis. It is important to choose a strain with a high CBD content, as this will result in a more potent and effective oil. Additionally, you will need coconut oil, which will serve as the base for your CBD infusion. Make sure to choose an organic, extra virgin coconut oil for the best results.

Once you have gathered all the necessary equipment and ingredients, you can proceed with the step-by-step process of making CBD oil with a coconut oil magic butter maker. This process typically involves decarboxylating the cannabis, infusing it with coconut oil using the magic butter maker, and then straining the mixture to remove any plant material.

Advertisement

Understanding CBD oil and its benefits is essential in order to fully appreciate the potential of this natural remedy. CBD oil has gained popularity for its various therapeutic properties, including pain relief, anxiety reduction, and anti-inflammatory effects. By making your own CBD oil with a coconut oil magic butter maker, you can have full control over the ingredients and ensure that you are using a high-quality product.

[bulkimporter_image id=’3′]

Understanding Cbd Oil and Its Benefits

When it comes to the health benefits of CBD, there is a wide range of potential benefits that have been reported. From reducing anxiety and stress to relieving pain and inflammation, CBD has shown promise in various areas of health and wellness.

Additionally, there are different CBD products available on the market, including oils, tinctures, edibles, and topicals, each offering its own unique benefits and methods of consumption.

Advertisement

Understanding the potential health benefits of CBD and the different product options can help individuals make informed decisions when incorporating CBD into their wellness routine.

Health Benefits of CBD

Did you know that CBD oil made with coconut oil in a magic butter maker can provide you with numerous health benefits? CBD oil has gained popularity in recent years for its potential to alleviate anxiety and provide pain relief.

Studies have shown that CBD oil may help reduce symptoms of anxiety by interacting with the body’s endocannabinoid system, which plays a role in regulating mood and stress responses. Additionally, CBD oil may offer pain relief by reducing inflammation and interacting with neurotransmitters in the body. Many people have found relief from chronic pain conditions such as arthritis and multiple sclerosis with the use of CBD oil.

These potential benefits make CBD oil a promising option for those seeking natural remedies for anxiety and pain relief. Now, let’s explore the different CBD products available on the market.

Different CBD Products

If you’re looking for different CBD products, there are a variety of options available on the market. CBD, or cannabidiol, is a compound found in cannabis plants that is known for its potential therapeutic benefits.

Advertisement

Here are three different CBD products that you might consider:

  1. CBD Oil: This is one of the most popular CBD products on the market. It is typically taken orally and can be used to promote relaxation, reduce anxiety, and relieve pain.

  2. CBD Edibles: These are food products that have been infused with CBD. They come in various forms, such as gummies, chocolates, and cookies. CBD edibles are a convenient and discreet way to consume CBD.

  3. CBD for Pets: CBD is not only for humans, but it can also be used for pets. Many pet owners have found that CBD can help manage anxiety, pain, and inflammation in their furry friends. Using CBD for pets is becoming increasingly popular, as it provides a natural alternative to traditional medications.

Now that you know about different CBD products, let’s dive into the topic of choosing the right strain of cannabis.

[bulkimporter_image id=’4′]

Choosing the Right Strain of Cannabis

Advertisement

The first step in making CBD oil with coconut oil using a magic butter maker is choosing the right strain of cannabis. Cannabis strain selection is crucial as different strains have varying levels of CBD and THC, the two primary compounds in cannabis. For CBD oil production, it is essential to choose a strain with high CBD content and low THC content.

To help you understand the variety of cannabis strains available, I have created a table below:

Strain Name CBD Content THC Content
Charlotte’s Web High Low
ACDC High Low
Harlequin Moderate Low

These are just a few examples, but there are many other strains to choose from. Once you have selected the right strain, you can move on to the next step of the process, which is decarboxylating the cannabis. This step involves heating the cannabis to activate its compounds and make them more bioavailable. By transitioning from strain selection to decarboxylation, we ensure that we have the necessary starting material for extracting CBD oil.

Advertisement
[bulkimporter_image id=’5′]

Decarboxylating the Cannabis

Now that you’ve selected the right strain of cannabis, it’s time to decarboxylate it to activate the compounds and prepare it for extraction. Decarboxylation is a crucial step in making CBD oil because it converts inactive cannabinoids, like THCA and CBDA, into their active forms, THC and CBD. This ensures you get the full therapeutic benefits of the plant.

To decarboxylate your cannabis effectively, here are three best methods:

  1. Oven Method: Preheat your oven to 240°F (115°C). Break up your cannabis buds into small pieces and spread them evenly on a baking sheet. Place the baking sheet in the oven for about 40 minutes, gently shaking it every 10 minutes for even heating.

  2. Sous Vide Method: Fill a large pot with water and attach a sous vide precision cooker. Set the temperature to 203°F (95°C). Seal your cannabis in a vacuum-sealed bag and submerge it in the water bath. Leave it for 90 minutes to two hours, ensuring the temperature remains constant.

  3. Infusion Devices: Various infusion devices, like the Magic Butter Maker, offer an easy and convenient way to decarboxylate cannabis. Simply follow the manufacturer’s instructions to activate the cannabinoids in your cannabis.

[bulkimporter_image id=’6′]

Advertisement

Infusing Coconut Oil With Cannabis

Once you have properly decarboxylated your cannabis, you can easily infuse it into coconut oil to create a versatile and potent ingredient for cooking and baking. Infusing cannabis into coconut oil allows you to harness the therapeutic benefits of CBD oil in a convenient and delicious form. There are various methods you can use to infuse coconut oil with cannabis, each with its own advantages and considerations.

One of the most common methods is the stovetop method. To do this, you will need to heat the coconut oil and cannabis together over low heat for an extended period of time, usually around 2 to 3 hours. This slow and steady process ensures that the cannabinoids in the cannabis are fully extracted into the coconut oil, resulting in a potent infusion.

Another popular method is using a crockpot or slow cooker. This method involves combining the coconut oil and cannabis in the crockpot and cooking it on low heat for several hours. The advantage of using a crockpot is that it allows for a more controlled and consistent temperature, which can help to maximize the extraction of cannabinoids.

It is important to note that while CBD oil has many potential health benefits, it can also have side effects. Some common side effects include dry mouth, drowsiness, and changes in appetite. It is always recommended to start with a low dose and gradually increase as needed, while monitoring your body’s response to the oil.

Advertisement
[bulkimporter_image id=’7′]

Using the Magic Butter Maker

When it comes to using the Magic Butter Maker for infusing coconut oil with cannabis, two key points that deserve attention are the efficient infusion process and the precise temperature control.

The Magic Butter Maker is designed to streamline the infusion process, ensuring that the cannabinoids are effectively extracted from the cannabis and infused into the coconut oil.

Additionally, the device allows for precise temperature control, which is crucial for achieving optimal results and preserving the integrity of both the cannabis and the coconut oil.

Efficient Infusion Process

To achieve an efficient infusion process, it’s important to properly decarboxylate the cannabis before adding it to the coconut oil in the magic butter maker. This step activates the cannabinoids and ensures maximum potency in the final product.

Advertisement

Here are three precise infusion techniques that will help you maximize the potency of your CBD oil:

  1. Grind the cannabis: Before decarboxylating, grind the cannabis into small, uniform pieces. This will create a larger surface area for the cannabinoids to be released during decarboxylation.

  2. Decarboxylate at the right temperature: Set your oven to 240°F (115°C) and spread the ground cannabis onto a baking sheet. Bake for 30-40 minutes, or until the cannabis turns a light golden brown. This process converts THCA into THC, the psychoactive compound in cannabis.

  3. Use the right ratio of cannabis to coconut oil: For a potent CBD oil, use 1 cup of coconut oil for every 1 ounce (28 grams) of decarboxylated cannabis. This ratio ensures that the cannabinoids are properly infused into the oil.

Precise Temperature Control

Achieving precise temperature control is essential for decarboxylating cannabis and maximizing the potency of CBD oil in the infusion process.

When making CBD oil with coconut oil using the magic butter maker, it is crucial to maintain the right temperature throughout the infusion. This ensures that the cannabinoids are properly activated and extracted, resulting in a more potent and effective final product.

The magic butter maker allows for precise temperature control, allowing you to set and maintain the ideal temperature for optimal infusion efficiency. By closely monitoring and adjusting the temperature, you can ensure that the cannabinoids are fully decarboxylated and infused into the coconut oil, maximizing the therapeutic benefits of the CBD oil.

This attention to precise temperature control is a key factor in producing high-quality CBD oil with coconut oil using the magic butter maker.

Advertisement

[bulkimporter_image id=’8′]

Setting Up the Magic Butter Maker

Once you’ve assembled all the required ingredients, it’s time to start setting up the Magic Butter Maker. This machine is a handy tool for infusing CBD oil with coconut oil, making it easier to incorporate into your daily routine.

Here are the steps to get started:

  1. Plug in the Magic Butter Maker: Locate a suitable power outlet and plug in the machine. Ensure that it is placed on a stable surface, away from any flammable materials.

  2. Add the ingredients: Measure out the desired amount of coconut oil and CBD oil and pour them into the machine. It’s important to follow the recommended ratios to achieve the desired potency.

  3. Set the timer and temperature: Adjust the timer and temperature settings according to the instructions provided. The Magic Butter Maker offers precise temperature control, allowing you to customize the infusion process to your liking.

Troubleshooting common issues with the Magic Butter Maker:

Advertisement
  • If the machine is not heating up, check if it is properly plugged in and the power outlet is functioning. If the issue persists, contact customer support for assistance.

  • If the infusion process is taking longer than expected, make sure that the ingredients are properly mixed and the machine is set to the correct temperature. Adjust the settings if necessary.

  • If there is a strong odor during the infusion process, ensure that the machine is properly sealed and there are no leaks. If the problem persists, contact customer support to address any potential issues with the machine.

Setting up the Magic Butter Maker is a straightforward process that allows you to create your own CBD-infused coconut oil with ease. By following these steps and troubleshooting common issues, you’ll be well on your way to enjoying the benefits of homemade CBD oil.

[bulkimporter_image id=’9′]

Adding Coconut Oil and Cannabis to the Machine

After measuring out the desired amount of coconut oil and cannabis, pour them into the machine. This step is crucial in the process of making CBD oil with the Magic Butter Maker. The combination of coconut oil and cannabis creates a potent extract that is rich in cannabinoids. Coconut oil is an excellent choice for extraction due to its high fat content, which helps to dissolve and extract the beneficial compounds from the cannabis plant.

To ensure accuracy and consistency in the recipe, it is essential to measure out the right proportions of coconut oil and cannabis. The table below provides a guideline for the recommended measurements:

Advertisement
Coconut Oil Cannabis
Amount 2 cups 1 ounce
Conversion 473 mL 28 grams

Once the coconut oil and cannabis are added to the machine, it is important to secure the lid tightly. This will prevent any leakage or spillage during the extraction process. The Magic Butter Maker will then begin its cycle, gently heating and mixing the ingredients to extract the desired compounds from the cannabis.

The addition of coconut oil enhances the extraction process by acting as a carrier for the cannabinoids. The high fat content of the oil helps to dissolve and absorb the active compounds, resulting in a more potent and bioavailable CBD oil. The combination of coconut oil and cannabis in the Magic Butter Maker ensures a high-quality extract that can be used for various purposes, such as cooking, topical applications, or sublingual consumption.

[bulkimporter_image id=’10’]

Adjusting the Settings for Cbd Oil Production

When it comes to producing CBD oil, there are two key factors to consider: temperature control options and optimal extraction time.

Advertisement

Temperature control options refer to the ability to adjust the heat settings of the machine to ensure the cannabinoids are extracted properly without degrading.

Optimal extraction time is the duration during which the cannabis and coconut oil mixture should be heated to achieve maximum extraction of CBD.

Temperature Control Options

There are various temperature control options available for making CBD oil with coconut oil using the magic butter maker. Temperature control techniques are crucial in ensuring the extraction process is efficient and produces high-quality CBD oil.

Here are three temperature regulation methods to consider:

  1. Precise Temperature Settings: The magic butter maker allows you to set the temperature accurately, ensuring the ideal extraction conditions for CBD. This precise control helps maintain the integrity of the cannabinoids and terpenes present in the plant material.

  2. Slow Cook Method: Utilizing a low and steady temperature for a longer duration is another effective technique. This method allows for a thorough extraction of CBD and other beneficial compounds, resulting in a potent and flavorful oil.

  3. Decarboxylation Temperature: Decarboxylation is an essential step in CBD oil production. By setting the magic butter maker at the appropriate decarboxylation temperature, you can activate the cannabinoids in the plant material, making them more bioavailable and potent.

Optimal Extraction Time

To optimize the extraction process and create high-quality CBD oil, it’s important to consider the optimal extraction time.

Advertisement

The extraction time refers to the duration during which the CBD compounds are extracted from the plant material. This is a crucial step in maximizing CBD potency and ensuring that the oil produced is of the highest quality.

The optimal extraction time can vary depending on the method used, such as solvent extraction or CO2 extraction. Solvent extraction typically requires a longer extraction time, around 1-2 hours, to fully extract the CBD compounds. On the other hand, CO2 extraction is a more efficient method that can extract CBD in as little as 15 minutes.

It’s essential to choose the optimal extraction method and time to ensure the best results in terms of CBD concentration and quality.

[bulkimporter_image id=’11’]

Advertisement

Monitoring the Infusion Process

Keep an eye on the infusion process while using the magic butter maker to make CBD oil with coconut oil. Efficient monitoring and precise control are crucial for achieving the best results. Here’s how you can ensure a successful infusion:

  1. Set the temperature: The magic butter maker allows you to control the temperature during the infusion process. It is important to set the temperature accurately to ensure the cannabinoids in the cannabis are activated without overheating the coconut oil. A temperature range of 160-185°F (71-85°C) is recommended for optimal infusion.

  2. Stir regularly: To achieve even distribution of the cannabinoids, it is essential to stir the mixture regularly. This helps in preventing any hot spots and ensures that all the cannabis is evenly infused into the coconut oil. Stirring also helps in efficiency by maximizing the extraction of cannabinoids from the plant material.

  3. Monitor the time: Timing is crucial when making CBD oil with the magic butter maker. The infusion process usually takes around 2-4 hours, but it is important to keep an eye on the clock. Over-infusing can lead to a bitter taste and a stronger psychoactive effect, while under-infusing may result in a weaker potency. Therefore, it is essential to monitor the time to achieve the desired potency and flavor.

[bulkimporter_image id=’12’]

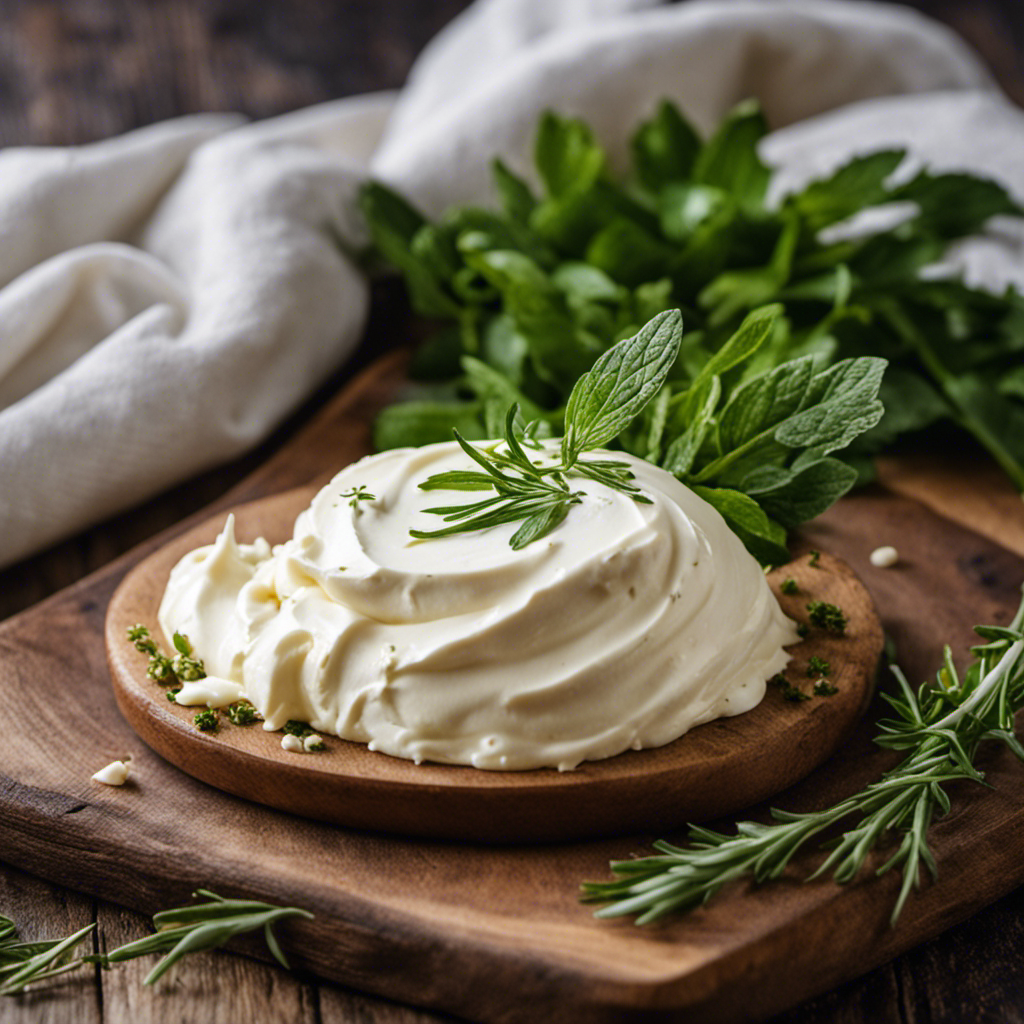
Straining and Storing the Cbd Oil

Now that the infusion process is complete, it’s time to move on to straining and storing the CBD oil. This step is crucial in removing any plant material or impurities from the oil, ensuring a smooth and clean final product.

To strain the CBD oil, I recommend using a fine mesh strainer or cheesecloth. Simply place the strainer or cheesecloth over a clean container and carefully pour the infused oil through it. The strainer will catch any solid particles, while allowing the oil to pass through. Gently press the plant material with a spoon to extract as much oil as possible.

Advertisement

Once the oil is strained, it is important to store it properly to maintain its potency and freshness. CBD oil can be sensitive to light, heat, and air, so it’s best to store it in a cool, dark place. Airtight glass containers are ideal for long-term storage, as they help prevent oxidation.

If you anticipate not using the CBD oil immediately, you can also store it in the refrigerator. This will help extend its shelf life and preserve its therapeutic properties. Just make sure to label the container with the date of extraction for reference.

[bulkimporter_image id=’13’]

Calculating the Cbd Concentration

Calculating the CBD concentration is a crucial step in determining the potency of your homemade oil. It allows you to accurately measure the amount of CBD in each dose, ensuring you achieve the desired effects.

Advertisement

Here are three important factors to consider when calculating the CBD concentration:

  1. Amount of CBD used: The first step is to determine the amount of CBD you added to the oil during the extraction process. This can be measured in milligrams (mg) or grams (g), depending on the scale you’re using. Precise measurements are essential for accurate calculations.

  2. Volume of oil: The next factor to consider is the volume of oil you used in the recipe. Whether you used cups, tablespoons, or milliliters, knowing the exact volume will help you determine the concentration of CBD per unit of oil.

  3. Extraction efficiency: The extraction method and equipment used can impact the overall efficiency of CBD extraction. This efficiency determines how much CBD is actually present in your oil. Taking this into account ensures you have an accurate representation of the CBD concentration.

[bulkimporter_image id=’14’]

Recommended Dosage and Usage

Determining the recommended dosage and usage for your homemade oil is crucial to ensure you achieve the desired effects. When it comes to CBD oil, there is no one-size-fits-all dosage. The optimal dosage can vary depending on various factors such as your body weight, the severity of your condition, and your individual tolerance. It is always best to start with a low dose and gradually increase it until you find the right amount that works for you.

The recommended dosage for CBD oil is typically measured in milligrams (mg). A general guideline is to start with 5-10 mg per day and gradually increase it by 5 mg every week until you experience the desired effects. However, it is important to note that everyone’s body reacts differently to CBD, so what works for one person may not work for another.

Advertisement

While CBD is generally well-tolerated, it is important to be aware of potential side effects. These can include dry mouth, drowsiness, and changes in appetite. If you experience any adverse effects, it is recommended to reduce the dosage or discontinue use.

To ensure your safety when using homemade CBD oil, it is important to follow some safety tips and precautions. These include properly storing your oil in a cool, dark place to maintain its potency, keeping it out of reach of children and pets, and consulting with a healthcare professional before incorporating CBD into your routine, especially if you are taking any medications or have underlying medical conditions.

[bulkimporter_image id=’15’]

Safety Tips and Precautions

To ensure your safety when using your homemade CBD oil, it’s important to follow these safety tips and precautions:

Advertisement
  1. Use proper equipment: When preparing CBD oil, make sure to use clean and sanitized equipment to avoid any contamination. This includes using a clean magic butter maker and sterilizing your utensils before use.

  2. Choose high-quality ingredients: Selecting high-quality CBD flowers or hemp buds, as well as organic coconut oil, is crucial for a safe and effective homemade CBD oil. Ensure that the CBD flowers are sourced from reputable suppliers and are free from pesticides or other harmful chemicals.

  3. Start with a small dosage: CBD oil can have different effects on individuals, so it’s important to start with a small dosage and gradually increase if needed. This will help you gauge your body’s reaction and minimize any potential side effects.

When preparing your homemade CBD oil, following these preparation steps will help ensure a safe and effective product. However, it’s important to note that CBD oil can have potential side effects, such as drowsiness, dry mouth, and changes in appetite. If you experience any severe side effects or have any concerns, it’s best to consult with a healthcare professional.

Now, let’s move on to troubleshooting common issues that may arise during the CBD oil-making process.

[bulkimporter_image id=’16’]

Troubleshooting Common Issues

When making CBD oil with a magic butter maker and coconut oil, there are a few common issues that may arise.

Advertisement

One problem is insufficient oil extraction, where the final product lacks the desired potency.

Another issue is the separation of ingredients, resulting in an uneven distribution of CBD throughout the oil.

Lastly, some homemade CBD oils may have an unpleasant taste or smell due to improper processing or low-quality ingredients.

These issues can be frustrating, but with the right troubleshooting techniques, they can be resolved to ensure a high-quality CBD oil.

Insufficient Oil Extraction

If you’re experiencing insufficient oil extraction, it’s likely due to a low ratio of coconut oil to CBD flower. To ensure a successful extraction, it’s important to use the right amount of coconut oil in relation to the amount of CBD flower you’re using. Here are three potential reasons why you might be experiencing this issue:

Advertisement
  1. Improper extraction methods: If you’re not using the right extraction method, such as using too much heat or not allowing enough time for the CBD to infuse with the coconut oil, you may not be extracting enough oil.

  2. Inadequate CBD flower to coconut oil ratio: The ratio of CBD flower to coconut oil is crucial in obtaining a potent and effective CBD oil. If the ratio is too low, the oil may not have enough CBD content.

  3. Alternative oil options: If you’re still having trouble with insufficient oil extraction, you can consider using alternative oils, such as olive oil or MCT oil, which may have higher extraction rates.

Separation of Ingredients

One potential issue you may encounter is the separation of ingredients in the CBD oil. When making CBD oil with coconut oil using a magic butter maker, it is important to ensure that the cannabinoids are evenly distributed throughout the oil to maximize potency.

Separation can occur if the oil is not properly emulsified or if the ingredients are not mixed thoroughly. To avoid this, it is crucial to follow the instructions carefully and use the appropriate settings on the magic butter maker. Additionally, stirring the mixture periodically during the infusion process can help prevent separation.

By taking these steps, you can ensure that the cannabinoids are properly dispersed in the oil, resulting in a more potent final product.

This will help to transition into the subsequent section about the unpleasant taste or smell that can be associated with CBD oil.

Unpleasant Taste or Smell

To avoid an unpleasant taste or smell, it’s important to properly emulsify and mix the ingredients when making CBD oil with coconut oil using a magic butter maker. Here are three key steps to overcome the taste and smell of CBD oil:

Advertisement
  1. Use high-quality ingredients: Start with high-quality CBD oil and coconut oil. This ensures a better flavor and aroma in the final product.

  2. Properly emulsify the ingredients: The magic butter maker is designed to help emulsify the CBD oil and coconut oil together. This process creates a smooth and consistent texture, minimizing any potential taste or smell issues.

  3. Add flavorings or masking agents: If the taste or smell of CBD oil is still bothersome, consider adding natural flavorings or masking agents such as mint, vanilla, or citrus. These can help to mask the earthy taste of CBD oil and make it more enjoyable to consume.

Frequently Asked Questions

Can I Use a Different Type of Oil Instead of Coconut Oil to Make CBD Oil?

Yes, you can use different oils instead of coconut oil to make CBD oil. Some alternatives include olive oil, hemp seed oil, and MCT oil. Each has its own pros and cons, so it’s important to research and choose the best option for your needs.

How Do I Determine the Correct Dosage of CBD Oil for My Needs?

To determine the correct dosage of CBD oil for your needs, it is important to start low and gradually increase until you find relief. Be aware of potential risks and side effects, and consult with a healthcare professional for personalized guidance.

Are There Any Potential Side Effects or Risks Associated With Using CBD Oil?

Using CBD oil may have potential side effects and risks, such as drowsiness and dry mouth. To ensure safety, consult a healthcare professional, start with low doses, and monitor your body’s response.

Can I Use a Different Type of Cannabis Strain to Make CBD Oil?

Yes, different strains can be used for CBD oil production. Each strain has its own unique cannabinoid profile, which affects the final product’s potency and effects. It’s important to choose a strain with high CBD content and low THC levels.

What Is the Shelf Life of Homemade CBD Oil and How Should It Be Stored?

Storing homemade CBD oil properly is crucial for maintaining its shelf life. The best storage methods include keeping it in a cool, dark place, away from heat and light. Properly sealed containers can also help preserve its potency and effectiveness.

Advertisement

Conclusion

Well, there you have it, folks! Making CBD oil with a magic butter maker and coconut oil is truly a magical experience.

Who needs a lab when you can become your own CBD oil wizard in the comfort of your own kitchen? With the right equipment, ingredients, and a little bit of know-how, you can create a potent and personalized CBD oil that will rival anything you can buy.

So go forth, my friends, and let the magic of CBD oil-making begin!

Continue Reading
Advertisement

Butter Tips and Tricks

Butter Hacks: 2/3 Cup Butter Is How Many Tablespoons?

Published

on

By

converting butter measurements easily

If you’ve ever wondered, 2/3 cup of butter equals around 10.67 tablespoons. This handy conversion guarantees your recipes turn out just right.

Key Takeaways

  • 2/3 cup of butter equals 10.67 tablespoons.
  • Useful for recipes specifying butter in tablespoons.
  • Ensures precise measurements in cooking.
  • Simplifies adjusting butter quantities.
  • Essential for accurate recipe results.

The Full Conversion Chart

Exploring the entire conversion chart for butter measurements can simplify your cooking endeavors. Understanding the different measurements for butter, such as blocks, sticks, cups, tablespoons, and weight in grams, allows you to easily adapt recipes to suit your needs.

For example, knowing that a block of butter weighs 5.33 ounces and that this is equivalent to 2.67 ounces in stick form can be incredibly helpful when following a recipe that specifies one form over the other.

Furthermore, realizing that 1/6 pound of butter is equal to one cup, or that one tablespoon of butter is approximately 80 milliliters, enables you to make precise adjustments based on what measuring tools you have available.

This detailed chart provides you with the flexibility to confidently experiment in the kitchen, ensuring that your dishes turn out just right every time. Whether you’re baking, sautéing, or simply spreading butter on your toast, having a solid grasp on these conversions will surely enhance your culinary skills.

How Much Is 1 Stick?

price of a single stick

To accurately measure butter, understanding the quantity in 1 stick is important for following recipes effectively. One stick of butter equals 8 tablespoons, approximately 4 ounces or 113 grams in weight, and fills half a cup. When working with recipes that call for butter, this information is vital for precise measurements.

Butter sticks are conveniently marked with tablespoon measurements, simplifying the process of cutting the right amount. By knowing how much butter is in 1 stick, you can easily adapt recipes to suit your needs without any guesswork.

Advertisement

Whether you’re baking a batch of cookies or whipping up a savory sauce, having this knowledge at your fingertips guarantees your dishes turn out just right every time. So next time you reach for a stick of butter, remember these measurements to ensure cooking or baking success.

Measuring Butter From Sticks

butter measurement using sticks

When measuring butter from sticks, make certain you understand that each stick is equivalent to 8 tablespoons or 1/2 cup. This means that if a recipe calls for 2/3 cup of butter, you’d need 1 stick plus 2 and 2/3 tablespoons of butter. Understanding this conversion is essential for accurately measuring butter in various recipes.

Measuring butter from sticks is a convenient way to portion out the right amount for your cooking or baking needs. By knowing that one stick equals 8 tablespoons, you can easily adjust the quantity of butter required for a recipe.

Whether you’re using butter in cups, tablespoons, or sticks, being able to convert between these measurements guarantees that your dishes turn out just right.

Next time you reach for a stick of butter, remember that it contains 8 tablespoons or 1/2 cup. This knowledge will simplify your cooking process and help you achieve consistent results in the kitchen.

Butter in Tablespoons (Tbsp.)

butter measurement in tablespoons

When measuring butter in tablespoons (Tbsp.), it’s essential to know that 2/3 cup of butter is equivalent to 10 and 2/3 tablespoons. Understanding this butter conversion can simplify your cooking and baking experience.

Here are a few key points to keep in mind:

Advertisement
  • Converting cups to tablespoons: To convert 2/3 cup of butter to tablespoons, multiply 2/3 by 16 (since 1 cup equals 16 tablespoons).
  • Precise measurement: The calculation results in 10.67 tablespoons, which can be rounded to 10 and 2/3 tablespoons. This accuracy is vital for achieving consistent results in your recipes.
  • Convenience in recipes: Knowing the butter measurements in tablespoons can be handy when a recipe specifies butter in this unit rather than cups, making it easier to follow instructions accurately.

Mastering butter measurements in tablespoons allows you to confidently navigate various recipes and secures your dishes turn out just right.

Butter Vs. Margarine Conversion

dairy debate butter or margarine

For a straightforward butter versus margarine conversion comparison, consider the differences in teaspoons and tablespoons.

ButterMargarine
1 Teaspoon1 Teaspoon
1 Tablespoon1 Tablespoon
1/4 Cup1/4 Cup

When substituting butter for margarine in recipes, bear in mind the conversion rate between the two. While both butter and margarine serve as fats in baking and cooking, they have slightly different compositions due to their ingredients. If a recipe calls for margarine but you prefer to use butter, a simple swap can be made using the table above. Remember that the water content in butter is higher than in margarine, which can affect the final texture of your dish. Experimenting with different ratios based on the conversion table can help you achieve the desired result.

Olive Oil Conversion

cooking with olive oil

To convert olive oil measurements effectively in your recipes, remember the following equivalences:

  • 1/4 Cup of olive oil is equivalent to 1/4 Cup of butter/margarine.
  • 1/4 Cup + 2 Tablespoons of olive oil is equal to 1/2 Cup of butter/margarine.
  • 1/2 Cup of olive oil is the same as 1/2 Cup + 1 Tablespoon of butter/margarine.

When substituting olive oil for butter or margarine in your recipes, keep these conversions in mind to guarantee your dish turns out just right. Whether you’re aiming for a healthier option or simply prefer the taste of olive oil, knowing how to make these conversions can make a significant difference in your cooking.

Next time you reach for olive oil instead of butter, confidently adjust your measurements using these simple equivalences.

Healthy Alternative: Olive Oil

heart healthy cooking with olives

Looking to make healthier choices in your cooking? Olive oil can be a great alternative to butter, providing a higher content of monounsaturated fats.

Benefits of Olive Oil

Consider incorporating olive oil into your cooking routine as a healthier alternative to butter, thanks to its rich content of monounsaturated fats. Substituting butter with olive oil not only reduces saturated fat intake but also maintains a similar texture and flavor profile in your dishes.

Here are some benefits of using olive oil:

  • Healthier Fat Option: Olive oil is packed with monounsaturated fats, which are considered heart-healthy fats that can help lower bad cholesterol levels.
  • Versatility in Cooking: From baking to sautéing and creating flavorful dressings, olive oil proves to be a versatile ingredient suitable for various cooking methods.
  • Unique Flavor Profile: Unlike butter, olive oil adds a distinct taste to your dishes, enhancing the overall flavor experience while offering a healthier alternative.

Incorporating olive oil into your daily cooking not only brings health benefits but also contributes to a more balanced and flavorful diet.

Cooking With Olive Oil

Enhance your cooking routine by incorporating olive oil as a healthier alternative to butter in various dishes. Olive oil offers a distinct flavor profile that can elevate the taste of your meals while providing several health benefits. Rich in monounsaturated fats, olive oil is considered heart-healthy and can help lower bad cholesterol levels.

Advertisement

When cooking with olive oil, you have the flexibility to use it in different methods such as sautéing, roasting, and making salad dressings. This versatility makes it a great choice for a wide range of recipes. By substituting butter with olive oil, you can reduce your saturated fat intake without compromising on flavor.

Next time you’re in the kitchen, consider reaching for olive oil instead of butter. Not only will you be making a healthier choice, but you’ll also be adding a delicious twist to your favorite dishes. Experiment with olive oil in your cooking and discover the wonderful benefits it can bring to your meals.

Contact & Copyright Information

contact and copyright details

For more details on butter and olive oil conversions, contact Monadnock Oil and Vinegar, LLC at their Dublin branch by dialing 603-563-7066 or at their Amherst branch at 603-589-9954.

If you prefer email correspondence, you can reach them at [emailprotected].

Remember that all content related to butter and olive oil conversions is protected by copyright owned by Monadnock Oil and Vinegar, LLC. Reproduction rights are reserved from 2015 to 2024, and any unauthorized use is strictly prohibited.

If you intend to use or refer to their content, make sure you have the appropriate permissions to avoid any copyright violations.

Advertisement

Frequently Asked Questions

How Many Tablespoons Is 2/3 Cup in a Stick of Butter?

To know how many tablespoons are in 2/3 cup of butter in a stick, remember it’s around 10 2/3 tablespoons or about 1 stick plus 2 tablespoons. This helps you accurately measure butter for recipes.

Is 1 Stick of Butter the Same as 1 2 Cup?

Yes, 1 stick of butter is equal to 1/2 cup. That means a stick of butter contains 8 tablespoons. Understanding these measurements can make your cooking and baking experiences smoother and more precise.

How Many Tablespoons Is a Full Cup of Butter?

To measure a full cup of butter, you’d need 16 tablespoons. That’s the scoop for your baking adventures. Remember this handy conversion to make your kitchen creations a piece of cake!

How Much Is 1 Cup of Butter in Stick Butter?

To convert 1 cup of butter to sticks, you need 2 sticks. For tablespoons, that’s 16 tablespoons. Knowing these conversions helps in precise measuring for recipes. It’s essential for successful baking and cooking.

Conclusion

Remember, when it comes to butter hacks, knowing how to convert measurements can make all the difference in your cooking.

Advertisement

As the saying goes, ‘A little butter can make everything better.’

So next time you’re in the kitchen and wondering how many tablespoons are in 2/3 cup of butter, you’ll be prepared to whip up something delicious with ease.

Happy cooking!

Continue Reading

Butter Tips and Tricks

How Many Sticks of Butter in 1 Cup: A Step-by-Step Guide

Published

on

By

An image showing a neatly arranged stack of 10 tablespoons of butter, each tablespoon represented by a smooth, rectangular slab with rounded edges, resembling traditional stick-shaped butter

Ever wondered how many sticks of butter are in one cup? Well, I have the answer for you!

Picture this: you’re in the middle of baking your favorite recipe and suddenly realize you’re out of butter. Panic sets in as you scramble to figure out the conversion from cups to sticks. But fear not!

In this article, I’ll break it down for you, providing all the information you need to know about the butter-to-cup ratio and how to make your baking adventures a breeze.

Key Takeaways

  • 1 cup of butter is equal to 2 sticks or 16 tablespoons.
  • Converting butter measurements from cups to sticks or vice versa is crucial for accurate recipe adjustments.
  • Different brands may have varying measurements for butter, so it’s important to be aware of equivalents.
  • Using the measurement markings on the butter wrapper allows for precise cutting of fractional amounts.
[bulkimporter_image id=’2′]

Understanding the Butter-to-Cup Ratio

1 cup of butter is equal to 2 sticks. When it comes to converting butter measurements, it’s important to understand the ratios.

If a recipe calls for tablespoons of butter, 1 stick is equivalent to 8 tablespoons. So, if you need 1 cup of butter, you’ll need 16 tablespoons or 2 sticks.

It’s also important to note the difference between salted and unsalted butter. Salted butter contains added salt, while unsalted butter does not. This can affect the taste and overall flavor of your dish.

When a recipe calls for unsalted butter, it’s best to stick to that recommendation to have better control over the amount of salt in the recipe. However, if you only have salted butter on hand, you can reduce the amount of added salt in the recipe.

[bulkimporter_image id=’3′]

Converting Butter Measurements: Cups to Sticks

When it comes to baking, understanding the butter cup to stick ratio is crucial. Knowing how many sticks of butter make up one cup can make or break a recipe.

In addition to the ratio, having an accurate conversion method from cups to sticks is essential for precise measurements.

Lastly, it’s important to familiarize oneself with common butter measurements to ensure successful baking endeavors.

Butter Cup to Stick Ratio

To determine the ratio of sticks of butter to cups, we can use this conversion chart. Understanding butter measurements is essential for baking and cooking. Converting butter ratios is a common task in the kitchen.

The standard stick of butter in the United States weighs 1/2 cup or 8 tablespoons. Therefore, if a recipe calls for 1 cup of butter, you will need 2 sticks. If the recipe calls for 1/2 cup of butter, you will need 1 stick.

It’s important to note that butter measurements can vary by country, so always consult a reliable conversion chart if you’re working with international recipes. By knowing the butter cup to stick ratio, you can confidently adapt recipes to suit your needs.

Accurate Conversion Method

The most accurate way to convert measurements is by consulting a reliable conversion chart. When it comes to measuring butter, it can be tricky since it often comes in sticks or cups. Here are some tips to help you accurately measure butter:

  1. Use a conversion chart: This will give you the exact measurement equivalents for butter, whether it’s in sticks or cups.
  2. Soften the butter: If a recipe calls for melted butter, measure it in its solid form and then melt it. This ensures accurate measurements.
  3. Use a kitchen scale: Weighing the butter can give you precise measurements, especially when dealing with small amounts.
  4. Know the standard measurements: One stick of butter is equal to 1/2 cup or 8 tablespoons. A cup of butter, on the other hand, is equal to 2 sticks or 16 tablespoons.

Common Butter Measurements?

Knowing the equivalents for different measurements of butter, such as tablespoons and sticks, can be helpful when following recipes. It ensures that you are adding the right amount of butter, which can greatly impact the outcome of your dish. Here are some common butter measurement equivalents to keep in mind:

Measurement Equivalent
1 stick 1/2 cup (8 tablespoons)
1/2 stick 1/4 cup (4 tablespoons)
1/4 stick 1/8 cup (2 tablespoons)
1 tablespoon 1/16 cup (1/2 stick)

When measuring butter, it’s important to be accurate. Use a kitchen scale for precise measurements, especially if the recipe calls for weight measurements. If you don’t have a scale, use a butter dish with marked measurements. Softened butter should be leveled off with a knife. When using tablespoons, make sure to fill them completely and level off the excess with a straight edge. These tips will help you measure butter accurately and achieve the best results in your recipes.

[bulkimporter_image id=’4′]

The Standard Size of a Stick of Butter

A stick of butter is typically equal to 1/2 cup. Understanding butter packaging and different butter measurements in other countries can be confusing.

Here are some key points to help you navigate the world of butter measurements:

  1. In the United States, butter is commonly sold in sticks, with each stick weighing 1/4 pound or 1/2 cup. This makes it easy to measure and use in recipes.
  2. In some European countries, butter is sold in blocks or tubs, with measurements listed in grams or kilograms. It’s important to convert these measurements to cups or ounces for American recipes.
  3. In Australia, butter is usually sold in 250g or 500g blocks, which can be converted to cups or ounces using conversion charts.
  4. When traveling or using international recipes, it’s helpful to familiarize yourself with the local butter measurements to ensure accurate results.
[bulkimporter_image id=’5′]

How Much Butter Is in 1 Cup

When it comes to baking, understanding the butter to cup ratio is crucial. Knowing how much butter is in 1 cup can help ensure that your recipes turn out perfectly.

Additionally, learning how to convert butter measurements can be helpful when using recipes from different countries or regions.

Lastly, if you’re looking for butter substitutes in baking, there are several options available that can still provide the moisture and richness that butter brings to baked goods.

Butter to Cup Ratio

To measure the butter to cup ratio, you can easily convert sticks of butter to cups. Understanding butter density is key to accurately converting butter measurements from tablespoons to cups. Here’s a step-by-step guide:

  1. Start by knowing that one stick of butter is equal to 1/2 cup. This is a common measurement used in many recipes.
  2. If your recipe calls for a different amount of butter in cups, you can use this conversion: 1 cup of butter is equivalent to 2 sticks or 16 tablespoons.
  3. To convert tablespoons to cups, divide the number of tablespoons by 16. For example, if you have 8 tablespoons of butter, it would be equal to 1/2 cup.
  4. Remember, when measuring butter, it’s important to consider its density. Softened or melted butter may take up less space compared to cold or solid butter.

Converting Butter Measurements

Understanding the conversion of butter measurements can help me confidently adjust my recipe. When it comes to baking or cooking, accuracy is key. Knowing the equivalents of butter can save me time and ensure the perfect outcome.

One cup of butter is equal to two sticks or 16 tablespoons. This information is crucial when a recipe calls for a specific amount of butter in cups, but I only have sticks. Conversely, if a recipe specifies butter in sticks, I can easily convert it to cups by dividing the number of sticks by two.

To measure butter accurately, I can use a kitchen scale or the markings on the butter wrapper. Softened butter should be packed into measuring cups, while solid butter should be cut according to the desired quantity.

With these tips, I can confidently use the correct amount of butter in my recipes.

Butter Substitutes in Baking

If you’re looking to substitute butter in your baking, there are various options available that can still yield delicious results. Here are four butter alternatives that not only provide a healthier option but also offer unique flavors and health benefits:

  1. Coconut oil: This versatile alternative adds a subtle tropical taste to your baked goods and is rich in healthy fats, promoting heart health.
  2. Avocado: Creamy and nutrient-dense, mashed avocado can replace butter in certain recipes, providing a boost of vitamins and minerals.
  3. Greek yogurt: With its tangy flavor and creamy texture, Greek yogurt adds moisture and protein to your baked treats while reducing the fat content.
  4. Applesauce: A natural sweetener and fat substitute, applesauce adds moisture and tenderness to your baked goods, making them lighter and healthier.
[bulkimporter_image id=’6′]

Butter Conversion: Cups to Sticks Simplified

You can easily convert 1 cup of butter to sticks by knowing that it equals 2 sticks.

When it comes to butter storage, it is important to consider the packaging. Butter is typically sold in wrapped blocks or sticks. The packaging not only protects the butter from external factors like air and light but also keeps it fresh for longer periods.

The most common packaging for butter is a waxed paper or foil wrapper. This type of packaging helps to maintain the butter’s quality and prevent it from spoiling. It is recommended to store butter in its original packaging or transfer it to an airtight container to maintain its freshness.

Proper butter storage ensures that it remains usable for a longer time and retains its flavor and texture.

[bulkimporter_image id=’7′]

Calculating Sticks of Butter for Your Recipe

To calculate the number of sticks needed for your recipe, it’s helpful to divide the total amount of butter by the conversion factor of 2. This will give you the accurate measurement in sticks.

Here are some tips for understanding butter measurements and achieving accurate conversions:

  1. Always use the conversion factor of 2 when converting cups to sticks of butter.
  2. Make sure to measure butter in its solid form for precise results.
  3. If your recipe calls for a fraction of a stick, you can easily cut it using the measurement markings on the wrapper.
  4. Remember that butter is sold in different sizes, so check the weight or volume on the packaging to ensure accuracy.

Now that you understand how to calculate the number of sticks needed for your recipe, let’s move on to some tips for measuring butter in cups.

[bulkimporter_image id=’8′]

Tips for Measuring Butter in Cups

When measuring butter in cups, it’s important to remember that different brands may have different measurements on their packaging. To ensure accuracy in your recipes, it’s helpful to be aware of butter measurement equivalents.

One cup of butter is equal to 2 sticks or 16 tablespoons. However, some brands of butter may label their packaging differently, so it’s always a good idea to double-check.

If you don’t have measuring cups or sticks of butter, there are alternative methods for measuring butter. One option is to use a kitchen scale to measure the desired amount in grams or ounces. Another option is to use the markings on the butter wrapper itself. Most butter sticks have measurements marked on the packaging, allowing you to easily cut off the desired amount.

[bulkimporter_image id=’9′]

Butter Conversions Made Easy: Cups to Sticks

When it comes to baking or cooking with butter, it’s important to have a clear understanding of the measurement equivalents. Knowing how many sticks of butter are in a cup can save time and ensure accurate results.

In this discussion, we will explore simple conversion techniques for butter measurements, providing you with the knowledge and confidence to easily adapt recipes to your preferred measurements.

Butter Measurement Equivalents

You can easily convert 1 cup of butter into sticks by dividing it into 2 sticks. This is a common measurement used in baking and cooking.

When it comes to understanding butter ratios and ensuring accurate measuring, here are some tips to keep in mind:

  1. Use a liquid measuring cup: Butter is a solid, but using a liquid measuring cup allows for more precise measurements.
  2. Soften the butter: To accurately measure butter, it should be softened to room temperature. This ensures that it is easily spreadable and can be measured accurately.
  3. Use a knife or bench scraper: When measuring butter, use a knife or bench scraper to level off the top. This will provide a consistent and accurate measurement.
  4. Pack it tightly: If a recipe calls for packed butter, make sure to tightly pack the butter into the measuring cup. This will give you the correct amount needed for the recipe.

Simple Conversion Techniques

To simplify conversions, try using a kitchen scale for more precise measurements. When it comes to baking, accurate measurements are crucial for the success of your recipe. Butter measurement equivalents in recipes can sometimes be confusing, especially when converting between different units.

Converting butter measurements for baking can be made easier by using a kitchen scale. By weighing the butter, you can accurately determine the amount needed for your recipe. For example, if a recipe calls for 1 cup of butter, you can weigh it on the scale to get the precise measurement in grams or ounces. This eliminates any guesswork and ensures that your baked goods turn out just right.

Now, let’s move on to how to substitute sticks of butter for cups.

[bulkimporter_image id=’10’]

How to Substitute Sticks of Butter for Cups

If you’re substituting sticks of butter for cups, it’s important to know that one stick of butter is equivalent to 1/2 cup. This knowledge is crucial for measuring accuracy in recipes.

Here are four key points to keep in mind when substituting sticks of butter for cups:

  1. Butter substitutes: In case you don’t have sticks of butter on hand, you can use other ingredients as substitutes. Options include margarine, shortening, coconut oil, or even applesauce for a healthier alternative.
  2. Measuring accuracy: When measuring butter in stick form, it’s essential to accurately cut the stick to the correct length. Each stick is typically 8 tablespoons or 1/2 cup, so make sure to measure it precisely.
  3. Conversions: If a recipe calls for a specific amount of cups, you may need to convert it to sticks of butter. Remember that two sticks of butter are equal to 1 cup, so adjust accordingly.
  4. Recipe adjustments: When substituting sticks of butter for cups, consider the impact on your recipe. Butter provides moisture and flavor, so using different substitutes may affect the final texture and taste.
[bulkimporter_image id=’11’]

Common Butter Measurements: Cups Vs Sticks

When baking, it’s helpful to know the difference between measuring butter in cups versus sticks. Understanding butter measurements and being able to convert between cups and sticks can make a big difference in the outcome of your baked goods. Here’s a simple table to help you understand the conversion:

Cups Sticks Grams
1 0.5 113
2 1 227
3 1.5 340

For example, if a recipe calls for 1 cup of butter, you can use 2 sticks or 227 grams. Similarly, if a recipe calls for 3 sticks of butter, you can use 1.5 cups or 340 grams. Having this understanding and being able to convert between cups and sticks will ensure that your baked goods turn out perfectly every time.

Frequently Asked Questions

Can I Use Margarine Instead of Butter When Measuring in Cups or Sticks?

Sure, you can use margarine instead of butter when measuring in cups or sticks. However, keep in mind that margarine has a different texture and flavor, so it may affect the outcome of your recipe. The butter vs margarine debate is a matter of personal preference.

How Much Does a Stick of Butter Weigh in Ounces?

A stick of butter weighs 4 ounces. Converting butter measurements can be tricky, but knowing that a stick of butter is 1/2 cup or 8 tablespoons helps in cooking and baking.

Can I Use Salted Butter Instead of Unsalted Butter in a Recipe That Calls for Measuring in Cups?

Yes, you can use salted butter instead of unsalted butter in a recipe that calls for measuring in cups. Just remember to adjust the amount of salt in the recipe accordingly.

Are There Any Special Considerations When Measuring Butter in High-Altitude Baking?

When baking at high altitudes, there are special considerations for measuring butter. The altitude affects the air pressure, which can impact the texture and rising of baked goods. Adjustments may be needed to ensure successful results.

Is There a Difference in Measurement if the Butter Is Cold or at Room Temperature When Using Cups or Sticks?

When measuring butter, it’s important to note that the accuracy may vary depending on whether the butter is cold or at room temperature. This applies to both measuring cups and sticks.

Conclusion

In conclusion, understanding the butter-to-cup ratio is crucial when it comes to baking. Converting measurements from cups to sticks can be simplified by knowing that one cup of butter is equal to two sticks.

It is important to note that a standard stick of butter typically measures 1/2 cup or 8 tablespoons. When measuring butter in cups, it is recommended to use precise measuring tools to ensure accurate results.

Remember, as the saying goes, “Measure twice, bake once!”

Continue Reading

Butter Tips and Tricks

How Many Cups of Butter Equal a Stick: A Simple Guide

Published

on

By

An image showing a neatly arranged cup filled with liquid butter, surrounded by a stack of butter sticks, one by one, gradually being poured into the cup until it reaches the brim

Ever thought about how many cups of butter are in one stick? Well, I have the answer for you! Deciphering butter measurements can be tricky, but don’t worry, I’m here to make it easier for you.

In this article, we’ll explore the standard stick of butter and how to convert it to cups. We’ll also delve into equivalents and measurements, as well as provide a handy butter conversion chart.

So, let’s dive in and demystify the world of butter measurements together!

Key Takeaways

  • One stick of butter is equal to 1/2 cup or 8 tablespoons.
  • Butter can be measured in grams or ounces for more precise measurements.
  • Conversion charts and kitchen scales are useful tools for accurate measurement conversion.
  • Knowing the equivalents (e.g., 1 stick = 1/2 cup, 2 sticks = 1 cup) helps measure butter accurately in recipes.

[bulkimporter_image id=’2′]

Understanding Butter Measurements

There’s no need to worry about how many cups of butter are in a stick because it’s a common measurement used in recipes. When it comes to accurately measuring butter, it’s important to understand the conversion from sticks to cups.

One stick of butter is equal to 1/2 cup or 8 tablespoons. This measurement is widely accepted and used in baking and cooking. However, it’s good to know that butter can also be measured in grams or ounces for more precise measurements.

To convert butter measurements for recipes, you can use a kitchen scale or refer to conversion charts that provide the equivalent measurements. Understanding these conversions ensures that you can accurately measure and use butter in your favorite recipes.

Advertisement

Now, let’s dive into the details of the standard stick of butter.

[bulkimporter_image id=’3′]

The Standard Stick of Butter

To determine the amount of butter in a standard stick, you’ll need to understand the conversion ratio. Understanding butter packaging and different butter measurements is crucial to accurately measuring ingredients in recipes. Here are some key points to keep in mind:

  • A standard stick of butter in the United States weighs 1/2 cup or 8 tablespoons.
  • The measurements on butter packaging are typically marked in tablespoons and cups.
  • European butter is often sold in 250-gram blocks, which is approximately 1 cup or 2 sticks of butter.
  • Some recipes may call for butter in ounces or grams, so it’s important to have a kitchen scale for precise measurements.
  • It’s also helpful to know that butter comes in different fat percentages, such as salted and unsalted.

[bulkimporter_image id=’4′]

Converting Sticks to Cups

When it comes to converting sticks to cups, it is important to understand the stick to cup ratio for accurate measurement conversion.

The stick to cup ratio is 1 stick of butter equals 1/2 cup. This means that if a recipe calls for 1 cup of butter, you will need 2 sticks.

Stick to Cup Ratio

The stick to cup ratio for butter is approximately 1/2 cup per stick. This ratio is important to know when it comes to baking and following recipes accurately.

Here are a few key points to keep in mind when it comes to butter measurements and baking conversions:

Advertisement

  • 1 stick of butter is equal to 1/2 cup or 8 tablespoons.
  • If a recipe calls for 1 cup of butter, you will need 2 sticks.
  • To convert tablespoons to cups, divide the number of tablespoons by 16.
  • It’s important to note that butter measurements can vary depending on the brand or type of butter you are using, so always check the packaging for accurate measurements.
  • When in doubt, it’s always a good idea to weigh your butter using a kitchen scale for precise measurements.

Knowing the stick to cup ratio and understanding butter measurements is essential for successful baking and achieving the desired results in your recipes.

Accurate Measurement Conversion

Remember, accurately converting measurements is crucial for achieving the desired results in your baking recipes.

When it comes to understanding butter measurements, it’s important to measure accurately to ensure your baked goods turn out just right.

Butter is often measured in sticks, and it’s helpful to know that one stick of butter is equal to 1/2 cup or 8 tablespoons.

This knowledge is especially handy when a recipe calls for a certain amount of cups and you only have sticks of butter on hand.

By measuring butter accurately, you can ensure that your recipes turn out perfectly every time.

Advertisement

Now that we understand how to measure butter correctly, let’s explore the equivalents and measurements for other common baking ingredients.

[bulkimporter_image id=’5′]

Equivalents and Measurements

You’ll need to know how many cups of butter are in a stick for accurate measurements. When it comes to butter measurement equivalents, it’s important to have the right conversions. Here are a few key measurements to keep in mind:

  • 1 stick of butter is equal to 1/2 cup
  • 1/2 stick of butter is equal to 1/4 cup
  • 2 sticks of butter is equal to 1 cup
  • 4 sticks of butter is equal to 2 cups
  • 8 sticks of butter is equal to 4 cups

Knowing these equivalents will help you measure butter accurately in your recipes.

Now that you have a good understanding of how many cups are in a stick of butter, let’s move on to the next section about how much butter is in a cup.

[bulkimporter_image id=’6′]

How Much Butter Is in a Cup

When it comes to baking or cooking, understanding the butter-to-cup ratio is crucial. Knowing how much butter is in a cup can make a huge difference in the outcome of your recipe.

In this discussion, we will explore the conversion of butter measurements and how to accurately measure the right amount of butter for your culinary endeavors.

Advertisement

Butter-To-Cup Ratio

To figure out the butter-to-cup ratio, divide the number of cups by the number of sticks. This ratio is essential when converting butter measurements or finding butter equivalents. Here are some important points to consider:

  • 1 stick of butter is equal to 1/2 cup.
  • 2 sticks of butter make 1 cup.
  • If a recipe calls for 1 cup of butter, you will need 2 sticks.
  • For 1/4 cup of butter, use half a stick.
  • To measure 1/3 cup of butter, you’ll need 5 and 1/3 tablespoons.

Understanding the butter-to-cup ratio allows for accurate measurements in recipes. Whether you’re baking cookies or making a savory dish, having the correct amount of butter is crucial for achieving the desired taste and texture.

Converting Butter Measurements?

Understanding how to convert butter measurements is essential for accurate recipe preparation. When it comes to converting butter measurements, there are a few common mistakes that people often make.

One of the most common mistakes is not knowing the correct conversion ratio. In the United States, butter is typically sold in sticks, with each stick weighing 1/2 cup or 8 tablespoons. However, in some recipes, butter may be measured in grams or ounces.

Another mistake people make is not properly measuring the butter. It is important to use a kitchen scale or measuring cups to ensure precise measurements.

Additionally, some recipes may call for melted butter, which can be measured differently than solid butter.

Advertisement

Understanding these conversions and avoiding these common mistakes will help ensure that your recipes turn out perfectly every time.

[bulkimporter_image id=’7′]

Measuring Butter for Baking

There’s no need to guess how many cups of butter are in a stick when measuring for baking. As someone who loves to bake, I have found that using the right tools for measuring butter is crucial for accurate results. Here are the best tools for measuring butter:

  • Measuring cups: These are the most common tools used for measuring butter. Make sure to use a dry measuring cup and pack the butter firmly for accurate measurements.

  • Kitchen scale: For precise measurements, a kitchen scale is the way to go. It allows you to measure the exact amount of butter required for your recipe.

  • Butter dish with markings: Some butter dishes come with markings that indicate the measurements. This makes it convenient to measure the required amount of butter directly from the dish.

  • Butter cutter: A butter cutter is a handy tool that helps you measure the butter by slicing it into tablespoons or teaspoons.

  • Butter wrappers: Butter wrappers often have measurements marked on them, making it easy to cut the butter into the desired amount.

By using these tools, you can ensure that your butter is measured accurately for your recipes.

Now, let’s move on to the next section where we will discuss a butter conversion chart.

[bulkimporter_image id=’8′]

Butter Conversion Chart

Now that we know how to measure butter for baking, let’s talk about butter conversion chart and how to convert butter for recipes.

Advertisement

It’s common to come across recipes that call for butter in different measurements, such as cups, tablespoons, or grams. To make things easier, there are some standard butter measurement equivalents that can be used for conversion.

For example, one stick of butter is equal to half a cup or 8 tablespoons. So if a recipe calls for 1 cup of butter, you would need 2 sticks or 16 tablespoons. It’s important to have these conversions handy to ensure you’re using the correct amount of butter in your recipes.

Now that we understand the butter conversion chart, let’s move on to some tips for measuring butter accurately.

[bulkimporter_image id=’9′]

Tips for Measuring Butter

To accurately measure butter, it’s helpful to soften it beforehand. Softening butter makes it easier to measure and ensures accurate results in your cooking. Here are some tips for measuring butter for cooking:

  • Take the butter out of the refrigerator and let it sit at room temperature for about 30 minutes before measuring.
  • Use a sharp knife to cut the butter into tablespoon-sized portions.
  • Fill a measuring cup with water and place the cut butter into the cup, submerging it completely.
  • Remove the butter from the water and drain any excess water.
  • Measure the butter in tablespoons or cups, depending on your recipe’s requirements.

[bulkimporter_image id=’10’]

Common Butter Measurement Mistakes

A common mistake when measuring butter is not using a sharp knife to cut it into proper portions. Accurately measuring butter is crucial in baking to achieve the desired results.

When butter is too soft or melted, it can throw off the texture and consistency of your baked goods. To measure butter accurately, start by using a sharp knife to cut the stick into tablespoon-sized portions. Then, use a measuring spoon to scoop out the desired amount.

Advertisement

It’s important to level off the butter with the back of a knife to ensure precise measurements. Another common mistake is eyeballing the amount of butter, which can lead to inconsistent results.

Frequently Asked Questions

Can I Use Margarine Instead of Butter in Baking Recipes?

I prefer using butter over margarine in baking recipes because it adds more flavor and richness. Margarine can affect the texture of baked goods, often making them softer and less tender. So, while margarine can be used as a substitute for butter in some recipes, it’s important to consider the impact on taste and texture.

How Can I Accurately Measure Butter Without Using a Scale?

When it comes to accurately measuring butter without a scale, it can be a bit tricky. But fear not! I’ve got you covered. Let me walk you through the process of converting butter measurements like a pro.

Can I Substitute Oil for Butter in a Recipe?

Substituting butter with oil in a recipe can have pros and cons. Oil can add moisture and make baked goods lighter, but it may also affect the taste and texture. The best oil substitutes for baking are vegetable oil, coconut oil, and olive oil.

How Much Butter Should I Use if the Recipe Calls for a Certain Number of Sticks?

When converting butter measurements, accurately measuring the amount of butter needed is crucial. If a recipe calls for a certain number of sticks, I can help you determine how much butter to use.

Advertisement

Can I Use Unsalted Butter Instead of Salted Butter in Baking Recipes?

Using unsalted butter for baking has its pros and cons. Pros include having more control over the saltiness of the recipe, while cons include potentially missing out on the flavor that salted butter provides.

Conclusion

In conclusion, understanding butter measurements is essential for successful baking. While a standard stick of butter is equivalent to 1/2 cup or 8 tablespoons, it’s important to note that this can vary depending on the brand or region.

To convert sticks to cups, simply divide the number of sticks by 2. Additionally, knowing that 1 cup of butter is equivalent to 2 sticks can help when following recipes.

By following a butter conversion chart and being mindful of common measurement mistakes, bakers can ensure accurate and delicious results.

Advertisement

Continue Reading
Advertisement

Affiliate disclaimer

As an affiliate, we may earn a commission from qualifying purchases. We get commissions for purchases made through links on this website from Amazon and other third parties.

Advertisement

Trending