Hey butter lovers!
Have you ever wondered what it takes to make your very own creamy, delicious butter right in your classroom? Well, wonder no more!
In this article, I’ll be sharing a step-by-step guide on how to embark on a butter-making adventure that will have your taste buds dancing with joy.
Get ready to roll up your sleeves, gather your materials, and discover the science behind this delectable dairy delight. Trust me, this is going to be udderly amazing!
Key Takeaways
- Heavy cream, a jar with a tight-fitting lid, and a pinch of salt are needed for making butter.
- Butter making involves the process of emulsification, where the fat molecules in cream are broken down and stick together to form butter.
- The liquid left after separation is called buttermilk.
- Troubleshooting butter making problems includes ensuring the cream is cold, the jar is tightly sealed, and shaking the jar vigorously if the buttermilk won’t separate.

Amazon Grocery, Heavy Whipping Cream, Ultra-Pasteurized, 16 Fl Oz
- Size: 16 Fl Oz carton
- Brand Transition: Part of Amazon Grocery brand
- Milk Source: Made from rBST-free cows
As an affiliate, we earn on qualifying purchases.
As an affiliate, we earn on qualifying purchases.
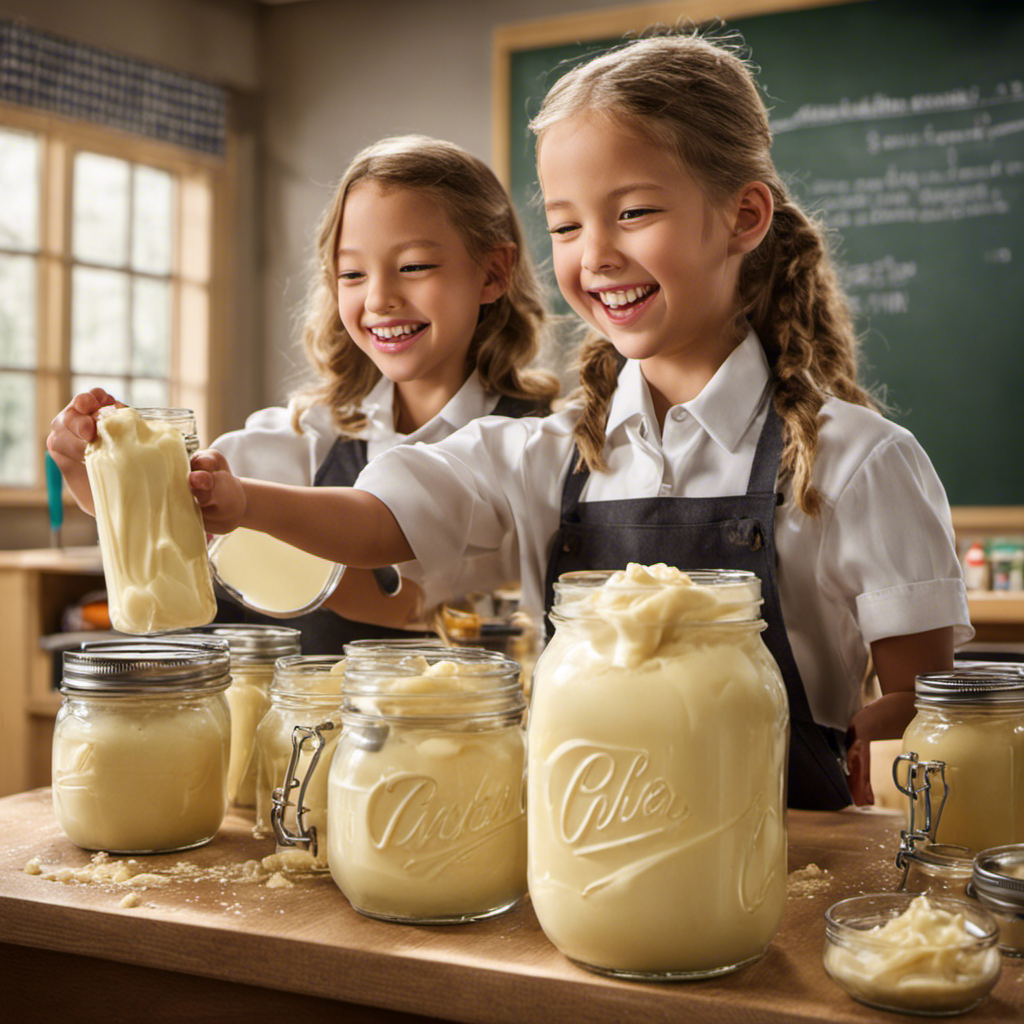
Gathering the Materials
First, make sure you’ve gathered all of the materials you’ll need to make butter. Obtaining ingredients is an essential step in preparing the classroom for our butter-making adventure.
You’ll need heavy cream, a jar with a tight-fitting lid, and a pinch of salt. Begin by checking the expiration date on the heavy cream to ensure freshness.
Next, gather enough jars for each student or group and make sure they are clean and dry. Having enough jars will ensure everyone gets a chance to participate.
Additionally, have a pinch of salt ready to add flavor to the butter. By obtaining these ingredients and preparing the classroom with enough jars, you’ll be ready to embark on an exciting journey of making butter.
Exploring the Science Behind Butter Making
Next, we’ll delve into the science behind how butter forms. Making butter is not just a fun activity, but it also involves some fascinating chemistry.
When we churn cream, we are actually separating the fat molecules from the liquid. This process is called emulsification. Here’s how it works:
- The fat molecules in cream are surrounded by a protective layer called a membrane.
- Churning the cream causes the fat molecules to collide and break the membrane.
- The broken membrane releases the fat molecules, which then stick together to form butter.
- The liquid that remains after the fat molecules separate is called buttermilk.
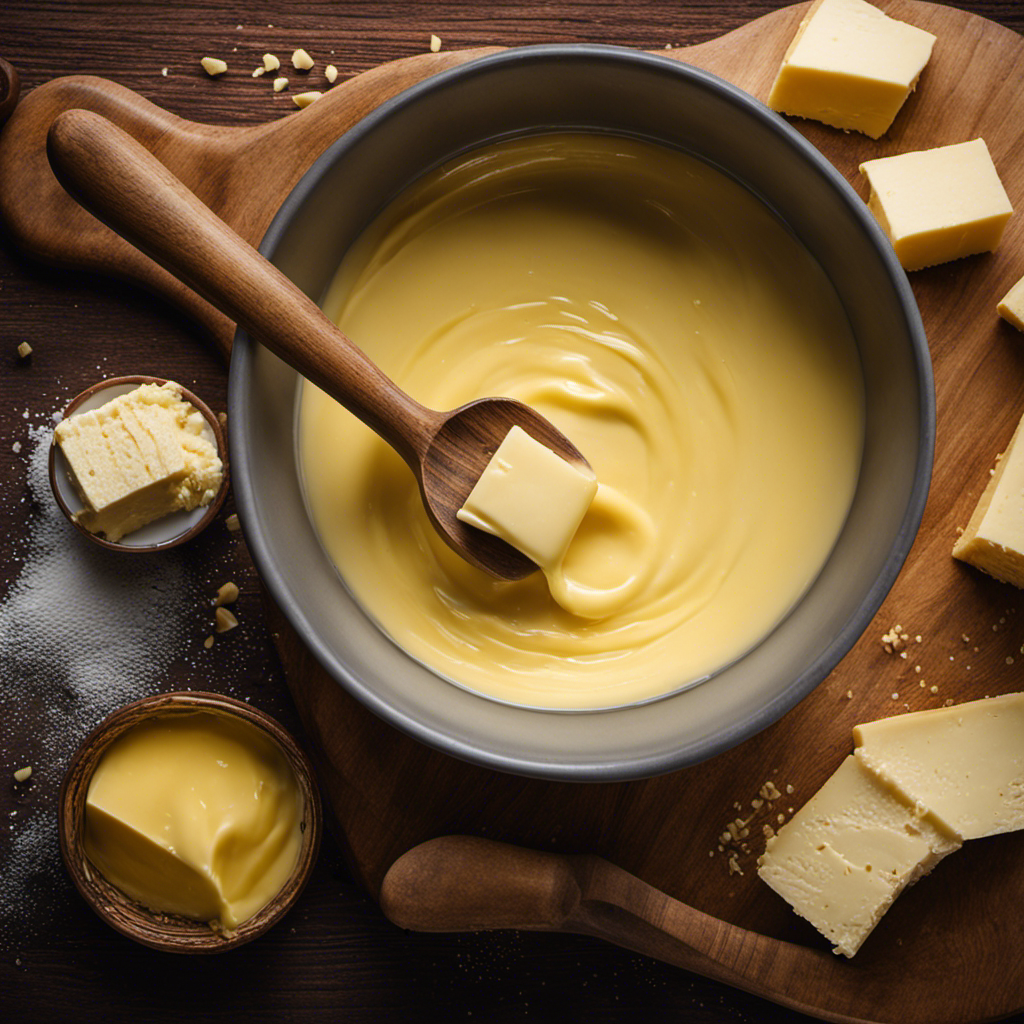
Step-by-Step Butter Making Process
To start the butter making process, you’ll need heavy cream, a jar with a tight lid, and a little bit of patience. Making butter is a fun and educational activity that can be done in the classroom. Here’s a step-by-step guide to making your own butter:
- Pour the heavy cream into the jar, filling it about halfway.
- Securely screw the lid onto the jar.
- Start shaking the jar vigorously. This is where the churning technique comes in. The cream will go through different stages, from liquid to whipped cream, and finally, to butter.
- Keep shaking until you hear a sloshing sound. This means that the butter has separated from the buttermilk.
- Carefully pour out the buttermilk and save it for another recipe.
- Rinse the butter under cold water to remove any remaining buttermilk.
- Pat the butter dry with a paper towel and shape it into a ball or stick.
- Enjoy your homemade butter on bread or use it in your favorite recipes!
Now, let’s take a look at some common butter making problems and how to troubleshoot them:
| Problem | Solution |
|---|---|
| Butter won’t form | Make sure the cream is cold. Room temperature cream will not churn into butter. Also, ensure that the jar is tightly sealed to prevent leaks. |
| Buttermilk won’t separate | Shake the jar more vigorously. The cream needs to be agitated enough to separate into butter and buttermilk. |
| Butter is too soft | Place the butter in the refrigerator for a few minutes to firm up. Alternatively, you can add a pinch of salt to help the butter solidify. |
| Butter has a sour taste | The cream may have been slightly spoiled. It’s best to start with fresh, high-quality cream to avoid this issue. |
With these tips and techniques, you’ll be able to make delicious homemade butter every time!
Adding Flavors and Variations
If you want to enhance the flavor of your homemade butter, you can try adding various herbs, spices, or even sweet ingredients like honey or maple syrup. Experimenting with different flavored butter options can take your butter-making experience to the next level.
Here are a few ideas to get you started:
-
Savory options:
-
Garlic and herb butter: Add minced garlic, parsley, and a pinch of salt to your butter for a delicious spread on bread or a flavorful addition to roasted vegetables.
-
Chili lime butter: Mix in some lime zest and chili powder to give your butter a tangy and spicy kick. Perfect for grilled corn or seafood dishes.
-
Sweet options:
-
Cinnamon honey butter: Combine softened butter, cinnamon, and honey for a sweet and aromatic spread on toast or muffins.
-
Maple pecan butter: Blend in some chopped pecans and a drizzle of maple syrup for a decadent treat on pancakes or waffles.
These creative ways to use homemade butter will surely impress your friends and family. So, let’s move on to enjoying and sharing the homemade butter.
Enjoying and Sharing the Homemade Butter
Now that you have made your delicious flavored butter, it’s time to savor the creamy goodness and share it with your loved ones. Sharing experiences and tasty treats is a wonderful way to create lasting memories and strengthen bonds. Whether it’s a family gathering, a picnic with friends, or a special occasion, homemade butter adds an extra touch of love to any meal. To help inspire you, here are five creative recipes to try with your homemade butter:
| Recipe | Ingredients |
|---|---|
| Garlic Herb Butter | Garlic, herbs (such as parsley, thyme, and dill) |
| Honey Cinnamon Butter | Honey, cinnamon |
| Lemon Pepper Butter | Lemon zest, black pepper |
| Maple Bacon Butter | Cooked bacon, maple syrup |
| Raspberry Almond Butter | Raspberries, almond extract |
These recipes are just a starting point, so feel free to get creative and experiment with different flavors. The possibilities are endless! Enjoy the process of making and sharing your homemade butter, and let it be a reminder of the joy that comes from sharing food and experiences with others.
Frequently Asked Questions
How Long Does It Take to Make Butter in the Classroom?
It doesn’t take long to make butter in the classroom! The hands-on classroom butter making demonstration is a great way to learn and have fun. Plus, it teaches us the benefits of hands-on learning.
Can I Use Any Type of Milk to Make Butter?
Yes, you can use different types of milk to make butter. It’s a fun and easy experiment! You don’t even need a jar or shaking. Let me show you how.
What Are Some Common Mistakes to Avoid When Making Butter?
To make butter successfully, I learned to avoid common mistakes like using warm milk and not shaking vigorously enough. Troubleshooting tips include adding a pinch of salt and using a cold jar to speed up the process.
Can I Use a Blender or a Food Processor Instead of Shaking the Jar?
Yes, you can use a blender or food processor instead of shaking the jar to make butter. However, shaking the jar has benefits like getting some exercise and having fun while making butter.
How Long Can Homemade Butter Be Stored Before It Goes Bad?
Homemade butter can be stored in the refrigerator for up to two weeks. It’s important to keep it in an airtight container to prevent it from absorbing odors. Signs that it has gone bad include a sour smell and mold.
Conclusion
In conclusion, making butter in the classroom is a fun and educational activity that allows students to explore the science behind food production. By gathering simple materials and following a step-by-step process, students can create their own homemade butter.
It’s like a magical transformation, just like the caterpillar turning into a butterfly. The excitement and joy on their faces when they see the cream turning into butter is priceless.
Not only do they learn about the science of emulsion, but they also get to enjoy and share their delicious creation with others.
So go ahead, grab some cream, and let the butter-making adventure begin!