Connect with us

Recipes & Culinary Uses

Quick Microwave Method to Make Clarified Butter

Published

on

An image showcasing the process of making clarified butter in the microwave

I have always been a fan of the rich, nutty taste of clarified butter, but using the traditional stovetop method can take up a lot of time.

That’s why I was thrilled to discover a quicker way to make it in the microwave. In just a few minutes, you can have a jar of golden, clarified goodness ready to use in your favorite recipes.

Trust me, once you try making clarified butter this way, you’ll never go back to the old method.

Key Takeaways

  • Making clarified butter in the microwave is quick and convenient.
  • Clarified butter made in the microwave is a healthier alternative to regular butter as it contains less lactose and milk solids.
  • Clarified butter made in the microwave is rich in essential fatty acids and vitamins A, D, E, and K.
  • Making clarified butter in the microwave is a cost-effective option compared to buying it from the store.

The Benefits of Making Clarified Butter in the Microwave

I love making clarified butter in the microwave because it’s quick and convenient. Not only does it save me time, but it also has numerous health benefits when used in cooking.

Advertisement

Clarified butter is known to be a healthier alternative to regular butter as it contains less lactose and milk solids. It’s also rich in essential fatty acids and vitamins A, D, E, and K. By making clarified butter at home, I can ensure its quality and freshness.

Moreover, it’s a cost-effective option compared to buying it from the store. The process is simple, and the ingredients required are minimal, which contributes to significant cost savings in the long run.

Making clarified butter in the microwave allows me to enjoy its health benefits and save money simultaneously.

The Tools You’ll Need to Make Clarified Butter in the Microwave

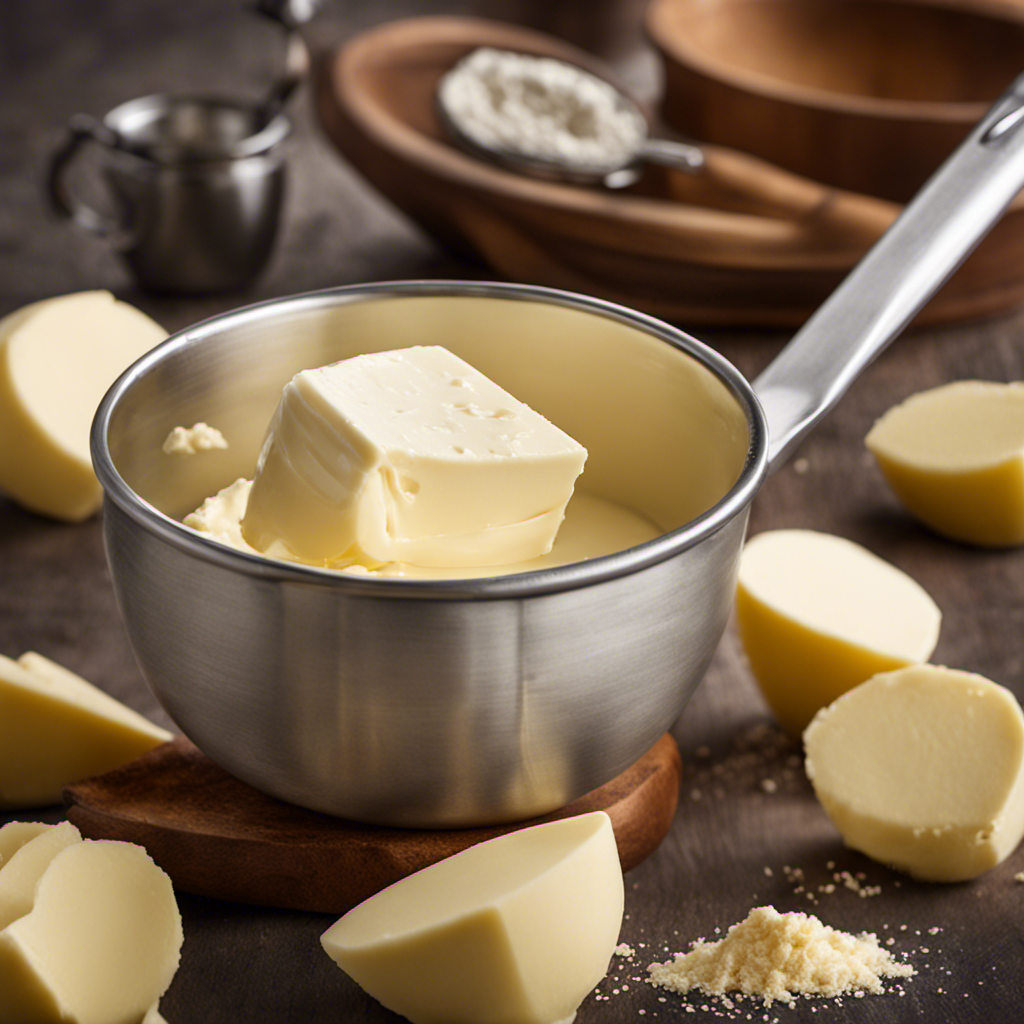
To prepare clarified butter in the microwave, all you’ll need are a microwave-safe bowl, a fine-mesh strainer, and a heatproof spatula. It’s important to use a microwave-safe bowl to prevent any accidents or damage to your microwave. Additionally, always use oven mitts or a heatproof spatula when handling hot bowls to avoid burns.

Making clarified butter in the microwave isn’t only convenient but also safe if you follow proper microwave safety guidelines. While the microwave method is a popular and efficient way to clarify butter, there are alternative methods such as using a stovetop or slow cooker. However, the microwave method offers a quicker and more convenient way to clarify butter without compromising on quality.

Advertisement

Now let’s move on to the step-by-step instructions for clarifying butter in the microwave.

Step-by-Step Instructions for Clarifying Butter in the Microwave

First, place the microwave-safe bowl with the butter in the microwave. Set the microwave to medium power and heat the butter for about 2 minutes, or until it melts completely.

Here are some alternative methods to clarify butter in the microwave:

Advertisement
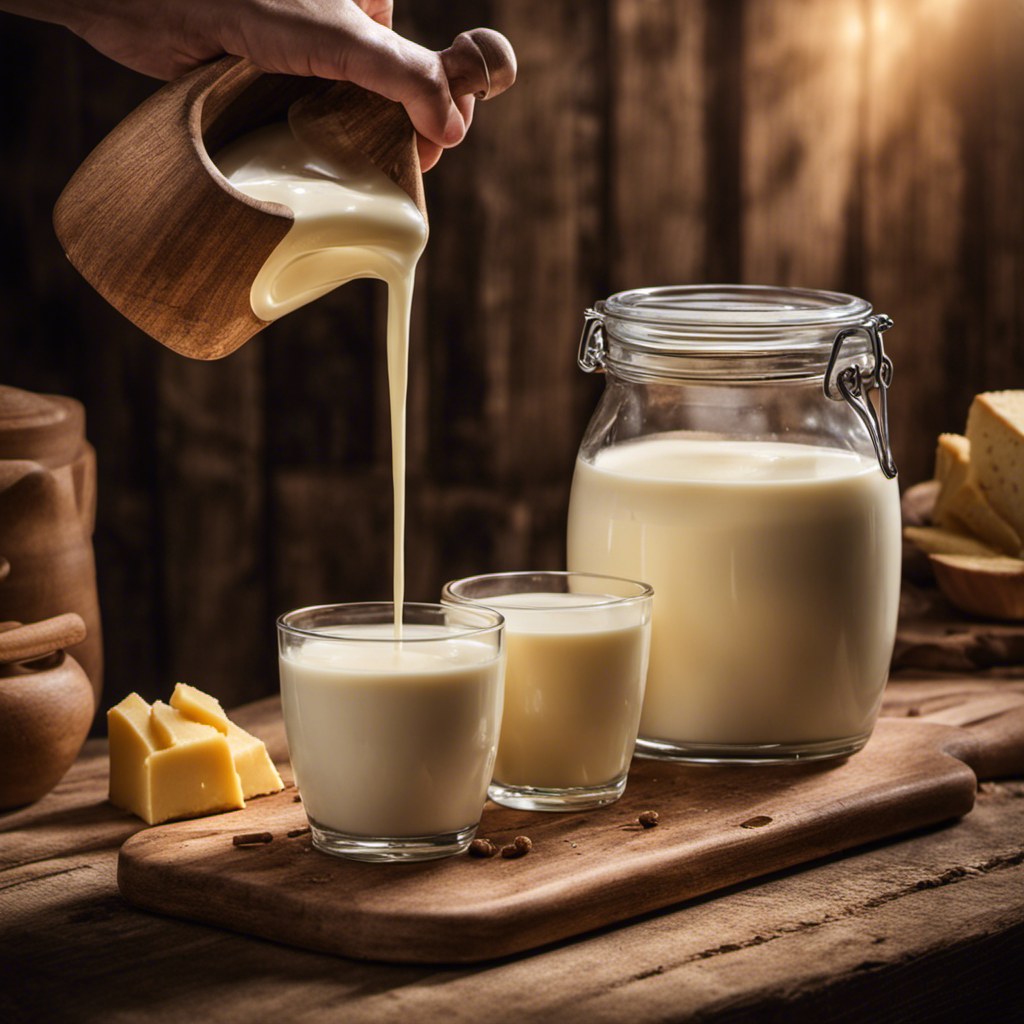
  • Use a microwave-safe glass measuring cup instead of a bowl for easier pouring.
  • Place a microwave-safe plate on top of the bowl to prevent splattering.
  • Add a pinch of salt to the butter before melting to enhance the flavor.
  • Stir the melted butter gently before clarifying to distribute any solids evenly.
  • Let the clarified butter cool for a few minutes before straining to avoid burns.

Common mistakes to avoid when clarifying butter in the microwave include overheating, not using a microwave-safe container, and pouring the butter too quickly, causing the solids to mix with the clarified butter.

Tips and Tricks for Perfectly Clarified Butter in the Microwave

Using a glass measuring cup instead of a bowl makes it easier to pour the clarified butter after it has been melted in the microwave. However, there are alternative microwave methods for clarifying butter that you can try.

One method is to place the butter in a microwave-safe bowl and cover it with a microwave-safe lid or microwave-safe plastic wrap with a few holes poked in it. This helps to prevent any splattering and allows the butter to melt evenly.

Another method is to use a microwave-safe glass jar with a lid. Simply place the butter in the jar, cover it with the lid, and microwave in short intervals, stirring in between, until the butter is melted and the milk solids have settled at the bottom.

When clarifying butter in the microwave, there are a few common mistakes to avoid. Firstly, using too high of a power setting can cause the butter to splatter or burn. It’s best to use a lower power setting, such as 50% power, and melt the butter in short intervals, checking and stirring frequently.

Secondly, microwaving the butter for too long can also lead to burnt butter or a bitter taste. It’s important to keep a close eye on the butter and stop microwaving as soon as it has melted and the milk solids have settled.

Advertisement

Lastly, not straining the butter properly can result in impurities and solids remaining in the clarified butter. Be sure to strain the melted butter through a fine-mesh sieve or cheesecloth to remove any unwanted particles.

Creative Uses for Homemade Clarified Butter

One of my favorite ways to utilize homemade clarified butter is by drizzling it over freshly popped popcorn for a rich and savory snack. The unique recipes using clarified butter are endless, and it adds a delicious flavor to both sweet and savory dishes.

Here are five creative uses for homemade clarified butter:

Advertisement
  • Roasted vegetables: Toss your favorite veggies in clarified butter, sprinkle with salt and pepper, and roast them in the oven for a crispy and flavorful side dish.

  • Pancakes and waffles: Substitute regular butter with clarified butter in your pancake and waffle batter for a lighter and more delicate texture.

  • Grilled cheese sandwiches: Spread a thin layer of clarified butter on the outside of your grilled cheese sandwich before grilling to achieve a perfectly golden and crispy crust.

  • Hollandaise sauce: Use clarified butter as the base for a rich and velvety hollandaise sauce to drizzle over eggs Benedict or steamed asparagus.

  • Baking: Replace regular butter with clarified butter in your baked goods for a moist and tender texture.

In addition to its versatility, using clarified butter in cooking also offers health benefits. It’s lactose-free, making it suitable for those with lactose intolerance. It’s also rich in healthy fats and contains vitamins A, D, E, and K. So not only does clarified butter add a delicious flavor to your dishes, but it also provides nutritional value.

Frequently Asked Questions

Can I Use Any Type of Butter to Make Clarified Butter in the Microwave?

Yes, you can use any type of butter to make clarified butter in the microwave. However, it’s important to note that different types of butter may have slightly different flavors and textures, so the end result may vary.

If you don’t have a microwave, there are alternative methods for making clarified butter, such as using a stove or a slow cooker.

To achieve the perfect texture and flavor in clarified butter, it’s crucial to follow the right temperature and time guidelines.

How Long Does It Take to Clarify Butter in the Microwave?

Clarifying butter in the microwave is a quick and convenient method. It usually takes about 5-7 minutes, depending on the amount of butter being clarified.

Advertisement

The process involves melting the butter in the microwave and then allowing it to rest so that the milk solids separate from the golden clarified butter. This method doesn’t significantly affect the flavor of the butter.

However, there are potential risks, such as overheating and splattering, so it’s important to be cautious and use a microwave-safe container.

Can I Store Clarified Butter in the Refrigerator?

Yes, you can definitely store clarified butter in the refrigerator. It’s actually a great way to extend its shelf life and keep it fresh for longer.

Clarified butter has a higher smoke point than regular butter, making it perfect for cooking and sautéing. It’s also commonly used in baking and as a spread.

What Is the Difference Between Clarified Butter and Regular Butter?

Clarified butter and regular butter differ in a few key ways.

Advertisement

Firstly, clarified butter has a higher smoke point, making it ideal for cooking applications like sautéing and frying. Regular butter, on the other hand, has a lower smoke point and can burn easily.

Additionally, clarified butter has a longer shelf life due to the removal of milk solids, making it less prone to spoilage.

Nutritionally, clarified butter contains higher levels of fat and fewer carbohydrates and proteins compared to regular butter.

Can I Use Clarified Butter for Baking Purposes?

I love baking with clarified butter! It adds a rich and nutty flavor to my cakes and cookies. Plus, it has a higher smoke point than regular butter, which means it won’t burn easily in the oven.

The process of clarifying butter removes the milk solids, leaving behind pure golden fat. This results in a lighter and more tender texture in baked goods.

Advertisement

Conclusion

In the magical realm of the microwave, butter transforms into golden clarity, shedding its impurities and embracing purity. With the right tools and a simple process, you can create this liquid gold in the comfort of your kitchen.

The microwave becomes a vessel of alchemy, unraveling the hidden potential of butter. So, dare to embark on this culinary adventure, and let your taste buds dance to the symphony of perfectly clarified butter.

Continue Reading
Advertisement

Recipes & Culinary Uses

Gourmet Lobster: Best Butter Poached Lobster Recipe!

Celebrate culinary excellence with our luxurious butter-poached lobster recipe, a decadent dish that will elevate your dining experience to new heights.

Published

on

By

delicious lobster with butter

Indulge in the epitome of culinary decadence with our exquisite butter-poached lobster recipe that promises to elevate your dining experience to new heights. Customize with garlic, chives, and Sauvignon Blanc for rich flavors. Use the Beurre Monté technique for a velvety sauce and maintain a gentle simmer during cooking. Opt for cold-water lobster tails, thawed and patted dry for even cooking. Serve with Chardonnay or Sauvignon Blanc for a gourmet touch. Pair with herbed risotto or lemon-infused asparagus. Enhance your dish further by choosing quality ingredients and complementary sides. Elevate your cooking and impress with a sophisticated meal.

Key Takeaways

  • Choose quality cold-water lobster tails for superior flavor and texture.
  • Implement Beurre Monté technique for a velvety sauce.
  • Use white wine, garlic, and lemon juice for enhanced flavors.
  • Serve with complementary sides like herbed risotto or lemon-infused asparagus.
  • Follow precise cooking techniques for tender, gourmet butter-poached lobster.

Recipe Overview

For a delectable dining experience, let's explore the enticing Recipe Overview of butter poached lobster. When preparing butter poached lobster tails, fresh lobster meat is the star of the show. The tails are gently poached in a luxurious bath of butter and poaching liquid over low heat to make sure they remain tender and juicy. The recipe typically calls for unsalted butter, white wine, and a selection of herbs to infuse the meat with rich flavors.

The process of poaching the lobster in butter results in a glossy sauce known as Beurre Monté that elevates the dish to a gourmet level. This classic cooking technique not only enhances the natural sweetness of the lobster but also creates a velvety texture that's truly indulgent.

The simplicity of the ingredients paired with the impressive results make butter poached lobster a go-to dish for special occasions or when you want to pamper yourself with a decadent meal.

Ingredients and Substitutions

recipe flexibility and options

Let's talk about the importance of ingredient variety and substitution options when preparing butter-poached lobster.

By exploring different herbs, spices, and flavor profiles, you can tailor the dish to your liking.

Understanding potential ingredient swaps allows for flexibility in creating a customized butter-poached lobster recipe that suits your taste preferences.

Advertisement

Ingredient Variety

Customize the flavors of your butter-poached lobster by experimenting with sliced garlic cloves, chopped chives, or other herbs and spices.

When using cold-water lobster tails for this recipe, make sure to thaw them thoroughly before cooking.

To make butter-poached lobster, start by heating the unsalted butter over low heat. Add the lobster tails and poach them for about one minute until the meat is just cooked through.

For added depth, consider using wines like Sauvignon Blanc, Pinot Grigio, or Chardonnay in your poaching liquid. These wines can complement the delicate flavors of the lobster and butter.

By choosing unsalted butter, you can better control the saltiness of the dish. Feel free to adjust the herbs and spices to suit your taste preferences.

Advertisement

This way, you can create a butter-poached lobster dish that's truly unique and tailored to your liking.

Substitution Options

Consider substituting ingredients in your butter poached lobster recipe to create new and exciting flavor variations. Swap frozen cold water lobster tails with warm water ones for a different taste experience.

Instead of using unsalted butter, try clarified butter or ghee to add a nutty richness to the dish. Experiment with herbs like tarragon, thyme, or basil to customize the flavor profile to your liking. Enhance the savory notes by adding minced shallots or onions to the poaching liquid.

For a deeper flavor dimension, replace white wine with dry vermouth or seafood stock in the recipe. These substitutions can elevate your butter poached lobster dish and offer a fresh take on this gourmet delicacy.

Don't be afraid to mix and match these ingredients to create a buttery lobster masterpiece that suits your palate perfectly.

Advertisement

Cooking Techniques

mastering culinary skills efficiently

To achieve a velvety sauce for your Butter Poached Lobster Tail, implement the finest technique – Beurre Monté. This method creates a stable emulsion using butter and liquid, enhancing the luxuriousness of the dish.

When preparing the lobster tails, use kitchen shears to carefully remove the meat, ensuring precision and minimal damage. Cook the lobster tails over low heat in the poaching liquid to maintain tenderness.

Thawing frozen lobster tails thoroughly and patting them dry before poaching is essential for even cooking and ideal texture. Keep the poaching liquid at a gentle simmer to prevent overcooking.

Checking the doneness of the lobster tails by observing their opaque appearance helps prevent them from becoming tough and rubbery. By following these cooking techniques, you can elevate your Butter Poached Lobster Tail to a gourmet level, impressing even the most discerning seafood connoisseurs.

Cooking Tips

improve your culinary skills

When cooking lobster, using a thermometer guarantees perfect doneness every time.

Thawing frozen lobster tails thoroughly is vital to prevent uneven cooking.

Remember to pat dry the lobster tails before poaching to avoid excess water in the poaching liquid.

Advertisement

Lobster Cooking Techniques

For a perfectly cooked lobster tail, maintain a precise poaching temperature of 180F using a thermometer.

When poaching lobster tails, remember the following tips:

  • Thaw frozen lobster tails thoroughly and pat them dry to prevent excess water in the cooking liquid.
  • Avoid overcrowding the saucepan to guarantee even cooking of the lobster tails.
  • Remove the digestive vein from the lobster tail meat and clean it thoroughly before cooking.

To prepare the Butter Poached Lobster Tail recipe, use unsalted butter, fresh lemon juice, dry white wine, and a pinch of red pepper flakes.

Heat the butter over low heat in a saucepan, add one piece of the cleaned lobster tail at a time, and poach them gently until they reach the desired doneness.

Remember to check the lobster tails a few minutes before the recommended cooking time to prevent overcooking them.

Enjoy the succulent and flavorful lobster tails prepared using these cooking techniques.

Advertisement

Lobster Serving Suggestions

Consider pairing your butter-poached lobster with Chardonnay or Sauvignon Blanc for a delightful wine accompaniment. To complement the succulent lobster, serve it alongside a citrusy quinoa salad or warm baguette slices. Enhance the meal further by adding herbed risotto or lemon-infused asparagus for an explosion of flavors.

When dealing with leftovers, remember to refrigerate them promptly in an airtight container to maintain freshness. When reheating, use a gentle heat setting on a pan. Incorporate a bit of the poaching liquid to keep the lobster moist and prevent it from becoming overcooked. This method will help retain the lobster's tenderness and flavors, ensuring a delicious meal even when reheating.

Serving, Storage, and Reheating

meal prep essentials explained

To maintain freshness and flavor, refrigerate any leftover butter-poached lobster promptly in an airtight container.

When it comes to serving, storage, and reheating your delectable lobster, here are some essential tips to guarantee a delightful culinary experience:

  • Refrigerate promptly: Store any uneaten lobster in an airtight container in the refrigerator to prevent spoilage and preserve its quality.
  • Reheat gently: When reheating, use a pan over low to medium heat to prevent overcooking and maintain the lobster's tenderness.
  • Utilize poaching liquid: Incorporate a bit of the poaching liquid when reheating to keep the lobster meat moist and flavorful.

Butter Poached Lobster

delicious lobster cooked perfectly

Enhance your culinary skills by mastering-immerse yourself in the exquisite art of butter poached lobster, a decadent dish that elevates the flavors of tender lobster meat with a rich and velvety texture.

Butter poached lobster involves gently cooking juicy lobster in a mixture of butter and white wine, creating a rich and flavorful dish perfect for special occasions. The use of Beurre monté, a French technique, results in a velvety sauce that heightens the delicate texture of the lobster.

The gentle cooking process of butter poached lobster guarantees that the lobster remains tender and juicy, without losing its natural sweetness. The poaching liquid used can also be served alongside the lobster, adding an extra layer of flavor and richness to the dish.

Advertisement

This gourmet delicacy is ideal for those looking to indulge in a luxurious meal at home or impress guests on special occasions.

Elevate Your Cooking

enhancing culinary skills

Looking to take your culinary skills to the next level? Elevate your cooking with these expert tips for preparing a gourmet butter-poached lobster dish using uncooked lobster tails and the Beurre monté technique:

  • Opt for cold-water lobster tails: Their sweet, delicate flavor and firm texture will enhance your dish, providing a gourmet dining experience.
  • Use quality ingredients: Incorporate white wine, garlic, and lemon juice to enhance the natural flavors of the lobster, creating a luxurious and flavorful meal.
  • Pair with complementary sides: Serve your butter-poached lobster with herbed risotto or lemon-infused asparagus to further elevate the dish to a gourmet level.

To ensure success, follow key steps like using kitchen shears for precise lobster tail meat removal and maintaining a gentle simmer during cooking. By implementing these techniques and tips, you'll be on your way to impressing your guests with a sophisticated and delicious lobster feast.

Frequently Asked Questions

What Kind of Butter Do Restaurants Use for Lobster?

Restaurants typically use high-quality unsalted butter for butter-poached lobster to control salt levels and enhance lobster flavor. Some may opt for clarified butter due to its higher smoke point. The choice varies based on chefs' preferences and dish style.

What Is the Tastiest Way to Cook Lobster?

When cooking lobster, the tastiest way is to butter poach it. This technique enhances the natural sweetness and delicate flavor of the meat, creating a luxurious, velvety texture. It's a gourmet experience you won't forget.

How to Season Lobster When Boiling?

When boiling lobster, season it with salt and lemon for sweetness. Enhance flavor by adding herbs like thyme or bay leaves. For a kick, throw in garlic, peppercorns, or red pepper flakes. Customize with paprika or cajun seasoning.

What Is Poaching in Butter?

So, what is poaching in butter? Well, it's a gentle cooking method where food luxuriates in warm, melted butter. This technique keeps things moist and intensifies flavors, resulting in tender, silky dishes.

Advertisement

Conclusion

Just like a lobster gracefully glides through the ocean depths, this butter poached lobster recipe will elevate your culinary skills to new heights.

With each succulent bite, you'll feel as though you're diving into a sea of gourmet flavors.

So, don't be afraid to take the plunge and try this luxurious dish – you'll be swimming in deliciousness in no time!

Continue Reading

Recipes & Culinary Uses

Creamy Delight: Best Butter Pecan Ice Cream Recipe for Summer!

Yearning for a creamy summer treat that will leave you craving more?

Published

on

By

butter pecan ice cream

Savor a delicious summer treat with our Butter Pecan Ice Cream recipe. Mix butter, brown sugar, cream, and pecans for a creamy delight. Melt butter, cook pecans, whisk eggs, and blend for a rich flavor. Add pecans, cream, and vanilla, then freeze to perfection. Master this easy-to-follow recipe for a tasty dessert to beat the heat.

Key Takeaways

  • Rich and creamy blend of butter, brown sugar, and heavy cream
  • Toasted pecans for a nutty crunch and flavor
  • Easy-to-follow steps for homemade ice cream perfection
  • Customization options with variations like bourbon or chocolate
  • Perfect summer treat with a decadent, refreshing taste

Recipe Ingredients for Butter Pecan Ice Cream

To create a delectable batch of butter pecan ice cream, gather the essential ingredients listed in the recipe.

You'll need:

  • Butter
  • Brown sugar
  • Heavy cream
  • Pecans

These ingredients combine to bring out the rich and nutty flavors of this classic dessert.

The brown sugar adds a caramel-like sweetness, while the heavy cream contributes to a creamy texture that's essential for a decadent treat.

Pecans, when toasted in butter, provide a delightful crunch and enhance the overall flavor profile of the ice cream.

Cooking Instructions for Homemade Ice Cream

making ice cream at home

Start by melting butter in a skillet to infuse the pecans with a rich, nutty flavor for your homemade butter pecan ice cream.

Here's a quick guide to help you make this creamy delight:

Advertisement
  • Melt butter and cook pecans for flavor.
  • Whisk eggs and combine with half-and-half and brown sugar for a creamy base.
  • Cook until thickened, then mix with eggs in a bowl.
  • Add cream, pecans, and vanilla extract.
  • Freeze the mixture in an ice cream maker.

Following these steps will guarantee your homemade butter pecan ice cream turns out rich and delicious.

Remember to carefully adhere to the manufacturer's instructions for your ice cream maker to achieve the perfect consistency.

Enjoy the process of creating this delightful treat that will surely be a hit during the summer months.

Ice Cream Preparation Steps

ice cream recipe instructions

Mix half and half with brown sugar over medium heat in a large bowl to prepare the ice cream base.

Next, whisk beaten eggs and temper them with the warm milk mixture to create a smooth custard.

Once done, thicken the mixture on low heat, then cool it over an ice bath to achieve ideal texture.

After that, stir in heavy cream, vanilla extract, maple extract, and a pinch of salt for rich flavor.

Advertisement

Remember to refrigerate the mixture for 1 1/2 – 2 hours before churning it into creamy butter pecan ice cream.

This process ensures that the flavors meld together beautifully and the ice cream attains the perfect consistency for scooping and savoring.

Nutritional Information and Tips

healthy eating guidance provided

Considering the rich and creamy nature of homemade butter pecan ice cream, it's important to be mindful of its nutritional content and serving size. When indulging in this delectable dessert, remember these essential tips:

  • Portion Control: Enjoy in moderation to savor the flavors without overindulging.
  • Brown Sugar Sweetness: Opt for a moderate amount of brown sugar to balance sweetness without overwhelming the palate.
  • Room Temperature Ingredients: Confirm ingredients like butter and heavy cream are at room temperature for a smoother texture.
  • Nutritional Awareness: Be mindful that homemade butter pecan ice cream can vary in nutritional content, so adjust ingredients accordingly.
  • Consultation: Seek advice from a nutritionist or healthcare provider for personalized guidance on incorporating this treat into a balanced diet.

Homemade Butter Pecan Ice Cream Variations

delicious homemade ice cream

Explore creative twists on traditional butter pecan ice cream by incorporating different nuts, spirits, sauces, chocolates, and dairy-free alternatives.

For a unique flavor, try substituting pecans with walnuts or almonds in the full recipe. Toast the nuts in a separate bowl until browned and fragrant, then chop them finely enough to coat in the ice cream mixture.

To add a boozy kick, mix in a splash of bourbon or rum to the base as you churn the ice cream. For an extra indulgent touch, swirl in caramel sauce or fudge ripple throughout the mixture.

Incorporate chunks of chocolate or chocolate-covered nuts for a delightful contrast in texture, giving each bite a sweet surprise.

Advertisement

If you prefer a lighter, dairy-free option, consider using coconut milk or almond milk as a substitute for traditional dairy products. These alternatives provide a creamy base while catering to plant-based diets.

Experiment with these variations to create a personalized butter pecan ice cream that suits your taste preferences.

Frequently Asked Questions

What Is the Secret to Making Ice Cream Very Creamy?

To make ice cream very creamy, you use a rich base of ingredients like heavy cream, eggs, and sugar. Chilling the base before churning is crucial for a smoother texture. Adding vanilla extract enhances creaminess, and slow churning prevents a dense outcome.

What Flavor Is the Ice Cream in Butter Pecan?

The ice cream in butter pecan is a delightful blend of buttery richness, vanilla sweetness, and maple undertones, perfectly paired with toasted pecans for a nutty crunch. This flavor combination creates a harmonious and indulgent treat.

What's the Difference Between Butter Pecan Ice Cream and Praline Pecan Ice Cream?

In butter pecan ice cream, you'll savor the buttery richness of pecans blended with a creamy base. On the other hand, praline pecan ice cream highlights caramelized sweetness with a swirl of praline sauce for a delightful flavor contrast.

Advertisement

What Age Group Eats Butter Pecan Ice Cream?

You'll find that adults and older individuals, typically in the 30-60 age group, enjoy butter pecan ice cream. It's a favorite among those with a more refined palate, drawn to its rich and nutty flavor.

Conclusion

So there you have it, folks! Whip up this buttery, nutty delight for a taste of summer in every scoop.

Don't cry over spilled milk – grab a cone and enjoy this creamy treat that's sure to satisfy your sweet tooth.

Get churning and indulge in the best butter pecan ice cream you've ever tasted!

Advertisement
Continue Reading

Recipes & Culinary Uses

Festive Favorites: Best Peanut Butter Blossoms Recipe for Holidays!

Unleash the ultimate holiday baking magic with the best Peanut Butter Blossoms recipe – an irresistible treat that will elevate your festive celebrations!

Published

on

By

holiday baking with flair

Elevate your holiday baking with the ultimate Peanut Butter Blossoms recipe. Cream together peanut butter, butter, sugars, and salt, then add egg and vanilla. Roll dough into balls, coat in brown sugar, bake until golden, then press a Hershey's kiss on top. Adjust baking time as needed. Explore ingredient swaps for a personalized touch. Enjoy with hot cocoa or pair with savory dishes. For more tips, ideas, and customization options, the recipe holds more festive surprises.

Key Takeaways

  • Cream together peanut butter, butter, sugars for rich flavor.
  • Bake at 375°F for 8-10 minutes for soft, chewy cookies.
  • Customize with ingredient swaps like almond butter or maple syrup.
  • Pair with savory dishes or hot cocoa for holiday enjoyment.
  • Press Hershey kisses onto warm cookies for a classic finish.

Ingredients for Peanut Butter Blossoms

For the classic Peanut Butter Blossoms recipe, gather peanut butter, butter, sugar, an egg, and Hershey's kisses as your essential ingredients.

Peanut butter is the star, offering a rich flavor that blends perfectly with the sweetness of the cookies.

Butter plays a pivotal role by adding moisture and richness to the dough, ensuring a soft and chewy texture.

The sugar not only sweetens the cookies but also contributes to their festive appeal, making them a perfect treat for any occasion.

Finally, the Hershey's kisses on top provide a delightful chocolatey finish that elevates these cookies to a whole new level of deliciousness.

Advertisement

Together, these ingredients create a harmonious blend of flavors and textures that make Peanut Butter Blossoms a beloved classic for holiday baking or any time you crave a sweet and satisfying treat.

Recipe Steps for Peanut Butter Blossoms

bake peanut butter cookies

To make Peanut Butter Blossoms, start by creaming together peanut butter, butter, sugars, and salt until light and fluffy.

Next, add in the egg and vanilla extract, making sure to mix well to combine all the ingredients thoroughly.

Then, gradually incorporate the dry ingredients into the wet mixture until a smooth dough forms.

Once the dough is ready, roll it into balls and coat each ball generously in brown sugar.

Place the sugar-coated dough balls on a baking sheet, making sure to leave enough space between them for spreading during baking.

Advertisement

Bake the cookies in a preheated oven until they turn a beautiful golden brown.

As soon as the cookies are out of the oven, press a Hershey's kiss into the center of each cookie gently.

The heat from the freshly baked cookies will melt the chocolate just enough to adhere it to the cookie.

These Peanut Butter Blossoms are a delightful treat perfect for Christmas celebrations!

Pro Tips for Making Peanut Butter Blossoms

baking perfect peanut blossoms

To enhance your peanut butter blossom baking experience, consider adjusting the baking time based on your oven's performance for best results.

Additionally, explore ingredient substitutions to cater to dietary preferences or allergies without compromising the flavor or texture of the cookies.

Advertisement

These pro tips can help you customize your peanut butter blossoms while ensuring delicious outcomes.

Baking Time Recommendations

Achieving the ideal texture for your peanut butter blossoms involves baking them at 375°F for 8-10 minutes. This baking duration guarantees that the cookies have a soft and chewy consistency while allowing the Hershey kisses on top to be softened but not completely melted.

Once out of the oven, remember to press the Hershey kisses onto the cookies immediately to secure them in place for that classic appearance.

For the best outcomes, chill the cookie dough for about 30 minutes before baking. This step helps the cookies maintain their shape and prevents excessive spreading during baking, ensuring your peanut butter blossom cookies are perfectly formed and ready to impress during your holiday baking.

Shortening or extending the baking time can alter the texture of the cookies. A quick bake of 6-8 minutes produces softer and chewier cookies, while longer baking times yield a slightly crispier consistency. Stick to the recommended 8-10 minutes for the best soft and chewy peanut butter blossoms.

Advertisement

Ingredient Substitutions

Consider incorporating different ingredients to elevate the flavor and nutritional profile of your peanut butter blossoms. For a healthier option, swap out shortening with unsalted butter to achieve a unique texture and taste in your cookies.

Try using natural peanut butter instead of creamy to add a wholesome twist to the classic recipe. If you're looking to reduce the glycemic impact, substitute brown sugar with coconut sugar in your baking. For a natural sweetener alternative, replace regular granulated sugar with maple syrup in the cookie dough mixture.

Additionally, for a distinct flavor experience, experiment with almond butter as a substitute for peanut butter in your blossoms. These ingredient substitutions can bring a new dimension to your peanut butter blossoms, making them not only delicious but also tailored to your dietary preferences.

Upgrade your baking game this holiday season with these creative twists on a beloved recipe!

Serving Suggestions for Peanut Butter Blossoms

peanut butter cookie recipe

Enhance the enjoyment of your peanut butter blossoms by pairing them with savory dishes like lasagna tortellini soup for a satisfying meal. These classic cookies also complement family-friendly dinners such as easy ground beef shepherd's pie and creamy broccoli cheddar soup, making for a delightful combination. The holiday season calls for cozy treats, and the sweet nuttiness of peanut butter blossoms pairs perfectly with a warm cup of hot cocoa. Whether you're participating in a cookie exchange or looking for a festive touch to your holiday dessert spread, consider rolling the cookies in red, green, and white sugar sprinkles to add a pop of color and fun.

Serving Suggestions Pairing Ideas
Lasagna Tortellini Soup Comforting and hearty meal alongside the cookies
Easy Ground Beef Shepherd's Pie Delicious combination for a family dinner
Creamy Broccoli Cheddar Soup Perfect accompaniment to the nutty cookie flavors

12 Days of Christmas Cookies Recipes

baking traditions for the holidays

Indulge in a variety of delightful Christmas cookie recipes each day during the holiday season. One standout choice is the classic Peanut Butter Blossoms. These holiday cookies feature a peanut butter base topped with a Hershey's kiss, making them a beloved treat for cookie exchanges and festive gatherings.

The process of making these cookies is simple yet rewarding. Start by rolling the dough balls in sugar before baking to add a sweet crunch to each bite. The combination of rich peanut butter flavor and the chocolatey goodness of the Hershey's kiss creates a perfect balance of sweetness.

Advertisement

When enjoying these Christmas cookies, consider pairing them with a glass of milk for a classic and satisfying treat.

Whether you're baking them for your family, a cookie exchange, or a holiday party, Peanut Butter Blossoms are sure to be a hit. Make each day of the holiday season a little sweeter with these delicious cookies.

User Engagement Features

user interaction enhancements

Let's talk about how user interaction features and personalization options enhance your experience with the Peanut Butter Blossoms recipe.

You can engage with others by leaving comments and sharing your results, creating a sense of community around this holiday treat.

Personalization options like name and email entry fields help tailor the experience to your preferences, making it more engaging and enjoyable.

User Interaction Features

Utilizing user engagement features on the website allows for increased participation and feedback from visitors. The comment section enables users to interact with each other and provide valuable feedback on the Peanut Butter Blossoms recipe or share their experiences with Hershey's kisses. By incorporating a reply option, users can engage in conversations, fostering a sense of community around baking these delightful peanut butter cookies.

Advertisement

Moreover, the inclusion of name and email fields not only allows for personalization but also facilitates communication between the website and its visitors. This data storage feature guarantees that users can conveniently access their information for future visits, enhancing their overall user experience.

These user engagement features play an essential role in creating an interactive platform where users can engage, provide feedback, and communicate effectively. Such interaction not only enriches the user experience but also encourages visitors to actively participate in the community surrounding the Peanut Butter Blossoms recipe.

Personalization Options

Enhance your website's user engagement by incorporating personalized options such as commenting, replying, and sharing feedback on the Peanut Butter Blossoms recipe. This level of user interaction not only fosters a sense of community building but also encourages customization and feedback. By allowing users to share their thoughts, results, and experiences with the festive favorites, you create a more engaging and interactive user experience. Additionally, providing users with the option to save their data for future visits and encouraging them to tag @preppykitchen and use #preppykitchen when trying the recipe further enhances their engagement.

Personalization Options Description Benefits
Commenting Users can leave comments on the Peanut Butter Blossoms recipe, sharing their thoughts and experiences. Fosters community building and user engagement.
Replying Users can reply to comments and engage in discussions with other users about the recipe. Encourages active participation and interaction.
Feedback Sharing Users can share feedback on the recipe, providing valuable insights for improvement. Enhances user experience and customization.

Additional Information

clarifying specific details provided

You may find it interesting to know more about the history of the Peanut Butter Blossoms recipe and its cultural significance during the holidays.

  • The Peanut Butter Blossoms recipe's popularity is backed by IRI MULO data, making it a sought-after choice for holiday baking.
  • Copyright for this beloved recipe belongs to The J.M. Smucker Company, a reputable name in the food industry known for quality products.
  • These delightful cookies aren't only perfect for serving at holiday parties but also make excellent gifts due to their festive appeal.

Frequently Asked Questions

Why Are My Peanut Butter Blossoms Dry?

If your peanut butter blossoms are dry, it could be due to using too much flour, overbaking, using natural peanut butter that requires stirring, or not enough butter/shortening. Guarantee precise measurements and follow the recipe closely to maintain moisture.

Why Did My Peanut Butter Blossoms Go Flat?

When making peanut butter blossoms, going flat happens due to overmixing, too much flour, insufficient chilling, or low oven temperature. Remember to avoid these pitfalls. Preheat the oven properly and follow the recipe for perfect blossoms!

What Is America's Favorite Christmas Cookie?

America's favorite Christmas cookie is Peanut Butter Blossoms. Loved for their peanut butter-chocolate combo and nostalgic Hershey's Kiss center, these easy-to-make treats are a holiday staple at parties and gatherings. They're a must-have during the festive season.

Advertisement

What Is Baskin Robbins Peanut Butter Blossom?

You asked about Baskin Robbins Peanut Butter Blossom. It's a delectable seasonal ice cream flavor featuring creamy peanut butter ice cream with a ribbon of more peanut butter and chocolate cookie pieces. Indulge in this festive treat!

Conclusion

Indulge in the warm, gooey goodness of these peanut butter blossoms this holiday season. With the perfect blend of creamy peanut butter and rich chocolate, these cookies are sure to bring joy to your festivities.

Picture yourself surrounded by loved ones, sharing laughter and memories as you enjoy these delicious treats. Let the aroma of freshly baked cookies fill your home and create a cozy, festive atmosphere.

Happy baking and happy holidays!

Advertisement
Continue Reading
Advertisement

Affiliate disclaimer

As an affiliate, we may earn a commission from qualifying purchases. We get commissions for purchases made through links on this website from Amazon and other third parties.

Advertisement

Trending