Connect with us

Recipes & Culinary Uses

Crafting Homemade Butter Extract in 7 Simple Steps

Published

on

An image showcasing the process of making butter extract: depict a mason jar filled with creamy butter, surrounded by fresh, golden buttercups

I have always believed that the secret to excellent cooking is paying attention to the little details. And when it comes to enhancing the flavor of your dishes, nothing compares to the richness of homemade butter extract.

In this article, I’ll guide you through the simple yet rewarding process of making your own butter extract. From choosing the right type of butter to preserving its delightful taste, I’ll share with you the tips and tricks to elevate your culinary creations.

So let’s dive in and unlock the secret to a truly buttery experience.

Key Takeaways

  • Making homemade butter extract allows control over the quality and purity of ingredients.
  • Choosing the right butter, such as unsalted, high-fat butter, is essential for a rich and creamy flavor.
  • The step-by-step process involves melting the butter, infusing it in a sealed jar, straining it, and storing it in a clean jar for up to six months.
  • Troubleshooting tips include adjusting the heat, infusion time, and proper straining to avoid burnt taste, weak flavor, and impurities.

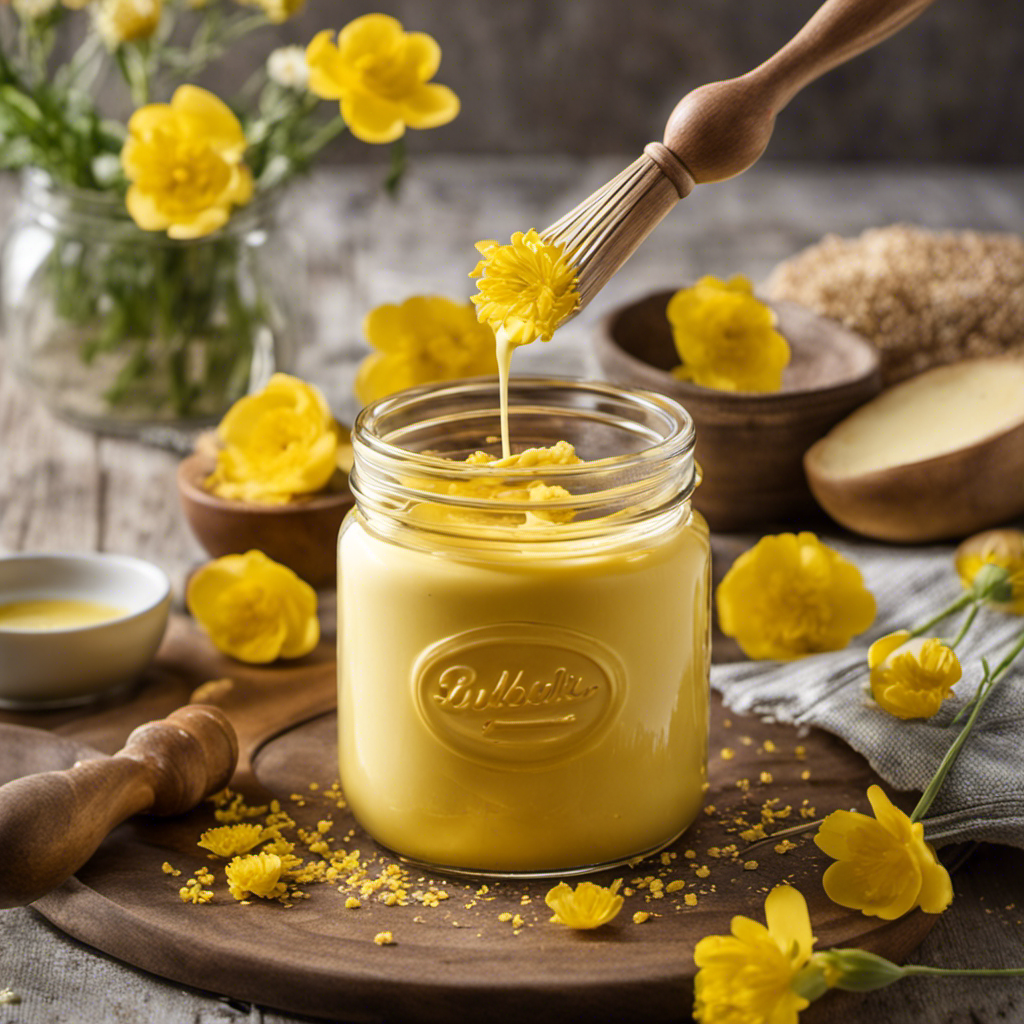
Ingredients Needed for Making Butter Extract

You’ll need three simple ingredients for making butter extract. Butter extract is a concentrated flavoring agent that is commonly used in baking and cooking recipes.

Advertisement

The recipe for making butter extract is quite straightforward. The main ingredients needed are unsalted butter, high-proof vodka, and vanilla extract. The unsalted butter provides the rich and creamy flavor, while the high-proof vodka acts as a solvent to extract the butter flavor. Vanilla extract is added to enhance the overall taste.

Making butter extract at home has several benefits. Firstly, it allows you to control the quality and purity of the ingredients used. Secondly, it can save you money compared to buying pre-made butter extract. Lastly, homemade butter extract imparts a more authentic and intense butter flavor to your dishes.

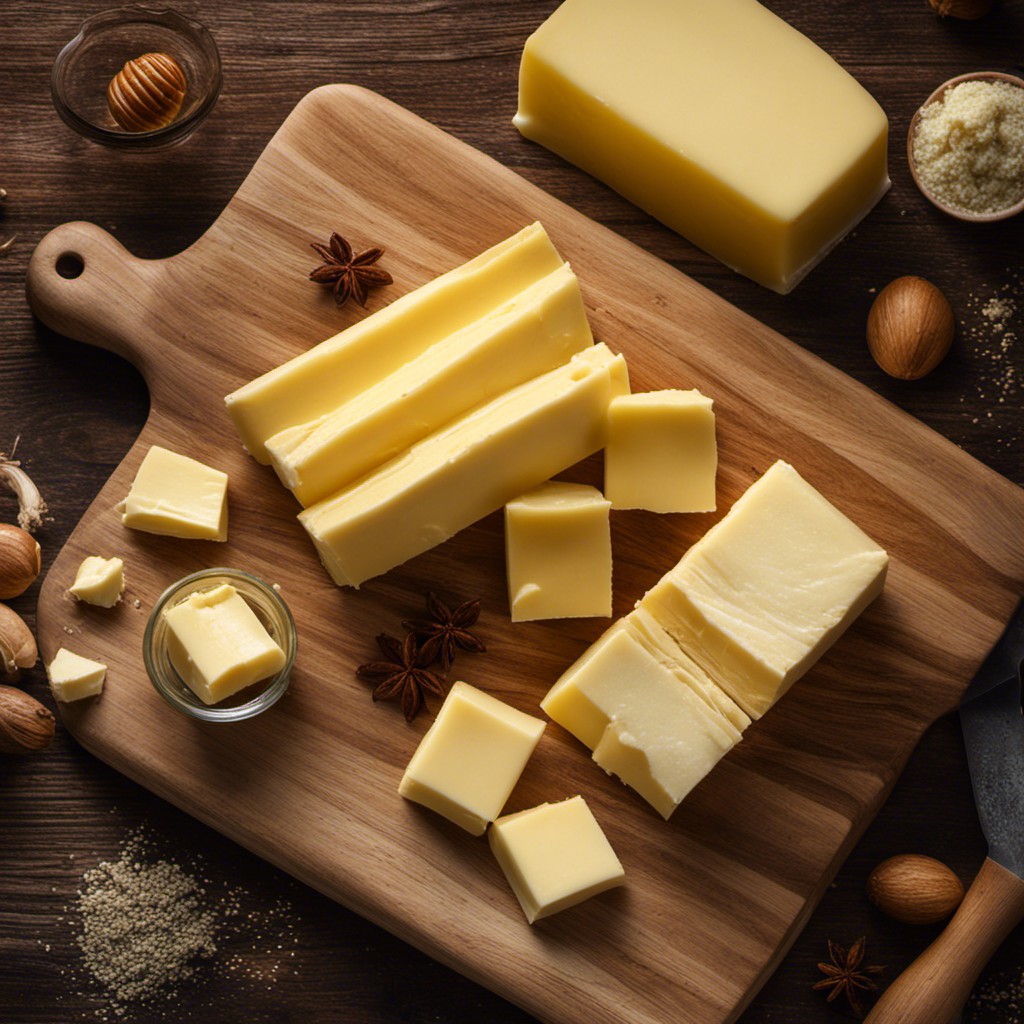
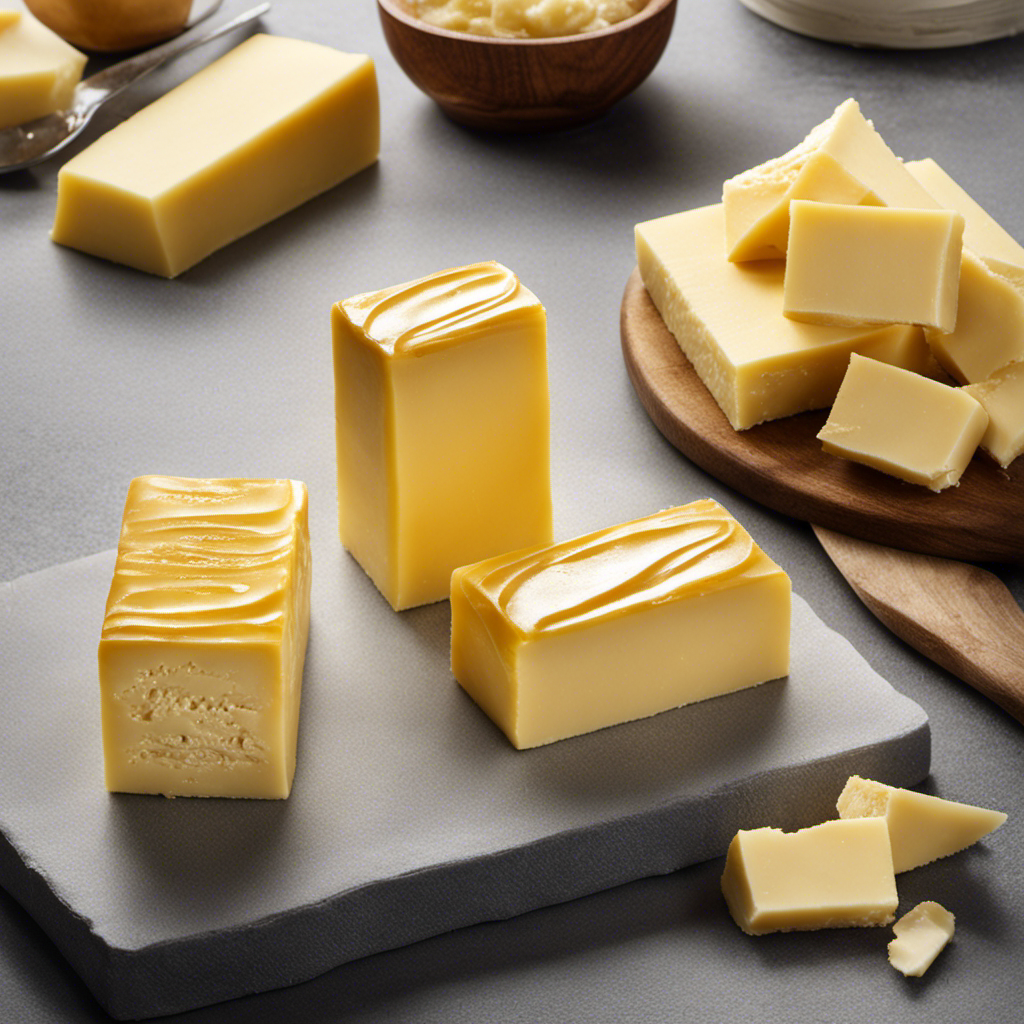
Choosing the Right Type of Butter for Extract

When choosing the right type of butter for your extract, it’s important to consider the fat content. The fat content in butter affects the flavor and texture of the extract, so selecting the appropriate butter is crucial to achieving the desired result.

Here are some common mistakes to avoid when making butter extract:

  • Using low-fat or light butter: These types of butter have a lower fat content, which can result in a weaker flavor and a thinner consistency for your extract.
  • Using margarine or spreads: Margarine and spreads often contain additives and oils that can alter the taste and texture of the extract.
  • Using salted butter: Salted butter may introduce an unwanted salty flavor to your extract.

To ensure the best outcome, it’s recommended to use unsalted, high-fat butter for making butter extract. This will provide a rich, creamy flavor and a smooth consistency.

Now that we’ve selected the right butter, let’s move on to the step-by-step process of making butter extract.

Advertisement

Step-By-Step Process of Making Butter Extract

Now that we’ve got the right butter, let’s dive into the step-by-step process of creating our delicious butter extract. To begin, gather the necessary equipment: a saucepan, a fine-mesh strainer, cheesecloth, and a glass jar with a tight-fitting lid.

  1. Melt the butter: Place the desired amount of butter in the saucepan and heat it over low heat until completely melted. Be careful not to let it burn or brown.

  2. Infuse the butter: Add the melted butter to the glass jar and tightly seal it. Allow the butter to infuse for at least 24 hours, but preferably up to 48 hours, in a cool, dark place.

  3. Strain the extract: After the infusion period, strain the butter extract through the fine-mesh strainer lined with cheesecloth. This will remove any solid particles or impurities.

  4. Store and use: Transfer the strained extract to a clean glass jar with a tight-fitting lid. Store it in a cool, dark place for up to six months. Use it in your favorite recipes to add a rich buttery flavor.

By following these steps and using the right equipment, you can create a high-quality butter extract that will enhance the taste of your dishes.

However, it’s important to be aware of common issues that may arise during the process. Here are some troubleshooting tips:

Advertisement
  • Issue: Extract has a burnt or unpleasant taste.

  • Troubleshooting: Ensure that the butter is melted over low heat and not allowed to brown or burn. Adjust the heat accordingly.

  • Issue: Extract has a weak or faint butter flavor.

  • Troubleshooting: Increase the infusion time to allow for a stronger flavor to develop. You can also try using a higher ratio of butter to extract.

  • Issue: Extract has particles or impurities.

  • Troubleshooting: Make sure to strain the extract properly using a fine-mesh strainer lined with cheesecloth. This will help remove any solids or impurities.

By understanding and addressing these common issues, you can troubleshoot any problems that may arise and ensure that your butter extract turns out perfect every time.

Happy extracting!

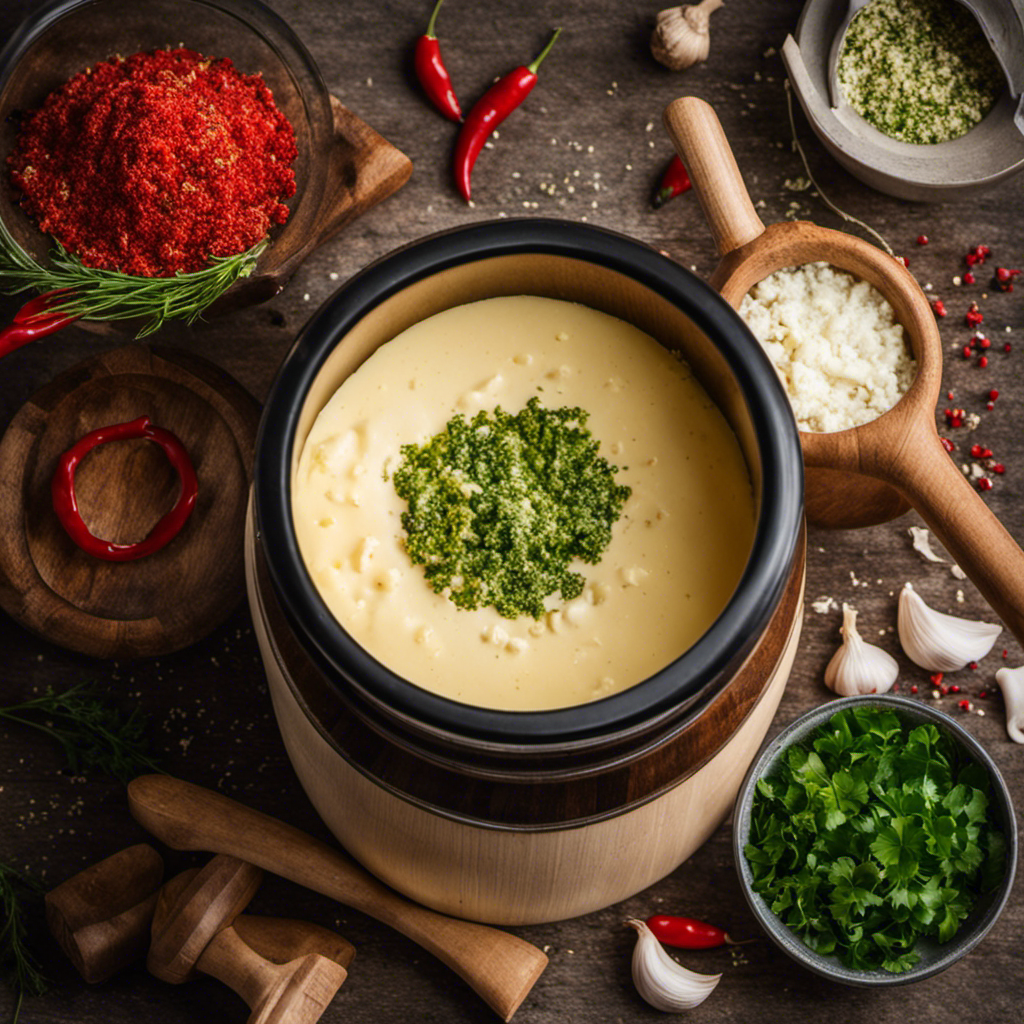
Tips and Tricks for Enhancing the Flavor of Butter Extract

To enhance the flavor of your butter extract, try incorporating different herbs and spices that complement the rich and buttery taste. Experimenting with various flavor combinations can create unique and delicious variations of butter extract. Here are three ideas to get you started:

  • Vanilla and Cinnamon: Add a touch of warmth and sweetness to your butter extract by infusing it with vanilla beans and a sprinkle of cinnamon. This combination pairs well with both sweet and savory dishes.

  • Lemon and Thyme: For a bright and refreshing twist, infuse your butter extract with lemon zest and fresh thyme. This flavor combination works wonderfully in seafood dishes or drizzled over roasted vegetables.

  • Garlic and Rosemary: Create a savory and aromatic butter extract by infusing it with minced garlic and crushed rosemary. This flavor variation is perfect for adding depth to sauces, marinades, or simply spread on warm bread.

Storing and Preserving Homemade Butter Extract

Advertisement

Storing homemade butter extract is simple and convenient, allowing you to enjoy its rich flavors whenever you need a burst of buttery goodness. To ensure its long-lasting quality, it is crucial to employ proper preserving techniques. One effective method is to store the extract in a cool, dark place, such as a pantry or refrigerator. This helps to prevent oxidation and maintain the extract’s freshness. Another option is to freeze the extract in small portions, using ice cube trays, for extended storage. By doing so, you can easily thaw and use the extract as needed without compromising its flavor. Furthermore, homemade butter extract offers endless variations, such as adding vanilla or almond extract for a unique twist. Experimenting with different flavors is a great way to customize your extract and elevate your culinary creations.

Preserving Techniques Homemade Extract Variations
Store in cool, dark place Add vanilla extract
Freeze in small portions Mix with almond extract
Use ice cube trays for easy access Experiment with different flavors

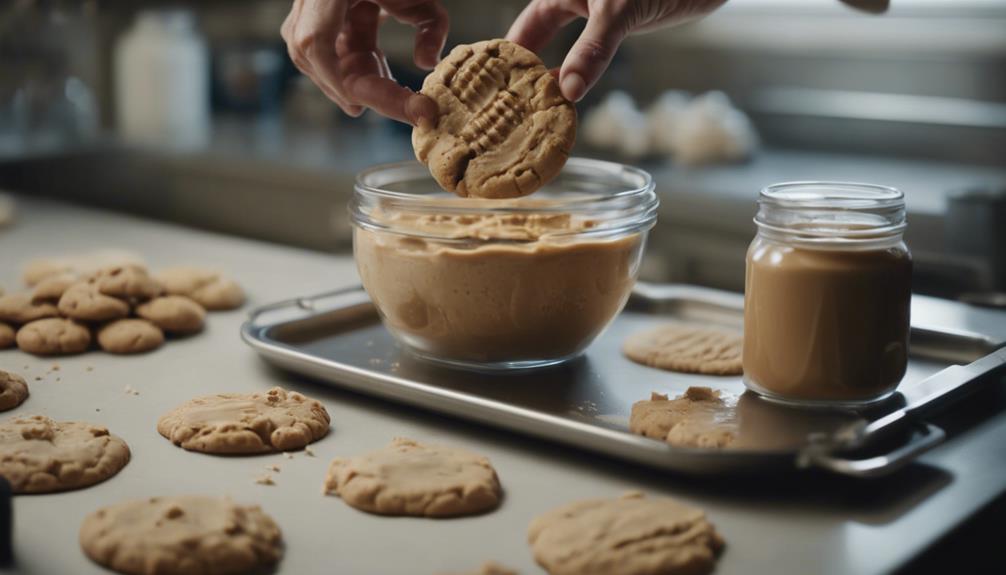
Creative Uses for Butter Extract in Cooking and Baking

When using homemade butter extract in cooking and baking, it adds a delightful hint of buttery flavor to your favorite recipes. But did you know that butter extract can also be used in creative ways beyond the traditional kitchen?

Here are three exciting ways to incorporate butter extract into your culinary adventures:

  • Creative uses for butter extract in cocktails: Add a few drops of butter extract to your favorite cocktail recipes to give them a unique twist. From buttery rum drinks to creamy whiskey concoctions, the possibilities are endless.

  • Incorporating butter extract into homemade ice cream: Take your homemade ice cream to the next level by adding a touch of butter extract. It will impart a rich and creamy flavor that will leave your taste buds wanting more.

  • Experimenting with butter extract in baked goods: Try adding a teaspoon of butter extract to your cookie or cake batter for an extra burst of buttery goodness. It can elevate your baked goods to a whole new level of deliciousness.

Frequently Asked Questions About Making Butter Extract

When it comes to butter extract, there are several alternatives available for those who want to avoid using the traditional version. These alternatives can include plant-based options like coconut or almond extract, which can provide a similar flavor profile.

In terms of shelf life and storage, butter extract should be stored in a cool, dry place to maximize its longevity, typically lasting for about 1-2 years.

Advertisement

As for its uses, butter extract can be utilized in a variety of recipes, including baked goods, frostings, and even savory dishes, to add a rich and buttery flavor.

Butter Extract Alternatives

If you don’t have butter extract on hand, you can try using margarine or clarified butter as alternatives. While these substitutes may not exactly replicate the unique flavor of butter extract, they can provide a similar richness and depth to your recipes. It’s important to note that margarine and clarified butter have their own distinct flavors, so the end result may vary slightly.

Here are three alternatives to consider:

  • Margarine: This butter substitute is made from vegetable oils and has a creamy texture. It can be a suitable replacement for butter extract in recipes that call for a buttery flavor.

  • Clarified Butter: Also known as ghee, clarified butter is made by melting butter and separating the milk solids. It has a nutty and rich flavor that can add depth to your dishes.

  • Homemade Butter Extract: If you have time, you can make your own butter extract by infusing butter with vanilla beans. This homemade version can offer a more authentic and customizable flavor compared to store-bought butter extract.

While these alternatives can be used in a pinch, it’s important to keep in mind that they may not provide an exact replication of the unique flavor of butter extract. Experimentation and adjustments may be needed to achieve the desired taste in your recipes.

Shelf Life and Storage

To maintain the quality and flavor of your alternatives, store them in a cool, dry place away from direct sunlight. Proper storage is essential in extending the shelf life of butter extract alternatives.

Advertisement

The shelf life of these alternatives can vary depending on the preserving methods used. If stored correctly, most commercially available butter extract alternatives can last for up to two years. However, homemade alternatives may have a shorter shelf life, typically around six months.

To maximize the longevity of your alternatives, ensure they are tightly sealed in airtight containers and kept in a consistently cool environment.

Now that we’ve discussed the importance of proper storage, let’s explore the various uses of butter extract in culinary applications.

Butter Extract Uses

Butter extract alternatives can be used in a variety of culinary applications to enhance the flavor of baked goods and desserts. These alternatives provide the same rich and creamy taste as butter extract, but without the actual butter.

Here are three benefits of using butter extract alternatives:

Advertisement
  • Lower fat content: Butter extract alternatives often have a lower fat content compared to real butter, making them a healthier option for those watching their fat intake.

  • Longer shelf life: Homemade butter extract recipes can spoil quickly, but butter extract alternatives have a longer shelf life, allowing you to use them for an extended period without worry.

  • Vegan-friendly: Butter extract alternatives are often plant-based, making them suitable for those following a vegan or dairy-free lifestyle.

Frequently Asked Questions

Can I Use Margarine Instead of Butter to Make Butter Extract?

Yes, margarine can be used as a substitute for butter in making butter extract. However, it may affect the overall taste and texture of the extract due to the different fat composition.

How Long Does Homemade Butter Extract Last?

The shelf life of homemade butter extract varies depending on the storage methods used. It is recommended to store it in a cool, dark place to extend its freshness.

Can I Use Salted Butter to Make Butter Extract?

Using salted butter to make butter extract will result in a different flavor compared to unsalted butter. The addition of salt may alter the overall taste. There are alternative methods to make butter extract without using salted butter.

Can I Use Clarified Butter to Make Butter Extract?

Yes, clarified butter can be used to make butter extract. Clarified butter is often preferred in baking due to its higher smoke point and longer shelf life compared to regular butter. It imparts a rich, buttery flavor to other recipes.

Can I Substitute Butter Extract With Vanilla Extract in a Recipe?

In baking, using vanilla extract instead of butter extract can alter the flavors in a recipe. Butter extract adds a rich, creamy taste, while vanilla extract provides a more subtle sweetness.

Advertisement

Conclusion

In conclusion, making butter extract is like crafting a delicate masterpiece. It requires patience, precision, and the right ingredients to achieve a rich and flavorful result.

Just like a skilled artist, you must choose the perfect butter and follow each step carefully to bring out the essence of its taste.

With proper storage and preservation, your homemade butter extract will continue to captivate your senses for months to come.

So go ahead, embrace your inner culinary artist and let the magic of butter extract elevate your cooking and baking creations to new heights.

Advertisement
Continue Reading
Advertisement

Recipes & Culinary Uses

Creamy Delight: Best Butter Pecan Ice Cream Recipe for Summer!

Yearning for a creamy summer treat that will leave you craving more?

Published

on

By

butter pecan ice cream

Savor a delicious summer treat with our Butter Pecan Ice Cream recipe. Mix butter, brown sugar, cream, and pecans for a creamy delight. Melt butter, cook pecans, whisk eggs, and blend for a rich flavor. Add pecans, cream, and vanilla, then freeze to perfection. Master this easy-to-follow recipe for a tasty dessert to beat the heat.

Key Takeaways

  • Rich and creamy blend of butter, brown sugar, and heavy cream
  • Toasted pecans for a nutty crunch and flavor
  • Easy-to-follow steps for homemade ice cream perfection
  • Customization options with variations like bourbon or chocolate
  • Perfect summer treat with a decadent, refreshing taste

Recipe Ingredients for Butter Pecan Ice Cream

To create a delectable batch of butter pecan ice cream, gather the essential ingredients listed in the recipe.

You'll need:

  • Butter
  • Brown sugar
  • Heavy cream
  • Pecans

These ingredients combine to bring out the rich and nutty flavors of this classic dessert.

The brown sugar adds a caramel-like sweetness, while the heavy cream contributes to a creamy texture that's essential for a decadent treat.

Pecans, when toasted in butter, provide a delightful crunch and enhance the overall flavor profile of the ice cream.

Cooking Instructions for Homemade Ice Cream

making ice cream at home

Start by melting butter in a skillet to infuse the pecans with a rich, nutty flavor for your homemade butter pecan ice cream.

Here's a quick guide to help you make this creamy delight:

Advertisement
  • Melt butter and cook pecans for flavor.
  • Whisk eggs and combine with half-and-half and brown sugar for a creamy base.
  • Cook until thickened, then mix with eggs in a bowl.
  • Add cream, pecans, and vanilla extract.
  • Freeze the mixture in an ice cream maker.

Following these steps will guarantee your homemade butter pecan ice cream turns out rich and delicious.

Remember to carefully adhere to the manufacturer's instructions for your ice cream maker to achieve the perfect consistency.

Enjoy the process of creating this delightful treat that will surely be a hit during the summer months.

Ice Cream Preparation Steps

ice cream recipe instructions

Mix half and half with brown sugar over medium heat in a large bowl to prepare the ice cream base.

Next, whisk beaten eggs and temper them with the warm milk mixture to create a smooth custard.

Once done, thicken the mixture on low heat, then cool it over an ice bath to achieve ideal texture.

After that, stir in heavy cream, vanilla extract, maple extract, and a pinch of salt for rich flavor.

Advertisement

Remember to refrigerate the mixture for 1 1/2 – 2 hours before churning it into creamy butter pecan ice cream.

This process ensures that the flavors meld together beautifully and the ice cream attains the perfect consistency for scooping and savoring.

Nutritional Information and Tips

healthy eating guidance provided

Considering the rich and creamy nature of homemade butter pecan ice cream, it's important to be mindful of its nutritional content and serving size. When indulging in this delectable dessert, remember these essential tips:

  • Portion Control: Enjoy in moderation to savor the flavors without overindulging.
  • Brown Sugar Sweetness: Opt for a moderate amount of brown sugar to balance sweetness without overwhelming the palate.
  • Room Temperature Ingredients: Confirm ingredients like butter and heavy cream are at room temperature for a smoother texture.
  • Nutritional Awareness: Be mindful that homemade butter pecan ice cream can vary in nutritional content, so adjust ingredients accordingly.
  • Consultation: Seek advice from a nutritionist or healthcare provider for personalized guidance on incorporating this treat into a balanced diet.

Homemade Butter Pecan Ice Cream Variations

delicious homemade ice cream

Explore creative twists on traditional butter pecan ice cream by incorporating different nuts, spirits, sauces, chocolates, and dairy-free alternatives.

For a unique flavor, try substituting pecans with walnuts or almonds in the full recipe. Toast the nuts in a separate bowl until browned and fragrant, then chop them finely enough to coat in the ice cream mixture.

To add a boozy kick, mix in a splash of bourbon or rum to the base as you churn the ice cream. For an extra indulgent touch, swirl in caramel sauce or fudge ripple throughout the mixture.

Incorporate chunks of chocolate or chocolate-covered nuts for a delightful contrast in texture, giving each bite a sweet surprise.

Advertisement

If you prefer a lighter, dairy-free option, consider using coconut milk or almond milk as a substitute for traditional dairy products. These alternatives provide a creamy base while catering to plant-based diets.

Experiment with these variations to create a personalized butter pecan ice cream that suits your taste preferences.

Frequently Asked Questions

What Is the Secret to Making Ice Cream Very Creamy?

To make ice cream very creamy, you use a rich base of ingredients like heavy cream, eggs, and sugar. Chilling the base before churning is crucial for a smoother texture. Adding vanilla extract enhances creaminess, and slow churning prevents a dense outcome.

What Flavor Is the Ice Cream in Butter Pecan?

The ice cream in butter pecan is a delightful blend of buttery richness, vanilla sweetness, and maple undertones, perfectly paired with toasted pecans for a nutty crunch. This flavor combination creates a harmonious and indulgent treat.

What's the Difference Between Butter Pecan Ice Cream and Praline Pecan Ice Cream?

In butter pecan ice cream, you'll savor the buttery richness of pecans blended with a creamy base. On the other hand, praline pecan ice cream highlights caramelized sweetness with a swirl of praline sauce for a delightful flavor contrast.

Advertisement

What Age Group Eats Butter Pecan Ice Cream?

You'll find that adults and older individuals, typically in the 30-60 age group, enjoy butter pecan ice cream. It's a favorite among those with a more refined palate, drawn to its rich and nutty flavor.

Conclusion

So there you have it, folks! Whip up this buttery, nutty delight for a taste of summer in every scoop.

Don't cry over spilled milk – grab a cone and enjoy this creamy treat that's sure to satisfy your sweet tooth.

Get churning and indulge in the best butter pecan ice cream you've ever tasted!

Advertisement
Continue Reading

Recipes & Culinary Uses

Festive Favorites: Best Peanut Butter Blossoms Recipe for Holidays!

Unleash the ultimate holiday baking magic with the best Peanut Butter Blossoms recipe – an irresistible treat that will elevate your festive celebrations!

Published

on

By

holiday baking with flair

Elevate your holiday baking with the ultimate Peanut Butter Blossoms recipe. Cream together peanut butter, butter, sugars, and salt, then add egg and vanilla. Roll dough into balls, coat in brown sugar, bake until golden, then press a Hershey's kiss on top. Adjust baking time as needed. Explore ingredient swaps for a personalized touch. Enjoy with hot cocoa or pair with savory dishes. For more tips, ideas, and customization options, the recipe holds more festive surprises.

Key Takeaways

  • Cream together peanut butter, butter, sugars for rich flavor.
  • Bake at 375°F for 8-10 minutes for soft, chewy cookies.
  • Customize with ingredient swaps like almond butter or maple syrup.
  • Pair with savory dishes or hot cocoa for holiday enjoyment.
  • Press Hershey kisses onto warm cookies for a classic finish.

Ingredients for Peanut Butter Blossoms

For the classic Peanut Butter Blossoms recipe, gather peanut butter, butter, sugar, an egg, and Hershey's kisses as your essential ingredients.

Peanut butter is the star, offering a rich flavor that blends perfectly with the sweetness of the cookies.

Butter plays a pivotal role by adding moisture and richness to the dough, ensuring a soft and chewy texture.

The sugar not only sweetens the cookies but also contributes to their festive appeal, making them a perfect treat for any occasion.

Finally, the Hershey's kisses on top provide a delightful chocolatey finish that elevates these cookies to a whole new level of deliciousness.

Advertisement

Together, these ingredients create a harmonious blend of flavors and textures that make Peanut Butter Blossoms a beloved classic for holiday baking or any time you crave a sweet and satisfying treat.

Recipe Steps for Peanut Butter Blossoms

bake peanut butter cookies

To make Peanut Butter Blossoms, start by creaming together peanut butter, butter, sugars, and salt until light and fluffy.

Next, add in the egg and vanilla extract, making sure to mix well to combine all the ingredients thoroughly.

Then, gradually incorporate the dry ingredients into the wet mixture until a smooth dough forms.

Once the dough is ready, roll it into balls and coat each ball generously in brown sugar.

Place the sugar-coated dough balls on a baking sheet, making sure to leave enough space between them for spreading during baking.

Advertisement

Bake the cookies in a preheated oven until they turn a beautiful golden brown.

As soon as the cookies are out of the oven, press a Hershey's kiss into the center of each cookie gently.

The heat from the freshly baked cookies will melt the chocolate just enough to adhere it to the cookie.

These Peanut Butter Blossoms are a delightful treat perfect for Christmas celebrations!

Pro Tips for Making Peanut Butter Blossoms

baking perfect peanut blossoms

To enhance your peanut butter blossom baking experience, consider adjusting the baking time based on your oven's performance for best results.

Additionally, explore ingredient substitutions to cater to dietary preferences or allergies without compromising the flavor or texture of the cookies.

Advertisement

These pro tips can help you customize your peanut butter blossoms while ensuring delicious outcomes.

Baking Time Recommendations

Achieving the ideal texture for your peanut butter blossoms involves baking them at 375°F for 8-10 minutes. This baking duration guarantees that the cookies have a soft and chewy consistency while allowing the Hershey kisses on top to be softened but not completely melted.

Once out of the oven, remember to press the Hershey kisses onto the cookies immediately to secure them in place for that classic appearance.

For the best outcomes, chill the cookie dough for about 30 minutes before baking. This step helps the cookies maintain their shape and prevents excessive spreading during baking, ensuring your peanut butter blossom cookies are perfectly formed and ready to impress during your holiday baking.

Shortening or extending the baking time can alter the texture of the cookies. A quick bake of 6-8 minutes produces softer and chewier cookies, while longer baking times yield a slightly crispier consistency. Stick to the recommended 8-10 minutes for the best soft and chewy peanut butter blossoms.

Advertisement

Ingredient Substitutions

Consider incorporating different ingredients to elevate the flavor and nutritional profile of your peanut butter blossoms. For a healthier option, swap out shortening with unsalted butter to achieve a unique texture and taste in your cookies.

Try using natural peanut butter instead of creamy to add a wholesome twist to the classic recipe. If you're looking to reduce the glycemic impact, substitute brown sugar with coconut sugar in your baking. For a natural sweetener alternative, replace regular granulated sugar with maple syrup in the cookie dough mixture.

Additionally, for a distinct flavor experience, experiment with almond butter as a substitute for peanut butter in your blossoms. These ingredient substitutions can bring a new dimension to your peanut butter blossoms, making them not only delicious but also tailored to your dietary preferences.

Upgrade your baking game this holiday season with these creative twists on a beloved recipe!

Serving Suggestions for Peanut Butter Blossoms

peanut butter cookie recipe

Enhance the enjoyment of your peanut butter blossoms by pairing them with savory dishes like lasagna tortellini soup for a satisfying meal. These classic cookies also complement family-friendly dinners such as easy ground beef shepherd's pie and creamy broccoli cheddar soup, making for a delightful combination. The holiday season calls for cozy treats, and the sweet nuttiness of peanut butter blossoms pairs perfectly with a warm cup of hot cocoa. Whether you're participating in a cookie exchange or looking for a festive touch to your holiday dessert spread, consider rolling the cookies in red, green, and white sugar sprinkles to add a pop of color and fun.

Serving Suggestions Pairing Ideas
Lasagna Tortellini Soup Comforting and hearty meal alongside the cookies
Easy Ground Beef Shepherd's Pie Delicious combination for a family dinner
Creamy Broccoli Cheddar Soup Perfect accompaniment to the nutty cookie flavors

12 Days of Christmas Cookies Recipes

baking traditions for the holidays

Indulge in a variety of delightful Christmas cookie recipes each day during the holiday season. One standout choice is the classic Peanut Butter Blossoms. These holiday cookies feature a peanut butter base topped with a Hershey's kiss, making them a beloved treat for cookie exchanges and festive gatherings.

The process of making these cookies is simple yet rewarding. Start by rolling the dough balls in sugar before baking to add a sweet crunch to each bite. The combination of rich peanut butter flavor and the chocolatey goodness of the Hershey's kiss creates a perfect balance of sweetness.

Advertisement

When enjoying these Christmas cookies, consider pairing them with a glass of milk for a classic and satisfying treat.

Whether you're baking them for your family, a cookie exchange, or a holiday party, Peanut Butter Blossoms are sure to be a hit. Make each day of the holiday season a little sweeter with these delicious cookies.

User Engagement Features

user interaction enhancements

Let's talk about how user interaction features and personalization options enhance your experience with the Peanut Butter Blossoms recipe.

You can engage with others by leaving comments and sharing your results, creating a sense of community around this holiday treat.

Personalization options like name and email entry fields help tailor the experience to your preferences, making it more engaging and enjoyable.

User Interaction Features

Utilizing user engagement features on the website allows for increased participation and feedback from visitors. The comment section enables users to interact with each other and provide valuable feedback on the Peanut Butter Blossoms recipe or share their experiences with Hershey's kisses. By incorporating a reply option, users can engage in conversations, fostering a sense of community around baking these delightful peanut butter cookies.

Advertisement

Moreover, the inclusion of name and email fields not only allows for personalization but also facilitates communication between the website and its visitors. This data storage feature guarantees that users can conveniently access their information for future visits, enhancing their overall user experience.

These user engagement features play an essential role in creating an interactive platform where users can engage, provide feedback, and communicate effectively. Such interaction not only enriches the user experience but also encourages visitors to actively participate in the community surrounding the Peanut Butter Blossoms recipe.

Personalization Options

Enhance your website's user engagement by incorporating personalized options such as commenting, replying, and sharing feedback on the Peanut Butter Blossoms recipe. This level of user interaction not only fosters a sense of community building but also encourages customization and feedback. By allowing users to share their thoughts, results, and experiences with the festive favorites, you create a more engaging and interactive user experience. Additionally, providing users with the option to save their data for future visits and encouraging them to tag @preppykitchen and use #preppykitchen when trying the recipe further enhances their engagement.

Personalization Options Description Benefits
Commenting Users can leave comments on the Peanut Butter Blossoms recipe, sharing their thoughts and experiences. Fosters community building and user engagement.
Replying Users can reply to comments and engage in discussions with other users about the recipe. Encourages active participation and interaction.
Feedback Sharing Users can share feedback on the recipe, providing valuable insights for improvement. Enhances user experience and customization.

Additional Information

clarifying specific details provided

You may find it interesting to know more about the history of the Peanut Butter Blossoms recipe and its cultural significance during the holidays.

  • The Peanut Butter Blossoms recipe's popularity is backed by IRI MULO data, making it a sought-after choice for holiday baking.
  • Copyright for this beloved recipe belongs to The J.M. Smucker Company, a reputable name in the food industry known for quality products.
  • These delightful cookies aren't only perfect for serving at holiday parties but also make excellent gifts due to their festive appeal.

Frequently Asked Questions

Why Are My Peanut Butter Blossoms Dry?

If your peanut butter blossoms are dry, it could be due to using too much flour, overbaking, using natural peanut butter that requires stirring, or not enough butter/shortening. Guarantee precise measurements and follow the recipe closely to maintain moisture.

Why Did My Peanut Butter Blossoms Go Flat?

When making peanut butter blossoms, going flat happens due to overmixing, too much flour, insufficient chilling, or low oven temperature. Remember to avoid these pitfalls. Preheat the oven properly and follow the recipe for perfect blossoms!

What Is America's Favorite Christmas Cookie?

America's favorite Christmas cookie is Peanut Butter Blossoms. Loved for their peanut butter-chocolate combo and nostalgic Hershey's Kiss center, these easy-to-make treats are a holiday staple at parties and gatherings. They're a must-have during the festive season.

Advertisement

What Is Baskin Robbins Peanut Butter Blossom?

You asked about Baskin Robbins Peanut Butter Blossom. It's a delectable seasonal ice cream flavor featuring creamy peanut butter ice cream with a ribbon of more peanut butter and chocolate cookie pieces. Indulge in this festive treat!

Conclusion

Indulge in the warm, gooey goodness of these peanut butter blossoms this holiday season. With the perfect blend of creamy peanut butter and rich chocolate, these cookies are sure to bring joy to your festivities.

Picture yourself surrounded by loved ones, sharing laughter and memories as you enjoy these delicious treats. Let the aroma of freshly baked cookies fill your home and create a cozy, festive atmosphere.

Happy baking and happy holidays!

Advertisement
Continue Reading

Recipes & Culinary Uses

Bite-Sized Treats: Best Peanut Butter Ball Recipe You'll Love!

Adore these heavenly peanut butter balls with a delectable mix of smooth peanut butter, powdered sugar, and vanilla—perfect for indulging in bite-sized bliss!

Published

on

By

delicious peanut butter balls

You'll adore these easy and heavenly peanut butter balls. Mix smooth peanut butter, powdered sugar, and vanilla extract for a delectable dough. Roll into small balls and chill. Dip in melted chocolate, then refrigerate to set. Enhance the flavor with rum extract, nuts, or crushed pretzels. Get creative with colorful sprinkles and different chocolate coatings. Use quality chocolate coating and adjust mix consistency. Store them in the fridge or freezer. Enjoy these mouthwatering treats alone or at gatherings. More tips and delightful variations await!

Key Takeaways

  • Creamy peanut butter, powdered sugar, and vanilla create a smooth dough.
  • Incorporate nuts, rum extract, or pretzels for flavor and texture variety.
  • Use quality chocolate coating like candy melts for best results.
  • Chill peanut butter balls before dipping for easier handling.
  • Store in the fridge or freezer for convenient snacking and serving.

Ingredients and Preparation

To create irresistible peanut butter balls, gather creamy peanut butter, powdered sugar, and vanilla extract as your key ingredients.

Begin by mixing the peanut butter, butter, sugar, and vanilla until you have a smooth dough. Roll this mixture into small balls and chill them before dipping them in melted chocolate.

The type of chocolate you use, such as dark or milk chocolate, will enhance the flavor of your peanut butter balls. After dipping, make sure to refrigerate the balls until the chocolate sets for a perfect finish.

This process guarantees that each bite-sized treat isn't only visually appealing but also bursting with delicious peanut butter and chocolate flavors.

Variations and Enhancements

creative modifications and improvements

You can elevate the flavor of your peanut butter balls by incorporating unique ingredients like chopped nuts or rum extract.

Experiment with different chocolate coatings such as white almond bark or dark chocolate candy melts for a varied taste experience.

Advertisement

Get creative by adding finishing touches like colorful sprinkles to make your peanut butter balls visually appealing.

Flavorful Ingredient Additions

Enhance the flavor of your peanut butter balls by incorporating unique ingredient variations and enhancements. While the classic combination of peanut butter, powdered sugar, and butter creates a delicious dough for your treats, you can take it up a notch by adding flavorful ingredient additions.

Consider mixing in crushed pretzels for a salty crunch that complements the sweetness of the peanut butter. Chopped nuts like almonds or pecans can also add a delightful texture and nutty taste to your chocolate-covered peanut butter balls.

For a burst of fruity flavor, try incorporating dried cranberries or raisins into the dough. These additions not only provide a contrast in texture but also introduce a hint of sweetness that pairs well with the creamy peanut butter.

Another option is to include a sprinkle of cinnamon or a dash of vanilla extract to elevate the overall taste profile of your peanut butter balls. Experiment with these flavorful ingredient additions to create a unique and delectable twist on the classic treat.

Advertisement

Chocolate Coating Options

Experiment with different types of chocolate coatings – dark, white, or milk chocolate – to suit your preferences and elevate the flavor of your peanut butter balls.

When considering the chocolate coating for your crunchy peanut butter treats, here are some options to enhance your culinary creation:

  1. Choose Candy Melts or Almond Bark: Opt for candy melts or almond bark for a smooth and firm chocolate coating that sets well on your peanut butter balls.
  2. Avoid Chocolate Chips: Steer clear of using chocolate chips for coating, as they may contain stabilizers that hinder smooth melting, affecting the overall texture.
  3. Add Colored Sprinkles: For a festive touch, sprinkle colored sprinkles on top of the chocolate coating before it sets to add a pop of color and extra crunch to your peanut butter balls.

Experimenting with different chocolate coatings and techniques can take your peanut butter balls to the next level, ensuring a delightful and indulgent treat for any occasion.

Creative Finishing Touches

To elevate the flavor profile of your peanut butter balls, consider incorporating creative finishing touches through various enhancements and unique variations.

You can enhance the texture by adding chopped nuts or crispy rice cereal to the peanut butter mixture, providing a delightful crunch with every bite.

Experiment with different flavors by using almond extract or rum extract instead of vanilla for a twist on the traditional taste.

Advertisement

For a festive touch, roll the balls in crushed graham crackers, sprinkles, or a sprinkle of sea salt to add a pop of flavor.

Drizzle white chocolate over the dark, semi-sweet, or milk chocolate coating for a visually appealing contrast that will impress your guests.

If you enjoy a crunchy element, try coating the balls in crushed pretzels or toasted coconut before the chocolate sets.

These creative enhancements will take your peanut butter balls to the next level, making them a standout treat at any gathering.

Tools and Tips

crafting with precision

Consider using a 1 tablespoon cookie scoop for consistent sizing when preparing your peanut butter balls. This tool will help guarantee all your treats are uniform in size, making for a neat presentation and even cooking.

Here are some additional tools and tips to enhance your peanut butter ball-making experience:

Advertisement
  1. Invest in Quality Chocolate Coating: Opt for candy melts or almond bark for a smooth and firm chocolate coating on your peanut butter balls. These coatings melt easily and provide a professional finish to your treats.
  2. Adjust Peanut Butter Mixture Consistency: If your peanut butter mixture is too sticky or too dry, adjust the consistency by adding more peanut butter or powdered sugar. This will help you achieve the perfect texture for shaping your balls.
  3. Refrigerate Before Dipping: Prior to dipping your peanut butter balls in chocolate, chill them in the refrigerator. This step will make the balls firmer, making them easier to handle and coat without falling apart.

Storage and Serving Suggestions

great suggestion for storage

For best freshness and presentation of your peanut butter balls, follow these storage and serving suggestions.

To keep your peanut butter balls tasting delicious, store them properly. You can store them in an airtight container in the fridge for up to 1 week or in the freezer for up to 2 months. When freezing, remember to thaw the frozen peanut butter balls before serving by bringing them to room temperature. To prevent them from sticking together, separate the layers of peanut butter balls with wax paper.

Here is a helpful table summarizing the storage and serving suggestions:

Storage Serving Frozen
Airtight container Display on festive tray Thaw before serving
Fridge – 1 week Pair with hot cocoa Bring to room temp
Freezer – 2 months Enjoy at holiday gatherings
Separate with wax paper

Additional Peanut Butter Desserts

peanut butter dessert recipes

Explore a variety of delectable peanut butter desserts to satisfy your sweet cravings.

  1. Peanut Butter Blossom Cookies: Indulge in the classic combination of peanut butter cookies topped with a chocolate kiss for a delightful treat.
  2. Peanut Butter Chocolate Mug Cake: Whip up this easy-to-make single-serving dessert that combines the rich flavors of peanut butter and chocolate in a mug for a quick fix.
  3. Peanut Butter Overload Cookies: For those who can't get enough peanut butter, these cookies are loaded with peanut butter chips, chocolate chips, and chopped peanuts for an explosion of flavor in every bite.

These additional peanut butter desserts offer a diverse selection to cater to your cravings.

Whether you're in the mood for a classic treat like Peanut Butter Blossom Cookies, a quick fix with Peanut Butter Chocolate Mug Cake, or a flavor-packed experience with Peanut Butter Overload Cookies, there's something for every peanut butter lover.

Enjoy these easy-to-make delights whenever you need a sweet pick-me-up!

Recipe Instructions and Nutritional Information

cooking guidance and facts

To create these delectable Peanut Butter Balls, start by blending peanut butter, butter, sugar, and vanilla to form a dough. Roll the mixture into small balls and place them on a baking sheet lined with parchment paper. Chill the peanut butter balls in the refrigerator for about 30 minutes until firm.

Once chilled, melt chocolate in a heatproof bowl over simmering water or in the microwave. Dip each chilled peanut butter ball into the melted chocolate, ensuring they're evenly coated. Place the coated balls back on the parchment paper and let the chocolate set.

Advertisement

Each serving of these delightful treats contains approximately 114 calories.

Store the finished peanut butter balls in the fridge for up to 2 weeks or freeze them for up to 3 months.

Enjoy these decadent bite-sized snacks whenever you crave a sweet and nutty indulgence.

Frequently Asked Questions

Can I Use Chunky Peanut Butter Instead of Creamy for This Recipe?

Yes, you can use chunky peanut butter instead of creamy for this recipe. It will add a delightful texture and extra crunch to your peanut butter balls. Enjoy experimenting with different variations!

How Long Do Chocolate Covered Peanut Butter Balls Stay Fresh?

Like a sweet memory, chocolate-covered peanut butter balls stay fresh for up to two weeks when stored in an airtight container in the fridge. Indulge in these delectable treats within that time frame for best taste.

Advertisement

Can I Freeze the Peanut Butter Balls for Later Enjoyment?

Yes, you can freeze the peanut butter balls for later enjoyment. Simply place them in an airtight container or freezer bag. When ready to indulge, let them thaw in the fridge for a few hours.

What Type of Chocolate Is Best for Coating the Peanut Butter Balls?

For coating the peanut butter balls, semi-sweet or milk chocolate works best. They provide a delicious contrast to the creamy peanut butter filling. Simply melt the chocolate, dip the balls, and enjoy the sweet treat!

Can I Add Chopped Nuts or Sprinkles to the Peanut Butter Balls for Extra Flavor?

You can definitely add chopped nuts or sprinkles to the peanut butter balls for extra flavor. It's a great way to customize your treats and add a delightful crunch or colorful touch to each bite.

Conclusion

Indulge in these irresistible peanut butter balls that are sure to satisfy your sweet tooth cravings.

With just a few simple ingredients and easy-to-follow instructions, you can enjoy these bite-sized treats in no time.

Advertisement

So go ahead, treat yourself to a little taste of heaven and experience the perfect combination of creamy peanut butter and rich chocolate.

You won't be able to resist coming back for more!

Continue Reading

Trending