Recipes & Culinary Uses
How to Make a Butter Churn

I know what you’re thinking. Making a butter churn sounds like a lot of work. But let me assure you, it’s worth every ounce of effort.
In this article, I will guide you through the step-by-step process of creating your very own butter churn. With the right materials and a little bit of patience, you’ll soon be enjoying the rich, creamy goodness of homemade butter.
So, let’s roll up our sleeves and get started!
Key Takeaways
- Choose durable and aesthetically pleasing materials
- Take precise measurements and follow safety precautions
- Assemble the churn carefully and resolve any issues
- Optimize the churning mechanism for smooth operation and efficiency
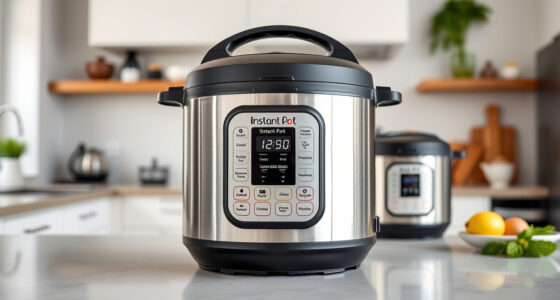
Selecting the Right Materials
When making a butter churn, it’s important to select the right materials for the job. Choosing materials that are durable and aesthetically pleasing is essential in creating a churn that will stand the test of time and also add charm to your kitchen.
There are several cost-effective options available for selecting the right materials for your churn. One option is to use a sturdy wooden barrel for the churn body. Wood is not only durable, but it also adds a rustic and traditional look to the churn.
For the churn handle, a strong metal rod or wooden dowel can be used. These materials offer durability and ease of use.
Measuring and Cutting the Wood
After measuring and cutting the wood, it’s important to ensure the pieces are the correct size for assembly. Woodworking techniques require precision and accuracy, so taking careful measurements is crucial.
I always use a tape measure or ruler to measure the length, width, and thickness of the wood. I then mark the measurements with a pencil before making the cuts.
When cutting the wood, I follow safety precautions to prevent accidents. I wear protective goggles to shield my eyes from any flying debris, and I secure the wood firmly in place before making any cuts.
It’s also important to use sharp tools to ensure clean and accurate cuts.
Assembling the Churn Base
To assemble the churn base, you’ll need to align the pieces carefully and secure them together using screws or nails. It’s important to choose the right tools for this task to ensure a sturdy and durable churn. A power drill or screwdriver will make it easier to insert the screws, while a hammer can be used for nails.
Make sure to line up the edges of the pieces before fastening them together to ensure a tight fit. If the pieces don’t align properly, you may need to adjust them or check if any of the wood needs trimming. Common issues that may arise during assembly include loose screws or nails, which can be resolved by tightening them or replacing them if necessary.
With the churn base successfully assembled, we can now move on to building the churning mechanism.
Building the Churning Mechanism
When it comes to building the churning mechanism for a butter churn, there are several key points to consider.
First, selecting the right materials is crucial for ensuring the durability and functionality of the churn.
Additionally, making thoughtful design choices can optimize the churning process and improve efficiency.
Assembling the mechanism correctly is essential to ensure smooth operation.
Lastly, troubleshooting can help identify and resolve any issues that may arise during the churning process.
Material and Design Choices
The best material for a butter churn is wood because it is durable and provides a traditional look. When it comes to material selection for a butter churn, there are a few important design considerations to keep in mind:
-
Durability: Wood is a sturdy material that can withstand the rigorous churning process. It is less likely to crack or break compared to other materials like plastic or metal.
-
Heat insulation: Wood provides excellent insulation, which is crucial for maintaining the ideal temperature for churning butter. It helps to keep the butter cool during the process, preventing it from melting or becoming too soft.
-
Aesthetics: Wood adds a touch of rustic charm to the butter churn. It gives it a traditional and authentic look that many people appreciate.
Considering these factors, it is clear that wood is the ideal choice for a butter churn. Its durability, heat insulation, and timeless appeal make it the perfect material for a homemade butter churn.
Assembly and Troubleshooting
One important step in assembling the butter churn is ensuring that all the parts fit together properly. This is crucial for the smooth functioning of the churn and the efficient production of butter. Troubleshooting tips can help address common assembly mistakes that may occur during this process.
One common mistake is not aligning the paddle and the lid correctly. To avoid this, it is important to carefully follow the manufacturer’s instructions and ensure that the paddle is properly inserted into the lid.
Another common mistake is not securing the handle tightly, which can result in it coming loose during operation. It is important to tighten the handle securely to prevent this from happening.
Adding the Churn Lid and Handle
Attach the churn lid and handle to the butter churn securely. This step is crucial for proper functioning and to prevent any accidents during the churning process. To ensure a tight and secure attachment, follow these steps:
- Place the churn lid on top of the churn barrel, ensuring it sits evenly.
- Align the handle’s holes with the holes on the churn lid.
- Insert the handle screws through the holes, making sure they go all the way through.
- Secure the handle with nuts on the inside of the churn lid, tightening them firmly.
- Double-check the attachment by giving the handle a gentle shake to ensure it is stable.
Regularly inspect the churn lid and handle for any signs of wear or damage, replacing them if necessary. Clean the lid and handle after each use to prevent buildup of residue.
Finishing Touches and Testing the Churn
In this discussion, I will be covering the final steps of making a butter churn. These steps include the churn stability test, applying the final paint or varnish, and enhancing the churn mechanism.
Firstly, it is important to ensure the stability of the churn. This can be done by conducting a test to confirm that it is sturdy and well-balanced. This test will help ensure that the churn can withstand the vigorous churning process without toppling over or causing any accidents.
Secondly, applying a final coat of paint or varnish is crucial. This not only adds a polished look to the churn, but also provides protection against moisture and wear. The paint or varnish acts as a barrier, preventing the wood from absorbing moisture and potentially causing damage. Additionally, it gives the churn a more aesthetically pleasing appearance.
Lastly, enhancing the churn mechanism involves making any necessary adjustments or modifications. This step is important to ensure smooth and efficient churning of the butter. It may involve tightening or loosening certain parts, lubricating the mechanism, or even replacing any worn-out components. These enhancements will help optimize the churn’s performance and make the butter-making process more effective.
Churn Stability Test
To ensure your churn is stable, you’ll need to perform a churn stability test. This test is crucial in determining the efficiency and effectiveness of your churn in producing butter. Here are some key points to consider when conducting a churn stability test:
- Ensure the churn is properly assembled and all parts are securely fastened.
- Fill the churn with a known quantity of cream and start the churning process.
- Observe the churn’s stability during the churning process.
- Look for any signs of wobbling or excessive shaking.
- Monitor the churn’s ability to maintain a consistent speed and motion.
- Check for any irregularities or fluctuations in the churning process.
- Measure the time and effort required to churn the cream into butter.
Final Paint or Varnish
When applying the final paint or varnish, you’ll want to ensure that you have a smooth and even coat to achieve a professional finish. To begin, lightly sand the surface of the churn to remove any imperfections or rough areas. This will create a smooth base for the paint or varnish to adhere to.
Next, apply a thin layer of primer to further enhance the surface and improve the adhesion of the final coat. Once the primer is dry, use a fine-grit sandpaper to lightly sand the surface again, creating a smooth and even texture.
Enhancing Churn Mechanism
For optimal performance, it’s important to ensure the churn mechanism is properly enhanced. Improving efficiency in butter churning can be achieved through various alternative methods. Here are a couple of ideas to consider:
-
Adjusting gear ratios: By modifying the gear ratios in the churn mechanism, you can optimize the rotational speed and torque, resulting in a more efficient churning process. This can be done by either increasing or decreasing the number of teeth on the gears, depending on the desired outcome.
-
Utilizing an electric motor: Instead of relying solely on manual labor, incorporating an electric motor into the churn mechanism can significantly improve efficiency. The motor can provide consistent and powerful rotational force, allowing for faster and more consistent churning.
Frequently Asked Questions
How Long Does It Take to Churn Butter Using This Homemade Churn?
Using this homemade churn, it typically takes around 20-30 minutes to churn butter. However, time-saving techniques such as using a stand mixer or alternative churning methods like shaking a jar can reduce the time significantly.
Can I Use Any Type of Wood for the Churn Base?
I love using different types of wood for my churn base. Oak is sturdy and reliable, while cherry adds a touch of elegance. However, if you’re looking for alternative materials, you can also consider using stainless steel or food-grade plastic.
What Type of Wood Finish Should I Use to Protect the Churn From Moisture?
For moisture protection on a churn, the best wood finishes are polyurethane, varnish, or tung oil. These wood finishing techniques create a protective barrier that seals the wood and prevents moisture from seeping in.
Is It Possible to Modify the Churn to Make Whipped Cream Instead of Butter?
Yes, it is possible to modify the churn to make whipped cream instead of butter. By adjusting the speed and duration of churning, you can create a light and fluffy whipped cream. It’s just one of the many different uses for a butter churn.
How Do I Clean and Maintain the Churn to Ensure Its Longevity?
Cleaning and maintaining the churn is crucial for its longevity. To ensure its proper functioning, I follow the best practices by using gentle cleaning methods and regularly inspecting and oiling the moving parts.
Conclusion
In conclusion, making a butter churn is a rewarding and practical project that anyone can tackle. By following the steps outlined in this article, you can create a sturdy and efficient churn that will make butter-making a breeze.
Remember to choose the right materials, measure and cut the wood accurately, assemble the base and churning mechanism carefully, and add the lid and handle securely.
With a few finishing touches and some testing, you’ll have a functional churn ready to use. So, why not give it a try and enjoy the satisfaction of making your own butter?
Sunny’s articles radiate enthusiasm, much like her sunny disposition. As our resident “Butter Geek”, she delves deep into the latest butter trends, ensuring our readers are always in the know. Beyond her writing, Sunny’s passion lies in exploring vegan butter alternatives and hosting butter-tasting soirées.
Recipes & Culinary Uses
How to Make Butter Balls

Do you crave a dollop of flavor to enhance your dining experience? Look no further!
In this article, we will guide you through the magical process of creating delectable butter balls. With just a few simple ingredients and tools, you’ll be able to craft these little balls of creamy goodness in no time.
So, put on your apron, grab your whisk, and prepare to embark on a buttery adventure that will leave your taste buds dancing with delight.
Key Takeaways
- Experiment with different combinations of herbs and spices to create unique flavors in the butter balls.
- Chilling the butter mixture in the refrigerator helps firm it up and allows the flavors to meld together for a more harmonious taste.
- Roll the chilled butter mixture into small, bite-sized spheres and optionally roll them in finely chopped herbs, spices, or edible flowers for added flavor and presentation.
- Store the butter balls in an airtight container in the refrigerator and let them come to room temperature before serving to enhance their versatility in various dishes and spreads.
Gathering the Ingredients and Tools
First, you’ll need to gather the ingredients and tools necessary for making butter balls. To begin, gather 1 cup of softened butter, 1 ¼ cups of powdered sugar, 1 teaspoon of vanilla extract, and a pinch of salt. These ingredients will create a smooth and flavorful base for your butter balls.
Additionally, you’ll need a mixing bowl, an electric mixer, a spatula, and a baking sheet lined with parchment paper. If you’re feeling adventurous, you can also experiment with alternative ingredients such as almond or coconut extract to add a unique twist to your butter balls.
Once you have everything ready, it’s time to move on to preparing the butter mixture.
Preparing the Butter Mixture
Next, you’ll need to mix together the softened butter, your choice of herbs and spices, and a pinch of salt in a bowl. This step is crucial for adding flavor to your butter balls.
As you mix in the herbs and spices, imagine the burst of savory goodness they will bring to each bite. Experiment with different combinations like garlic and rosemary, or perhaps a hint of lemon zest and thyme.
Once everything is well incorporated, cover the bowl with plastic wrap and place it in the refrigerator to chill. This will help the butter mixture firm up, making it easier to shape into balls later on. The chilling process also allows the flavors to meld together, resulting in a more harmonious taste.
Get ready to elevate your butter balls to a whole new level of deliciousness.
Shaping the Butter Balls
Now it’s time to take the chilled butter mixture and roll it into small, bite-sized spheres. Shaping butter balls requires some techniques to achieve the perfect form.
Start by scooping a small amount of the butter mixture with a spoon or a melon baller. Then, gently roll it between your palms, applying light pressure to create a smooth and round shape.
For a more decorative touch, you can roll the butter balls in finely chopped herbs, spices, or even edible flowers. Arrange them on a serving plate, or place them in a decorative butter dish for a stunning presentation.
These butter balls can be a delightful addition to a cheese platter or served alongside warm bread.
Now, let’s move on to the next step – adding flavors and variations to your butter balls.
Adding Flavors and Variations
To enhance the taste and create unique variations, you can experiment with different ingredients and seasonings for your butter balls. By adding different flavors, you can elevate your butter balls to a whole new level. Here are some ideas to get you started:
Flavor | Ingredients | Creative Uses |
---|---|---|
Garlic and Herb | Garlic, parsley, thyme | Spread on bread or use in pasta dishes |
Citrus | Lemon or orange zest | Use in baking or melt over grilled fish |
Spicy | Chili flakes, paprika | Add a kick to roasted vegetables or steaks |
Sweet | Honey, cinnamon | Delicious on pancakes or toast |
There are endless possibilities when it comes to flavored butter balls. Get creative and experiment with different combinations to find your favorites. Once you have made your butter balls, it’s time to move on to storing and serving them.
TRANSITION: Now that you have created your delicious flavored butter balls, let’s talk about the best way to store and serve them.
Storing and Serving the Butter Balls
When it comes to storing and serving your flavorful creations, remember to keep your butter balls chilled in an airtight container to maintain their freshness. Storing butter balls properly is essential to preserve their taste and texture.
After shaping your butter into small balls, place them in the refrigerator for at least an hour to firm up. Once chilled, transfer the butter balls to an airtight container to prevent them from absorbing any odors or flavors from the fridge. This will ensure that your butter balls stay fresh and delicious.
When it’s time to serve, take out the desired amount and let them come to room temperature for a few minutes. Butter balls are versatile and can be used in various ways – spread them on toast, melt them on steamed vegetables, or use them to enhance the flavor of your favorite dishes. Get creative and enjoy the rich, creamy goodness of your homemade butter balls!
Conclusion
So there you have it, a step-by-step guide on how to make butter balls.
Now that you know the secrets to creating these delectable delights, you can impress your friends and family with your culinary skills.
Imagine the look on their faces as they bite into these creamy, flavorful bites of heaven.
The possibilities are endless when it comes to adding your own unique twist to the recipe.
So go ahead, gather your ingredients and tools, and embark on this buttery adventure.
Get ready to indulge in the buttery goodness that awaits!
Diana’s meticulous nature and editorial prowess set the gold standard for our content. With over a decade in the culinary and publishing industries, her guidance ensures that every article perfectly blends information and entertainment. A culinary experimenter, Diana loves whipping up new butter-based concoctions in her kitchen.
Recipes & Culinary Uses
How to Make Brownies With Weed Butter

Hey there, fellow baking enthusiasts! Ever wondered how to take your brownie recipe to a whole new level? Well, I’ve got a little secret ingredient that’ll surely elevate your baking game: weed butter.
Now, before you start raising eyebrows, let me assure you that this article is all about responsible and informed baking. I’ll guide you through the process of making your very own batch of deliciously potent weed brownies.
So, get ready to embark on a mouthwatering journey that combines the best of baking and cannabis. Let’s dive in!
Key Takeaways
- Different weed strains have different effects, so choose a balanced strain with a combination of THC and CBD for making weed butter.
- Decarboxylate cannabis in the oven to activate THC before making weed butter.
- Use proper dosing techniques and start with a lower dose to avoid overconsumption and unpleasant side effects.
- Store weed brownies properly in a cool, dark place and consume within a week for optimal freshness and potency.
Selecting the Right Strain for Weed Butter
To make the best brownies with weed butter, you’ll need to choose the right strain of cannabis. When it comes to selecting the best cannabis strain for edibles, it’s important to understand the effects that different weed strains can have.
Some strains are known for their uplifting and energizing effects, while others are more relaxing and calming. For edibles, you’ll want to choose a strain that has a balanced combination of THC and CBD. THC is responsible for the psychoactive effects, while CBD provides a more calming and therapeutic experience. Finding the right balance will ensure that your brownies have the desired effects.
Now that you know the importance of choosing the right strain, let’s move on to making weed butter from scratch.
Making Weed Butter From Scratch
First, you’ll need to gather the necessary ingredients for making weed butter from scratch. To make weed butter, you’ll need unsalted butter, ground cannabis, and water. Start by decarboxylating your cannabis in the oven to activate the THC.
Next, melt the butter and add the ground cannabis. Simmer the mixture on low heat for a few hours, stirring occasionally. The alternative method of making weed-infused butter involves using a slow cooker, which can simplify the process.
The benefits of using weed butter in other recipes are numerous. Not only does it add a unique flavor to your dishes, but it also allows for a more controlled and precise dosage of cannabis.
Once the butter has cooled, strain out the plant matter, and you’re left with homemade weed butter ready to be used in all sorts of delicious recipes.
Infusing Weed Butter Into Your Brownie Mix
Once you’ve infused your homemade weed butter into your brownie mix, the rich and potent flavors will elevate your brownies to a whole new level of deliciousness. Infusing weed butter into your brownie mix is a simple and effective way to create alternative edibles that pack a punch.
Here are three infusing techniques to help you make the most of your weed butter brownies:
-
Double Boiler Method: Place a heatproof bowl over a pot of simmering water, and melt your weed butter in the bowl. Once melted, add it to your brownie mix and stir well to ensure even distribution.
-
Stovetop Method: Melt your weed butter in a saucepan on low heat, stirring continuously to prevent burning. Once melted, add it to your brownie mix and mix thoroughly.
-
Microwave Method: Melt your weed butter in a microwave-safe bowl, heating in short bursts and stirring in between. Once melted, add it to your brownie mix and mix well.
With these infusing techniques, you can create delectable weed butter brownies that are sure to impress. Enjoy responsibly!
Baking Perfectly Potent Weed Brownies
For perfectly potent weed brownies, ensure you mix the infused butter thoroughly into the brownie batter. This step is crucial to evenly distribute the cannabis throughout the mixture, ensuring each bite is infused with the desired dose.
When it comes to dosing techniques, it’s important to note that the potency of your brownies will depend on the strength of your infused butter. To control the dosage, start by calculating the total amount of THC in your butter and divide it by the number of servings. This will give you an idea of how much THC is in each brownie.
If you’re looking for alternative cannabis-infused desserts, consider trying recipes like cannabis-infused cookies, cakes, or even ice cream. Just remember to adjust the dosage accordingly and always label your edibles clearly.
Happy baking!
Dos and Don’ts of Dosing Weed Brownies
When it comes to making weed brownies, proper dosage of weed butter is crucial. Overconsumption can lead to unpleasant experiences, so it’s important to know how much weed butter to use for the desired effect.
To ensure consistent potency, there are a few tips to keep in mind. First, use a reliable recipe that provides specific instructions on the amount of weed butter needed. This will help you avoid using too much or too little.
Second, properly measure the weed butter. Use a kitchen scale to weigh the butter accurately, as eyeballing it can result in inaccurate dosing. This step is crucial for achieving the desired effect and avoiding any potential negative experiences.
Proper Weed Butter Dosage
To determine the proper dosage of weed butter for your brownies, it’s essential to consider the potency and desired effects. Here are three important things to consider:
-
Weed butter infusion methods: The potency of your weed butter depends on how you infuse it. Common methods include using a stovetop, slow cooker, or a specialized cannabis-infused butter machine. Each method may result in varying levels of THC extraction, so it’s important to choose a method that suits your desired potency.
-
Calculating THC content: To accurately calculate the THC content in your weed butter, you need to know the percentage of THC in your starting cannabis material. This information can usually be found on the packaging of your cannabis product. From there, you can use a simple formula to determine the approximate THC content in your infused butter.
-
Desired effects: Understanding your desired effects is crucial in determining the proper dosage of weed butter. If you’re a beginner or have a low tolerance, it’s recommended to start with a lower dose and gradually increase as needed. It’s important to remember that the effects of edibles can take longer to kick in and can be more potent, so patience is key.
Avoid Overconsumption Risks
Understanding the potential risks of overconsumption is crucial in ensuring a safe and enjoyable experience with cannabis-infused edibles. While edibles can provide a longer-lasting and more intense high compared to smoking or vaping, it’s important to consume them responsibly.
Overconsumption can lead to unpleasant side effects such as anxiety, paranoia, and even hallucinations. To avoid these risks, it is recommended to start with a low dose, especially if you are a beginner. Give your body enough time to process the edible before consuming more.
It’s also important to be aware of the potency of the edible you are consuming, as different products can have varying levels of THC. By practicing responsible consumption practices and being aware of the risks, you can have a safe and enjoyable experience with cannabis-infused edibles.
Tips for Consistent Potency
When it comes to making weed butter brownies, maintaining consistent effects can be a challenge. However, there are a few tips that can help you adjust the potency levels and ensure a consistent experience every time. Here’s what you need to know:
-
Use precise measurements: To achieve consistent potency, it’s crucial to measure your ingredients accurately. This applies not only to the amount of weed butter you use but also to the other ingredients in your recipe.
-
Test potency before baking: Before adding the weed butter to your brownie mix, try a small amount to gauge its potency. This will give you an idea of how strong the final product will be and allow you to adjust the amount of weed butter accordingly.
-
Keep notes: Maintaining a record of your recipes and the effects they produce can help you fine-tune the potency levels over time. By noting the amount of weed butter used and the resulting effects, you can make adjustments to achieve your desired experience.
Following these tips will help you create consistently potent weed butter brownies that deliver the desired effects every time.
Storing and Enjoying Your Weed Brownies
Once they’ve cooled, you can store your weed brownies in an airtight container to keep them fresh. Proper storage techniques are essential to maintain the potency and flavor of your infused brownies. Here are some tips for storing and enjoying your weed brownies:
Technique | Description |
---|---|
Store in a cool, dark place | Heat and light can degrade the potency of the cannabinoids in your brownies. Keep them away from direct sunlight or high temperatures. |
Separate from regular brownies | To avoid confusion or accidental consumption, it’s best to store your weed brownies separately from regular ones. Label the container clearly. |
Use within a week | Although the brownies can last longer, it’s recommended to consume them within a week to ensure optimal freshness and potency. |
Freeze for long-term storage | If you have a large batch or want to save them for later, you can freeze your weed brownies in an airtight container. Thaw them before serving. |
Best serving methods | Enjoy your weed brownies by cutting them into small, manageable pieces. Start with a low dosage and wait at least an hour before consuming more. Remember to always store them securely and out of reach of children or pets. |
Frequently Asked Questions
Can I Use Any Strain of Weed to Make Weed Butter, or Are There Specific Strains That Work Best?
Any strain of weed can be used to make weed butter, but there are specific strains that work best for making edibles. When infusing weed butter, consider the potency, flavor profile, and desired effects of the strain.
How Long Does It Take to Make Weed Butter From Scratch?
To make weed butter from scratch, it typically takes a few hours. After infusing the butter with cannabis, you can use it to enhance various recipes. Remember to store the weed butter properly to maintain its potency.
Can I Use Store-Bought Brownie Mix or Do I Have to Make the Mix From Scratch?
I can use store-bought brownie mix for weed brownies, but it’s important to properly dose them. The homemade mix gives more control over the ingredients, but store-bought is convenient.
How Do I Know if My Weed Brownies Are Potent Enough?
To properly dose weed brownies, start by using a reliable recipe and accurately measuring the amount of weed butter. Test the potency by starting with a small piece and waiting for the effects. Adjust the dosage accordingly for future batches.
How Long Can I Store My Weed Brownies Before They Go Bad?
The shelf life of weed brownies depends on how they are stored. To ensure the best quality, store them in an airtight container in a cool, dark place. They can last up to a week, but it’s best to consume them within a few days for optimal freshness.
Conclusion
In conclusion, making brownies with weed butter is a fun and delicious way to enjoy the benefits of marijuana. By selecting the right strain for your weed butter and infusing it into your brownie mix, you can create perfectly potent treats.
However, it is important to be mindful of dosing to avoid any unwanted effects. Did you know that a recent survey found that 42% of cannabis users prefer edibles as their preferred method of consumption?
So why not try making your own weed brownies and join the growing number of people who enjoy this tasty and alternative way of experiencing the effects of marijuana.
Sunny’s articles radiate enthusiasm, much like her sunny disposition. As our resident “Butter Geek”, she delves deep into the latest butter trends, ensuring our readers are always in the know. Beyond her writing, Sunny’s passion lies in exploring vegan butter alternatives and hosting butter-tasting soirées.
Recipes & Culinary Uses
How to Make Brown Sugar Butter

Deliciously decadent and delightfully creamy, making homemade brown sugar butter is a culinary endeavor that is both easy and rewarding. With just a few simple ingredients and a touch of creativity, you can whip up a batch of this delectable spread that will elevate any dish it graces.
In this article, I will guide you through each step of the process, from selecting the perfect ingredients to achieving the ideal texture. Get ready to embark on a buttery journey like no other!
Key Takeaways
- Consider coconut sugar, maple syrup, and honey as substitutes for brown sugar
- Proper ingredient ratios are crucial for consistency and flavor
- Spices like cinnamon and nutmeg can elevate the taste
- Thoroughly cream together softened butter and brown sugar
Choosing the Right Ingredients
To make brown sugar butter, you’ll want to start by choosing the right ingredients.
When it comes to brown sugar substitutes and alternative sweeteners, there are a few options to consider. One popular substitute for brown sugar is coconut sugar. It has a similar flavor profile and can be used in equal amounts as a replacement.
Another alternative sweetener is maple syrup, which adds a rich and distinct taste to the butter. Honey is also a great option, with its natural sweetness and smooth texture.
Depending on your preference, you can experiment with different combinations of these substitutes to find the perfect balance of flavor. Remember to carefully measure the amount of substitute you use to ensure the right consistency and taste in your brown sugar butter.
Measuring and Mixing the Ingredients
When it comes to baking, getting the right ingredient ratios is crucial for achieving the perfect consistency and flavor in your finished product.
In this discussion, I will delve into the importance of proper ingredient ratios and how they can affect the outcome of your recipe.
Additionally, I will explore various mixing techniques that can help you achieve consistency in your batter or dough, ensuring that every bite is just as delicious as the last.
Proper Ingredient Ratios
The proper ingredient ratios for making brown sugar butter are essential for achieving the perfect balance of sweetness and richness. When it comes to ingredient substitutions, it’s important to note that while you can use white sugar instead of brown sugar, it will alter the flavor and color of the butter.
To troubleshoot common issues, such as the butter being too sweet or not sweet enough, you can adjust the amount of brown sugar used. If the butter is too sweet, try using less brown sugar or adding a pinch of salt to balance out the sweetness. On the other hand, if the butter is not sweet enough, you can increase the amount of brown sugar or add a teaspoon of vanilla extract for extra flavor.
Mixing Techniques for Consistency
For a consistent texture, try gently folding the mixture instead of vigorously stirring it.
When making brown sugar butter, the whisking method and temperature control are crucial for achieving the desired texture.
Begin by whisking the softened butter until it becomes smooth and creamy. This can be done using an electric mixer or by hand with a whisk.
Next, gradually add the brown sugar, ensuring that it is fully incorporated before moving on. Whisking slowly and evenly will prevent clumps from forming and create a smooth consistency.
Additionally, maintaining the temperature of the butter throughout the process is essential. If the butter becomes too warm, it can cause the mixture to separate or become greasy. To avoid this, work with softened butter at room temperature and avoid overheating.
Adding Flavor Enhancements
When it comes to adding flavor to a dish, spices are my go-to choice. They have the power to elevate the taste and take a recipe from ordinary to extraordinary.
In addition to spices, I also love infusing my dishes with aromatic herbs, like rosemary or thyme, to impart a subtle yet distinctive flavor.
Together, these flavor enhancements can transform a simple meal into a culinary masterpiece.
Spices for Added Taste
Spice up your brown sugar butter by adding a pinch of cinnamon or a dash of nutmeg for added taste. These warm and comforting spices will elevate the flavor profile of your butter, giving it a delightful twist.
But why stop there? You can also experiment with other aromatic spices like vanilla and cardamom to take your brown sugar butter to the next level. The combination of these flavors will create a harmonious blend that is both sweet and fragrant.
Whether you’re spreading it on toast, using it in baking, or simply enjoying it on its own, this spiced brown sugar butter will add a burst of flavor to any dish.
Now, let’s explore how infusing it with aromatic herbs can take it even further.
Infusing With Aromatic Herbs
After exploring the use of spices to enhance the taste of brown sugar butter, I decided to take it a step further and infuse it with aromatic herbs. Infusing the butter with citrus and experimenting with different herbs can elevate its flavor profile and add a refreshing twist. To help you understand the possibilities, I’ve created a table to showcase some exciting herb and citrus combinations:
Citrus | Herbs | Flavor Profile |
---|---|---|
Lemon | Rosemary | Fresh, tangy, and herbaceous |
Orange | Thyme | Sweet, citrusy, and savory |
Lime | Basil | Zesty, bright, and aromatic |
Grapefruit | Mint | Tangy, refreshing, and cool |
Achieving the Perfect Texture
To achieve the perfect texture for your brown sugar butter, make sure you thoroughly cream together the softened butter and brown sugar. This step is crucial in creating a smooth and spreadable consistency.
Here are three tips to improve spreadability and enhance shelf life:
-
Gradually add the brown sugar to the softened butter while mixing. This ensures that the sugar is evenly distributed throughout the butter, resulting in a smooth texture.
-
Beat the mixture on medium-high speed for a few minutes until it becomes light and fluffy. This incorporates air into the butter, making it easier to spread.
-
Store the brown sugar butter in an airtight container in the refrigerator. This helps to preserve its freshness and extend its shelf life.
Storing and Preserving Brown Sugar Butter
Now that you’ve achieved the perfect texture for your brown sugar butter, it’s important to know how to store and preserve it to ensure its freshness and extend its shelf life.
There are several techniques that can help you in this process.
First, transfer the butter into an airtight container, ensuring that there is no excess air inside. This will prevent oxidation and maintain its flavor.
Secondly, store the butter in the refrigerator, as the cool temperature will slow down the growth of bacteria and maintain its quality.
Lastly, if you want to extend the shelf life even further, you can consider freezing the brown sugar butter. Simply wrap it tightly in plastic wrap or place it in a freezer-safe container.
Following these preserving techniques will help you enjoy your delicious brown sugar butter for a longer period of time.
Creative Ways to Use Brown Sugar Butter
If you’re feeling adventurous in the kitchen, try incorporating this delectable spread into your favorite baked goods or breakfast recipes for a unique and irresistible twist.
Here are three creative ways to use brown sugar butter:
-
Baked Goods: Add a dollop of brown sugar butter to your cookie dough or cake batter for an extra burst of flavor. The rich and caramel-like taste of the butter will complement the sweetness of your treats, making them even more indulgent.
-
Breakfast Delights: Spread brown sugar butter on your toast, pancakes, or waffles for a sweet and creamy topping. The warm and buttery notes of the spread will melt into your breakfast, adding a delightful richness to every bite.
-
Savory Dishes: Don’t limit brown sugar butter to just sweet treats! Use it as a glaze for roasted vegetables or grilled meats. The hint of sweetness from the brown sugar will balance out the savory flavors, creating a harmonious and mouthwatering dish.
Frequently Asked Questions
Can I Use Salted Butter Instead of Unsalted Butter in This Recipe?
Yes, you can use salted butter instead of unsalted butter in this recipe. However, it will impact the taste as salted butter already has salt in it, which may make the brown sugar butter slightly saltier.
Can I Use Coconut Sugar Instead of Brown Sugar?
Yes, you can use coconut sugar instead of brown sugar. It will give the brown sugar butter a slightly different taste, with a hint of coconut flavor.
Can I Substitute Another Type of Sweetener, Like Honey or Maple Syrup, for the Brown Sugar?
Yes, you can substitute honey or maple syrup for the brown sugar in brown sugar butter. However, keep in mind that the flavor profile will change. Honey adds a floral sweetness, while maple syrup adds a rich, caramel-like taste.
How Long Can I Store Brown Sugar Butter in the Refrigerator?
The shelf life of brown sugar butter stored in the refrigerator varies, but it typically lasts for several weeks. To ensure proper storage, keep it in an airtight container or wrap it tightly in plastic wrap.
Can I Freeze Brown Sugar Butter for Long-Term Storage?
Yes, you can freeze brown sugar butter for long-term storage. To do so, put it in an airtight container or freezer bag. This freezing technique will preserve its flavor and texture.
Conclusion
In conclusion, making brown sugar butter is a simple and delicious way to add flavor to your dishes. By using the right ingredients, measuring and mixing them properly, and adding flavor enhancements, you can achieve the perfect texture and taste.
One interesting statistic to consider is that the average American consumes about 23 pounds of butter per year, showing just how popular this ingredient is in our diets.
So why not elevate your recipes with the rich and sweet taste of homemade brown sugar butter? Give it a try and enjoy the delightful results!
Sunny’s articles radiate enthusiasm, much like her sunny disposition. As our resident “Butter Geek”, she delves deep into the latest butter trends, ensuring our readers are always in the know. Beyond her writing, Sunny’s passion lies in exploring vegan butter alternatives and hosting butter-tasting soirées.
-
Recipes & Culinary Uses3 weeks ago
How to Scramble Eggs Without Butter or Oil
-
Specialized Equipment3 weeks ago
Best Butter Infuser for Cannabis
-
Butter Tips and Tricks3 weeks ago
How Many Calories in Tbsp of Butter
-
Butter Tips and Tricks3 weeks ago
Where Can I Find a Peanut Butter Maker Grocery Store
-
Butter Basics3 weeks ago
What Is Crab Butter
-
Butter Tips and Tricks3 weeks ago
How Many Grams in a Tbsp of Butter
-
Butter Basics3 weeks ago
What Is Shave Butter
-
Product Care & Storage3 weeks ago
How Long Does It Take for Butter to Come to Room Temperature