Connect with us

Butter Basics

5 Easy Ways to Cut Butter for Perfect Baking Results

Published

on

An image showcasing the delicate process of cutting in butter: a pair of hands firmly holding a chilled butter stick, gently slicing it into small cubes using a pastry cutter, with fine flour particles floating in the air

As a home cook, I recognize the importance of mastering the art of cutting butter. It’s more than just slicing; it’s about obtaining the perfect consistency and seamlessly melding flavors.

In this article, I’ll guide you through the step-by-step process of softening butter, the science behind cold vs. room temperature butter cutting, and troubleshooting common issues.

From the classic cut-in method to advanced techniques and ideas, we’ll take your butter cutting skills to the next level.

Get ready to elevate your baking and cooking game with the art of cutting in butter.

Key Takeaways

  • Proper butter cutting techniques are important for achieving desired results in baked goods.
  • Choosing the right tools, such as knives or butter slicers, is crucial for cutting butter effectively.
  • Sharp knives make spreading butter easier and more efficient, enhancing precision and control.
  • Softening butter properly, by leaving it at room temperature or using other methods, is crucial for easier cutting and achieving the desired texture.
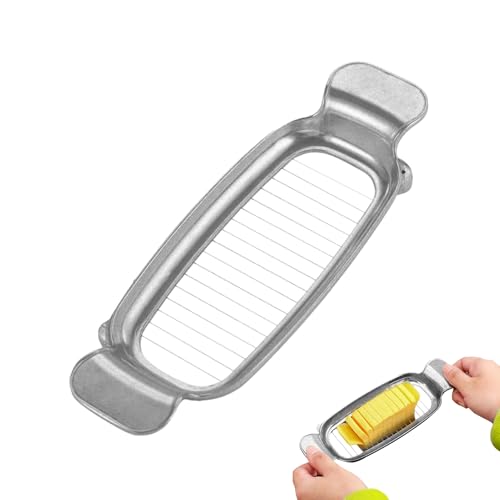
Understanding the Importance of Proper Butter Cutting Techniques

Advertisement

Understanding the importance of proper butter cutting techniques is crucial for achieving the desired results in your baked goods.

When it comes to cutting butter, using the right tools and methods can make a significant difference in the texture and consistency of your dough. There are various butter cutting tools available, such as pastry blenders, knives, or even your fingertips. Each tool has its advantages, but the key is to ensure that the butter is evenly distributed throughout the dough.

One popular method is the ‘rubbing in’ technique, where you use your fingertips to break up the butter into small pieces and then incorporate it into the flour mixture. Another method is using a pastry blender, which cuts the butter into small, uniform pieces.

Whichever method you choose, make sure to work quickly to prevent the butter from melting too much, as this can affect the final texture of your baked goods.

Choosing the Right Tools for Cutting Butter

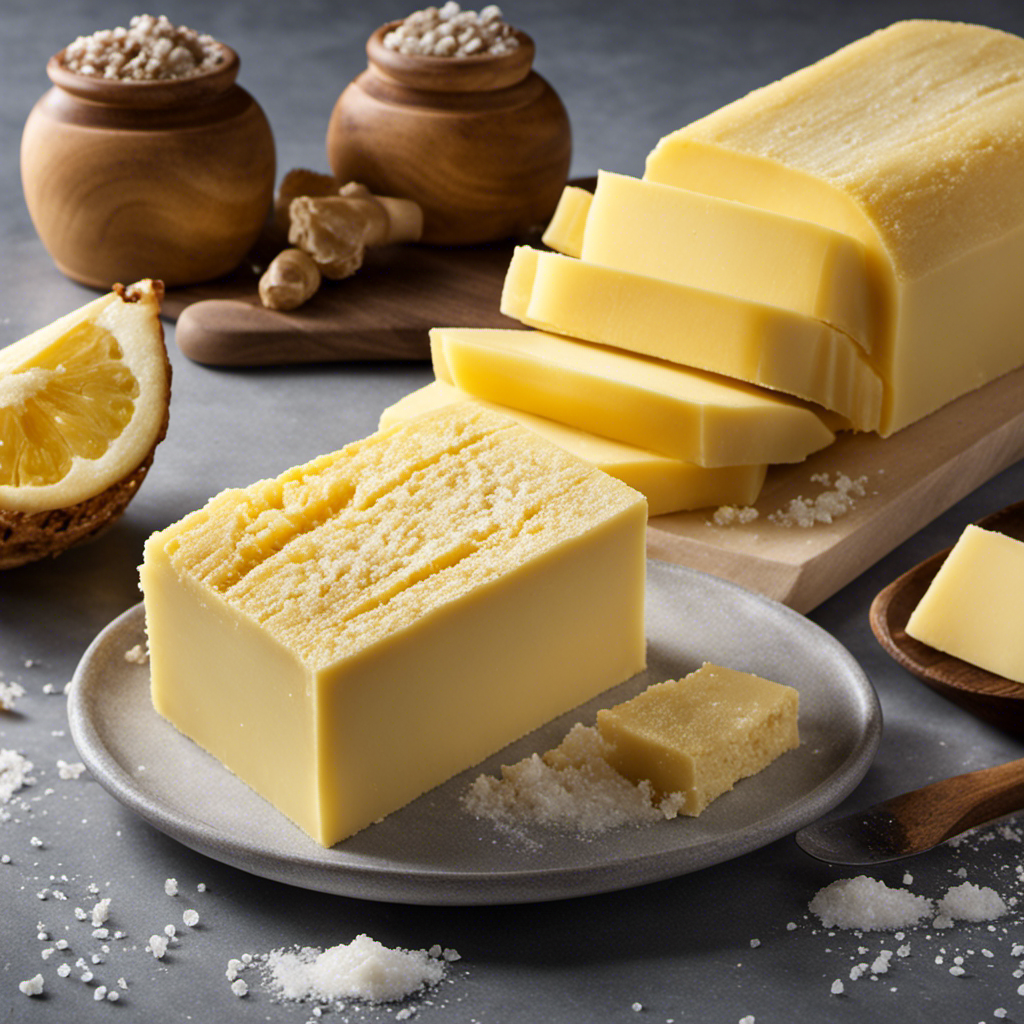
When it comes to cutting butter, choosing the right knife is crucial. Different knife types are designed specifically for butter, such as a butter knife or a cheese knife with a serrated edge.

Advertisement

The sharpness of the knife is also important, as a dull blade can lead to squished or uneven slices. If you don’t have a suitable knife, there are also alternative butter slicers available that can make the task easier and more efficient.

Knife Types for Butter

To cut in butter, you’ll want to use a knife that’s specifically designed for this purpose. There are several knife options available, each with its own unique features that make cutting through butter a breeze. Here are three popular knife types for cutting butter:

Knife Type Description
Butter Knife This knife has a rounded tip and a serrated edge, making it perfect for spreading butter on bread or toast. It allows for smooth, even spreading without tearing the bread.
Cheese Knife Although designed for cutting cheese, a cheese knife can also be used to cut through cold butter. It typically has a wide, flat blade that makes it easy to slice through the butter without any effort.
Offset Spatula While not technically a knife, an offset spatula can be a great tool for cutting in butter. Its long, narrow blade and angled handle provide excellent control and precision when cutting butter into flour for pastry dough.

These knife options, combined with proper spreading techniques, will ensure that your butter is evenly distributed and your dishes turn out delicious every time.

Importance of Sharpness

The importance of having sharp knives is that they make the task of spreading butter much easier and more efficient. When it comes to cutting in butter, sharpness plays a vital role in achieving the desired results. Here are three reasons why sharp knives are important:

  1. Smooth and Effortless Spreading: A sharp knife effortlessly glides through butter, allowing for smooth and even spreading on bread, toast, or any other surface.

  2. Precision and Control: With a sharp knife, you have better control over the amount of butter you’re spreading, ensuring that you get the perfect amount every time.

  3. Time-saving: Sharp knives reduce the effort required to cut in butter, making the process quicker and more efficient.

Butter Slicer Alternatives

If you’re looking for a different tool for slicing butter, you might want to consider trying out alternative options. While a traditional butter knife may be the go-to choice for most people, there are other tools available that can make the task easier and more efficient. To help you find the right alternative butter cutting tool, I have compiled a list of options along with their features and reviews in the table below:

Advertisement
Tool Name Features Reviews
Butter Slicer Adjustable thickness settings, ergonomic handle, stainless steel blade "This butter slicer is a game changer! It slices through butter effortlessly." – User A
Cheese Plane Thin and sharp blade, comfortable grip handle "I use this cheese plane to slice butter and it works like a charm." – User B
Wire Butter Cutter Wire design for precise slicing, easy to clean "I love how precise this wire butter cutter is. It makes beautiful thin slices." – User C

Step-by-Step Guide to Softening Butter for Cutting

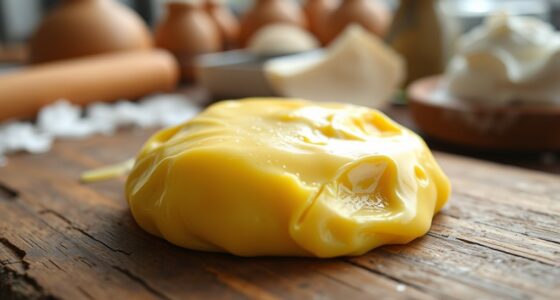
When it comes to cutting butter, one important factor to consider is its temperature. Room temperature butter is easier to work with and yields better results than cold or melted butter.

To achieve the perfect texture, it is crucial to soften the butter properly before cutting. In this discussion, we will explore different techniques and step-by-step guides to ensure that you have the ideal room temperature butter for all your cutting needs.

Room Temperature Butter

To easily cut in butter, you’ll want it to be at room temperature. Room temperature butter is soft enough to be easily incorporated into dry ingredients, making it perfect for cutting into dough or creating a crumbly texture in pastries.

Here are some tips for softening butter and storing it at room temperature:

  1. Leave it out: Simply place the butter on the counter and let it sit for about 30 minutes to an hour until it reaches room temperature. This method is quick and easy.

  2. Microwave it: If you’re short on time, you can soften the butter in the microwave. Cut the butter into small pieces and microwave it in 10-second intervals, checking and stirring in between, until it’s soft but not melted.

  3. Store it properly: If you often use room temperature butter, you can keep it on the counter in a covered butter dish or a butter keeper. This way, you’ll always have softened butter ready for cutting.

Cutting Techniques

Now that we have our room temperature butter ready, let’s move on to the next step: cutting techniques. Cutting in butter is an essential skill in many baking recipes, and mastering it can greatly improve the texture and consistency of your baked goods. Luckily, there are some butter cutting hacks that even beginners can use to achieve excellent results.

Advertisement

One popular technique is using a pastry cutter or a fork to cut the butter into small pieces. Simply press the tool into the butter and rock it back and forth until the butter breaks down into pea-sized crumbs.

Another method is grating the butter using a cheese grater on a large hole setting. This creates thin shreds of butter that can be easily incorporated into the dough.

Whichever method you choose, remember to work quickly to prevent the butter from melting too much. With a little practice, you’ll become a pro at butter cutting in no time!

The Science Behind Cold Vs. Room Temperature Butter Cutting

The science behind cutting in cold vs. room temperature butter is fascinating. When it comes to achieving cutting precision, the temperature of the butter plays a crucial role. Here’s why:

  1. Cold butter: When butter is cold, it is firm and holds its shape better. This makes it easier to cut into small, uniform pieces, especially when making pastries or pie crusts. The cold temperature also helps to keep the butter from melting too quickly, which can affect the texture of the final product.

  2. Room temperature butter: Room temperature butter is softer and more pliable. This makes it easier to incorporate into batters and doughs, resulting in a smoother and more evenly mixed mixture. However, it may be more challenging to achieve precise cutting when the butter is too soft, as it tends to stick to the knife or pastry cutter.

  3. Finding the right temperature: The key to cutting butter with precision is finding the balance between cold and room temperature. For tasks that require small, defined pieces, such as making flaky biscuits, cold butter is ideal. On the other hand, when blending butter into a batter or dough, allowing it to come to room temperature is recommended for easier incorporation.

Understanding the role of butter temperature in cutting can help you achieve better results in your baking and cooking endeavors.

Advertisement

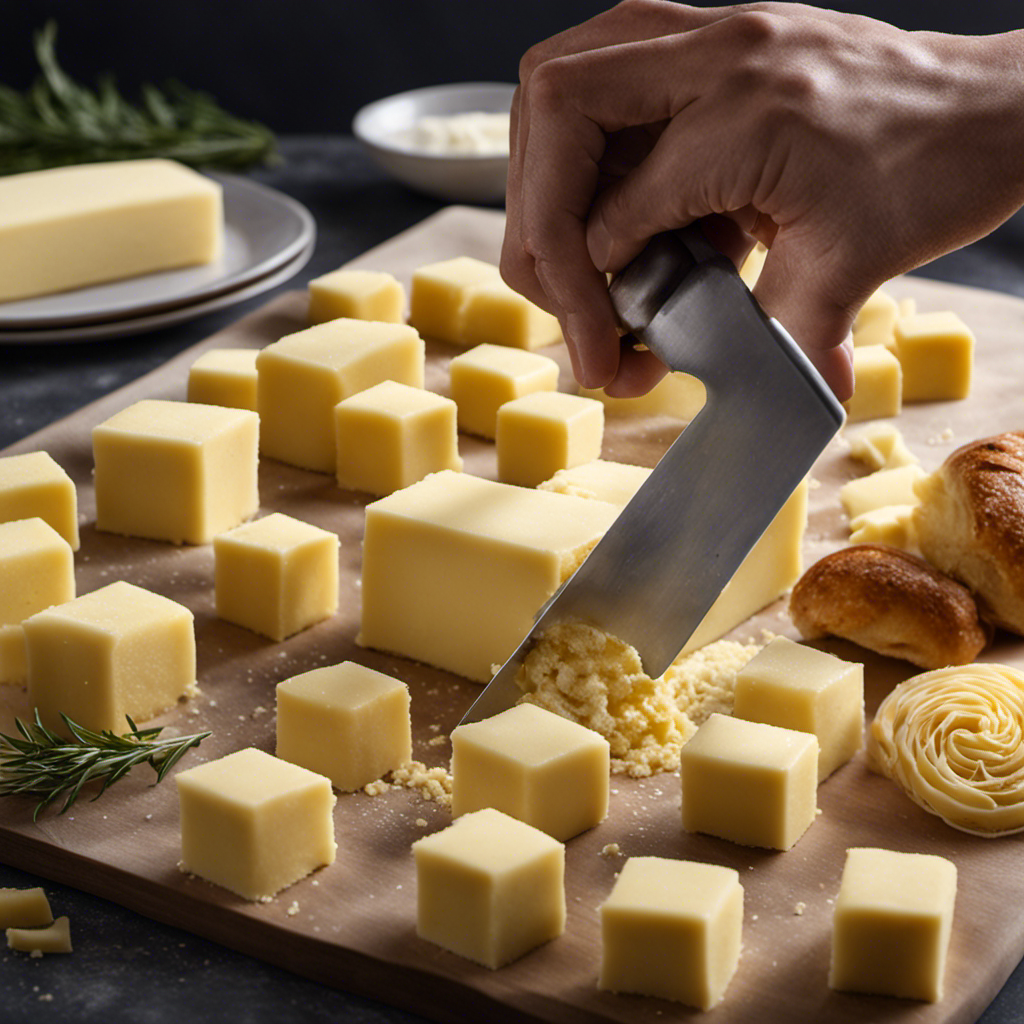
Mastering the Classic Cut-in Method for Butter

Mastering the classic cut-in method involves incorporating chilled butter into dry ingredients using a pastry cutter until the mixture resembles coarse crumbs. This technique is essential for creating flaky pastries, biscuits, and pie crusts.

However, if you don’t have a pastry cutter on hand or prefer alternative methods, there are a few options to consider.

One alternative is using two knives or a fork to cut the butter into the dry ingredients. Simply cross the knives or use the fork to cut through the butter, blending it with the dry mixture until it reaches the desired coarse texture.

Another option is grating frozen butter directly into the dry ingredients, using a box grater. This method allows for even distribution of butter throughout the mixture, resulting in a flaky and tender finished product.

While the classic cut-in method is commonly used in sweet recipes, it can also be applied to savory dishes, such as biscuits for a hearty breakfast or a savory pie crust for a delicious dinner.

Advertisement

Exploring Alternative Butter Cutting Techniques

If you don’t have a pastry cutter, there are alternative methods for incorporating chilled butter into dry ingredients. As someone who loves baking, I’ve had the opportunity to explore unique butter cutting tools and experiment with flavored butter cutting techniques. Here are three methods that I have found to be effective and enjoyable:

  1. The Fork Method: Simply use a fork to mash the chilled butter into small pieces, pressing it against the sides of the bowl until it resembles coarse crumbs. This method works well for recipes that require a crumbly texture, like pie crusts or streusel toppings.

  2. The Knife Method: Cut the chilled butter into small cubes and use a knife to chop it into the dry ingredients. This method allows for better control over the size of the butter pieces, resulting in a more even distribution throughout the mixture.

  3. The Grater Method: If you prefer a more hands-on approach, try grating the chilled butter using a box grater. This creates fine, grated butter that can easily be incorporated into the dry ingredients, perfect for recipes like scones or biscuits.

Tips and Tricks for Achieving Perfectly Cut Butter

To achieve perfectly incorporated butter in your baked goods, you’ll want to ensure that the butter is cold and firm. This is essential for achieving a flaky texture and even distribution of the butter throughout your dough. Softening techniques can be used when you want the butter to blend more easily with other ingredients, but for cutting in butter, firmness is key.

Here are some tips and tricks for achieving perfectly cut butter:

  1. Start with cold butter: Keep your butter in the refrigerator until you’re ready to use it. Cold butter will hold its shape better and make cutting in easier.

  2. Use a pastry cutter or two knives: These tools are designed to cut the butter into small pieces and incorporate it into the dough. Simply press down on the butter and move the tool in a cutting motion until the butter is evenly distributed.

  3. Work quickly: The goal is to cut the butter into pea-sized pieces. The longer you work with the butter, the more it will soften, so work as efficiently as possible.

Troubleshooting Common Butter Cutting Issues

When incorporating butter into your dough, it’s important to work quickly to prevent the butter from softening too much. Maintaining the right butter consistency is crucial for achieving flaky and tender baked goods. However, sometimes things don’t go as planned and you may encounter some common issues when cutting in butter.

Here are a few troubleshooting tips to help you overcome these problems:

Advertisement
  1. Butter melting too quickly: If the butter starts melting before you’re finished cutting it into the dough, try chilling the dough for a few minutes to firm up the butter.

  2. Uneven distribution: If you end up with unevenly distributed butter in your dough, try using a pastry cutter or your fingers to break up any large chunks and distribute them more evenly.

  3. Overmixing: Be careful not to overmix the dough when cutting in butter, as this can result in a tough texture. Mix just until the butter is distributed in small, pea-sized pieces throughout the dough.

Enhancing Flavors With Infused Butter Cutting Techniques

When it comes to adding an extra burst of flavor to dishes, butter can be a game-changer.

In this discussion, we will explore the art of creating flavorful butter combinations by using a variety of ingredients such as herbs, spices, and even fruits.

We will also delve into the different methods of infusing butter with these ingredients to maximize their taste and aroma, ultimately enhancing the overall flavor profile of our culinary creations.

Flavorful Butter Combinations

One way to enhance the flavor of butter is by combining it with different herbs and spices. Flavored butter recipes can add a burst of deliciousness to any dish, and they are incredibly easy to make.

Here are three flavorful butter combinations that you can try:

Advertisement
  1. Garlic and Herb Butter: Mix softened butter with minced garlic, chopped fresh herbs like parsley, rosemary, and thyme, and a pinch of salt. This aromatic butter is perfect for spreading on bread or melting over grilled meats and vegetables.

  2. Lemon Pepper Butter: Zest a lemon and mix it with softened butter, freshly ground black pepper, and a squeeze of lemon juice. This tangy and peppery butter is excellent for adding a zing to seafood, roasted chicken, or steamed vegetables.

  3. Chili Lime Butter: Combine softened butter with lime zest, freshly squeezed lime juice, minced chili peppers, and a sprinkle of salt. This spicy and citrusy butter is fantastic for adding a kick to corn on the cob, grilled shrimp, or even roasted potatoes.

Infusion Methods for Butter

To infuse butter with flavors, you can try using methods like melting the butter with herbs and spices or letting it sit with them at room temperature. Infused butter adds a delicious twist to your dishes and can be used in a variety of recipes. Whether you want to elevate your morning toast or enhance the flavors of your favorite pasta dish, infused butter is a versatile ingredient that can take your cooking to the next level.

Here are some popular infused butter recipes and their benefits:

Infused Butter Recipe Flavor Profile Benefits
Garlic and Herb Butter Savory and aromatic Enhances the taste of roasted vegetables and grilled meats
Lemon and Dill Butter Bright and refreshing Perfect for seafood dishes and adds a zesty kick to salads
Cinnamon and Honey Butter Warm and sweet Delicious on pancakes, waffles, and baked goods
Chili Lime Butter Spicy and tangy Adds a kick to grilled corn, chicken, or roasted vegetables
Truffle Butter Earthy and rich Elevates pasta dishes, mashed potatoes, and popcorn

Experiment with these infused butter recipes to discover new flavors and enhance your culinary creations. Enjoy the benefits of infused butter in your cooking and elevate your dishes to a whole new level.

Enhancing Taste With Butter

Enhancing the taste of your dishes is easy with infused butter. The process of infusing butter with different flavors can add a delightful twist to your favorite recipes. Here are three ways to make the most of infused butter:

  1. Herb-infused butter: Mix softened butter with finely chopped herbs like parsley, rosemary, or thyme. This adds a burst of freshness to roasted vegetables or grilled meats.

  2. Citrus-infused butter: Zest a lemon or an orange and mix it into softened butter. This tangy butter can be spread on toast, used for baking, or melted over seafood for a zesty kick.

  3. Spiced-infused butter: Combine softened butter with spices like garlic, paprika, or cayenne pepper. This versatile butter can be used to sauté vegetables, spread on corn on the cob, or melt over popcorn for a flavorful snack.

Using butter cutting tools and using softened butter in your infused butter recipes will allow for easier mixing and blending of flavors. So why not elevate your dishes with the deliciousness of infused butter?

Advertisement

Incorporating Butter Cutting Into Baking and Cooking Recipes

When incorporating butter cutting into your baking and cooking recipes, it’s important to use a pastry cutter for the best results. A pastry cutter is a versatile tool that helps you achieve the perfect texture and consistency in your recipes. It allows you to cut cold butter into flour, creating a crumbly and flaky texture that is essential for pastries and pie crusts.

To soften butter for cutting, there are a few techniques you can use. One method is to leave the butter at room temperature for about 30 minutes until it becomes soft but not melted. Another technique is to grate the cold butter using a cheese grater, which helps distribute it evenly throughout the dough.

Flavor variations can also be achieved by incorporating different types of butter, such as salted or unsalted, into your recipes. Salted butter adds a hint of saltiness to your baked goods, while unsalted butter allows the other flavors in your recipe to shine through. Experimenting with different butter options can elevate the taste of your dishes and give them a unique twist.

To illustrate the different softening techniques and flavor variations, here is a table:

Softening Techniques Flavor Variations
Room temperature Salted
Grating Unsalted
Microwave Flavored
Clarified
Cultured

Taking Butter Cutting to the Next Level: Advanced Techniques and Ideas

Using advanced techniques and creative ideas, you can elevate your baking and cooking recipes to new heights by incorporating innovative butter cutting methods.

Advertisement

With the help of advanced butter tools and techniques, you can achieve the perfect consistency and texture in your baked goods.

Here are three ways to take your butter cutting to the next level:

  1. Use a pastry blender: This tool is designed to cut cold butter into flour quickly and evenly. Its multiple blades make it easy to incorporate the butter without overmixing.

  2. Try the rubbing-in method: This technique involves rubbing cold butter into dry ingredients using your fingertips. It creates a crumbly texture that is perfect for pie crusts and scones.

  3. Freeze and grate: Freeze the butter and grate it directly into your recipe. This method ensures that the butter is evenly distributed and results in a flaky texture.

Frequently Asked Questions

Can I Use Margarine Instead of Butter When Cutting in Butter?

Yes, you can use margarine instead of butter when cutting in butter. The pros of using margarine include a lower saturated fat content, while the cons include a different flavor and texture.

Can I Use a Food Processor or Blender to Cut in Butter?

Using a food processor or blender to cut in butter saves time and effort. The best technique is to pulse the machine until the butter is evenly distributed and resembles coarse crumbs.

How Long Does It Take for Butter to Soften at Room Temperature?

To speed up the process of softening butter at room temperature, you can try cutting it into smaller pieces or using a microwave on low power. Be cautious not to melt it completely.

Advertisement

Can I Use Melted Butter Instead of Softened Butter?

Using melted butter in baking recipes can be an alternative to softened butter. It blends easily and adds moisture to the final product. However, it may affect the texture and rise of certain baked goods.

Can I Use a Pastry Cutter Instead of a Fork When Cutting in Butter?

Using a pastry cutter instead of a fork when cutting in butter has its pros and cons. A pastry cutter can make the process quicker and easier, but a fork allows for better control and precision.

Conclusion

In conclusion, mastering the art of butter cutting is essential for achieving the perfect texture and flavor in your dishes. By understanding the science behind it and choosing the right tools, you can elevate your culinary skills.

Whether you’re baking, cooking, or experimenting with infused butter cutting techniques, there’s always room to take it to the next level. So, grab your knife, soften that butter, and let your creativity flow.

With practice and perseverance, you’ll soon become a butter cutting pro, adding a touch of richness to every bite.

Advertisement
Continue Reading
Advertisement

Butter Basics

What if You Buttered Up Your Life with “Butter”?

Published

on

By

An image of a slice of toast with melted butter, oozing with richness and flavor

Have you thought about the idea of making your own delicious and nutritious butter at home? Imagine being able to create that rich, creamy delicacy right in your own kitchen!

In this article, we will delve into the world of butter, exploring its various types and culinary uses. We will also uncover the science behind making perfect butter at home and dive into the fascinating history of this beloved ingredient.

Get ready to embark on a buttery adventure that will leave you craving for more.

Key Takeaways

  • Grass-fed butter is rich in essential vitamins and fatty acids, promoting healthy skin, bones, and immune system.
  • Homemade butter allows for control over ingredients, avoiding unhealthy additives or preservatives.
  • Flavored butter options and vegan alternatives offer diverse culinary exploration and cater to different dietary preferences.
  • Proper temperature during the butter-making process is crucial for achieving the desired consistency and yield.

The Health Benefits of Homemade Butter

If you make your own butter, you’ll enjoy the health benefits that come with it. One of the main benefits of grass-fed butter is its high nutrient content. Grass-fed cows produce milk that is rich in vitamins A, D, E, and K. These vitamins are essential for maintaining healthy skin, strong bones, and a properly functioning immune system.

Advertisement

Grass-fed butter also contains a healthy balance of omega-3 and omega-6 fatty acids, which are important for brain health and reducing inflammation in the body.

Additionally, making your own butter at home allows you to control the ingredients, giving you the freedom to create flavored butter using herbs, spices, or even fruits. This allows you to add extra flavor and nutrients to your dishes without relying on store-bought options that may contain unhealthy additives or preservatives.

Exploring Different Types of Butter

There are various types of butter available for exploration. When it comes to flavored butter, the options are endless. From savory garlic butter to sweet cinnamon butter, these variations add a burst of flavor to any dish.

Additionally, for those following a vegan lifestyle, there are plenty of vegan butter alternatives to choose from. Made from plant-based oils like coconut or olive, these spreads provide a similar creamy texture and taste. They are perfect for baking or spreading on toast.

Exploring different types of butter can be a fun and delicious journey, allowing you to elevate your meals and cater to different dietary preferences. So go ahead and indulge in the world of flavored butter and vegan alternatives to discover new and exciting flavors.

Advertisement

Butter as a Culinary Ingredient: Tips and Tricks

To enhance your culinary skills, try incorporating butter into your recipes using these helpful tips and tricks.

Butter is not only a rich and creamy ingredient, but it can also be used as a vegan alternative. For those who follow a plant-based diet, there are several substitutes available such as vegan butter or margarine made from plant oils. These alternatives can be used in baking, cooking, or spreading on toast.

Additionally, using flavored butter can elevate your dishes to a whole new level. Get creative with flavor combinations like garlic and herb butter for roasted vegetables or lemon and dill butter for grilled fish. The possibilities are endless, and flavored butter can add depth and complexity to your favorite recipes.

Advertisement

The Science Behind Making Perfect Butter at Home

Creating homemade butter is a fascinating process that involves churning cream until it separates into butter and buttermilk. The chemistry of churning butter is a delicate balance of fat and water molecules. Temperature plays a crucial role in butter making.

Here are some key points to consider:

  • Cream should be at a slightly warmer temperature, around 50-55°F, to ensure proper separation.
  • Churning at too low a temperature can result in a longer process and less yield.
  • Conversely, churning at too high a temperature can cause the butter to become greasy and not hold its shape well.
  • The ideal temperature range allows for the fat globules to coalesce and form a solid mass.
  • The process can be accelerated by using colder cream or a colder churning environment.

Understanding the chemistry and temperature requirements of butter making ensures a successful outcome.

Now, let’s uncover the history of butter: from ancient times to today.

Uncovering the History of Butter: From Ancient Times to Today

Advertisement

Let’s delve into the fascinating history of butter, from ancient times to today.

Butter has played a significant role in the cultural traditions of various regions around the world. In Europe, for example, butter has been a staple in cooking and baking for centuries, symbolizing richness and indulgence.

In India, ghee, a form of clarified butter, holds great cultural and religious significance and is used in traditional ceremonies and rituals.

The environmental impact of butter production, however, is a growing concern. The dairy industry contributes to greenhouse gas emissions and deforestation, as well as water pollution from runoff.

Sustainable practices, such as organic farming and reducing food waste, are being implemented to mitigate these effects.

Advertisement

It is crucial to balance the cultural importance of butter with sustainable production methods for a better future.

Frequently Asked Questions

How Many Calories Are in a Serving of Homemade Butter?

A serving of homemade butter typically contains around 100-120 calories. It is important to note that butter is high in saturated fat and should be consumed in moderation. However, it does provide some nutritional benefits, such as being a good source of vitamin A.

What Is the Shelf Life of Homemade Butter?

The shelf life of homemade butter varies depending on storage methods. It can last up to two weeks in the refrigerator and up to six months in the freezer. Proper storage is crucial to maintain its freshness.

Can Homemade Butter Be Used as a Substitute for Margarine in Baking Recipes?

If I were to use homemade butter as a substitute for margarine in baking, I would ensure it’s properly chilled and the moisture content is controlled. This way, the butter can provide a richer flavor and better texture to the baked goods.

Are There Any Potential Allergens in Homemade Butter?

There are potential health risks associated with homemade butter, including the possibility of allergens. It’s important to consider the source of ingredients and proper hygiene practices. Store-bought butter may offer more safety assurances.

Advertisement

Can Homemade Butter Be Frozen for Long-Term Storage?

Yes, you can freeze homemade butter for long-term storage. It’s important to wrap it tightly to prevent freezer burn. There are many homemade butter recipes available online that can guide you through the process.

Conclusion

As I churned the cream, a sense of satisfaction washed over me. The process of making homemade butter had not only given me a delicious spread for my toast, but also a deeper understanding of its health benefits and culinary versatility.

Each rich, golden pat symbolized the nourishment and creativity that butter brings to our lives. Delving into its history, I saw how this humble ingredient has stood the test of time, evolving with us.

So, next time you see a stick of butter, remember the power it holds and the possibilities it offers.

Advertisement
Continue Reading

Butter Basics

What Happens if You Use Expired Shea Butter on Your Skin?

Published

on

By

An image of a cracked, discolored jar of expired shea butter, oozing with a rancid odor

As someone who is passionate about taking care of my skin, I have learned the importance of using high-quality products. But what happens if we accidentally use expired shea butter? Let me tell you, the results are not good.

Signs of expired shea butter include changes in texture, loss of nutritional benefits, and potential skin irritation. Plus, there’s a risk of mold or bacteria growth.

In this article, I’ll delve into the potential dangers and safety concerns of using expired shea butter, so you can make informed decisions for your skincare routine.

Key Takeaways

  • Using expired shea butter can lead to reduced skin softness and decreased skin elasticity.
  • Expired shea butter may cause dry and rough skin, as well as a lack of natural glow.
  • There is a potential risk of mold or bacteria growth on expired shea butter, which can result in skin irritations, infections, and allergic reactions.
  • To ensure safety and effectiveness, it is important to check the expiration date, store shea butter properly, and avoid using expired products to prevent bacterial or fungal contamination.

Signs of Expired Shea Butter

If you’re wondering how to tell if your shea butter has expired, you can look for changes in texture and smell. Shea butter typically has a shelf life of about two years, but it can start to deteriorate over time.

Advertisement

When shea butter expires, it may become grainy or lumpy instead of smooth and creamy. The texture can be a clear indicator that the shea butter is past its prime. Additionally, the smell of expired shea butter can change, becoming rancid or unpleasant.

It’s important to note that using expired shea butter may not be harmful to your skin, but it may not provide the same beneficial effects as fresh shea butter.

Now, let’s dive into the changes in texture and consistency that can occur when shea butter expires.

Changes in Texture and Consistency

To change the texture and consistency of your expired shea butter, simply store it in a warm environment. When shea butter expires, it can become dry, hard, or grainy. However, by subjecting it to heat, you can bring it back to its original smoothness.

Here are some changes you may notice in the appearance of expired shea butter:

Advertisement
  • Loss of its creamy consistency
  • Formation of lumps or clumps
  • Development of a rancid smell

It’s important to note that expired shea butter may not be as effective as fresh shea butter in providing the same nourishing benefits for your skin. Additionally, the shelf life of shea butter can vary depending on how it is stored. Properly stored shea butter can last up to two years, but exposure to air, heat, and light can shorten its lifespan.

Loss of Nutritional Benefits

When shea butter expires, it loses its nutritional benefits and may not provide the same nourishing effects for your skin. As the expiration date approaches, the effectiveness of shea butter decreases, leading to weakened nourishing properties. The natural vitamins and fatty acids that make shea butter so beneficial gradually break down over time, resulting in a diminished ability to moisturize and protect the skin.

The expiration process causes the shea butter to become less potent, reducing its ability to soothe dryness, heal damaged skin, and improve elasticity. Using expired shea butter may not only be less effective but could also potentially cause skin irritations or allergic reactions.

To ensure maximum benefits, it’s essential to check the expiration date and replace your shea butter when needed.

Advertisement

Potential Skin Irritation

Allergic reactions are possible when using expired shea butter, as the quality and potency of the ingredients may have degraded over time. It is important to note that everyone’s skin reacts differently, so what may cause an allergic reaction in one person may not affect another.

Additionally, expired shea butter can also lead to increased bacterial growth, which can further irritate the skin and potentially cause infections.

Allergic Reactions Possible

Using expired shea butter can potentially cause allergic reactions. It is important to be aware of the potential side effects that can occur when using expired skincare products.

Here are some key points to consider:

  • Skin irritation: Expired shea butter may contain harmful bacteria or mold, which can irritate the skin and cause redness, itching, or rashes.

  • Decreased effectiveness: Over time, shea butter can lose its beneficial properties, such as its moisturizing and healing abilities. Using expired shea butter may not provide the desired results.

  • Risk of infection: Expired shea butter can harbor increased bacterial growth, which can lead to skin infections or other complications.

Therefore, it is crucial to always check the expiration dates on skincare products and avoid using expired shea butter to prevent potential allergic reactions and other negative effects on the skin.

Advertisement

Increased Bacterial Growth

The risk of infection can significantly increase due to the increased bacterial growth in expired shea butter. When shea butter expires, it becomes more susceptible to increased microbial contamination. Bacteria can thrive in expired shea butter, leading to a higher chance of contamination when it is applied to the skin. This increased bacterial growth can pose a serious risk to our health.

Additionally, expired shea butter may also have diminished efficacy. Over time, the beneficial properties of shea butter, such as its moisturizing and healing abilities, can deteriorate, making it less effective in providing the desired results.

It is important to check the expiration date of shea butter before using it to ensure its safety and efficacy.

Decreased Effectiveness for Moisturizing

When shea butter expires, its hydration properties become weakened, resulting in a decreased effectiveness for moisturizing the skin.

Additionally, the nourishing benefits of expired shea butter diminish, causing a loss in its ability to provide essential nutrients to the skin.

Advertisement

As a result, the skin may experience reduced softness and a lack of moisture retention, leading to potential dryness and discomfort.

Weakened Hydration Properties

Expired shea butter may not have its full hydration properties intact. When shea butter expires, it can lead to weakened hydration properties, resulting in decreased moisturizing effectiveness. This means that using expired shea butter on your skin may not provide the same level of hydration and moisture as fresh shea butter.

Here are some emotional responses that may arise from using expired shea butter:

  • Frustration: Feeling disappointed that the shea butter you were counting on for hydration is not as effective as expected.
  • Discomfort: Experiencing dryness and roughness on your skin due to the weakened hydration properties.
  • Wasted effort: Realizing that you have been using expired shea butter and the time and money spent on it have gone to waste.

Using expired shea butter not only results in weakened hydration properties but also leads to a loss of nourishing benefits for your skin.

Loss of Nourishing Benefits

Using expired shea butter can result in a loss of the nourishing benefits it provides to your skin. Shea butter is known for its moisturizing and healing properties, but these qualities diminish over time. The expiration date on the packaging indicates the period during which the shea butter is at its best.

Once it has expired, the butter may start to oxidize and degrade, leading to a decrease in its effectiveness. The nourishing vitamins and fatty acids present in shea butter may become less potent, making it less beneficial for your skin. It’s important to check the expiration date and use fresh shea butter to ensure you are receiving all the nourishing benefits it has to offer.

Advertisement

Reduced Skin Softness

When shea butter expires, not only does it lose its nourishing benefits, but it can also lead to reduced skin softness. Expired shea butter may not provide the same level of hydration and moisture to the skin as fresh shea butter does. This can result in several negative effects on the skin, including reduced skin elasticity and decreased moisturization.

Using expired shea butter can leave your skin feeling dry, rough, and lacking the natural glow it once had. The decreased moisturization can also lead to the development of fine lines and wrinkles, making you appear older than you actually are. To ensure optimal skin softness and health, it is important to use fresh shea butter that hasn’t expired.

Potential Mold or Bacteria Growth

If shea butter is expired, there’s a chance that mold or bacteria could grow on it. Using expired shea butter can pose potential health risks as these microorganisms can cause skin irritations, infections, or allergic reactions. It is crucial to properly store shea butter to maintain its freshness and extend its shelf life. Here are some recommended storage methods to prevent the growth of mold or bacteria:

Storage Method Description
Keep it sealed Ensure the shea butter container is tightly sealed after each use to prevent air and moisture from entering, creating an environment conducive to bacterial growth.
Store in a cool place Shea butter should be stored in a cool, dry place away from direct sunlight and heat sources. Elevated temperatures can accelerate the growth of bacteria and mold.
Avoid contamination Do not touch the shea butter directly with your fingers. Instead, use a clean, dry spoon or spatula to scoop out the desired amount to minimize the risk of introducing bacteria.

Safety Concerns and Allergic Reactions

To avoid potential health risks and allergic reactions, it’s important to check the expiration date of your shea butter and store it properly. Expired shea butter can lead to various skin reactions, such as rashes, itching, and redness. The shelf life of shea butter can vary depending on the processing and storage conditions.

Here are a few key points to keep in mind:

Advertisement
  • Expired shea butter may lose its effectiveness and may not provide the desired benefits for your skin.
  • Using expired shea butter can increase the risk of bacterial or fungal contamination, which can lead to infections.
  • Allergic reactions can occur when using expired shea butter, especially if you have sensitive skin or existing allergies.

To ensure your safety and get the most out of your shea butter, always check the expiration date and store it in a cool, dry place away from direct sunlight.

Frequently Asked Questions

Can Expired Shea Butter Be Harmful if Used on the Skin?

Expired shea butter can be harmful if used on the skin. It may lose its effectiveness for hair care and can cause potential side effects on sensitive skin. It’s important to check the expiration date and avoid using expired products.

How Long Does Shea Butter Usually Last Before It Expires?

Shea butter typically lasts up to two years before it expires. To ensure its longevity, store it in a cool, dry place away from direct sunlight. Signs of expiration include a rancid smell and a change in texture.

Can Using Expired Shea Butter Cause Skin Allergies or Irritation?

Using expired shea butter can potentially cause skin allergies or irritation. It’s important to note that expired skincare products may lose their effectiveness and could harbor harmful bacteria, posing risks to skin health.

Can Expired Shea Butter Still Be Effective for Treating Dry Skin?

Using expired shea butter on hair may not provide the same benefits as fresh shea butter. However, it can still be effective for treating dry skin, including eczema.

Is It Safe to Use Shea Butter That Has Mold or Bacteria Growth on It?

Using shea butter with mold or bacteria growth can pose potential health risks. To prevent this, store shea butter in a clean, airtight container in a cool, dry place. Always check for expiration dates to ensure safety.

Advertisement

Conclusion

In conclusion, using expired shea butter can have negative effects on your skin and overall health. The signs of expired shea butter include changes in texture and consistency, as well as a loss of nutritional benefits. It may also cause potential skin irritation and decrease its effectiveness for moisturizing.

Furthermore, there is a risk of mold or bacteria growth, which can be harmful to your skin. To ensure safety and avoid allergic reactions, it’s important to check the expiration date and use fresh shea butter.

So remember, don’t let your skin suffer, and always use fresh shea butter to keep it nourished and healthy.

Continue Reading

Butter Basics

What Does Indian Butter Chicken Taste Like: A Flavorful Experience

Published

on

By

An image that showcases the rich, creamy texture of Indian Butter Chicken, with tender chunks of marinated chicken, immersed in a vibrant orange sauce, infused with a medley of aromatic spices

Curious about trying Indian butter chicken? Get ready for a burst of delicious flavors!

This mouthwatering dish is a symphony of traditional Indian flavors, packed with a creamy and rich sauce that will make your taste buds dance with delight.

The combination of aromatic spices creates a perfect balance of sweet and savory, while the tender and juicy chicken takes it to a whole new level.

Get ready to be transported to a world of delectable aromas and flavors that will leave you craving more.

Key Takeaways

  • Indian butter chicken embodies the essence of Indian cuisine, combining spices and ingredients from diverse regional variations.
  • The creamy and rich sauce in Indian butter chicken creates a symphony of flavors that complement the chicken, leaving you completely satisfied.
  • The flavorful spice blend in Indian butter chicken, including spices like cumin, coriander, turmeric, and garam masala, creates a harmonious balance of heat, sweetness, and creaminess.
  • The succulent and tender chicken in Indian butter chicken is infused with flavor through the marinade and cooking techniques, enhancing the overall taste of the dish.

Traditional Indian Flavors

Advertisement

If you’re craving traditional Indian flavors, you’ll love the rich and aromatic taste of Indian butter chicken. This dish perfectly embodies the essence of Indian cuisine with its unique blend of spices and ingredients.

Indian butter chicken has been influenced by the diverse regional variations found across India, resulting in a dish that is both familiar and distinct. From the fiery flavors of North Indian cuisine to the subtle and delicate tastes of South Indian cuisine, every bite of butter chicken is a journey through the diverse culinary landscape of India.

The combination of tender chicken, marinated in a flavorful blend of spices and cooked in a creamy and rich sauce, creates a harmonious balance of flavors that will leave you craving for more.

Creamy and Rich Sauce

Get ready to indulge in a culinary experience like no other with this discussion on the flavorful spice blend and succulent chicken pieces that make up this mouthwatering dish.

The aroma of the spices will instantly transport you to the bustling streets of India, while the tender chicken pieces will melt in your mouth, leaving you craving for more.

Advertisement

Each bite is a symphony of flavors, with the spices perfectly complementing the juicy chicken, creating a harmonious blend that will leave you completely satisfied.

Flavorful Spice Blend

You’ll love the flavorful spice blend in Indian butter chicken. This popular Indian dish is known for its aromatic and rich taste, thanks to the spice-infused marinade.

The combination of spices like cumin, coriander, turmeric, and garam masala creates a symphony of flavors that will tantalize your taste buds. The marinade not only adds depth to the chicken but also helps to tenderize it, resulting in succulent and juicy pieces of meat.

As the chicken cooks in the creamy and buttery tomato sauce, the flavors meld together, creating a harmonious balance of heat, sweetness, and creaminess. The spices add a subtle kick that is not overpowering but still provides a delightful warmth.

Get ready to savor the explosion of flavors in every bite as the succulent chicken pieces are coated in the fragrant and spiced sauce.

Advertisement

Succulent Chicken Pieces

The succulent chicken pieces become incredibly tender as they cook in the creamy tomato sauce. The juicy marinade penetrates the meat, infusing it with a burst of flavor. The chicken takes on a rich, savory taste that is enhanced by the spices and herbs in the marinade.

The cooking techniques used in Indian butter chicken are essential in achieving the perfect texture and taste. The chicken is first marinated in a mixture of yogurt, lemon juice, and various spices for several hours. This allows the flavors to develop and tenderize the meat.

Then, the chicken is cooked in a buttery tomato sauce, allowing it to absorb the creamy goodness. The result is a dish that is succulent and full of flavor, with the chicken practically melting in your mouth.

Mouthwatering Spices

Advertisement

Experience the explosion of flavors in each bite as the mouthwatering spices in Indian butter chicken tantalize your taste buds. Indian butter chicken is known for its sensational flavor combination and tantalizing aroma that will leave you craving for more. The rich and creamy tomato-based sauce is infused with a blend of aromatic spices, creating a harmonious balance of heat and tanginess. The use of spices like cumin, coriander, turmeric, and garam masala adds depth and complexity to the dish. The tender chicken pieces are marinated in a yogurt-based marinade, which helps to tenderize the meat and enhance the flavors. Each bite is a burst of flavors, with the spices dancing on your palate and leaving a lingering warmth. It is a culinary experience that is truly unforgettable.

Flavor Description
Spicy The spices in Indian butter chicken add a kick of heat, creating a satisfying spicy flavor.
Tangy The tomato-based sauce provides a tangy and slightly acidic taste that balances out the spices.
Creamy The richness of the creamy sauce adds a smooth and velvety texture to the dish.

Perfect Balance of Sweet and Savory

Now that we’ve explored the mouthwatering spices that make up Indian butter chicken, let’s dive into its perfect balance of sweet and savory flavors. When you take that first bite, you’ll be greeted with a symphony of tastes that will leave you craving for more.

The sweet and tangy notes dance on your tongue, creating a delightful explosion of flavors. The complex flavor profile of Indian butter chicken is a result of the carefully selected spices, such as garam masala, fenugreek leaves, and yogurt, which all come together to create a harmonious blend.

The sweetness comes from the caramelized onions and the richness of the cream, while the tanginess is provided by the tomato-based gravy. This combination creates a dish that is both comforting and exciting, making Indian butter chicken a true culinary masterpiece.

Tender and Juicy Chicken

When you take that first bite, you’ll be amazed by how tender and juicy the chicken in Indian butter chicken is. The succulent pieces of chicken are perfectly cooked, with a melt-in-your-mouth texture that is truly satisfying.

Advertisement

The flavors seep into every crevice of the meat, creating a taste explosion in your mouth. The chicken is marinated in a blend of aromatic spices, yogurt, and lemon juice, which not only tenderizes the meat but also infuses it with a myriad of delicious flavors.

As you chew, you can taste the subtle hints of cumin, coriander, and garam masala, along with the rich creaminess of the buttery tomato sauce. The combination of tender chicken and juicy flavors is what makes Indian butter chicken a true culinary delight.

Aromatic and Fragrant Dish

When it comes to Indian butter chicken, you’re in for a flavor explosion. The bold flavors and spices used in this dish will tantalize your taste buds and leave you craving for more.

The creamy tomato-based sauce adds a luscious and rich element to the dish, perfectly complementing the succulent and tender chicken.

Trust me, once you try this dish, you won’t be able to get enough of its delectable combination of flavors and textures.

Advertisement

Bold Flavors and Spices

Bold flavors and spices are what give Indian butter chicken its distinct taste. This classic dish is known for its explosion of flavors that will tantalize your taste buds. The combination of traditional spices like cumin, coriander, and garam masala creates a rich and aromatic profile that is truly unforgettable. The use of these bold flavors elevates the dish to a whole new level, making it a favorite among Indian food enthusiasts. The table below highlights some of the key spices used in Indian butter chicken:

Spice Flavor Profile
Cumin Earthy and nutty
Coriander Citrusy and floral
Garam Masala Warm and pungent

These spices work harmoniously together, creating a symphony of flavors that will make your taste buds dance. As you indulge in the bold flavors of Indian butter chicken, you’ll soon discover why it has become a beloved dish worldwide. And while the spices play a crucial role in its taste, it’s the creamy tomato-based sauce that takes this dish to the next level. [Transition to subsequent section: ‘creamy tomato-based sauce’]

Creamy Tomato-Based Sauce

The creamy tomato-based sauce in Indian butter chicken is what adds a luscious and velvety texture to the dish. This sauce is made by simmering tomatoes, onions, garlic, ginger, and a blend of aromatic spices such as cumin, coriander, and turmeric. The result is a rich and flavorful sauce that coats the tender pieces of chicken, infusing them with a burst of Indian spices.

The creaminess comes from the addition of butter and cream, which adds a luxurious and indulgent touch to the dish. The combination of the tangy tomatoes, aromatic spices, and creamy texture creates a harmonious balance of flavors.

Indian butter chicken is a beloved dish in Indian cuisine, known for its rich, comforting, and satisfying taste.

Advertisement

Succulent, Tender Chicken

The succulent, tender chicken in this dish is cooked to perfection, resulting in a melt-in-your-mouth texture that is incredibly satisfying.

The marinated chicken is packed with flavor, infusing every bite with a burst of aromatic spices.

The juicy meat is so tender that it practically falls off the bone, making it a delight to eat.

The marinade adds an extra layer of richness, ensuring that each piece of chicken is well-seasoned and packed with deliciousness.

The cooking process seals in the moisture, resulting in a juicy and succulent texture that is hard to resist.

Advertisement

Whether you’re a fan of chicken or not, this dish will captivate your taste buds and leave you craving for more.

Conclusion

So, now you know what Indian butter chicken tastes like! It’s a culinary delight that combines the traditional flavors of India with a creamy and rich sauce. The mouthwatering spices create a perfect balance of sweet and savory, making every bite a treat for your taste buds.

The tender and juicy chicken adds a satisfying texture to the dish. And let’s not forget about the aromatic and fragrant aroma that fills the air when this dish is being prepared. In fact, did you know that butter chicken is one of the most popular Indian dishes worldwide? It’s no surprise considering its irresistible flavors and delightful combination of ingredients.

So why not give it a try and experience the magic of Indian butter chicken for yourself?

Advertisement
Continue Reading
Advertisement

Affiliate disclaimer

As an affiliate, we may earn a commission from qualifying purchases. We get commissions for purchases made through links on this website from Amazon and other third parties.

Advertisement

Trending