I’ve consistently held the belief that the cornerstone of a triumphant baking journey is a pan that’s thoroughly buttered and floured. It acts as the robust foundation supporting all the scrumptious delight.
In this article, I’ll guide you through the simple yet essential steps of buttering and flouring a pan, ensuring your cakes and breads come out effortlessly.
Grab your tools, roll up your sleeves, and let’s dive into this magical world of pan preparation!
Key Takeaways
- Buttering and flouring a pan creates a non-stick surface for baked goods and ensures easy release.
- Cooking spray can be used as an alternative to buttering and flouring, saving time and providing an even coating on the pan.
- Different types of flour can be used for pan preparation, enhancing the flavor and texture of baked goods.
- Having the right tools, such as a silicone pastry brush and a fine-mesh sieve, makes pan preparation easier and more successful.

Butter Mold with Lid, Silicone Butter Tray Container with Spatula, Non-Stick Silicone Butter Molds for Making 4 Stick Forms Herbal Butter, Homemade Butter, Garlic Butter, Easy Release (Purple)
- Material: Silicone for easy release and cleaning
- Capacity: Makes 4 x 4oz butter sticks
- Temperature Range: -40F to 464F for versatile use
As an affiliate, we earn on qualifying purchases.
Why Butter and Flouring a Pan Is Important
Buttering and flouring a pan is important because it creates a non-stick surface for your baked goods. There are alternatives to buttering and flouring, such as using cooking spray.
One of the benefits of using cooking spray is that it is quick and easy to apply, saving you time in the kitchen. Additionally, cooking spray provides an even coating on the pan, ensuring that your baked goods release easily.
Another aspect to consider when preparing your pan is the type of flour you use. Different types of flour can be used for pan preparation, such as all-purpose flour, cake flour, or even cocoa powder for chocolate desserts. Choosing the right flour can enhance the flavor and texture of your baked goods.
Necessary Tools and Ingredients
When it comes to cooking, having the right tools in the kitchen is essential. From a sharp chef’s knife to a sturdy cutting board, these tools can make all the difference in your cooking experience.
Additionally, proper pan preparation is crucial for preventing food from sticking and ensuring even cooking.
Lastly, understanding the importance of flour and how it affects the texture and structure of your baked goods can help you achieve the perfect results in your recipes.
Essential Kitchen Tools
To ensure success in the kitchen, you’ll need a few essential tools. When it comes to buttering and flouring pans, choosing the right utensils is crucial.
A silicone pastry brush is perfect for evenly spreading melted butter or oil on the surface of the pan. It’s heat-resistant and easy to clean.
For flouring, a fine-mesh sieve or a flour sifter will help you distribute the flour evenly and remove any lumps.
When it comes to pans, different baking needs call for different types. For cakes and brownies, a round cake pan or a square baking pan is ideal. For breads and loaves, a loaf pan is necessary. And for cookies and biscuits, a baking sheet or a cookie sheet with parchment paper is essential.
Having these tools on hand will make your baking experience a breeze.
Proper Pan Preparation
Having the right utensils is crucial for properly preparing your pans for baking. Here are the necessary tools you will need for the step-by-step process of buttering and flouring a pan:
- Softened Butter: This will help prevent your baked goods from sticking to the pan.
- Pastry Brush: Use this to evenly coat the pan with the softened butter.
- Flour: Dusting the pan with flour after buttering will further ensure easy release of your baked goods.
- Sifter or Fine Mesh Strainer: Use this to evenly distribute a thin layer of flour over the buttered pan.
To begin, generously butter the entire interior surface of the pan using the pastry brush. Then, sift a small amount of flour into the pan and tilt it around to coat the buttered surface evenly. Tap out any excess flour.
This simple process will create a non-stick barrier for your delicious baked treats.
Importance of Flour
Flour is an essential ingredient for achieving a non-stick surface on your baked goods. It plays a crucial role in baking by providing structure and texture to your creations.
One important aspect of flour is its gluten content. Gluten is a protein found in wheat flour that gives dough its elasticity and helps it rise. Different types of flour contain varying amounts of gluten, which affects the final result of your baked goods.
For example, bread flour has a higher gluten content, making it ideal for bread and pizza dough. On the other hand, cake flour has less gluten, resulting in a tender and delicate crumb.
Understanding the importance of gluten and the different types of flour will help you choose the right one for your baking needs.
Step 1: Selecting the Right Pan
When it comes to baking, selecting the right pan is crucial for a successful outcome.
Two important factors to consider are pan size and whether to use a non-stick or regular pan.
Pan size considerations ensure that your baked goods cook evenly and don’t overflow.
Deciding between non-stick and regular pans can impact the release of your baked goods and the level of browning achieved.
Pan Size Considerations
To ensure your recipe turns out perfectly, choose a pan size that matches the amount of batter you have. Here are some considerations when selecting a pan size:
-
Pan Size Options: Depending on the recipe, you may have various pan size options, such as a 9-inch round pan, a 9×13-inch rectangular pan, or a loaf pan. Consider the recipe instructions to determine the recommended pan size.
-
Batter Quantity: Measure the amount of batter you have to determine the appropriate pan size. If you have a small amount of batter, using a larger pan may result in a thinner cake or bread. Conversely, using a smaller pan for a large amount of batter may cause the batter to overflow.
-
Adjusting Cooking Time: Using a different pan size may require adjusting the cooking time. A smaller pan may result in a faster cooking time, while a larger pan may require a longer cooking time. Keep an eye on your recipe and make sure to check for doneness using a toothpick or cake tester.
-
Recipe Recommendations: Some recipes may provide specific pan size recommendations and cooking times. Follow these recommendations for the best results.
Non-Stick Vs. Regular Pans
Non-stick pans are a popular choice due to their easy cleanup and ability to prevent food from sticking. Taking care of non-stick pans is essential to ensure their longevity. Avoid using metal utensils that can scratch the surface and opt for silicone or wooden tools instead. Additionally, it’s important to avoid using abrasive cleaners or scrubbers that can damage the non-stick coating.
Regularly seasoning cast iron pans is another crucial step in their care. Seasoning creates a protective layer on the pan’s surface, preventing rust and enhancing its non-stick properties. To season a cast iron pan, coat it with a thin layer of oil and heat it in the oven for about an hour.
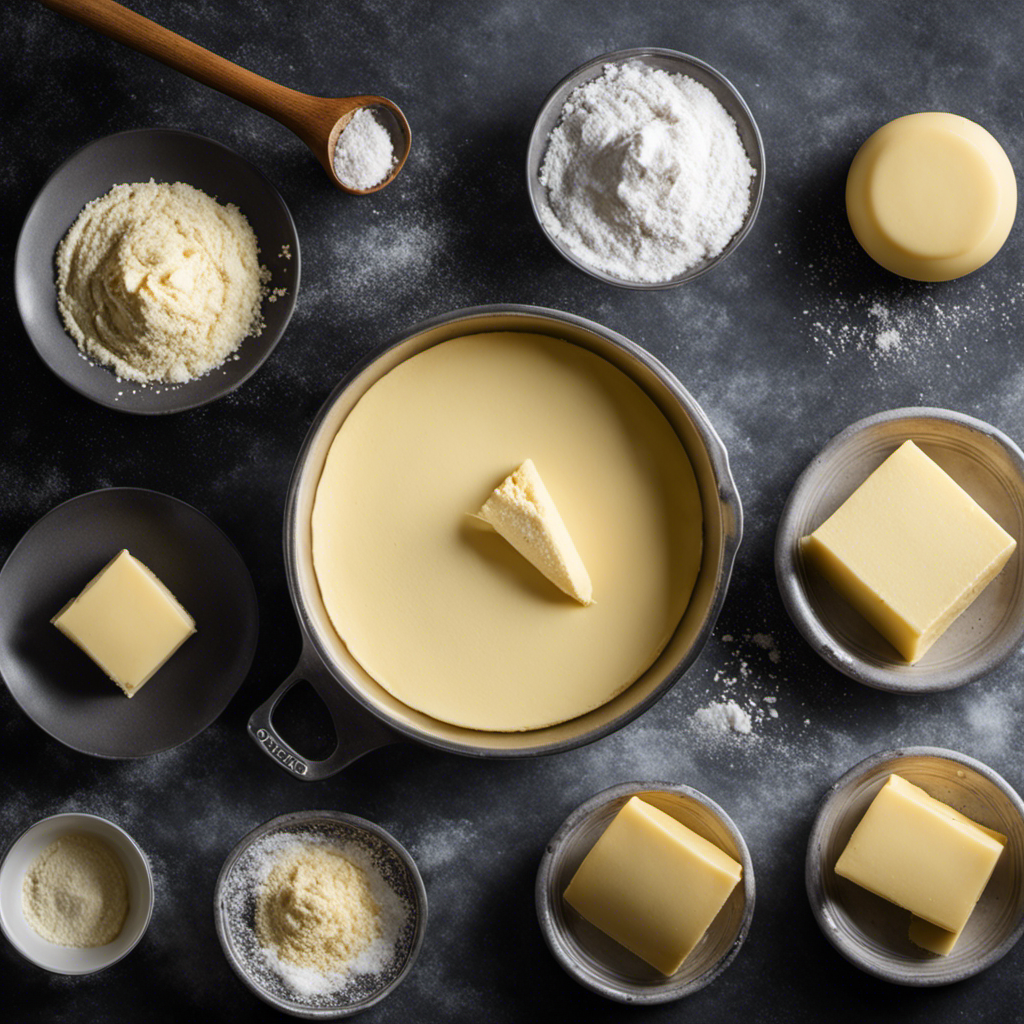
Step 2: Preparing the Butter
Once the butter has softened, you’ll want to spread it evenly across the surface of the pan. Here’s how to prepare the butter before using it to butter and flour a pan:
- Begin by melting the butter in a microwave-safe bowl or in a small saucepan on low heat.
- Carefully stir the butter until it becomes smooth and creamy.
- Allow the melted butter to cool slightly, so it’s warm but not hot to the touch.
- Once cooled, use a pastry brush or a paper towel to spread the melted butter onto the surface of the pan.
Preparing the butter is an important step in ensuring that it coats the pan evenly and helps prevent sticking.
Now that the butter is ready, let’s move on to the next step: applying the butter to the pan.
Step 3: Applying the Butter to the Pan
Now that the melted butter is ready, it’s time to spread it evenly on the surface of the pan. This step is crucial to ensure that your baked goods don’t stick to the pan.
To apply the butter evenly, I like to use a pastry brush or a paper towel. I dip the brush or towel into the melted butter and then gently spread it all over the inside of the pan, making sure to cover the bottom and sides.
Alternatively, you can use a non-stick cooking spray or vegetable oil as an alternative to butter. These methods also work well in preventing sticking.
Whichever method you choose, make sure to coat the entire surface of the pan to ensure easy removal of your baked goods.
Step 4: Dusting the Pan With Flour
To evenly distribute the flour, you can tap the sides of the pan after dusting it. This helps to ensure that the flour covers the entire surface and prevents any sticking.
Here are four alternative methods for removing excess flour:
-
Shake off the excess: Hold the pan over the sink or trash can and gently shake it from side to side. This will help to loosen any excess flour that may have accumulated.
-
Use a pastry brush: Take a clean pastry brush and lightly brush off any excess flour from the pan. Be sure to get into any crevices or corners where flour may have collected.
-
Blow off the flour: If you don’t have a pastry brush, you can simply blow off the excess flour. Hold the pan away from your face and blow gently to remove the flour.
-
Wipe with a clean cloth: Take a clean, dry cloth and gently wipe away any excess flour from the pan. This method is especially useful if the flour has clumped together or stuck to the pan.
Step 5: Removing Excess Flour
Make sure you have thoroughly removed any excess flour by using one of these alternative methods.
One effective way is to tap the pan gently on your countertop to shake off any excess flour.
Another option is to use a pastry brush to sweep away the excess flour.
If you don’t have a pastry brush, you can also use a clean, dry paper towel to wipe away the excess flour.
It’s important to remove the excess flour because if too much flour remains in the pan, it can create a thick, unpleasant coating on your baked goods.
Now that you’ve removed the excess flour, you’re ready to move on to the next step: buttering the pan.
Tips for Successful Buttering and Flouring
One effective way to ensure successful buttering and flouring is by using a pastry brush to evenly distribute the butter. Here are some tips for even distribution and common mistakes to avoid:
- Soften the butter: Make sure the butter is at room temperature for easy spreading.
- Use a pastry brush: Dip the brush into the softened butter and brush it evenly across the entire surface of the pan.
- Pay attention to corners and edges: Make sure to reach all the nooks and crannies to prevent sticking.
- Dust with flour: After buttering, sprinkle flour over the buttered surface and tap out any excess.
By following these tips, you can achieve a perfectly buttered and floured pan, ensuring that your baked goods come out easily and intact.
Now, let’s explore alternative methods for preparing the pan.
Alternative Methods for Preparing the Pan
If you’re looking for other ways to prepare the pan, consider using parchment paper as a non-stick alternative. It’s a simple and effective method that can save you time and effort. By lining the pan with parchment paper, you eliminate the need for buttering and flouring altogether. The paper creates a barrier between the batter and the pan, preventing sticking and ensuring easy release.
But what if you don’t have parchment paper on hand? There are other alternative methods you can try. One option is to use cooking spray, which provides a thin layer of oil to prevent sticking. Another option is to brush the pan with melted butter or oil. Both of these methods offer the benefits of using oil, which helps create a crispy and golden crust on your baked goods.
To help you compare these alternative methods, here’s a table outlining their pros and cons:
| Method | Pros | Cons |
|---|---|---|
| Parchment paper | Easy to use | Requires extra step |
| Cooking spray | Quick application | May contain additives |
| Melted butter/oil | Adds flavor | Can be messy |
With these alternative methods, you can choose the one that suits your needs and preferences. Whether it’s parchment paper, cooking spray, or brushing with butter, each option offers its own benefits and can help you achieve a non-stick surface for your baking endeavors.
Frequently Asked Questions
How Do I Know if I Should Use Butter or Cooking Spray to Grease the Pan?
I usually use butter to grease the pan because it adds flavor. However, if you prefer a healthier option, you can use non-stick cooking spray. Some people also use margarine instead of butter.
Can I Use Oil Instead of Butter to Grease the Pan?
Yes, oil can be used as an alternative to butter for greasing a pan. However, it may affect the flavor of the final product. Butter adds richness and flavor, while oil provides a more neutral taste.
What Should I Do if I Don’t Have Any Flour on Hand?
If I don’t have any flour on hand, there are alternative pan greasing methods I can use, such as using oil or non-stick cooking spray. These options will help prevent sticking without the need for flour.
Can I Use Parchment Paper Instead of Buttering and Flouring the Pan?
I prefer buttering and flouring the pan because it helps prevent sticking and promotes even baking. While parchment paper can be an alternative, it may not provide the same level of protection or enhance the flavor of the baked goods.
How Do I Prevent the Cake From Sticking to the Pan After Baking?
To prevent cake from sticking to the pan, I’ve found that using parchment paper instead of greasing and flouring works like a charm. It’s a simple alternative that ensures easy removal and a perfectly intact cake.
Conclusion
Buttering and flouring a pan is a crucial step in baking that should never be overlooked. It ensures that your baked goods release easily and have a beautiful, golden crust.
By following these simple steps and using the right tools, you can achieve bakery-worthy results every time. So don’t skip the butter and flour!
Embrace this essential technique and elevate your baking game to new heights of perfection and professionalism. Remember, a properly buttered and floured pan is the key to heavenly and homestyle treats!