Connect with us

Recipes & Culinary Uses

How Much Is 4oz of Butter

Published

on

An image showcasing four identical sticks of butter, precisely measured at 1 ounce each, beautifully arranged side by side on a pristine white cutting board, surrounded by a gentle sprinkle of powdered sugar

As a lover of all things culinary, I’ve often found myself pondering the question, ‘Just how much is 4oz of butter?’ It’s a common measurement in recipes, but its exact equivalent can sometimes elude us.

In this article, we will unravel the mystery behind this buttery dilemma and provide you with practical tips on how to accurately measure 4 ounces of this golden ingredient.

So, grab your apron and let’s dive into the world of butter measurements!

Key Takeaways

  • 4oz of butter is approximately 113.4 grams.
  • Converting ounces to tablespoons requires multiplying by 2.
  • Measuring accurately ensures the balance of flavors in dishes.
  • Margarine is made from vegetable oils and can be used as a non-dairy substitute for butter.

Understanding Butter Measurements

Do you know how much 4oz of butter actually is? Well, let me break it down for you.

When converting grams to ounces, 4oz is equivalent to approximately 113.4 grams. It may not sound like much, but when it comes to butter, every gram counts.

Now, if you’re looking for butter substitutes, there are a few options to consider. One popular choice is margarine, which is made from vegetable oils and has a similar texture to butter. Another option is coconut oil, which adds a unique flavor to your dishes. And if you’re looking for a healthier alternative, you can try using Greek yogurt or applesauce in your baking recipes.

Converting Ounces to Tablespoons

To convert ounces to tablespoons, you’ll need to multiply the number of ounces by 2. This conversion is essential when it comes to cooking and following recipes accurately.

For example, if a recipe calls for 4 ounces of butter, you would need to multiply 4 by 2, which equals 8 tablespoons. This simple calculation ensures that you are using the correct amount of ingredients and helps maintain the balance of flavors in your dishes.

It’s important to note that this conversion method only works for converting ounces to tablespoons and not for other measurements like grams to ounces or pounds to kilograms. To convert grams to ounces, you’ll need to divide the number of grams by 28.35, and to convert pounds to kilograms, simply multiply the number of pounds by 0.4536.

How to Measure 4 Ounces of Butter

When measuring 4 ounces of butter, you’ll need to multiply the amount by 2, resulting in 8 tablespoons.

  • Measuring butter with a scale: Using a kitchen scale is the most accurate way to measure 4 ounces of butter. Simply place a bowl on the scale, set it to zero, and then add the butter until it reaches 4 ounces.

  • Estimating butter weight: If you don’t have a scale, you can estimate the weight of butter by using the markings on the wrapper. Most butter sticks have tablespoon markings, so you can count the number of tablespoons needed to reach 4 ounces. In this case, you would need 8 tablespoons.

  • Converting to grams: If you prefer to measure in grams, 4 ounces of butter is approximately 113 grams. This conversion can be useful if you’re following a recipe that uses metric measurements.

Butter Equivalents in Recipes

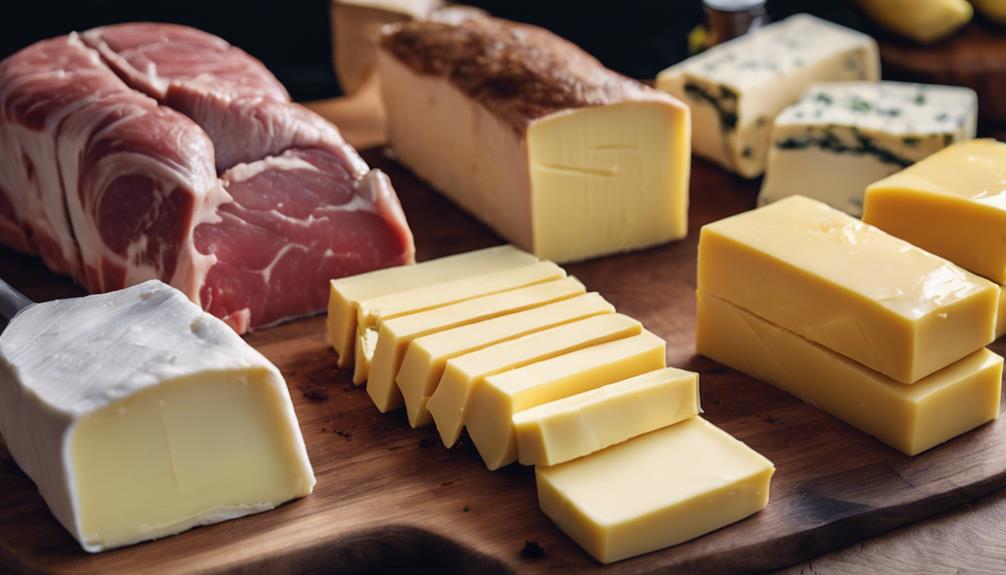
Butter equivalents in recipes can vary depending on the specific recipe and the desired outcome. Sometimes, you might come across a recipe that calls for butter substitutes, like margarine or oil. It’s important to note that these substitutes may not have the exact same flavor or texture as butter, so the end result may differ slightly.

Additionally, if you need to convert butter measurements, there are handy formulas you can use. For example, 1 cup of butter is equivalent to 2 sticks or 16 tablespoons. If you’re dealing with smaller amounts, 1 tablespoon of butter is equal to 14 grams. These conversion formulas can be really helpful when you’re trying to adapt a recipe to your needs.

Speaking of accurately measuring butter, let’s move on to some tips in the next section.

Tips for Accurately Measuring Butter

Measuring butter accurately can be tricky, but there are a few tips that can help.

Here are three ways to measure butter without a scale and some ideas for using butter substitutes:

  • Use measuring spoons: A tablespoon of butter is equal to about 14 grams or 1/2 an ounce. So, if your recipe calls for 4 ounces of butter, you’ll need about 8 tablespoons.

  • Use the markings on the wrapper: Most butter wrappers have markings to show tablespoon measurements. Simply cut along the markings to get the desired amount.

  • Use a kitchen scale: If you have a kitchen scale, you can weigh the butter substitute to get the accurate amount.

When you don’t have butter on hand, you can also try using substitutes like coconut oil, avocado, or Greek yogurt for a healthier twist. These alternatives can add moisture and flavor to your recipes.

Now, let’s explore some ways to simplify butter measurements.

Simplifying Butter Measurements

When it comes to baking, getting the measurements right is crucial. In this discussion, we’ll explore three key points to simplify the process of measuring butter accurately.

First, we’ll delve into butter conversion charts, which provide a handy reference for converting between different butter measurements.

Next, we’ll uncover tips and tricks for measuring butter accurately, ensuring your recipes turn out just right.

Lastly, we’ll explore alternative butter measurements, such as using tablespoons or cups, for when you don’t have access to a kitchen scale.

Get ready to up your baking game with these butter measurement insights!

Butter Conversion Charts

If you’re unsure about how much butter you need, consult a conversion chart for accurate measurements. Butter weight conversions can be tricky, but with the right chart, you’ll be able to convert any recipe effortlessly.

Here are three reasons why using a conversion chart can make your baking experience smoother:

  • Accurate Measurements: A conversion chart provides precise measurements, ensuring that you add the correct amount of butter to your recipe.

  • Convenience: Instead of guessing or estimating, a conversion chart allows you to quickly convert butter measurements from ounces to cups or grams, saving you time and effort.

  • Consistency: Using a conversion chart ensures consistency in your baking. By following the chart, you can replicate your favorite recipes with confidence, knowing that you’re using the correct amount of butter every time.

Measuring Butter Accurately

To ensure precise measurements in your baking, it’s important to consult a butter conversion chart for accurate conversions. Understanding butter fat and knowing the right substitutes can greatly impact the outcome of your recipes. When it comes to measuring butter, it’s crucial to be precise. Here is a helpful table to guide you:

Butter Measurement Equivalent in Cups Equivalent in Grams
1/4 cup 1/2 stick 57g
1/2 cup 1 stick 113g
1 cup 2 sticks 227g
2 cups 4 sticks 454g

Now that you have a better understanding of butter conversions, let’s explore alternative butter measurements to cater to different recipes and dietary restrictions.

Alternative Butter Measurements

One option is using margarine as a substitute for butter in recipes. Margarine is a popular alternative because it has a similar taste and texture to butter, making it a seamless replacement. It is made from vegetable oils, so it is a good choice for those who are looking for a non-dairy option.

Here are three reasons why margarine can be a great alternative to butter:

  • Margarine comes in various packaging sizes, allowing you to easily measure and use the amount required for your recipe.
  • Margarine is often sold in spreadable tubs, making it convenient to use and reducing the need for softening or melting before adding it to your recipes.
  • Margarine is available in different varieties, such as salted, unsalted, and even flavored options, giving you more flexibility and options when cooking or baking.

Next time you’re in need of a butter substitute, consider giving margarine a try.

Frequently Asked Questions

Can I Substitute Margarine for Butter in a Recipe That Calls for 4 Ounces of Butter?

Yes, you can substitute margarine for butter in a recipe that calls for 4 ounces of butter. Margarine is one of the popular butter alternatives and can be used in equal amounts.

What Is the Shelf Life of Butter?

The shelf life of butter depends on proper storage. When stored in the refrigerator, butter can last up to a few months. However, it is best to use it within a month for optimal freshness.

Can I Freeze Butter to Extend Its Freshness?

Freezing butter is a great way to extend its freshness. I love storing butter in the freezer because it stays fresh for months. It’s convenient and ensures I always have butter on hand.

How Many Calories Are in 4 Ounces of Butter?

The calorie content and nutritional value of 4 ounces of butter can vary depending on the brand and type. It’s important to check the packaging or use a nutritional database to get accurate information.

Are There Any Health Benefits to Consuming Butter?

Are there any health benefits to consuming butter? Butter, when consumed in moderate amounts, can provide essential nutrients like vitamins A, D, and E. However, it is important to be aware of the potential health risks associated with its high saturated fat content.

Conclusion

So there you have it, folks! I hope this article has cleared up any confusion you may have had about measuring butter.

Remember, 4 ounces of butter is equal to 8 tablespoons or half a cup. It’s always important to accurately measure your butter for the best results in your recipes.

Whether you’re baking a delicious cake or whipping up a savory sauce, knowing the right amount of butter to use is key.

So go ahead and confidently measure out that 4 ounces of butter, and get ready to create some culinary magic in your kitchen!

Continue Reading

Recipes & Culinary Uses

How to Make Butter at Home From Milk

Published

on

By

An image of a stainless steel churn on a rustic wooden countertop

As a passionate home cook, I’ve always found joy in creating my own ingredients from scratch. Making butter at home from milk is not only a rewarding process, but it also allows me to have full control over the quality and taste of the final product.

In this article, I’ll guide you through the steps of transforming ordinary milk into delicious homemade butter. Get ready to roll up your sleeves and experience the satisfaction of churning butter right in your own kitchen.

Key Takeaways

  • Gather the necessary ingredients and tools, including fresh milk, salt (optional), ice-cold water, and flavorings.
  • Churn the milk using a traditional or modern method until fat globules clump together to form butter with a smooth and creamy texture.
  • Separate the butter from the buttermilk by straining the mixture and rinsing the butter with cold water.
  • Store the homemade butter in an airtight container in the refrigerator and enjoy it as a spread or in cooking and baking.

Gathering the Necessary Ingredients

To make butter at home, you’ll need to gather the necessary ingredients. Start with fresh or store-bought milk. Make sure it is full-fat milk, as this will yield the best results. Other ingredients you’ll need include a pinch of salt (optional), ice-cold water, and any desired flavorings, such as herbs or spices.

For churning the milk into butter, you can use a hand mixer, a stand mixer with a whisk attachment, or even a mason jar with a tight-fitting lid. When separating the butter from the buttermilk, you can use a cheesecloth or a fine-mesh strainer.

Store your homemade butter in an airtight container in the refrigerator. Enjoy it on toast, baked goods, or in cooking and baking. If you encounter any issues, such as the butter not solidifying or the buttermilk being too watery, troubleshoot by adjusting the churning time or temperature.

Adding flavors to homemade butter is easy – simply mix in your desired herbs or spices while the butter is soft. Homemade butter has several health benefits, including being a good source of healthy fats and vitamins. Don’t throw away the leftover buttermilk – you can use it in various recipes, such as pancakes, biscuits, or salad dressings.

Lastly, if you want to take your butter-making to the next level, try making cultured butter at home by using live cultures or yogurt as a starter.

Preparing the Milk for Churning

Before beginning the churning process, it’s important to ensure the milk is at room temperature. This helps to promote the growth of beneficial bacteria and ensures a successful butter-making process.

To prepare the milk for churning, follow these steps:

  • Pasteurizing milk: Heat the milk to 161°F (72°C) for 15 seconds to kill any harmful bacteria while preserving the beneficial enzymes.
  • Adding culture: Introduce a starter culture, such as yogurt or buttermilk, to the milk. This helps to acidify the milk, creating a favorable environment for butter formation.

By pasteurizing the milk, you eliminate any potential health risks while retaining the essential components for butter-making. Adding a culture helps to enhance the flavor and texture of the final product.

Now that the milk is ready, it’s time to move on to the exciting process of churning it into butter.

Transition: With the milk properly prepared, let’s explore the next step in the butter-making process: churning.

Churning the Milk Into Butter

Now that you have prepared the milk, it’s time to start churning it into creamy, delicious butter.

Churning is the process of agitating the milk to separate the fat globules from the liquid, resulting in the formation of butter.

There are various methods of churning milk into butter, ranging from traditional butter making techniques to modern machinery.

One traditional method involves using a butter churn, which is a container with a paddle or dasher that is manually rotated. This motion causes the fat globules to collide and stick together, forming butter.

Another method is using a stand mixer or food processor, which provides a more convenient and efficient way to churn the milk.

Regardless of the method chosen, the key is to continue churning until the fat globules clump together and separate from the liquid, creating a smooth and creamy butter.

Separating the Butter From the Buttermilk

Once the churning is complete, you can strain the mixture to separate the butter from the buttermilk. To achieve a creamy and flavorful homemade butter, here are some important tips:

  • Use cold, high-quality cream for churning. This will result in a richer and tastier butter.
  • Add a pinch of salt to enhance the flavor of the butter.
  • Allow the cream to sit at room temperature for a few hours before churning. This helps to develop the flavor and improves the texture of the butter.
  • Churn the cream at a moderate speed to avoid over-churning, which can lead to a grainy texture.
  • Once the butter has formed, drain the buttermilk and rinse the butter with cold water to remove any remaining buttermilk.

Making butter at home has several benefits compared to store-bought options. It allows you to control the quality of ingredients, resulting in a healthier and more natural product. Additionally, homemade butter often has a fresher taste and creamier texture.

Now that the butter is separated from the buttermilk, let’s move on to the next step of storing and enjoying homemade butter.

Storing and Enjoying Homemade Butter

To store and enjoy your homemade butter, you’ll want to transfer it to an airtight container and keep it refrigerated. This will help maintain its freshness and prevent it from spoiling. When choosing a container, opt for one that is made of glass or food-grade plastic. Avoid using metal containers as they can react with the butter and affect its flavor. It’s also important to label the container with the date of preparation to keep track of its shelf life. Homemade butter can last up to two weeks when stored properly in the refrigerator.

Here is a table highlighting creative ways to flavor homemade butter and how to use it in baking recipes:

Flavoring Ideas Baking Recipes
Garlic and Herb Garlic bread, savory scones
Cinnamon Cinnamon rolls, apple pie
Honey Honey butter cookies, cornbread
Lemon and Dill Lemon dill butter salmon, roasted potatoes
Maple Maple pecan butter tart, pancakes

Experimenting with different flavors can add a unique twist to your homemade butter and elevate your baked goods to a whole new level of deliciousness.

Frequently Asked Questions

Can I Use Any Type of Milk to Make Butter at Home?

Yes, you can use any type of milk to make butter at home. However, it’s important to note that different types of milk may yield slightly different results in terms of taste and texture. Here are some tips for making butter at home.

How Long Does It Take to Churn the Milk Into Butter?

Churning milk into butter takes time and effort. Using proper techniques and following tips for consistency is crucial. It’s like turning cream into fluffy clouds—rewarding and satisfying.

Can I Use an Electric Mixer Instead of a Hand Churn?

Yes, an electric mixer can be used instead of a hand churn to make butter at home from milk. The pros of using an electric mixer are faster and easier churning, while the cons include potential over-churning and a less traditional experience.

How Can I Use the Leftover Buttermilk in Other Recipes?

I love using leftover buttermilk in baking! It adds a tangy flavor and moisture to cakes, biscuits, and pancakes. Some creative recipes include buttermilk ranch dressing, buttermilk fried chicken, and buttermilk pancakes.

How Long Can Homemade Butter Be Stored in the Refrigerator?

Homemade butter can be stored in the refrigerator for about 2-3 weeks, depending on the preservation methods used. It’s important to store it in an airtight container to maintain its freshness and extend its shelf life.

Conclusion

In conclusion, making butter at home from milk is a simple and rewarding process. By following the precise instructions provided, you can transform milk into delicious homemade butter.

The analytical perspective allows us to understand the chemical processes involved, while the informative approach ensures a comprehensive understanding of the butter-making process.

With accurate measurements and detailed explanations, you can confidently create your own butter. So go ahead, give it a try and experience the sheer delight of spreading your homemade butter on warm, freshly baked bread – it’s a taste sensation like no other!

Continue Reading

Recipes & Culinary Uses

How to Make Butter Balls

Published

on

By

An image that showcases the step-by-step process of shaping smooth, round butter balls

Do you crave a dollop of flavor to enhance your dining experience? Look no further!

In this article, we will guide you through the magical process of creating delectable butter balls. With just a few simple ingredients and tools, you’ll be able to craft these little balls of creamy goodness in no time.

So, put on your apron, grab your whisk, and prepare to embark on a buttery adventure that will leave your taste buds dancing with delight.

Key Takeaways

  • Experiment with different combinations of herbs and spices to create unique flavors in the butter balls.
  • Chilling the butter mixture in the refrigerator helps firm it up and allows the flavors to meld together for a more harmonious taste.
  • Roll the chilled butter mixture into small, bite-sized spheres and optionally roll them in finely chopped herbs, spices, or edible flowers for added flavor and presentation.
  • Store the butter balls in an airtight container in the refrigerator and let them come to room temperature before serving to enhance their versatility in various dishes and spreads.

Gathering the Ingredients and Tools

First, you’ll need to gather the ingredients and tools necessary for making butter balls. To begin, gather 1 cup of softened butter, 1 ¼ cups of powdered sugar, 1 teaspoon of vanilla extract, and a pinch of salt. These ingredients will create a smooth and flavorful base for your butter balls.

Additionally, you’ll need a mixing bowl, an electric mixer, a spatula, and a baking sheet lined with parchment paper. If you’re feeling adventurous, you can also experiment with alternative ingredients such as almond or coconut extract to add a unique twist to your butter balls.

Once you have everything ready, it’s time to move on to preparing the butter mixture.

Preparing the Butter Mixture

Next, you’ll need to mix together the softened butter, your choice of herbs and spices, and a pinch of salt in a bowl. This step is crucial for adding flavor to your butter balls.

As you mix in the herbs and spices, imagine the burst of savory goodness they will bring to each bite. Experiment with different combinations like garlic and rosemary, or perhaps a hint of lemon zest and thyme.

Once everything is well incorporated, cover the bowl with plastic wrap and place it in the refrigerator to chill. This will help the butter mixture firm up, making it easier to shape into balls later on. The chilling process also allows the flavors to meld together, resulting in a more harmonious taste.

Get ready to elevate your butter balls to a whole new level of deliciousness.

Shaping the Butter Balls

Now it’s time to take the chilled butter mixture and roll it into small, bite-sized spheres. Shaping butter balls requires some techniques to achieve the perfect form.

Start by scooping a small amount of the butter mixture with a spoon or a melon baller. Then, gently roll it between your palms, applying light pressure to create a smooth and round shape.

For a more decorative touch, you can roll the butter balls in finely chopped herbs, spices, or even edible flowers. Arrange them on a serving plate, or place them in a decorative butter dish for a stunning presentation.

These butter balls can be a delightful addition to a cheese platter or served alongside warm bread.

Now, let’s move on to the next step – adding flavors and variations to your butter balls.

Adding Flavors and Variations

To enhance the taste and create unique variations, you can experiment with different ingredients and seasonings for your butter balls. By adding different flavors, you can elevate your butter balls to a whole new level. Here are some ideas to get you started:

Flavor Ingredients Creative Uses
Garlic and Herb Garlic, parsley, thyme Spread on bread or use in pasta dishes
Citrus Lemon or orange zest Use in baking or melt over grilled fish
Spicy Chili flakes, paprika Add a kick to roasted vegetables or steaks
Sweet Honey, cinnamon Delicious on pancakes or toast

There are endless possibilities when it comes to flavored butter balls. Get creative and experiment with different combinations to find your favorites. Once you have made your butter balls, it’s time to move on to storing and serving them.

TRANSITION: Now that you have created your delicious flavored butter balls, let’s talk about the best way to store and serve them.

Storing and Serving the Butter Balls

When it comes to storing and serving your flavorful creations, remember to keep your butter balls chilled in an airtight container to maintain their freshness. Storing butter balls properly is essential to preserve their taste and texture.

After shaping your butter into small balls, place them in the refrigerator for at least an hour to firm up. Once chilled, transfer the butter balls to an airtight container to prevent them from absorbing any odors or flavors from the fridge. This will ensure that your butter balls stay fresh and delicious.

When it’s time to serve, take out the desired amount and let them come to room temperature for a few minutes. Butter balls are versatile and can be used in various ways – spread them on toast, melt them on steamed vegetables, or use them to enhance the flavor of your favorite dishes. Get creative and enjoy the rich, creamy goodness of your homemade butter balls!

Conclusion

So there you have it, a step-by-step guide on how to make butter balls.

Now that you know the secrets to creating these delectable delights, you can impress your friends and family with your culinary skills.

Imagine the look on their faces as they bite into these creamy, flavorful bites of heaven.

The possibilities are endless when it comes to adding your own unique twist to the recipe.

So go ahead, gather your ingredients and tools, and embark on this buttery adventure.

Get ready to indulge in the buttery goodness that awaits!

Continue Reading

Recipes & Culinary Uses

How to Make Brownies With Weed Butter

Published

on

By

An image showcasing a close-up of fudgy, decadent brownies with a subtle hint of green peeking through the rich chocolate, enticing readers to learn the secret behind their magical ingredient

Hey there, fellow baking enthusiasts! Ever wondered how to take your brownie recipe to a whole new level? Well, I’ve got a little secret ingredient that’ll surely elevate your baking game: weed butter.

Now, before you start raising eyebrows, let me assure you that this article is all about responsible and informed baking. I’ll guide you through the process of making your very own batch of deliciously potent weed brownies.

So, get ready to embark on a mouthwatering journey that combines the best of baking and cannabis. Let’s dive in!

Key Takeaways

  • Different weed strains have different effects, so choose a balanced strain with a combination of THC and CBD for making weed butter.
  • Decarboxylate cannabis in the oven to activate THC before making weed butter.
  • Use proper dosing techniques and start with a lower dose to avoid overconsumption and unpleasant side effects.
  • Store weed brownies properly in a cool, dark place and consume within a week for optimal freshness and potency.

Selecting the Right Strain for Weed Butter

To make the best brownies with weed butter, you’ll need to choose the right strain of cannabis. When it comes to selecting the best cannabis strain for edibles, it’s important to understand the effects that different weed strains can have.

Some strains are known for their uplifting and energizing effects, while others are more relaxing and calming. For edibles, you’ll want to choose a strain that has a balanced combination of THC and CBD. THC is responsible for the psychoactive effects, while CBD provides a more calming and therapeutic experience. Finding the right balance will ensure that your brownies have the desired effects.

Now that you know the importance of choosing the right strain, let’s move on to making weed butter from scratch.

Making Weed Butter From Scratch

First, you’ll need to gather the necessary ingredients for making weed butter from scratch. To make weed butter, you’ll need unsalted butter, ground cannabis, and water. Start by decarboxylating your cannabis in the oven to activate the THC.

Next, melt the butter and add the ground cannabis. Simmer the mixture on low heat for a few hours, stirring occasionally. The alternative method of making weed-infused butter involves using a slow cooker, which can simplify the process.

The benefits of using weed butter in other recipes are numerous. Not only does it add a unique flavor to your dishes, but it also allows for a more controlled and precise dosage of cannabis.

Once the butter has cooled, strain out the plant matter, and you’re left with homemade weed butter ready to be used in all sorts of delicious recipes.

Infusing Weed Butter Into Your Brownie Mix

Once you’ve infused your homemade weed butter into your brownie mix, the rich and potent flavors will elevate your brownies to a whole new level of deliciousness. Infusing weed butter into your brownie mix is a simple and effective way to create alternative edibles that pack a punch.

Here are three infusing techniques to help you make the most of your weed butter brownies:

  1. Double Boiler Method: Place a heatproof bowl over a pot of simmering water, and melt your weed butter in the bowl. Once melted, add it to your brownie mix and stir well to ensure even distribution.

  2. Stovetop Method: Melt your weed butter in a saucepan on low heat, stirring continuously to prevent burning. Once melted, add it to your brownie mix and mix thoroughly.

  3. Microwave Method: Melt your weed butter in a microwave-safe bowl, heating in short bursts and stirring in between. Once melted, add it to your brownie mix and mix well.

With these infusing techniques, you can create delectable weed butter brownies that are sure to impress. Enjoy responsibly!

Baking Perfectly Potent Weed Brownies

For perfectly potent weed brownies, ensure you mix the infused butter thoroughly into the brownie batter. This step is crucial to evenly distribute the cannabis throughout the mixture, ensuring each bite is infused with the desired dose.

When it comes to dosing techniques, it’s important to note that the potency of your brownies will depend on the strength of your infused butter. To control the dosage, start by calculating the total amount of THC in your butter and divide it by the number of servings. This will give you an idea of how much THC is in each brownie.

If you’re looking for alternative cannabis-infused desserts, consider trying recipes like cannabis-infused cookies, cakes, or even ice cream. Just remember to adjust the dosage accordingly and always label your edibles clearly.

Happy baking!

Dos and Don’ts of Dosing Weed Brownies

When it comes to making weed brownies, proper dosage of weed butter is crucial. Overconsumption can lead to unpleasant experiences, so it’s important to know how much weed butter to use for the desired effect.

To ensure consistent potency, there are a few tips to keep in mind. First, use a reliable recipe that provides specific instructions on the amount of weed butter needed. This will help you avoid using too much or too little.

Second, properly measure the weed butter. Use a kitchen scale to weigh the butter accurately, as eyeballing it can result in inaccurate dosing. This step is crucial for achieving the desired effect and avoiding any potential negative experiences.

Proper Weed Butter Dosage

To determine the proper dosage of weed butter for your brownies, it’s essential to consider the potency and desired effects. Here are three important things to consider:

  1. Weed butter infusion methods: The potency of your weed butter depends on how you infuse it. Common methods include using a stovetop, slow cooker, or a specialized cannabis-infused butter machine. Each method may result in varying levels of THC extraction, so it’s important to choose a method that suits your desired potency.

  2. Calculating THC content: To accurately calculate the THC content in your weed butter, you need to know the percentage of THC in your starting cannabis material. This information can usually be found on the packaging of your cannabis product. From there, you can use a simple formula to determine the approximate THC content in your infused butter.

  3. Desired effects: Understanding your desired effects is crucial in determining the proper dosage of weed butter. If you’re a beginner or have a low tolerance, it’s recommended to start with a lower dose and gradually increase as needed. It’s important to remember that the effects of edibles can take longer to kick in and can be more potent, so patience is key.

Avoid Overconsumption Risks

Understanding the potential risks of overconsumption is crucial in ensuring a safe and enjoyable experience with cannabis-infused edibles. While edibles can provide a longer-lasting and more intense high compared to smoking or vaping, it’s important to consume them responsibly.

Overconsumption can lead to unpleasant side effects such as anxiety, paranoia, and even hallucinations. To avoid these risks, it is recommended to start with a low dose, especially if you are a beginner. Give your body enough time to process the edible before consuming more.

It’s also important to be aware of the potency of the edible you are consuming, as different products can have varying levels of THC. By practicing responsible consumption practices and being aware of the risks, you can have a safe and enjoyable experience with cannabis-infused edibles.

Tips for Consistent Potency

When it comes to making weed butter brownies, maintaining consistent effects can be a challenge. However, there are a few tips that can help you adjust the potency levels and ensure a consistent experience every time. Here’s what you need to know:

  1. Use precise measurements: To achieve consistent potency, it’s crucial to measure your ingredients accurately. This applies not only to the amount of weed butter you use but also to the other ingredients in your recipe.

  2. Test potency before baking: Before adding the weed butter to your brownie mix, try a small amount to gauge its potency. This will give you an idea of how strong the final product will be and allow you to adjust the amount of weed butter accordingly.

  3. Keep notes: Maintaining a record of your recipes and the effects they produce can help you fine-tune the potency levels over time. By noting the amount of weed butter used and the resulting effects, you can make adjustments to achieve your desired experience.

Following these tips will help you create consistently potent weed butter brownies that deliver the desired effects every time.

Storing and Enjoying Your Weed Brownies

Once they’ve cooled, you can store your weed brownies in an airtight container to keep them fresh. Proper storage techniques are essential to maintain the potency and flavor of your infused brownies. Here are some tips for storing and enjoying your weed brownies:

Technique Description
Store in a cool, dark place Heat and light can degrade the potency of the cannabinoids in your brownies. Keep them away from direct sunlight or high temperatures.
Separate from regular brownies To avoid confusion or accidental consumption, it’s best to store your weed brownies separately from regular ones. Label the container clearly.
Use within a week Although the brownies can last longer, it’s recommended to consume them within a week to ensure optimal freshness and potency.
Freeze for long-term storage If you have a large batch or want to save them for later, you can freeze your weed brownies in an airtight container. Thaw them before serving.
Best serving methods Enjoy your weed brownies by cutting them into small, manageable pieces. Start with a low dosage and wait at least an hour before consuming more. Remember to always store them securely and out of reach of children or pets.

Frequently Asked Questions

Can I Use Any Strain of Weed to Make Weed Butter, or Are There Specific Strains That Work Best?

Any strain of weed can be used to make weed butter, but there are specific strains that work best for making edibles. When infusing weed butter, consider the potency, flavor profile, and desired effects of the strain.

How Long Does It Take to Make Weed Butter From Scratch?

To make weed butter from scratch, it typically takes a few hours. After infusing the butter with cannabis, you can use it to enhance various recipes. Remember to store the weed butter properly to maintain its potency.

Can I Use Store-Bought Brownie Mix or Do I Have to Make the Mix From Scratch?

I can use store-bought brownie mix for weed brownies, but it’s important to properly dose them. The homemade mix gives more control over the ingredients, but store-bought is convenient.

How Do I Know if My Weed Brownies Are Potent Enough?

To properly dose weed brownies, start by using a reliable recipe and accurately measuring the amount of weed butter. Test the potency by starting with a small piece and waiting for the effects. Adjust the dosage accordingly for future batches.

How Long Can I Store My Weed Brownies Before They Go Bad?

The shelf life of weed brownies depends on how they are stored. To ensure the best quality, store them in an airtight container in a cool, dark place. They can last up to a week, but it’s best to consume them within a few days for optimal freshness.

Conclusion

In conclusion, making brownies with weed butter is a fun and delicious way to enjoy the benefits of marijuana. By selecting the right strain for your weed butter and infusing it into your brownie mix, you can create perfectly potent treats.

However, it is important to be mindful of dosing to avoid any unwanted effects. Did you know that a recent survey found that 42% of cannabis users prefer edibles as their preferred method of consumption?

So why not try making your own weed brownies and join the growing number of people who enjoy this tasty and alternative way of experiencing the effects of marijuana.

Continue Reading

Trending