Recipes & Culinary Uses
How Much Is 3/4 Pound of Butter

As I stood in my kitchen, contemplating the recipe before me, a question arose: how much is 3/4 pound of butter? It’s a common question that many cooks find themselves asking.
Well, fear not, for in this article, I will unravel the mystery for you. Join me on a journey as we explore the weight, volume, and measurements of 3/4 pound of butter.
Prepare to be enlightened and empowered in your culinary endeavors. Let’s dive in!
Key Takeaways
- 3/4 pound of butter weighs approximately 12 ounces.
- Butter can be measured in sticks, with each stick weighing 1/2 cup or 8 tablespoons.
- One stick of butter weighs 1/4 pound, so 4 sticks equal a pound of butter.
- Alternative measurements for 3/4 pound of butter include: 3/4 cup, 12 tablespoons, and 6 ounces.
The Weight of 3/4 Pound of Butter
You’ll be glad to know that 3/4 pound of butter weighs approximately 12 ounces.
When it comes to converting butter weight, it’s essential to understand butter measurement equivalents. Whether you’re following a recipe or simply need to know how much butter to use, having this knowledge is incredibly helpful.
Sometimes, a recipe may call for butter in ounces, while others may use cups or grams. Understanding the different measurements ensures that you can accurately measure the right amount of butter for your cooking or baking needs.
Converting butter weight can be confusing at first, but with practice, it becomes second nature. Knowing that 3/4 pound of butter equals 12 ounces is just the beginning of your butter measurement journey.
Converting 3/4 Pound to Ounces
When it comes to cooking and baking, understanding measurements is key. One common conversion that often comes up is pounds to ounces. Knowing how to convert pounds to ounces can make a big difference in getting your recipe just right.
In this discussion, we will explore the pound to ounce conversion, as well as how to calculate 3/4 of a pound and delve into the world of butter measurements.
Get ready to become a pro at measuring ingredients in no time!
Pound to Ounce Conversion
To convert pounds to ounces, simply multiply the weight in pounds by 16. It’s a straightforward calculation that allows you to easily convert between these two units of measurement.
As I think about the pound to kilogram conversion, I can’t help but be amazed at the vast difference between the two. It’s incredible how a small change in units can result in such a significant increase in weight.
And when it comes to ounce to gram conversion, it’s fascinating to see how the numbers change and how precise measurements can be. It’s like looking at the world through a different lens, where even the tiniest details matter. This conversion process truly highlights the intricacies and complexities of our world.
Now, let’s delve into calculating 3/4 pound of butter.
Calculating 3/4 Pound
Calculating 3/4 of a pound is a simple task that can be done by multiplying the weight by 0.75. This is a common method used when converting weights or calculating fractions. To give you a better understanding, let’s take a look at the following table:
Weight (in pounds) | 3/4 of the Weight |
---|---|
1 | 0.75 |
2 | 1.5 |
3 | 2.25 |
As you can see, when you multiply the weight by 0.75, you get the corresponding 3/4 of the weight. So, if you have 3/4 pound of butter, you would simply multiply 0.75 by the weight of the butter to find out how much it is. This technique can be applied to any weight measurement, making it a useful skill to have when converting weights or calculating fractions.
Understanding Butter Measurements
Understanding butter measurements can be helpful when cooking or baking. When it comes to butter weight, it can sometimes be confusing to know exactly how much a recipe requires. Here are five essential things to know about butter measurements:
- Butter is typically measured in sticks, with each stick weighing 1/2 cup or 8 tablespoons.
- If a recipe calls for a certain number of cups, you can easily convert it to sticks by dividing the cup measurement by 1/2.
- Butter can also be measured in grams or ounces. One stick of butter weighs approximately 113 grams or 4 ounces.
- It’s important to note that butter can vary in density, so measuring by weight is more accurate than measuring by volume.
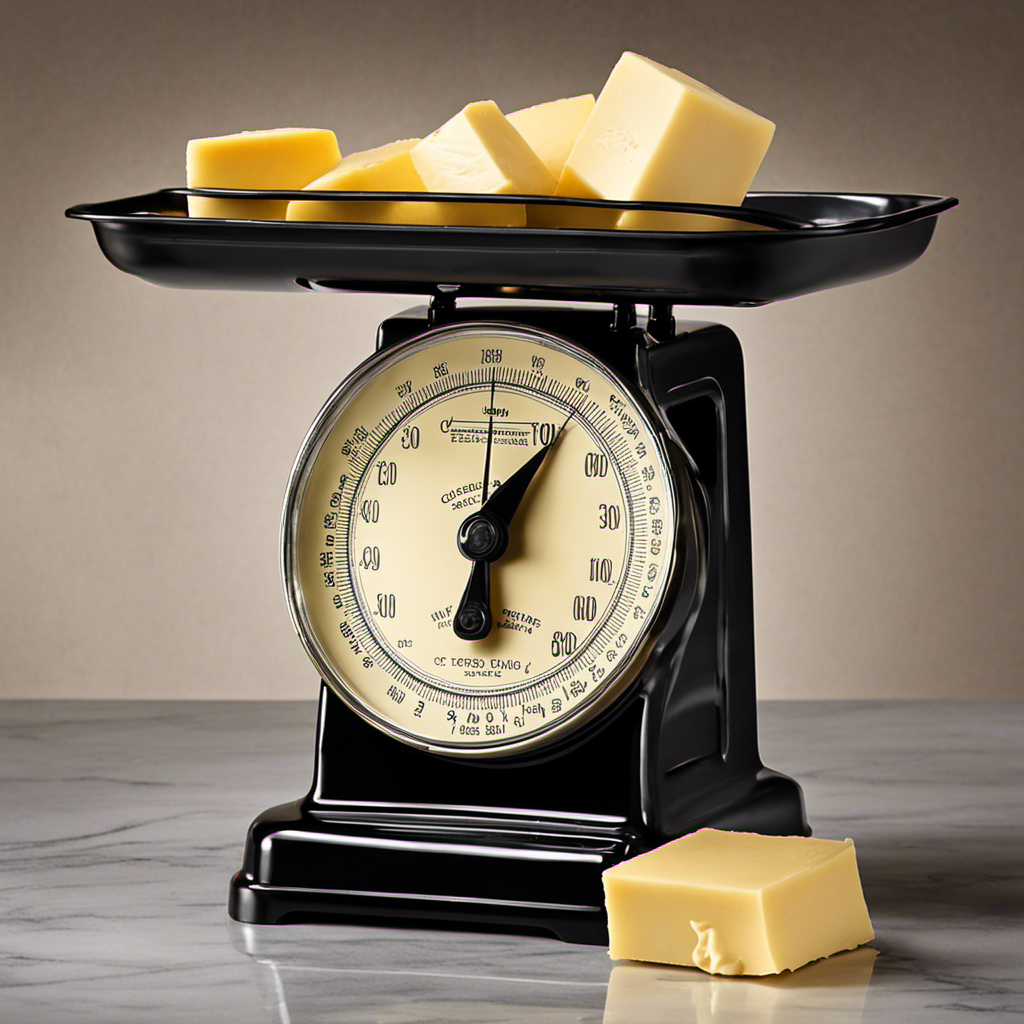
- If a recipe calls for a specific weight of butter, using a kitchen scale is the best way to ensure accuracy.
Understanding these butter measurements will make your cooking and baking adventures much smoother and more successful. Happy measuring!
Calculating the Volume of 3/4 Pound of Butter
You can easily figure out the volume of 3/4 pound of butter. By using a simple volume calculation and weight conversion, you can determine how much space this amount of butter takes up. To help you visualize it, here’s a handy table showcasing the volume equivalents of 3/4 pound of butter in different measurements:
Measurement | Equivalent Volume |
---|---|
Cups | 1.5 cups |
Tablespoons | 24 tablespoons |
Teaspoons | 72 teaspoons |
Now, armed with this information, you can confidently measure out 3/4 pound of butter in any recipe. Whether you’re baking a cake or making a delicious sauce, understanding the volume of butter will ensure that your dish turns out just right. So go ahead, get creative in the kitchen, and let the butter do its magic!
Estimating the Number of Sticks in 3/4 Pound
When it comes to estimating the number of sticks in 3/4 pound of butter, there are a few stick-to-pound conversion methods that can be used. These methods vary in accuracy, so it’s important to understand their limitations.
In this discussion, we will explore the different methods and their accuracy, helping you make a more informed estimation.
Stick-To-Pound Conversion Methods
There’s a simple way to convert sticks of butter to pounds. All you need to know is that one stick of butter weighs 1/4 pound. So, if you have 4 sticks, you have a pound of butter.
But if you’re like me and don’t always have a kitchen scale handy, here are some tips to help you estimate the weight of butter:
- Look at the packaging: Many butter brands indicate the weight of each stick on the packaging.
- Use a tablespoon: A stick of butter is equivalent to 8 tablespoons.
- Consider the butter’s texture: Soft or melted butter will weigh less than cold, solid butter.
- Account for variations in butter weight: Different butter brands may have slightly different weights for their sticks.
- Practice makes perfect: The more you work with butter, the better you’ll become at estimating its weight accurately.
Estimating the weight of butter can be a handy skill to have in the kitchen, but how accurate is it really? Let’s explore the accuracy of estimation in the next section.
Accuracy of Estimation
Estimating the weight of butter can be challenging, but it’s important to consider the accuracy of our estimations. When it comes to measuring accuracy, there are various estimation techniques that can be used. One common method is using a kitchen scale to weigh the butter precisely. However, if you don’t have a scale on hand, you can rely on visual estimation. To help you get a better sense of how much butter you’re estimating, here’s a table that compares the visual appearance of different amounts of butter:
Amount of Butter | Visual Appearance |
---|---|
1/4 pound | Size of a standard stick of butter |
1/2 pound | Two standard sticks of butter |
3/4 pound | Three standard sticks of butter |
Understanding the metric equivalent of 3/4 pound will allow you to accurately estimate the weight of butter in recipes that use metric measurements.
Understanding the Metric Equivalent of 3/4 Pound
To understand the metric equivalent of 3/4 pound, it helps to know that 1 pound is equal to approximately 0.454 kilograms. So, when we convert 3/4 pound of butter to metric, we can calculate it as follows:
- 3/4 pound is approximately 0.340 kilograms of butter.
- It might not seem like much, but trust me, it’s enough to make a delicious batch of cookies.
- Picture this: a rich, creamy buttery flavor that melts in your mouth with every bite.
- The aroma of freshly baked bread, made with 3/4 pound of butter, filling your kitchen.
- Imagine the satisfaction of spreading that perfect amount of butter on your morning toast, adding a touch of indulgence to your day.
Now that we understand the metric conversion of 3/4 pound of butter, let’s compare it to other ingredients and see how it stacks up.
Comparing 3/4 Pound of Butter to Other Ingredients
When comparing 3/4 pound of butter to other ingredients, it’s important to consider their respective quantities and impact on the final dish. Butter, with its rich flavor and creamy texture, plays a crucial role in many recipes. However, it can be helpful to understand the equivalent measurements when converting to other ingredients. Here is a table that compares the measurements of 3/4 pound of butter to other common ingredients:
Ingredient | Approximate Equivalent |
---|---|
3/4 pound butter | 3 cups |
Flour | 1.5 cups |
Sugar | 1.5 cups |
Milk | 1.5 cups |
Oil | 1.5 cups |
Tips for Measuring 3/4 Pound of Butter
You can easily measure 3/4 pound of butter by using a kitchen scale or by following these simple tips.
- Soften the butter: Leave it at room temperature until it’s easy to spread.
- Use measuring lines on the packaging: Many butter packages have markings for tablespoons or ounces.
- Cut the butter into tablespoons: Each tablespoon is approximately 1/2 ounce, so you’ll need 12 tablespoons for 3/4 pound.
- Use a butter dish: Some butter dishes have markings to indicate different measurements.
- Compare with a reference object: If you have a known weight, such as a can of soup, you can use it as a reference to estimate the weight of the butter.
Measuring butter accurately is crucial for achieving the perfect consistency and taste in your recipes.
Now that you know how to measure 3/4 pound of butter, let’s explore how to use it in delicious dishes.
Using 3/4 Pound of Butter in Recipes
Using 3/4 pound of butter in recipes can add a rich and creamy flavor to your dishes. Butter is a versatile ingredient that enhances both sweet and savory recipes. But what if you don’t have a kitchen scale to accurately measure 3/4 pound of butter? Don’t worry, there are alternative measurements you can use to estimate the amount of butter needed. Here is a helpful table to guide you:
Measurement | Equivalent |
---|---|
3/4 cup | 1 1/2 sticks |
12 tablespoons | 24 teaspoons |
6 ounces | 1 1/2 cups |
These conversions can come in handy when you’re in a pinch and need to estimate the amount of butter for your recipe. So go ahead and experiment with 3/4 pound of butter in your dishes, and enjoy the rich and delicious results it brings.
Frequently Asked Questions
Can I Use Margarine Instead of Butter in Recipes That Call for 3/4 Pound of Butter?
Sure, you can use margarine as a substitute for butter in recipes that require 3/4 pound of butter. However, keep in mind that margarine may alter the taste slightly. Experiment with different brands to find the best flavor.
How Many Calories Are in 3/4 Pound of Butter?
I’ll tell you the calorie content and nutritional value of 3/4 pound of butter. It’s important to know this information when considering its impact on your diet and overall health.
Can I Freeze 3/4 Pound of Butter for Later Use?
Sure, you can freeze 3/4 pound of butter for later use. It’s a great way to extend its shelf life. Just make sure to wrap it tightly in freezer-safe packaging to prevent freezer burn.
How Long Does 3/4 Pound of Butter Typically Last in the Refrigerator?
In the refrigerator, 3/4 pound of butter typically lasts around 2-3 weeks. To properly store butter, wrap it tightly in foil or place it in an airtight container. Butter can also be used for baking, spreading on bread, or making sauces.
Are There Any Health Benefits Associated With Consuming 3/4 Pound of Butter?
There are no health benefits associated with consuming 3/4 pound of butter. It is high in saturated fat and can increase the risk of heart disease. Consider alternative options like olive oil or avocado spread.
Conclusion
In conclusion, 3/4 pound of butter is a substantial amount that can transform any recipe into a creamy delight.
Picture yourself holding a stick of butter in your hand, its smooth texture and rich aroma enticing your senses. Imagine the silky butter melting in a hot pan, sizzling and filling the air with a mouthwatering fragrance.
Whether you’re baking a batch of flaky croissants or whipping up a velvety sauce, 3/4 pound of butter will add that indulgent touch that makes all the difference.
So go ahead, embrace the decadence and elevate your culinary creations with this golden treasure.
Diana’s meticulous nature and editorial prowess set the gold standard for our content. With over a decade in the culinary and publishing industries, her guidance ensures that every article perfectly blends information and entertainment. A culinary experimenter, Diana loves whipping up new butter-based concoctions in her kitchen.
Recipes & Culinary Uses
How to Make Butter Balls

Do you crave a dollop of flavor to enhance your dining experience? Look no further!
In this article, we will guide you through the magical process of creating delectable butter balls. With just a few simple ingredients and tools, you’ll be able to craft these little balls of creamy goodness in no time.
So, put on your apron, grab your whisk, and prepare to embark on a buttery adventure that will leave your taste buds dancing with delight.
Key Takeaways
- Experiment with different combinations of herbs and spices to create unique flavors in the butter balls.
- Chilling the butter mixture in the refrigerator helps firm it up and allows the flavors to meld together for a more harmonious taste.
- Roll the chilled butter mixture into small, bite-sized spheres and optionally roll them in finely chopped herbs, spices, or edible flowers for added flavor and presentation.
- Store the butter balls in an airtight container in the refrigerator and let them come to room temperature before serving to enhance their versatility in various dishes and spreads.
Gathering the Ingredients and Tools
First, you’ll need to gather the ingredients and tools necessary for making butter balls. To begin, gather 1 cup of softened butter, 1 ¼ cups of powdered sugar, 1 teaspoon of vanilla extract, and a pinch of salt. These ingredients will create a smooth and flavorful base for your butter balls.
Additionally, you’ll need a mixing bowl, an electric mixer, a spatula, and a baking sheet lined with parchment paper. If you’re feeling adventurous, you can also experiment with alternative ingredients such as almond or coconut extract to add a unique twist to your butter balls.
Once you have everything ready, it’s time to move on to preparing the butter mixture.
Preparing the Butter Mixture
Next, you’ll need to mix together the softened butter, your choice of herbs and spices, and a pinch of salt in a bowl. This step is crucial for adding flavor to your butter balls.
As you mix in the herbs and spices, imagine the burst of savory goodness they will bring to each bite. Experiment with different combinations like garlic and rosemary, or perhaps a hint of lemon zest and thyme.
Once everything is well incorporated, cover the bowl with plastic wrap and place it in the refrigerator to chill. This will help the butter mixture firm up, making it easier to shape into balls later on. The chilling process also allows the flavors to meld together, resulting in a more harmonious taste.
Get ready to elevate your butter balls to a whole new level of deliciousness.
Shaping the Butter Balls
Now it’s time to take the chilled butter mixture and roll it into small, bite-sized spheres. Shaping butter balls requires some techniques to achieve the perfect form.
Start by scooping a small amount of the butter mixture with a spoon or a melon baller. Then, gently roll it between your palms, applying light pressure to create a smooth and round shape.
For a more decorative touch, you can roll the butter balls in finely chopped herbs, spices, or even edible flowers. Arrange them on a serving plate, or place them in a decorative butter dish for a stunning presentation.
These butter balls can be a delightful addition to a cheese platter or served alongside warm bread.
Now, let’s move on to the next step – adding flavors and variations to your butter balls.
Adding Flavors and Variations
To enhance the taste and create unique variations, you can experiment with different ingredients and seasonings for your butter balls. By adding different flavors, you can elevate your butter balls to a whole new level. Here are some ideas to get you started:
Flavor | Ingredients | Creative Uses |
---|---|---|
Garlic and Herb | Garlic, parsley, thyme | Spread on bread or use in pasta dishes |
Citrus | Lemon or orange zest | Use in baking or melt over grilled fish |
Spicy | Chili flakes, paprika | Add a kick to roasted vegetables or steaks |
Sweet | Honey, cinnamon | Delicious on pancakes or toast |
There are endless possibilities when it comes to flavored butter balls. Get creative and experiment with different combinations to find your favorites. Once you have made your butter balls, it’s time to move on to storing and serving them.
TRANSITION: Now that you have created your delicious flavored butter balls, let’s talk about the best way to store and serve them.
Storing and Serving the Butter Balls
When it comes to storing and serving your flavorful creations, remember to keep your butter balls chilled in an airtight container to maintain their freshness. Storing butter balls properly is essential to preserve their taste and texture.
After shaping your butter into small balls, place them in the refrigerator for at least an hour to firm up. Once chilled, transfer the butter balls to an airtight container to prevent them from absorbing any odors or flavors from the fridge. This will ensure that your butter balls stay fresh and delicious.
When it’s time to serve, take out the desired amount and let them come to room temperature for a few minutes. Butter balls are versatile and can be used in various ways – spread them on toast, melt them on steamed vegetables, or use them to enhance the flavor of your favorite dishes. Get creative and enjoy the rich, creamy goodness of your homemade butter balls!
Conclusion
So there you have it, a step-by-step guide on how to make butter balls.
Now that you know the secrets to creating these delectable delights, you can impress your friends and family with your culinary skills.
Imagine the look on their faces as they bite into these creamy, flavorful bites of heaven.
The possibilities are endless when it comes to adding your own unique twist to the recipe.
So go ahead, gather your ingredients and tools, and embark on this buttery adventure.
Get ready to indulge in the buttery goodness that awaits!
Diana’s meticulous nature and editorial prowess set the gold standard for our content. With over a decade in the culinary and publishing industries, her guidance ensures that every article perfectly blends information and entertainment. A culinary experimenter, Diana loves whipping up new butter-based concoctions in her kitchen.
Recipes & Culinary Uses
How to Make Brownies With Weed Butter

Hey there, fellow baking enthusiasts! Ever wondered how to take your brownie recipe to a whole new level? Well, I’ve got a little secret ingredient that’ll surely elevate your baking game: weed butter.
Now, before you start raising eyebrows, let me assure you that this article is all about responsible and informed baking. I’ll guide you through the process of making your very own batch of deliciously potent weed brownies.
So, get ready to embark on a mouthwatering journey that combines the best of baking and cannabis. Let’s dive in!
Key Takeaways
- Different weed strains have different effects, so choose a balanced strain with a combination of THC and CBD for making weed butter.
- Decarboxylate cannabis in the oven to activate THC before making weed butter.
- Use proper dosing techniques and start with a lower dose to avoid overconsumption and unpleasant side effects.
- Store weed brownies properly in a cool, dark place and consume within a week for optimal freshness and potency.
Selecting the Right Strain for Weed Butter
To make the best brownies with weed butter, you’ll need to choose the right strain of cannabis. When it comes to selecting the best cannabis strain for edibles, it’s important to understand the effects that different weed strains can have.
Some strains are known for their uplifting and energizing effects, while others are more relaxing and calming. For edibles, you’ll want to choose a strain that has a balanced combination of THC and CBD. THC is responsible for the psychoactive effects, while CBD provides a more calming and therapeutic experience. Finding the right balance will ensure that your brownies have the desired effects.
Now that you know the importance of choosing the right strain, let’s move on to making weed butter from scratch.
Making Weed Butter From Scratch
First, you’ll need to gather the necessary ingredients for making weed butter from scratch. To make weed butter, you’ll need unsalted butter, ground cannabis, and water. Start by decarboxylating your cannabis in the oven to activate the THC.
Next, melt the butter and add the ground cannabis. Simmer the mixture on low heat for a few hours, stirring occasionally. The alternative method of making weed-infused butter involves using a slow cooker, which can simplify the process.
The benefits of using weed butter in other recipes are numerous. Not only does it add a unique flavor to your dishes, but it also allows for a more controlled and precise dosage of cannabis.
Once the butter has cooled, strain out the plant matter, and you’re left with homemade weed butter ready to be used in all sorts of delicious recipes.
Infusing Weed Butter Into Your Brownie Mix
Once you’ve infused your homemade weed butter into your brownie mix, the rich and potent flavors will elevate your brownies to a whole new level of deliciousness. Infusing weed butter into your brownie mix is a simple and effective way to create alternative edibles that pack a punch.
Here are three infusing techniques to help you make the most of your weed butter brownies:
-
Double Boiler Method: Place a heatproof bowl over a pot of simmering water, and melt your weed butter in the bowl. Once melted, add it to your brownie mix and stir well to ensure even distribution.
-
Stovetop Method: Melt your weed butter in a saucepan on low heat, stirring continuously to prevent burning. Once melted, add it to your brownie mix and mix thoroughly.
-
Microwave Method: Melt your weed butter in a microwave-safe bowl, heating in short bursts and stirring in between. Once melted, add it to your brownie mix and mix well.
With these infusing techniques, you can create delectable weed butter brownies that are sure to impress. Enjoy responsibly!
Baking Perfectly Potent Weed Brownies
For perfectly potent weed brownies, ensure you mix the infused butter thoroughly into the brownie batter. This step is crucial to evenly distribute the cannabis throughout the mixture, ensuring each bite is infused with the desired dose.
When it comes to dosing techniques, it’s important to note that the potency of your brownies will depend on the strength of your infused butter. To control the dosage, start by calculating the total amount of THC in your butter and divide it by the number of servings. This will give you an idea of how much THC is in each brownie.
If you’re looking for alternative cannabis-infused desserts, consider trying recipes like cannabis-infused cookies, cakes, or even ice cream. Just remember to adjust the dosage accordingly and always label your edibles clearly.
Happy baking!
Dos and Don’ts of Dosing Weed Brownies
When it comes to making weed brownies, proper dosage of weed butter is crucial. Overconsumption can lead to unpleasant experiences, so it’s important to know how much weed butter to use for the desired effect.
To ensure consistent potency, there are a few tips to keep in mind. First, use a reliable recipe that provides specific instructions on the amount of weed butter needed. This will help you avoid using too much or too little.
Second, properly measure the weed butter. Use a kitchen scale to weigh the butter accurately, as eyeballing it can result in inaccurate dosing. This step is crucial for achieving the desired effect and avoiding any potential negative experiences.
Proper Weed Butter Dosage
To determine the proper dosage of weed butter for your brownies, it’s essential to consider the potency and desired effects. Here are three important things to consider:
-
Weed butter infusion methods: The potency of your weed butter depends on how you infuse it. Common methods include using a stovetop, slow cooker, or a specialized cannabis-infused butter machine. Each method may result in varying levels of THC extraction, so it’s important to choose a method that suits your desired potency.
-
Calculating THC content: To accurately calculate the THC content in your weed butter, you need to know the percentage of THC in your starting cannabis material. This information can usually be found on the packaging of your cannabis product. From there, you can use a simple formula to determine the approximate THC content in your infused butter.
-
Desired effects: Understanding your desired effects is crucial in determining the proper dosage of weed butter. If you’re a beginner or have a low tolerance, it’s recommended to start with a lower dose and gradually increase as needed. It’s important to remember that the effects of edibles can take longer to kick in and can be more potent, so patience is key.
Avoid Overconsumption Risks
Understanding the potential risks of overconsumption is crucial in ensuring a safe and enjoyable experience with cannabis-infused edibles. While edibles can provide a longer-lasting and more intense high compared to smoking or vaping, it’s important to consume them responsibly.
Overconsumption can lead to unpleasant side effects such as anxiety, paranoia, and even hallucinations. To avoid these risks, it is recommended to start with a low dose, especially if you are a beginner. Give your body enough time to process the edible before consuming more.
It’s also important to be aware of the potency of the edible you are consuming, as different products can have varying levels of THC. By practicing responsible consumption practices and being aware of the risks, you can have a safe and enjoyable experience with cannabis-infused edibles.
Tips for Consistent Potency
When it comes to making weed butter brownies, maintaining consistent effects can be a challenge. However, there are a few tips that can help you adjust the potency levels and ensure a consistent experience every time. Here’s what you need to know:
-
Use precise measurements: To achieve consistent potency, it’s crucial to measure your ingredients accurately. This applies not only to the amount of weed butter you use but also to the other ingredients in your recipe.
-
Test potency before baking: Before adding the weed butter to your brownie mix, try a small amount to gauge its potency. This will give you an idea of how strong the final product will be and allow you to adjust the amount of weed butter accordingly.
-
Keep notes: Maintaining a record of your recipes and the effects they produce can help you fine-tune the potency levels over time. By noting the amount of weed butter used and the resulting effects, you can make adjustments to achieve your desired experience.
Following these tips will help you create consistently potent weed butter brownies that deliver the desired effects every time.
Storing and Enjoying Your Weed Brownies
Once they’ve cooled, you can store your weed brownies in an airtight container to keep them fresh. Proper storage techniques are essential to maintain the potency and flavor of your infused brownies. Here are some tips for storing and enjoying your weed brownies:
Technique | Description |
---|---|
Store in a cool, dark place | Heat and light can degrade the potency of the cannabinoids in your brownies. Keep them away from direct sunlight or high temperatures. |
Separate from regular brownies | To avoid confusion or accidental consumption, it’s best to store your weed brownies separately from regular ones. Label the container clearly. |
Use within a week | Although the brownies can last longer, it’s recommended to consume them within a week to ensure optimal freshness and potency. |
Freeze for long-term storage | If you have a large batch or want to save them for later, you can freeze your weed brownies in an airtight container. Thaw them before serving. |
Best serving methods | Enjoy your weed brownies by cutting them into small, manageable pieces. Start with a low dosage and wait at least an hour before consuming more. Remember to always store them securely and out of reach of children or pets. |
Frequently Asked Questions
Can I Use Any Strain of Weed to Make Weed Butter, or Are There Specific Strains That Work Best?
Any strain of weed can be used to make weed butter, but there are specific strains that work best for making edibles. When infusing weed butter, consider the potency, flavor profile, and desired effects of the strain.
How Long Does It Take to Make Weed Butter From Scratch?
To make weed butter from scratch, it typically takes a few hours. After infusing the butter with cannabis, you can use it to enhance various recipes. Remember to store the weed butter properly to maintain its potency.
Can I Use Store-Bought Brownie Mix or Do I Have to Make the Mix From Scratch?
I can use store-bought brownie mix for weed brownies, but it’s important to properly dose them. The homemade mix gives more control over the ingredients, but store-bought is convenient.
How Do I Know if My Weed Brownies Are Potent Enough?
To properly dose weed brownies, start by using a reliable recipe and accurately measuring the amount of weed butter. Test the potency by starting with a small piece and waiting for the effects. Adjust the dosage accordingly for future batches.
How Long Can I Store My Weed Brownies Before They Go Bad?
The shelf life of weed brownies depends on how they are stored. To ensure the best quality, store them in an airtight container in a cool, dark place. They can last up to a week, but it’s best to consume them within a few days for optimal freshness.
Conclusion
In conclusion, making brownies with weed butter is a fun and delicious way to enjoy the benefits of marijuana. By selecting the right strain for your weed butter and infusing it into your brownie mix, you can create perfectly potent treats.
However, it is important to be mindful of dosing to avoid any unwanted effects. Did you know that a recent survey found that 42% of cannabis users prefer edibles as their preferred method of consumption?
So why not try making your own weed brownies and join the growing number of people who enjoy this tasty and alternative way of experiencing the effects of marijuana.
Sunny’s articles radiate enthusiasm, much like her sunny disposition. As our resident “Butter Geek”, she delves deep into the latest butter trends, ensuring our readers are always in the know. Beyond her writing, Sunny’s passion lies in exploring vegan butter alternatives and hosting butter-tasting soirées.
Recipes & Culinary Uses
How to Make Brown Sugar Butter

Deliciously decadent and delightfully creamy, making homemade brown sugar butter is a culinary endeavor that is both easy and rewarding. With just a few simple ingredients and a touch of creativity, you can whip up a batch of this delectable spread that will elevate any dish it graces.
In this article, I will guide you through each step of the process, from selecting the perfect ingredients to achieving the ideal texture. Get ready to embark on a buttery journey like no other!
Key Takeaways
- Consider coconut sugar, maple syrup, and honey as substitutes for brown sugar
- Proper ingredient ratios are crucial for consistency and flavor
- Spices like cinnamon and nutmeg can elevate the taste
- Thoroughly cream together softened butter and brown sugar
Choosing the Right Ingredients
To make brown sugar butter, you’ll want to start by choosing the right ingredients.
When it comes to brown sugar substitutes and alternative sweeteners, there are a few options to consider. One popular substitute for brown sugar is coconut sugar. It has a similar flavor profile and can be used in equal amounts as a replacement.
Another alternative sweetener is maple syrup, which adds a rich and distinct taste to the butter. Honey is also a great option, with its natural sweetness and smooth texture.
Depending on your preference, you can experiment with different combinations of these substitutes to find the perfect balance of flavor. Remember to carefully measure the amount of substitute you use to ensure the right consistency and taste in your brown sugar butter.
Measuring and Mixing the Ingredients
When it comes to baking, getting the right ingredient ratios is crucial for achieving the perfect consistency and flavor in your finished product.
In this discussion, I will delve into the importance of proper ingredient ratios and how they can affect the outcome of your recipe.
Additionally, I will explore various mixing techniques that can help you achieve consistency in your batter or dough, ensuring that every bite is just as delicious as the last.
Proper Ingredient Ratios
The proper ingredient ratios for making brown sugar butter are essential for achieving the perfect balance of sweetness and richness. When it comes to ingredient substitutions, it’s important to note that while you can use white sugar instead of brown sugar, it will alter the flavor and color of the butter.
To troubleshoot common issues, such as the butter being too sweet or not sweet enough, you can adjust the amount of brown sugar used. If the butter is too sweet, try using less brown sugar or adding a pinch of salt to balance out the sweetness. On the other hand, if the butter is not sweet enough, you can increase the amount of brown sugar or add a teaspoon of vanilla extract for extra flavor.
Mixing Techniques for Consistency
For a consistent texture, try gently folding the mixture instead of vigorously stirring it.
When making brown sugar butter, the whisking method and temperature control are crucial for achieving the desired texture.
Begin by whisking the softened butter until it becomes smooth and creamy. This can be done using an electric mixer or by hand with a whisk.
Next, gradually add the brown sugar, ensuring that it is fully incorporated before moving on. Whisking slowly and evenly will prevent clumps from forming and create a smooth consistency.
Additionally, maintaining the temperature of the butter throughout the process is essential. If the butter becomes too warm, it can cause the mixture to separate or become greasy. To avoid this, work with softened butter at room temperature and avoid overheating.
Adding Flavor Enhancements
When it comes to adding flavor to a dish, spices are my go-to choice. They have the power to elevate the taste and take a recipe from ordinary to extraordinary.
In addition to spices, I also love infusing my dishes with aromatic herbs, like rosemary or thyme, to impart a subtle yet distinctive flavor.
Together, these flavor enhancements can transform a simple meal into a culinary masterpiece.
Spices for Added Taste
Spice up your brown sugar butter by adding a pinch of cinnamon or a dash of nutmeg for added taste. These warm and comforting spices will elevate the flavor profile of your butter, giving it a delightful twist.
But why stop there? You can also experiment with other aromatic spices like vanilla and cardamom to take your brown sugar butter to the next level. The combination of these flavors will create a harmonious blend that is both sweet and fragrant.
Whether you’re spreading it on toast, using it in baking, or simply enjoying it on its own, this spiced brown sugar butter will add a burst of flavor to any dish.
Now, let’s explore how infusing it with aromatic herbs can take it even further.
Infusing With Aromatic Herbs
After exploring the use of spices to enhance the taste of brown sugar butter, I decided to take it a step further and infuse it with aromatic herbs. Infusing the butter with citrus and experimenting with different herbs can elevate its flavor profile and add a refreshing twist. To help you understand the possibilities, I’ve created a table to showcase some exciting herb and citrus combinations:
Citrus | Herbs | Flavor Profile |
---|---|---|
Lemon | Rosemary | Fresh, tangy, and herbaceous |
Orange | Thyme | Sweet, citrusy, and savory |
Lime | Basil | Zesty, bright, and aromatic |
Grapefruit | Mint | Tangy, refreshing, and cool |
Achieving the Perfect Texture
To achieve the perfect texture for your brown sugar butter, make sure you thoroughly cream together the softened butter and brown sugar. This step is crucial in creating a smooth and spreadable consistency.
Here are three tips to improve spreadability and enhance shelf life:
-
Gradually add the brown sugar to the softened butter while mixing. This ensures that the sugar is evenly distributed throughout the butter, resulting in a smooth texture.
-
Beat the mixture on medium-high speed for a few minutes until it becomes light and fluffy. This incorporates air into the butter, making it easier to spread.
-
Store the brown sugar butter in an airtight container in the refrigerator. This helps to preserve its freshness and extend its shelf life.
Storing and Preserving Brown Sugar Butter
Now that you’ve achieved the perfect texture for your brown sugar butter, it’s important to know how to store and preserve it to ensure its freshness and extend its shelf life.
There are several techniques that can help you in this process.
First, transfer the butter into an airtight container, ensuring that there is no excess air inside. This will prevent oxidation and maintain its flavor.
Secondly, store the butter in the refrigerator, as the cool temperature will slow down the growth of bacteria and maintain its quality.
Lastly, if you want to extend the shelf life even further, you can consider freezing the brown sugar butter. Simply wrap it tightly in plastic wrap or place it in a freezer-safe container.
Following these preserving techniques will help you enjoy your delicious brown sugar butter for a longer period of time.
Creative Ways to Use Brown Sugar Butter
If you’re feeling adventurous in the kitchen, try incorporating this delectable spread into your favorite baked goods or breakfast recipes for a unique and irresistible twist.
Here are three creative ways to use brown sugar butter:
-
Baked Goods: Add a dollop of brown sugar butter to your cookie dough or cake batter for an extra burst of flavor. The rich and caramel-like taste of the butter will complement the sweetness of your treats, making them even more indulgent.
-
Breakfast Delights: Spread brown sugar butter on your toast, pancakes, or waffles for a sweet and creamy topping. The warm and buttery notes of the spread will melt into your breakfast, adding a delightful richness to every bite.
-
Savory Dishes: Don’t limit brown sugar butter to just sweet treats! Use it as a glaze for roasted vegetables or grilled meats. The hint of sweetness from the brown sugar will balance out the savory flavors, creating a harmonious and mouthwatering dish.
Frequently Asked Questions
Can I Use Salted Butter Instead of Unsalted Butter in This Recipe?
Yes, you can use salted butter instead of unsalted butter in this recipe. However, it will impact the taste as salted butter already has salt in it, which may make the brown sugar butter slightly saltier.
Can I Use Coconut Sugar Instead of Brown Sugar?
Yes, you can use coconut sugar instead of brown sugar. It will give the brown sugar butter a slightly different taste, with a hint of coconut flavor.
Can I Substitute Another Type of Sweetener, Like Honey or Maple Syrup, for the Brown Sugar?
Yes, you can substitute honey or maple syrup for the brown sugar in brown sugar butter. However, keep in mind that the flavor profile will change. Honey adds a floral sweetness, while maple syrup adds a rich, caramel-like taste.
How Long Can I Store Brown Sugar Butter in the Refrigerator?
The shelf life of brown sugar butter stored in the refrigerator varies, but it typically lasts for several weeks. To ensure proper storage, keep it in an airtight container or wrap it tightly in plastic wrap.
Can I Freeze Brown Sugar Butter for Long-Term Storage?
Yes, you can freeze brown sugar butter for long-term storage. To do so, put it in an airtight container or freezer bag. This freezing technique will preserve its flavor and texture.
Conclusion
In conclusion, making brown sugar butter is a simple and delicious way to add flavor to your dishes. By using the right ingredients, measuring and mixing them properly, and adding flavor enhancements, you can achieve the perfect texture and taste.
One interesting statistic to consider is that the average American consumes about 23 pounds of butter per year, showing just how popular this ingredient is in our diets.
So why not elevate your recipes with the rich and sweet taste of homemade brown sugar butter? Give it a try and enjoy the delightful results!
Sunny’s articles radiate enthusiasm, much like her sunny disposition. As our resident “Butter Geek”, she delves deep into the latest butter trends, ensuring our readers are always in the know. Beyond her writing, Sunny’s passion lies in exploring vegan butter alternatives and hosting butter-tasting soirées.
-
Butter Tips and Tricks3 weeks ago
How Much Salt in 1/2 Cup Salted Butter
-
Recipes & Culinary Uses3 weeks ago
How to Season Popcorn Without Butter
-
Recipes & Culinary Uses3 weeks ago
How to Scramble Eggs Without Butter or Oil
-
Butter Basics3 weeks ago
How to Cut Butter Lettuce
-
Recipes & Culinary Uses3 weeks ago
How to Make Pecan Butter
-
Specialized Equipment3 weeks ago
Easy Butter Infuser Machine
-
Specialized Equipment3 weeks ago
Best Butter Infuser for Cannabis
-
Specialized Equipment3 weeks ago
STX Infuzium 420 Herbal Butter Infuser