Indulge in the perfect blend of flaky pastry, rich brown sugar, and a decadent filling with this irresistible butter tart recipe that will captivate your taste buds. Gather brown sugar, corn syrup, and vanilla for that perfect sweetness. Make a flaky crust dough and fill it with a balance of brown sugar goodness. Bake at 425°F for a delightful crunch. Experiment with variations like pecans or raisins for added flavor. Want to elevate your tart game? This recipe offers creative variations like maple syrup twists. Customize your filling for the perfect texture and enjoy the sweet journey of butter tarts.
Key Takeaways
- Perfect balance of sweetness and flaky texture in Canadian Butter Tarts.
- Homemade pastry dough for indulgent, crispy crust.
- Customize fillings with pecans, raisins, or chocolate chips.
- Experiment with baking variations for desired consistency.
- Share nostalgic memories and engage with fellow enthusiasts.

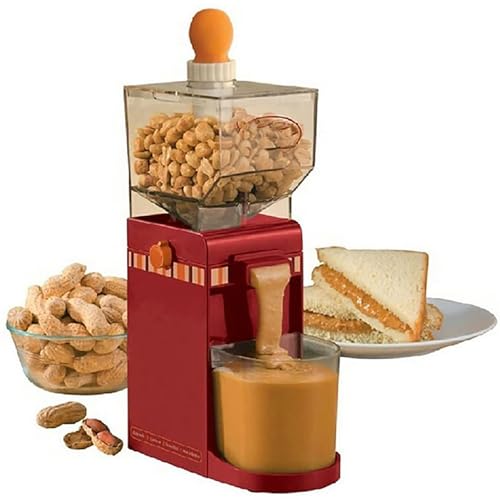
Peanut Butter Maker, Nut Butter Machine, 2025 New Electric Nut Butter Maker Machine, Electric Sesame Sauce Nut Grinder with Non-Slip Base Entry, Easy Install Easy to Use,Grinder
Our peanut nut grinder lets you easily grind a variety of nuts and seeds to make smooth.
As an affiliate, we earn on qualifying purchases.
Recipe Overview
For a straightforward understanding of how to make these delectable treats, let's begin with the Recipe Overview. Canadian Butter Tarts are renowned for their flaky pastry and rich brown sugar filling. To prepare these mouthwatering tarts, you'll need a combination of butter, brown sugar, pecans, raisins, and of course, a buttery homemade crust.
The key to achieving the perfect butter tart lies in the balance of sweetness and the texture of the filling. Some may opt to include pecans or raisins for added flavor and crunch. The process of creating these tarts involves carefully crafting the pastry to make sure it's light, crispy, and the ideal vessel for the gooey, indulgent filling.
Whether you choose to enjoy them plain or with additional toppings, Canadian Butter Tarts are guaranteed to satisfy any sweet cravings with their irresistible taste and delightful texture.

1100W Peanut Butter Maker Machine, 33lbs/h Stainless Steel Food Electric Grain Grinder Sesame Sauce Grinder Nut Butter Maker Home/Commercial for Groundnut, Almond, Cashew Nut, Sesame, 2850RPM
【Industrial-Grade Durable Grain Mill】- Crafted with premium stainless steel housing & aluminum grinding bin for corrosion/rust resistance. Built...
As an affiliate, we earn on qualifying purchases.
Ingredient Preparation

Prepare the ingredients for the butter tart recipe by gathering brown sugar, corn syrup, vanilla extract, eggs, butter, heavy cream, and optional additions like pecans.
To start the preparation, make the pastry dough by combining pastry flour, shortening, butter, brown sugar, salt, and ice water for a flaky crust. Chill the dough, then roll it out and cut circles to fit into muffin cups.
For the sweet filling, mix brown sugar, corn syrup, vanilla extract, eggs, butter, and heavy cream until smooth and creamy. Don't forget to add in the pecans or any other optional ingredients at this stage for extra flavor. This step is vital in achieving the perfect balance of sweetness and texture in your butter tarts.
With all your ingredients ready and prepared, you're now one step closer to creating delicious homemade butter tarts that will surely delight your taste buds.
DBXMJWCMDT Electric Nut Grinder Peanut Butter Maker Machine, 500ml Large-Capacity Almond/Cashew/Sesame Grinding Mill with Non-Slip Base, Efficient Home & Commercial Nut Butter Processor
【Homemade Peanut Butter Maker】 This 500ml electric grinder allows you to create fresh, natural peanut butter and nut...
As an affiliate, we earn on qualifying purchases.
Baking Instructions

Let's discuss the critical baking temperature details and the essential filling preparation tips for your butter tarts.
It's important to preheat your oven to 425 degrees F to guarantee the perfect bake.
When mixing the filling ingredients, make sure to achieve a smooth and consistent texture for delicious results.
Baking Temperature Details
To achieve a crispy and golden pastry crust, bake the butter tarts at 425 degrees Fahrenheit for 12-15 minutes until done. Maintaining this high baking temperature is vital as it helps in creating that perfect crispy texture that every butter tart lover adores.
Here are a few essential points to keep in mind for baking the most delectable butter tarts:
- Consistent baking: Ensure uniform heat distribution in your oven for perfectly consistent baking results.
- Time is key: Follow the recommended baking duration closely to guarantee that your butter tarts come out just right.
- Crispy perfection: The 425 degrees Fahrenheit temperature isn't just a number; it's the key to achieving that delightful crunch in every bite.
Filling Preparation Tips
For a perfect butter tart filling, focus on achieving the desired consistency by adjusting the baking time and ingredients to suit your taste preferences.
To get a runny center in your butter tarts, bake them for 12-15 minutes until the filling is set but soft. If you prefer a firmer set center, bake the tarts for a few extra minutes to secure a less gooey consistency.
You can also tweak the recipe by modifying ingredients like butter, corn syrup, and eggs to attain the desired texture in your filling. Experiment with variations in baking time and temperature to find the perfect balance for your butter tarts.
ZERNEIL Peanut Butter Maker Machine Nut Butter Machine 110V 1100W Electric Grain Grinder Peanut Butter Maker - 33lb/h Sesame Sauce Grinder Home/Commercial for Groundnut, Almond, Cashew Nut and Sesame
🧉【Grinding Assistant】: The 1100W pure copper motor, 2850r/min, and the white jade just grinding wheel used can grind...
As an affiliate, we earn on qualifying purchases.
Storage and Serving Tips

When storing your butter tarts, remember to keep them in an airtight container to maintain freshness.
Serving suggestions can elevate your tarts, whether paired with a scoop of ice cream or a dollop of whipped cream.
Get creative with presentation by arranging your butter tarts on a decorative platter or adding a sprinkle of powdered sugar for a finishing touch.
Storage Tips for Tarts
Consider storing your butter tarts in an airtight container either at room temperature for up to 2 days or in the refrigerator for up to 5 days. For longer storage, freezing butter tarts for about 3 months is a great option.
- Preserve Freshness: Seal your butter tarts in an airtight container to maintain their delicious taste and texture.
- Extend Shelf Life: Refrigerating your tarts can help them stay fresh for a longer period, giving you more time to enjoy each bite.
- Avoid Moisture: When freezing butter tarts, make sure they're well wrapped to prevent freezer burn and maintain their quality.
Expert advice recommends not overworking the dough, chilling the pastry before baking, and using a knife to gently release the tarts from the pan. Remember, store-bought pie crust can be a convenient alternative for crafting these delectable treats.
The debate over filling consistency allows for a personalized touch to suit your taste preferences, whether you prefer a runnier or firmer texture.
Serving Suggestions for Tarts
Preserving the freshness and flavor of your butter tarts is crucial when considering serving suggestions and storage tips. If you adore butter tarts, here are some expert tips to enhance your tart experience.
When using store-bought pie crust for convenience, make sure not to overwork the dough to maintain a tender texture. Before baking, chill the pastry to prevent shrinking and maintain a flaky crust. To achieve the perfect filling consistency, you can customize between a runnier or firmer texture based on your preference.
For serving suggestions, consider storing your butter tarts in an airtight container at room temperature for up to 2 days, or in the refrigerator for up to 5 days. If you need to store them for longer periods, butter tarts freeze well for about 3 months. When serving, use a knife to gently loosen the tarts from the pan for easy removal.
Presentation Ideas for Tarts
To enhance the overall presentation of your butter tarts, focus on creative storage and serving ideas that elevate the visual appeal alongside the delicious flavors. When considering the presentation of your tarts, here are some ideas to keep in mind:
- Utilize decorative tart shells: Experiment with different shapes and designs to make your butter tarts visually appealing.
- Opt for store-bought pie crust: For a convenient and time-saving option, consider using store-bought pie crusts to streamline the baking process.
- Adjust filling consistency: Customize the filling consistency to your liking, whether you prefer a gooey center or a firmer texture.
Remember to store your butter tarts in an airtight container at room temperature for short-term freshness or in the fridge for longer shelf life.
If you plan on storing them for an extended period, freezing the tarts can help maintain their quality for up to three months.
Enjoy your butter tarts with these presentation ideas in mind!
Butter Tart Variations

Explore the myriad ways to elevate your butter tart experience with creative variations that cater to different tastes and preferences. Butter tart enthusiasts can experiment with additions like pecans, walnuts, raisins, or even chocolate chips to enhance both texture and flavor.
In Canada, different provinces boast unique twists on this classic treat, showcasing regional variations that incorporate local ingredients and preferences. For a true Canadian twist, consider using maple syrup instead of the traditional corn syrup to infuse a distinctive flavor profile into your butter tarts.
When it comes to the filling, you have the freedom to customize the consistency to your liking, whether you prefer a gooey, runny center or a firmer, more set texture. This flexibility allows bakers to adapt the recipe to suit their individual tastes and create butter tarts that are truly personalized.
Whether you enjoy them classic or with a unique spin, butter tarts offer a deliciously versatile treat for anyone to savor.
User Engagement and Feedback

Engage with fellow butter tart enthusiasts by sharing your feedback, experiences, and questions about the recipe. User interactions can bring a community together and enhance the baking experience.
Here are some ways you can participate:
- Share your nostalgic memories of enjoying butter tarts with loved ones to create a sense of connection and warmth.
- Discuss any adjustments or tweaks you made to the recipe to inspire others to experiment with their own variations.
- Talk about your success stories with the recipe, whether it's winning a baking competition or simply delighting your family with a perfect batch.
Frequently Asked Questions
What Is Butter Tart Filling Made Of?
Butter tart filling is made of brown sugar, corn syrup, butter, eggs, and vanilla extract. Some variations include heavy cream or nuts like pecans or walnuts. The mixture creates a sweet, gooey filling that can be customized to your taste.
Why Are My Butter Tarts so Runny?
When your butter tarts turn out runny, it's like a river flowing where it shouldn't. Likely causes include too much moisture in the filling, overbaking, or not letting them cool properly. Adjust and conquer!
Do You Grease Butter Tart Pans?
Yes, you grease butter tart pans to prevent sticking and guarantee easy removal of the tarts. It helps maintain the tart's shape, adds a buttery flavor, and contributes to a smooth baking process. Use a pastry brush or non-stick cooking spray.
What's the Difference Between Pecan Pie and Butter Tart?
When comparing pecan pie and butter tarts, note that pecan pie has a thicker, denser filling in a larger pie form, while butter tarts offer a gooey center in a smaller size. Both share sweet ingredients but differ in texture and size.
Conclusion
So there you have it, folks – the best butter tart recipe you'll ever taste!
Get ready to bake up a batch of these sweet treats and watch them disappear faster than you can say 'butter me up!'
Trust me, you won't be disappointed with the perfect combination of gooey filling and flaky crust.
Happy baking!