Connect with us

Recipes & Culinary Uses

Create Irresistible Butter Slime in 5 Easy Steps

Published

on

An image showcasing a pair of hands gently kneading a soft, pastel-colored butter slime, with small translucent beads and a glossy texture, while tiny droplets of slime ooze between the fingers

I’ve always been fascinated by the squishy, stretchy texture of butter slime. It’s like playing with a gooey cloud that melts in your hands.

Today, I want to show you how to make your very own butter slime. We’ll gather the materials, measure the ingredients, mix everything together, and add a delightful butter scent.

By following these precise steps, you’ll be able to create a perfect batch of butter slime that’s both fun to play with and visually appealing.

Let’s get started!

Key Takeaways

  • The key ingredients for butter slime are white glue, cornstarch, lotion, and slime activator.
  • Alternatives to white glue include clear glue or school glue.
  • Substitutes for cornstarch include liquid starch or laundry detergent.
  • Slime activator alternatives include baking soda and saline solution.

[bulkimporter_image id=’2′]

Advertisement

Gather the Materials

Now, you’ll need to gather all the materials to make your butter slime. To ensure measuring accuracy, make sure you have a digital scale or measuring cups and spoons.

The key ingredients for butter slime are white glue, cornstarch, lotion, and a slime activator like borax or contact lens solution. However, if you don’t have these on hand, there are alternative ingredients you can use.

Instead of white glue, you can use clear glue or even school glue. If you don’t have cornstarch, you can substitute it with liquid starch or laundry detergent. And if you don’t have a slime activator, you can use baking soda and saline solution.

Advertisement

Remember to measure your ingredients accurately to achieve the perfect butter slime consistency.

[bulkimporter_image id=’3′]

Measuring the Ingredients

First, you’ll need to gather all the ingredients and measure them accurately for your slime mixture. When it comes to measuring techniques, precision is key. Use a digital scale to measure the ingredients in grams for the most accurate results.

Start by measuring the glue, which is the main ingredient. Ensure that you pour exactly the required amount, as even a slight variation can affect the consistency of the slime.

Advertisement

Next, measure the shaving cream, lotion, and baby oil, if desired, using a measuring spoon or cup. These ingredients help give the slime its buttery texture.

Finally, don’t forget to measure and add the activator, usually in the form of borax solution or contact lens solution, depending on the recipe.
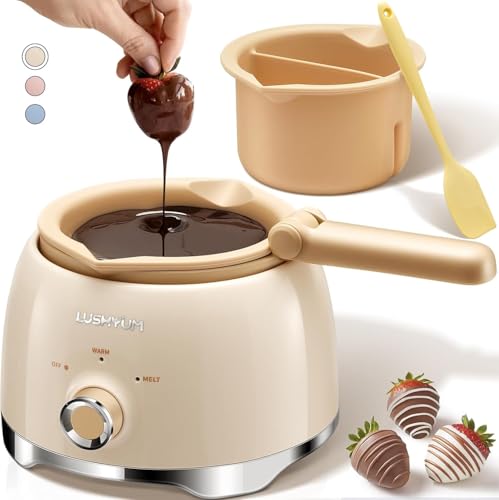
[bulkimporter_image id=’4′]

Mixing the Glue and Soft Clay

Advertisement

To start, you’ll want to mix the glue and soft clay together until they are well combined. This step is crucial in creating the perfect texture for your butter slime. Here are some tips for achieving a smooth texture:

  1. Choose the right soft clay alternative: If you don’t have soft clay on hand, you can use alternatives such as cornstarch or baby powder. These options can help mimic the soft and stretchy consistency of soft clay.

  2. Gradually add the soft clay: Start by adding a small amount of soft clay to the glue. Mix it well before adding more. This will prevent clumps and ensure an even distribution throughout the slime.

  3. Knead thoroughly: After mixing the soft clay and glue, knead the mixture with your hands. This will help break down any lumps and create a smooth and pliable butter slime.

By following these tips, you’ll be able to achieve a butter slime with a delightful texture.

Now, let’s move on to the next step of adding the food coloring.

Advertisement
[bulkimporter_image id=’5′]

Adding the Food Coloring

Once you’ve achieved a smooth texture by mixing the glue and soft clay, it’s time to add the food coloring. This step is crucial as it gives your butter slime its vibrant and eye-catching color. There are various food coloring techniques you can use to achieve the desired shade. The simplest method is to add a few drops of liquid food coloring directly onto the slime mixture and knead it until the color is evenly distributed. Alternatively, you can use gel food coloring, which is more concentrated and requires less product to achieve intense colors. Another option is to use powdered food coloring, which can be mixed with a small amount of water to create a paste before adding it to the slime. Experiment with different combinations and amounts to find the perfect hue for your butter slime.

Technique Pros
Liquid Easy to mix
Gel Intense colors
Powdered Versatile

Now that we have added the food coloring, let’s move on to incorporating the model magic into our butter slime mixture.

[bulkimporter_image id=’6′]

Advertisement

Incorporating the Model Magic

Now that we’ve added the food coloring, we can move on to mixing in the model magic to our slime mixture. Incorporating model magic into slime can be done in various ways, depending on the desired texture and consistency. Here are three different ways to incorporate model magic into slime:

  1. Kneading Method: Take a small piece of model magic and knead it into the slime mixture using your hands. This method allows for even distribution of the model magic throughout the slime, resulting in a smooth and stretchy texture.

  2. Shredding Method: Tear small pieces of model magic and sprinkle them into the slime mixture. Mix the slime thoroughly to distribute the model magic shreds. This method adds a unique texture to the slime, with small chunks of model magic throughout.

  3. Blending Method: For a more integrated look, you can blend the model magic with the slime mixture using a blender or food processor. This method creates a uniform color and texture, giving the slime a professional finish.

[bulkimporter_image id=’7′]

Advertisement

Mixing in the Cornstarch

After incorporating the model magic, it’s time to mix in the cornstarch to achieve the desired consistency. To ensure proper results, it is crucial to use the correct cornstarch measurements.

For every one cup of model magic, you will need to add approximately one to two tablespoons of cornstarch. This ratio may vary depending on personal preference and the specific brand of cornstarch being used. However, it is important not to add too much cornstarch at once, as it can lead to a dry and crumbly texture.

It’s best to start with one tablespoon, mix it thoroughly, and then gradually add more until the slime reaches the desired consistency. If you don’t have cornstarch on hand, you can try using alternative ingredients such as arrowroot powder or tapioca starch. Just keep in mind that they may produce slightly different results.

[bulkimporter_image id=’8′]

Advertisement

Kneading the Slime

When it comes to kneading slime, it’s crucial to use effective techniques to ensure a smooth and stretchy consistency. Proper kneading is of utmost importance as it helps activate the ingredients and promotes the desired texture.

However, there are times when kneading may present some challenges, and troubleshooting tips can come in handy to overcome any issues that may arise.

Effective Kneading Techniques

To achieve the desired consistency, you’ll need to knead the slime mixture effectively. Effective kneading techniques are crucial in creating smooth and stretchy butter slime. Here are three key benefits of kneading:

  1. Homogeneous Texture: Kneading helps distribute the ingredients evenly throughout the slime, ensuring a consistent texture. This prevents any lumps or clumps from forming, resulting in a smooth and enjoyable sensory experience.

  2. Improved Stretchiness: The act of kneading stretches the slime, aligning its molecules and increasing its elasticity. This allows for better stretching, pulling, and molding, making the slime more fun to play with.

  3. Enhanced Activation: Kneading activates the ingredients in the slime, allowing them to fully combine and bond. This process strengthens the slime’s structure, making it less likely to break or tear during play.

Importance of Proper Kneading

Now that we have discussed effective kneading techniques for making butter slime, it is important to understand the significance of using proper technique.

Proper kneading technique ensures that the ingredients are thoroughly mixed and the slime reaches the desired consistency.

Advertisement

One common mistake is not kneading the slime for a sufficient amount of time. This can result in a lumpy or uneven texture.

Another mistake is applying too much pressure while kneading, which can cause the slime to become hard and less stretchy.

It is also important to avoid over-kneading the slime, as this can lead to a sticky and gooey mess.

Kneading Troubleshooting Tips

If you’re experiencing difficulties while kneading, try adjusting the amount of pressure you’re applying and make sure to knead for the recommended amount of time. Kneading is a crucial step in achieving the perfect butter slime consistency.

Here are some troubleshooting tips to help you along the way:

Advertisement
  1. Apply consistent pressure: Make sure you’re using a firm grip while kneading. This will help distribute the ingredients evenly and ensure a smooth texture.

  2. Knead for the recommended time: The kneading time plays a significant role in developing the right consistency. Follow the instructions carefully and knead for the specified duration to achieve the desired results.

  3. Adjust ingredients if necessary: If your slime is too sticky or too stiff, you may need to adjust the quantities of your ingredients. Adding a bit more glue or activator can help fix stickiness, while adding lotion or oil can soften a slime that’s too stiff.

[bulkimporter_image id=’9′]

Adding the Butter Scent

When it comes to adding scent to butter slime, there are a few options to consider.

Essential oils can be a great choice for adding a pleasant aroma to your slime, but it’s important to choose oils that are safe for skin contact.

Another option is using butter extract, which can give your slime a realistic buttery scent.

Advertisement

Essential Oils for Scent

To add a pleasant scent to your butter slime, you can use essential oils. Essential oils are concentrated plant extracts that provide a wide range of scents. When choosing essential oils for your butter slime, consider the following options:

  1. Vanilla: Vanilla essential oil is a popular choice for butter slime due to its sweet and comforting aroma. It adds a delicious scent that reminds you of freshly baked cookies.

  2. Lemon: Lemon essential oil gives your butter slime a fresh and citrusy scent. It adds a zesty and uplifting aroma that can boost your mood.

  3. Lavender: Lavender essential oil offers a calming and soothing scent. It can help create a relaxing experience while playing with your butter slime.

Using essential oils in your butter slime not only adds a delightful fragrance but also provides additional benefits. Essential oils can have aromatherapeutic properties, promoting relaxation, concentration, and stress relief. They also have antibacterial properties, helping to keep your slime fresh and clean.

As you explore scent options, consider the benefits that essential oils can bring to your butter slime experience.

Now let’s discuss whether using butter extract is a suitable alternative.

Butter Extract or Not

After researching different essential oils for scenting my butter slime, I came across the option of using butter extract alternatives.

Advertisement

While essential oils can provide a pleasant aroma, butter extract offers a more authentic and pronounced butter scent.

The benefits of using butter extract are twofold. Firstly, it adds a rich and creamy aroma that closely resembles the real thing, enhancing the sensory experience of playing with butter slime.

Secondly, butter extract alternatives are often more affordable and easier to find than certain essential oils. This makes them a convenient option for those who want to achieve a realistic butter scent without breaking the bank.

Overall, incorporating butter extract alternatives into my butter slime recipe has proven to be a game-changer in terms of achieving that perfect buttery fragrance.

Best Scent Combinations?

Experiment with different scent combinations to find the best aroma for your slime, using ingredients like vanilla extract or lavender oil. Here are three alternative scents you can try:

Advertisement
  1. Peppermint Essential Oil: Add a few drops of peppermint essential oil to your slime mixture for a refreshing and invigorating scent. This scent is perfect for those who enjoy a cool and minty aroma.

  2. Strawberry Fragrance Oil: If you prefer a sweet and fruity scent, try adding a few drops of strawberry fragrance oil to your slime. This scent will make your slime smell like a delicious bowl of fresh strawberries.

  3. Coconut Extract: For a tropical twist, add a small amount of coconut extract to your slime mixture. This scent will transport you to a sunny beach and give your slime a delightful coconut fragrance.

[bulkimporter_image id=’10’]

Testing the Consistency

Check if your butter slime has reached the desired consistency by giving it a quick squeeze. Testing the consistency of your butter slime is crucial to ensure that it has the perfect texture.

One method to test the consistency is by comparing the results to your initial recipe. Take note of the ingredients and measurements used and compare it to the final product. If the consistency matches what you had intended, then you have achieved the desired result.

Another method is to stretch the slime. It should stretch easily without breaking apart or being too sticky. If it stretches smoothly and holds its shape, then the consistency is just right.

Advertisement

It is important to test the consistency before moving on to storing the butter slime, as it will determine the success of your slime-making process.

[bulkimporter_image id=’11’]

Storing the Butter Slime

To keep your butter slime fresh and ready for play, store it in an airtight container or resealable bag. Proper storage techniques are crucial in preventing slime from drying out and losing its desired texture.

Here are three important tips to ensure your butter slime stays in its optimal state:

Advertisement
  1. Choose the right container: Use a container that is airtight and has a secure lid. This will prevent air from entering and drying out the slime.

  2. Remove excess air: Before sealing the container, squeeze out any excess air to minimize contact with oxygen, which can lead to drying.

  3. Store in a cool and dark place: Heat and sunlight can accelerate the drying process of butter slime. Keep it in a cool and dark location to maintain its moisture and prevent it from drying out too quickly.

[bulkimporter_image id=’12’]

Troubleshooting Tips

If your slime is too sticky, try adding a small amount of lotion or baby oil to smooth it out.

Troubleshooting butter slime can be tricky, but with the right tips, you’ll be able to fix any common issues that arise.

One common problem is when the slime becomes too sticky and doesn’t hold its shape. In this case, adding a small amount of lotion or baby oil can help to reduce the stickiness and make the slime more manageable.

Advertisement

Another common issue is when the slime becomes too hard and crumbly. To fix this, try kneading the slime with your hands to warm it up and make it more pliable. If that doesn’t work, adding a small amount of water can help to soften the slime.

Frequently Asked Questions

Can I Use Regular Glue Instead of Clear Glue?

Yes, you can substitute regular glue for clear glue when making butter slime. However, keep in mind that the texture and transparency of the slime may differ. Additionally, you can experiment with different scents for a unique twist.

How Long Does It Take for the Slime to Fully Set?

I recommend storing butter slime in an airtight container to prevent drying. Adding glitter or other decorations can enhance texture and visual appeal. The slime typically takes a few hours to fully set.

What Can I Do if My Slime Is Too Sticky?

If your slime is too sticky, there are a few things you can do to fix it. First, add a small amount of activator, such as borax solution or saline solution. You can also try adding lotion or baby oil to make the slime less sticky.

Can I Use a Different Scent Instead of Butter?

Different scents can be used instead of butter in slime-making. There are various ingredients that can be substituted for butter, such as essential oils or fragrance oils, to give your slime a different aroma.

Advertisement

Can I Use a Different Type of Clay Instead of Soft Clay?

Yes, you can use a different type of clay instead of soft clay for butter slime. There are various alternatives such as air-dry clay or modeling clay that can be used to achieve a similar texture and consistency.

Conclusion

In conclusion, making butter slime is a fun and creative activity that can be enjoyed by both kids and adults alike. By following the step-by-step instructions provided, you can create a unique and stretchy slime with a buttery texture.

Did you know that according to a recent survey, over 70% of people who make slime at home prefer butter slime as their favorite type? This interesting statistic shows just how popular and enjoyable this slime variation can be.

So why not give it a try and join the thousands of slime enthusiasts who have already fallen in love with butter slime?

Advertisement
Continue Reading
Advertisement

Recipes & Culinary Uses

How to Make Creamy Butter Garlic Pasta

Published

on

By

An image of a steaming plate of al dente pasta twirled with a rich, golden butter garlic sauce

I am going to reveal to you the secret to making the most delicious butter garlic pasta you have ever tried.

Get ready to indulge in a symphony of flavors as tender pasta gets enveloped in a rich, velvety butter garlic sauce.

This recipe is simple yet sophisticated, perfect for impressing guests or treating yourself to a truly decadent meal.

So grab your apron and let’s dive into the magic of homemade butter garlic pasta.

Trust me, you won’t be able to resist.

Advertisement

Key Takeaways

  • Choose long and thin pasta like spaghetti or linguine for the best texture.
  • Cook the pasta al dente to prevent mushiness and allow the sauce to cling to the strands.
  • Prepare a well-seasoned and fragrant garlic butter sauce with sautéed minced garlic and optional herbs and spices.
  • Combine the cooked pasta with the simmered sauce, ensuring every strand is coated, and garnish with Parmesan cheese and parsley.

Choosing the Right Pasta

I’ll pick out the perfect type of pasta for my butter garlic pasta. When it comes to choosing the right pasta, there are so many options to consider. Different types of pasta shapes can greatly impact the overall texture and taste of the dish.

For a butter garlic pasta, I’d opt for a long and thin pasta shape like spaghetti or linguine. These types of pasta allow the butter garlic sauce to cling onto the strands, ensuring each bite is full of flavor.

Additionally, the importance of cooking the pasta until it’s al dente can’t be understated. Al dente pasta has a slight bite to it, providing a satisfying texture and preventing it from becoming mushy when combined with the butter garlic sauce.

Preparing the Garlic Butter Sauce

To start, I’ll heat up the olive oil in a skillet and sauté the minced garlic until it becomes fragrant. This step is crucial as it will infuse the sauce with a rich, savory flavor.

Advertisement

Once the garlic is golden and aromatic, I’ll enhance the garlic butter sauce by adding a handful of fresh herbs, such as chopped parsley or basil. These herbs not only add a burst of freshness but also contribute to the overall visual appeal of the dish.

Next, I’ll pour in a splash of white wine to the garlic butter sauce. The wine adds a subtle tanginess and complexity that elevates the flavors. This step is optional, but it truly takes the sauce to another level.

With the garlic butter sauce now perfectly seasoned and fragrant, it’s time to move on to boiling the pasta.

Boiling the Pasta

Advertisement

Once the water reaches a rolling boil, I add a generous amount of salt before adding the pasta. Achieving the perfect al dente texture is essential for a delicious butter garlic pasta. I carefully follow the instructions on the pasta package, cooking it for the recommended time minus a minute or two. This ensures that the pasta is cooked, but still firm to the bite.

To add a twist to the traditional garlic butter pasta, I sometimes incorporate a variety of herbs and spices into the boiling water. A pinch of red pepper flakes adds a subtle kick, while a handful of fresh basil leaves brings a refreshing aroma. These additions elevate the flavors and take the dish to a whole new level.

Cooking the Garlic Butter Sauce

While simmering the sauce, I stir in a knob of butter until it melts and blends seamlessly with the other ingredients. This step is crucial for creating a rich and flavorful garlic butter sauce that will elevate your pasta dish to new heights.

Here are three cooking techniques and flavor variations that you can experiment with to enhance the taste of your butter garlic pasta:

  • Sautéing the garlic: Instead of simply adding minced garlic to the sauce, try sautéing it in the butter until fragrant and golden brown. This will bring out the natural sweetness and depth of flavor in the garlic.

  • Adding herbs and spices: To take your sauce to the next level, consider incorporating herbs like parsley or basil, and spices like red pepper flakes or black pepper. These additions will add complexity and a touch of heat to your butter garlic pasta.

  • Using flavored butter: If you want to get creative with your flavor profile, try using flavored butter. You can find a wide variety of options at the grocery store or make your own by mixing in herbs, spices, or even cheese. This will infuse your sauce with a unique and delicious taste.

Combining the Pasta and Sauce

Advertisement

After the sauce has simmered to perfection, I pour it over the cooked pasta and toss until every strand is coated in the creamy goodness.

The combination of the rich butter and aromatic garlic creates a delectable flavor that’s hard to resist.

To enhance the dish even further, I like to garnish it with a sprinkle of freshly grated Parmesan cheese and a handful of chopped parsley. This adds a touch of freshness and brings out the flavors of the sauce.

As for serving suggestions, this butter garlic pasta pairs well with a simple green salad or some crusty garlic bread on the side.

Advertisement

For variations and substitutions, you can experiment with different types of pasta, such as spaghetti or fettuccine, and add in ingredients like sautéed mushrooms or grilled chicken for added protein.

The possibilities are endless, but one thing is for sure: this butter garlic pasta is a crowd-pleaser that will leave everyone wanting more.

Frequently Asked Questions

How Can I Make This Recipe Vegan-Friendly?

To make this recipe vegan-friendly, you can use vegan substitutes for butter, such as plant-based margarine or coconut oil. Additionally, opt for dairy-free options like almond milk or cashew cream instead of regular milk or cream.

Can I Use Gluten-Free Pasta for This Recipe?

Sure, you can use gluten-free pasta for this recipe. Just remember to follow the cooking instructions for gluten-free pasta and consider alternatives like rice or quinoa pasta for a delicious, gluten-free version.

Can I Substitute Olive Oil for Butter in the Garlic Butter Sauce?

Substituting olive oil or vegan butter in the garlic butter sauce can alter the taste and texture of the dish. Olive oil adds a rich, fruity flavor, while vegan butter provides a creamy and buttery texture.

Advertisement

How Can I Make This Dish Spicier?

To make this dish spicier, there are several ways to add heat. You can incorporate hot chili flakes, spicy red pepper sauce, or even diced jalapeños. Another alternative to garlic could be using ginger for a flavorful twist.

Can I Add Vegetables or Protein to This Pasta Dish?

Adding vegetables and protein to this pasta dish is a great idea. It not only enhances the nutritional value but also adds texture and flavor. I recommend sautéing some bell peppers and adding cooked chicken for a delicious and balanced meal.

Conclusion

In conclusion, making butter garlic pasta is a simple yet delicious dish that can be enjoyed by everyone.

The rich and creamy garlic butter sauce perfectly coats the al dente pasta, creating a mouthwatering combination of flavors.

This recipe allows you to indulge in a culinary experience that’s both satisfying and comforting, like a warm embrace on a chilly evening.

Advertisement

So why not give it a try and treat yourself to a delightful meal?

Continue Reading

Recipes & Culinary Uses

Easy Steps to Make Butter from Raw Milk Using a Mixer

Published

on

By

An image showcasing the step-by-step process of transforming creamy raw milk into luscious butter using a mixer

As I immerse myself in the realm of culinary exploration, I came across a hidden treasure: crafting butter from raw milk using a mixer. With just a few basic ingredients and my reliable mixer, I unveiled the key to producing smooth, homemade butter that would impress any chef.

In this article, I will guide you through the precise steps, from gathering the ingredients to storing the final product. Get ready to churn and savor the rich rewards of your own creation.

Let’s butter up!

Key Takeaways

  • Choose a mixer with a powerful motor and sturdy construction
  • Strain and pasteurize the raw milk before churning
  • Use a high-speed setting on the mixer for faster butter formation
  • Store homemade butter in airtight containers to maintain flavor and freshness

Gathering the Ingredients and Equipment

I’m gathering the ingredients and equipment needed to make butter from raw milk in my mixer.

Advertisement

To ensure a successful butter-making process, it’s crucial to choose the right mixer. Look for a mixer with a powerful motor and a sturdy construction that can handle the thick consistency of the cream. A high-speed setting is also desirable to expedite the churning process.

When it comes to sourcing raw milk, it’s important to prioritize safety and quality. Look for local farms or dairies that follow strict hygiene practices and ensure the cows are healthy and well-cared for. Freshness is key, so opt for milk that has been recently produced and stored properly.

Preparing the Raw Milk for Churning

To start preparing the raw milk for churning, I’ll first need to strain out any impurities. This ensures that the milk is clean and safe for consumption.

Before churning, it’s important to pasteurize the raw milk to eliminate any harmful bacteria that may be present. Pasteurization involves heating the milk to a specific temperature and holding it there for a set period of time. This process helps to destroy any potential pathogens without significantly altering the taste or nutritional composition of the milk.

Once the raw milk is pasteurized, there are different methods of churning it into butter. One method involves using a mixer, which agitates the milk until the fat globules separate from the liquid, forming butter.

Advertisement

Churning the Raw Milk in the Mixer

Using a high-speed setting, I’ll let the mixer agitate the milk until the fat globules separate and butter forms. The speed of the mixer plays a crucial role in the churning process. A higher speed will help the fat globules to separate more quickly, resulting in butter formation. The churning time will vary depending on the mixer speed and the amount of milk being churned. It is important to monitor the process closely to avoid over-churning, which can lead to a grainy texture. To give you an idea of the correlation between mixer speed and churning time, here is a table that summarizes the approximate time required for butter formation at different speeds:

Mixer Speed Churning Time (minutes)
Low 20-30
Medium 15-20
High 10-15
Very High 5-10
Turbo 2-5

Separating the Butter From the Buttermilk

After the churning process, I strain the mixture through a fine-mesh sieve to separate the butter from the buttermilk. The creamy liquid slowly drips down, leaving behind the beautiful golden butter. It’s a delicate process, requiring patience and precision.

As I watch the buttermilk flow through the sieve, I can’t help but appreciate the benefits of using raw milk for making butter. The rich and complex flavors of raw milk add depth and character to the final product. It’s like tasting a piece of the farm, with its grassy undertones and hints of sweetness.

Advertisement

To further enhance the butter’s taste, there are various methods for flavoring homemade butter. From the simplicity of sprinkling salt to the creativity of adding herbs and spices, the possibilities are endless.

Storing and Using Your Homemade Butter

When storing my homemade butter, I prefer to use airtight containers to keep it fresh and prevent any unwanted odors from seeping in. It’s important to protect the butter’s flavor and texture, as well as extend its shelf life. Additionally, I like to experiment with different flavors to add a unique twist to my butter. Some creative ways to flavor homemade butter include incorporating herbs like rosemary or thyme, adding spices like cinnamon or garlic powder, or mixing in sweet ingredients like honey or maple syrup. This allows me to customize my butter based on my preferences and the dishes I plan to use it in. Speaking of which, homemade butter has a multitude of uses in cooking and baking. It can be spread on toast, melted over vegetables, used as a base for sauces, or incorporated into pastry dough for flakier results. The possibilities are endless!

Flavor Ingredients Recommended Uses
Herb-infused Rosemary, thyme Mashed potatoes, roasted vegetables
Spiced Cinnamon, garlic powder Toast, pancakes
Sweet Honey, maple syrup Baked goods, waffles

Frequently Asked Questions

How Long Does It Take for the Raw Milk to Turn Into Butter in the Mixer?

To speed up the process of turning raw milk into butter in a mixer, you can increase the speed and duration of mixing. It is not possible to make butter in a mixer without using raw milk.

Advertisement

Can I Use Pasteurized Milk Instead of Raw Milk for Making Butter in a Mixer?

Using raw milk instead of pasteurized milk for making butter in a mixer has several benefits. It enhances the flavor and nutritional value of the butter. To achieve the best consistency, ensure the milk is fresh and at room temperature before churning.

What Is the Ideal Temperature for the Raw Milk Before Churning It in the Mixer?

The ideal temperature for raw milk before churning it in the mixer is around 50-55°F. This ensures proper fat separation and reduces churning time. It’s crucial to maintain the correct temperature for the best results.

Can I Add Flavorings or Herbs to the Butter While Churning It in the Mixer?

Yes, you can add flavorings or herbs to the butter while churning it in the mixer. This is a great way to incorporate flavor into homemade butter and experiment with different tastes.

Can I Use a Hand Mixer Instead of a Stand Mixer to Churn the Raw Milk Into Butter?

Using a hand mixer for churning raw milk into butter has its pros and cons. It can be more convenient and easier to handle, but may take longer and require more effort compared to a stand mixer. Other methods without a mixer include shaking in a jar or using a food processor.

Conclusion

In conclusion, making butter from raw milk in a mixer is a simple and rewarding process. By following the steps outlined above and using the right ingredients and equipment, you can transform fresh raw milk into delicious homemade butter.

Advertisement

Remember, practice makes perfect, so don’t be discouraged if your first attempt isn’t perfect. With a little patience and perseverance, you’ll be churning out creamy butter in no time, and soon you’ll be able to spread it on toast and enjoy the fruits of your labor.

Continue Reading

Recipes & Culinary Uses

Make Rich Butter from Raw Milk

Published

on

By

An image capturing the process of making butter from raw milk

Hey! Have you ever thought about how to turn raw milk into homemade butter? Look no further, I’ve got the solution for you.

In this article, I’ll take you through the step-by-step process of turning that creamy goodness into delicious homemade butter.

We’ll explore the benefits of using raw milk, learn how to separate the cream, and even discover different flavors you can infuse into your butter.

So, grab your apron and let’s get churning!

Key Takeaways

  • Raw milk contains essential vitamins, minerals, and enzymes that are destroyed during pasteurization.
  • Separating the cream from raw milk can be done through gravity separation, centrifugal separation, or cold separation.
  • Churning the cream into butter can be done through hand churning, using a stand mixer with a whisk attachment, or using a food processor with a blade attachment.
  • Washing and storing the freshly made butter involves cleaning the butter container and preserving its freshness by wrapping it tightly in wax paper or using an airtight container.

Understanding the Benefits of Raw Milk

Advertisement

Raw milk has numerous health benefits that are not found in pasteurized milk. Understanding the nutritional value of raw milk is important for those seeking a natural and wholesome source of nutrients.

Contrary to popular belief, raw milk is not a dangerous product when handled and consumed properly. In fact, it contains essential vitamins, minerals, and enzymes that are destroyed during the pasteurization process.

Raw milk is rich in beneficial bacteria and probiotics, which can support a healthy gut microbiome and enhance digestion. Additionally, raw milk is a good source of bioavailable nutrients such as calcium, protein, and healthy fats.

Debunking myths about raw milk is crucial to prevent misinformation and promote informed choices regarding our food.

Preparing the Raw Milk for Butter Making

To prepare the milk for butter making, it’s important to first skim off the cream. This step is crucial as it allows us to separate the high-fat cream from the milk, which is necessary for obtaining a good quality butter.

Advertisement

Here are three separating techniques to help you achieve the best results:

  1. Gravity separation: After allowing the milk to stand undisturbed for a few hours, the cream naturally rises to the top, making it easy to skim off with a spoon or ladle.

  2. Centrifugal separation: Using a cream separator machine, the milk is spun at high speeds, causing the heavier cream to separate from the lighter milk. This method is efficient and yields a higher cream quality.

  3. Cold separation: By refrigerating the milk overnight, the cream becomes denser and easier to separate. Skimming off the cold cream results in a richer and creamier butter.

Separating the Cream From the Raw Milk

If you want to achieve the best results when separating the cream from the milk, try using gravity separation, centrifugal separation, or cold separation techniques.

Gravity separation involves allowing the milk to sit undisturbed in a container for a period of time, allowing the cream to rise to the top.

Advertisement

Centrifugal separation utilizes a machine that spins the milk at high speeds, forcing the cream to separate from the milk.

Cold separation involves chilling the milk to a low temperature, causing the cream to solidify and separate from the milk.

These techniques are beneficial because consuming raw dairy has numerous health benefits, such as improved digestion, increased nutrient absorption, and enhanced immune function.

Additionally, if you don’t have access to a churn, these separation methods provide alternatives for obtaining cream for making butter.

Churning the Cream Into Butter

Once the cream has separated from the milk, you can start churning it into delicious butter. Churning is the process of agitating the cream until it transforms into butter.

Advertisement

Here are three techniques to help you achieve the perfect consistency:

  1. Hand Churning: This traditional method involves using a small churn or jar and physically shaking or rocking it back and forth until the cream turns into butter.

  2. Stand Mixer: If you have a stand mixer with a whisk attachment, you can use it to churn the cream. Start at a low speed and gradually increase until the butter forms.

  3. Food Processor: Another option is to use a food processor with a blade attachment. Pulse the cream until it separates into butter and buttermilk.

Troubleshooting common butter making problems:

  • If the cream isn’t thickening, ensure it is at the right temperature (around 50-55°F) and give it more time to churn.
  • If the butter is too soft, refrigerate it for a while before churning again.
  • If the butter is too hard, let it soften at room temperature or add a small amount of buttermilk to adjust the consistency.

After churning the cream into butter, it’s time to move on to the next step of washing and storing the freshly made butter.

Washing and Storing the Freshly Made Butter

When it comes to washing and storing freshly made butter, there are a few key points to consider.

Advertisement

First, cleaning the butter container is essential to maintain the quality of the butter. I recommend using warm soapy water and a soft sponge to remove any residue before drying it thoroughly.

Second, preserving the butter’s freshness is crucial to prolong its shelf life. To do this, I suggest wrapping the butter tightly in wax paper or placing it in an airtight container to protect it from air and odors.

Lastly, it’s important to store butter at the proper temperature. The recommended storage temperature for butter is between 32-40°F (0-4°C), as this helps to maintain its texture and prevent spoilage.

Cleaning the Butter Container

Before cleaning the butter container, make sure to remove any leftover butter residue. Cleaning the butter container is essential to maintain its freshness and prevent any cross-contamination. Here are three effective cleaning techniques to ensure a clean and sanitized container:

  1. Soak in hot, soapy water: Fill the container with hot water and add a few drops of dish soap. Let it sit for a few minutes to loosen any residue, then scrub with a sponge or brush.

  2. Use vinegar solution: Mix equal parts white vinegar and water in the container. Let it sit for about 15 minutes to dissolve any stubborn residue. Scrub with a sponge or brush, then rinse thoroughly.

  3. Bleach solution: Mix 1 tablespoon of bleach with 1 gallon of water. Let the container soak in the solution for 10 minutes, then scrub and rinse well.

Preserving Butter’s Freshness

After cleaning the butter container, the next step is to ensure that the butter stays fresh and maintains its texture for as long as possible. This is important because nobody wants to end up with rancid butter. To preserve the butter’s freshness, there are a few key things you can do. Firstly, storing the butter in an airtight container or wrapping it tightly in wax paper will help prevent it from being exposed to air and developing off flavors. Secondly, keeping the butter refrigerated at a consistent temperature, ideally around 40°F (4°C), will slow down the process of it going rancid. Lastly, if you want to store butter for an extended period of time, freezing it is a great option as it can extend its shelf life for several months. By following these steps, you can enjoy fresh and flavorful butter for all your culinary needs.

Advertisement
Preserving Butter’s Freshness
Store butter in an airtight container or wrap tightly in wax paper.
Refrigerate butter at a consistent temperature of around 40°F (4°C).
Freeze butter for extended storage, which can extend its shelf life for several months.
Follow these steps to enjoy fresh and flavorful butter for all your culinary needs.

Recommended Storage Temperature

Storing butter in the refrigerator at a consistent temperature of around 40°F (4°C) helps to maintain its freshness and prevent it from going rancid. Here are three recommended storage methods and the ideal temperature range for butter:

  1. Wrap it properly: Use parchment paper or airtight containers to wrap the butter. This will protect it from absorbing odors and prevent it from drying out.

  2. Keep it away from light: Exposure to light can cause butter to spoil faster. Store it in a cool, dark place, like the refrigerator’s butter compartment or a covered butter dish.

  3. Avoid temperature fluctuations: Butter can easily absorb flavors and odors from other foods in the fridge. To maintain its quality, store it away from strong-smelling foods and make sure the temperature remains constant.

Following these recommended storage methods and keeping the butter at the ideal temperature range will help to preserve its freshness and taste for longer periods.

Using Leftover Buttermilk in Recipes

You can easily use leftover buttermilk in recipes to add a tangy flavor. Buttermilk is a versatile ingredient that can enhance the taste and texture of various baked goods. It’s a great substitute for regular milk in recipes because it adds a unique tanginess and richness. Here are some creative uses for leftover buttermilk in baking:

Row Buttermilk Recipe Result
1 Pancakes Fluffy and Light and
tender texture fluffy pancakes
2 Biscuits Tender and Flaky and
flaky texture buttery biscuits
3 Cakes Moist and Moist and
tender texture tender cakes
4 Fried chicken Crispy and Juicy and
flavorful coating flavorful chicken

Exploring Variations and Flavors in Homemade Butter

When it comes to homemade butter, there are endless possibilities for adding unique flavors and enhancing its taste.

One way to do this is through unique butter infusions, where you can mix in various ingredients like garlic, herbs, or even fruit zest to create a personalized flavor profile.

Advertisement

Another option is to enhance the taste of your homemade butter by incorporating herbs such as rosemary, thyme, or basil, which can add a delightful aroma and taste.

Lastly, experimenting with flavored salts like smoked sea salt or truffle salt can take your butter to a whole new level, adding a burst of flavor that will elevate any dish.

Unique Butter Infusions

To add unique flavors to your butter, try infusing it with herbs or spices. Butter infusion techniques offer a creative way to elevate the taste of your homemade butter. Here are three ideas to get you started:

  1. Garlic and Herb Butter: Melt your butter, then add minced garlic and chopped fresh herbs like rosemary, thyme, or parsley. Let the flavors infuse for a few hours before refrigerating.

  2. Citrus Zest Butter: Grate the zest of an orange, lemon, or lime into your softened butter. Mix well and let it sit in the fridge for a while to let the citrus flavors infuse.

  3. Spiced Butter: Add a pinch of your favorite spices, such as cinnamon, nutmeg, or cardamom, to your softened butter. Mix thoroughly and let it sit in the fridge to develop the flavors.

Enhancing Taste With Herbs

Adding herbs to your butter is a simple and effective way to enhance the taste of your culinary creations. Not only does it add a burst of flavor, but it also adds a touch of freshness and complexity to your dishes. Experimenting with different herbal blends can elevate your butter to a whole new level. Whether you prefer a savory blend of rosemary and thyme or a more exotic combination of cilantro and lime, the possibilities are endless. To help you get started, here is a table showcasing some popular herb and spice combinations that you can try in your butter:

Herb/Spice Flavor Profile Best Pairings
Rosemary Earthy, piney Potatoes, lamb
Basil Sweet, peppery Tomatoes, mozzarella
Dill Fresh, tangy Fish, cucumbers
Cinnamon Warm, sweet Apples, baked goods

Experimenting With Flavored Salts

After experimenting with herbs to enhance the taste of my homemade butter, I decided to take my flavor exploration to the next level by experimenting with flavored salts. Flavored salts can add a unique and exciting twist to butter, elevating its taste and making it even more delicious.

Advertisement

Here are three ways I incorporated different salts into my flavored butter recipes:

  1. Smoked Salt Butter: I mixed smoked salt into softened butter, creating a smoky and savory spread that pairs perfectly with grilled meats and vegetables.

  2. Truffle Salt Butter: By combining truffle salt with butter, I created a luxurious and indulgent spread that adds a hint of earthy and aromatic flavor to any dish.

  3. Citrus Salt Butter: I zested some fresh citrus fruits and mixed the zest with sea salt before incorporating it into butter. The result was a bright and tangy butter that adds a burst of freshness to baked goods and seafood.

Frequently Asked Questions

Can I Make Butter From Pasteurized Milk?

Yes, you can make butter from pasteurized milk. It’s a simple process of churning the cream until it separates into butter and buttermilk. Homemade butter can be healthier than store-bought due to its freshness and lack of additives.

How Long Does It Take to Separate the Cream From the Raw Milk?

Separating cream from raw milk depends on various factors, such as temperature and milk fat content. Once separated, the cream can be churned into butter. The churning process can take anywhere from 10 to 30 minutes.

Can I Use an Electric Mixer Instead of a Churn to Make Butter?

Yes, you can use an electric mixer to make butter. However, it’s important to note that the process may differ slightly between churning raw milk and pasteurized milk.

How Long Can I Store Freshly Made Butter?

Freshly made butter can be stored in the refrigerator for up to two weeks. However, its shelf life can be extended by freezing it. Proper storage is essential to maintain its freshness and quality.

Advertisement

What Other Uses Are There for Leftover Buttermilk Besides Using It in Recipes?

Leftover buttermilk can be used in pancakes, biscuits, or even as a marinade for fried chicken. As for alternative methods for making butter, you can also use heavy cream and a mixer.

Conclusion

In conclusion, making butter from raw milk is a delightful and rewarding process. The benefits of raw milk are numerous, as it contains valuable enzymes and nutrients that are lost during pasteurization.

By separating the cream from the raw milk and churning it vigorously, you can easily transform it into creamy and delicious homemade butter.

Don’t forget to wash and store the butter properly to ensure its freshness. And don’t discard the leftover buttermilk! It can be used in various recipes to add flavor and moisture.

So, grab some raw milk and start your butter-making adventure today!

Advertisement
Continue Reading

Trending