Connect with us

Butter Tips and Tricks

How Much Butter is 8 Oz? Easy Conversion Guide

Published

on

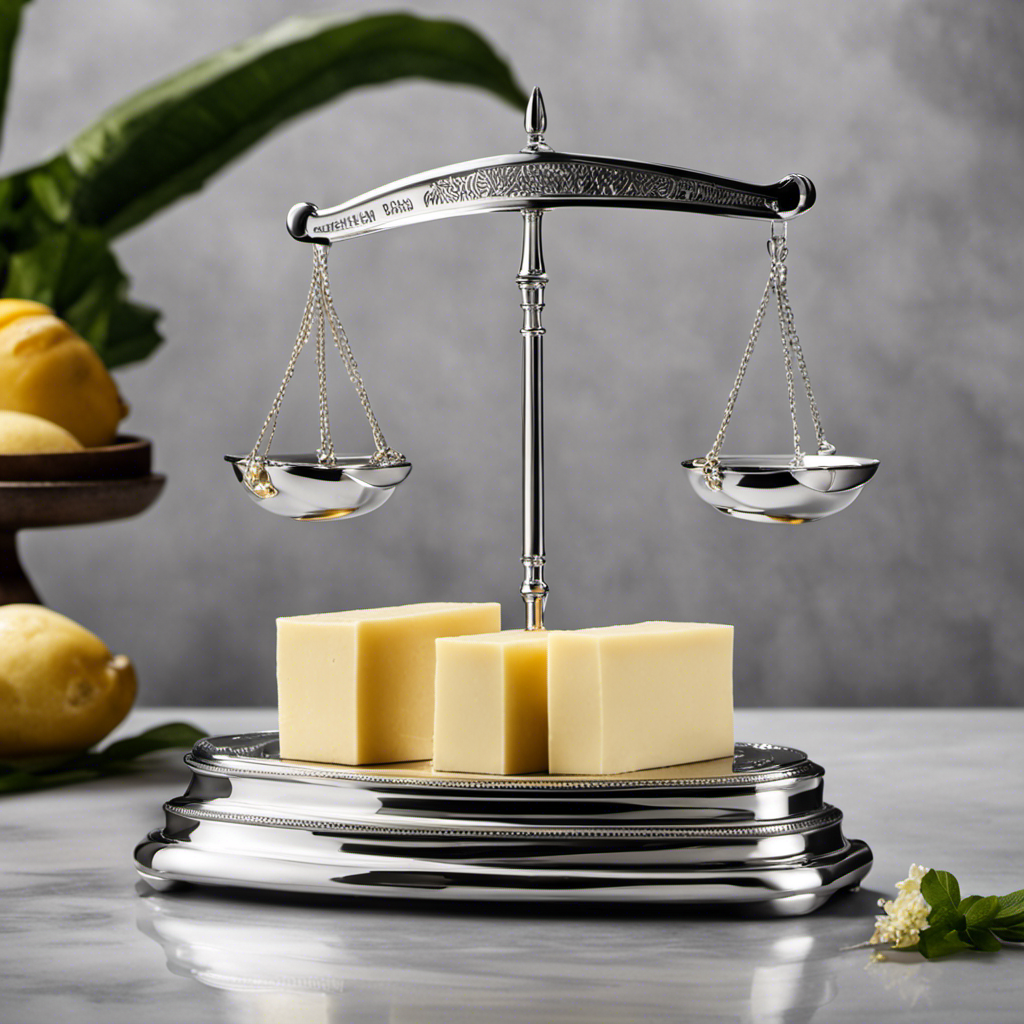
An image showcasing a silver measuring scale with a block of creamy butter placed on one side, precisely balancing eight shiny silver weights on the other side

Were you aware that one cup is the same as 8 ounces of butter? Indeed, it is!

In this article, I will take you on a journey of understanding butter measurements and how to convert ounces to cups. We will explore the scoop on 8 ounces of butter, including its equivalents in grams and tablespoons.

Plus, I’ll share some baking tips on using 8 ounces of butter in your favorite recipes.

Get ready to become an expert on how much 8 ounces of butter really is!

Key Takeaways

  • 8 ounces of butter is equivalent to 1 cup or 2 sticks.
  • Butter measurements can vary depending on the country or region.
  • Converting from ounces to cups ensures the right amount of butter for a recipe.
  • Baking with butter adds a creamy and rich texture to baked goods.

Understanding Butter Measurements

Advertisement

Understanding how much 8 oz of butter is can be confusing. When it comes to butter measurements, it’s important to understand conversions.

As someone who loves to bake, I’ve encountered this dilemma many times. To put it simply, 8 oz of butter is equivalent to 1 cup or 2 sticks. However, it’s essential to note that butter measurements can vary depending on the country or region you’re in.

In the United States, butter is typically sold in sticks, with each stick weighing 4 oz. So, to get 8 oz of butter, you’ll need two sticks. But in other countries, butter may be sold in different measurements, such as grams or kilograms.

It’s always a good idea to double-check the packaging or consult a reliable conversion chart to ensure accuracy.

Converting Ounces to Cups: Butter Edition

When it comes to baking, getting the measurements right is crucial, especially when it comes to butter.

Advertisement

In this discussion, I will be exploring butter measurement conversions, calculating butter quantities, and the ever-confusing task of converting ounces to cups.

Whether you’re a seasoned baker or just starting out, understanding these key points will help you confidently navigate any recipe that calls for butter.

Butter Measurement Conversions

To convert 8 oz of butter, you’ll need to know the proper measurement conversions. Butter measurement equivalents can vary depending on the country or region you’re in.

In the United States, 1 cup of butter is equal to 8 ounces or 16 tablespoons. However, if you’re in Europe or Australia, butter is commonly sold in 250-gram blocks, which is approximately 8.8 ounces.

To calculate the quantity of butter you need, you can use butter conversion formulas. For example, if a recipe calls for 8 ounces of butter and you only have butter sticks (1 stick = 4 ounces), you’ll need 2 sticks to meet the requirement.

Advertisement

Understanding these conversions and formulas will make it easier for you to measure the right amount of butter for your recipes.

Now, let’s move on to the next section and learn about calculating butter quantities.

Calculating Butter Quantities

Calculating butter quantities is essential for ensuring you have the right amount for your recipes. It can be frustrating when a recipe calls for a specific measurement of butter, and you don’t have the exact amount. But fear not! Converting butter measurements is easier than you think.

Here are some tips to help you navigate the world of butter measurement equivalents:

  • Stick of Butter: 1 stick is equal to 1/2 cup or 4 ounces of butter.
  • Tablespoon: 1 tablespoon of butter is equal to 1/8 cup or 2 tablespoons.
  • Teaspoon: 1 teaspoon of butter is equal to 1/3 of a tablespoon or 1/6 of a stick.
  • Grams: 1 gram of butter is equal to 0.035 ounces or 0.0022 pounds.
  • Cups: 1 cup of butter is equal to 2 sticks or 16 tablespoons.

With these conversions in mind, you can confidently tackle any recipe that calls for butter, knowing that you have the right amounts. Happy baking!

Ounces to Cups Conversion

Converting from ounces to cups is a quick and easy way to ensure you have the right amount of butter for your recipe. When it comes to baking, precision is key, and using the correct measurements for butter can make or break your dish. To help you easily convert butter measurements, here is a handy table:

Advertisement
Ounces (oz) Cups (c)
1 0.125
2 0.25
4 0.5

Simply find the number of ounces you need to convert and look for the corresponding cup measurement. For example, if your recipe calls for 8 ounces of butter, you would need 1 cup. This conversion table will save you time and ensure your butter is measured accurately. Happy baking!

The Scoop on 8 Ounces of Butter

Don’t forget to check the label for the serving size of 8 ounces of butter. When it comes to baking with butter, it’s important to have the right measurements.

Here’s what you need to know about 8 ounces of butter:

  • Creamy and rich: Butter adds a luxurious texture and flavor to baked goods.
  • Versatile: Use it in cookies, cakes, pies, and more for that perfect buttery taste.
  • Melts in your mouth: When baked, butter creates a tender and moist crumb.
  • Golden and delicious: Butter helps create a beautiful golden brown crust on pastries.
  • Indulgent treat: Baking with butter adds that extra touch of decadence to your desserts.

So, the next time your recipe calls for 8 ounces of butter, make sure you have the right amount to achieve baking perfection.

Happy baking!

Butter Equivalents: 8 Ounces in Grams and Tablespoons

When you’re baking with 8 ounces of butter, it’s helpful to know the equivalents in grams and tablespoons.

Advertisement

8 ounces of butter is equal to approximately 227 grams. This conversion is important because many recipes provide measurements in grams rather than ounces.

Additionally, knowing the tablespoons equivalent can be useful when you don’t have a kitchen scale. 8 ounces of butter is equivalent to 16 tablespoons. This means that if a recipe calls for 8 ounces of butter and you don’t have a scale, you can simply measure out 16 tablespoons instead.

It’s also worth noting that 8 ounces is equivalent to 0.227 kilograms. This conversion can be helpful if you’re working with metric measurements or need to convert between different units of weight.

Baking Tips: Using 8 Ounces of Butter in Recipes

When it comes to baking, using the right amount of butter is crucial for achieving the desired results. In my experience, one of the key factors to consider is the consistency of the butter. The texture of butter can vary depending on its temperature, making it important to use the correct form in your recipes.

Here are some helpful tips for using 8 ounces of butter in your baking adventures:

Advertisement
  • Softened butter: This is the most common form of butter used in baking. It should be at room temperature and have a smooth, creamy consistency.

  • Melted butter: In certain recipes, melted butter can be substituted for softened butter. This will result in a denser and moister final product.

  • Clarified butter: If you’re looking for a richer flavor, you can try using clarified butter. It has a higher fat content and adds a delicious nutty taste to your baked goods.

  • Margarine: If you’re out of butter or prefer a dairy-free option, margarine can be a suitable substitute. However, keep in mind that it may alter the taste and texture of your baked goods.

  • Coconut oil: Another dairy-free alternative is coconut oil. It adds a subtle coconut flavor and can be used as a 1:1 replacement for butter in most recipes.

Experimenting with different forms of butter can lead to exciting results in your baking adventures. So don’t be afraid to get creative and try out these substitutions to achieve the perfect consistency and flavor in your treats!

Expert Advice: How Much Is 8 Ounces of Butter Really?

Using 8 ounces of butter in your baking can make a significant difference in the texture and flavor of your treats. But have you ever wondered how much exactly is 8 ounces of butter? As an avid baker, I know the importance of precise measurements in achieving the perfect bake. To help you out, here’s a handy table that shows the conversion of 8 ounces of butter into various measurements commonly used in recipes:

Measurement Quantity
Cups 1
Sticks 2
Tablespoons 16
Teaspoons 48
Grams 227

Now that you know how much 8 ounces of butter is, you might be wondering if there are any butter substitutes you can use. While nothing truly replicates the rich flavor of butter, you can try alternatives like margarine, coconut oil, or vegetable shortening. Just keep in mind that the texture and taste of your baked goods may vary slightly. So go ahead, experiment with different measurements and substitutes to find the perfect balance for your recipes!

Frequently Asked Questions

Can I Use Margarine Instead of Butter in Recipes That Call for 8 Ounces of Butter?

Yes, you can substitute margarine for butter in recipes that call for 8 ounces. However, keep in mind that butter adds a rich flavor and texture to baked goods, while margarine may affect the taste and consistency.

How Long Does It Take for 8 Ounces of Butter to Melt at Room Temperature?

How long does it take for 8 ounces of butter to melt at room temperature? The time it takes for butter to melt can vary depending on the temperature of the room and the size of the butter.

Advertisement

Is It Possible to Substitute Oil for Butter in a Recipe That Requires 8 Ounces of Butter?

Is it possible to substitute oil for butter? While oil can be used as a substitute for butter in recipes that require 8 ounces of butter, it’s important to consider the pros and cons.

What Is the Shelf Life of 8 Ounces of Butter?

The shelf life of 8 oz of butter can vary depending on the storage methods used. Properly stored in the refrigerator, it can last up to a month. Make sure to keep it tightly wrapped or in an airtight container to prevent spoilage.

Can I Freeze 8 Ounces of Butter for Later Use?

Sure, you can freeze 8 ounces of butter for later use. It’s a great way to extend its shelf life and ensure that you always have butter on hand. Just wrap it tightly in plastic wrap or place it in an airtight container before freezing.

Conclusion

To sum it up, 8 ounces of butter is a versatile ingredient that can be used in a variety of recipes. Whether you’re baking a batch of cookies or whipping up a delicious sauce, this amount of butter adds a rich and creamy flavor.

So next time you come across a recipe that calls for 8 ounces of butter, rest assured that you have just the right amount to create something truly delectable.
Advertisement
Advertisement

Butter Tips and Tricks

Creating the Perfect Butter Sauce Base

Learn how to create a rich butter sauce base that elevates any dish, and discover unique tips to perfect your culinary creations.

Published

on

By

perfect butter sauce recipe

Creating the perfect butter sauce base starts with using high-quality, unsalted butter to guarantee rich flavor. Melt it slowly over low heat, then add fresh aromatics like garlic or shallots for depth. Incorporate an acidic agent such as lemon juice or white wine to balance the sauce's richness. Whisk vigorously to achieve a smooth texture and prevent separation. Taste as you go, adjusting seasonings to enhance flavors without overpowering. With these techniques, your butter sauce will elevate any dish. There's plenty more to explore about unique variations and tips to perfect your culinary creations.

Key Takeaways

  • Use high-quality, unsalted butter with at least 82% fat content for a rich and creamy sauce base.
  • Incorporate fresh herbs, garlic, or shallots to enhance the flavor profile and aroma of the butter sauce.
  • Gradually add acidic agents like lemon juice or white wine to balance the richness and brighten the overall taste.
  • Monitor cooking temperature closely to prevent burning and maintain a smooth, velvety texture throughout the process.
  • Taste frequently and adjust seasoning to achieve a harmonious flavor profile that complements your main dish.

Understanding Butter Sauce Types

exploring butter sauce varieties

When it comes to butter sauces, understanding the different types can elevate your culinary skills. Each type of butter sauce has its unique flavor profile and application, making it essential for you to know how to use them effectively.

Butter is versatile and enhances the flavor of sauces, making it a key ingredient in many culinary creations, especially when paired with savory dishes like fish or roasted meats butter enhances flavor.

First up is the classic beurre blanc, a creamy, tangy sauce made from butter, white wine, and shallots. It's perfect for drizzling over fish or vegetables.

Then there's beurre noisette, or brown butter, which gets its nutty flavor from cooking the butter until it turns a golden brown. This sauce adds depth to pasta and enhances roasted meats.

Another popular option is beurre maître d'hôtel, a compound butter mixed with herbs, lemon juice, and seasoning. You can easily slice it and let it melt over grilled steaks or sautéed vegetables.

Advertisement

Essential Ingredients for Butter Sauce

key components of butter sauce

To create a delicious butter sauce, you need to focus on a few key ingredients.

Start with quality butter, as it forms the foundation of your sauce and provides essential fatty acids and fat-soluble vitamins butter's nutritional benefits.

Then, think about adding aromatic enhancements and acidic balancing agents to elevate the flavor profile.

Quality of Butter

Choosing the right quality of butter can make or break your butter sauce. When you're selecting butter, go for high-fat content options, ideally around 82% fat. This higher fat percentage guarantees a creamier texture and richer flavor, which elevates your sauce considerably.

Additionally, butter is a source of vitamins A, D, E, and K, making it a nutritious choice for your culinary creations. Look for unsalted butter, as this gives you better control over the seasoning of your sauce. Salted butter can lead to an overly salty sauce that masks the delicate flavors you're aiming for.

Additionally, choose butter that's made from fresh cream and has minimal additives. This guarantees a clean taste and a smooth consistency. If you can, opt for European-style butter. It's churned longer, which gives it a unique richness and depth that can enhance your sauce.

Advertisement

Brands that prioritize quality often have a more vibrant flavor profile, making your sauce stand out. Don't overlook the importance of freshness, as optimal storage temperature for butter plays an essential role in maintaining its quality.

Butter that's nearing its expiration date can have off-flavors that will compromise your dish. Always check the packaging for the best quality, and when in doubt, invest a little more for superior butter. The right choice will pay off in the final flavor of your butter sauce.

Aromatic Enhancements

A butter sauce's flavor profile can be dramatically enhanced by the right aromatic ingredients. You want to contemplate herbs, spices, and other flavor boosters that can elevate your sauce from simple to spectacular. Think about fresh herbs like thyme, parsley, or basil; they add vibrant notes that complement the richness of butter.

Don't underestimate garlic. When sautéed gently, it infuses your sauce with an irresistible aroma and depth. Shallots are another great choice—they offer a subtle sweetness and complexity that can transform your dish.

For a touch of warmth, contemplate adding a pinch of nutmeg or even red pepper flakes. These spices can introduce a gentle heat that balances the sauce beautifully.

Advertisement

You can also experiment with aromatics like lemon zest or finely grated ginger, which bring brightness and freshness. Infusing your butter with these ingredients while it melts allows their flavors to meld seamlessly.

Ultimately, don't be afraid to get creative. The right aromatic enhancements can turn a basic butter sauce into a memorable component of your meal.

Remember to taste as you go, adjusting the balance to suit your preferences. Happy cooking!

Acidic Balancing Agents

While enhancing your butter sauce with aromatics adds depth, balancing that richness with acidity is key to achieving a harmonious flavor profile. Acidic balancing agents, like lemon juice, vinegar, or white wine, cut through the richness of butter, preventing it from overwhelming your dish.

When you add a splash of citrus juice, you're not just brightening the sauce; you're elevating every ingredient's flavor. Lemon juice, for instance, offers a fresh, zesty kick that pairs beautifully with seafood or vegetables.

Advertisement

On the other hand, a dash of red wine vinegar introduces a slightly sweet tang that complements richer meats and hearty pastas.

Don't be afraid to experiment. Start with a small amount, taste as you go, and adjust until you find that perfect balance. You might also consider using citrus zest alongside juice for an added depth of flavor.

Techniques for Perfecting the Base

mastering base application techniques

To perfect your butter sauce base, you need to focus on a few key techniques.

Start by choosing quality ingredients, as they'll make a noticeable difference in flavor.

Then, pay attention to temperature control, timing, and whisking techniques to guarantee a smooth and rich sauce.

Choosing Quality Ingredients

Choosing the right ingredients is essential for crafting a delicious butter sauce base. Start with high-quality butter; it's the star of your sauce. Look for unsalted butter, as it allows you to control the seasoning better. Opt for European-style butter if you want a richer flavor and creamier texture.

Advertisement

Next, select fresh herbs. Parsley, thyme, or chives can elevate your sauce, adding vibrant flavors. Always use fresh herbs instead of dried ones for maximum impact.

When it comes to aromatics, shallots and garlic are perfect additions. They impart a subtle sweetness and depth, enhancing your sauce's complexity.

Don't forget about acid! A splash of lemon juice or white wine will brighten your sauce and balance the richness of the butter. If you're feeling adventurous, consider adding a hint of Dijon mustard or capers for an extra layer of flavor.

Lastly, pay attention to any additional ingredients, such as cheese or cream. Choose high-quality options, as inferior ingredients can compromise your sauce.

Proper Temperature Control

Mastering proper temperature control is essential for perfecting your butter sauce base. If you want your sauce to achieve that rich, velvety texture without separation or burning, you need to pay attention to the heat.

Advertisement

Here are three key points to keep in mind:

  1. Start Low: Begin by melting your butter over low heat. This allows the butter to soften and separate its milk solids gently without browning or burning.
  2. Increase Gradually: Once melted, you can gradually increase the heat to medium. This stage is vital for developing flavors while ensuring the sauce doesn't cook too quickly, which could lead to undesirable textures.
  3. Monitor Closely: Keep a close eye on the temperature throughout the cooking process. If you notice any bubbling or foaming, it's a sign that the heat is too high. Lower the heat immediately to maintain a smooth consistency.

Timing and Whisking Techniques

When creating a butter sauce base, timing and whisking techniques are critical for achieving the perfect consistency and flavor. Start by melting your butter slowly over medium heat. This guarantees it doesn't brown prematurely.

Once it's melted, you can begin adding your other ingredients, like shallots or garlic. Timing is key here; you want to let them cook just long enough to soften but not burn.

As you incorporate your ingredients, whisk vigorously. Using a whisk instead of a spoon allows you to incorporate air, creating a lighter, more emulsified sauce.

Keep whisking as you gradually add any liquids, like stock or wine. This helps to prevent separation and guarantees a smooth texture.

Pay attention to the sauce's consistency; if it starts to thicken too much, you can add a little warm water or stock to loosen it up.

Advertisement

Balancing Flavors and Acidity

harmonizing taste and tartness

Balancing flavors and acidity in a butter sauce is essential for achieving a harmonious taste that complements your dish. When you create a butter sauce, you want it to enhance your ingredients without overpowering them. Here's how to find that perfect balance:

  1. Add acidity gradually: Start with a small amount of lemon juice, vinegar, or white wine. Taste as you go, and adjust until it brightens the sauce without making it sour.
  2. Incorporate complementary flavors: Consider the main ingredients of your dish. If you're working with seafood, a splash of citrus can elevate the flavors. For meats, a touch of balsamic vinegar can bring richness to the sauce.
  3. Season wisely: Don't forget the role of salt. It enhances flavors and can help tone down too much acidity. Be mindful of your salt levels; you can always add more, but it's tough to fix an overly salty sauce.

Infusing Herbs and Aromatics

herbal and aromatic infusion

Infusing herbs and aromatics into your butter sauce can elevate its flavor profile, bringing depth and complexity to your dishes. Start by choosing fresh herbs like thyme, rosemary, or basil, as they offer vibrant flavors that can transform your sauce. Chop them finely to release their essential oils, and add them to melted butter over low heat. This gentle cooking allows the herbs to infuse their flavors without losing their freshness.

You can also enhance your butter sauce with aromatics like garlic or shallots. Sauté minced garlic in the butter until it's fragrant, but avoid browning it to prevent bitterness. Shallots add a sweet and mild onion flavor that complements the richness of the butter beautifully. Consider adding a sprig of bay leaf or a pinch of crushed red pepper flakes for an extra kick.

Remember to taste as you go; the goal is to achieve a balanced flavor. Once your sauce has reached the desired intensity, strain out any solids if you prefer a smooth finish.

Enjoy your expertly infused butter sauce drizzled over vegetables, pasta, or seafood, and watch as it takes your dish to the next level.

Common Mistakes to Avoid

avoiding common mistakes

Many home cooks overlook some common pitfalls while preparing a butter sauce, which can lead to disappointing results. Avoiding these mistakes will help you create a rich, flavorful sauce that enhances your dishes.

  1. Overheating the Butter: It's essential to keep the heat low when melting butter. High temperatures can cause it to burn, resulting in a bitter taste. Always melt it gently and watch for browning.
  2. Neglecting to Add Seasoning: Butter on its own can be bland. Don't forget to season your sauce adequately. Incorporate salt, pepper, or even a splash of lemon juice to elevate the flavor.
  3. Rushing the Infusion Process: If you're infusing herbs or aromatics, be patient. Let them simmer in the melted butter for several minutes to fully release their flavors. Skipping this step can leave your sauce lacking depth.

Serving Suggestions and Pairings

ideal combinations and recommendations

When it comes to serving butter sauce, there's no shortage of delicious possibilities. You can elevate your dishes by drizzling this rich sauce over perfectly cooked seafood, like lobster or scallops. The creamy texture and savory flavor complement the natural sweetness of the seafood beautifully.

For pasta lovers, tossing your favorite noodles in butter sauce creates a simple yet luxurious dish. Add some grated parmesan and fresh herbs for an extra layer of flavor.

Don't forget about vegetables! Roasted or steamed veggies, like asparagus or broccoli, come alive with a touch of butter sauce, making them irresistible.

Advertisement

You might also consider pairing butter sauce with grilled meats. A drizzle over chicken or steak enhances the dish, providing a velvety finish.

If you're feeling adventurous, try infusing your butter sauce with garlic, lemon, or herbs for a unique twist.

Frequently Asked Questions

Can I Use Margarine Instead of Butter for the Sauce?

Yes, you can use margarine instead of butter for your sauce. Just keep in mind that the flavor and texture might differ slightly. Experimenting will help you find the right balance for your taste.

How Long Does Butter Sauce Last in the Fridge?

When it comes to butter sauce, it's better to be safe than sorry. You can store it in the fridge for about a week. Just make sure to keep it tightly sealed for freshness!

Can I Freeze Butter Sauce for Later Use?

Yes, you can freeze butter sauce for later use. Just let it cool, transfer it to an airtight container, and freeze. When you're ready, thaw it in the fridge before reheating. Enjoy!

Advertisement

Is It Possible to Make a Vegan Butter Sauce?

You might wonder if a vegan butter sauce can truly satisfy your taste buds. Absolutely! By using plant-based ingredients like coconut oil or vegan butter, you can whip up a delicious sauce that's creamy and flavorful.

What Are Some Alternative Thickeners for Butter Sauce?

For thickening your sauce, consider using cornstarch, arrowroot, or even flour. You can also try puréed vegetables or nuts for a unique twist. These alternatives work well to achieve that desired consistency without compromising flavor.

Conclusion

Now that you've mastered the art of creating the perfect butter sauce base, imagine the rich, velvety sauce glistening on your plate, ready to elevate any dish. Picture the aroma of fresh herbs wafting through the air, teasing your senses as you prepare to serve. With every drizzle, you're not just adding flavor; you're crafting an experience. So, what will you pair it with? The possibilities are endless, and your culinary adventure is just beginning.

Continue Reading

Butter Tips and Tricks

Butter Basting Techniques for Different Meats

Flavor your meats like never before with butter basting techniques that elevate every bite—unlock the secrets to perfecting your culinary skills!

Published

on

By

meat butter basting techniques

Butter basting is a fantastic way to enhance the flavor and juiciness of meats. For steak, sear it on medium-high heat, then add a mix of melted butter and herbs like thyme or garlic while cooking. With chicken, use bone-in, skin-on cuts and baste frequently to keep it moist and flavorful. When grilling pork chops, choose thick cuts and baste with garlic-infused butter towards the end of cooking for extra richness. Experimenting with different herbs and spices in your butter mix can transform your dishes. Stick around to discover even more techniques and tips for perfecting your butter basting skills!

Key Takeaways

  • Choose the Right Meat Cuts: Opt for bone-in, thicker cuts like steak, chicken, or pork chops to retain moisture and enhance flavor during basting.
  • Preheat Your Cooking Surface: Always start with a medium-high heat skillet or grill to achieve a good sear and maintain juiciness while cooking.
  • Season Generously: Use salt and pepper liberally on the meat to elevate its natural flavors before starting the basting process.
  • Incorporate Flavorful Ingredients: Melt unsalted butter with fresh herbs and garlic to enhance the taste, drizzling it over the meat frequently while cooking.
  • Rest Meat After Cooking: Allow the meat to rest post-cooking to let the juices redistribute, ensuring optimal tenderness and flavor in each bite.

Essential Tools for Butter Basting

butter basting essential tools

To achieve the perfect butter-basted meat, you'll need a few essential tools. First, grab a heavy-duty skillet or a cast-iron pan. These materials retain heat well and guarantee an even cooking surface, which is critical for basting effectively.

Next, you'll want a good pair of tongs. They'll help you easily flip the meat without piercing it, allowing those delicious juices to stay locked inside.

You'll also need a basting brush or spoon. This tool allows you to drizzle melted butter and herbs over your meat, enhancing the flavor and moisture.

Don't forget a meat thermometer. It's essential for checking doneness without cutting into your meat, keeping those juices intact.

Finally, have some fresh herbs, like thyme or rosemary, on hand to infuse the butter with additional flavors.

Advertisement

With these tools, you're set to create succulent, butter-basted dishes that impress. Each item plays a significant role, guaranteeing you control the cooking process and achieve that rich, savory finish.

Investing in quality tools will make your butter basting experience enjoyable and rewarding. Happy cooking!

Butter Basting Steak Techniques

butter basting steak method

Butter basting steak is a game-changer that elevates your grilling or pan-searing experience. This technique infuses rich flavor and moisture into your steak, creating a mouthwatering crust.

Start by preheating your grill or skillet over medium-high heat. Pat your steak dry, season it generously with salt and pepper, and add a little oil to the pan to prevent sticking.

Once your steak hits the heat, let it sear without moving it for a few minutes until a crust forms. Then, add a couple of tablespoons of unsalted butter, along with aromatics like garlic or thyme. As the butter melts, tilt the pan and use a spoon to scoop up the melted butter, basting it over the steak.

Continue this process until your steak reaches your desired level of doneness, typically around 3-5 minutes per side for medium-rare. Don't forget to use a meat thermometer for accuracy!

Advertisement

Once done, let the steak rest for a few minutes to allow the juices to redistribute. Slice it up and enjoy the enhanced flavor and tenderness that butter basting brings to your steak experience.

Perfecting Chicken With Butter

butter infused chicken perfection

While steak benefits greatly from butter basting, chicken can also reach new heights with this simple technique. By adding butter to your cooking process, you enhance the flavor and moisture of the meat, creating a juicy, succulent dish.

This method is particularly effective with butter's creamy texture, which contributes to the overall richness of the dish. Here's how to perfect chicken with butter basting:

  1. Choose the Right Cut: Opt for bone-in, skin-on pieces like thighs or breasts. These cuts hold moisture better and benefit more from the basting process.
  2. Prep Your Butter: Melt unsalted butter and infuse it with herbs like thyme or rosemary for an aromatic twist. You can also add garlic for an extra layer of flavor.
  3. Baste Frequently: As your chicken cooks, use a spoon to drizzle the melted butter over the meat every few minutes. This keeps the surface crispy while locking in moisture.
  4. Monitor Temperature: Use a meat thermometer to verify your chicken reaches 165°F (75°C). This guarantees it's cooked through while remaining tender.

With these steps, you'll transform your chicken into a buttery masterpiece that's sure to impress at any dinner table. Enjoy the delicious results!

Grilling Pork Chops With Butter

butter basted grilled pork chops

Grilling pork chops can elevate your outdoor cooking game, and incorporating butter into the process makes them even more delicious.

Start by selecting thick, bone-in pork chops for juiciness. Preheat your grill to medium-high heat, ensuring the grates are clean and well-oiled.

Season the pork chops with salt and pepper, or your favorite dry rub. Once the grill's hot, place the chops on it, searing them for about 4-5 minutes on each side. This initial sear locks in the juices and creates a beautiful crust.

Now's the time to add the butter. In a small saucepan, melt a few tablespoons of butter with some minced garlic and fresh herbs, such as thyme or rosemary.

Advertisement

As the pork chops finish cooking, use a spoon to baste them with the melted butter, turning them frequently. This adds flavor and moisture, keeping the meat tender.

Grill the chops until they reach an internal temperature of 145°F. Once done, let them rest for a few minutes before serving.

This resting period allows the juices to redistribute, giving you a succulent, flavorful bite. Enjoy your perfectly grilled pork chops!

Tips for Flavorful Butter Blends

creative compound butter recipes

Elevating your butter blends can make a world of difference in the flavors of your meats. By customizing your butter, you can enhance the natural taste of your cuts and impress your guests. Here are some tips to create flavorful butter blends that will elevate your dishes:

  1. Herbs: Fresh herbs like rosemary, thyme, or parsley can add a burst of freshness. Chop them finely and mix them into softened butter for a vibrant flavor.
  2. Garlic: Incorporating minced garlic or roasted garlic into your butter brings a rich, savory element. Be mindful of the amount, as it can easily overpower other flavors.
  3. Spices: Experiment with spices like smoked paprika, cumin, or black pepper. A pinch can add depth and warmth, making your butter blend unique.
  4. Citrus Zest: Adding lemon or orange zest provides a bright, zesty kick. This can cut through the richness of the butter and enhance the overall flavor profile.

Frequently Asked Questions

Can I Use Margarine Instead of Butter for Basting?

You can use margarine instead of butter for basting, but it won't provide the same rich flavor. Margarine has a higher water content, which may affect the overall taste and browning of your dish.

How Often Should I Baste While Cooking?

You should baste every 15 to 30 minutes while cooking. This keeps the meat moist and flavorful. Just remember not to open the oven too often, or you'll lose heat and extend cooking time.

What Is the Ideal Temperature for Butter Basting?

When butter basting, aim for a cooking temperature between 350°F and 400°F. This range allows the butter to melt nicely, enhancing flavor while ensuring your meat cooks evenly and retains moisture. Don't rush the process!

Advertisement

Is It Safe to Reuse Basting Butter?

Reusing basting butter isn't recommended. It can harbor bacteria from the meat, increasing food safety risks. If you want to save it, strain it and use it for cooking at a later time.

Can I Add Herbs Directly to the Basting Butter?

You can totally add herbs directly to your basting butter. It'll explode with flavor, turning your dish into an unforgettable masterpiece. Just mix it well and watch your taste buds dance with joy!

Conclusion

Incorporating butter basting into your cooking routine is like adding a secret ingredient to your flavor arsenal. Whether you're sizzling steak, roasting chicken, or grilling pork chops, this technique elevates your dishes to new heights. Remember, the right tools and flavorful butter blends can turn an ordinary meal into a culinary masterpiece. So, grab your skillet and let the magic of butter work wonders in your kitchen—your taste buds will thank you!

Continue Reading

Butter Tips and Tricks

How to Brown Butter Perfectly

Savor the rich, nutty flavor of perfectly browned butter with our simple guide—discover the secrets to achieving this culinary delight!

Published

on

By

mastering perfect brown butter

To brown butter perfectly, start with unsalted, high-quality butter in a light-colored saucepan. Use medium heat and stir constantly as the butter melts and the water evaporates. Watch for bubbling and foaming, signaling it's on the right track. When the butter turns from pale yellow to a deep amber and emits a nutty aroma, it's ready to be removed from heat. Be quick to pour it into a separate container to stop the cooking process and prevent burning. For even richer flavor, consider adding herbs or a sprinkle of salt—there's so much more you can explore with brown butter!

Key Takeaways

  • Use unsalted, high-quality butter for better flavor control and a richer taste profile.
  • Melt butter in a light-colored saucepan over medium heat, stirring continuously.
  • Watch for bubbling and foaming, indicating water evaporation, and monitor the color change.
  • Remove from heat once it reaches a light brown color and nutty aroma to prevent burning.
  • Pour the browned butter into a separate container immediately to halt the cooking process.

Understanding Brown Butter

mastering brown butter techniques

Understanding brown butter is essential for elevating your cooking. When you melt butter, it begins to change. As the water evaporates, the milk solids sink and start to brown. This transformation creates a rich, nutty flavor that can enhance everything from baked goods to savory dishes.

To achieve that perfect brown butter, keep a close eye on it as it cooks. You'll notice the color shifting from pale yellow to a golden hue, and finally to a deep amber. The aroma will evolve too, going from a simple buttery scent to a complex, nutty fragrance that signals it's ready.

Stirring continuously helps prevent the milk solids from burning, so don't walk away! Once it reaches that desired color, remove it from the heat immediately to halt the cooking process. Pour it into a heatproof bowl to stop it from cooking further in the pan.

Brown butter adds depth to recipes, giving them an unexpected twist. So, whether you're drizzling it over vegetables or incorporating it into cookies, understanding this technique will certainly elevate your culinary skills.

Get ready to impress your taste buds and those of your guests!

Advertisement

Choosing the Right Butter

selecting ideal butter type

Quality matters when it comes to choosing the right butter for browning. Start with unsalted butter, as it allows you to control the saltiness of your dish. Unsalted butter also tends to have a fresher taste and higher fat content, which is ideal for achieving that rich, nutty flavor you want.

Look for high-quality brands that use cream from grass-fed cows; this can greatly enhance the flavor of your browned butter. You'll often find that these butters have a deeper color and a more complex taste, making your final dish even better.

Avoid margarine or spreads when browning butter, as they contain water and emulsifiers that can hinder the browning process. Stick to pure butter for the best results.

Consider the size of the butter you purchase; buying in bulk can be economical if you plan to brown butter regularly. Store it in the freezer to maintain freshness, ensuring you always have quality butter on hand.

The Browning Process

browning process explained clearly

Browning butter is a simple yet transformative process that elevates your dishes with its rich, nutty flavor.

To start, choose a light-colored saucepan, as it'll help you monitor the color of the butter. Add your butter to the pan over medium heat. As it melts, keep an eye on it and stir occasionally.

You'll notice the butter bubbling and foaming—this is the water evaporating. After a few minutes, the color will begin to change from golden yellow to a deeper amber. This is the vital moment you need to watch closely.

Advertisement

The milk solids at the bottom of the pan will start to brown, releasing a delightful aroma. Once you see a light brown color and smell that nutty scent, remove the pan from the heat immediately to prevent burning.

Be cautious, as it can go from perfect to burnt in seconds. Pour the browned butter into a separate container to stop the cooking process.

Now you're ready to use your beautifully browned butter in various recipes, enhancing flavors with its unique, toasty profile. Enjoy the transformation!

Tips for Perfecting Flavor

enhancing culinary taste techniques

How can you take your browned butter to the next level? Start by choosing high-quality butter. Grass-fed butter often has a richer flavor, which enhances the nuttiness of your browned butter.

Next, consider adding a pinch of salt while browning. It balances the sweetness and elevates the overall flavor profile.

To deepen the taste, experiment with aromatics. Toss in a sprig of fresh thyme or rosemary as the butter browns. This infuses the fat with exquisite herbal notes.

Advertisement

You can also add a splash of vanilla extract or a hint of citrus zest toward the end for a surprising twist.

Don't forget to pay attention to the temperature. Browning your butter on medium heat allows for better control, preventing burnt bits. Stir continuously to promote even browning and guarantee you catch that perfect moment just before it turns too dark.

Lastly, consider adding nuts. Toasted nuts will complement the flavor of your browned butter beautifully, creating a delicious depth.

Recipes to Try

delicious dishes to explore

You'll often find that browned butter elevates a variety of dishes to new heights. Its nutty, rich flavor can transform even the simplest recipes into something extraordinary.

Here are some delicious ideas to incorporate browned butter into your cooking:

  • Brown Butter Pasta: Toss your favorite pasta with browned butter, garlic, and a sprinkle of Parmesan for a comforting meal.
  • Brown Butter Cookies: Replace regular butter in your cookie recipe with browned butter to create cookies with a deeper, more complex flavor.
  • Brown Butter Mashed Potatoes: Mix browned butter into your mashed potatoes for a velvety texture and a delightful nuttiness.
  • Brown Butter Vegetables: Drizzle browned butter over roasted or sautéed vegetables for a rich, savory finish that enhances their natural sweetness.
  • Brown Butter Cake: Use browned butter in your cake batter to add a warm, toasty flavor that makes every bite feel indulgent.

Try these recipes to experience how browned butter can transform your dishes. You'll be amazed at how this simple technique can elevate your cooking and impress your friends and family!

Frequently Asked Questions

Can I Use Margarine Instead of Butter for Browning?

You can use margarine instead of butter for browning, but it won't achieve the same rich flavor and nutty aroma. Butter's milk solids contribute to that unique taste, so consider sticking with it for better results.

Advertisement

How Long Does Brown Butter Stay Fresh?

Brown butter's rich, nutty flavor is tempting, but it won't last forever. You've got about a week in the fridge or a month in the freezer. Just keep it in an airtight container!

Is Brown Butter Healthier Than Regular Butter?

Brown butter isn't necessarily healthier than regular butter. It has a richer flavor due to the browning process, but the nutritional profile remains similar. It's all about how you use it in your recipes.

Can I Freeze Brown Butter for Later Use?

Yes, you can freeze brown butter for later use! It won't spoil, but you might lose some flavor. Just make sure to store it in an airtight container to maintain its delicious taste. Enjoy!

What Dishes Pair Well With Brown Butter?

You'll love pairing brown butter with dishes like pasta, risotto, or roasted vegetables. It also enhances baked goods, such as cookies and cakes, adding a rich, nutty flavor that elevates your culinary creations.

Conclusion

Now that you know how to brown butter perfectly, you can elevate your dishes with its rich, nutty flavor. Did you know that incorporating brown butter into recipes can increase their perceived taste satisfaction by up to 30%? This simple technique not only enhances your culinary creations but also impresses your guests. So, get cooking and enjoy the delicious depth brown butter brings to your meals—your taste buds will thank you!

Advertisement
Continue Reading
Advertisement

Affiliate disclaimer

As an affiliate, we may earn a commission from qualifying purchases. We get commissions for purchases made through links on this website from Amazon and other third parties.

Vetted

Vetted4 hours ago

LĒVO II Essential Kit Review: Powerful Herbal Infusion Machine [2024]

I recently had the chance to test out the LĒVO II Essentials Kit- Herbal Oil and Butter Infusion Machine, and...

Vetted4 hours ago

Magical Butter Machine Review: Is It Worth It? [2024]

Today, I would like to share my thoughts on the Magical Butter Machine MB2E Botanical Extractor Kitchen Bundle. Being a...

Vetted4 hours ago

LĒVO II Review – Herbal Oil Infusion Machine [2024]

I recently got to try out the LĒVO II – Herbal Oil and Butter Infusion Machine – Botanical Decarboxylator, Herb...

Vetted4 hours ago

Herb Decarboxylator Infuser Review: 2 in 1 Machine [2024]

Thank you for dedicating your time to read my assessment of the Herb Decarboxylator Infuser 2 in 1 – Decarb...

Vetted4 hours ago

Ivation Herbal Infusion Machine Review [2024]

I recently had the opportunity to test the Ivation Herbal Infusion Machine, and I have to say, I am really...

Vetted4 hours ago

Silicone Butter Mold Review: Large, Non-stick Tray [2024]

Today, I am going to discuss my opinions on the 2 Pcs Silicone Butter Mold with Lid. If you like...

Vetted4 hours ago

ONGROK Butter Maker: Sleek & Simple Extraction Device [2024]

The ONGROK Butter Maker Machine is a wonderful asset for any kitchen. Its sleek design and small footprint not only...

Vetted4 hours ago

LEVO Lux: The Ultimate Herbal Oil Infusion Machine Review [2024]

I recently had the opportunity to test out the LEVO Lux – Premium Herbal Oil Infusion Machine in Black Steel....

Vetted4 hours ago

Magic Butter Machine Review: Make Oil, Tincture, EdiWhip [2024]

Today, I will share my thoughts on the Decarboxylator and Infuser Machine, Magic Herbal Butter Maker Machine, which enables you...

Vetted4 hours ago

STX Infuzium Butter-Oil-Tincture Infuser Review [2024]

Today, I am excited to discuss the STX International Infuzium Butter-Oil-Tincture Infuser Maker Machine Complete Kit. As a fan of...

Vetted4 hours ago

Magical Filter Press Review: Ultimate Plant Matter Removal System [2024]

In today’s presentation, I will be talking about the Magical Filter Press – The Ultimate Mess-Free Plant Matter Removal System...

Vetted4 hours ago

STX Infuzium Butter-Oil-Tincture Infuser & STX Activation Decarboxylator Bundle Review [2024]

Today, I am excited to discuss my experience with the STX Infuzium Butter-Oil-Tincture Infuser & STX Activation Decarboxylator Herbal Activator...

Advertisement

Trending