Connect with us

Butter Tips and Tricks

Create Easy Oil with the Butter Maker: 7 Simple Steps

Published

on

An image showcasing the step-by-step process of making oil with the Easy Butter Maker: Pour melted butter into the device, add desired herbs, close the lid, and set it in motion

Using the Easy Butter Maker is akin to possessing a magical culinary gadget that seamlessly converts ingredients into a tasty and powerful blend.

In this article, I’ll guide you through the step-by-step process of creating your own oil using this revolutionary device.

From choosing the right ingredients to infusing the oil with cannabis and adding delicious flavors, I’ll share my tips and tricks for achieving the best results.

Get ready to unlock the secrets of making oil with the Easy Butter Maker and elevate your culinary creations to new heights.

Key Takeaways

  • Choosing the right ingredients and measuring ratios correctly is crucial for the best oil
  • Efficient oil extraction methods are essential for optimal results
  • Decarboxylate ingredients before extraction for best results
  • Experiment with temperature and timing to find preferred flavor and potency
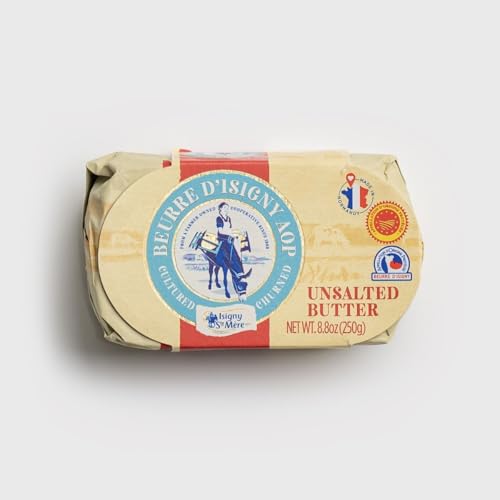
[bulkimporter_image id=’2′]

Advertisement

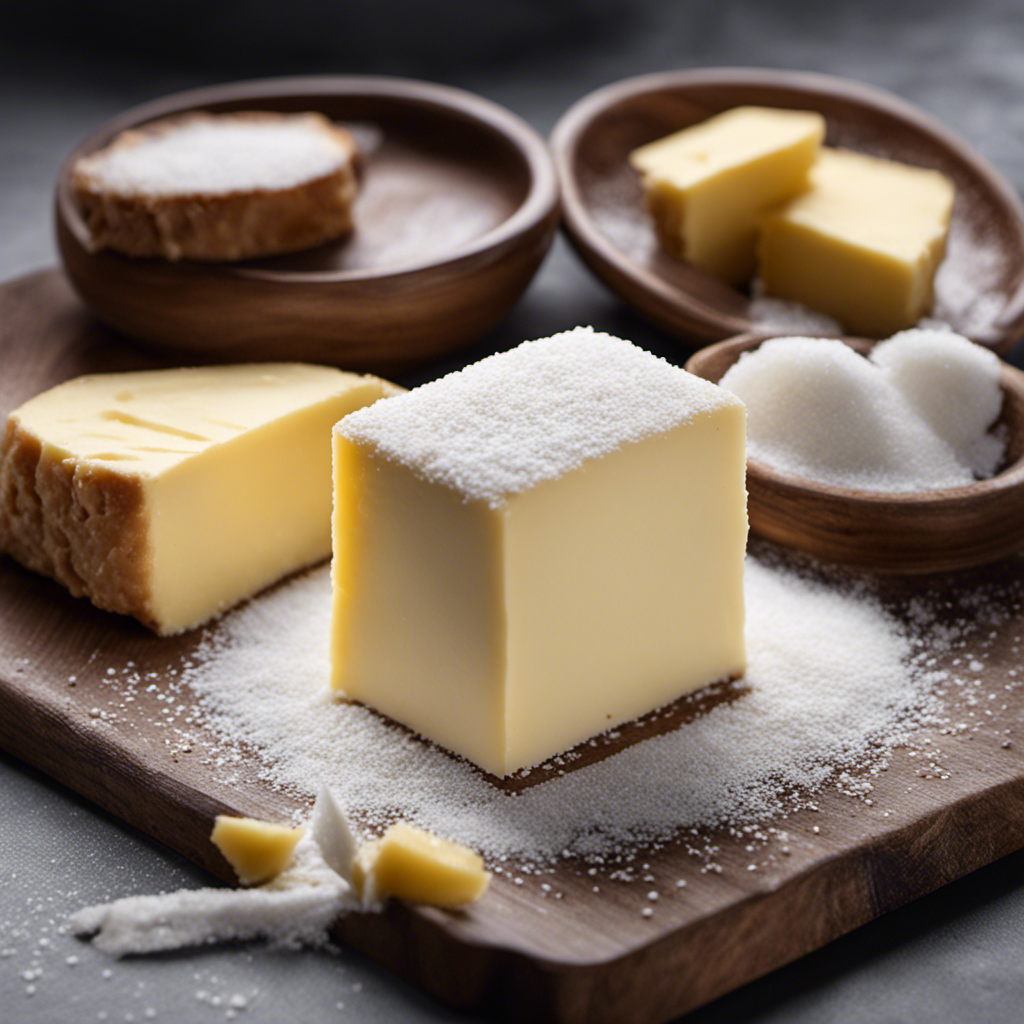
Choosing the Right Ingredients

To make the best oil with the Easy Butter Maker, you’ll want to choose the right ingredients. When it comes to making oil, there are alternatives to cannabis that can be used. Some popular options include lavender, chamomile, and rosemary. These alternatives can provide unique flavors and aromas to your oil.

Once you’ve decided on the main ingredient, it’s important to measure the ingredient ratios correctly. This will ensure that your oil turns out just the way you want it. The Easy Butter Maker comes with a measuring guide that helps you determine the right amount of ingredients to use. Following this guide will ensure that your oil is potent and flavorful.

In addition to the main ingredient, you may also want to consider adding other complementary herbs and spices to enhance the flavor of your oil. Some popular choices include thyme, basil, and garlic. Experimenting with different combinations can lead to incredible results.

Advertisement

Now that you know the importance of choosing the right ingredients and measuring the ratios correctly, let’s move on to preparing the Easy Butter Maker.

[bulkimporter_image id=’3′]

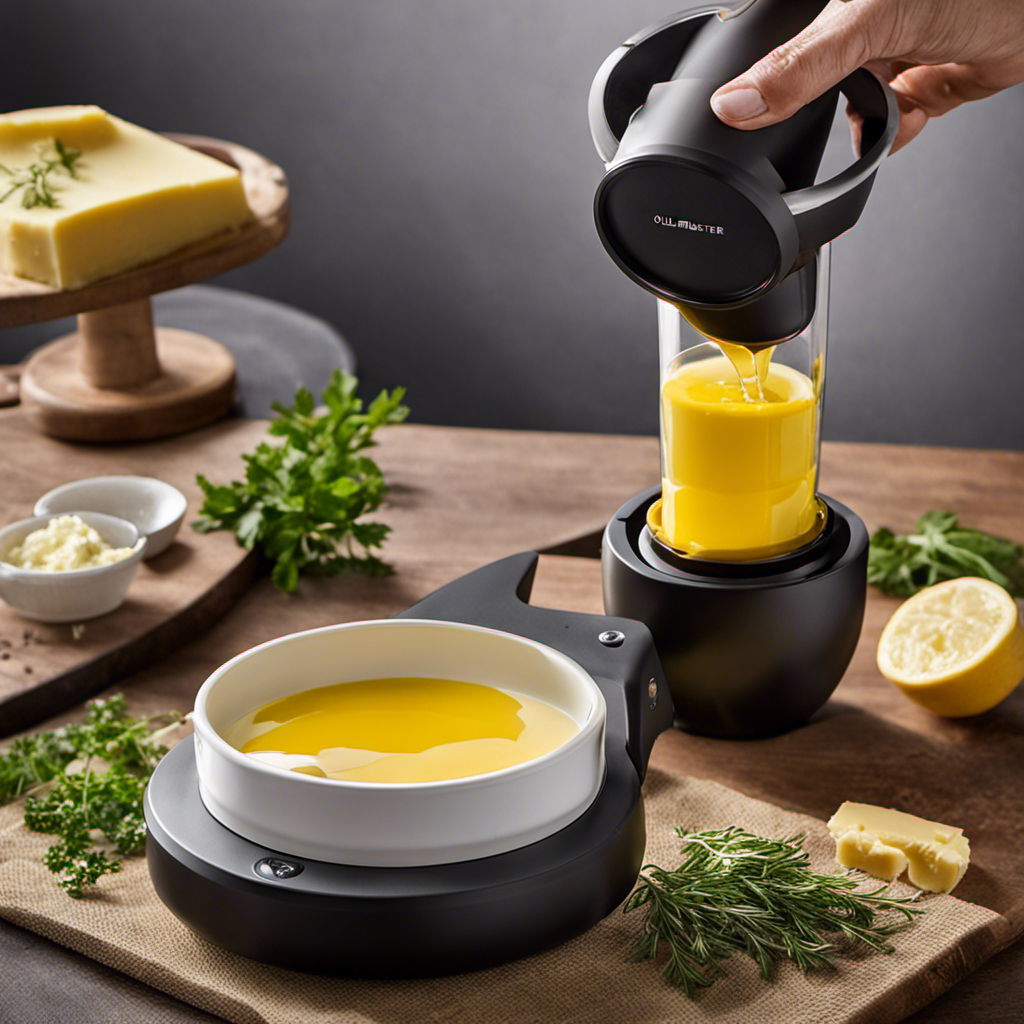
Preparing the Easy Butter Maker

When it comes to extracting oil efficiently, there are a few key methods that can yield optimal results. From using solvent extraction to cold pressing, each technique has its own advantages and considerations.

In this discussion, I will delve into these efficient oil extraction methods and provide you with valuable tips to achieve the best possible results in your oil-making endeavors.

Advertisement

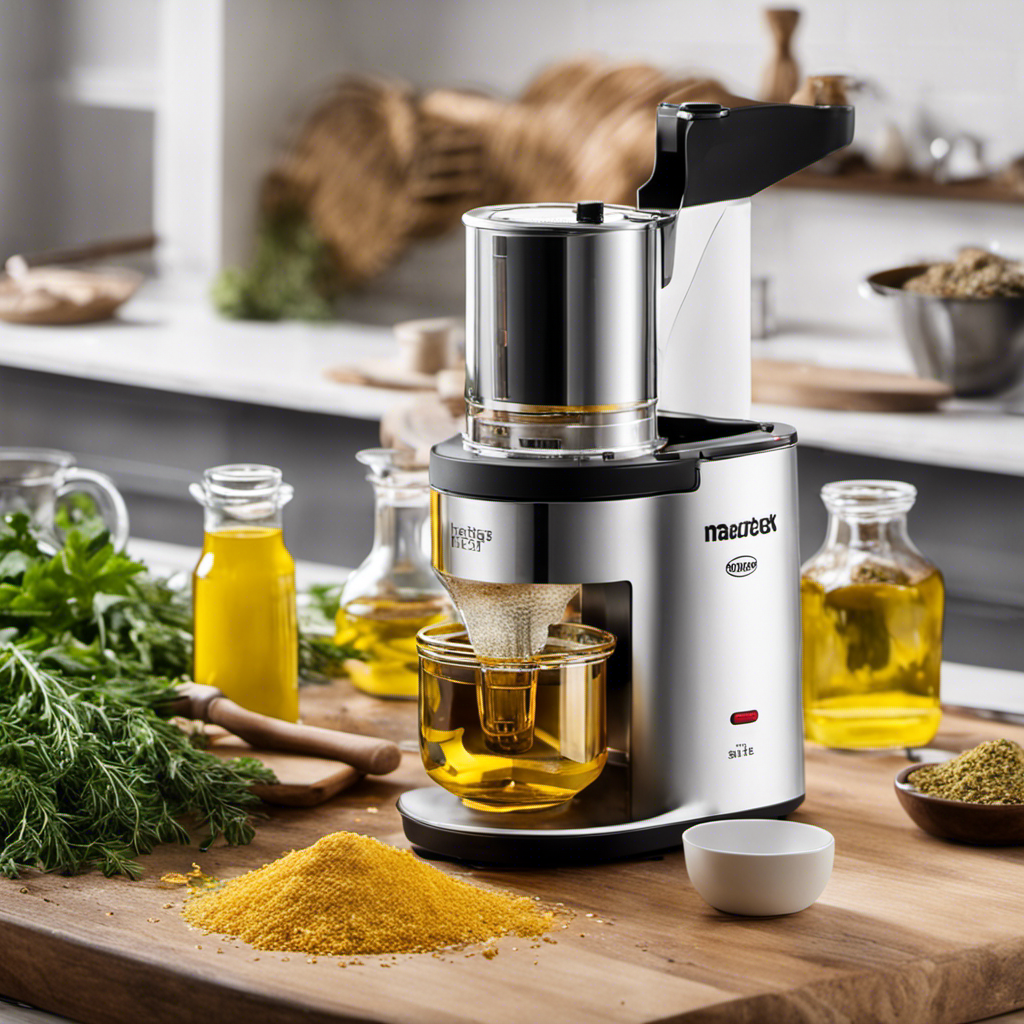
Efficient Oil Extraction Methods

Using efficient extraction methods will help you maximize the amount of oil you can make with the easy butter maker. When dealing with low-quality ingredients, it becomes even more important to optimize your oil yield.

One effective method is to start by decarboxylating your ingredients. This process involves heating them at a low temperature to activate the cannabinoids and increase their potency. Once decarboxylated, you can proceed to the extraction stage.

I recommend using a high-quality solvent, such as food-grade ethanol, to extract the oil effectively. This solvent is able to separate the cannabinoids from the plant material, resulting in a more potent and flavorful oil.

Additionally, using a cold extraction method, such as the freezer or dry ice method, can further enhance your oil yield by reducing the loss of cannabinoids during the extraction process.

Tips for Optimal Results

For the best results, it’s important to decarboxylate your ingredients before proceeding with the extraction process.

Advertisement

Decarboxylation is the process of heating your cannabis or other ingredients at a specific temperature to activate their compounds.

To enhance the flavor and potency of your oil, it’s crucial to adjust the temperature correctly during decarboxylation.

The ideal temperature range for decarboxylation is between 220 to 240 degrees Fahrenheit (104 to 115 degrees Celsius).

This ensures that the cannabinoids and terpenes are activated without being degraded.

By adjusting the temperature within this range, you can maximize the flavor profile of your oil.

Advertisement

It’s also important to note that different strains may require slight temperature adjustments for optimal results.

Experimenting with temperature and timing will help you find your preferred flavor and potency.

[bulkimporter_image id=’4′]

Decarboxylating the Cannabis

Advertisement

When it comes to decarboxylating cannabis, it is important to understand the optimal temperature for this process. This temperature typically falls between 220-240°F (104-115°C) and allows for the conversion of THCA into THC, the compound responsible for the psychoactive effects of cannabis.

Additionally, even heating throughout the decarboxylation process is crucial to ensure that all parts of the cannabis are properly activated.

Lastly, it is worth noting that different cannabis strains may require slight variations in temperature and time for optimal decarboxylation, as the chemical composition can vary between strains.

Optimal Decarboxylation Temperature

To achieve the best results, you’ll want to set the optimal decarboxylation temperature for maximum potency.

Advertisement

Decarboxylation is a crucial step in making cannabis oil as it activates the cannabinoids, making them psychoactive.

Adjusting the decarboxylation temperature can significantly impact the potency of your oil.

The ideal temperature for decarboxylation is around 220 to 245 degrees Fahrenheit.

This temperature range ensures the complete conversion of THCA (tetrahydrocannabinolic acid) into THC (tetrahydrocannabinol), the compound responsible for the psychoactive effects.

Going below the optimal temperature may result in incomplete decarboxylation, leading to a less potent oil.

Advertisement

On the other hand, exceeding the temperature range can degrade the cannabinoids, reducing the overall potency.

Therefore, it is crucial to monitor and maintain the optimal decarboxylation temperature to maximize the potency of your cannabis oil.

Importance of Even Heating

Achieving even heating is essential for maximizing the potency of your cannabis oil. This ensures that all parts of the mixture are evenly decarboxylated. Consistent temperature throughout the decarboxylation process is crucial because different compounds in cannabis activate at different temperatures.

By using even heating techniques, such as stirring the mixture regularly or using a double boiler, you can ensure that the temperature remains consistent throughout the process. This consistency allows for a more efficient and thorough decarboxylation, resulting in a more potent and effective cannabis oil.

The benefits of consistent temperature include maximizing the conversion of THCA to THC, which is responsible for the psychoactive effects of cannabis. This ensures that you get the most out of your cannabis oil.

Advertisement

Now, let’s explore how to decarb different cannabis strains to optimize their unique properties.

Decarbing Different Cannabis Strains

Decarbing different cannabis strains is an important step in making oil with the Easy Butter Maker. It involves applying heat to activate the THC and other cannabinoids in the plant material. The temperature and time required for decarboxylation can vary depending on the strain of cannabis being used. To ensure optimal results, it’s crucial to adjust the temperature and time accordingly.

Here is a table showing the recommended temperature and time for decarbing different cannabis strains:

Strain Temperature (Fahrenheit) Time (minutes)
Sativa 240 40
Indica 220 60
Hybrid 230 50

[bulkimporter_image id=’5′]

Advertisement

Infusing the Oil With Cannabis

Once you have ground your cannabis, it’s time to infuse the oil. Infusing oil with cannabis is a crucial step in creating homemade cannabis-infused products. There are several different infusion techniques you can use, depending on your preferences and desired outcome. Here are three popular methods:

  1. Stovetop method: This is the most traditional and commonly used technique. Simply combine your ground cannabis and oil in a pot or saucepan and heat it over low heat for a few hours. This method allows for more control over the temperature and infusion process.

  2. Slow cooker method: If you prefer a hands-off approach, using a slow cooker is a great option. Place your ground cannabis and oil in the slow cooker and let it simmer on low heat for several hours. This method is convenient and ensures a consistent temperature throughout the infusion process.

  3. Sous vide method: This technique involves using a precision cooker to maintain a specific temperature for an extended period. Simply seal your ground cannabis and oil in a vacuum-sealed bag and immerse it in a water bath controlled by the precision cooker. This method provides precise control over the temperature and results in a potent infusion.

[bulkimporter_image id=’6′]

Adding Flavor and Aroma

When it comes to enhancing taste with herbs, there are endless possibilities to explore. Whether it’s adding a hint of freshness with basil or a burst of earthiness with rosemary, herbs can take your dishes to the next level.

Additionally, infusing oils with spices can elevate the flavor profile of any dish. From the warmth of cinnamon to the boldness of cumin, these infused oils can add depth and complexity to your culinary creations.

Advertisement

Join me as we delve into the world of enhancing taste with herbs and infusing oils with spices, and discover how these simple techniques can transform your cooking.

Enhancing Taste With Herbs

To add more flavor to your oil, you can mix in herbs and spices. Infusing butter with different herbs is a great way to enhance its taste and make it more versatile in your cooking.

Here are three herbs that work particularly well for infusing butter:

  1. Rosemary: This aromatic herb adds a savory and slightly woody flavor to butter. It pairs well with roasted meats and vegetables and can elevate simple dishes like mashed potatoes or grilled cheese sandwiches.

  2. Basil: Known for its fresh and slightly sweet taste, basil adds a burst of flavor to butter. It is perfect for making herb-infused butter for pasta dishes, spreading on bread, or drizzling over grilled vegetables.

  3. Thyme: With its earthy and slightly minty flavor, thyme is a popular choice for infusing butter. It complements roasted chicken, fish, and potatoes, and is also great for making compound butter for steaks or grilled seafood.

Infusing Oils With Spices

Using a variety of spices can enhance the flavor of your oils and add a unique twist to your dishes. Infusing oils with fruits and experimenting with different spices can take your culinary creations to the next level.

When infusing oils with fruits, it’s important to choose ripe and flavorful ones. Berries like strawberries and raspberries add a sweet and tangy note, while citrus fruits like oranges and lemons bring a refreshing and zesty taste.

Advertisement

To experiment with spices, start with familiar ones like garlic, ginger, or chili flakes for a savory kick. Then, venture into more exotic options like cardamom, cinnamon, or star anise for a hint of warmth and complexity.

Remember to let the oils sit for a few days to allow the flavors to meld together. With these creative infusions, you can elevate your dishes with a burst of flavor that will impress your guests.

[bulkimporter_image id=’7′]

Adjusting the Temperature and Time

The first step in adjusting the temperature and time is to ensure you have the correct settings on the easy butter maker. This is crucial for achieving optimal temperature control and maximizing oil yield. Here are three key points to keep in mind when adjusting the temperature and time:

Advertisement
  1. Set the temperature accurately: The easy butter maker allows you to select a specific temperature range for infusing your oils. It is important to choose the right temperature to ensure that the active compounds in your ingredients are properly extracted. Different herbs and spices require different temperatures, so refer to the instructions or recipe for guidance.

  2. Monitor the time: Time plays a significant role in the infusion process. It is important to follow the recommended time guidelines to extract the desired flavors and aromas from your ingredients. However, be cautious not to exceed the recommended time, as it may result in a bitter or unpleasant taste.

  3. Experiment and adjust: Every ingredient and recipe is unique, so don’t be afraid to experiment and make adjustments to the temperature and time settings. Keep notes of your experiments to track what works best for different ingredients and flavors.

[bulkimporter_image id=’8′]

Straining the Oil Mixture

When it comes to making oil with the easy butter maker, proper straining techniques are essential to achieve a high-quality final product.

By using fine mesh strainers or cheesecloth, you can effectively filter out any impurities, such as plant matter or sediment, resulting in a cleaner and smoother oil.

Additionally, enhancing oil extraction can be achieved by gently pressing the mixture through the strainer to ensure maximum extraction of the desired compounds.

Advertisement

Proper Straining Techniques

To strain your oil properly, you’ll want to start by placing a fine mesh strainer over a heat-resistant container. This will ensure that any unwanted particles or impurities are removed from your oil, resulting in a clean and smooth final product.

Here are three essential equipment and techniques for proper straining:

  1. Use a fine mesh strainer: A fine mesh strainer is necessary to catch even the tiniest particles in your oil. This will help you achieve a pure and clear oil.

  2. Strain slowly and gently: Pour your oil mixture slowly through the strainer to allow for thorough straining. Avoid pressing or squeezing the mixture, as this can force impurities through the strainer.

  3. Patience is key: Proper straining takes time, so be patient and let gravity do its work. Rushing the process can lead to incomplete straining and compromise the quality of your oil.

Filtering Out Impurities

Filtering out impurities is important in ensuring a clean and high-quality final product. By removing unwanted particles, we can enhance the flavor and improve the purity of our oil. To achieve this, I recommend using a fine mesh strainer or cheesecloth during the filtration process. These tools effectively trap any solids or debris, leaving behind a smooth and pure oil. Additionally, it is crucial to be patient and allow sufficient time for the oil to pass through the filter. Rushing this step may result in a less refined product. Remember, a little effort in filtering goes a long way in producing an oil that is not only visually appealing but also boasts a superior taste and quality.

Here is a helpful table to guide you through the process:

Tools Needed Steps to Follow
Fine mesh strainer or cheesecloth 1. Place the strainer or cheesecloth over a clean container.
2. Slowly pour the oil into the strainer or onto the cheesecloth.
3. Allow the oil to pass through the filter, leaving behind any impurities.

Enhancing Oil Extraction

For an improved oil extraction process, you can enhance the flavor and quality of your final product by experimenting with different ingredients and techniques.

Advertisement

Here are three ways to enhance oil extraction efficiency and infuse oils with fruits:

  1. Cold-Press Method: Use a cold-press technique to extract oils from fruits. This method helps retain the natural flavors and nutrients of the fruits, resulting in a more flavorful oil.

  2. Sous Vide Infusion: Try infusing oils with fruits using a sous vide technique. This involves sealing the fruits and oil in a vacuum-sealed bag and cooking it at a precise temperature for an extended period. This allows the flavors to infuse into the oil thoroughly.

  3. Herb and Fruit Combinations: Experiment with different combinations of herbs and fruits to create unique flavor profiles. For example, try infusing olive oil with lemon and rosemary for a zesty and aromatic oil.

[bulkimporter_image id=’9′]

Storing the Finished Oil

Once the oil is ready, it’s important to store it properly to maintain its freshness and potency. Proper storage techniques are crucial for prolonging the oil’s shelf life and preserving its quality. Here are some tips to help you store your homemade oil effectively:

Technique Description
Dark Glass Bottles Store your oil in dark glass bottles to protect it from light exposure, which can cause oxidation and degradation of the oil. Amber or blue glass bottles are ideal as they block out harmful UV rays.
Cool, Dark Place Keep your oil in a cool, dark place away from direct sunlight and heat sources. Exposure to heat and light can accelerate the breakdown of the oil, diminishing its flavor and potency.
Airtight Seal Ensure that the bottles have a tight and secure seal to prevent air from entering. Oxygen can cause the oil to spoil and become rancid over time.
Avoid Oxygen Exposure When using the oil, pour out only the required amount and promptly seal the bottle again. This minimizes oxygen exposure and helps preserve the oil’s freshness.
Refrigeration If you live in a warm climate or if your oil has a high concentration of perishable ingredients, storing it in the refrigerator can help extend its shelf life. However, keep in mind that refrigerated oil may solidify, so allow it to come to room temperature before use.

Advertisement
[bulkimporter_image id=’10’]

Understanding Different Strains of Cannabis

After learning about the importance of storing the finished oil, let’s now delve into understanding different strains of cannabis. This knowledge is crucial for anyone looking to maximize the THC content in their oil.

  1. Indica: Indica strains are known for their relaxing and sedating effects. They often have higher levels of CBD, which can help with pain relief and promoting sleep. When dealing with moldy cannabis, it’s important to choose an indica strain that is resistant to mold and mildew.

  2. Sativa: Sativa strains, on the other hand, are known for their energizing and uplifting effects. They typically have higher levels of THC, which can enhance creativity and focus. When dealing with moldy cannabis, it’s crucial to choose a sativa strain that has been properly dried and cured to prevent the growth of mold.

  3. Hybrid: Hybrid strains are a combination of both indica and sativa genetics. They offer a balanced experience, with properties from both strains. When dealing with moldy cannabis, it’s essential to choose a hybrid strain that has been tested for mold and has a high THC content.

[bulkimporter_image id=’11’]

Exploring Alternative Ingredients

To enhance the flavor and potency of your cannabis-infused products, consider exploring alternative ingredients that can complement the effects of different strains.

Advertisement

One way to do this is by infusing oils with fruits. Fruits not only add a burst of flavor but also provide additional health benefits. For example, infusing olive oil with citrus fruits like oranges or lemons can add a refreshing and tangy taste to your infused products. Additionally, citrus fruits are rich in vitamin C, which can boost your immune system.

Another great fruit option is berries, such as strawberries or blueberries. These fruits are packed with antioxidants and can add a sweet and fruity twist to your cannabis-infused oils.

In addition to fruits, experimenting with different herbs can also elevate the taste and effects of your infused products. Herbs like mint or basil can provide a refreshing and aromatic flavor to your oils. Mint, in particular, has a cooling effect that can complement certain strains known for their relaxing properties. On the other hand, basil can add a savory and earthy note to your infused oils, enhancing the overall taste experience.

[bulkimporter_image id=’12’]

Advertisement

Troubleshooting Common Issues

If you’re experiencing common issues with your cannabis-infused products, there are a few troubleshooting tips that can help you resolve them.

  1. Check your equipment: One of the most common issues with cannabis-infused products is equipment malfunction. Ensure that your infusion device, such as the Easy Butter Maker, is in good working condition. Check for any loose connections, broken parts, or clogs that may be affecting the infusion process. If you spot any issues, try cleaning or repairing the equipment before proceeding.

  2. Monitor your temperatures: Temperature control is crucial when making cannabis-infused products. If you’re encountering problems with your infusion, it’s essential to check and calibrate your temperature settings. Ensure that your device is maintaining the correct temperature throughout the entire process. Fluctuations or incorrect temperatures can affect the potency and consistency of your final product.

  3. Evaluate your ingredients: Another factor that can contribute to infusion problems is the quality and consistency of your ingredients. Make sure you’re using high-quality cannabis and other ingredients that are fresh and free from contaminants. Additionally, ensure that you’re using the right ratio of ingredients for your desired potency. Adjusting the quality and quantity of your ingredients can significantly impact the success of your infusion.

By troubleshooting equipment issues, monitoring temperatures, and evaluating ingredients, you can overcome common problems encountered when making cannabis-infused products.

Remember to follow these tips to achieve consistent and satisfying results.

[bulkimporter_image id=’13’]

Advertisement

Understanding the Effects and Potency

Understanding the effects and potency of cannabis-infused products can help you make informed decisions about consumption. When it comes to cannabis-infused products, it’s important to understand that the effects can vary depending on various factors such as dosage and the method of infusion.

Dosage is crucial because it determines the intensity of the effects you will experience. It’s always best to start with a low dose and gradually increase it until you find the desired effect.

Experimenting with infusion methods is also key to understanding the potency of cannabis-infused products. Different methods, such as using butter or oil, can result in different levels of potency. For example, using butter may result in a slower onset of effects, while using oil may have a quicker onset.

By exploring different infusion methods, you can find the one that works best for you and your desired effects.

Now that we have a better understanding of the effects and potency of cannabis-infused products, let’s dive into exploring different extraction methods.

Advertisement

[bulkimporter_image id=’14’]

Exploring Different Extraction Methods

Exploring different extraction methods can help you find the most effective way to create cannabis-infused products. When dealing with limited resources, it’s important to consider organic extraction methods that are both efficient and sustainable. Here are three methods worth exploring:

  1. Supercritical CO2 extraction: This method uses carbon dioxide in its supercritical state to extract cannabinoids from the plant material. It is a clean and efficient process that produces high-quality extracts. However, it requires specialized equipment and can be expensive to set up.

  2. Ethanol extraction: This method involves soaking the plant material in ethanol to dissolve the cannabinoids. It is a cost-effective and widely used method that can be done at home with basic equipment. However, it requires careful monitoring of temperature and time to avoid extracting unwanted compounds.

  3. Rosin pressing: This method involves applying heat and pressure to the plant material to extract the cannabinoids. It is a simple and DIY-friendly method that doesn’t require any solvents. However, it may not be as efficient as other methods and may not yield as high-quality extracts.

[bulkimporter_image id=’15’]

Advertisement

Using the Oil in Cooking and Baking

To incorporate the infused oil into your cooking and baking, you can simply substitute it for regular oil or butter in your recipes. The possibilities are endless when it comes to using the oil in your culinary creations. The rich, herb-infused flavors can add depth and complexity to your dishes. Whether you’re sautéing vegetables, roasting meats, or baking desserts, the infused oil can elevate your recipes to a whole new level.

But the uses of this oil don’t stop at the kitchen. The infused oil can also be used for skincare and medicinal purposes. The natural properties of the herbs can provide nourishment and hydration to your skin, leaving it feeling soft and supple. Additionally, the oil can be used topically to soothe minor skin irritations or as a massage oil for relaxation and pain relief.

Now that you know the various uses of the infused oil, let’s move on to some tips and tricks for making the best oil.

[bulkimporter_image id=’16’]

Advertisement

Tips and Tricks for Making the Best Oil

Now that you’ve mastered the art of infusing oil with herbs, let’s dive into some helpful tips and tricks for creating the most flavorful and aromatic concoctions. To ensure the best results, it’s important to understand decarboxylation techniques and how to store your oil properly.

Here are three key tips to take your oil-making skills to the next level:

  1. Decarboxylation: Before infusing your oil, it’s crucial to activate the cannabinoids in your herbs through decarboxylation. This process involves heating your herbs at a low temperature to convert the non-psychoactive THCA into the psychoactive THC. This step ensures that your oil will be more potent and effective.

  2. Temperature control: When infusing your oil, maintaining the right temperature is essential. Too high of a temperature can cause the cannabinoids to degrade, resulting in a less potent oil. It’s best to use a double boiler or a slow cooker to gently heat your oil and herbs without overheating.

  3. Proper storage: To keep your oil fresh and flavorful, it’s important to store it properly. Use dark, airtight glass containers to protect your oil from light and oxygen. Store it in a cool, dark place, away from direct sunlight and heat. This will help to preserve the potency and quality of your infused oil.

Frequently Asked Questions

Can I Use Any Type of Oil in the Easy Butter Maker?

Yes, you can use different types of oil in the Easy Butter Maker. Each oil has its own unique benefits when used for infusing. It’s important to choose the right oil based on your desired outcome.

How Long Does It Take to Decarboxylate Cannabis?

Decarboxylation is a crucial step in making cannabis oil. It converts THCA, a non-psychoactive compound, into THC, which gives you the desired effects. The process usually takes about 1-2 hours at 220-240°F.

Can I Use Different Strains of Cannabis to Infuse the Oil?

Yes, you can use different strains of cannabis to infuse the oil. It allows you to experiment with flavors and effects. Adjusting the potency is possible by adjusting the amount of cannabis used in the infusion process.

Advertisement

How Do I Know if the Oil Is Properly Strained?

When straining oil, it’s important to achieve the right consistency. I strain my oil by using a fine mesh strainer or cheesecloth to remove any plant matter. If the oil isn’t properly strained, I re-strain it to ensure a smooth and pure final product.

Can I Store the Finished Oil in the Refrigerator?

Yes, you can store the finished oil in the refrigerator, but it’s best to store it at room temperature for optimal freshness and taste. Glass jars or airtight containers are the best options for storing oil.

Conclusion

In conclusion, making oil with the Easy Butter Maker is a simple and efficient process. It allows you to enjoy the benefits of cannabis-infused oil in your cooking and baking. With the right ingredients and proper techniques, you can create a flavorful and potent oil. This oil will elevate your culinary creations. Just like a skilled chef adds the perfect amount of spice to a dish, you can now add a touch of cannabis oil. This will elevate your recipes to a whole new level of deliciousness. So go ahead, unleash your inner chef and start creating your own cannabis-infused masterpieces!

Continue Reading
Advertisement

Butter Tips and Tricks

Butter Hacks: 2/3 Cup Butter Is How Many Tablespoons?

Published

on

By

converting butter measurements easily

If you’ve ever wondered, 2/3 cup of butter equals around 10.67 tablespoons. This handy conversion guarantees your recipes turn out just right.

Key Takeaways

  • 2/3 cup of butter equals 10.67 tablespoons.
  • Useful for recipes specifying butter in tablespoons.
  • Ensures precise measurements in cooking.
  • Simplifies adjusting butter quantities.
  • Essential for accurate recipe results.

The Full Conversion Chart

Exploring the entire conversion chart for butter measurements can simplify your cooking endeavors. Understanding the different measurements for butter, such as blocks, sticks, cups, tablespoons, and weight in grams, allows you to easily adapt recipes to suit your needs.

For example, knowing that a block of butter weighs 5.33 ounces and that this is equivalent to 2.67 ounces in stick form can be incredibly helpful when following a recipe that specifies one form over the other.

Furthermore, realizing that 1/6 pound of butter is equal to one cup, or that one tablespoon of butter is approximately 80 milliliters, enables you to make precise adjustments based on what measuring tools you have available.

This detailed chart provides you with the flexibility to confidently experiment in the kitchen, ensuring that your dishes turn out just right every time. Whether you’re baking, sautéing, or simply spreading butter on your toast, having a solid grasp on these conversions will surely enhance your culinary skills.

How Much Is 1 Stick?

price of a single stick

To accurately measure butter, understanding the quantity in 1 stick is important for following recipes effectively. One stick of butter equals 8 tablespoons, approximately 4 ounces or 113 grams in weight, and fills half a cup. When working with recipes that call for butter, this information is vital for precise measurements.

Butter sticks are conveniently marked with tablespoon measurements, simplifying the process of cutting the right amount. By knowing how much butter is in 1 stick, you can easily adapt recipes to suit your needs without any guesswork.

Advertisement

Whether you’re baking a batch of cookies or whipping up a savory sauce, having this knowledge at your fingertips guarantees your dishes turn out just right every time. So next time you reach for a stick of butter, remember these measurements to ensure cooking or baking success.

Measuring Butter From Sticks

butter measurement using sticks

When measuring butter from sticks, make certain you understand that each stick is equivalent to 8 tablespoons or 1/2 cup. This means that if a recipe calls for 2/3 cup of butter, you’d need 1 stick plus 2 and 2/3 tablespoons of butter. Understanding this conversion is essential for accurately measuring butter in various recipes.

Measuring butter from sticks is a convenient way to portion out the right amount for your cooking or baking needs. By knowing that one stick equals 8 tablespoons, you can easily adjust the quantity of butter required for a recipe.

Whether you’re using butter in cups, tablespoons, or sticks, being able to convert between these measurements guarantees that your dishes turn out just right.

Next time you reach for a stick of butter, remember that it contains 8 tablespoons or 1/2 cup. This knowledge will simplify your cooking process and help you achieve consistent results in the kitchen.

Butter in Tablespoons (Tbsp.)

butter measurement in tablespoons

When measuring butter in tablespoons (Tbsp.), it’s essential to know that 2/3 cup of butter is equivalent to 10 and 2/3 tablespoons. Understanding this butter conversion can simplify your cooking and baking experience.

Here are a few key points to keep in mind:

Advertisement
  • Converting cups to tablespoons: To convert 2/3 cup of butter to tablespoons, multiply 2/3 by 16 (since 1 cup equals 16 tablespoons).
  • Precise measurement: The calculation results in 10.67 tablespoons, which can be rounded to 10 and 2/3 tablespoons. This accuracy is vital for achieving consistent results in your recipes.
  • Convenience in recipes: Knowing the butter measurements in tablespoons can be handy when a recipe specifies butter in this unit rather than cups, making it easier to follow instructions accurately.

Mastering butter measurements in tablespoons allows you to confidently navigate various recipes and secures your dishes turn out just right.

Butter Vs. Margarine Conversion

dairy debate butter or margarine

For a straightforward butter versus margarine conversion comparison, consider the differences in teaspoons and tablespoons.

ButterMargarine
1 Teaspoon1 Teaspoon
1 Tablespoon1 Tablespoon
1/4 Cup1/4 Cup

When substituting butter for margarine in recipes, bear in mind the conversion rate between the two. While both butter and margarine serve as fats in baking and cooking, they have slightly different compositions due to their ingredients. If a recipe calls for margarine but you prefer to use butter, a simple swap can be made using the table above. Remember that the water content in butter is higher than in margarine, which can affect the final texture of your dish. Experimenting with different ratios based on the conversion table can help you achieve the desired result.

Olive Oil Conversion

cooking with olive oil

To convert olive oil measurements effectively in your recipes, remember the following equivalences:

  • 1/4 Cup of olive oil is equivalent to 1/4 Cup of butter/margarine.
  • 1/4 Cup + 2 Tablespoons of olive oil is equal to 1/2 Cup of butter/margarine.
  • 1/2 Cup of olive oil is the same as 1/2 Cup + 1 Tablespoon of butter/margarine.

When substituting olive oil for butter or margarine in your recipes, keep these conversions in mind to guarantee your dish turns out just right. Whether you’re aiming for a healthier option or simply prefer the taste of olive oil, knowing how to make these conversions can make a significant difference in your cooking.

Next time you reach for olive oil instead of butter, confidently adjust your measurements using these simple equivalences.

Healthy Alternative: Olive Oil

heart healthy cooking with olives

Looking to make healthier choices in your cooking? Olive oil can be a great alternative to butter, providing a higher content of monounsaturated fats.

Benefits of Olive Oil

Consider incorporating olive oil into your cooking routine as a healthier alternative to butter, thanks to its rich content of monounsaturated fats. Substituting butter with olive oil not only reduces saturated fat intake but also maintains a similar texture and flavor profile in your dishes.

Here are some benefits of using olive oil:

  • Healthier Fat Option: Olive oil is packed with monounsaturated fats, which are considered heart-healthy fats that can help lower bad cholesterol levels.
  • Versatility in Cooking: From baking to sautéing and creating flavorful dressings, olive oil proves to be a versatile ingredient suitable for various cooking methods.
  • Unique Flavor Profile: Unlike butter, olive oil adds a distinct taste to your dishes, enhancing the overall flavor experience while offering a healthier alternative.

Incorporating olive oil into your daily cooking not only brings health benefits but also contributes to a more balanced and flavorful diet.

Cooking With Olive Oil

Enhance your cooking routine by incorporating olive oil as a healthier alternative to butter in various dishes. Olive oil offers a distinct flavor profile that can elevate the taste of your meals while providing several health benefits. Rich in monounsaturated fats, olive oil is considered heart-healthy and can help lower bad cholesterol levels.

Advertisement

When cooking with olive oil, you have the flexibility to use it in different methods such as sautéing, roasting, and making salad dressings. This versatility makes it a great choice for a wide range of recipes. By substituting butter with olive oil, you can reduce your saturated fat intake without compromising on flavor.

Next time you’re in the kitchen, consider reaching for olive oil instead of butter. Not only will you be making a healthier choice, but you’ll also be adding a delicious twist to your favorite dishes. Experiment with olive oil in your cooking and discover the wonderful benefits it can bring to your meals.

Contact & Copyright Information

contact and copyright details

For more details on butter and olive oil conversions, contact Monadnock Oil and Vinegar, LLC at their Dublin branch by dialing 603-563-7066 or at their Amherst branch at 603-589-9954.

If you prefer email correspondence, you can reach them at [emailprotected].

Remember that all content related to butter and olive oil conversions is protected by copyright owned by Monadnock Oil and Vinegar, LLC. Reproduction rights are reserved from 2015 to 2024, and any unauthorized use is strictly prohibited.

If you intend to use or refer to their content, make sure you have the appropriate permissions to avoid any copyright violations.

Advertisement

Frequently Asked Questions

How Many Tablespoons Is 2/3 Cup in a Stick of Butter?

To know how many tablespoons are in 2/3 cup of butter in a stick, remember it’s around 10 2/3 tablespoons or about 1 stick plus 2 tablespoons. This helps you accurately measure butter for recipes.

Is 1 Stick of Butter the Same as 1 2 Cup?

Yes, 1 stick of butter is equal to 1/2 cup. That means a stick of butter contains 8 tablespoons. Understanding these measurements can make your cooking and baking experiences smoother and more precise.

How Many Tablespoons Is a Full Cup of Butter?

To measure a full cup of butter, you’d need 16 tablespoons. That’s the scoop for your baking adventures. Remember this handy conversion to make your kitchen creations a piece of cake!

How Much Is 1 Cup of Butter in Stick Butter?

To convert 1 cup of butter to sticks, you need 2 sticks. For tablespoons, that’s 16 tablespoons. Knowing these conversions helps in precise measuring for recipes. It’s essential for successful baking and cooking.

Conclusion

Remember, when it comes to butter hacks, knowing how to convert measurements can make all the difference in your cooking.

Advertisement

As the saying goes, ‘A little butter can make everything better.’

So next time you’re in the kitchen and wondering how many tablespoons are in 2/3 cup of butter, you’ll be prepared to whip up something delicious with ease.

Happy cooking!

Continue Reading

Butter Tips and Tricks

How Many Sticks of Butter in 1 Cup: A Step-by-Step Guide

Published

on

By

An image showing a neatly arranged stack of 10 tablespoons of butter, each tablespoon represented by a smooth, rectangular slab with rounded edges, resembling traditional stick-shaped butter

Ever wondered how many sticks of butter are in one cup? Well, I have the answer for you!

Picture this: you’re in the middle of baking your favorite recipe and suddenly realize you’re out of butter. Panic sets in as you scramble to figure out the conversion from cups to sticks. But fear not!

In this article, I’ll break it down for you, providing all the information you need to know about the butter-to-cup ratio and how to make your baking adventures a breeze.

Key Takeaways

  • 1 cup of butter is equal to 2 sticks or 16 tablespoons.
  • Converting butter measurements from cups to sticks or vice versa is crucial for accurate recipe adjustments.
  • Different brands may have varying measurements for butter, so it’s important to be aware of equivalents.
  • Using the measurement markings on the butter wrapper allows for precise cutting of fractional amounts.
[bulkimporter_image id=’2′]

Understanding the Butter-to-Cup Ratio

1 cup of butter is equal to 2 sticks. When it comes to converting butter measurements, it’s important to understand the ratios.

If a recipe calls for tablespoons of butter, 1 stick is equivalent to 8 tablespoons. So, if you need 1 cup of butter, you’ll need 16 tablespoons or 2 sticks.

It’s also important to note the difference between salted and unsalted butter. Salted butter contains added salt, while unsalted butter does not. This can affect the taste and overall flavor of your dish.

When a recipe calls for unsalted butter, it’s best to stick to that recommendation to have better control over the amount of salt in the recipe. However, if you only have salted butter on hand, you can reduce the amount of added salt in the recipe.

[bulkimporter_image id=’3′]

Converting Butter Measurements: Cups to Sticks

When it comes to baking, understanding the butter cup to stick ratio is crucial. Knowing how many sticks of butter make up one cup can make or break a recipe.

In addition to the ratio, having an accurate conversion method from cups to sticks is essential for precise measurements.

Lastly, it’s important to familiarize oneself with common butter measurements to ensure successful baking endeavors.

Butter Cup to Stick Ratio

To determine the ratio of sticks of butter to cups, we can use this conversion chart. Understanding butter measurements is essential for baking and cooking. Converting butter ratios is a common task in the kitchen.

The standard stick of butter in the United States weighs 1/2 cup or 8 tablespoons. Therefore, if a recipe calls for 1 cup of butter, you will need 2 sticks. If the recipe calls for 1/2 cup of butter, you will need 1 stick.

It’s important to note that butter measurements can vary by country, so always consult a reliable conversion chart if you’re working with international recipes. By knowing the butter cup to stick ratio, you can confidently adapt recipes to suit your needs.

Accurate Conversion Method

The most accurate way to convert measurements is by consulting a reliable conversion chart. When it comes to measuring butter, it can be tricky since it often comes in sticks or cups. Here are some tips to help you accurately measure butter:

  1. Use a conversion chart: This will give you the exact measurement equivalents for butter, whether it’s in sticks or cups.
  2. Soften the butter: If a recipe calls for melted butter, measure it in its solid form and then melt it. This ensures accurate measurements.
  3. Use a kitchen scale: Weighing the butter can give you precise measurements, especially when dealing with small amounts.
  4. Know the standard measurements: One stick of butter is equal to 1/2 cup or 8 tablespoons. A cup of butter, on the other hand, is equal to 2 sticks or 16 tablespoons.

Common Butter Measurements?

Knowing the equivalents for different measurements of butter, such as tablespoons and sticks, can be helpful when following recipes. It ensures that you are adding the right amount of butter, which can greatly impact the outcome of your dish. Here are some common butter measurement equivalents to keep in mind:

Measurement Equivalent
1 stick 1/2 cup (8 tablespoons)
1/2 stick 1/4 cup (4 tablespoons)
1/4 stick 1/8 cup (2 tablespoons)
1 tablespoon 1/16 cup (1/2 stick)

When measuring butter, it’s important to be accurate. Use a kitchen scale for precise measurements, especially if the recipe calls for weight measurements. If you don’t have a scale, use a butter dish with marked measurements. Softened butter should be leveled off with a knife. When using tablespoons, make sure to fill them completely and level off the excess with a straight edge. These tips will help you measure butter accurately and achieve the best results in your recipes.

[bulkimporter_image id=’4′]

The Standard Size of a Stick of Butter

A stick of butter is typically equal to 1/2 cup. Understanding butter packaging and different butter measurements in other countries can be confusing.

Here are some key points to help you navigate the world of butter measurements:

  1. In the United States, butter is commonly sold in sticks, with each stick weighing 1/4 pound or 1/2 cup. This makes it easy to measure and use in recipes.
  2. In some European countries, butter is sold in blocks or tubs, with measurements listed in grams or kilograms. It’s important to convert these measurements to cups or ounces for American recipes.
  3. In Australia, butter is usually sold in 250g or 500g blocks, which can be converted to cups or ounces using conversion charts.
  4. When traveling or using international recipes, it’s helpful to familiarize yourself with the local butter measurements to ensure accurate results.
[bulkimporter_image id=’5′]

How Much Butter Is in 1 Cup

When it comes to baking, understanding the butter to cup ratio is crucial. Knowing how much butter is in 1 cup can help ensure that your recipes turn out perfectly.

Additionally, learning how to convert butter measurements can be helpful when using recipes from different countries or regions.

Lastly, if you’re looking for butter substitutes in baking, there are several options available that can still provide the moisture and richness that butter brings to baked goods.

Butter to Cup Ratio

To measure the butter to cup ratio, you can easily convert sticks of butter to cups. Understanding butter density is key to accurately converting butter measurements from tablespoons to cups. Here’s a step-by-step guide:

  1. Start by knowing that one stick of butter is equal to 1/2 cup. This is a common measurement used in many recipes.
  2. If your recipe calls for a different amount of butter in cups, you can use this conversion: 1 cup of butter is equivalent to 2 sticks or 16 tablespoons.
  3. To convert tablespoons to cups, divide the number of tablespoons by 16. For example, if you have 8 tablespoons of butter, it would be equal to 1/2 cup.
  4. Remember, when measuring butter, it’s important to consider its density. Softened or melted butter may take up less space compared to cold or solid butter.

Converting Butter Measurements

Understanding the conversion of butter measurements can help me confidently adjust my recipe. When it comes to baking or cooking, accuracy is key. Knowing the equivalents of butter can save me time and ensure the perfect outcome.

One cup of butter is equal to two sticks or 16 tablespoons. This information is crucial when a recipe calls for a specific amount of butter in cups, but I only have sticks. Conversely, if a recipe specifies butter in sticks, I can easily convert it to cups by dividing the number of sticks by two.

To measure butter accurately, I can use a kitchen scale or the markings on the butter wrapper. Softened butter should be packed into measuring cups, while solid butter should be cut according to the desired quantity.

With these tips, I can confidently use the correct amount of butter in my recipes.

Butter Substitutes in Baking

If you’re looking to substitute butter in your baking, there are various options available that can still yield delicious results. Here are four butter alternatives that not only provide a healthier option but also offer unique flavors and health benefits:

  1. Coconut oil: This versatile alternative adds a subtle tropical taste to your baked goods and is rich in healthy fats, promoting heart health.
  2. Avocado: Creamy and nutrient-dense, mashed avocado can replace butter in certain recipes, providing a boost of vitamins and minerals.
  3. Greek yogurt: With its tangy flavor and creamy texture, Greek yogurt adds moisture and protein to your baked treats while reducing the fat content.
  4. Applesauce: A natural sweetener and fat substitute, applesauce adds moisture and tenderness to your baked goods, making them lighter and healthier.
[bulkimporter_image id=’6′]

Butter Conversion: Cups to Sticks Simplified

You can easily convert 1 cup of butter to sticks by knowing that it equals 2 sticks.

When it comes to butter storage, it is important to consider the packaging. Butter is typically sold in wrapped blocks or sticks. The packaging not only protects the butter from external factors like air and light but also keeps it fresh for longer periods.

The most common packaging for butter is a waxed paper or foil wrapper. This type of packaging helps to maintain the butter’s quality and prevent it from spoiling. It is recommended to store butter in its original packaging or transfer it to an airtight container to maintain its freshness.

Proper butter storage ensures that it remains usable for a longer time and retains its flavor and texture.

[bulkimporter_image id=’7′]

Calculating Sticks of Butter for Your Recipe

To calculate the number of sticks needed for your recipe, it’s helpful to divide the total amount of butter by the conversion factor of 2. This will give you the accurate measurement in sticks.

Here are some tips for understanding butter measurements and achieving accurate conversions:

  1. Always use the conversion factor of 2 when converting cups to sticks of butter.
  2. Make sure to measure butter in its solid form for precise results.
  3. If your recipe calls for a fraction of a stick, you can easily cut it using the measurement markings on the wrapper.
  4. Remember that butter is sold in different sizes, so check the weight or volume on the packaging to ensure accuracy.

Now that you understand how to calculate the number of sticks needed for your recipe, let’s move on to some tips for measuring butter in cups.

[bulkimporter_image id=’8′]

Tips for Measuring Butter in Cups

When measuring butter in cups, it’s important to remember that different brands may have different measurements on their packaging. To ensure accuracy in your recipes, it’s helpful to be aware of butter measurement equivalents.

One cup of butter is equal to 2 sticks or 16 tablespoons. However, some brands of butter may label their packaging differently, so it’s always a good idea to double-check.

If you don’t have measuring cups or sticks of butter, there are alternative methods for measuring butter. One option is to use a kitchen scale to measure the desired amount in grams or ounces. Another option is to use the markings on the butter wrapper itself. Most butter sticks have measurements marked on the packaging, allowing you to easily cut off the desired amount.

[bulkimporter_image id=’9′]

Butter Conversions Made Easy: Cups to Sticks

When it comes to baking or cooking with butter, it’s important to have a clear understanding of the measurement equivalents. Knowing how many sticks of butter are in a cup can save time and ensure accurate results.

In this discussion, we will explore simple conversion techniques for butter measurements, providing you with the knowledge and confidence to easily adapt recipes to your preferred measurements.

Butter Measurement Equivalents

You can easily convert 1 cup of butter into sticks by dividing it into 2 sticks. This is a common measurement used in baking and cooking.

When it comes to understanding butter ratios and ensuring accurate measuring, here are some tips to keep in mind:

  1. Use a liquid measuring cup: Butter is a solid, but using a liquid measuring cup allows for more precise measurements.
  2. Soften the butter: To accurately measure butter, it should be softened to room temperature. This ensures that it is easily spreadable and can be measured accurately.
  3. Use a knife or bench scraper: When measuring butter, use a knife or bench scraper to level off the top. This will provide a consistent and accurate measurement.
  4. Pack it tightly: If a recipe calls for packed butter, make sure to tightly pack the butter into the measuring cup. This will give you the correct amount needed for the recipe.

Simple Conversion Techniques

To simplify conversions, try using a kitchen scale for more precise measurements. When it comes to baking, accurate measurements are crucial for the success of your recipe. Butter measurement equivalents in recipes can sometimes be confusing, especially when converting between different units.

Converting butter measurements for baking can be made easier by using a kitchen scale. By weighing the butter, you can accurately determine the amount needed for your recipe. For example, if a recipe calls for 1 cup of butter, you can weigh it on the scale to get the precise measurement in grams or ounces. This eliminates any guesswork and ensures that your baked goods turn out just right.

Now, let’s move on to how to substitute sticks of butter for cups.

[bulkimporter_image id=’10’]

How to Substitute Sticks of Butter for Cups

If you’re substituting sticks of butter for cups, it’s important to know that one stick of butter is equivalent to 1/2 cup. This knowledge is crucial for measuring accuracy in recipes.

Here are four key points to keep in mind when substituting sticks of butter for cups:

  1. Butter substitutes: In case you don’t have sticks of butter on hand, you can use other ingredients as substitutes. Options include margarine, shortening, coconut oil, or even applesauce for a healthier alternative.
  2. Measuring accuracy: When measuring butter in stick form, it’s essential to accurately cut the stick to the correct length. Each stick is typically 8 tablespoons or 1/2 cup, so make sure to measure it precisely.
  3. Conversions: If a recipe calls for a specific amount of cups, you may need to convert it to sticks of butter. Remember that two sticks of butter are equal to 1 cup, so adjust accordingly.
  4. Recipe adjustments: When substituting sticks of butter for cups, consider the impact on your recipe. Butter provides moisture and flavor, so using different substitutes may affect the final texture and taste.
[bulkimporter_image id=’11’]

Common Butter Measurements: Cups Vs Sticks

When baking, it’s helpful to know the difference between measuring butter in cups versus sticks. Understanding butter measurements and being able to convert between cups and sticks can make a big difference in the outcome of your baked goods. Here’s a simple table to help you understand the conversion:

Cups Sticks Grams
1 0.5 113
2 1 227
3 1.5 340

For example, if a recipe calls for 1 cup of butter, you can use 2 sticks or 227 grams. Similarly, if a recipe calls for 3 sticks of butter, you can use 1.5 cups or 340 grams. Having this understanding and being able to convert between cups and sticks will ensure that your baked goods turn out perfectly every time.

Frequently Asked Questions

Can I Use Margarine Instead of Butter When Measuring in Cups or Sticks?

Sure, you can use margarine instead of butter when measuring in cups or sticks. However, keep in mind that margarine has a different texture and flavor, so it may affect the outcome of your recipe. The butter vs margarine debate is a matter of personal preference.

How Much Does a Stick of Butter Weigh in Ounces?

A stick of butter weighs 4 ounces. Converting butter measurements can be tricky, but knowing that a stick of butter is 1/2 cup or 8 tablespoons helps in cooking and baking.

Can I Use Salted Butter Instead of Unsalted Butter in a Recipe That Calls for Measuring in Cups?

Yes, you can use salted butter instead of unsalted butter in a recipe that calls for measuring in cups. Just remember to adjust the amount of salt in the recipe accordingly.

Are There Any Special Considerations When Measuring Butter in High-Altitude Baking?

When baking at high altitudes, there are special considerations for measuring butter. The altitude affects the air pressure, which can impact the texture and rising of baked goods. Adjustments may be needed to ensure successful results.

Is There a Difference in Measurement if the Butter Is Cold or at Room Temperature When Using Cups or Sticks?

When measuring butter, it’s important to note that the accuracy may vary depending on whether the butter is cold or at room temperature. This applies to both measuring cups and sticks.

Conclusion

In conclusion, understanding the butter-to-cup ratio is crucial when it comes to baking. Converting measurements from cups to sticks can be simplified by knowing that one cup of butter is equal to two sticks.

It is important to note that a standard stick of butter typically measures 1/2 cup or 8 tablespoons. When measuring butter in cups, it is recommended to use precise measuring tools to ensure accurate results.

Remember, as the saying goes, “Measure twice, bake once!”

Continue Reading

Butter Tips and Tricks

How Many Cups of Butter Equal a Stick: A Simple Guide

Published

on

By

An image showing a neatly arranged cup filled with liquid butter, surrounded by a stack of butter sticks, one by one, gradually being poured into the cup until it reaches the brim

Ever thought about how many cups of butter are in one stick? Well, I have the answer for you! Deciphering butter measurements can be tricky, but don’t worry, I’m here to make it easier for you.

In this article, we’ll explore the standard stick of butter and how to convert it to cups. We’ll also delve into equivalents and measurements, as well as provide a handy butter conversion chart.

So, let’s dive in and demystify the world of butter measurements together!

Key Takeaways

  • One stick of butter is equal to 1/2 cup or 8 tablespoons.
  • Butter can be measured in grams or ounces for more precise measurements.
  • Conversion charts and kitchen scales are useful tools for accurate measurement conversion.
  • Knowing the equivalents (e.g., 1 stick = 1/2 cup, 2 sticks = 1 cup) helps measure butter accurately in recipes.

[bulkimporter_image id=’2′]

Understanding Butter Measurements

There’s no need to worry about how many cups of butter are in a stick because it’s a common measurement used in recipes. When it comes to accurately measuring butter, it’s important to understand the conversion from sticks to cups.

One stick of butter is equal to 1/2 cup or 8 tablespoons. This measurement is widely accepted and used in baking and cooking. However, it’s good to know that butter can also be measured in grams or ounces for more precise measurements.

To convert butter measurements for recipes, you can use a kitchen scale or refer to conversion charts that provide the equivalent measurements. Understanding these conversions ensures that you can accurately measure and use butter in your favorite recipes.

Advertisement

Now, let’s dive into the details of the standard stick of butter.

[bulkimporter_image id=’3′]

The Standard Stick of Butter

To determine the amount of butter in a standard stick, you’ll need to understand the conversion ratio. Understanding butter packaging and different butter measurements is crucial to accurately measuring ingredients in recipes. Here are some key points to keep in mind:

  • A standard stick of butter in the United States weighs 1/2 cup or 8 tablespoons.
  • The measurements on butter packaging are typically marked in tablespoons and cups.
  • European butter is often sold in 250-gram blocks, which is approximately 1 cup or 2 sticks of butter.
  • Some recipes may call for butter in ounces or grams, so it’s important to have a kitchen scale for precise measurements.
  • It’s also helpful to know that butter comes in different fat percentages, such as salted and unsalted.

[bulkimporter_image id=’4′]

Converting Sticks to Cups

When it comes to converting sticks to cups, it is important to understand the stick to cup ratio for accurate measurement conversion.

The stick to cup ratio is 1 stick of butter equals 1/2 cup. This means that if a recipe calls for 1 cup of butter, you will need 2 sticks.

Stick to Cup Ratio

The stick to cup ratio for butter is approximately 1/2 cup per stick. This ratio is important to know when it comes to baking and following recipes accurately.

Here are a few key points to keep in mind when it comes to butter measurements and baking conversions:

Advertisement

  • 1 stick of butter is equal to 1/2 cup or 8 tablespoons.
  • If a recipe calls for 1 cup of butter, you will need 2 sticks.
  • To convert tablespoons to cups, divide the number of tablespoons by 16.
  • It’s important to note that butter measurements can vary depending on the brand or type of butter you are using, so always check the packaging for accurate measurements.
  • When in doubt, it’s always a good idea to weigh your butter using a kitchen scale for precise measurements.

Knowing the stick to cup ratio and understanding butter measurements is essential for successful baking and achieving the desired results in your recipes.

Accurate Measurement Conversion

Remember, accurately converting measurements is crucial for achieving the desired results in your baking recipes.

When it comes to understanding butter measurements, it’s important to measure accurately to ensure your baked goods turn out just right.

Butter is often measured in sticks, and it’s helpful to know that one stick of butter is equal to 1/2 cup or 8 tablespoons.

This knowledge is especially handy when a recipe calls for a certain amount of cups and you only have sticks of butter on hand.

By measuring butter accurately, you can ensure that your recipes turn out perfectly every time.

Advertisement

Now that we understand how to measure butter correctly, let’s explore the equivalents and measurements for other common baking ingredients.

[bulkimporter_image id=’5′]

Equivalents and Measurements

You’ll need to know how many cups of butter are in a stick for accurate measurements. When it comes to butter measurement equivalents, it’s important to have the right conversions. Here are a few key measurements to keep in mind:

  • 1 stick of butter is equal to 1/2 cup
  • 1/2 stick of butter is equal to 1/4 cup
  • 2 sticks of butter is equal to 1 cup
  • 4 sticks of butter is equal to 2 cups
  • 8 sticks of butter is equal to 4 cups

Knowing these equivalents will help you measure butter accurately in your recipes.

Now that you have a good understanding of how many cups are in a stick of butter, let’s move on to the next section about how much butter is in a cup.

[bulkimporter_image id=’6′]

How Much Butter Is in a Cup

When it comes to baking or cooking, understanding the butter-to-cup ratio is crucial. Knowing how much butter is in a cup can make a huge difference in the outcome of your recipe.

In this discussion, we will explore the conversion of butter measurements and how to accurately measure the right amount of butter for your culinary endeavors.

Advertisement

Butter-To-Cup Ratio

To figure out the butter-to-cup ratio, divide the number of cups by the number of sticks. This ratio is essential when converting butter measurements or finding butter equivalents. Here are some important points to consider:

  • 1 stick of butter is equal to 1/2 cup.
  • 2 sticks of butter make 1 cup.
  • If a recipe calls for 1 cup of butter, you will need 2 sticks.
  • For 1/4 cup of butter, use half a stick.
  • To measure 1/3 cup of butter, you’ll need 5 and 1/3 tablespoons.

Understanding the butter-to-cup ratio allows for accurate measurements in recipes. Whether you’re baking cookies or making a savory dish, having the correct amount of butter is crucial for achieving the desired taste and texture.

Converting Butter Measurements?

Understanding how to convert butter measurements is essential for accurate recipe preparation. When it comes to converting butter measurements, there are a few common mistakes that people often make.

One of the most common mistakes is not knowing the correct conversion ratio. In the United States, butter is typically sold in sticks, with each stick weighing 1/2 cup or 8 tablespoons. However, in some recipes, butter may be measured in grams or ounces.

Another mistake people make is not properly measuring the butter. It is important to use a kitchen scale or measuring cups to ensure precise measurements.

Additionally, some recipes may call for melted butter, which can be measured differently than solid butter.

Advertisement

Understanding these conversions and avoiding these common mistakes will help ensure that your recipes turn out perfectly every time.

[bulkimporter_image id=’7′]

Measuring Butter for Baking

There’s no need to guess how many cups of butter are in a stick when measuring for baking. As someone who loves to bake, I have found that using the right tools for measuring butter is crucial for accurate results. Here are the best tools for measuring butter:

  • Measuring cups: These are the most common tools used for measuring butter. Make sure to use a dry measuring cup and pack the butter firmly for accurate measurements.

  • Kitchen scale: For precise measurements, a kitchen scale is the way to go. It allows you to measure the exact amount of butter required for your recipe.

  • Butter dish with markings: Some butter dishes come with markings that indicate the measurements. This makes it convenient to measure the required amount of butter directly from the dish.

  • Butter cutter: A butter cutter is a handy tool that helps you measure the butter by slicing it into tablespoons or teaspoons.

  • Butter wrappers: Butter wrappers often have measurements marked on them, making it easy to cut the butter into the desired amount.

By using these tools, you can ensure that your butter is measured accurately for your recipes.

Now, let’s move on to the next section where we will discuss a butter conversion chart.

[bulkimporter_image id=’8′]

Butter Conversion Chart

Now that we know how to measure butter for baking, let’s talk about butter conversion chart and how to convert butter for recipes.

Advertisement

It’s common to come across recipes that call for butter in different measurements, such as cups, tablespoons, or grams. To make things easier, there are some standard butter measurement equivalents that can be used for conversion.

For example, one stick of butter is equal to half a cup or 8 tablespoons. So if a recipe calls for 1 cup of butter, you would need 2 sticks or 16 tablespoons. It’s important to have these conversions handy to ensure you’re using the correct amount of butter in your recipes.

Now that we understand the butter conversion chart, let’s move on to some tips for measuring butter accurately.

[bulkimporter_image id=’9′]

Tips for Measuring Butter

To accurately measure butter, it’s helpful to soften it beforehand. Softening butter makes it easier to measure and ensures accurate results in your cooking. Here are some tips for measuring butter for cooking:

  • Take the butter out of the refrigerator and let it sit at room temperature for about 30 minutes before measuring.
  • Use a sharp knife to cut the butter into tablespoon-sized portions.
  • Fill a measuring cup with water and place the cut butter into the cup, submerging it completely.
  • Remove the butter from the water and drain any excess water.
  • Measure the butter in tablespoons or cups, depending on your recipe’s requirements.

[bulkimporter_image id=’10’]

Common Butter Measurement Mistakes

A common mistake when measuring butter is not using a sharp knife to cut it into proper portions. Accurately measuring butter is crucial in baking to achieve the desired results.

When butter is too soft or melted, it can throw off the texture and consistency of your baked goods. To measure butter accurately, start by using a sharp knife to cut the stick into tablespoon-sized portions. Then, use a measuring spoon to scoop out the desired amount.

Advertisement

It’s important to level off the butter with the back of a knife to ensure precise measurements. Another common mistake is eyeballing the amount of butter, which can lead to inconsistent results.

Frequently Asked Questions

Can I Use Margarine Instead of Butter in Baking Recipes?

I prefer using butter over margarine in baking recipes because it adds more flavor and richness. Margarine can affect the texture of baked goods, often making them softer and less tender. So, while margarine can be used as a substitute for butter in some recipes, it’s important to consider the impact on taste and texture.

How Can I Accurately Measure Butter Without Using a Scale?

When it comes to accurately measuring butter without a scale, it can be a bit tricky. But fear not! I’ve got you covered. Let me walk you through the process of converting butter measurements like a pro.

Can I Substitute Oil for Butter in a Recipe?

Substituting butter with oil in a recipe can have pros and cons. Oil can add moisture and make baked goods lighter, but it may also affect the taste and texture. The best oil substitutes for baking are vegetable oil, coconut oil, and olive oil.

How Much Butter Should I Use if the Recipe Calls for a Certain Number of Sticks?

When converting butter measurements, accurately measuring the amount of butter needed is crucial. If a recipe calls for a certain number of sticks, I can help you determine how much butter to use.

Advertisement

Can I Use Unsalted Butter Instead of Salted Butter in Baking Recipes?

Using unsalted butter for baking has its pros and cons. Pros include having more control over the saltiness of the recipe, while cons include potentially missing out on the flavor that salted butter provides.

Conclusion

In conclusion, understanding butter measurements is essential for successful baking. While a standard stick of butter is equivalent to 1/2 cup or 8 tablespoons, it’s important to note that this can vary depending on the brand or region.

To convert sticks to cups, simply divide the number of sticks by 2. Additionally, knowing that 1 cup of butter is equivalent to 2 sticks can help when following recipes.

By following a butter conversion chart and being mindful of common measurement mistakes, bakers can ensure accurate and delicious results.

Advertisement

Continue Reading
Advertisement

Affiliate disclaimer

As an affiliate, we may earn a commission from qualifying purchases. We get commissions for purchases made through links on this website from Amazon and other third parties.

Advertisement

Trending