Connect with us

Butter Tips and Tricks

Create Magic Oil with Butter Maker: 10 Simple Steps

Published

on

An image showcasing the step-by-step process of extracting oil using the Magic Butter Maker: pouring herbs and liquid into the machine, setting the timer, and the machine magically transforming the mixture into rich, golden oil

So, you’re interested in mastering the skill of producing oil with the magical butter machine, are you? Get ready, because I’m going to guide you through an exciting journey of taste and exploration.

In this article, I’ll be sharing my precise, scientific, and detailed process for creating that golden elixir that will make your taste buds dance with joy.

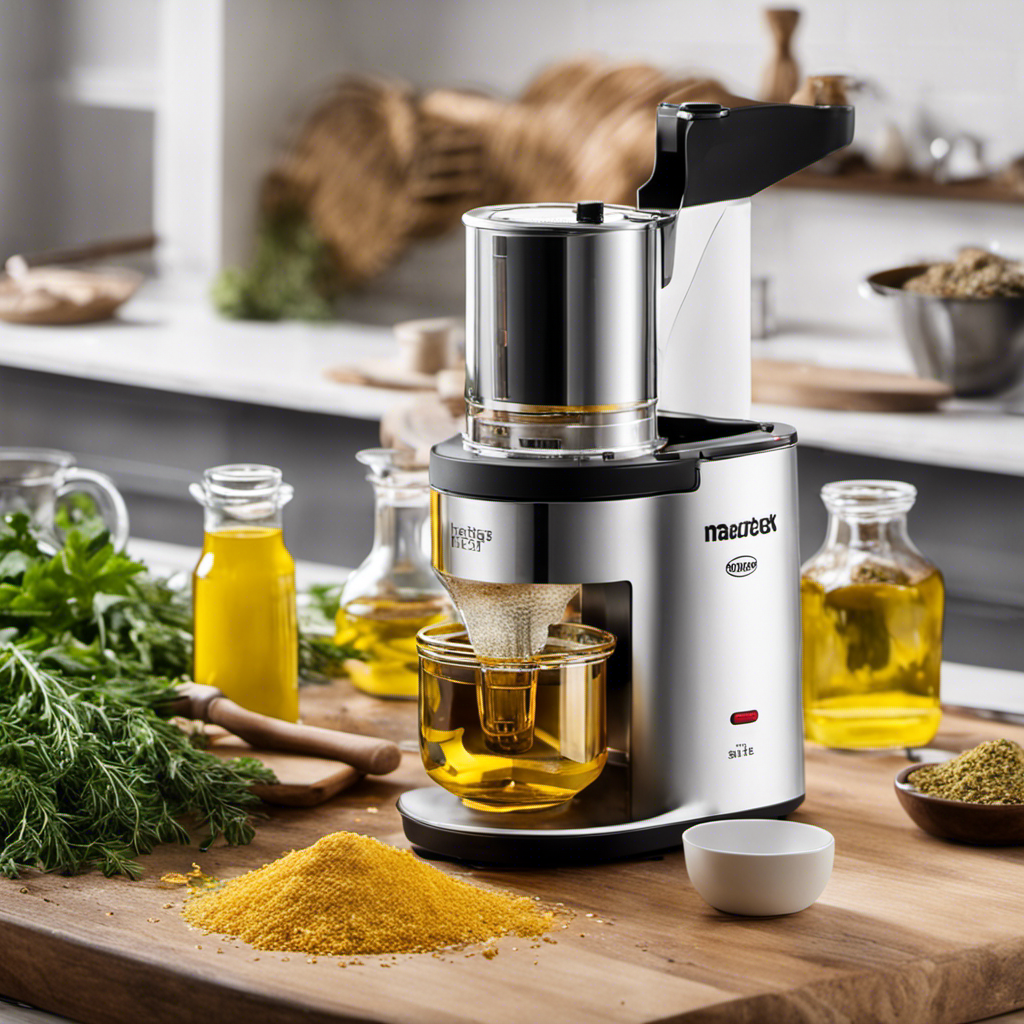
From choosing the right ingredients to enhancing the aroma, get ready to become a master of oil-making in the magic butter maker.

Let’s get started!

Key Takeaways

  • Optimal ingredient ratios and proper infusion are crucial for high-quality oil
  • Activate cannabinoids through decarboxylation before adding to the magic butter maker
  • Control time and temperature settings for the best results
  • Strain the oil and store it properly to maintain freshness and potency

[bulkimporter_image id=’2′]

Advertisement

Choosing the Right Ingredients

To make the perfect oil in your magic butter maker, you need to choose the right ingredients. Achieving the optimal ingredient ratios is crucial in obtaining a high-quality oil.

The magic butter maker requires a combination of herbs and oil, and the proportions of these ingredients play a significant role in determining the potency and flavor of the final product.

When it comes to choosing the herbs, it is essential to consider their potency and desired effects. Whether you’re using cannabis, lavender, or any other herb, it is important to find the right balance. The magic butter maker typically requires one cup of herbs per two cups of oil. This ratio ensures that the oil is infused with the herb’s essence without overpowering it.

Advertisement

In addition to the ingredient ratios, the mixing order is of utmost importance. To maximize the extraction process, it is recommended to add the herbs to the magic butter maker first, followed by the oil. This allows the herbs to be evenly distributed throughout the oil, promoting efficient infusion.

[bulkimporter_image id=’3′]

Preparing the Magic Butter Maker

Before we begin preparing the Magic Butter Maker, it is important to gather all the required ingredients and equipment. For this recipe, you’ll need a specific amount of cannabis flower, unsalted butter, and water. Additionally, you’ll need a Magic Butter Maker machine, a fine mesh strainer, and a heatproof container for storage.

In the following step-by-step instructions, I’ll guide you through the process of using the Magic Butter Maker to create infused butter. I’ll also provide tips for achieving optimal results, ensuring that your infused butter turns out perfectly every time.

Advertisement

Required Ingredients and Equipment

You’ll need a few essential ingredients and some equipment to make oil in the magic butter maker.

First, let’s talk about the equipment. It’s crucial to choose the right equipment to ensure a successful oil infusion process. The magic butter maker is specifically designed for this purpose, providing precise temperature control and efficient mixing. This machine guarantees optimal extraction and infusion of the desired compounds into the oil.

As for alternative oil infusion methods, there are a few options available. One popular method is the stove-top method using a double boiler setup. This involves using a heatproof container placed over a pot of boiling water to gently heat the oil and ingredients.

Another option is using a slow cooker, which allows for longer infusion times at a consistent temperature. Ultimately, the choice of equipment depends on your preferences and needs.

Step-By-Step Instructions

Now that you have gathered all the necessary ingredients and equipment, it’s time to begin the step-by-step instructions for making infused oil.

Advertisement

To start, it is crucial to activate the cannabinoids in your plant material through decarboxylation techniques. Preheat your oven to 240°F (115°C) and evenly spread your finely ground cannabis on a baking sheet. Bake for 40 minutes, ensuring that you mix it every 10 minutes for even heating.

Next, transfer the decarboxylated cannabis to your Magic Butter Maker, along with your chosen oil. Set the temperature to 160°F (71°C) and run the machine for two hours. Alternatively, you can also use alternative infusion methods such as slow cookers or double boilers.

Once the infusion is complete, strain the oil using a fine mesh strainer or cheesecloth, and store it in airtight containers.

This concludes the step-by-step instructions for making infused oil. Now let’s move on to some tips for optimal results.

Tips for Optimal Results

For the best results, it’s important to strain the infused oil using a fine mesh strainer or cheesecloth to remove any plant material. This ensures a smooth and pure oil without any unwanted debris.

Advertisement

To achieve optimal infusion technique, follow these tips:

  1. Use high-quality cannabis: Choose fresh, potent buds for the best flavor and potency.
  2. Grind the cannabis finely: This increases the surface area for better extraction.
  3. Control temperature and time: Use the recommended temperature and time settings to extract the desired compounds without compromising the oil’s quality.
  4. Store properly: To maintain freshness and potency, store the infused oil in a cool, dark place, away from direct sunlight and heat sources.

By following these tips, you can create a high-quality infused oil with optimal flavor and potency.

Now, let’s move on to the next step: decarboxylating the cannabis.

[bulkimporter_image id=’4′]

Decarboxylating the Cannabis

To properly decarboxylate your cannabis, start by preheating the oven to 245°F. The cannabis decarboxylation process is a crucial step in oil making as it activates the cannabinoids, making them more potent and bioavailable.

Advertisement

Decarboxylation is the process of converting the non-psychoactive acid forms of cannabinoids, such as THCA and CBDA, into their psychoactive counterparts, THC and CBD. This process involves removing a carboxyl group from the molecular structure, which occurs through the application of heat.

To begin, finely grind your cannabis using a grinder. This will ensure even heat distribution and maximize the surface area for decarboxylation. Next, spread the ground cannabis in a single layer on a baking sheet lined with parchment paper. Place the baking sheet in the preheated oven and let the cannabis decarboxylate for approximately 30-40 minutes. It’s essential to monitor the process closely to avoid overheating or burning the cannabis.

During decarboxylation, the cannabinoids undergo a chemical reaction, transforming into their active forms. This activation is essential for oil making, as it ensures that the final product will have the desired therapeutic effects. Without proper decarboxylation, the oil may lack potency and therapeutic benefits.

Therefore, taking the time to decarboxylate your cannabis correctly is crucial in achieving high-quality oil.

Advertisement
[bulkimporter_image id=’5′]

Infusing the Oil With Herbs and Spices

Infusing oil with herbs and spices enhances its flavor and adds an aromatic touch to your culinary creations. There are various methods to choose from when it comes to infusing techniques, each yielding different results.

One popular technique is the cold infusion method. In this method, the oil and herbs are combined and left to infuse at room temperature for a period of time. It is ideal for delicate herbs like basil and cilantro, as it preserves their fresh flavors.

Another technique is the hot infusion method. Here, the oil and herbs are heated together to extract their flavors more quickly. This method is great for tougher herbs like rosemary and thyme, as it helps release their aromatic oils.

Lastly, the slow cooker method involves combining the oil and herbs in a slow cooker and allowing them to infuse over a longer period of time. This results in a more intense flavor profile.

Advertisement

Infusing oil with herbs and spices not only enhances the taste of your dishes but also provides numerous health benefits. The herbs and spices used in infusions are rich in antioxidants, vitamins, and minerals that can promote overall well-being.

For example, infusing oil with garlic can provide antibacterial and antiviral properties, while infusing with turmeric can provide anti-inflammatory benefits. Furthermore, herbs like basil and rosemary contain compounds that have been shown to have anti-cancer properties.

It’s important to note that the health benefits of infused oils may vary depending on the type and quality of the herbs and spices used. Therefore, it’s always recommended to use fresh, organic ingredients for the best results.

[bulkimporter_image id=’6′]

Advertisement

Setting the Time and Temperature

After infusing the oil with herbs and spices, the next step in making oil in the Magic Butter Maker is setting the time and temperature. Proper time management and temperature settings are crucial to ensure the best results and maximize the potency of the infused oil.

Here’s how to do it:

  1. Press the ‘Time’ button on the Magic Butter Maker. Use the up and down arrows to set the desired infusion time. The recommended infusion time varies depending on the ingredients used, but a general guideline is around 2 to 4 hours.

  2. Press the ‘Temperature’ button to adjust the heat settings. Again, use the up and down arrows to select the desired temperature. The ideal temperature for infusing oil typically ranges between 160°F (71°C) and 200°F (93°C), depending on the specific recipe or ingredient requirements.

  3. Once you have set the desired time and temperature, press the ‘Start’ button to begin the infusion process. The Magic Butter Maker will automatically start heating and mixing the ingredients.

  4. Monitor the machine periodically during the infusion process to ensure that the temperature and time settings remain stable. Adjust them if necessary to maintain the desired conditions.

Now that the time and temperature are set, it’s time to add the ingredients to the machine and continue with the oil-making process.

[bulkimporter_image id=’7′]

Advertisement

Adding the Ingredients to the Machine

When it comes to achieving the best results in my magic butter maker, two key factors to consider are the optimal ingredient ratios and the importance of mixing order.

The right balance of ingredients can greatly impact the flavor and potency of the final product, so it’s crucial to understand the ideal proportions.

Additionally, the order in which the ingredients are added and mixed can affect the extraction process and the overall quality of the infused oil or butter.

Optimal Ingredient Ratios

For the best results, you’ll want to use a 1:1 ratio of herbs to oil in the magic butter maker. This ensures that the infusion is potent and balanced. The proper ingredient ratios are crucial for achieving the desired flavor and potency in your oil.

Here are four important points to keep in mind when it comes to ingredient ratios and infusion techniques:

Advertisement
  1. Consistency: Maintaining a consistent ratio of herbs to oil throughout the infusion process ensures that the flavors and potency are evenly distributed.

  2. Extraction: A 1:1 ratio allows for maximum extraction of the herbs’ beneficial compounds into the oil, resulting in a more potent infusion.

  3. Taste: Balancing the amount of herbs with the oil ensures that the final product has a well-rounded and enjoyable flavor profile.

  4. Efficiency: Using a 1:1 ratio also helps to optimize the efficiency of the magic butter maker, allowing for a more thorough and effective infusion.

Now that we understand the importance of ingredient ratios and infusion techniques, let’s explore the next crucial aspect: the mixing order importance.

Mixing Order Importance?

To ensure optimal results when making oil in the Magic Butter Maker, it is crucial to consider the mixing order. The mixing technique plays a significant role in the infusion process, affecting both the flavor and potency of the final product.

The general rule of thumb is to start by combining the desired ingredients, such as herbs or botanicals, with the chosen oil or butter. This initial mixture should be thoroughly stirred to ensure even distribution.

Next, the mixture is added to the Magic Butter Maker, which will facilitate the infusion process. The infusion time will depend on various factors, including the desired potency and the specific recipe being used.

Once the infusion time is complete, the mixture can proceed to the next step: the mixing and heating process.

Advertisement

[bulkimporter_image id=’8′]

Mixing and Heating Process

The mixing and heating process begins by adding the ingredients to the Magic Butter Maker and letting it work its magic. This innovative machine utilizes advanced mixing techniques and precise temperature regulation to produce high-quality oil.

During the mixing and heating process, the Magic Butter Maker employs the following techniques:

  1. Agitation: The machine constantly stirs the ingredients, ensuring a thorough mixture and preventing any clumping or separation.

  2. Homogenization: By subjecting the ingredients to consistent mixing, the Magic Butter Maker creates a uniform blend, resulting in a smooth and even oil.

  3. Controlled Heating: The machine maintains a precise temperature throughout the process, allowing for optimal extraction and activation of cannabinoids.

  4. Time Optimization: The Magic Butter Maker efficiently completes the mixing and heating process within a specific timeframe, ensuring maximum potency and flavor in the final product.

With its advanced mixing techniques and temperature regulation, the Magic Butter Maker guarantees a consistent and efficient oil-making process. This innovative device takes the guesswork out of creating homemade oils and provides a convenient solution for those seeking precise and scientific results.

Advertisement

[bulkimporter_image id=’9′]

Monitoring the Extraction Progress

When it comes to monitoring the extraction progress, two key factors to consider are time and temperature control.

Time control ensures that the extraction process is carried out for the optimal duration, while temperature control ensures that the extraction is done at the correct heat level to maximize efficiency and quality.

Additionally, visual indicators can also be utilized to assess the progress of the extraction, providing a tangible way to gauge the desired outcome.

Advertisement

Time and Temperature Control

Adjusting the time and temperature settings on your Magic Butter Maker allows for precise control over your oil-making process. Time management and temperature settings are crucial factors in the extraction of oil from herbs or botanicals. Here are four key points to consider:

  1. Optimal Extraction Time: Set the timer according to the recommended extraction time for your specific recipe. Extracting for too long can result in a bitter taste, while extracting for too short may not yield the desired potency.

  2. Temperature Control: Adjust the temperature settings based on the type of oil you’re making. Different oils require different temperature ranges for optimal extraction. It’s important to follow the guidelines provided in the recipe or manual.

  3. Precise Timing: Keep track of the time accurately to ensure consistency in your oil-making process. Use a reliable timer or set an alarm to avoid over or under extraction.

  4. Monitoring the Process: Regularly check the temperature and adjust if necessary. Monitor the extraction progress to ensure that the oil is being made at the desired temperature and within the recommended time frame.

Visual Indicators for Extraction

Monitoring the extraction progress using visual indicators is essential for achieving optimal results with your oil-making process. By employing various monitoring techniques, you can ensure maximum extraction efficiency and yield. Visual indicators allow you to track the progress of the extraction process, enabling you to make adjustments as needed. Below is a table that illustrates some common visual indicators and their corresponding meanings:

Visual Indicator Meaning
Color Darker color indicates more extraction
Clarity Clearer liquid suggests higher purity
Bubbling Intense bubbling signifies active extraction
Sedimentation Settling of particles indicates progress

[bulkimporter_image id=’10’]

Straining the Oil Mixture

After blending the oil mixture, strain it through a fine mesh sieve to remove any plant material. Straining the oil is an important step in the process of making infused oil, as it helps to ensure a smooth and pure final product. Here are some straining techniques and alternative extraction methods to consider:

Advertisement
  1. Fine Mesh Sieve: Use a fine mesh sieve to strain the oil. This will help remove any large particles or plant material that may have been left behind during the blending process.

  2. Cheesecloth: Another option is to use a cheesecloth to strain the oil. Simply pour the mixture through the cheesecloth and let it strain into a container. This method allows for a finer strain, removing even smaller particles.

  3. Coffee Filter: For an even finer strain, you can use a coffee filter. Place the coffee filter over a jar or container and pour the oil mixture through it. This method ensures a clean and clear oil.

  4. Pressing Method: If you prefer a more hands-on approach, you can use a pressing method. Place the oil mixture in a clean cloth or muslin bag, and then squeeze or press the bag to extract the oil. This method is effective for removing any remaining plant material.

By using these straining techniques and alternative extraction methods, you can achieve a high-quality infused oil that is free from any unwanted plant material.

Now, let’s move on to the next step of storing the infused oil properly.

[bulkimporter_image id=’11’]

Storing the Infused Oil Properly

To ensure the longevity and quality of your infused oil, it’s important to store it properly. Proper storage is crucial in maintaining the flavor, potency, and shelf life of your homemade oil.

Advertisement

Here are some key tips to follow for optimal storage.

Firstly, choose the right container for storing your infused oil. It’s best to use dark glass bottles or jars with airtight lids. This helps to protect the oil from light and air exposure, which can cause oxidation and degradation.

Next, make sure to store the oil in a cool and dark place. Heat and light can accelerate the breakdown of the oil, leading to a shorter shelf life. Therefore, avoid keeping the oil near stoves, ovens, or windows. Instead, opt for a pantry or cupboard away from direct sunlight.

Additionally, it’s essential to keep the infused oil away from moisture. Moisture can promote the growth of bacteria and mold, which can spoil the oil. To prevent this, ensure that the container is completely dry before transferring the oil and avoid storing it in humid environments like the refrigerator.

By following these proper storage techniques, you can extend the shelf life of your infused oil and maintain its quality for longer periods.

Advertisement

[bulkimporter_image id=’12’]

Understanding Dosage and Potency

When it comes to infusing oil with cannabis, it is important to have a clear understanding of dosage and potency. This knowledge ensures that the oil is used safely and effectively. Here are some key points to consider:

  1. Dosage accuracy: It is crucial to accurately measure the amount of cannabis used in the infusion process. This will help determine the potency of the final product and allow for precise dosing. Using a scale to weigh the cannabis is recommended for the best results.

  2. Understanding bioavailability: Bioavailability refers to the amount of a substance that is absorbed into the bloodstream and available for the body to use. When infusing oil with cannabis, it is important to consider the bioavailability of the cannabinoids. Different methods of consumption, such as oral ingestion or topical application, can have varying levels of bioavailability.

  3. Start low and go slow: It is always advised to start with a low dose when using infused oil. This allows for a gradual increase in dosage until the desired effects are achieved. It is important to wait for the effects to fully kick in before considering increasing the dosage.

  4. Consistency is key: To ensure accurate dosing, it is important to maintain consistency in the infusion process. This includes using the same strain of cannabis, measuring accurately, and following a standardized recipe.

[bulkimporter_image id=’13’]

Advertisement

Tips for Enhancing Flavor and Aroma

Enhancing the flavor and aroma of infused oil can be achieved by adding complementary herbs and spices. When it comes to enhancing potency, using alternative ingredients can be a game-changer. By carefully selecting the right combination of herbs and spices, you can transform your infused oil into a culinary masterpiece.

To begin, consider adding herbs such as rosemary, thyme, or basil to your oil. These herbs not only provide a burst of flavor but also add depth to the aroma. For a spicy kick, consider adding chili flakes or black pepper. These ingredients can elevate the taste profile of your infused oil and create a delightful sensation on the palate.

In addition to traditional herbs and spices, consider experimenting with alternative ingredients. For example, adding citrus zest can bring a refreshing and vibrant flavor to your oil. Alternatively, you can try infusing your oil with garlic or ginger for a savory twist. These alternative ingredients can create unique flavor profiles that will surely impress your guests.

Remember to stay mindful of the potency of your infused oil. While enhancing the flavor and aroma is important, it is crucial to strike a balance to ensure that the potency of the oil remains consistent. By using small amounts of herbs and spices, you can achieve a harmonious blend without overpowering the oil.

Advertisement
[bulkimporter_image id=’14’]

Experimenting With Different Strains

When it comes to making oil in the magic butter maker, experimenting with different strains can have a significant impact on the final product. The effects of strain variation can be observed in the taste and aroma differences of the oils produced.

Effects of Strain Variation

To get the best results, you should try using different strains of cannabis when making oil in the magic butter maker. The effects of strain selection can have a significant impact on the medicinal properties of the final product. Here is a list of key factors to consider:

  1. Cannabinoid profile: Different strains contain varying levels of cannabinoids such as THC and CBD, which have distinct therapeutic effects. Experimenting with different strains allows you to tailor the oil’s potency and desired effects.

  2. Terpene composition: Terpenes are aromatic compounds that contribute to the unique flavors and aromas of cannabis. They also play a role in the entourage effect, enhancing the therapeutic properties of cannabinoids. Choosing strains with specific terpene profiles can enhance the oil’s medicinal benefits.

  3. Indica vs. Sativa: Indica strains generally offer more relaxing and sedating effects, while Sativa strains tend to be more energizing and uplifting. Selecting strains based on their indica/sativa classification can help achieve desired effects.

  4. Personal preference: Each individual may respond differently to different strains. Experimenting with various strains allows you to find the one that best suits your needs and preferences.

Taste and Aroma Differences

Have you noticed the difference in taste and aroma between different strains of cannabis? It’s fascinating how each strain offers a unique sensory experience. When it comes to enhancing the flavor and preserving the aroma of cannabis, understanding strain variation is crucial. Let’s take a closer look at the differences in taste and aroma between various strains:

Strain Taste Aroma
Sativa Citrus, earthy Sweet, fruity
Indica Sweet, spicy Musky, herbal
Hybrid Floral, piney Earthy, skunky

As you can see from the table, different strains have distinct taste profiles and aromas. Sativa strains often have citrus or earthy flavors, accompanied by sweet or fruity aromas. Indicas tend to offer sweet and spicy tastes, along with musky or herbal scents. Hybrids can have a mix of floral and piney flavors, with earthy or skunky aromas.

Advertisement

Understanding these differences allows us to choose strains that complement our preferences when making cannabis oil in the Magic Butter Maker. By selecting strains with desired tastes and aromas, we can create infused oils that enhance the overall flavor and preserve the delightful scents we enjoy.

Now that we understand the importance of strain variation in enhancing the flavor and preserving the aroma of cannabis oil, let’s move on to troubleshooting common issues that may arise during the oil-making process.

[bulkimporter_image id=’15’]

Troubleshooting Common Issues

If the machine is not working properly, you can try troubleshooting common issues by checking the power connection and cleaning the components.

Advertisement

Troubleshooting techniques can help identify and resolve problems that may arise during the oil making process in the Magic Butter Maker. Here are some common issues you may encounter and how to address them:

  1. Machine not turning on: Ensure that the power cord is securely plugged into a functioning outlet. Check if the power switch is turned on. If the machine still does not turn on, try using a different power outlet or contact customer support.

  2. Uneven heating: If you notice that the oil is not heating evenly, make sure that the heating plate is clean and free from any residue. Also, check that the temperature settings are correctly adjusted. If the issue persists, consider recalibrating the temperature controls or contacting the manufacturer for assistance.

  3. Leaking or overflowing: If the Magic Butter Maker is leaking or overflowing, it could be due to overfilling the machine or a faulty seal. Make sure to follow the recommended maximum fill line and ensure that the lid is properly sealed. If the problem continues, replace the seal or contact customer support.

  4. Strange odors or tastes: If your oil has an unusual odor or taste, it could be due to residue buildup or improper cleaning. Thoroughly clean all components of the machine, including the filter and heating plate, to remove any residue that may affect the flavor.

[bulkimporter_image id=’16’]

Cleaning and Maintenance of the Magic Butter Maker

Now that we have discussed troubleshooting common issues with the Magic Butter Maker, it is important to understand the cleaning and maintenance procedures for this device. Proper cleaning techniques and a regular maintenance schedule are crucial to ensure the longevity and efficiency of the machine.

To clean the Magic Butter Maker, start by unplugging it and allowing it to cool down. Gently remove any residual oil or butter from the machine using a soft cloth or paper towel. For more stubborn residue, you can use warm soapy water and a non-abrasive sponge. Avoid using harsh chemicals or abrasive cleaning agents as they may damage the machine.

Advertisement

Additionally, it is recommended to clean the filter bag after each use. Rinse it thoroughly with warm water and mild soap, ensuring all residue is removed. Allow it to air dry before storing it.

As for maintenance, it is essential to follow the manufacturer’s guidelines. This may include regular lubrication of moving parts, checking and tightening any loose screws or connections, and inspecting the power cord for any signs of wear or damage.

Frequently Asked Questions

Can I Use Any Type of Oil in the Magic Butter Maker?

Yes, you can use alternative oils in the Magic Butter Maker. However, it’s important to consider potential drawbacks such as altered taste and consistency. Experiment with different oils to find the best results for your desired outcome.

How Long Does the Decarboxylation Process Take?

The decarboxylation process takes around 45-60 minutes at an optimal temperature of 240°F. It’s crucial to monitor the time and temperature accurately to ensure the desired level of activation and potency.

Can I Infuse the Oil With Multiple Herbs and Spices at Once?

Yes, I can infuse the oil with multiple herbs and spices at once in the Magic Butter Maker. This allows me to maximize the flavor profiles and create a more complex and delicious infused oil.

Advertisement

How Do I Know When the Extraction Process Is Complete?

To check the potency of the oil and ensure the extraction process is complete, I recommend using a potency checker or a testing kit. Troubleshoot common issues like low potency or incomplete extraction for better results.

How Often Should I Clean the Magic Butter Maker?

I clean my Magic Butter Maker after each use to ensure optimal performance. The best cleaning method involves disassembling the machine, soaking the parts in warm soapy water, and scrubbing away any residue.

Conclusion

In conclusion, after thoroughly investigating the theory of making oil in the Magic Butter Maker, I can confidently say that it is a precise and scientific process.

By carefully selecting ingredients, preparing the machine, decarboxylating cannabis, infusing the oil with herbs and spices, and setting the time and temperature, one can achieve a flavorful and aromatic oil.

It is essential to experiment with different strains to find the perfect combination of flavors. Additionally, troubleshooting common issues and practicing regular cleaning and maintenance will ensure optimal results.

Advertisement
Continue Reading
Advertisement

Butter Tips and Tricks

Butter Hacks: 2/3 Cup Butter Is How Many Tablespoons?

Published

on

By

converting butter measurements easily

If you’ve ever wondered, 2/3 cup of butter equals around 10.67 tablespoons. This handy conversion guarantees your recipes turn out just right.

Key Takeaways

  • 2/3 cup of butter equals 10.67 tablespoons.
  • Useful for recipes specifying butter in tablespoons.
  • Ensures precise measurements in cooking.
  • Simplifies adjusting butter quantities.
  • Essential for accurate recipe results.

The Full Conversion Chart

Exploring the entire conversion chart for butter measurements can simplify your cooking endeavors. Understanding the different measurements for butter, such as blocks, sticks, cups, tablespoons, and weight in grams, allows you to easily adapt recipes to suit your needs.

For example, knowing that a block of butter weighs 5.33 ounces and that this is equivalent to 2.67 ounces in stick form can be incredibly helpful when following a recipe that specifies one form over the other.

Furthermore, realizing that 1/6 pound of butter is equal to one cup, or that one tablespoon of butter is approximately 80 milliliters, enables you to make precise adjustments based on what measuring tools you have available.

This detailed chart provides you with the flexibility to confidently experiment in the kitchen, ensuring that your dishes turn out just right every time. Whether you’re baking, sautéing, or simply spreading butter on your toast, having a solid grasp on these conversions will surely enhance your culinary skills.

How Much Is 1 Stick?

price of a single stick

To accurately measure butter, understanding the quantity in 1 stick is important for following recipes effectively. One stick of butter equals 8 tablespoons, approximately 4 ounces or 113 grams in weight, and fills half a cup. When working with recipes that call for butter, this information is vital for precise measurements.

Butter sticks are conveniently marked with tablespoon measurements, simplifying the process of cutting the right amount. By knowing how much butter is in 1 stick, you can easily adapt recipes to suit your needs without any guesswork.

Advertisement

Whether you’re baking a batch of cookies or whipping up a savory sauce, having this knowledge at your fingertips guarantees your dishes turn out just right every time. So next time you reach for a stick of butter, remember these measurements to ensure cooking or baking success.

Measuring Butter From Sticks

butter measurement using sticks

When measuring butter from sticks, make certain you understand that each stick is equivalent to 8 tablespoons or 1/2 cup. This means that if a recipe calls for 2/3 cup of butter, you’d need 1 stick plus 2 and 2/3 tablespoons of butter. Understanding this conversion is essential for accurately measuring butter in various recipes.

Measuring butter from sticks is a convenient way to portion out the right amount for your cooking or baking needs. By knowing that one stick equals 8 tablespoons, you can easily adjust the quantity of butter required for a recipe.

Whether you’re using butter in cups, tablespoons, or sticks, being able to convert between these measurements guarantees that your dishes turn out just right.

Next time you reach for a stick of butter, remember that it contains 8 tablespoons or 1/2 cup. This knowledge will simplify your cooking process and help you achieve consistent results in the kitchen.

Butter in Tablespoons (Tbsp.)

butter measurement in tablespoons

When measuring butter in tablespoons (Tbsp.), it’s essential to know that 2/3 cup of butter is equivalent to 10 and 2/3 tablespoons. Understanding this butter conversion can simplify your cooking and baking experience.

Here are a few key points to keep in mind:

Advertisement
  • Converting cups to tablespoons: To convert 2/3 cup of butter to tablespoons, multiply 2/3 by 16 (since 1 cup equals 16 tablespoons).
  • Precise measurement: The calculation results in 10.67 tablespoons, which can be rounded to 10 and 2/3 tablespoons. This accuracy is vital for achieving consistent results in your recipes.
  • Convenience in recipes: Knowing the butter measurements in tablespoons can be handy when a recipe specifies butter in this unit rather than cups, making it easier to follow instructions accurately.

Mastering butter measurements in tablespoons allows you to confidently navigate various recipes and secures your dishes turn out just right.

Butter Vs. Margarine Conversion

dairy debate butter or margarine

For a straightforward butter versus margarine conversion comparison, consider the differences in teaspoons and tablespoons.

ButterMargarine
1 Teaspoon1 Teaspoon
1 Tablespoon1 Tablespoon
1/4 Cup1/4 Cup

When substituting butter for margarine in recipes, bear in mind the conversion rate between the two. While both butter and margarine serve as fats in baking and cooking, they have slightly different compositions due to their ingredients. If a recipe calls for margarine but you prefer to use butter, a simple swap can be made using the table above. Remember that the water content in butter is higher than in margarine, which can affect the final texture of your dish. Experimenting with different ratios based on the conversion table can help you achieve the desired result.

Olive Oil Conversion

cooking with olive oil

To convert olive oil measurements effectively in your recipes, remember the following equivalences:

  • 1/4 Cup of olive oil is equivalent to 1/4 Cup of butter/margarine.
  • 1/4 Cup + 2 Tablespoons of olive oil is equal to 1/2 Cup of butter/margarine.
  • 1/2 Cup of olive oil is the same as 1/2 Cup + 1 Tablespoon of butter/margarine.

When substituting olive oil for butter or margarine in your recipes, keep these conversions in mind to guarantee your dish turns out just right. Whether you’re aiming for a healthier option or simply prefer the taste of olive oil, knowing how to make these conversions can make a significant difference in your cooking.

Next time you reach for olive oil instead of butter, confidently adjust your measurements using these simple equivalences.

Healthy Alternative: Olive Oil

heart healthy cooking with olives

Looking to make healthier choices in your cooking? Olive oil can be a great alternative to butter, providing a higher content of monounsaturated fats.

Benefits of Olive Oil

Consider incorporating olive oil into your cooking routine as a healthier alternative to butter, thanks to its rich content of monounsaturated fats. Substituting butter with olive oil not only reduces saturated fat intake but also maintains a similar texture and flavor profile in your dishes.

Here are some benefits of using olive oil:

  • Healthier Fat Option: Olive oil is packed with monounsaturated fats, which are considered heart-healthy fats that can help lower bad cholesterol levels.
  • Versatility in Cooking: From baking to sautéing and creating flavorful dressings, olive oil proves to be a versatile ingredient suitable for various cooking methods.
  • Unique Flavor Profile: Unlike butter, olive oil adds a distinct taste to your dishes, enhancing the overall flavor experience while offering a healthier alternative.

Incorporating olive oil into your daily cooking not only brings health benefits but also contributes to a more balanced and flavorful diet.

Cooking With Olive Oil

Enhance your cooking routine by incorporating olive oil as a healthier alternative to butter in various dishes. Olive oil offers a distinct flavor profile that can elevate the taste of your meals while providing several health benefits. Rich in monounsaturated fats, olive oil is considered heart-healthy and can help lower bad cholesterol levels.

Advertisement

When cooking with olive oil, you have the flexibility to use it in different methods such as sautéing, roasting, and making salad dressings. This versatility makes it a great choice for a wide range of recipes. By substituting butter with olive oil, you can reduce your saturated fat intake without compromising on flavor.

Next time you’re in the kitchen, consider reaching for olive oil instead of butter. Not only will you be making a healthier choice, but you’ll also be adding a delicious twist to your favorite dishes. Experiment with olive oil in your cooking and discover the wonderful benefits it can bring to your meals.

Contact & Copyright Information

contact and copyright details

For more details on butter and olive oil conversions, contact Monadnock Oil and Vinegar, LLC at their Dublin branch by dialing 603-563-7066 or at their Amherst branch at 603-589-9954.

If you prefer email correspondence, you can reach them at [emailprotected].

Remember that all content related to butter and olive oil conversions is protected by copyright owned by Monadnock Oil and Vinegar, LLC. Reproduction rights are reserved from 2015 to 2024, and any unauthorized use is strictly prohibited.

If you intend to use or refer to their content, make sure you have the appropriate permissions to avoid any copyright violations.

Advertisement

Frequently Asked Questions

How Many Tablespoons Is 2/3 Cup in a Stick of Butter?

To know how many tablespoons are in 2/3 cup of butter in a stick, remember it’s around 10 2/3 tablespoons or about 1 stick plus 2 tablespoons. This helps you accurately measure butter for recipes.

Is 1 Stick of Butter the Same as 1 2 Cup?

Yes, 1 stick of butter is equal to 1/2 cup. That means a stick of butter contains 8 tablespoons. Understanding these measurements can make your cooking and baking experiences smoother and more precise.

How Many Tablespoons Is a Full Cup of Butter?

To measure a full cup of butter, you’d need 16 tablespoons. That’s the scoop for your baking adventures. Remember this handy conversion to make your kitchen creations a piece of cake!

How Much Is 1 Cup of Butter in Stick Butter?

To convert 1 cup of butter to sticks, you need 2 sticks. For tablespoons, that’s 16 tablespoons. Knowing these conversions helps in precise measuring for recipes. It’s essential for successful baking and cooking.

Conclusion

Remember, when it comes to butter hacks, knowing how to convert measurements can make all the difference in your cooking.

Advertisement

As the saying goes, ‘A little butter can make everything better.’

So next time you’re in the kitchen and wondering how many tablespoons are in 2/3 cup of butter, you’ll be prepared to whip up something delicious with ease.

Happy cooking!

Continue Reading

Butter Tips and Tricks

How Many Sticks of Butter in 1 Cup: A Step-by-Step Guide

Published

on

By

An image showing a neatly arranged stack of 10 tablespoons of butter, each tablespoon represented by a smooth, rectangular slab with rounded edges, resembling traditional stick-shaped butter

Ever wondered how many sticks of butter are in one cup? Well, I have the answer for you!

Picture this: you’re in the middle of baking your favorite recipe and suddenly realize you’re out of butter. Panic sets in as you scramble to figure out the conversion from cups to sticks. But fear not!

In this article, I’ll break it down for you, providing all the information you need to know about the butter-to-cup ratio and how to make your baking adventures a breeze.

Key Takeaways

  • 1 cup of butter is equal to 2 sticks or 16 tablespoons.
  • Converting butter measurements from cups to sticks or vice versa is crucial for accurate recipe adjustments.
  • Different brands may have varying measurements for butter, so it’s important to be aware of equivalents.
  • Using the measurement markings on the butter wrapper allows for precise cutting of fractional amounts.
[bulkimporter_image id=’2′]

Understanding the Butter-to-Cup Ratio

1 cup of butter is equal to 2 sticks. When it comes to converting butter measurements, it’s important to understand the ratios.

If a recipe calls for tablespoons of butter, 1 stick is equivalent to 8 tablespoons. So, if you need 1 cup of butter, you’ll need 16 tablespoons or 2 sticks.

It’s also important to note the difference between salted and unsalted butter. Salted butter contains added salt, while unsalted butter does not. This can affect the taste and overall flavor of your dish.

When a recipe calls for unsalted butter, it’s best to stick to that recommendation to have better control over the amount of salt in the recipe. However, if you only have salted butter on hand, you can reduce the amount of added salt in the recipe.

[bulkimporter_image id=’3′]

Converting Butter Measurements: Cups to Sticks

When it comes to baking, understanding the butter cup to stick ratio is crucial. Knowing how many sticks of butter make up one cup can make or break a recipe.

In addition to the ratio, having an accurate conversion method from cups to sticks is essential for precise measurements.

Lastly, it’s important to familiarize oneself with common butter measurements to ensure successful baking endeavors.

Butter Cup to Stick Ratio

To determine the ratio of sticks of butter to cups, we can use this conversion chart. Understanding butter measurements is essential for baking and cooking. Converting butter ratios is a common task in the kitchen.

The standard stick of butter in the United States weighs 1/2 cup or 8 tablespoons. Therefore, if a recipe calls for 1 cup of butter, you will need 2 sticks. If the recipe calls for 1/2 cup of butter, you will need 1 stick.

It’s important to note that butter measurements can vary by country, so always consult a reliable conversion chart if you’re working with international recipes. By knowing the butter cup to stick ratio, you can confidently adapt recipes to suit your needs.

Accurate Conversion Method

The most accurate way to convert measurements is by consulting a reliable conversion chart. When it comes to measuring butter, it can be tricky since it often comes in sticks or cups. Here are some tips to help you accurately measure butter:

  1. Use a conversion chart: This will give you the exact measurement equivalents for butter, whether it’s in sticks or cups.
  2. Soften the butter: If a recipe calls for melted butter, measure it in its solid form and then melt it. This ensures accurate measurements.
  3. Use a kitchen scale: Weighing the butter can give you precise measurements, especially when dealing with small amounts.
  4. Know the standard measurements: One stick of butter is equal to 1/2 cup or 8 tablespoons. A cup of butter, on the other hand, is equal to 2 sticks or 16 tablespoons.

Common Butter Measurements?

Knowing the equivalents for different measurements of butter, such as tablespoons and sticks, can be helpful when following recipes. It ensures that you are adding the right amount of butter, which can greatly impact the outcome of your dish. Here are some common butter measurement equivalents to keep in mind:

Measurement Equivalent
1 stick 1/2 cup (8 tablespoons)
1/2 stick 1/4 cup (4 tablespoons)
1/4 stick 1/8 cup (2 tablespoons)
1 tablespoon 1/16 cup (1/2 stick)

When measuring butter, it’s important to be accurate. Use a kitchen scale for precise measurements, especially if the recipe calls for weight measurements. If you don’t have a scale, use a butter dish with marked measurements. Softened butter should be leveled off with a knife. When using tablespoons, make sure to fill them completely and level off the excess with a straight edge. These tips will help you measure butter accurately and achieve the best results in your recipes.

[bulkimporter_image id=’4′]

The Standard Size of a Stick of Butter

A stick of butter is typically equal to 1/2 cup. Understanding butter packaging and different butter measurements in other countries can be confusing.

Here are some key points to help you navigate the world of butter measurements:

  1. In the United States, butter is commonly sold in sticks, with each stick weighing 1/4 pound or 1/2 cup. This makes it easy to measure and use in recipes.
  2. In some European countries, butter is sold in blocks or tubs, with measurements listed in grams or kilograms. It’s important to convert these measurements to cups or ounces for American recipes.
  3. In Australia, butter is usually sold in 250g or 500g blocks, which can be converted to cups or ounces using conversion charts.
  4. When traveling or using international recipes, it’s helpful to familiarize yourself with the local butter measurements to ensure accurate results.
[bulkimporter_image id=’5′]

How Much Butter Is in 1 Cup

When it comes to baking, understanding the butter to cup ratio is crucial. Knowing how much butter is in 1 cup can help ensure that your recipes turn out perfectly.

Additionally, learning how to convert butter measurements can be helpful when using recipes from different countries or regions.

Lastly, if you’re looking for butter substitutes in baking, there are several options available that can still provide the moisture and richness that butter brings to baked goods.

Butter to Cup Ratio

To measure the butter to cup ratio, you can easily convert sticks of butter to cups. Understanding butter density is key to accurately converting butter measurements from tablespoons to cups. Here’s a step-by-step guide:

  1. Start by knowing that one stick of butter is equal to 1/2 cup. This is a common measurement used in many recipes.
  2. If your recipe calls for a different amount of butter in cups, you can use this conversion: 1 cup of butter is equivalent to 2 sticks or 16 tablespoons.
  3. To convert tablespoons to cups, divide the number of tablespoons by 16. For example, if you have 8 tablespoons of butter, it would be equal to 1/2 cup.
  4. Remember, when measuring butter, it’s important to consider its density. Softened or melted butter may take up less space compared to cold or solid butter.

Converting Butter Measurements

Understanding the conversion of butter measurements can help me confidently adjust my recipe. When it comes to baking or cooking, accuracy is key. Knowing the equivalents of butter can save me time and ensure the perfect outcome.

One cup of butter is equal to two sticks or 16 tablespoons. This information is crucial when a recipe calls for a specific amount of butter in cups, but I only have sticks. Conversely, if a recipe specifies butter in sticks, I can easily convert it to cups by dividing the number of sticks by two.

To measure butter accurately, I can use a kitchen scale or the markings on the butter wrapper. Softened butter should be packed into measuring cups, while solid butter should be cut according to the desired quantity.

With these tips, I can confidently use the correct amount of butter in my recipes.

Butter Substitutes in Baking

If you’re looking to substitute butter in your baking, there are various options available that can still yield delicious results. Here are four butter alternatives that not only provide a healthier option but also offer unique flavors and health benefits:

  1. Coconut oil: This versatile alternative adds a subtle tropical taste to your baked goods and is rich in healthy fats, promoting heart health.
  2. Avocado: Creamy and nutrient-dense, mashed avocado can replace butter in certain recipes, providing a boost of vitamins and minerals.
  3. Greek yogurt: With its tangy flavor and creamy texture, Greek yogurt adds moisture and protein to your baked treats while reducing the fat content.
  4. Applesauce: A natural sweetener and fat substitute, applesauce adds moisture and tenderness to your baked goods, making them lighter and healthier.
[bulkimporter_image id=’6′]

Butter Conversion: Cups to Sticks Simplified

You can easily convert 1 cup of butter to sticks by knowing that it equals 2 sticks.

When it comes to butter storage, it is important to consider the packaging. Butter is typically sold in wrapped blocks or sticks. The packaging not only protects the butter from external factors like air and light but also keeps it fresh for longer periods.

The most common packaging for butter is a waxed paper or foil wrapper. This type of packaging helps to maintain the butter’s quality and prevent it from spoiling. It is recommended to store butter in its original packaging or transfer it to an airtight container to maintain its freshness.

Proper butter storage ensures that it remains usable for a longer time and retains its flavor and texture.

[bulkimporter_image id=’7′]

Calculating Sticks of Butter for Your Recipe

To calculate the number of sticks needed for your recipe, it’s helpful to divide the total amount of butter by the conversion factor of 2. This will give you the accurate measurement in sticks.

Here are some tips for understanding butter measurements and achieving accurate conversions:

  1. Always use the conversion factor of 2 when converting cups to sticks of butter.
  2. Make sure to measure butter in its solid form for precise results.
  3. If your recipe calls for a fraction of a stick, you can easily cut it using the measurement markings on the wrapper.
  4. Remember that butter is sold in different sizes, so check the weight or volume on the packaging to ensure accuracy.

Now that you understand how to calculate the number of sticks needed for your recipe, let’s move on to some tips for measuring butter in cups.

[bulkimporter_image id=’8′]

Tips for Measuring Butter in Cups

When measuring butter in cups, it’s important to remember that different brands may have different measurements on their packaging. To ensure accuracy in your recipes, it’s helpful to be aware of butter measurement equivalents.

One cup of butter is equal to 2 sticks or 16 tablespoons. However, some brands of butter may label their packaging differently, so it’s always a good idea to double-check.

If you don’t have measuring cups or sticks of butter, there are alternative methods for measuring butter. One option is to use a kitchen scale to measure the desired amount in grams or ounces. Another option is to use the markings on the butter wrapper itself. Most butter sticks have measurements marked on the packaging, allowing you to easily cut off the desired amount.

[bulkimporter_image id=’9′]

Butter Conversions Made Easy: Cups to Sticks

When it comes to baking or cooking with butter, it’s important to have a clear understanding of the measurement equivalents. Knowing how many sticks of butter are in a cup can save time and ensure accurate results.

In this discussion, we will explore simple conversion techniques for butter measurements, providing you with the knowledge and confidence to easily adapt recipes to your preferred measurements.

Butter Measurement Equivalents

You can easily convert 1 cup of butter into sticks by dividing it into 2 sticks. This is a common measurement used in baking and cooking.

When it comes to understanding butter ratios and ensuring accurate measuring, here are some tips to keep in mind:

  1. Use a liquid measuring cup: Butter is a solid, but using a liquid measuring cup allows for more precise measurements.
  2. Soften the butter: To accurately measure butter, it should be softened to room temperature. This ensures that it is easily spreadable and can be measured accurately.
  3. Use a knife or bench scraper: When measuring butter, use a knife or bench scraper to level off the top. This will provide a consistent and accurate measurement.
  4. Pack it tightly: If a recipe calls for packed butter, make sure to tightly pack the butter into the measuring cup. This will give you the correct amount needed for the recipe.

Simple Conversion Techniques

To simplify conversions, try using a kitchen scale for more precise measurements. When it comes to baking, accurate measurements are crucial for the success of your recipe. Butter measurement equivalents in recipes can sometimes be confusing, especially when converting between different units.

Converting butter measurements for baking can be made easier by using a kitchen scale. By weighing the butter, you can accurately determine the amount needed for your recipe. For example, if a recipe calls for 1 cup of butter, you can weigh it on the scale to get the precise measurement in grams or ounces. This eliminates any guesswork and ensures that your baked goods turn out just right.

Now, let’s move on to how to substitute sticks of butter for cups.

[bulkimporter_image id=’10’]

How to Substitute Sticks of Butter for Cups

If you’re substituting sticks of butter for cups, it’s important to know that one stick of butter is equivalent to 1/2 cup. This knowledge is crucial for measuring accuracy in recipes.

Here are four key points to keep in mind when substituting sticks of butter for cups:

  1. Butter substitutes: In case you don’t have sticks of butter on hand, you can use other ingredients as substitutes. Options include margarine, shortening, coconut oil, or even applesauce for a healthier alternative.
  2. Measuring accuracy: When measuring butter in stick form, it’s essential to accurately cut the stick to the correct length. Each stick is typically 8 tablespoons or 1/2 cup, so make sure to measure it precisely.
  3. Conversions: If a recipe calls for a specific amount of cups, you may need to convert it to sticks of butter. Remember that two sticks of butter are equal to 1 cup, so adjust accordingly.
  4. Recipe adjustments: When substituting sticks of butter for cups, consider the impact on your recipe. Butter provides moisture and flavor, so using different substitutes may affect the final texture and taste.
[bulkimporter_image id=’11’]

Common Butter Measurements: Cups Vs Sticks

When baking, it’s helpful to know the difference between measuring butter in cups versus sticks. Understanding butter measurements and being able to convert between cups and sticks can make a big difference in the outcome of your baked goods. Here’s a simple table to help you understand the conversion:

Cups Sticks Grams
1 0.5 113
2 1 227
3 1.5 340

For example, if a recipe calls for 1 cup of butter, you can use 2 sticks or 227 grams. Similarly, if a recipe calls for 3 sticks of butter, you can use 1.5 cups or 340 grams. Having this understanding and being able to convert between cups and sticks will ensure that your baked goods turn out perfectly every time.

Frequently Asked Questions

Can I Use Margarine Instead of Butter When Measuring in Cups or Sticks?

Sure, you can use margarine instead of butter when measuring in cups or sticks. However, keep in mind that margarine has a different texture and flavor, so it may affect the outcome of your recipe. The butter vs margarine debate is a matter of personal preference.

How Much Does a Stick of Butter Weigh in Ounces?

A stick of butter weighs 4 ounces. Converting butter measurements can be tricky, but knowing that a stick of butter is 1/2 cup or 8 tablespoons helps in cooking and baking.

Can I Use Salted Butter Instead of Unsalted Butter in a Recipe That Calls for Measuring in Cups?

Yes, you can use salted butter instead of unsalted butter in a recipe that calls for measuring in cups. Just remember to adjust the amount of salt in the recipe accordingly.

Are There Any Special Considerations When Measuring Butter in High-Altitude Baking?

When baking at high altitudes, there are special considerations for measuring butter. The altitude affects the air pressure, which can impact the texture and rising of baked goods. Adjustments may be needed to ensure successful results.

Is There a Difference in Measurement if the Butter Is Cold or at Room Temperature When Using Cups or Sticks?

When measuring butter, it’s important to note that the accuracy may vary depending on whether the butter is cold or at room temperature. This applies to both measuring cups and sticks.

Conclusion

In conclusion, understanding the butter-to-cup ratio is crucial when it comes to baking. Converting measurements from cups to sticks can be simplified by knowing that one cup of butter is equal to two sticks.

It is important to note that a standard stick of butter typically measures 1/2 cup or 8 tablespoons. When measuring butter in cups, it is recommended to use precise measuring tools to ensure accurate results.

Remember, as the saying goes, “Measure twice, bake once!”

Continue Reading

Butter Tips and Tricks

How Many Cups of Butter Equal a Stick: A Simple Guide

Published

on

By

An image showing a neatly arranged cup filled with liquid butter, surrounded by a stack of butter sticks, one by one, gradually being poured into the cup until it reaches the brim

Ever thought about how many cups of butter are in one stick? Well, I have the answer for you! Deciphering butter measurements can be tricky, but don’t worry, I’m here to make it easier for you.

In this article, we’ll explore the standard stick of butter and how to convert it to cups. We’ll also delve into equivalents and measurements, as well as provide a handy butter conversion chart.

So, let’s dive in and demystify the world of butter measurements together!

Key Takeaways

  • One stick of butter is equal to 1/2 cup or 8 tablespoons.
  • Butter can be measured in grams or ounces for more precise measurements.
  • Conversion charts and kitchen scales are useful tools for accurate measurement conversion.
  • Knowing the equivalents (e.g., 1 stick = 1/2 cup, 2 sticks = 1 cup) helps measure butter accurately in recipes.

[bulkimporter_image id=’2′]

Understanding Butter Measurements

There’s no need to worry about how many cups of butter are in a stick because it’s a common measurement used in recipes. When it comes to accurately measuring butter, it’s important to understand the conversion from sticks to cups.

One stick of butter is equal to 1/2 cup or 8 tablespoons. This measurement is widely accepted and used in baking and cooking. However, it’s good to know that butter can also be measured in grams or ounces for more precise measurements.

To convert butter measurements for recipes, you can use a kitchen scale or refer to conversion charts that provide the equivalent measurements. Understanding these conversions ensures that you can accurately measure and use butter in your favorite recipes.

Advertisement

Now, let’s dive into the details of the standard stick of butter.

[bulkimporter_image id=’3′]

The Standard Stick of Butter

To determine the amount of butter in a standard stick, you’ll need to understand the conversion ratio. Understanding butter packaging and different butter measurements is crucial to accurately measuring ingredients in recipes. Here are some key points to keep in mind:

  • A standard stick of butter in the United States weighs 1/2 cup or 8 tablespoons.
  • The measurements on butter packaging are typically marked in tablespoons and cups.
  • European butter is often sold in 250-gram blocks, which is approximately 1 cup or 2 sticks of butter.
  • Some recipes may call for butter in ounces or grams, so it’s important to have a kitchen scale for precise measurements.
  • It’s also helpful to know that butter comes in different fat percentages, such as salted and unsalted.

[bulkimporter_image id=’4′]

Converting Sticks to Cups

When it comes to converting sticks to cups, it is important to understand the stick to cup ratio for accurate measurement conversion.

The stick to cup ratio is 1 stick of butter equals 1/2 cup. This means that if a recipe calls for 1 cup of butter, you will need 2 sticks.

Stick to Cup Ratio

The stick to cup ratio for butter is approximately 1/2 cup per stick. This ratio is important to know when it comes to baking and following recipes accurately.

Here are a few key points to keep in mind when it comes to butter measurements and baking conversions:

Advertisement

  • 1 stick of butter is equal to 1/2 cup or 8 tablespoons.
  • If a recipe calls for 1 cup of butter, you will need 2 sticks.
  • To convert tablespoons to cups, divide the number of tablespoons by 16.
  • It’s important to note that butter measurements can vary depending on the brand or type of butter you are using, so always check the packaging for accurate measurements.
  • When in doubt, it’s always a good idea to weigh your butter using a kitchen scale for precise measurements.

Knowing the stick to cup ratio and understanding butter measurements is essential for successful baking and achieving the desired results in your recipes.

Accurate Measurement Conversion

Remember, accurately converting measurements is crucial for achieving the desired results in your baking recipes.

When it comes to understanding butter measurements, it’s important to measure accurately to ensure your baked goods turn out just right.

Butter is often measured in sticks, and it’s helpful to know that one stick of butter is equal to 1/2 cup or 8 tablespoons.

This knowledge is especially handy when a recipe calls for a certain amount of cups and you only have sticks of butter on hand.

By measuring butter accurately, you can ensure that your recipes turn out perfectly every time.

Advertisement

Now that we understand how to measure butter correctly, let’s explore the equivalents and measurements for other common baking ingredients.

[bulkimporter_image id=’5′]

Equivalents and Measurements

You’ll need to know how many cups of butter are in a stick for accurate measurements. When it comes to butter measurement equivalents, it’s important to have the right conversions. Here are a few key measurements to keep in mind:

  • 1 stick of butter is equal to 1/2 cup
  • 1/2 stick of butter is equal to 1/4 cup
  • 2 sticks of butter is equal to 1 cup
  • 4 sticks of butter is equal to 2 cups
  • 8 sticks of butter is equal to 4 cups

Knowing these equivalents will help you measure butter accurately in your recipes.

Now that you have a good understanding of how many cups are in a stick of butter, let’s move on to the next section about how much butter is in a cup.

[bulkimporter_image id=’6′]

How Much Butter Is in a Cup

When it comes to baking or cooking, understanding the butter-to-cup ratio is crucial. Knowing how much butter is in a cup can make a huge difference in the outcome of your recipe.

In this discussion, we will explore the conversion of butter measurements and how to accurately measure the right amount of butter for your culinary endeavors.

Advertisement

Butter-To-Cup Ratio

To figure out the butter-to-cup ratio, divide the number of cups by the number of sticks. This ratio is essential when converting butter measurements or finding butter equivalents. Here are some important points to consider:

  • 1 stick of butter is equal to 1/2 cup.
  • 2 sticks of butter make 1 cup.
  • If a recipe calls for 1 cup of butter, you will need 2 sticks.
  • For 1/4 cup of butter, use half a stick.
  • To measure 1/3 cup of butter, you’ll need 5 and 1/3 tablespoons.

Understanding the butter-to-cup ratio allows for accurate measurements in recipes. Whether you’re baking cookies or making a savory dish, having the correct amount of butter is crucial for achieving the desired taste and texture.

Converting Butter Measurements?

Understanding how to convert butter measurements is essential for accurate recipe preparation. When it comes to converting butter measurements, there are a few common mistakes that people often make.

One of the most common mistakes is not knowing the correct conversion ratio. In the United States, butter is typically sold in sticks, with each stick weighing 1/2 cup or 8 tablespoons. However, in some recipes, butter may be measured in grams or ounces.

Another mistake people make is not properly measuring the butter. It is important to use a kitchen scale or measuring cups to ensure precise measurements.

Additionally, some recipes may call for melted butter, which can be measured differently than solid butter.

Advertisement

Understanding these conversions and avoiding these common mistakes will help ensure that your recipes turn out perfectly every time.

[bulkimporter_image id=’7′]

Measuring Butter for Baking

There’s no need to guess how many cups of butter are in a stick when measuring for baking. As someone who loves to bake, I have found that using the right tools for measuring butter is crucial for accurate results. Here are the best tools for measuring butter:

  • Measuring cups: These are the most common tools used for measuring butter. Make sure to use a dry measuring cup and pack the butter firmly for accurate measurements.

  • Kitchen scale: For precise measurements, a kitchen scale is the way to go. It allows you to measure the exact amount of butter required for your recipe.

  • Butter dish with markings: Some butter dishes come with markings that indicate the measurements. This makes it convenient to measure the required amount of butter directly from the dish.

  • Butter cutter: A butter cutter is a handy tool that helps you measure the butter by slicing it into tablespoons or teaspoons.

  • Butter wrappers: Butter wrappers often have measurements marked on them, making it easy to cut the butter into the desired amount.

By using these tools, you can ensure that your butter is measured accurately for your recipes.

Now, let’s move on to the next section where we will discuss a butter conversion chart.

[bulkimporter_image id=’8′]

Butter Conversion Chart

Now that we know how to measure butter for baking, let’s talk about butter conversion chart and how to convert butter for recipes.

Advertisement

It’s common to come across recipes that call for butter in different measurements, such as cups, tablespoons, or grams. To make things easier, there are some standard butter measurement equivalents that can be used for conversion.

For example, one stick of butter is equal to half a cup or 8 tablespoons. So if a recipe calls for 1 cup of butter, you would need 2 sticks or 16 tablespoons. It’s important to have these conversions handy to ensure you’re using the correct amount of butter in your recipes.

Now that we understand the butter conversion chart, let’s move on to some tips for measuring butter accurately.

[bulkimporter_image id=’9′]

Tips for Measuring Butter

To accurately measure butter, it’s helpful to soften it beforehand. Softening butter makes it easier to measure and ensures accurate results in your cooking. Here are some tips for measuring butter for cooking:

  • Take the butter out of the refrigerator and let it sit at room temperature for about 30 minutes before measuring.
  • Use a sharp knife to cut the butter into tablespoon-sized portions.
  • Fill a measuring cup with water and place the cut butter into the cup, submerging it completely.
  • Remove the butter from the water and drain any excess water.
  • Measure the butter in tablespoons or cups, depending on your recipe’s requirements.

[bulkimporter_image id=’10’]

Common Butter Measurement Mistakes

A common mistake when measuring butter is not using a sharp knife to cut it into proper portions. Accurately measuring butter is crucial in baking to achieve the desired results.

When butter is too soft or melted, it can throw off the texture and consistency of your baked goods. To measure butter accurately, start by using a sharp knife to cut the stick into tablespoon-sized portions. Then, use a measuring spoon to scoop out the desired amount.

Advertisement

It’s important to level off the butter with the back of a knife to ensure precise measurements. Another common mistake is eyeballing the amount of butter, which can lead to inconsistent results.

Frequently Asked Questions

Can I Use Margarine Instead of Butter in Baking Recipes?

I prefer using butter over margarine in baking recipes because it adds more flavor and richness. Margarine can affect the texture of baked goods, often making them softer and less tender. So, while margarine can be used as a substitute for butter in some recipes, it’s important to consider the impact on taste and texture.

How Can I Accurately Measure Butter Without Using a Scale?

When it comes to accurately measuring butter without a scale, it can be a bit tricky. But fear not! I’ve got you covered. Let me walk you through the process of converting butter measurements like a pro.

Can I Substitute Oil for Butter in a Recipe?

Substituting butter with oil in a recipe can have pros and cons. Oil can add moisture and make baked goods lighter, but it may also affect the taste and texture. The best oil substitutes for baking are vegetable oil, coconut oil, and olive oil.

How Much Butter Should I Use if the Recipe Calls for a Certain Number of Sticks?

When converting butter measurements, accurately measuring the amount of butter needed is crucial. If a recipe calls for a certain number of sticks, I can help you determine how much butter to use.

Advertisement

Can I Use Unsalted Butter Instead of Salted Butter in Baking Recipes?

Using unsalted butter for baking has its pros and cons. Pros include having more control over the saltiness of the recipe, while cons include potentially missing out on the flavor that salted butter provides.

Conclusion

In conclusion, understanding butter measurements is essential for successful baking. While a standard stick of butter is equivalent to 1/2 cup or 8 tablespoons, it’s important to note that this can vary depending on the brand or region.

To convert sticks to cups, simply divide the number of sticks by 2. Additionally, knowing that 1 cup of butter is equivalent to 2 sticks can help when following recipes.

By following a butter conversion chart and being mindful of common measurement mistakes, bakers can ensure accurate and delicious results.

Advertisement

Continue Reading

Trending