Connect with us

Recipes & Culinary Uses

Discover Who Makes Nutter Butter Cookies: A Guide

Published

on

An image showcasing a bustling factory floor, filled with nimble workers donned in white uniforms, expertly maneuvering large mixers and meticulously shaping golden-brown Nutter Butter cookies with trademark fork-tine imprints

As a fan of sugary delights, I’ve always been curious about the mastermind behind the delicious Nutter Butter cookies that never fail to satisfy my taste buds.

Well, my fellow cookie enthusiasts, prepare to have your curiosity satisfied. In this article, we will delve into the fascinating world of Nutter Butter cookies, exploring the history, ingredients, production process, and the people behind this irresistible snack.

So grab a glass of milk, sit back, and let’s unravel the mystery of who makes Nutter Butter cookies.

Key Takeaways

  • Nutter Butter Cookies were introduced by Nabisco in 1969 and have become a beloved treat worldwide.
  • The cookies are crafted to have a unique and delicious peanut butter flavor, which quickly grew in popularity.
  • The main ingredients for Nutter Butter Cookies are peanuts, flour, sugar, and butter, with a peanut butter filling and crumbly texture.
  • Nutter Butter Cookies have allergen concerns for those with peanut or gluten allergies, and strict protocols are followed to prevent cross-contamination during production.

The History of Nutter Butter Cookies

Nutter Butter cookies were first introduced in 1969 by Nabisco. They have since become a beloved treat for cookie enthusiasts around the world.

Advertisement

The origins of Nutter Butter cookies can be traced back to the desire for a unique and delicious peanut butter flavored cookie. The recipe was carefully crafted to ensure the perfect combination of peanut butter flavor and a crunchy texture.

The popularity of Nutter Butter cookies quickly grew as people discovered the irresistible taste and texture. The distinct shape of the cookie, resembling a peanut, further added to its appeal.

Today, Nutter Butter cookies continue to be a favorite snack for peanut butter lovers everywhere, and their popularity shows no signs of waning.

The Ingredients Used in Nutter Butter Cookies

When discussing the key ingredients used in Nutter Butter cookies, it is important to note the primary components that give these treats their distinct flavor and texture.

The main ingredients include peanuts, flour, sugar, and butter, which work together to create a rich and nutty taste.

Advertisement

Additionally, Nutter Butter cookies often contain unique additions such as peanut butter filling and a crumbly texture that adds to their overall appeal.

Lastly, when it comes to allergen concerns, Nutter Butter cookies may pose a risk for individuals with peanut or gluten allergies, as they contain both peanuts and wheat flour.

Key Cookie Ingredients

To make the delicious nutter butter cookies, you’ll need to gather a few key ingredients. Here are the essential components for creating these delectable treats:

  • Peanut Butter: A creamy and rich peanut butter is the star ingredient in nutter butter cookies. It provides a distinct nutty flavor and smooth texture.

  • Butter: Butter adds richness and helps create a tender cookie. Make sure to use unsalted butter for better control of the overall flavor.

  • Sugar: Granulated sugar is used to sweeten the cookies and gives them a delightful crispness.

  • Vanilla Extract: A small amount of vanilla extract enhances the flavor profile of the cookies, adding a subtle sweetness.

Once you have these key ingredients, you can begin the baking process. Mixing the dough, shaping it into the iconic peanut shape, and baking until golden brown will result in irresistible nutter butter cookies.

Enjoy!

Advertisement

Any Unique Additions

Adding a pinch of cinnamon or a sprinkle of sea salt can give these cookies a unique twist. When it comes to creating unique flavors and recipe variations, the possibilities are endless. For a burst of citrusy freshness, you can add some lemon zest to the cookie dough. If you’re craving something sweet with a kick, a dash of cayenne pepper can do the trick. For a subtle touch of sophistication, try folding in some finely chopped dark chocolate or adding a hint of espresso powder. Experimenting with different ingredients can elevate the taste and make your cookies stand out from the rest. So go ahead and get creative with your cookie recipes, and let your taste buds lead the way.

Now, let’s address the allergen concerns.

Allergen Concerns Addressed?

Are there any allergen concerns that need to be addressed? Absolutely.

When it comes to food products, allergen labeling and cross contamination risks are of utmost importance. As a consumer, it is crucial to have accurate and transparent information about potential allergens present in a product. Manufacturers must clearly label their products to ensure that individuals with allergies can make informed choices.

Cross contamination risks, on the other hand, refer to the unintentional transfer of allergens from one product to another during production or packaging. This can occur through shared equipment or facilities. To mitigate these risks, manufacturers must have stringent protocols in place to prevent cross contamination and ensure the safety of their products.

Advertisement

It is essential for consumers to be aware of these concerns and for manufacturers to prioritize allergen labeling and minimize cross contamination risks.

  • Accurate and transparent allergen labeling
  • Awareness of cross contamination risks
  • Clear communication of potential allergens
  • Strict protocols to prevent cross contamination

The Production Process of Nutter Butter Cookies

When it comes to the production process of Nutter Butter cookies, two key aspects to consider are the ingredients and recipe, as well as packaging and distribution.

The ingredients used in Nutter Butter cookies include peanut butter, sugar, flour, and various other additives. The recipe involves mixing these ingredients together, shaping the dough, and baking it to perfection.

Once the cookies are ready, they are packaged in individual packages or boxes and distributed to stores and consumers worldwide.

Ingredients and Recipe

To make nutter butter cookies, you’ll need peanut butter, sugar, butter, eggs, flour, baking soda, and vanilla extract.

First, preheat the oven to 350°F.

Advertisement

In a large mixing bowl, cream together the butter, sugar, and peanut butter until smooth.

Add the eggs one at a time, mixing well after each addition.

In a separate bowl, whisk together the flour and baking soda.

Gradually add the dry ingredients to the wet mixture, mixing until just combined.

Lastly, stir in the vanilla extract.

Advertisement

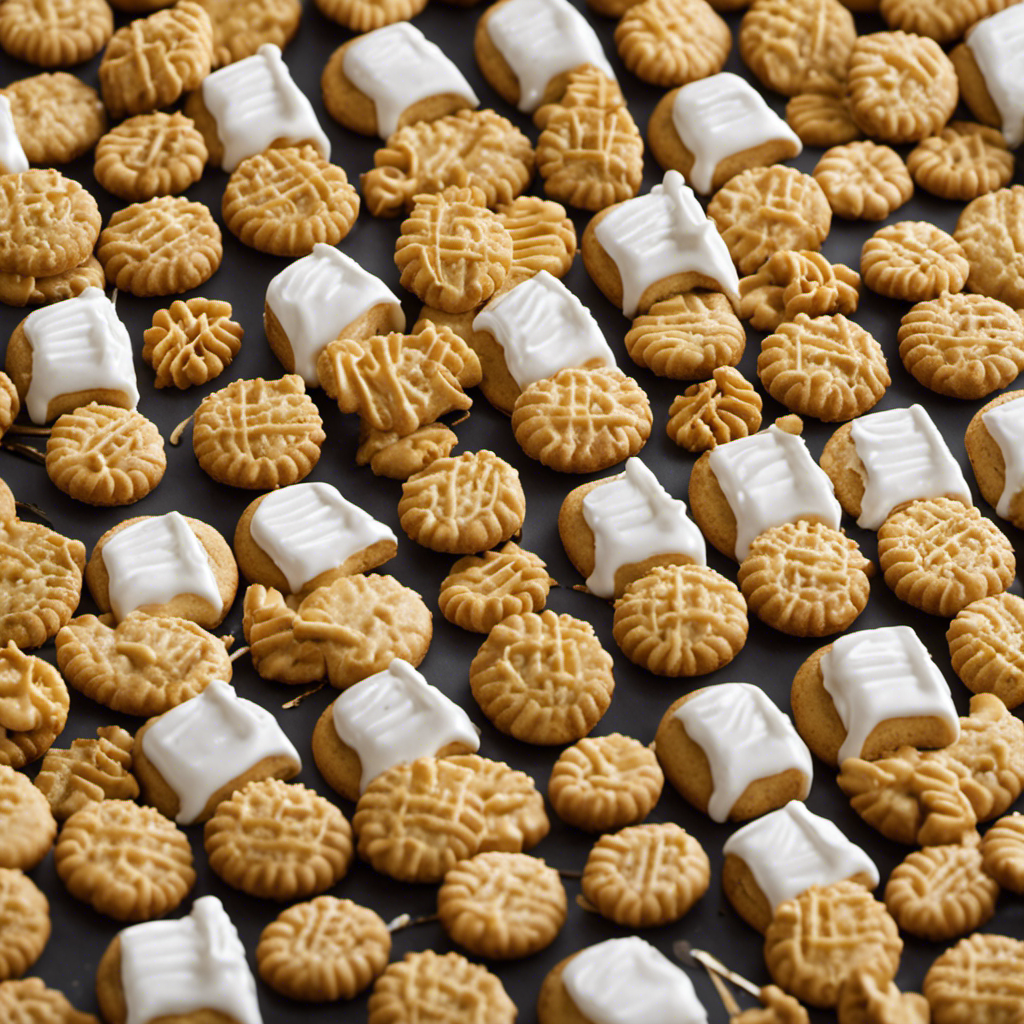
Drop spoonfuls of dough onto a lined baking sheet, and flatten each cookie with a fork, creating the signature crisscross pattern.

Bake for 10-12 minutes or until golden brown.

Let cool before enjoying.

  • Peanut butter provides protein and healthy fats.
  • Eggs add extra protein and help bind the ingredients together.
  • Vanilla extract adds flavor and aroma.
  • Different variations of nutter butter cookies can include adding chocolate chips, chopped nuts, or drizzling melted chocolate on top for added indulgence.

Packaging and Distribution

After carefully crafting the recipe and selecting the finest ingredients, the next step in the production of Nutter Butter cookies is packaging and distribution. As a key aspect of food safety and consumer protection, allergen labeling plays a vital role in the packaging design. To ensure transparency and assist individuals with allergies or dietary restrictions, our packaging prominently displays allergen information. This includes a clear and concise list of all potential allergens present in the product, such as peanuts, wheat, and soy. Additionally, our packaging design aims to capture attention and create a positive emotional response. Through vibrant colors, enticing images of the delicious cookies, and a user-friendly layout, we strive to engage and delight consumers from the moment they lay eyes on our product.

Column 1 Column 2 Column 3 Column 4
Allergen Peanuts Wheat Soy
Quantity Present Present Present
Labeling Prominent Prominent Prominent
Design Vibrant Enticing User-friendly

The Brand Behind Nutter Butter Cookies

The brand behind Nutter Butter cookies is known for its iconic peanut-shaped sandwich cookies. These delicious treats have been a favorite among cookie lovers for decades. But have you ever wondered about the origin of Nutter Butter cookies?

Well, let me enlighten you. Nutter Butter cookies were first introduced by Nabisco in 1969. They quickly gained popularity due to their unique shape and irresistible peanut butter flavor.

Advertisement

As for the nutritional value of Nutter Butter cookies, here are a few key points to consider:

  • Each serving of Nutter Butter cookies contains approximately 140 calories.
  • They are made with real peanut butter, which provides a good source of protein.
  • Nutter Butter cookies are also a decent source of iron and calcium.
  • However, it’s important to note that they are high in sugar and fat, so they should be enjoyed in moderation.

The People Involved in Making Nutter Butter Cookies

When you bite into a Nutter Butter cookie, you can taste the hard work and dedication of the people who craft these delicious treats. The manufacturing process of Nutter Butter cookies involves a team of skilled individuals who ensure that every cookie is made to perfection. Let’s take a closer look at the people involved in this process:

Role Responsibilities
Production Manager Oversees the entire manufacturing process
Machine Operators Operate the machinery that mixes and shapes the dough
Baking Technicians Monitor the baking process to achieve the perfect texture
Quality Control Inspect each cookie for consistency, taste, and appearance

From the production manager who oversees the process to the quality control team who ensures the cookies meet the brand’s high standards, each person plays a crucial role. Their expertise and attention to detail ensure that Nutter Butter cookies are consistently delicious and satisfying. The dedication of these individuals is what makes each cookie a true delight.

The Quality Control of Nutter Butter Cookies

You play a vital role in ensuring the consistency, taste, and appearance of each cookie as part of the quality control team for Nutter Butter cookies. Our quality control process is rigorous and meticulous, ensuring that every batch of cookies meets the highest standards.

Here are the testing procedures we follow:

  • Visual inspection: We carefully examine each cookie for any visual defects, such as cracks or blemishes.

  • Texture analysis: We use specialized equipment to measure the texture of the cookies, ensuring they have the perfect crunch and chewiness.

  • Taste testing: A panel of trained tasters evaluates the flavor profile of the cookies, ensuring they have the signature Nutter Butter taste.

  • Shelf life testing: We conduct tests to determine the longevity of the cookies, ensuring they remain fresh and delicious for an extended period.

The Distribution of Nutter Butter Cookies

To ensure that Nutter Butter cookies reach their destinations in a timely manner, our distribution team utilizes efficient logistics strategies.

Advertisement

We carefully analyze the availability and demand for these delicious treats to ensure that we can meet the needs of our customers. Nutter Butter cookies come in a variety of popular flavors and variations, including the classic peanut butter flavor, chocolate-covered, and even limited edition holiday flavors.

Our distribution process involves careful inventory management and coordination with our production team to ensure that we have enough cookies to meet the demand. We also work closely with our shipping partners to optimize routes and minimize delivery times.

The Packaging of Nutter Butter Cookies

Our packaging team carefully selects materials and designs to ensure that Nutter Butter cookies are protected and presented beautifully. The packaging design plays a crucial role in preserving the cookies’ freshness and enhancing their visual appeal. Our team takes sustainability measures seriously, striving to minimize the environmental impact of our packaging.

Here are some key elements of our packaging design:

  • We use sturdy and recyclable materials to protect the cookies during transportation and storage.
  • Our packaging incorporates innovative techniques such as air-tight seals and moisture barriers to maintain the cookies’ crisp texture.
  • Special attention is given to the design aesthetics, with vibrant colors and enticing imagery that grab the consumer’s attention.
  • We also prioritize the use of eco-friendly inks and materials, ensuring that our packaging is as sustainable as possible.

The Global Reach of Nutter Butter Cookies

When traveling abroad, it’s common to find Nutter Butter cookies in various countries around the world. The popularity of Nutter Butter cookies has reached far and wide, making it a popular choice among cookie enthusiasts globally.

These delicious treats have become a staple in many cultures, with their unique blend of peanut butter flavor and signature peanut shape. The cultural significance of Nutter Butter cookies cannot be understated, as they have become a symbol of indulgence and comfort food for people of all ages.

Advertisement

Whether enjoyed as a snack or incorporated into desserts, Nutter Butter cookies have managed to transcend borders and bring joy to millions of people worldwide. So, no matter where you find yourself, the chances are high that you’ll be able to savor the buttery goodness of Nutter Butter cookies.

Frequently Asked Questions

What Is the Nutritional Information of Nutter Butter Cookies?

The nutritional information of Nutter Butter Cookies includes calories, fat, carbohydrates, protein, and sugar content. Allergen information may vary, so it is important to check the packaging for specific details.

Are Nutter Butter Cookies Suitable for People With Allergies or Dietary Restrictions?

As someone with dietary restrictions, I understand the importance of allergen-friendly options. When it comes to cookies, it’s essential to explore alternative recipes that cater to specific needs. Let’s delve into this topic further.

Can Nutter Butter Cookies Be Purchased in Bulk or Wholesale?

Nutter Butter cookies can be purchased in bulk or wholesale, making it convenient for large-scale events or businesses. The availability of bulk purchase ensures a steady supply of these delicious treats for any occasion.

Are There Any Variations or Flavors of Nutter Butter Cookies Available?

Are there any variations or flavors of Nutter Butter cookies available? Yes, Nutter Butter offers a variety of flavors and variations, including chocolate, peanut butter and jelly, and double nut. These options cater to different taste preferences and add excitement to the classic cookie.

Advertisement

Are There Any Plans to Expand the Nutter Butter Cookies Brand With New Products?

There are plans for expansion and new product development for the Nutter Butter Cookies brand. We are actively exploring opportunities to introduce variations and flavors to meet the evolving tastes of our consumers.

Conclusion

In conclusion, it’s clear that Nutter Butter cookies are a delectable treat enjoyed by people all over the world.

The intricate process of creating these cookies involves carefully selected ingredients and a meticulous production process.

The brand behind Nutter Butter cookies ensures that every cookie meets the highest standards of quality through rigorous quality control measures.

These cookies are then distributed globally, reaching the hands of cookie lovers far and wide.

Advertisement

The packaging of Nutter Butter cookies is designed to preserve their freshness and appeal.

Indulging in a Nutter Butter cookie is truly a delightful experience.

Continue Reading
Advertisement

Recipes & Culinary Uses

7 Easy Steps to Make Seafood Butter at Home

Published

on

By

An image that showcases a glistening golden butter melting over a steaming platter of succulent seafood

I have always had a passion for seafood, and there is nothing quite like a flavorful, homemade butter to elevate any seafood dish.

Making your own seafood butter may sound intimidating, but it’s actually quite simple. In this article, I’ll guide you through the process of creating your own flavorful butter for seafood, using the right ingredients and equipment.

From clarifying butter to adding herbs and spices, you’ll learn all the tips and tricks to enhance your seafood dishes with this delectable homemade butter.

Key Takeaways

  • Unsalted butter is preferred for seafood dishes to allow the natural flavors of the seafood to shine through.
  • Clarified butter has a higher smoke point, making it ideal for sautéing or pan-searing seafood.
  • Homemade seafood butter allows for customization and experimentation with flavors.
  • Using high-quality butter ensures superior taste and freshness.

Types of Butter to Use for Seafood

When making butter for seafood, you’ll want to use unsalted butter for the best flavor. While there are different butter alternatives available, such as clarified butter or ghee, unsalted butter is the preferred choice for seafood dishes.

Advertisement

The absence of salt allows the natural flavors of the seafood to shine through without overpowering them. It also gives you more control over the seasoning of your dish, as you can add salt to taste.

Unsalted butter has a creamy and rich texture that complements the delicate flavors of seafood, enhancing its taste and adding a luscious mouthfeel.

Essential Ingredients for Homemade Seafood Butter

One of the essential ingredients for homemade seafood butter is a high-quality unsalted butter. There are a few different types to consider when making butter for seafood. Here are three options that work well:

  1. European-style butter: This type of butter has a higher fat content, resulting in a richer and creamier flavor. It adds a decadent touch to seafood dishes.

  2. Clarified butter: This is butter that has been melted and strained to remove the milk solids. It has a higher smoke point, making it perfect for sautéing or pan-searing seafood.

  3. Cultured butter: Made from fermented cream, cultured butter has a tangy flavor that pairs wonderfully with seafood. It adds a unique depth of flavor to any dish.

Making your own seafood butter has several benefits. First, you have control over the ingredients, ensuring that you use high-quality butter. Second, you can customize the flavors by adding herbs, spices, or even citrus zest. Finally, homemade seafood butter allows you to experiment and create unique and delicious combinations.

Now that we know what types of butter to use and the benefits of homemade seafood butter, let’s move on to the equipment needed for making this delectable condiment.

Advertisement

Equipment Needed for Making Seafood Butter

To prepare this delectable condiment, you’ll need a few essential pieces of equipment. First and foremost, a heavy-bottomed saucepan is crucial for melting the butter without scorching it.

A fine mesh strainer is also necessary to remove any impurities from the butter during the clarifying process.

Additionally, a heatproof container with a lid will be needed to store the clarified butter once it is done.

Now, let’s talk about the types of seafood that pair exceptionally well with homemade butter. From succulent lobster tails to delicate scallops, the rich and creamy flavor of homemade butter enhances the natural sweetness of seafood, creating a harmonious and indulgent taste.

The benefits of using homemade butter for seafood dishes are numerous. Not only does it add a luxurious touch, but it also allows you to control the quality and freshness of the butter, ensuring a superior taste.

Advertisement

With the equipment ready, let’s move on to the next section for step-by-step instructions on how to clarify butter.

Step-by-Step Instructions for Clarifying Butter

Grab your heavy-bottomed saucepan and start melting the butter over low heat. Clarifying butter is a simple process that removes impurities and solids, leaving behind a golden, pure liquid that is perfect for drizzling over seafood.

Here are three tips for achieving the perfect consistency:

  1. Strain it: Once the butter has melted, carefully pour it through a fine-mesh sieve or cheesecloth to remove any remaining solids. This step ensures a smooth and silky texture.

  2. Skim the foam: As the butter melts, foam will rise to the surface. Use a spoon or skimmer to gently remove the foam, as it can affect the texture and flavor of the clarified butter.

  3. Choose the right seafood: Clarified butter pairs well with a variety of seafood, such as lobster, crab, shrimp, and scallops. The rich, nutty flavor of the butter complements the delicate flavors of these seafood options.

Adding Flavors to Seafood Butter: Herbs and Spices

Advertisement

When it comes to adding flavors to seafood butter, the combination of herbs and spices can take your culinary creations to the next level.

The best herb combinations can vary depending on the type of seafood you’re working with, but some classic options include dill and lemon zest for a fresh and tangy flavor, or thyme and garlic for a savory and aromatic profile.

As for spice pairing suggestions, don’t be afraid to experiment with a pinch of cayenne for a subtle kick, or smoked paprika for a smoky and earthy undertone.

Best Herb Combinations

The best herb combinations for making butter for seafood are garlic and dill. These two herbs bring out the natural flavors of seafood and add a savory and aromatic touch to the butter. When combined, garlic and dill create a harmonious balance of flavors that enhance the taste of seafood dishes.

Here are three reasons why using fresh herbs in your seafood butter is beneficial:

Advertisement
  1. Enhanced Flavor: Fresh herbs have a vibrant and intense flavor that can elevate the taste of your seafood butter. The aromatic notes of garlic and the delicate taste of dill complement the richness of the butter and enhance the overall flavor profile.

  2. Health Benefits: Garlic is known for its numerous health benefits, including its ability to boost the immune system and reduce inflammation. Dill, on the other hand, is rich in antioxidants and can aid digestion. Incorporating these herbs into your butter adds a nutritional boost to your seafood dishes.

  3. Visual Appeal: Fresh herbs not only add flavor but also enhance the visual appeal of your dishes. The vibrant green color of dill and the aromatic cloves of garlic can make your seafood butter visually enticing and appetizing.

Spice Pairing Suggestions

One way to enhance the flavors of your dishes is by using spice pairing suggestions. By combining different spices, you can create a unique and delicious flavor profile for your seafood butter. Here are some spice pairing recommendations to elevate your seafood butter to the next level:

Spice Pairing
Paprika Garlic
Cumin Lemon
Cayenne Pepper Dill

Incorporating these alternative flavorings for seafood butter will add depth and complexity to your dishes. Whether you prefer a smoky and spicy flavor or a tangy and herbaceous taste, there’s a spice pairing that will suit your palate. Now that we’ve explored spice pairing suggestions, let’s move on to infusing seafood butter with citrus zest to further enhance its flavor.

Infusing Seafood Butter With Citrus Zest

To infuse your seafood butter with citrus zest, start by zesting your favorite citrus fruit directly into the melted butter. The warmth of the butter will release the oils in the zest, creating a burst of bright, tangy flavor.

Here are three ways to elevate your seafood recipes with this infused butter:

  1. Lemon Butter: Zest a fresh lemon into the melted butter for a classic and versatile citrus flavor that pairs well with any seafood dish.

  2. Orange Butter: For a sweeter, more subtle citrus taste, zest an orange into the butter. This infusion adds a touch of brightness to rich seafood like lobster or scallops.

  3. Lime Butter: Zesting a lime into the butter creates a vibrant and zesty flavor that complements lighter seafood options like fish or shrimp.

By infusing your butter with citrus zest, you can add a burst of flavor to your seafood dishes.

Advertisement

Now, let’s explore the options for chilling and storing homemade seafood butter.

Options for Chilling and Storing Homemade Seafood Butter

When it comes to chilling and storing homemade seafood butter, there are a few key points to consider.

First, you have the option of refrigeration or freezing. Refrigeration will keep the butter fresh for a shorter period of time, usually up to two weeks, while freezing can extend the shelf life for several months.

It’s important to take into account the shelf life considerations and how long you plan to store the butter before deciding which method is best for you.

Refrigeration Vs. Freezing

If you’re debating whether to refrigerate or freeze your butter for seafood, it’s best to keep it in the refrigerator. Here’s why:

Advertisement
  1. Refrigeration benefits: By storing your seafood butter in the refrigerator, you can maintain its freshness and quality for a longer period. The cool temperatures slow down the bacterial growth, preventing spoilage. Moreover, refrigeration helps to preserve the butter’s flavor and texture, ensuring that it enhances the taste of your seafood dishes.

  2. Freezing drawbacks: While freezing can extend the shelf life of butter, it may negatively impact its quality. Freezing can cause the butter to become grainy and lose its smooth texture. Additionally, when thawed, the water content in the butter may separate, resulting in an undesirable consistency. Freezing can also affect the flavor of the butter, potentially altering its taste and aroma.

To ensure the best results, I recommend refrigerating your seafood butter. It will maintain its freshness and quality, enhancing your seafood dishes with its creamy and delicious flavor.

Shelf Life Considerations

Storing your seafood butter in the refrigerator helps maintain its freshness and quality for a longer period. The cool temperature slows down the growth of bacteria, ensuring that your seafood butter stays safe to consume. It’s important to keep it in an airtight container to prevent any odors or flavors from seeping in.

When it comes to long-term storage, the refrigerator is your best bet. If you have leftover seafood butter that you don’t plan on using within a week or two, you can also consider freezing it for even longer storage. Just make sure to wrap it tightly in plastic wrap or place it in a freezer bag to protect it from freezer burn.

Although frozen seafood butter may lose some of its creamy texture, it can still be used as a flavoring agent in various dishes, making it a versatile ingredient even beyond its original purpose.

Creative Ways to Use Seafood Butter in Your Recipes

Once you’ve made your delicious seafood butter, you can use it in a variety of creative ways in your recipes. The rich and savory flavor of the butter adds a delightful twist to any dish.

Advertisement

Here are three different uses and flavor variations to try:

  1. Grilled Seafood: Brush the seafood butter onto shrimp, lobster, or fish before grilling. The butter will melt and infuse the seafood with its delectable taste, creating a succulent and flavorful dish.

  2. Pasta Sauce: Melt the seafood butter and toss it with cooked pasta for a simple yet indulgent pasta dish. Add some grated Parmesan cheese and freshly chopped herbs for an extra burst of flavor.

  3. Garlic Bread: Spread the seafood butter onto slices of bread and toast them until golden brown. The buttery, garlicky goodness will make your taste buds sing.

With these different uses and flavor variations, your seafood butter will elevate your recipes to a whole new level of deliciousness.

Frequently Asked Questions

Can I Use Margarine Instead of Butter for Making Seafood Butter?

Sure, you can use margarine instead of butter for making seafood butter. However, using real butter has its benefits. It adds a rich flavor and creamy texture that enhances the taste of the seafood.

Can I Use Flavored Butter for Seafood Dishes?

Using flavored butter alternatives in seafood dishes can enhance the taste and provide a unique twist. The benefits of using flavored butter for seafood include adding depth of flavor and complementing the natural flavors of the seafood.

How Long Can I Store Homemade Seafood Butter in the Refrigerator?

I store homemade seafood butter in the refrigerator for up to two weeks. It’s important to properly seal and label the container to ensure freshness. Preserving seafood butter allows me to have it ready whenever I need it.

Advertisement

Can I Use Frozen Butter for Making Seafood Butter?

Sure, you can use frozen butter for making seafood butter. It’s a great alternative if you don’t have fresh butter on hand. Just make sure to thaw it before using.

Can I Use Plant-Based Butter Alternatives for Making Seafood Butter?

Yes, you can use plant-based butter alternatives for making seafood butter. Vegan butter alternatives are a great option for those who prefer cooking with plant-based spreads. They provide a similar creamy texture and flavor to traditional butter.

Conclusion

In conclusion, making homemade seafood butter is a simple and rewarding process.

By clarifying butter and infusing it with herbs, spices, or citrus zest, you can create a flavorful accompaniment to enhance any seafood dish.

Whether you choose to use it as a dip, a sauce, or to baste your seafood while grilling, the possibilities are endless.

Advertisement

So why settle for store-bought when you can elevate your seafood experience with a personalized touch?

Get creative and let your taste buds rejoice in the deliciousness of homemade seafood butter.

Continue Reading

Recipes & Culinary Uses

How to Make Delicious Butter Flavored Oil at Home

Published

on

By

An image showcasing the process of making butter-flavored oil: a transparent glass jar filled with melted golden butter, pouring into a clear bottle of light olive oil

I have always been a firm believer that adding a touch of butter makes everything taste better. That’s why learning how to make butter-flavored oil was a total game-changer for me in the kitchen!

In this article, I’ll guide you through the simple process of infusing your favorite oil with that rich, creamy buttery taste. With just a few ingredients and some easy steps, you’ll have a versatile and delicious condiment ready to enhance your dishes.

Get ready to elevate your cooking with homemade butter flavored oil!

Key Takeaways

  • Select the right oil for making butter flavored oil
  • Infuse the oil with butter flavor for a rich and creamy taste
  • Choose the best butter for infusion to enhance the flavor
  • Strain and store the butter flavored oil properly to maintain its quality and shelf life

Selecting the Right Oil

When selecting the right oil for making butter flavored oil, it’s important to consider the smoke point. Choosing the right oil can greatly impact the taste and quality of your final product.

Advertisement

I recommend experimenting with different oils to find the one that best suits your preferences. Oils with a high smoke point, such as avocado oil or refined coconut oil, are ideal for making butter flavored oil as they can withstand high heat without burning or producing a strong odor. These oils provide a neutral base that allows the butter flavor to shine through.

Now that you know the importance of selecting the right oil, let’s move on to the next step: infusing the oil with butter flavor.

Infusing the Oil With Butter Flavor

To infuse the oil with a delicious buttery flavor, start by melting butter in a saucepan. Once the butter has melted completely, add your chosen oil to the saucepan. The heat from the melted butter will help infuse the oil with its rich and savory flavor.

If you’re looking for butter flavor alternatives, you can also use vegan butter or butter extract to achieve a similar taste.

The benefits of using butter flavored oil are numerous. It not only adds a delightful taste to your dishes, but also brings a smooth and creamy texture. Additionally, butter flavored oil is a healthier alternative to using actual butter, as it contains fewer calories and less saturated fat.

Advertisement

Choosing the Best Butter for Infusion

One option is to use vegan butter as a substitute for achieving that delicious buttery flavor when infusing the oil. Vegan butter is made from plant-based oils, such as coconut or almond oil, and is free from any animal products. It is a great choice for those who follow a vegan or dairy-free diet.

When choosing the right butter for infusion, there are a few factors to consider:

  • Flavor: Experiment with different types of vegan butter to find the one that best matches the flavor you desire. Some may have a stronger buttery taste, while others may have a more subtle flavor.

  • Ingredients: Look for a vegan butter that is made from high-quality, natural ingredients, without any artificial additives or preservatives.

  • Texture: Consider the texture of the vegan butter, as it can affect the overall consistency of the infused oil.

  • Shelf Life: Check the expiration date and storage recommendations to ensure the vegan butter stays fresh for a longer period of time.

Preparing the Ingredients

To prepare the ingredients, you’ll want to gather all the necessary items before you begin. When it comes to flavor infusion, there are different methods you can try.

Advertisement

One popular method is infusing oil with herbs and spices. Experimenting with different herb and spice combinations allows you to create unique and delicious flavors. Start by selecting your favorite herbs and spices, such as rosemary, thyme, garlic, or chili flakes.

Next, gather a high-quality oil, like olive or sunflower oil, and a clean glass jar with a tight-fitting lid. Wash and dry the herbs and spices, then add them to the jar. Pour the oil over the herbs and spices, making sure they are completely submerged.

Close the lid tightly and let the mixture sit for at least 24 hours to infuse the flavors. After that, strain the oil to remove any solids, and your homemade flavored oil is ready to use!

Infusing the Oil and Butter Mixture

Advertisement

Once the herbs and spices have been added to the jar, pour the oil over them and ensure they are completely submerged. This is a crucial step in infusing the oil with the flavors of the herbs and spices.

To create a harmonious blend of flavors, consider experimenting with different infusing techniques and flavor combinations. Here are some ideas to get you started:

  • Classic Italian: Basil, oregano, rosemary, and garlic.
  • Asian Fusion: Ginger, lemongrass, cilantro, and chili flakes.
  • Mediterranean Delight: Thyme, marjoram, lemon zest, and black pepper.
  • Savory Herb Garden: Sage, parsley, chives, and dill.

By combining different herbs and spices, you can create unique and delicious flavor profiles in your infused oil. Remember to let the oil infuse for at least a week to allow the flavors to develop fully.

Use your infused butter flavored oil to enhance the taste of your dishes, whether it’s drizzling over roasted vegetables, marinating meat, or simply dipping bread.

Enjoy the process of experimenting with different flavors and infusing techniques to create your own signature butter flavored oil.

Straining and Storing the Butter Flavored Oil

After infusing the oil with herbs and spices, strain the mixture to remove any solids and transfer it to a clean, airtight container for storage. Straining the butter flavored oil is an essential step to ensure a smooth and flavorful end product.

Advertisement

There are a few different straining techniques you can use, depending on your preference and the tools you have on hand. One popular method is to line a fine-mesh strainer with cheesecloth and pour the oil through it, catching any solids in the cloth. Another option is to use a coffee filter or a paper towel placed inside a funnel to strain the oil. Whichever method you choose, be sure to press the solids gently to extract as much flavor as possible.

Once strained, the butter flavored oil should be stored in a clean, airtight container to preserve its freshness and flavor. Make sure the container is completely dry to prevent any moisture from spoiling the oil.

Now that we have our butter flavored oil ready, let’s move on to some tips and variations for using it in our recipes.

Tips and Variations for Using Butter Flavored Oil

When using butter flavored oil in your recipes, remember to adjust the amount of salt you add, as the oil already contains some.

Butter flavored oil is a great substitute for butter in baking and cooking. It provides the rich, creamy taste of butter without the cholesterol and saturated fat.

Advertisement

Here are some benefits of using butter flavored oil in your recipes:

  • Healthier option: Butter flavored oil is lower in fat and calories compared to butter, making it a healthier choice for those watching their intake.

  • Easy to use: Butter flavored oil can be used in the same way as regular oil or melted butter, making it convenient and versatile.

  • Enhanced flavor: The buttery taste of the oil adds a delicious flavor to your dishes, enhancing their overall taste and appeal.

  • Longer shelf life: Butter flavored oil has a longer shelf life compared to butter, allowing you to keep it on hand for longer periods without worrying about spoilage.

Incorporating butter flavored oil into your baking and cooking can bring numerous benefits, from healthier options to enhanced flavors. Give it a try and see how it elevates your recipes.

Frequently Asked Questions

Can I Use Any Type of Oil for Making Butter Flavored Oil?

Yes, you can use different types of oil for making butter flavored oil. However, some oils may work better than others in infusing the butter flavor. It’s important to choose a neutral-flavored oil to let the butter flavor shine through.

Can I Use Margarine Instead of Butter for Infusing the Oil?

Using margarine instead of butter for infusing oil has pros and cons. Margarine can alter the flavor of the infused oil, giving it a different taste. It’s important to consider personal preference and desired outcome when making this substitution.

How Long Can I Store the Butter Flavored Oil?

When it comes to long term storage of butter flavored oil, it’s important to follow best storage practices. This ensures the oil stays fresh and flavorful. Be sure to store it in a cool, dark place to maintain its quality.

Advertisement

Can I Use Dried Herbs for Adding Additional Flavor to the Oil?

Sure, you can use dried herbs to add flavor to your oil, but using fresh herbs will give you a more vibrant taste. There are various methods for infusing oil with herbs, like heat infusion or cold infusion.

Can I Use the Leftover Strained Butter for Other Recipes?

Yes, you can definitely use the leftover strained butter in baking or other recipes. It adds a rich, buttery flavor that enhances the taste of your dishes. Get creative and explore different ways to incorporate it into your cooking!

Conclusion

In conclusion, making butter flavored oil is a simple process that can elevate your cooking to new levels of flavor. By infusing your chosen oil with the rich taste of butter, you can add a deliciously decadent touch to your dishes.

For example, imagine drizzling this oil over freshly popped popcorn, creating a movie night snack that is both buttery and aromatic.

With a little creativity and experimentation, the possibilities for using butter flavored oil are endless. So why not give it a try and elevate your culinary creations today?

Advertisement
Continue Reading

Recipes & Culinary Uses

How to Make Creamy Butter from Pasteurized Milk

Published

on

By

An image showcasing the step-by-step process of making butter from pasteurized milk: a glass jar filled with creamy milk, shaking motion blurred hands, milk separating into butter and buttermilk, and finally, a lump of freshly churned butter

I have always been intrigued by the transformation of milk into butter. It is incredible how something as basic as pasteurized milk can be changed into a luxurious and creamy spread.

In this article, I’ll guide you through the step-by-step process of making butter from pasteurized milk. We’ll explore the science behind butter making, troubleshoot common issues, and discover the health benefits of homemade butter.

Get ready to embark on a delicious and informative butter-making journey!

Key Takeaways

  • Pasteurization kills harmful bacteria and pathogens in milk, making it safe for consumption.
  • Churning separates butterfat from liquid in pasteurized milk to create homemade butter.
  • The process of churning butter involves agitating cream to encourage fat globules to clump together.
  • Homemade butter offers the advantage of customization, flavor enhancement, and control over ingredients compared to processed butter.

The Importance of Using Pasteurized Milk

Using pasteurized milk is essential for making butter because it ensures the butter is safe to consume. Pasteurization is a process that involves heating the milk to kill harmful bacteria and pathogens that can cause foodborne illnesses. By using pasteurized milk, we can minimize the risk of contamination and ensure the health benefits of homemade butter.

Advertisement

Pasteurization does not significantly affect the nutritional value of the milk, as it retains most of its vitamins and minerals. Additionally, pasteurized milk is readily available in grocery stores, making it convenient for butter-making purposes.

Now that we understand the importance of using pasteurized milk, let’s move on to the next step of gathering the necessary equipment for making butter.

Gathering the Necessary Equipment

To gather the necessary equipment, you’ll need a blender, a large bowl, and a fine-mesh strainer. These tools are essential for successfully making butter from pasteurized milk. The blender will help you separate the butterfat from the liquid, while the large bowl will catch the liquid for further use. The fine-mesh strainer will ensure that no unwanted particles end up in your final product.

When choosing the right milk for making butter, it is important to opt for pasteurized milk. Pasteurization helps eliminate harmful bacteria and ensures the milk is safe for consumption. Additionally, pasteurized milk has a longer shelf life, making it easier to store and use for making butter.

Step-by-Step Guide to Churning Butter

Advertisement

First, you’ll need a clean and spacious workspace to start churning your homemade butter. The science behind churning involves the separation of fat from the liquid in milk. This process can be achieved by agitating the cream until the fat globules clump together and separate from the buttermilk. To achieve the perfect consistency, it is essential to control the temperature and timing during the churning process. Here is a step-by-step guide to churning butter:

Step Procedure Time (minutes)
1 Pour the cream into a churn or mixer. 10
2 Begin churning at a low speed to break up the fat globules. 20
3 Increase the speed gradually to encourage the fat to clump together. 30
4 Once the fat has separated from the buttermilk, stop churning and strain the butter. 40

Understanding the Science Behind Butter Making

Understanding the science behind butter making involves recognizing the separation of fat from the liquid in milk and the process of agitating the cream. When cream is churned, the fat globules in the cream collide with each other, causing them to stick together and eventually form butter. Here are some key points to consider when delving into the science behind churning:

  • Cream contains fat globules that are dispersed in water.
  • Agitating the cream causes the fat globules to come together and form clumps.
  • The clumps of fat globules trap air and water, resulting in the formation of butter.
  • The process of churning also helps release buttermilk, which can be used in various culinary applications.

Homemade butter offers several benefits in cooking. Firstly, it has a rich and creamy flavor that enhances the taste of dishes. Secondly, it allows for better control over the ingredients used, ensuring a healthier option. Lastly, it can be customized by adding herbs, spices, or even sweeteners, adding a unique and personalized touch to your culinary creations.

Understanding the science behind churning and the benefits of homemade butter can greatly elevate your cooking skills and enhance your dishes.

Tips for Achieving the Perfect Consistency

Advertisement

When churning your own butter, you can achieve the perfect consistency by ensuring that the cream is chilled before starting the process. This step is crucial in achieving a smooth texture in your homemade butter. Cold cream helps to separate the butterfat from the liquid, resulting in a better consistency.

Another important tip is to avoid over-churning the cream. Over-churning can lead to a grainy texture, so it’s important to stop churning as soon as the butter starts to form clumps.

Additionally, make sure to strain the butter after churning to remove any excess liquid, which can also affect the texture.

By following these tips, you can avoid common mistakes and achieve a smooth and creamy homemade butter.

Advertisement

Now, let’s explore the next section about adding flavors and enhancements to your butter.

Adding Flavors and Enhancements to Your Butter

When it comes to adding flavors and enhancements to butter, there are endless possibilities to explore. Creative butter combinations can elevate the taste of any dish, allowing for a unique and personalized culinary experience.

From savory options like garlic and herbs to sweet additions like honey and cinnamon, the versatility of butter makes it a perfect canvas for experimentation and flavor infusion.

Creative Butter Combinations

To get creative with your butter, try blending in different herbs and spices for unique flavor combinations. Flavored butter recipes are a fantastic way to elevate your dishes and add a burst of flavor.

Here are some unique butter pairings that you can experiment with:

Advertisement
  • Garlic and Parsley: This classic combination adds a delicious savory flavor to your butter, perfect for spreading on bread or melting over grilled meats.

  • Lemon and Dill: The bright citrusy notes of lemon combined with the fresh taste of dill create a refreshing and zesty butter that pairs well with seafood.

  • Cinnamon and Brown Sugar: Transform your butter into a sweet treat by blending in cinnamon and brown sugar. This combination is great for spreading on toast or pancakes.

  • Chili and Lime: Add a kick to your butter by mixing in chili and lime zest. This spicy and tangy combination is excellent for adding a bold flavor to grilled corn or roasted vegetables.

Flavorful Butter Additions

Now that we’ve explored some creative butter combinations, let’s dive into the world of flavorful butter additions.

By experimenting with different flavor pairings, you can create unique and delicious homemade spreads that will elevate any dish.

One popular option is adding herbs and spices to your butter. For example, mixing in chopped garlic and parsley can give your butter a savory kick, perfect for spreading on warm bread or melting over grilled meats.

Another option is incorporating sweet ingredients like honey or cinnamon for a delightful twist. The possibilities are endless, so don’t be afraid to get creative and try out different combinations.

In the next section, we will discuss the best practices for storing and preserving your homemade butter, ensuring its freshness and quality.

Advertisement

Storing and Preserving Homemade Butter

If you want to store and preserve your homemade butter, you can simply place it in an airtight container and keep it in the refrigerator. This will help maintain its freshness and extend its shelf life. However, there are a few techniques you can follow to ensure your butter stays in optimal condition for longer periods of time:

  • Keep the butter away from strong-smelling foods to prevent flavor absorption.
  • Store the butter in the coldest part of the refrigerator, preferably in the back.
  • Wrap the butter tightly in wax or parchment paper to prevent it from picking up any off flavors.
  • If you want to store butter for an extended period, consider freezing it in a freezer-safe container or wrapped tightly in plastic wrap.

Troubleshooting Common Butter Making Issues

One common issue when making homemade butter is that it may not solidify properly if the cream was not chilled enough before churning. To troubleshoot this problem, it is important to ensure that the cream is thoroughly chilled before starting the churning process. Additionally, using cream with a higher fat content can help achieve a better solidification of the butter.

Another common issue is the butter turning out too soft or greasy. This can be caused by over-churning the cream, which leads to the fat separating and resulting in a softer consistency. To avoid this, it is crucial to monitor the churning process closely and stop once the butter has formed solid clumps.

By addressing these common butter making issues, you can ensure a successful homemade butter-making experience.

Transition: Now that we have discussed troubleshooting tips for common butter making issues, let’s delve into the health benefits of homemade butter.

Health Benefits of Homemade Butter

When it comes to discussing the nutritional value of butter, it’s important to understand the differences between processed and homemade butter.

Advertisement

Processed butter often contains added ingredients, such as stabilizers and preservatives, which can affect its nutritional composition.

On the other hand, homemade butter is typically made from pure cream, which means it contains higher amounts of beneficial nutrients like vitamins A, D, and E.

In this discussion, we will explore the nutritional differences between processed and homemade butter and how they can impact our overall health.

Nutritional Value of Butter

The nutritional value of butter can vary depending on the quality of the milk used. When it comes to health benefits, homemade butter can provide several advantages. Here are some key points to consider regarding the nutritional content of butter:

  • Rich in healthy fats: Butter is a good source of healthy saturated fats, which are essential for brain function and hormone production.

  • Vitamins and minerals: Butter contains fat-soluble vitamins like A, D, E, and K, which are important for various bodily functions. It also provides small amounts of minerals like calcium, phosphorus, and selenium.

  • Conjugated linoleic acid (CLA): Homemade butter from grass-fed cows may contain higher levels of CLA, a fatty acid associated with potential health benefits, including reduced inflammation and improved heart health.

  • Antioxidants: Butter contains small amounts of antioxidants like beta-carotene and vitamin E, which help protect the body against free radicals.

Overall, homemade butter can be a nutritious addition to a balanced diet, providing essential fats, vitamins, and minerals.

Advertisement

Processed Vs Homemade Butter

If you’re looking for a healthier option, consider opting for homemade butter instead of processed butter. Processed butter often contains additives and preservatives that can be harmful to your health.

On the other hand, homemade butter is made from fresh ingredients and can be customized to your preferences. There are many homemade butter recipes available that are easy to follow and require minimal ingredients.

One popular recipe involves churning pasteurized milk until it separates into butter and buttermilk. This process ensures that you have control over the quality and purity of your butter.

Additionally, making your own butter allows you to experiment with different flavors by adding herbs, spices, or even fruits. So, why settle for processed butter when you can enjoy the taste and health benefits of homemade butter?

Exploring Different Varieties of Butter

To explore different varieties of butter, you can try mixing in various herbs and spices for added flavor. Here are four creative butter combinations that you can experiment with:

Advertisement
  • Garlic and Herb: Mix minced garlic, chopped fresh herbs like parsley, thyme, and rosemary, and a pinch of salt into softened butter. This aromatic blend is perfect for spreading on bread or melting over cooked vegetables.

  • Lemon and Dill: Combine grated lemon zest, freshly squeezed lemon juice, chopped fresh dill, and a sprinkle of salt into softened butter. This tangy and refreshing butter is great for seafood dishes or as a dip for grilled shrimp.

  • Chili and Lime: Add finely chopped red chili pepper, lime zest, lime juice, and a touch of salt to softened butter. The spicy kick and zesty lime flavor make this butter ideal for adding heat to grilled corn or slathering on grilled chicken.

  • Maple and Cinnamon: Mix pure maple syrup, ground cinnamon, and a pinch of salt into softened butter. This sweet and warm butter is a delightful addition to pancakes, waffles, or even a simple slice of toast.

Creative Ways to Use Homemade Butter in Recipes

When it comes to homemade butter, the flavor-enhancing benefits are truly remarkable. The rich and creamy taste of homemade butter can elevate any dish, from baked goods to savory dishes.

Additionally, homemade butter offers versatility in cooking, allowing for a wide range of culinary creations that can satisfy any palate.

Flavor-Enhancing Benefits

Enhancing the flavor of your homemade butter can be achieved by using high-quality, pasteurized milk. When it comes to flavor extraction and taste enhancement, the quality of the milk used plays a vital role. Here are four reasons why using high-quality, pasteurized milk can improve the taste of your homemade butter:

  • Freshness: High-quality milk ensures that your butter will have a fresher taste, as it is sourced from reputable farms that prioritize freshness and quality.

  • Creaminess: Pasteurized milk contains a higher fat content, resulting in a creamier texture and richer flavor in your butter.

  • Nutritional Value: High-quality milk is packed with essential nutrients and vitamins, which can contribute to a more flavorful and nutritious homemade butter.

  • Consistency: Using pasteurized milk ensures a consistent flavor profile in your butter, allowing you to achieve the desired taste every time.

Versatility in Cooking

Using high-quality milk in your recipes allows for greater versatility in your cooking. It enhances the flavor and texture of various dishes. The quality of the ingredients plays a crucial role in the final outcome when it comes to cooking techniques. High-quality milk, with its rich and creamy consistency, can be used in a wide range of recipes to elevate the taste and mouthfeel.

From creamy soups and sauces to fluffy pancakes and custards, the possibilities are endless. The richness of the milk adds depth and complexity to savory dishes, while enhancing the sweetness in desserts. High-quality milk can be a great source of inspiration for creating unique and delicious recipes.

Advertisement

Its versatility allows you to experiment with different flavors and textures, ensuring a delightful culinary experience.

Frequently Asked Questions

How Long Does It Take to Make Butter From Pasteurized Milk?

It takes approximately 20 minutes to make butter from pasteurized milk without using a churner. Alternative methods, such as shaking cream vigorously in a jar or using a food processor, can expedite the process.

Can I Use Unpasteurized Milk to Make Butter?

Yes, using unpasteurized milk for butter making is possible, but it poses safety risks. Unpasteurized milk may contain harmful bacteria that can cause foodborne illnesses. It’s recommended to use pasteurized milk for butter making to ensure safety.

What Type of Equipment Do I Need to Make Butter From Pasteurized Milk?

To make butter from pasteurized milk, you will need a few key pieces of equipment. One option is to use a stand mixer with a whisk attachment. Another alternative is to use a hand-held mixer or a food processor.

Can I Add Salt to My Homemade Butter?

Yes, you can add salt to homemade butter to enhance its flavor. When choosing salt, opt for fine-grained or kosher salt as they dissolve easily. Add a pinch or to taste during the churning process.

Advertisement

How Long Can Homemade Butter Be Stored?

Proper storage is crucial to maximize the shelf life of homemade butter. It can last up to three weeks when stored in an airtight container in the refrigerator.

Conclusion

In conclusion, making butter from pasteurized milk is a rewarding and scientific process that anyone can enjoy.

By following the step-by-step guide and understanding the science behind butter making, you can achieve the perfect consistency for your homemade butter.

The health benefits of homemade butter are numerous, and exploring different varieties can add a unique touch to your culinary creations.

So gather your equipment, churn away, and let the creamy richness of homemade butter transport you to a world of culinary delight.

Advertisement
Continue Reading

Trending