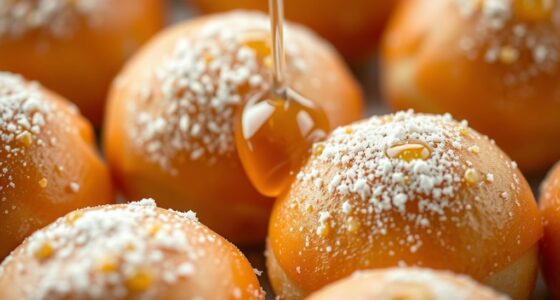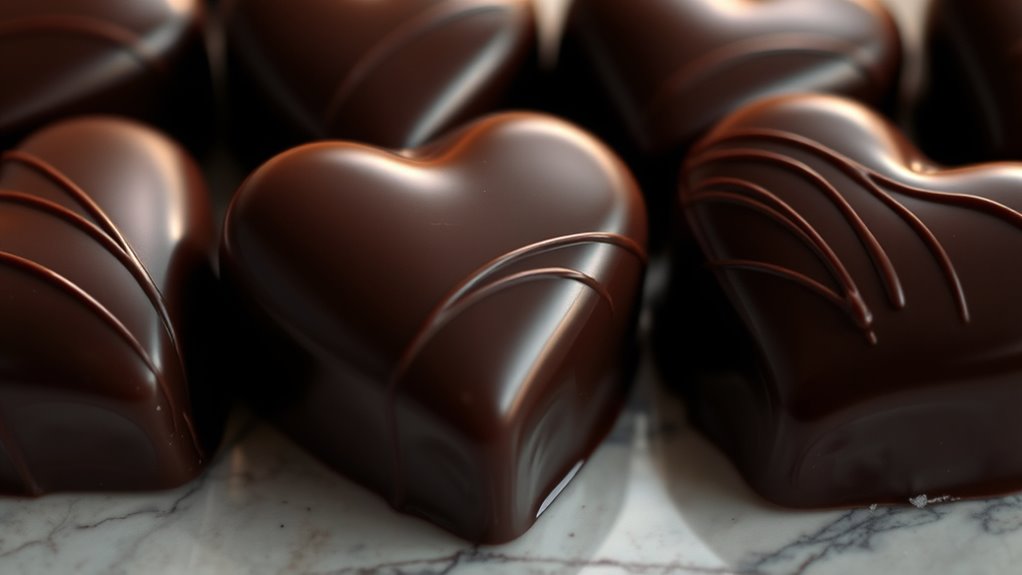

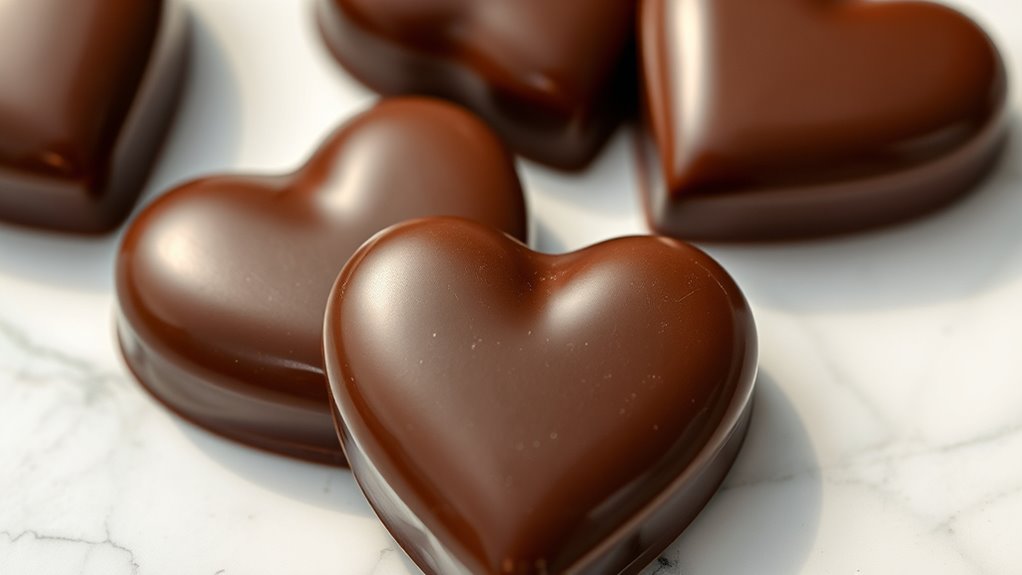
To make beautiful Valentine’s Day chocolate butter hearts, start with high-quality couverture chocolate and sterilize all your tools. Melt the chocolate carefully in a double boiler or microwave, then cool it to about 27°C (80°F) while stirring continuously. Reheat gently to the working temperature, around 30-31°C, for a shiny, firm finish. Consistent temperature control and environment are key to prevent bloom and achieve that perfect glossy, crisp heart. Keep these tips in mind as you continue perfecting your technique.
Key Takeaways
- Use high-quality couverture chocolate with ample cocoa butter for better tempering and a glossy finish.
- Heat chocolate to the correct temperature (around 45°C for dark, slightly lower for milk/white) before cooling.
- Cool the chocolate to approximately 27°C, then gently reheat to 30-31°C for proper crystal formation.
- Stir continuously during cooling to ensure even temperature distribution and prevent seed contamination.
- Maintain a dry, cool environment below 50% humidity to achieve shiny, crisp Valentine’s Day hearts.
Understanding the Science Behind Tempering

Tempering chocolate is essential because it guarantees your hearts have a glossy finish and a crisp snap. When you temper chocolate, you’re manipulating its crystal structure to achieve the ideal form. Proper heat transfer encourages the formation of stable, well-organized crystals, which give chocolate its smooth texture and shine. If the heat isn’t controlled, the crystals become unstable, leading to dull, streaky, or soft chocolate. By consistently heating and cooling the chocolate, you influence the crystal structure, ensuring it solidifies with the right stability. This process isn’t just about temperature; it’s about understanding how heat transfer affects the microscopic arrangement of cocoa butter. Proper timing and temperature control are crucial to prevent the formation of unstable crystals that can compromise the final product. Mastering this science allows you to produce perfectly tempered chocolate with professional-quality appearance and texture.
Selecting the Right Chocolate for Tempering

Choosing the right chocolate is the first step toward beautifully tempered confections. Start by considering cocoa bean varieties, as they influence flavor and texture. For a smooth, glossy finish, opt for high-quality couverture chocolate, which contains a higher cocoa butter content. Different cocoa bean varieties, such as Forastero, Criollo, or Trinitario, offer distinct flavor profiles—ranging from robust and earthy to delicate and fruity—that can enhance your hearts’ taste. Dark chocolate provides richness and depth, while milk chocolate adds sweetness and creaminess. White chocolate, though technically not a true chocolate, can also be tempered for a glossy appearance. Selecting the right chocolate guarantees your Valentine’s Day hearts will not only look stunning but also deliver the perfect flavor experience. Proper chocolate tempering techniques ensure the finished product has a professional look and satisfying texture.
Preparing Your Workspace and Tools

Before you begin tempering your chocolate hearts, it’s essential to prepare your workspace and tools to guarantee a smooth process. Proper workstation organization helps prevent cross-contamination and keeps everything accessible. Confirm your surface is clean, clutter-free, and dry. Here are four key steps:
Preparing a clean, organized workspace ensures smooth, successful chocolate tempering.
- Sterilize all tools, including spatulas, bowls, and thermometers, to prevent bacteria or residue from affecting the chocolate.
- Set up a dedicated workspace away from direct sunlight and drafts to maintain temperature control.
- Arrange your ingredients and tools within easy reach for efficient workflow.
- Use a clean, flat surface as your work area to avoid accidental spills or contamination. Additionally, ensuring your workspace reflects the rustic charm of farmhouse decor can create a cozy and inspiring environment.
Step-by-Step Tempering Process
To get your chocolates perfectly shiny and smooth, you need to master melting and cooling techniques. Proper tempering guarantees your butter hearts set with a beautiful gloss and firm texture. Let’s walk through each step so your chocolates turn out flawless. Ensuring accurate temperature control during the process is essential for achieving optimal results.
Melting and Cooling Techniques
Tempering chocolate is essential for achieving a glossy finish and a firm snap in your hearts. Proper melting and cooling techniques ensure color consistency and flavor enhancement. To do this effectively:
- Use a double boiler or microwave in short bursts, stirring constantly to prevent overheating.
- Heat the chocolate to 45°C (113°F) for dark chocolate or slightly lower for milk and white chocolates.
- Cool the chocolate to around 27°C (80°F) by stirring or adding small amounts of unmelted chocolate.
- Reheat gently to 31°C (88°F) for dark or 30°C (86°F) for milk and white chocolates before pouring.
Following these steps guarantees smooth, shiny hearts with vibrant color and ideal flavor, perfect for Valentine’s Day.
Achieving Proper Gloss
Achieving a beautiful, glossy finish on your chocolate hearts starts with mastering the tempering process. Proper tempering ensures your chocolates have a smooth, shiny surface that enhances their visual appeal and makes decorating techniques easier. To attain this, carefully heat, cool, and rewarm your chocolate to specific temperatures, stirring consistently. Once tempered, pour the chocolate onto a smooth surface and spread it thinly, then gather and reheat if needed. This process promotes even crystallization, resulting in a mirror-like gloss. When decorating your hearts, consider flavor pairing—using tempered chocolate with complementary fillings or accents enhances both appearance and taste. A glossy finish not only elevates your presentation but also signals high-quality craftsmanship, making your Valentine’s Day chocolates truly special. Additionally, understanding proper equipment and maintaining a clean workspace can significantly improve your tempering results.
Troubleshooting Common Tempering Issues

Even experienced chocolatiers encounter issues when tempering chocolate, but most problems can be remedied with a few simple adjustments. Common causes of tempering problems include temperature fluctuations, improper mixing, or using contaminated tools. To troubleshoot effectively: 1. Check if the chocolate is overheating; if so, gently re-cool it to the proper temperature. 2. Ensure your equipment is spotless to avoid seed contamination. 3. Stir continuously to promote even temperature distribution. 4. Confirm you’re using the correct temperature ranges for your chocolate type. Additionally, understanding proper tempering techniques can help prevent common issues and achieve glossy, snappy chocolates.
Tips for Achieving a Perfect Gloss and Texture

To get that gorgeous gloss and smooth texture, you need to master proper tempering techniques. Ensuring the chocolate cools in the right conditions helps set a shiny finish without streaks. Pay attention to temperature control and cooling environments for perfect results. Incorporating techniques like controlled cooling can further improve the consistency and appearance of your chocolates.
Proper Tempering Techniques
Proper tempering is essential for creating chocolates with a beautiful gloss and a firm, crisp texture. To achieve perfect tempering, focus on these key steps:
- Use a reliable thermometer to monitor temperature closely during melting and cooling.
- Heat and cool in stages—melt to the correct temperature, then cool gradually to develop stable crystals.
- Stir consistently to ensure even temperature distribution.
- Test the temper by spreading a small amount on parchment; it should set quickly with a shiny surface.
Good tempering enhances flavor pairing by allowing subtle flavor notes to shine through and improves packaging ideas, as glossy chocolates look more appealing. Mastering these techniques guarantees your Valentine’s Day butter hearts will impress both visually and texturally.
Optimal Cooling Conditions
Achieving ideal cooling conditions is vital for developing a glossy finish and optimal texture in your chocolates. To do this, focus on precise temperature control and humidity management. After tempering, let your chocolates cool at a steady, cool room temperature—around 65-70°F (18-21°C)—to prevent bloom and maintain shine. Avoid drafts or fluctuating temperatures that can cause uneven cooling. Keep humidity low, ideally below 50%, as excess moisture can dull the gloss and affect texture. Use a well-ventilated space with stable temperature conditions to guarantee even cooling. If necessary, place your chocolates in a cool, dry place or in a controlled environment. Proper cooling helps set the fats uniformly, resulting in beautifully glossy, firm chocolates with a satisfying texture. Incorporating sound knowledge of industry trends can further improve your tempering process and final presentation.
Frequently Asked Questions
How Long Can Tempered Chocolate Hearts Be Stored Before Melting?
You might wonder how long your tempered chocolate hearts last before melting. Generally, their storage duration is about one to two weeks if kept in a cool, dry place away from direct sunlight. Proper storage extends their shelf life, ensuring they stay solid and beautiful. If exposed to heat or humidity, they’ll melt faster. Keep them in an airtight container for ideal freshness and to prevent melting or blooming.
Can I Temper White or Milk Chocolate Using the Same Method?
You can temper white chocolate and milk chocolate using the same method, but keep in mind they have slightly different properties. White chocolate contains cocoa butter but lacks cocoa solids, so it melts at a lower temperature. Milk chocolate has added milk solids, making it a bit more delicate. Use a thermometer to carefully control temperatures, and follow the same tempering steps for both to achieve a glossy finish and proper snap.
What Are Alternative Methods if I Don’t Have a Thermometer?
They say, “A watch pot never boils,” but when tempering chocolate without a thermometer, patience is key. You can use alternative tools like a marble slab or a cool, flat surface for chocolate cooling. Stirring continuously helps you gauge the temperature by feel, watching for a slight thickening. Keep an eye on the sheen and texture; these clues guide you through proper chocolate cooling without a thermometer.
How Do Humidity Levels Affect the Tempering Process?
Humidity levels greatly impact tempering because high humidity can cause chocolate to seize or develop a dull finish, making it harder to achieve a glossy look. The humidity impact means you need better temperature control, especially in humid environments. To counter this, work in a dry, cool space, keep the chocolate covered, and avoid steam or moisture exposure. Maintaining proper temperature control helps ensure smooth, glossy chocolate with a perfect temper.
Can I Reuse Tempered Chocolate That Has Hardened?
You can reuse tempered chocolate that has hardened, but it’s important to handle it properly. When storing tempered chocolate, keep it in an airtight container at a cool, dry place. To reuse, gently reheat the hardened chocolate until it melts smoothly, then re-temper if needed. Avoid adding water or other ingredients, as this can affect its texture. Proper chocolate reuse and storage help maintain its shine and consistency.
Conclusion
Think of tempering as tending a delicate garden—you nurture it patiently, adjusting your approach as needed. With practice, your chocolate blooms into glossy, smooth hearts that shine like well-tended flowers. Every step, from selecting the right chocolate to troubleshooting, helps your creation flourish. Remember, patience and attention to detail are your best tools. Keep tending your craft, and soon your chocolates will blossom into perfect, beautiful hearts that truly impress.