Connect with us

International Butter Dishes

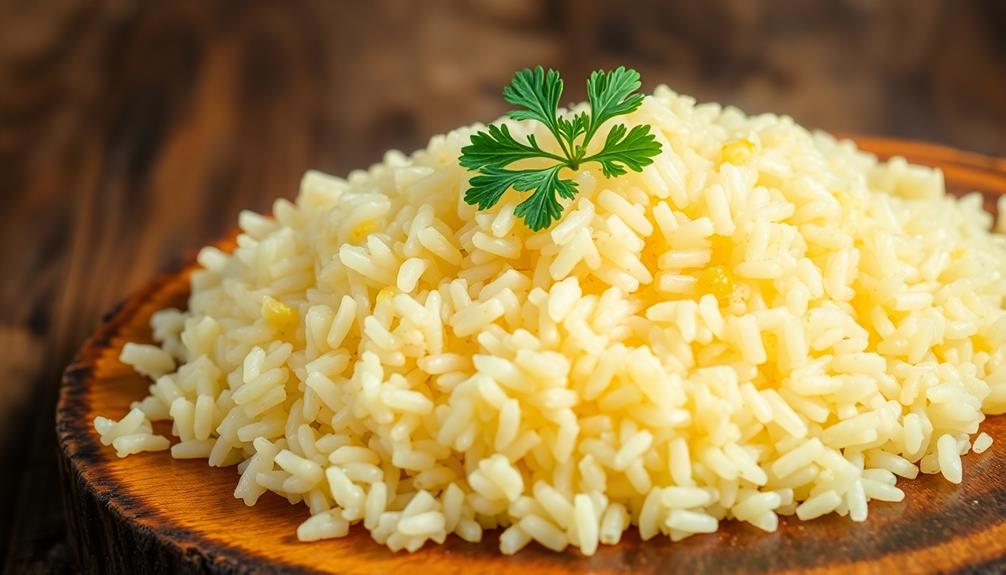
Turkish Butter Pilaf: the Simple, Savory Rice Dish Bursting With Buttery Goodness

Aromatic and creamy, the Turkish butter pilaf is a cherished staple that showcases the rich heritage of Ottoman cuisine, inviting you to uncover its secrets.

Published

on

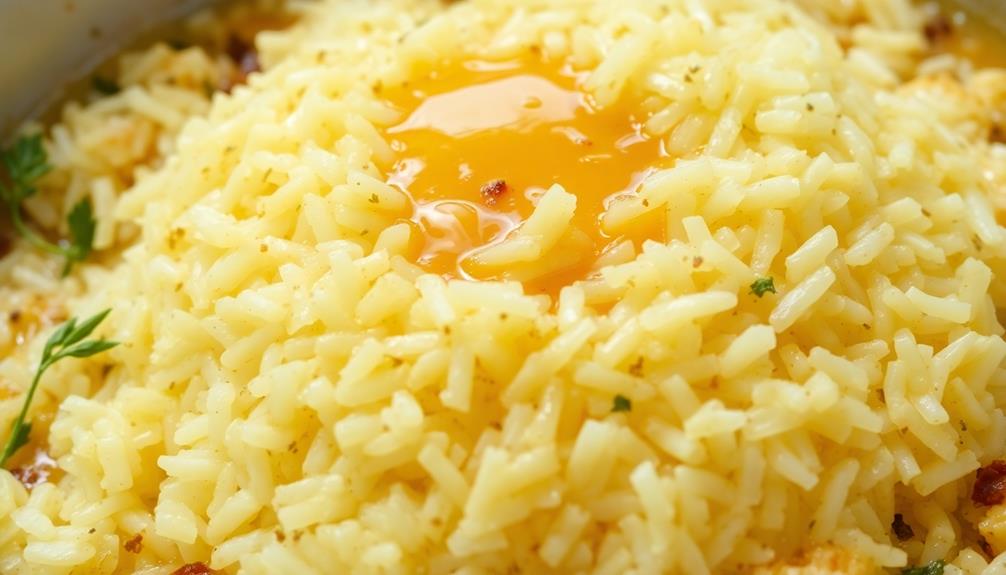
savory buttery rice dish

Dive into the rich heritage of Turkish cuisine with the beloved butter pilaf. This simple, savory rice dish originated in the Ottoman Empire, where chefs perfected it centuries ago using golden butter as the key ingredient. As the empire expanded, the pilaf traveled with traders and diplomats, evolving regional variations. Today, it remains a cherished part of Turkish culture – a comforting, flavorful staple that highlights the creamy decadence of butter harmonized with aromatic spices. From the careful rinsing of rice to the fluffing technique, every step elevates this dish into a true culinary delight. Continue reading to uncover the secrets behind crafting the ultimate Turkish butter pilaf.

Key Takeaways

  1. Turkish Butter Pilaf is a cherished part of Turkish culinary heritage, with origins tracing back to the Ottoman Empire's 15th-century perfection of rice cooked in butter.
  2. The dish features a simple yet flavorful preparation that combines long-grain rice, aromatic spices, and rich, creamy butter to create a comforting and satisfying staple.
  3. Proper technique, such as rinsing the rice thoroughly and allowing the cooked rice to rest, is crucial for achieving the dish's signature fluffy and light texture.
  4. The balance of buttery luxury and subtle spice complexity in Turkish Butter Pilaf offers a sensory awakening, with the fragrant aroma enhancing the overall tasting experience.
  5. The dish exemplifies the beauty of everyday cooking, celebrating the power of simple, quality ingredients and encouraging a slower pace to truly appreciate the meal.

History
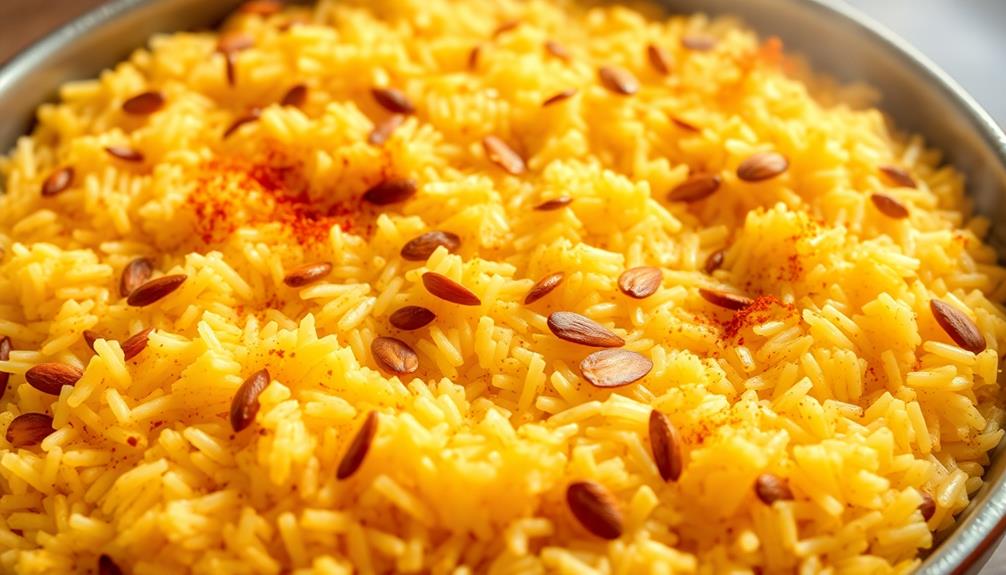
historical events and timelines

Turkish butter pilaf has a rich history rooted in the culinary traditions of the Ottoman Empire. For centuries, this beloved dish has graced the tables of palaces, cafes, and homes across the region.

Its origins can be traced back to the 15th century, when the Ottoman chefs perfected the art of cooking rice in an abundance of butter, creating a decadent and fragrant pilaf that became a hallmark of imperial cuisine.

As the Ottoman Empire expanded, so too did the popularity of Turkish butter pilaf. The dish traveled with traders, diplomats, and soldiers, spreading its delicious influence far and wide.

Each region put its own spin on the recipe, incorporating local ingredients and techniques to make it their own.

Today, Turkish butter pilaf remains a cherished part of the country's cultural heritage, a timeless classic that continues to delight and nourish generations of food lovers.

Advertisement

Recipe

cooking instructions and ingredients

Recipe

Turkish Butter Pilaf is a comforting and flavorful rice dish that's a staple in Turkish cuisine. The key to this dish is the perfect balance of aromatic spices and the rich, creamy texture achieved by the long-grain rice and butter. The dish is often enjoyed for its simplicity and can be a nutritious option when prepared with wholesome ingredients, similar to the benefits of raw food diets which emphasize whole, unprocessed foods.

The dish is traditionally made with vermilion-colored Turkish rice, which lends a unique flavor and texture. However, you can easily substitute other long-grain rice varieties such as basmati or jasmine rice.

Ingredients:

  • 2 cups long-grain rice
  • 4 cups chicken or vegetable broth
  • 1/2 cup unsalted butter
  • 1 teaspoon cumin
  • 1 teaspoon paprika
  • 1/2 teaspoon ground cinnamon
  • 1/2 teaspoon salt
  • 1/4 teaspoon black pepper

Instructions:

In a large saucepan, melt the butter over medium heat. Add the rice and sauté for 2-3 minutes, stirring frequently, until the rice is lightly toasted.

Pour in the broth and stir in the cumin, paprika, cinnamon, salt, and pepper. Bring the mixture to a boil, then reduce the heat to low, cover, and simmer for 20-25 minutes, or until the rice is tender and the liquid is absorbed.

When cooking Turkish Butter Pilaf, it's important to use a heavy-bottomed saucepan or pot to ensure even heating and prevent the rice from burning.

Advertisement

Additionally, avoid lifting the lid during the simmering process, as this can release valuable steam and affect the cooking time. For a richer flavor, you can also stir in a tablespoon of butter or olive oil at the end of the cooking process.

Cooking Steps
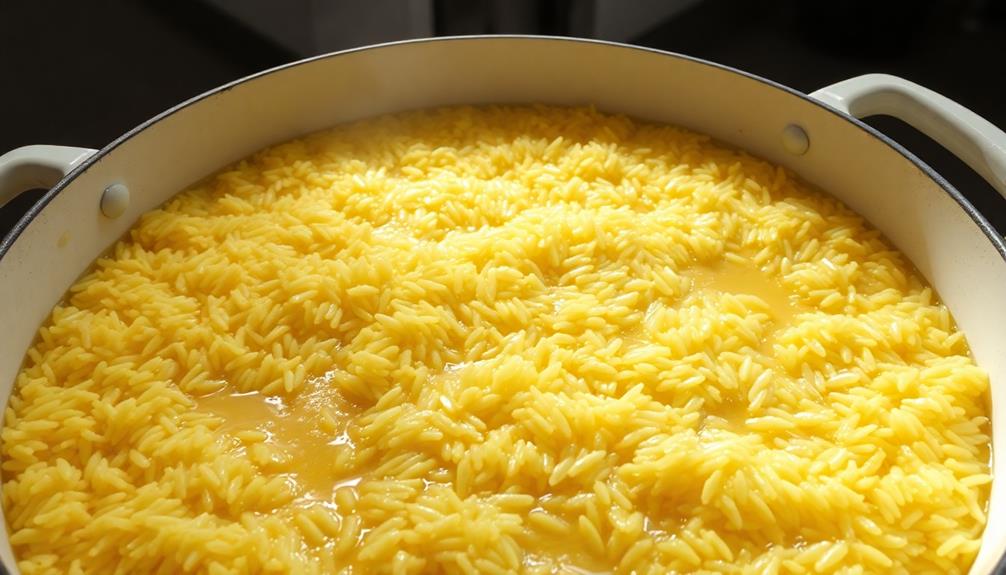
preparation and cooking instructions

First, you'll want to rinse the rice thoroughly before cooking to remove any excess starch.

Next, melt the butter in a skillet over medium heat.

Then, add the rice and toast it, stirring frequently, until it's fragrant and golden.

After that, pour in the broth and let the mixture simmer until the rice is tender.

Step 1. Rinse Rice Thoroughly Before Cooking
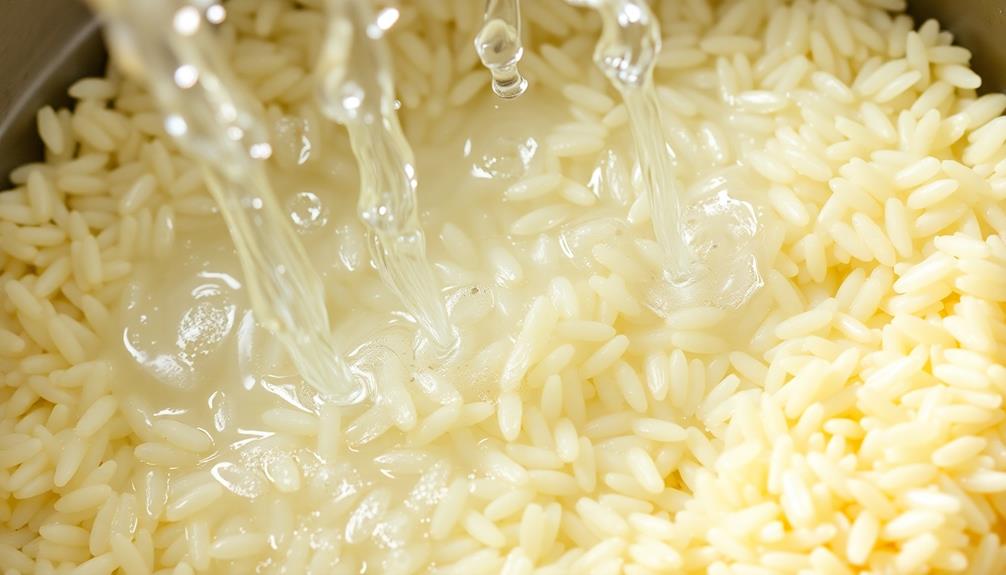
rinse rice thoroughly first

Rinsing the rice thoroughly before cooking is a crucial step in preparing the perfect Turkish butter pilaf. This simple process helps remove any impurities or excess starch, ensuring your rice cooks up fluffy, not clumpy.

Start by placing the rice in a fine-mesh strainer and rinse it under cool running water. Swish the grains around with your fingers, allowing the water to run through and carry away any debris or powdery starch. Continue rinsing until the water runs clear, usually about 1-2 minutes.

Advertisement

This extra step may seem tedious, but it's worth the effort – the result is a light, tender texture that's essential for an authentic Turkish butter pilaf.

Once rinsed, your rice is ready to be cooked to pilaf perfection. Don't skip this crucial preparatory stage; taking the time to rinse thoroughly will have your rice turning out beautifully every time.

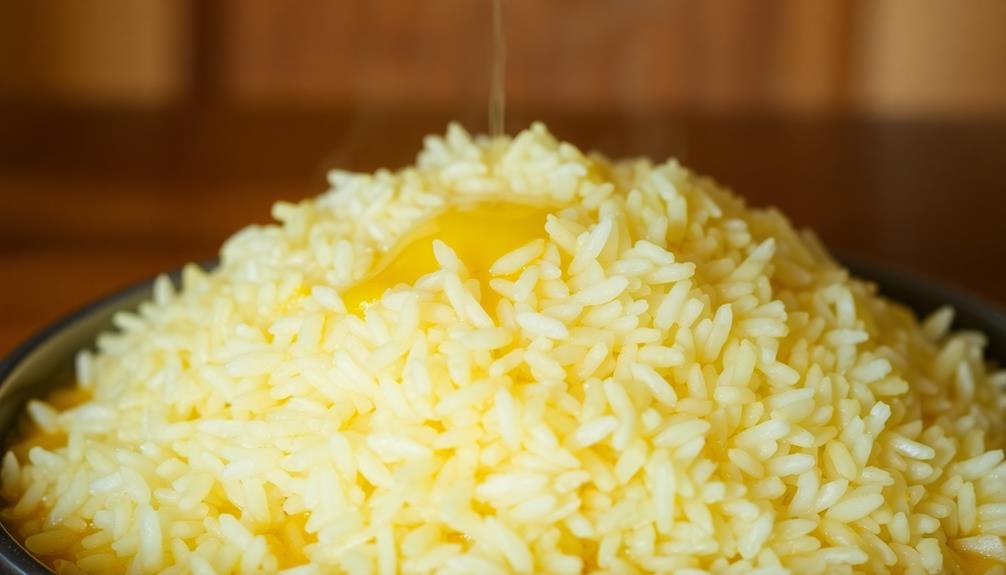
Step 2. Melt Butter in a Skillet
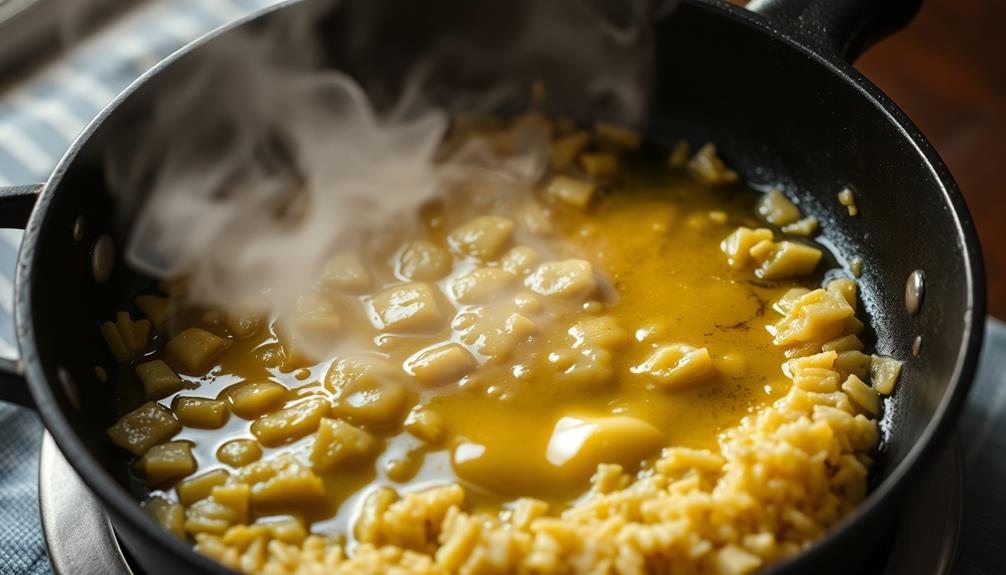
melt butter in skillet

Next, melt the butter in a large skillet over medium heat.

Butter, which typically contains 80-82% fat, is perfect for creating a rich and creamy base for your dish.

Watch the butter carefully as it begins to melt, swirling the pan gently to ensure even heating.

As the butter melts, it will start to bubble and foam.

Advertisement

Keep a close eye on it, as the butter can quickly go from perfectly golden to burnt if you're not attentive.

Once the butter is fully melted and has a lovely, nutty aroma, remove the skillet from the heat.

This step is crucial, as you don't want the butter to burn and ruin the delicate flavor.

Take a moment to breathe in the rich, buttery scent – it's a tantalizing preview of the savory dish to come.

Butter enhances flavor and moisture with its creamy texture, making it an essential ingredient in this recipe.

Advertisement

With the butter melted, you're now ready to start building the layers of flavor that will make this Turkish Butter Pilaf so irresistible.

Get ready to add the fragrant spices and fluffy rice!

Step 3. Add Rice and Toast
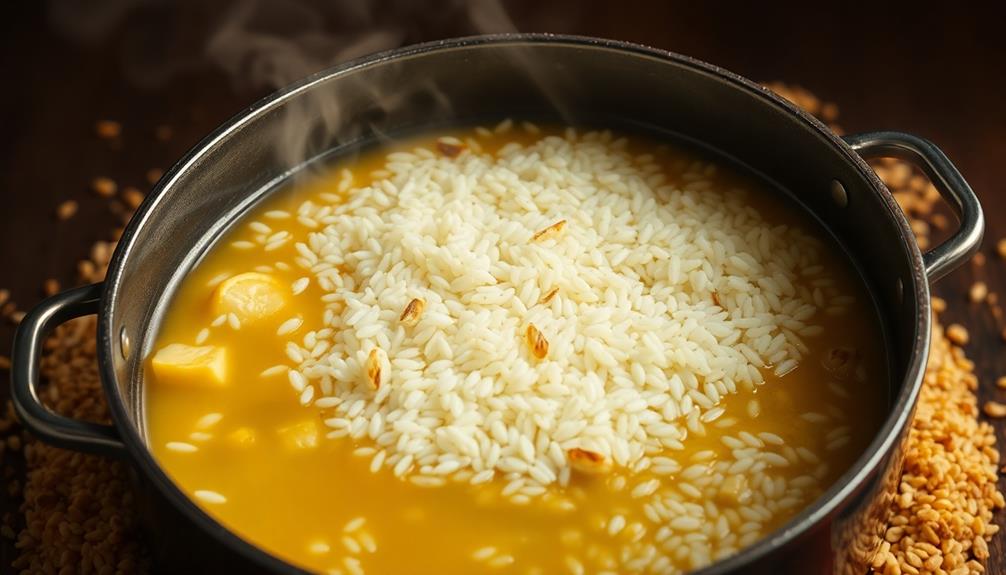
add rice and toast

With the butter melted to perfection, it's time to add the rice and toast it. Grab your trusty spatula and gently pour the rice into the hot, fragrant butter.

As the grains hit the pan, they'll sizzle and pop, releasing an aroma that'll have your mouth watering. Stir the rice continuously, ensuring each grain gets coated in that rich, golden butter. You'll want to toast the rice for 2-3 minutes, until it turns slightly translucent and takes on a lovely nutty flavor.

Keep a close eye on it, though – you don't want the rice to burn! Once it's perfectly toasted, it's ready for the next step.

The rice should have a delightful, slightly chewy texture that contrasts beautifully with the silky butter. This simple act of toasting transforms the rice, laying the foundation for the truly special Turkish butter pilaf to come.

Advertisement

Get ready, because the flavors are about to intensify!

Step 4. Add Broth and Simmer
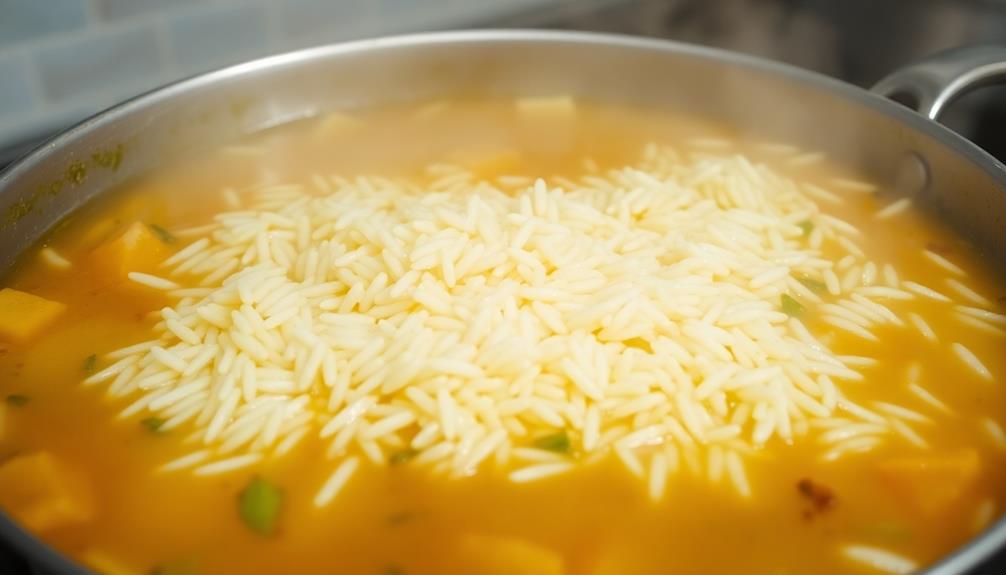
add broth then simmer

Now, grab the flavorful broth you've prepared and slowly pour it into the pan with the toasted rice. As the liquid hits the grains, you'll hear a gentle sizzle and see the rice start to swell and become plump.

For optimal cooking results, ensure your cooking environment is clean and free from distractions, just like how regular cleaning is essential for air purifiers to maintain performance.

Stir the mixture gently, ensuring every grain is coated in the aromatic broth. Bring the pan to a simmer, then cover it with a tight-fitting lid. Reduce the heat to low and let the rice cook, undisturbed, for about 15-20 minutes.

The rice will slowly absorb the broth, becoming tender and infused with deep, savory flavor. Peek under the lid occasionally to check the progress, but resist the urge to stir too much, as this can make the rice sticky.

Once the liquid has been fully absorbed and the rice is cooked through, remove the pan from the heat and let it sit, covered, for another 5 minutes. This resting period allows the grains to firm up and the flavors to meld together perfectly.

Advertisement

Step 5. Fluff Rice With a Fork

fluff rice using fork

Fluffing the rice with a fork is the final step in perfecting this aromatic Turkish butter pilaf. Gently run the tines of the fork through the cooked rice, lifting and separating the grains. This simple technique creates a fluffy, light texture that's essential for this dish.

Don't overmix or squeeze the rice – you want to maintain its delicate, individual grains. As you fluff, you'll release the enticing aromas of the melted butter, fragrant spices, and tender vegetables. The rice should be thoroughly separated, with no clumps or stickiness remaining.

Fluff just until you achieve that perfect, cloud-like consistency. Then, transfer the light, fluffy rice to a serving dish, ready to be enjoyed. This final step ensures every bite of the Turkish butter pilaf is as light and flavorful as the first.

Treat the rice with care, and it will reward you with an authentic, mouthwatering result.

Final Thoughts
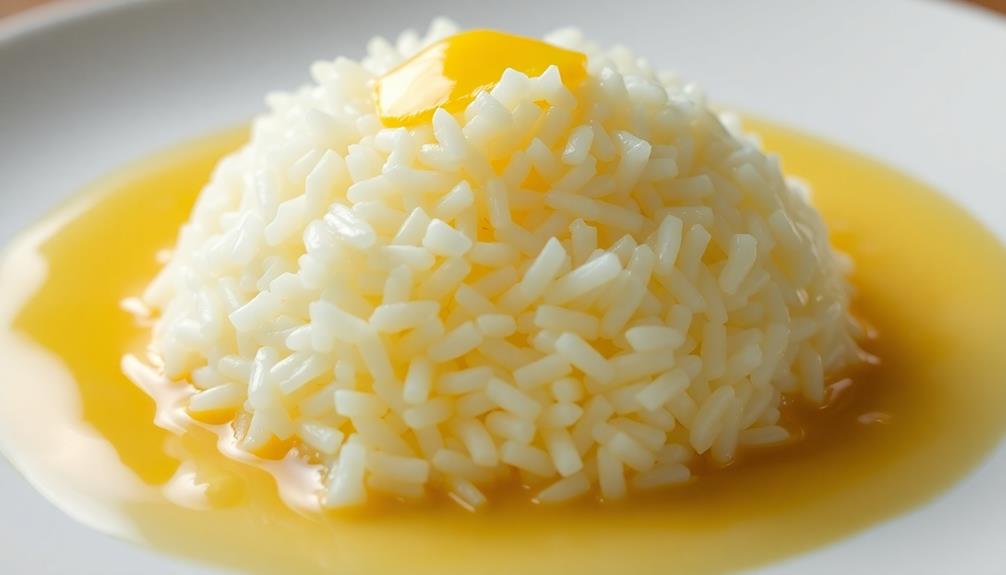
concluding reflections and insights

Having savored the aromatic Turkish Butter Pilaf, you can't help but appreciate the depth of flavors woven into this humble dish. The perfectly cooked rice, infused with the rich, creamy butter, is a true delight. Each bite awakens your senses, the fragrant aroma of toasted spices lingering pleasantly on your tongue.

What makes this pilaf so special is the balance it strikes – the buttery luxury offset by the subtle complexity of the seasonings, creating a harmonious symphony of tastes.

As you savor the last morsels, you can't help but feel a sense of culinary satisfaction. This is a dish that reminds you of the joys of simplicity, where humble ingredients are transformed into something truly extraordinary.

Advertisement

The Turkish Butter Pilaf is a testament to the power of thoughtful technique and the magic that can happen when flavors are allowed to mingle and meld. It's a dish that invites you to slow down, savor each moment, and appreciate the beauty of the everyday.

Frequently Asked Questions

What Is the Best Type of Rice for Turkish Butter Pilaf?

The best type of rice for Turkish butter pilaf is a long-grain rice like basmati or jasmine. These rices have a light, fluffy texture that's perfect for soaking up the rich, buttery flavor of the dish.

Can I Substitute Olive Oil for the Butter?

You can substitute olive oil for the butter, but the dish won't have the same rich, creamy flavor that the butter provides. The butter is essential for the traditional Turkish butter pilaf taste.

How Long Does Turkish Butter Pilaf Stay Fresh?

How long it stays fresh depends on how you store it. If you refrigerate the Turkish butter pilaf, it'll stay fresh for 3-4 days. But if you leave it out at room temperature, it'll only last 1-2 days before spoiling.

Can I Make Turkish Butter Pilaf in a Rice Cooker?

You can definitely make Turkish butter pilaf in a rice cooker. Just follow the same basic recipe, adding the rice, broth, and butter to the cooker. It'll come out perfectly cooked and full of that rich, buttery flavor.

Advertisement

Is Turkish Butter Pilaf Suitable for Vegetarians or Vegans?

You'll find that Turkish butter pilaf is not suitable for vegetarians or vegans, as it typically contains butter and may also include meat or meat-based broth. However, you could try a plant-based alternative using a neutral oil and vegetable broth.
Continue Reading
Advertisement

International Butter Dishes

Tibetan Butter Tea: The Unique, Savory Tea to Warm You Up

Unraveling the rich cultural tapestry of Tibetan butter tea, a distinctive beverage that offers a savory respite from the Himalayan chill.

Published

on

By

savory tibetan butter tea

Tibetan butter tea, a timeless beverage rooted in the resilient culture of the Tibetan people, is a unique and savory delight that'll warm you up in the harsh Himalayan climate. Tracing back to the 7th century, this traditional drink, known as 'po cha', has been a staple for nourishment and comfort among nomads and monks. Crafted with high-quality black tea, yak butter, salt, and water, the distinctive flavor profile warms the soul while offering nutritional benefits. More than just a tea, it's a cherished ritual that connects individuals to Tibetan heritage and identity. Intrigued to learn the fascinating history and time-honored preparation?

Key Takeaways

  • Tibetan butter tea, known as 'po cha', is a centuries-old cultural staple that reflects the resilience and resourcefulness of the Tibetan people.
  • Crafted with high-quality black tea leaves, yak butter, salt, and water, the unique flavor profile warms the soul and offers nutritional benefits.
  • Preparation involves a rhythmic ritual of churning and blending the ingredients, serving as a calming communal experience in Tibetan culture.
  • The tea provides warmth and energy in the harsh Himalayan climate, with the salt content aiding in hydration at high altitudes.
  • Drinking Tibetan butter tea is more than just a beverage – it is an immersive cultural experience that celebrates the heritage and identity of the Tibetan people.

History

past events and narratives

The origins of Tibetan butter tea, also known as 'po cha', can be traced back to the 7th century. This savory beverage has been a staple in Tibetan culture for centuries, providing essential nourishment and warmth in the high-altitude, frigid climate of the Himalayan region.

Traditionally prepared by combining black tea, yak butter, and sometimes salt, this unique concoction was initially consumed by Tibetan nomads and monks to combat the harsh, bitter cold. Over time, the recipe evolved, incorporating regional variations and personal preferences.

Today, butter tea remains a beloved part of Tibetan daily life, served as a welcoming gesture, a comforting ritual, and a source of sustenance. Its rich, creamy texture and robust flavor have captivated the hearts and palates of both Tibetans and curious adventurers from around the world, ensuring the enduring legacy of this iconic Himalayan beverage.

Recipe

cooking instructions and ingredients

Tibetan butter tea, known as "po cha" in the Tibetan language, is a unique and traditional beverage that has been enjoyed for centuries in the Himalayan region. This rich and creamy tea is more than just a drink; it's a cultural tradition that reflects the resilience and resourcefulness of the Tibetan people.

The key to a perfect cup of Tibetan butter tea lies in the high-quality ingredients and the meticulous preparation process. The tea leaves, sourced from the high-altitude tea gardens of the Tibetan Plateau, are carefully selected and expertly brewed to extract their full, robust flavor.

Ingredients:

Advertisement
  • 4 cups of water
  • 4 teaspoons of black tea leaves
  • 2 tablespoons of unsalted butter
  • 1 teaspoon of salt

Directions:

Bring the water to a boil in a saucepan. Add the tea leaves and let them steep for 5-7 minutes. Strain the tea into a clean pot, discarding the leaves.

Add the butter and salt, and whisk the mixture vigorously until the butter is fully incorporated and the tea is frothy.

When preparing Tibetan butter tea, it's essential to use high-quality, unsalted butter to ensure the perfect balance of flavors. The salt added to the tea helps to enhance the natural sweetness and richness of the butter.

Serve the tea hot, allowing the drinker to savor the unique and comforting taste of this traditional beverage.

Cooking Steps

recipe preparation instructions

First, gather your black tea and yak butter.

Next, add the yak butter to a pot and bring it to a gentle simmer.

Advertisement

Step 1. Gather Black Tea and Yak Butter

gather tea and butter

Gathering the necessary ingredients for the classic Tibetan butter tea begins with selecting high-quality black tea leaves and obtaining fresh yak butter.

Look for bold, full-bodied black tea that will stand up to the rich, creamy flavor of the yak butter. You'll want to find a reputable source for your yak butter, as this traditional ingredient is the heart and soul of this savory beverage.

Once you have your tea and butter, you'll need to prepare them for brewing.

Crush the tea leaves to release their robust aroma and flavor. Then, softly warm the yak butter until it's just melted, being careful not to let it get too hot. The key is to maintain the delicate balance of the tea's bold character and the butter's luscious mouthfeel.

With your ingredients ready, you can now begin the process of infusing them together to create the signature Tibetan butter tea.

Step 2. Add Yak Butter

add yak butter now

With your tea leaves crushed and the yak butter softened, you're ready to begin the process of infusing them together.

Grab a medium saucepan and add the softened yak butter. Gently melt the butter over medium heat, stirring occasionally. Once it's fully melted, pour in your freshly brewed black tea. Stir the mixture thoroughly, ensuring the butter and tea are well combined.

Advertisement

Allow the buttery tea to simmer for 5-7 minutes, letting the flavors meld together. The aroma of the rich, creamy tea will start to fill your kitchen, making your mouth water in anticipation.

As the tea simmers, the butter will melt completely, creating a silky, smooth texture. Stir the tea occasionally to prevent any skin from forming on top.

When the time is up, your Tibetan butter tea is ready to serve. Ladle the fragrant, golden liquid into your favorite mugs or bowls.

Enjoy the savory, comforting sip that warms you from the inside out.

Step 3. Bring to a Gentle Simmer

gently simmer the mixture

With the softened yak butter and freshly brewed black tea now combined in the saucepan, you'll want to bring the mixture to a gentle simmer.

Slowly increase the heat, keeping a close eye on the pan. As the liquid begins to bubble, you'll see tiny, delicate bubbles form and rise to the surface. Don't let the tea come to a rolling boil – that would make the flavors too intense and potentially scorch the butter.

Advertisement

Instead, maintain a gentle, steady simmer, allowing the ingredients to meld together harmoniously.

You'll notice the rich, creamy aroma of the yak butter wafting through the air, complementing the robust, earthy notes of the black tea.

Stir the mixture occasionally with a wooden spoon to ensure even heating. This low-and-slow approach allows the flavors to develop and the tea to become perfectly infused with the velvety butter.

After a few minutes of gentle simmering, your Tibetan butter tea will be ready for the next step – pouring into your favorite mug to enjoy its warm, comforting goodness.

Step 4. Pour Into Cups

pour mixture into cups

Once the Tibetan butter tea has reached a gentle simmer, carefully pour the fragrant liquid into your favorite mugs or cups. The rich, creamy texture and earthy aroma will immediately fill the air, enticing your senses.

Be mindful not to spill as you ladle the tea, ensuring an even distribution among the vessels. The golden-hued liquid should reach about three-quarters of the way up each cup, leaving ample room for the final touch – a dollop of fresh yak butter on top. This traditional beverage not only warms you up but also reflects the cultural significance of butter, which has evolved over centuries in various culinary traditions the historical evolution of butter.

Advertisement

Slowly drizzle the butter over the surface, watching it melt and swirl into the hot tea. The contrast of the smooth, velvety butter and the robust, slightly nutty flavor of the tea creates a harmonious blend that's truly unique to the Tibetan culinary tradition.

Inhale deeply, savoring the comforting scent, then take your first sip. The warmth envelops your body, while the balanced flavors dance across your palate, transporting you to the rugged Himalayan landscape.

Step 5. Enjoy the Aromatic Beverage

savor the fragrant drink

Take a moment to savor the aromatic beverage. As you bring the steaming cup to your lips, the captivating scent of Tibetan butter tea envelops your senses. The rich, creamy flavor dances on your tongue, a harmonious blend of black tea, yak butter, and a pinch of salt. Each sip warms you from the inside out, providing a comforting respite from the chill.

Gently blowing on the surface, you watch the steam swirl and dissipate, revealing the golden liquid waiting to be savored. With each subsequent sip, you discover new layers of flavor – the subtle earthiness of the tea, the velvety smoothness of the butter, and the perfect balance of saltiness that ties it all together.

The beverage's unique texture and robust taste make it a truly indulgent experience, transporting you to the heart of the Tibetan plateau.

As you empty your cup, you feel a sense of contentment and renewed vigor, ready to embrace the day ahead.

Advertisement

Final Thoughts

concluding reflections and insights

Amidst the rich tapestry of Tibetan culture, the alluring aroma and comforting warmth of butter tea have long captivated the senses. As you sip this unique and savory beverage, you're transported to the snow-capped peaks and rugged landscapes of the Himalayas. The blend of black tea, yak butter, and salt creates a truly distinctive flavor that warms the soul and nourishes the body.

Whether enjoyed during a contemplative moment or shared with friends, butter tea is more than just a drink – it's a cherished tradition that embodies the resilience and adaptability of the Tibetan people.

Its preparation, with the rhythmic churning and blending of ingredients, is a calming ritual that connects you to the rich cultural heritage. As you savor each sip, you can't help but appreciate the ingenuity and resourcefulness that went into crafting this age-old recipe, perfectly suited to the harsh yet beautiful Tibetan environment.

Truly, butter tea is a remarkable elixir that invites you to slow down, savor the moment, and immerse yourself in the captivating world of Tibetan culture.

Frequently Asked Questions

How Long Does Tibetan Butter Tea Last Before Spoiling?

Tibetan butter tea can last up to a week in the refrigerator, but it's best consumed fresh. The rich, creamy texture and flavor won't last long, so enjoy it while it's at its peak.

Can Tibetan Butter Tea Be Consumed Cold?

Can Tibetan butter tea be consumed cold? Absolutely! While it's traditionally served hot, you can enjoy this savory beverage chilled on a hot day. The rich, creamy texture and bold flavors make it a refreshing treat.

Advertisement

What Are the Health Benefits of Drinking Tibetan Butter Tea?

Drinking Tibetan butter tea can provide you with health benefits like boosting energy, improving digestion, and supporting heart health. The high-fat content and nutrients in the tea can also help keep you warm on chilly days.

Can Tibetan Butter Tea Be Made With Different Types of Tea Leaves?

You can absolutely make Tibetan butter tea using different types of tea leaves. While black and oolong teas are traditional, you can experiment with green, white, or even herbal teas to create your own unique version.

How Does the Taste of Tibetan Butter Tea Compare to Regular Black Tea?

Compared to regular black tea, Tibetan butter tea has a richer, creamier, and more savory flavor profile. The addition of yak butter and salt creates a unique taste experience that's quite different from the lighter, more astringent notes of black tea.

Continue Reading

International Butter Dishes

Irish Butter Colcannon: the Creamy, Buttery Mashed Potatoes With a Twist

Graced Irish tables for generations, this soul-warming colcannon dish combines fluffy potatoes, luscious Irish butter, and tender kale or cabbage for a creamy, comforting twist on classic mashed potatoes.

Published

on

By

creamy buttered irish colcannon

Experience the cozy comfort of traditional Irish butter colcannon – a delightfully creamy twist on classic mashed potatoes that celebrates the rich heritage and flavors of the Emerald Isle. This beloved dish combines fluffy potatoes enriched with luscious Irish butter and milk, then gently folded with tender kale or cabbage for earthy goodness. Colcannon has graced Irish tables for generations, evolving from humble peasant fare to a cherished comfort food that's especially revered during festive occasions like St. Patrick's Day. Dive in and discover why this soul-warming recipe remains a beloved part of Ireland's culinary legacy.

Key Takeaways

  • Irish Butter Colcannon is a traditional Irish dish dating back to the 18th century or earlier, combining creamy mashed potatoes with kale or cabbage.
  • The dish reflects the resourcefulness of Irish cuisine, maximizing available ingredients, and remains a cherished part of Irish culinary heritage.
  • Colcannon is often associated with festive occasions, particularly St. Patrick's Day, representing comfort food and Irish community traditions.
  • The key ingredients include potatoes, kale or cabbage, Irish butter, and milk, with optional additions like scallions or leeks for extra flavor.
  • Colcannon is versatile, served as a side or main course, and its rich, buttery taste with earthy notes from the greens invokes feelings of warmth and comfort.

History

historical events and narratives

Originating in Ireland, colcannon has long been a traditional Irish dish, dating back to the 18th century or earlier. This creamy, buttery mashed potato concoction was a staple in the diets of Irish peasants, providing a hearty, filling meal that made the most of available ingredients.

The name "colcannon" comes from the Gaelic words "cal" meaning cabbage and "ceann" meaning head, referring to the inclusion of cabbage or kale in the dish. Historically, butter has played a significant role in Irish cuisine, reflecting its versatility and cultural importance as a cherished ingredient in cooking, particularly in comforting dishes like colcannon.

Butter's role in culinary traditions has contributed to its enduring popularity.

Over time, colcannon evolved, with recipes calling for the addition of other nutritious vegetables like onions, leeks, and scallions. The dish gained popularity not only in Ireland but also with Irish immigrants who brought the recipe to the United States and other parts of the world.

Today, colcannon remains a cherished part of Irish culinary heritage, enjoyed as a comforting side dish or a standalone meal, particularly around St. Patrick's Day celebrations.

Advertisement

Recipe

cooking instructions and ingredients

Colcannon is a traditional Irish dish that combines mashed potatoes with kale or cabbage and is often enriched with butter and milk. This recipe showcases the use of Irish butter, which lends a rich, creamy flavor to the dish.

Butter enhances flavor and moisture in baked goods, making it a staple in pastry recipes, and its creamy texture is influenced by the emulsification process during churning butter's creamy texture.

The combination of the buttery mashed potatoes and the earthy greens creates a comforting and satisfying meal. Colcannon is a versatile dish that can be served as a side or as a main course, making it a perfect addition to any St. Patrick's Day celebration or cozy family dinner.

Ingredients:

  • 2 pounds potatoes, peeled and cut into 1-inch cubes
  • 1 cup kale or cabbage, chopped
  • 1/2 cup Irish butter, plus more for serving
  • 1/2 cup milk
  • 1 teaspoon salt
  • 1/4 teaspoon black pepper

Instructions:

In a large pot, cover the potatoes with cold water and bring to a boil over high heat. Reduce the heat to medium-low and simmer until the potatoes are tender, about 15 minutes.

Drain the potatoes and return them to the pot. Add the kale or cabbage, 1/2 cup of butter, milk, salt, and pepper. Mash the potatoes and greens together until well combined and creamy. Taste and adjust seasoning as needed.

Advertisement

Serve the colcannon hot, with additional pats of Irish butter on top. Enjoy!

Tips:

For a richer flavor, consider using half-and-half or heavy cream instead of milk. You can also stir in shredded cheddar cheese or crispy bacon bits for added depth.

If the mixture seems too thick, add a splash of milk or warm water to reach your desired consistency.

Cooking Steps

step by step cooking instructions

Peel and cube those potatoes, then boil 'em until they're nice and tender.

Drain the water and mash the spuds up good.

Advertisement

Now, stir in some creamy butter and milk to make 'em extra smooth and tasty.

Don't forget to mix in that fresh kale or cabbage – it's the perfect addition to your Irish Butter Colcannon!

Step 1. Peel and Cube Potatoes

peel and cube potatoes

Next, peel and cube the potatoes. Grab a sharp knife and get to work! Gently scrape the skin off each potato, being careful not to waste too much of the flesh beneath.

Once peeled, place the potatoes on a clean cutting board. Using your knife, slice the potatoes into 1-inch cubes, creating uniform bite-sized pieces. This step is important for ensuring even cooking later on.

As you cube, try to keep the pieces a similar size so they'll cook at the same rate. Toss the cubed potatoes into a large pot – you'll need plenty of room for boiling.

Fill the pot with cold water, making sure the potato cubes are fully submerged. Get ready to bring this mixture to a boil on the stovetop!

Advertisement

The perfectly peeled and cubed potatoes will be the foundation for your delicious Irish butter colcannon.

Step 2. Boil Potatoes Until Tender

boil potatoes until tender

Bring the water to a boil over high heat. Once it's bubbling vigorously, carefully add the cubed potatoes.

Let them cook for 12-15 minutes, or until they're fork-tender. You'll know they're ready when you can easily pierce them with a fork.

Be sure to keep an eye on the pot and give the potatoes a gentle stir every few minutes. This helps them cook evenly.

The water should maintain a steady, rolling boil the whole time. Adjust the heat as needed to keep it at a strong simmer.

When the potatoes are tender, drain them well in a colander. Give them a few good shakes to remove any excess moisture.

Advertisement

The drier the potatoes, the fluffier your mashed potatoes will be. With this quick boiling step, you're one big step closer to enjoying creamy, decadent Irish Butter Colcannon!

Step 3. Drain and Mash Potatoes

drain and mash potatoes

Once the potatoes are tender and drained, it's time to mash them up. Grab a potato masher or a sturdy fork, and get ready to work your magic.

Mash the potatoes right in the pot, breaking them down into a smooth, creamy consistency. Don't be afraid to put some muscle into it – you want to achieve that perfect, lump-free texture.

As you mash, feel free to add a splash of milk or cream to help the potatoes become extra silky and luxurious. Incorporate the dairy slowly, mashing and stirring until you reach your desired creaminess.

Keep going until the potatoes are light and fluffy, ready to be transformed into the star of your Irish Butter Colcannon dish. This simple act of mashing unlocks the true potential of the humble potato, preparing it to become the foundation for a cozy, comforting meal.

With each press of the masher, you're one step closer to enjoying the rich, buttery goodness of this classic Irish recipe.

Advertisement

Step 4. Add Butter and Milk

incorporate butter and milk

With the potatoes mashed to perfection, it's time to add the rich, creamy elements that will transform them into the quintessential Irish Butter Colcannon.

Grab a generous knob of fresh, high-quality Irish butter and drop it into the fluffy mashed potatoes. As the butter melts, its golden color and decadent aroma will start to permeate the dish.

Next, slowly pour in some warm milk, stirring continuously to incorporate it seamlessly. The milk will lend a velvety texture and subtle sweetness to the potatoes. Keep stirring until the butter and milk are fully combined, creating a luxuriously creamy mixture.

The vibrant yellow hue and silky smooth consistency will have your mouth watering in anticipation. Now that the potatoes are brimming with the essence of Ireland, you're well on your way to creating an authentic and delectable Irish Butter Colcannon.

Step 5. Stir in Kale or Cabbage

incorporate kale or cabbage

Next, stir in your chosen green vegetable to the creamy mashed potatoes.

Whether you prefer the earthy, slightly bitter taste of kale or the mild, sweet flavor of cabbage, these leafy additions will transform your colcannon into a true Irish delight.

Gently fold in a generous handful of shredded kale or thinly sliced cabbage, making sure to evenly distribute the greens throughout the buttery potato mixture.

Advertisement

The vibrant colors and contrasting textures will create a visually stunning and texturally exciting dish.

As the greens wilt and meld with the hot potatoes, they'll infuse the colcannon with their nutrition and unique character.

Don't be afraid to experiment – try a combination of kale and cabbage for an even more dynamic flavor profile.

With the greens now incorporated, your Irish Butter Colcannon is well on its way to becoming a comforting and satisfying side dish that'll have your taste buds dancing a jig.

Final Thoughts

concluding reflections and insights

As you've now delved into the intricacies of crafting the perfect Irish Butter Colcannon, it's time to reflect on the journey. You've mastered the art of perfectly cooked and mashed potatoes, blending them with rich, creamy butter for a luscious texture.

The addition of hearty kale or cabbage has introduced a delightful contrast of flavors and textures, elevating this traditional dish to new heights.

Advertisement

Creating Irish Butter Colcannon is a labor of love, but the rewards are undeniable. Imagine sinking your spoon into the fluffy, golden mounds, the butter glistening and beckoning you to take a bite.

The interplay of the buttery potatoes and the earthy greens is a symphony for the senses, transporting you straight to the heart of Ireland. As you savor each forkful, you'll be transported to a cozy cottage, the scent of peat fires and the laughter of loved ones filling the air.

This dish isn't just sustenance – it's a celebration of heritage, of community, and of the simple pleasures that make life truly fulfilling.

Frequently Asked Questions

Can I Use Regular Potatoes Instead of Yukon Gold?

Yes, you can use regular potatoes instead of Yukon Gold. The texture and flavor may differ slightly, but regular potatoes will work just fine in this recipe. Feel free to experiment and find your preferred potato.

Is It Possible to Make This Dish Vegan?

Yes, you can absolutely make this dish vegan! Simply swap out the butter for a plant-based alternative like coconut oil or vegan margarine, and use plant-based milk instead of dairy. The key is to keep the potatoes creamy and flavorful.

Advertisement

How Long Do the Leftovers Last in the Fridge?

The leftovers should last 3-4 days in the fridge when stored in an airtight container. Be sure to refrigerate them promptly to prevent bacterial growth and maximize their shelf life.

Can I Substitute Bacon for the Kale or Cabbage?

You can definitely substitute bacon for the kale or cabbage in this dish. The smoky, savory flavor of the bacon will complement the creamy mashed potatoes nicely. Just be sure to adjust the seasoning to your taste.

Is It Necessary to Use an Electric Mixer to Mash the Potatoes?

You don't necessarily need an electric mixer to mash the potatoes. A ricer, masher, or even a fork can work just as well, depending on your preferred texture and how much elbow grease you're willing to put in.

Continue Reading

International Butter Dishes

Swedish Butter Cookies (Spritz): The Delicate, Buttery Cookie That Melts in Your Mouth

Yes, the irresistible Swedish butter cookies, or spritz, offer a heavenly blend of rich flavor and crumbly texture that beckons you to indulge further.

Published

on

By

buttery melt in your mouth cookies

Indulge in the heavenly delicacy that is the Swedish butter cookie, or spritz. These melt-in-your-mouth morsels boast a rich, buttery flavor and crumbly texture that's perfect for pairing with a warm cup of coffee or tea. Crafted with quality ingredients like creamed butter, sugar, and vanilla, these cookies are pressed through a cookie press to create intricate, decorative shapes. Their history dates back to the 19th century, firmly rooted in Swedish culture and cherished during the holiday season. With the right technique and a chilled dough, you'll soon be savoring the timeless appeal of these delightful treats. Curious to uncover more?

Key Takeaways

  • Swedish butter cookies, also known as spritz cookies, have a rich, buttery flavor and a delicate, crumbly texture that melts in your mouth.
  • These cookies have a long history in Swedish households, dating back to the 19th century, and are a cherished part of Swedish culture.
  • The use of a cookie press to shape the dough into intricate designs, such as wreaths, stars, and florals, adds to the visual appeal of these cookies.
  • Quality ingredients, proper dough handling, and chilling the dough are crucial for achieving the perfect melt-in-your-mouth consistency.
  • Swedish butter cookies are typically enjoyed during "fika," a traditional Swedish coffee break with friends and family, and can be served as a homemade gift or on dessert platters.

History

historical events and timelines

The origin of Swedish butter cookies can be traced back to the 19th century, when they were a popular treat among Swedish households.

These delicate, crumbly cookies were often enjoyed during fika, the beloved Swedish tradition of taking a coffee break with friends and family. Back then, the cookies were shaped by hand and baked to a light golden hue, their buttery aroma filling the air.

Over time, the recipe evolved, with bakers experimenting with different shapes and flavors.

The iconic spritz cookie design, created by pressing the dough through a cookie press, became a hallmark of the Swedish butter cookie. This method allowed for intricate, decorative patterns that added visual appeal to the already tempting treats.

Today, Swedish butter cookies remain a cherished part of Swedish culture, enjoyed year-round but especially during the holiday season when they're a staple on festive cookie trays.

Advertisement

Recipe

cooking instructions and ingredients

Swedish Butter Cookies are a classic holiday treat, beloved for their rich, buttery flavor and delicate, crumbly texture. These cookies are a simple pleasure, perfect for enjoying with a warm cup of coffee or tea.

Maintaining a clean kitchen environment while baking can enhance your overall experience, as it reduces the risk of allergens and promotes a healthier space for food preparation. The key to achieving the perfect Swedish Butter Cookie lies in the quality of the ingredients and the careful handling of the dough. By using high-quality butter and taking the time to chill the dough before baking, you can ensure that your cookies come out of the oven with a delightful melt-in-your-mouth consistency.

Ingredients:

  • 1 cup (2 sticks) unsalted butter, softened
  • 3/4 cup granulated sugar
  • 1 egg yolk
  • 2 teaspoons vanilla extract
  • 1/4 teaspoon salt
  • 2 1/4 cups all-purpose flour

Cooking Instructions:

Preheat your oven to 350°F (175°C). In a large mixing bowl, cream the softened butter and sugar together until light and fluffy. Beat in the egg yolk and vanilla extract, then stir in the salt and flour until a dough forms. Chill the dough in the refrigerator for at least 30 minutes.

Once chilled, roll the dough into 1-inch balls and place them about 2 inches apart on a parchment-lined baking sheet. Bake for 12-15 minutes, or until the cookies are lightly golden around the edges. Allow the cookies to cool on the baking sheet for a few minutes before transferring them to a wire rack to cool completely.

When making Swedish Butter Cookies, be mindful not to overbeat the dough, as this can lead to a tough, dense texture. Additionally, be sure to use high-quality butter and avoid overbaking the cookies, as they can quickly go from perfectly golden to dry and crumbly.

Advertisement

Following these tips not only helps in baking but also supports a clean and organized kitchen that contributes to a more enjoyable baking experience.

Cooking Steps

recipe preparation instructions

Preheat your oven to 350°F (175°C) – it's time to get baking!

Next, cream the butter and sugar together until light and fluffy.

Don't forget to add the egg and vanilla, then slowly incorporate the flour and salt.

Step 1. Preheat Oven to 350°F (175°C)

preheat oven to 350 f

Preheat your oven to 350°F (175°C) to begin the baking process. This critical step ensures your oven is the perfect temperature for the delicate Swedish butter cookies.

As the oven heats up, the air inside will circulate and reach the desired temperature, readying the space for your tender, buttery treats.

Once the oven beeps, signaling it's reached the target temperature, carefully slide in the baking sheet loaded with perfectly portioned cookie dough.

Advertisement

The intense, dry heat will work its magic, causing the butter to melt and the cookies to rise and develop a gorgeous golden-brown color.

Keep a close eye on them, as the delicate nature of these treats means they can go from perfectly baked to overdone in the blink of an eye.

After 8-10 minutes, your kitchen will be filled with the mouthwatering aroma of freshly baked Swedish butter cookies, ready to melt in your mouth.

Step 2. Cream Butter and Sugar Together

cream butter and sugar

Starting the cookie preparation, cream the butter and sugar together in a large bowl. Use a hand mixer or stand mixer fitted with the paddle attachment to whip the butter and sugar until light and fluffy, about 2-3 minutes.

You'll notice the mixture transform from grainy to smooth and creamy. Isn't it satisfying to watch the transformation? Make sure to scrape down the sides of the bowl occasionally to ensure even mixing.

This creaming process incorporates air into the batter, which will result in a light, melt-in-your-mouth texture for your Swedish butter cookies. Keep an eye on the mixture, and when it's reached the desired light and fluffy consistency, you're ready to move on to the next step.

Advertisement

Isn't it exciting to see your cookie dough come together? With the butter and sugar beautifully combined, you're well on your way to baking delectable Swedish treats.

Step 3. Add Egg and Vanilla

incorporate egg and vanilla

With the butter and sugar now beautifully creamed, you're ready to add the egg and vanilla to your cookie dough. Crack that fresh egg into the bowl, being careful not to let any shell bits fall in. Use a fork to gently whisk the egg, then pour it right into the creamed butter and sugar. Stir everything together until the egg is fully incorporated.

Next, it's time for the fragrant vanilla extract. Just a teaspoon or two will do the trick, adding a lovely warmth and depth of flavor to your cookies. As you pour in the vanilla, take a deep breath and enjoy the aroma – it's sure to get your taste buds tingling in anticipation.

Stir the vanilla in thoroughly, making sure it's evenly distributed throughout the dough. With the egg and vanilla now blended in, your cookie dough is really starting to come together. The rich, buttery base is infused with that classic vanilla essence, creating a beautifully balanced flavor that's just begging to be baked into irresistible Swedish butter cookies.

Step 4. Add Flour and Salt

incorporate flour and salt

Next, you'll want to add the dry ingredients to your cookie dough. In a separate bowl, whisk together 2 cups of all-purpose flour and 1/4 teaspoon of salt.

This dry mixture will help create the perfect texture for your spritz cookies – delicate and tender, with just the right amount of crispness. Remember, the use of butter in your dough not only adds flavor but also contributes to the moisture that makes these cookies so delightful, as butter is a key ingredient in many baking recipes butter adds flavor and moisture.

Gradually incorporate the flour and salt into your buttery dough, mixing until everything is well combined. You'll want to work the dough gently, taking care not to overwork it, as that can result in tough cookies.

Advertisement

Once the dry ingredients are fully incorporated, your dough is ready to be piped or pressed into your desired cookie shapes. Get creative with the designs – from classic rounds to festive trees or stars.

These little bites of buttery goodness are sure to melt in your mouth and delight your family and friends.

Step 5. Press Dough Through Cookie Press

dough pressing with cookie press

Once the flour and salt have been thoroughly incorporated, it's time to press the dough through a cookie press.

Grab your trusty cookie press and prepare to unleash the magic. Gently pack the dough into the barrel, being careful not to overfill it.

Position the press over your baking sheet, then slowly pull the lever, allowing the dough to extrude through the decorative disk at the end.

Watch in delight as the dough takes shape, forming delicate, intricate patterns on the sheet.

Advertisement

Repeat this process, spacing the cookies about an inch apart, until you've used up all the dough.

Remember to switch out the disks to create a variety of shapes and designs – from classic wreaths and stars to more elaborate florals and geometrics.

With each press, you're crafting edible works of art, ready to delight your family and friends.

Final Thoughts

concluding reflections and insights

Baking these Swedish butter cookies is a delightful experience that you'll want to revisit time and time again. The satisfying process of pressing the dough through the cookie press and watching the intricate designs take shape is truly captivating.

The aroma of the buttery dough baking in the oven is simply divine, filling your kitchen with a mouthwatering scent that will have your family eagerly awaiting the final product. Incorporating nutritional benefits like chia seeds into baked treats can enhance their health profile.

Once cooled, these delicate cookies melt in your mouth, leaving you craving more of their rich, buttery goodness. The versatility of the recipe allows you to experiment with different shapes and flavors, keeping the tradition alive while putting your own creative spin on it.

Advertisement

Whether you enjoy them on their own or paired with a hot cup of tea or coffee, these Swedish butter cookies are a timeless delight that will bring joy to any occasion.

Frequently Asked Questions

How Long Do the Cookies Stay Fresh?

The cookies'll stay fresh for up to a week if you store them in an airtight container at room temperature. But you'll probably gobble them up long before that, they're so delicious!

Can I Substitute Any Ingredients in the Recipe?

You can certainly substitute some ingredients in the recipe to suit your taste preferences. Try swapping out the flour for a gluten-free alternative or using a different type of nut in place of the almonds.

What's the Best Way to Store the Cookies?

The best way to store the cookies is to place them in an airtight container at room temperature. This will help preserve their delicate texture and prevent them from drying out or becoming stale. Enjoy!

Can I Freeze the Dough for Later Use?

Yes, you can freeze the dough for later use. Simply shape it into a log, wrap it tightly, and freeze it for up to 3 months. When ready to bake, thaw it in the fridge overnight and proceed as usual.

Advertisement

Are These Cookies Suitable for People With Dietary Restrictions?

You'll need to consider the dietary restrictions of your guests when determining if these cookies are suitable. They may not be appropriate for those with lactose intolerance or gluten sensitivities, so it's best to inquire about any dietary needs beforehand.

Continue Reading
Advertisement

Affiliate disclaimer

As an affiliate, we may earn a commission from qualifying purchases. We get commissions for purchases made through links on this website from Amazon and other third parties.

Vetted

Vetted4 months ago

Infusion Buds Butter Infuser & Decarboxylator – 2024 Review

I recently got to try out the Infusion Buds Butter Infuser & Decarboxylator Machine Combo, and I am excited to...

Vetted4 months ago

LEVO Lux – Premium Herbal Oil Infusion Machine – Review [2024]

I recently got to try out the LEVO Lux – Premium Herbal Oil Infusion Machine – Botanical Extractor – Herb...

Vetted4 months ago

STX Infuzium & Decarboxylator Bundle Review [2024]

Today, I am thrilled to share my thoughts on the PREMIUM PACK • STX Infuzium Butter-Oil-Tincture Infuser & STX Activation...

Vetted4 months ago

Review: ONGROK Small Butter Infuser [2024]

Introduction: I am thrilled to share my experience with the ONGROK Small Butter Infuser in this post. This device has...

Vetted4 months ago

Herbal Infuser Hi – Innovative Botanical Butter Maker [2024]

Today, I am thrilled to share with you my experiences with the Herbal Infuser Hi Countertop Botanical Butter Maker, Tincture...

Vetted4 months ago

Ardent FX Decarboxylator Review: Quick & Effortless! [2024]

I recently had the opportunity to try out the Ardent FX Decarboxylator 110V With Bluetooth Connectivity, and I must say,...

Vetted4 months ago

Infusion Buds Butter Infuser – Review & Accessories [2024]

Thank you for joining me as we explore a review of the Infusion Buds Butter Infuser & Decarboxylator Machine Combo....

Vetted4 months ago

Decarboxylator Machine Review: Easy & Odorless Herb Activation [2024]

I recently had the opportunity to try out the Decarboxylator Machine for Herbs, and I have to admit, it really...

Vetted4 months ago

Decarb Mini System Review: All-in-One Herbal Processing Solution [2024]

Today, I will be giving my thoughts on the Decarb Mini System. As someone who enjoys herbal infusions and tinctures,...

elevate steak with butter elevate steak with butter
Vetted4 months ago

12 Best Compound Butter Recipes for Elevating Your Steak Game

Kick your steak game up a notch with these 12 mouthwatering compound butter recipes that will take your taste buds...

mouthwatering butter cookie taste mouthwatering butter cookie taste
Vetted4 months ago

15 Best Butter Cookies That Will Melt In Your Mouth – Taste Test Results

Tantalize your taste buds with the top 15 butter cookies that promise a melt-in-your-mouth experience - a delightful journey awaits!

peanut butter ice cream peanut butter ice cream
Vetted4 months ago

15 Best Peanut Butter Ice Cream Flavors You Need to Try This Summer

Craving a creamy and decadent summer treat?

Advertisement

Trending