Connect with us

Production & Processing

How to Use Peanut Butter Maker Without Oil Dispenser

Published

on

An image showcasing a step-by-step guide on using a peanut butter maker without an oil dispenser

So, you’ve got yourself a peanut butter maker, but there’s one small problem – it doesn’t have an oil dispenser. Well, fear not, because I’m here to show you how to make delicious, creamy peanut butter without that fancy gadget.

In this article, I’ll guide you through the process step by step, from choosing the right ingredients to adjusting the consistency just the way you like it.

Get ready to become a peanut butter pro in no time!

Key Takeaways

  • There are various alternative oil dispensing methods for using a peanut butter maker without an oil dispenser, such as using a funnel or squeeze bottle with a narrow spout, a measuring cup with a spout, a small ladle or spoon, or a plastic bag with a corner snipped off.
  • It is important to gradually add oil or water to achieve the desired consistency of the peanut butter, making it smoother and easier to spread, but avoiding making it too runny.
  • Different liquids, such as oil or water, have different effects on the consistency of the peanut butter. Oil makes it creamier, while water makes it thinner.
  • It can be helpful to refer to a table for common liquids and their effects on the consistency of peanut butter when adjusting the texture.
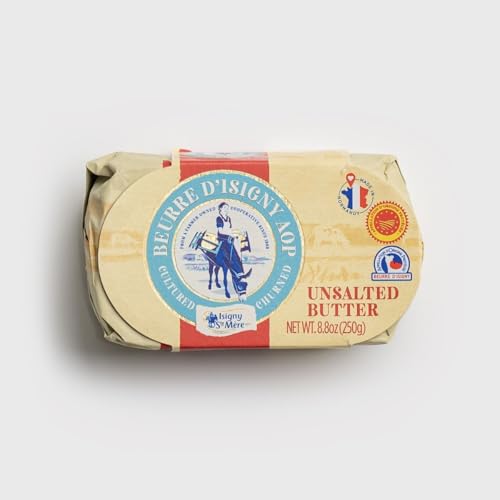
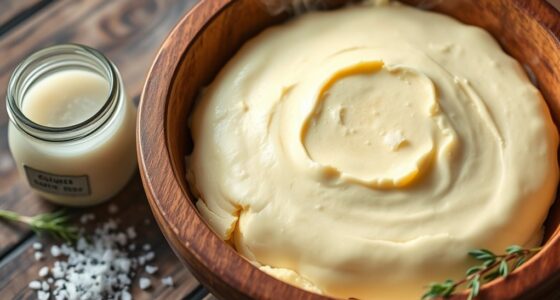
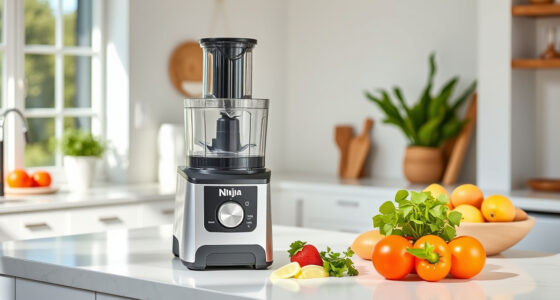
Choosing the Right Peanut Butter Maker

To choose the right peanut butter maker, you’ll want to consider its size, power, and durability. When it comes to choosing the right peanut butter maker, there are a few key factors to keep in mind.

First and foremost, you’ll want to consider the size of the machine. If you plan on making large batches of peanut butter, you’ll want a machine with a larger capacity.

Secondly, you’ll want to consider the power of the machine. A more powerful motor will be able to handle tougher nuts and create a smoother consistency.

Finally, durability is important for long-term use. Look for a peanut butter maker made from high-quality materials that can withstand frequent use. Additionally, some peanut butter makers offer alternative oil dispensing methods, allowing you to adjust the amount of oil to your preference.

Now that you understand how to choose the right peanut butter maker, let’s move on to understanding the ingredients and equipment needed for making delicious homemade peanut butter.

Understanding the Ingredients and Equipment

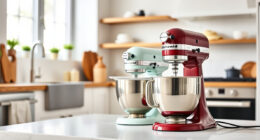
When it comes to making homemade peanut butter, having the right equipment is essential. A high-quality food processor or blender is a must, as it will allow you to achieve that creamy smooth texture.

Additionally, having a reliable oil dispenser is important for controlling the amount of oil you add to your peanut butter. Speaking of ingredients, the key to making delicious homemade peanut butter lies in using high-quality peanuts and a good oil, such as peanut or vegetable oil.

However, if you don’t have an oil dispenser, don’t worry! There are alternative methods you can use to add oil to your peanut butter, such as using a measuring spoon or slowly drizzling it in while the processor is running.

Necessary Equipment for Peanut Butter-Making

The necessary equipment for making peanut butter includes a food processor, peanuts, and a peanut butter maker. With these tools, you can create delicious, homemade peanut butter that is free from preservatives and additives commonly found in store-bought brands.

When choosing peanut butter brands, it is important to read the labels and opt for natural options that contain only peanuts and maybe a pinch of salt. Homemade peanut butter offers numerous health benefits, such as being a good source of protein, healthy fats, and fiber. It also contains essential minerals like magnesium and potassium.

Key Ingredients for Homemade Peanut Butter

You’ll need a food processor and peanuts to make homemade peanut butter. Making your own nut butters at home is not only fun, but it also allows you to control the ingredients and customize the flavors to your liking. While peanut butter is a popular choice, you can also experiment with other nuts like almonds to make homemade almond butter.

Peanut butter is not only delicious, but it also offers several nutritional benefits. It is a great source of protein, healthy fats, and important vitamins and minerals. It is packed with heart-healthy monounsaturated fats, which can help lower bad cholesterol levels and reduce the risk of heart disease. Peanut butter is also rich in fiber, which aids in digestion and helps keep you feeling full and satisfied. Additionally, it contains important nutrients like vitamin E, magnesium, and potassium.

Alternative Oil Dispensing Methods

To easily pour oil, try using a funnel or a squeeze bottle with a narrow spout. This can be especially useful when making homemade peanut butter without an oil dispenser. However, if you don’t have access to these tools, there are alternative storage methods you can try. Here are a few options to consider:

  1. Use a measuring cup with a spout: This can help control the flow of oil as you pour it into the peanut butter maker.

  2. Use a small ladle or spoon: While this method may take a bit more time and patience, it allows you to carefully add the oil in small increments, ensuring a smooth and creamy consistency.

  3. Use a plastic bag with a corner snipped off: Fill the bag with the desired amount of oil, seal it, and then cut a small hole in one corner. Squeeze the bag to dispense the oil into the peanut butter maker.

Preparing the Peanuts for Grinding

When it comes to preparing peanuts for grinding, there are two important steps to consider: roasting the peanuts and removing the peanut skin.

Roasting the peanuts helps to enhance their flavor and aroma, giving the resulting peanut butter a rich and nutty taste. To roast the peanuts, you can simply spread them out on a baking sheet and bake them in the oven until they are golden brown.

Once the peanuts are roasted, it’s time to remove the skin. This can be done easily by rubbing the peanuts between your hands or by placing them in a clean kitchen towel and rubbing them vigorously. Removing the skin not only improves the texture of the peanut butter but also eliminates any bitterness that may be present.

Roasting the Peanuts

After roasting, the peanuts will release their natural oils, which is a crucial step in making homemade peanut butter. Roasting the peanuts not only enhances their flavor but also helps in removing the skin easily.

Here are some roasting techniques and flavoring options you can try:

  • Roasting techniques:

  • Oven roasting: Preheat the oven to 350°F (175°C). Spread the peanuts in a single layer on a baking sheet and roast for about 10-15 minutes, stirring occasionally, until they turn golden brown.

  • Stovetop roasting: Heat a skillet over medium heat and add the peanuts. Stir them continuously for about 5-7 minutes until they become golden brown.

  • Microwave roasting: Place the peanuts in a microwave-safe bowl and microwave on high for 1-2 minutes, stirring every 30 seconds until they are roasted.

  • Flavoring options:

  • Salted: Sprinkle some salt on the roasted peanuts to enhance their flavor.

  • Honey roasted: Drizzle honey over the roasted peanuts and toss them until evenly coated.

  • Spicy: Add spices like chili powder, paprika, or cayenne pepper to give the peanuts a spicy kick.

Once the peanuts are roasted, the next step is to remove their skin, which I will discuss in the next section.

Removing the Peanut Skin

You can easily remove the skin from the roasted peanuts by rubbing them between your hands. This step is essential for achieving a smooth and creamy texture in your homemade peanut butter.

Once the peanuts have been roasted to perfection, they develop a slightly crispy skin that needs to be removed. By gently rubbing the peanuts, the skin will start to peel off, revealing the inner nut. This process can be quite therapeutic, as you feel the skin separate from the nut.

Once all the peanuts have been de-skinned, you can proceed with making your peanut butter using a peanut butter maker.

Peanut butter is not only delicious, but it also offers numerous health benefits. It is a great source of protein, healthy fats, and essential nutrients. Incorporating peanut butter into your diet can help with weight management, improve heart health, and provide a steady source of energy.

With so many peanut butter recipes available, you can enjoy this versatile ingredient in both sweet and savory dishes.

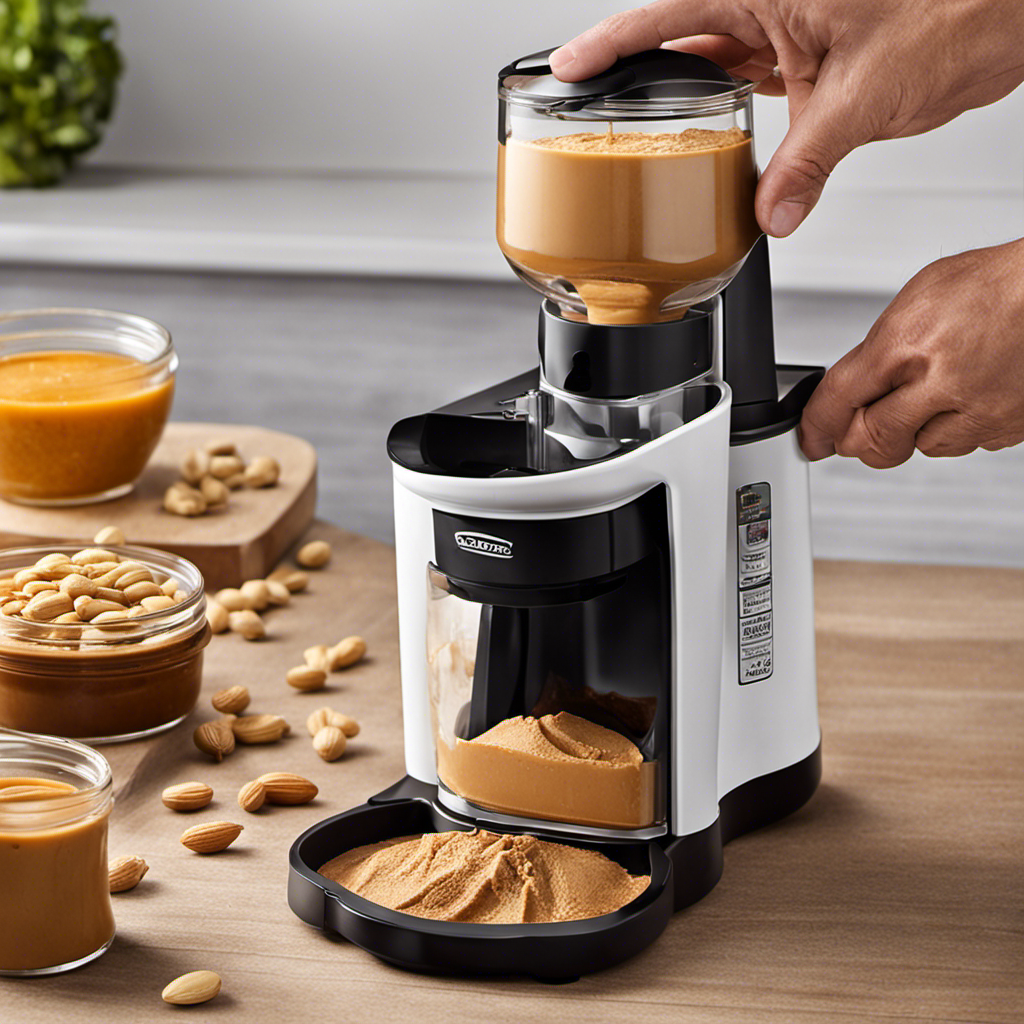
Operating the Peanut Butter Maker

To operate the peanut butter maker, simply add roasted peanuts and turn on the machine. It’s a straightforward process that allows you to create your own delicious and healthy homemade peanut butter.

Here are a few things to keep in mind when using a peanut butter maker:

  • Alternative peanut butter recipes: Don’t limit yourself to just plain peanut butter. Experiment with different flavors by adding ingredients like honey, cocoa powder, or cinnamon. This will give your peanut butter a unique twist and enhance the taste.

  • Troubleshooting common issues: If you encounter any problems while using the peanut butter maker, such as the machine not grinding the peanuts properly or the consistency being too thick, try adjusting the settings. You can also add a little bit of oil or water to achieve your desired consistency.

  • Cleaning and maintenance: After each use, make sure to clean the peanut butter maker thoroughly to prevent any residue from building up. Refer to the user manual for specific instructions on how to disassemble and clean the machine properly.

Adjusting the Consistency of the Peanut Butter

If the consistency of your homemade peanut butter is too thick, try adding a small amount of liquid to achieve the desired texture. Adjusting the consistency of homemade peanut butter can be a simple process. By adding a liquid, such as oil or water, you can make the peanut butter smoother and easier to spread. However, it’s important to add the liquid gradually to avoid making the peanut butter too runny. Here is a table that shows some common liquids that can be added to peanut butter and their effects on the consistency:

Liquid Effect on Consistency
Oil Creamier and smoother
Water Thinner and lighter
Honey Sweeter and stickier
Maple syrup Richer and thicker

Adding Flavor Variations to Your Peanut Butter

Now, let’s explore some exciting flavor variations you can add to your homemade peanut butter.

  • Sweet and Salty: Mix in a tablespoon of honey and a pinch of sea salt for a delightful combination of flavors that will satisfy your cravings.

  • Chocolate Lover’s Delight: Stir in a tablespoon of cocoa powder and a drizzle of melted chocolate for a rich and decadent twist on traditional peanut butter.

  • Spicy Kick: Add a teaspoon of chili powder or a dash of cayenne pepper to give your peanut butter a fiery kick. Perfect for those who love a little heat in their snacks.

These flavored peanut butter recipes not only add delicious taste but also enhance the texture of your homemade peanut butter. Experiment with different combinations and find your favorite flavor profile.

Whether you prefer sweet, savory, or spicy, there’s a flavored peanut butter recipe out there to suit your taste buds. So go ahead, get creative, and enjoy the endless possibilities of homemade flavored peanut butter!

Storing and Preserving Homemade Peanut Butter

When storing homemade peanut butter, it’s important to keep it in an airtight container to maintain its freshness. Storing techniques are crucial in preventing spoilage and ensuring that your homemade peanut butter stays delicious for as long as possible.

First, make sure the container you use is clean and dry to avoid any contamination. Glass jars with tight-fitting lids are ideal for storing peanut butter. They help to preserve its flavor and prevent moisture from seeping in.

It’s also a good idea to store the peanut butter in the refrigerator, as the cold temperature helps to slow down the oxidation process and extend its shelf life. Just remember to let it sit at room temperature for a few minutes before using to make it easier to spread.

With proper storage techniques, your homemade peanut butter will stay fresh and tasty, ready to enjoy whenever you want.

Now, let’s move on to troubleshooting common peanut butter maker issues.

Troubleshooting Common Peanut Butter Maker Issues

To troubleshoot common issues with your peanut butter maker, check the power cord for any loose connections or damage. If the power cord is intact, the next step is to examine the blades. Make sure they are properly inserted and securely tightened. If the blades are dull or damaged, they may need to be replaced.

Another common issue is overheating. If your peanut butter maker is overheating, allow it to cool down before using it again. Additionally, check the consistency of the peanuts you are using. If they are too dry or not roasted enough, it can affect the performance of the machine.

By following these troubleshooting tips, you can ensure that your peanut butter maker is in optimal condition for making delicious homemade peanut butter.

Now that we have covered troubleshooting common issues with your peanut butter maker, let’s move on to the next important topic – cleaning and maintaining your peanut butter maker.

Cleaning and Maintaining Your Peanut Butter Maker

Cleaning and maintaining your peanut butter maker is essential for ensuring its longevity and optimal performance. Proper cleaning techniques not only help remove any residue or leftover peanut butter, but they also prevent mold growth, which can affect the taste and quality of your homemade peanut butter.

To clean your peanut butter maker, start by disassembling the machine and removing any removable parts, such as the hopper, auger, and grinding plates. Wash these parts with warm, soapy water and rinse thoroughly. Use a small brush or toothbrush to remove any stubborn residue. Dry all the parts completely before reassembling the machine.

Additionally, it’s important to clean the exterior of the machine regularly with a damp cloth to prevent any buildup.

Frequently Asked Questions

Can I Use Any Type of Peanuts in the Peanut Butter Maker?

Yes, you can use different types of peanuts in the peanut butter maker. Each type has its own unique flavor and nutritional benefits, so feel free to experiment and find your favorite!

How Long Does It Take to Make Homemade Peanut Butter Using a Peanut Butter Maker?

To make smooth homemade peanut butter using a peanut butter maker, it usually takes about 5-10 minutes. I’ve found that adding a bit of honey or maple syrup helps enhance the flavor. Cleaning the peanut butter maker is easy, just rinse with warm water and mild soap.

Can I Add Other Ingredients, Such as Honey or Chocolate, to the Peanut Butter Maker?

Yes, you can add other ingredients like honey or chocolate to the peanut butter maker. It allows for creative flavors in homemade peanut butter made with different types of nuts.

How Should I Store Homemade Peanut Butter Made With the Peanut Butter Maker?

To properly store homemade peanut butter made with the peanut butter maker, place it in an airtight container and refrigerate it. This will help maintain its freshness and prevent it from spoiling.

Are There Any Specific Safety Precautions I Should Be Aware of When Using a Peanut Butter Maker?

When using a peanut butter maker, it’s important to follow safety precautions to avoid accidents. Some tips include cleaning the machine thoroughly before and after use, ensuring it is properly assembled, and keeping hands away from moving parts.

Conclusion

In conclusion, using a peanut butter maker without an oil dispenser is not only possible, but also quite simple. By following the steps outlined in this article and understanding the ingredients and equipment involved, anyone can create their own delicious homemade peanut butter.

For example, Sarah, a busy mom of two, decided to try making her own peanut butter using a peanut butter maker without an oil dispenser. She was amazed at how easy it was and how much her kids loved the taste of the freshly made peanut butter.

With a little practice and experimentation, you too can enjoy the satisfaction of making your own peanut butter at home.

Continue Reading

Production & Processing

Will Magic Butter Maker Stop Lighting up When Its Done a Cylce

Published

on

By

An image that showcases the Magic Butter Maker's sleek design, with its LED display illuminating in a vibrant green hue, indicating the completion of a cycle

You might be wondering if the Magic Butter Maker will stop lighting up when it’s done a cycle. Well, let me assure you that this innovative device has a cycle completion indicator that will let you know when your butter-making process is complete.

In this article, I will explain how to determine if the Magic Butter Maker has finished its cycle and what to expect from its lighting system when the cycle is complete.

So, let’s dive into the details and discover how this technology can optimize your butter-making experience.

Table of Contents

Key Takeaways

  • The cycle completion indicator of the Magic Butter Maker stops lighting up when the machine is done with a cycle.
  • The lighting system and cycle completion indicator work together seamlessly to provide a user-friendly experience.
  • Some models of the Magic Butter Maker emit an audible sound to signal completion in addition to the indicator lights.
  • The indicator lights and audible sound ensure timely retrieval of the finished product and prevent overrunning the machine.

Understanding the Magic Butter Maker’s Cycle Completion Indicator

You’ll know when the Magic Butter Maker is done with its cycle because the indicator stops lighting up. The Magic Butter Maker’s cycle completion indicator is an essential part of its lighting system.

This indicator lights up at the beginning of the cycle to let you know that it is in progress. As the machine goes through its various stages, the indicator remains lit, providing a visual cue of its ongoing operation.

However, once the cycle is complete and your butter is ready, the indicator will stop lighting up. This serves as a clear signal that the Magic Butter Maker has finished its task and you can now remove your finished product.

The lighting system and the cycle completion indicator work together seamlessly to ensure that you are aware of the machine’s progress and can easily determine when it is done.

How to Determine if the Magic Butter Maker Has Finished Its Cycle

When it comes to determining if the Magic Butter Maker has finished its cycle, two key indicators can be used: indicator lights and audible sound.

The indicator lights on the machine will typically change or turn off once the cycle is complete, providing a visual cue that the process has finished.

Additionally, some models of the Magic Butter Maker also emit an audible sound, such as a beep or a chime, to further signal the completion of the cycle.

These indicators can be useful in ensuring that the butter maker is not left running longer than necessary and helps to maintain the quality of the final product.

Indicator Lights for Completion

The magic butter maker’s lights will stop lighting up once it’s finished a cycle. This is a key feature of its user-friendly design. The indicator lights serve as a visual cue, allowing users to easily determine when the machine has completed its task.

When the butter maker has finished processing, the lights will automatically turn off, indicating that it is safe to open and retrieve the finished product.

In the event that the lights do not turn off after a cycle, there are a few troubleshooting tips to consider. First, ensure that the machine is properly plugged in and the power supply is functioning. If the lights still do not turn off, try resetting the machine by unplugging it for a few minutes and then plugging it back in.

If the issue persists, consult the user manual or contact customer support for further assistance.

Audible Sound When Finished?

There’s an audible beep that signals the completion of a cycle on the magic butter maker. This user-friendly audio signal is one of the key benefits of this device.

Not only does it provide convenience, but it also ensures that you don’t miss the moment when your butter is ready. The audible notification eliminates the need for constantly checking the machine or setting timers. With just a simple beep, you can go about your other tasks and be alerted when the cycle is finished.

This feature is especially helpful for busy individuals who may have multiple things going on in the kitchen. The magic butter maker’s audible notification is a small but significant detail that enhances the overall user experience.

The Significance of the Magic Butter Maker’s Lighting System During Operation

The lighting system on the Magic Butter Maker serves a crucial purpose during operation. It not only indicates the progress of the automatic cycle completion, but also provides a user-friendly visual indicator.

The purpose of this lighting system is to ensure that users are aware of the machine’s status and can easily determine when their desired process has been completed.

Lighting System Purpose

Yes, the lighting system on the Magic Butter Maker is designed to indicate when a cycle is complete. The lights will illuminate during operation to show the progress of the cycle. When the cycle is finished, the lights will stop lighting up, letting the user know that the process is done. This feature eliminates any guesswork and ensures that the user knows when their butter or oil is ready. The lighting system also serves as a troubleshooting indicator, alerting the user to any potential issues or errors during the cycle. This makes the Magic Butter Maker a reliable and efficient kitchen appliance.

Automatic Cycle Completion

During the magic butter maker’s automatic cycle, it is programmed to run for a specific duration to ensure proper extraction and infusion of ingredients. The length of the cycle may vary depending on the recipe or desired outcome.

Once the cycle is completed, the magic butter maker will notify you through a cycle completion notification. This notification can be in the form of a beep, a change in the lighting system, or both.

The purpose of this notification is to let you know that the extraction or infusion process is finished and your magic butter is ready to be used. It is important to pay attention to this notification to avoid overcooking or undercooking your ingredients.

User-Friendly Visual Indicator?

Once the automatic cycle finishes, you’ll be alerted by a visual indicator that lets you know your magic butter is ready.

The magic butter maker has been designed with the user in mind, ensuring a user-friendly experience from start to finish. Instead of relying solely on traditional lights to indicate the completion of the cycle, this innovative device offers alternative indicators that are both intuitive and easy to understand.

The visual indicator, which could be a light or a symbol, will clearly show when the magic butter is ready for use. This user-friendly design eliminates any confusion and ensures that you can confidently proceed to the next step in your butter-making process.

Now, let’s explore what to expect from the magic butter maker’s lights when the cycle is complete.

What to Expect From the Magic Butter Maker’s Lights When the Cycle Is Complete

The lights on the Magic Butter Maker will stop lighting up when it’s finished a cycle. This user-friendly design feature ensures that you can easily determine when your butter is ready.

Here are some troubleshooting tips to keep in mind:

  • Check the power source: Make sure the Magic Butter Maker is properly plugged in and receiving power.

  • Verify the ingredients: Ensure that you have followed the recipe and added the correct ingredients in the right proportions.

  • Clean the machine: A buildup of residue or debris can affect the functionality of the lights. Clean the Magic Butter Maker thoroughly before starting a new cycle.

  • Contact customer support: If the lights still don’t turn off after completing a cycle, reach out to the manufacturer for assistance.

  • Read the manual: Familiarize yourself with the Magic Butter Maker’s operation and troubleshooting guidelines to troubleshoot any issues effectively.

Tips for Interpreting the Magic Butter Maker’s Lighting Patterns

When it comes to using the Magic Butter Maker, understanding the meanings behind its lighting patterns is crucial. Different light signals indicate various stages of the process, such as blending, heating, and infusion.

Troubleshooting light signals is also important in case any issues arise, ensuring a smooth operation.

Furthermore, comprehending cycle completion is essential to know when the Magic Butter Maker has finished its job and is ready for use.

Lighting Pattern Meanings

You can tell what the Magic Butter Maker is doing based on its lighting pattern meanings. The different light signals serve as a way to communicate the current status of the machine and guide the user through the process. Here are the meanings behind the lighting patterns:

  • Steady Green: This indicates that the machine is powered on and ready to use.
  • Blinking Red: This suggests that there is an error or issue with the machine. Troubleshooting may be required to resolve the problem.
  • Alternating Blue and Green: This signifies that the machine is currently in the infusion process, where it is extracting the flavors and nutrients from the ingredients.
  • Slow Blinking Yellow: This indicates that the infusing process has completed, and the machine is now in the cooling phase.
  • Solid Yellow: This means that the machine is in standby mode, waiting for further instructions.

Troubleshooting Light Signals

To troubleshoot any issues with the machine, simply refer to the meanings behind the different lighting patterns. The Magic Butter Maker is designed to be user-friendly, making troubleshooting a breeze.

Interpreting the lighting patterns is key to identifying and resolving any problems that may arise during the machine’s operation. Each lighting pattern corresponds to a specific function or status of the machine.

For example, a steady green light indicates that the machine is ready to begin a cycle, while a flashing red light signals an error or issue that needs attention.

Understanding Cycle Completion

After the machine has finished its cycle, it’ll emit a series of beeps to indicate that it’s done. This feature ensures that users are aware of the completion of the process without having to constantly check the machine.

The Magic Butter Maker is designed with a user-friendly interface, making it easy to understand and operate. However, in case of any issues, there are troubleshooting techniques that can be employed. Here are some key points to consider:

  • Properly following the instructions provided in the user manual.
  • Checking the power source and ensuring it is properly connected.
  • Verifying that the ingredients are added in the correct proportions.
  • Cleaning and maintaining the machine regularly to prevent any clogs or malfunctions.
  • Contacting customer support for further assistance, if needed.

Common Misconceptions About the Magic Butter Maker’s Cycle Completion Indicator

Don’t be fooled by common misconceptions about the Magic Butter Maker’s cycle completion indicator. Many users mistakenly believe that the indicator will stop lighting up once the cycle is done. However, this is not necessarily true.

The Magic Butter Maker’s cycle completion indicator is designed to inform users about the progress of the cycle, but it does not always indicate that the process is complete.

One common misconception is that the indicator will turn off as soon as the cycle is finished. In reality, the indicator may continue to light up even after the cycle is done. This is because the Magic Butter Maker goes through a cooling phase after the cycle is complete, which can take some time.

If you are troubleshooting the Magic Butter Maker and the cycle completion indicator is still lit, even after waiting for a reasonable amount of time, there are a few tips you can try. First, make sure that the lid is securely closed, as an open lid can prevent the indicator from turning off. Additionally, double-check that you have followed the instructions correctly and that all ingredients are properly measured and added.

Troubleshooting: What to Do if the Magic Butter Maker’s Lights Don’t Turn off After a Cycle

If the lights on your Magic Butter Maker’s cycle completion indicator do not turn off after a cycle, try troubleshooting with these tips:

  • Check the power source: Ensure that the Magic Butter Maker is properly plugged in and receiving power.

  • Reset the machine: Turn off the Magic Butter Maker, unplug it, and wait for a few minutes before plugging it back in and turning it on again.

  • Clean the machine: Remove any residue or buildup from the cycle completion indicator and the surrounding area.

  • Contact customer support: If the issue persists, reach out to the manufacturer’s customer support for further assistance.

  • Consider professional repair: If all else fails, consult a professional technician who specializes in Magic Butter Maker repairs.

Exploring the Technology Behind the Magic Butter Maker’s Lighting System

To understand how the lighting system in your Magic Butter Maker works, take a closer look at its technological features.

The Magic Butter Maker is equipped with a user-friendly lighting design that serves multiple purposes. The lights not only indicate the current stage of the cycle but also provide valuable information for interpreting light patterns.

For example, when the machine is in operation, the lights will illuminate to show that the infusion process is underway. As the cycle progresses, the lights may change color or intensity to indicate different stages, such as blending or straining.

By observing and understanding these light patterns, you can easily keep track of the progress and ensure optimal results.

Transitioning into the next section, let’s explore how the Magic Butter Maker’s lights can help maximize efficiency and optimize your cycles.

Maximizing Efficiency: How the Magic Butter Maker’s Lights Can Help Optimize Your Cycles

By understanding and utilizing the light patterns in the Magic Butter Maker, you can maximize efficiency and optimize your infusion cycles. The Magic Butter Maker’s user-friendly interface allows for easy navigation and control over the lights, enabling you to customize your infusion process.

Here are five ways the lights can help optimize your cycle times:

  • The lights indicate the different stages of the infusion process, ensuring you know exactly where you are in the cycle.
  • By monitoring the lights, you can adjust the settings to achieve the desired potency and flavor of your infusions.
  • The lights provide real-time feedback, allowing you to make any necessary adjustments to optimize the extraction process.
  • With the help of the lights, you can avoid over-infusing or under-infusing your ingredients, resulting in a consistently high-quality end product.
  • The intuitive light system makes it easier to track and manage multiple infusion cycles simultaneously, saving you time and effort.

With the Magic Butter Maker’s advanced lighting system and user-friendly interface, optimizing your infusion cycles has never been easier.

Understanding the Benefits of the Magic Butter Maker’s Automatic Cycle Completion Notification

Understanding the benefits of the Magic Butter Maker’s automatic cycle completion notification is essential for optimizing your infusion process. This user-friendly notification feature is designed to let you know when your infusion cycle is complete, ensuring that you can achieve the perfect results every time.

When the cycle is finished, the Magic Butter Maker’s lights will stop lighting up, indicating that it is time to remove your infusion. This simple yet effective notification system eliminates the need for constant monitoring and guesswork, allowing you to focus on other tasks while your infusion is being prepared.

However, if you encounter any issues with the notification, there are troubleshooting tips available in the instruction manual or online resources. These tips can help you resolve any potential problems and ensure a smooth and successful infusion process.

Frequently Asked Questions

Can the Magic Butter Maker’s Cycle Completion Indicator Be Turned Off?

Yes, the Magic Butter Maker’s cycle completion indicator can be turned off. It is a versatile device that can be used for various purposes. Alternatives for making infused butter include using a slow cooker or stove top method.

How Long Does It Typically Take for the Magic Butter Maker’s Lights to Turn off After a Cycle?

The optimal butter infusion time in the Magic Butter Maker varies depending on several factors. These factors can affect the duration of a cycle and the time it takes for the lights to turn off once it’s done.

What Should I Do if the Magic Butter Maker’s Lights Don’t Turn off After a Cycle?

If the Magic Butter Maker’s lights don’t turn off after a cycle, try these troubleshooting tips. Check for alternative indicators that the cycle is complete, such as a sound or a change in the display.

Can I Manually Override the Magic Butter Maker’s Lighting System to Indicate the End of a Cycle?

Yes, you can manually adjust the cycle settings on the Magic Butter Maker to stop the lighting system when the cycle is done. Additionally, there are alternative indicators available to signify the completion of a cycle.

Are There Any Safety Concerns Associated With Relying Solely on the Magic Butter Maker’s Lighting System to Determine if a Cycle Is Complete?

When relying solely on the Magic Butter Maker’s lighting system, there may be reliability concerns. It’s important to consider alternative indicators, such as checking the consistency of the mixture or using a timer, to ensure a complete cycle.

Conclusion

In conclusion, the Magic Butter Maker’s lighting system serves as a helpful indicator to determine when the cycle is complete. The lights will stop lighting up once the machine has finished its cycle, providing a convenient notification for users.

By understanding the different lighting patterns and interpreting them correctly, users can optimize their cycles and maximize efficiency.

Remember the old saying, ‘A watched pot never boils.’ With the Magic Butter Maker’s automatic cycle completion notification, you can confidently step away and let the machine do its magic.

Continue Reading

Production & Processing

Why Does My Magical Butter Maker Have Different Temps

Published

on

By

An image showcasing a sleek Magical Butter Maker with an LED display, radiating a soft blue light, while two distinct temperature settings, labeled "Infuse" and "Decarb," are selected, revealing its versatility

As a proud owner of a Magical Butter Maker, I couldn’t help but wonder why this incredible machine has different temperature settings.

Take a moment to imagine this scenario: you’re infusing your favorite herbs and oils, and suddenly you notice that the temperature fluctuates. Frustrating, right?

Well, fear not! In this article, we will delve into the importance of temperature control, understand the different temperature settings, and explore how temperature affects the extraction process.

Get ready to unlock the secrets behind achieving consistent temperatures and maximizing the flavor and potency of your infusions.

Key Takeaways

  • Temperature control is crucial for extracting desired flavors and compounds.
  • Different ingredients require different temperatures for optimal infusion.
  • The magical butter maker offers a range of temperature settings to choose from.
  • Experimenting with temperature options optimizes the flavor of infusions.

The Importance of Temperature Control

You’ll want to pay attention to temperature control because it plays a crucial role in the magical butter maker’s functionality.

The benefits of temperature control are numerous. First and foremost, it helps in extracting the desired flavors and compounds from the ingredients. By regulating the temperature, you can ensure that the butter or oil is infused with the perfect amount of flavor and potency.

Additionally, temperature control allows for precise and consistent results. Different ingredients require different temperatures for optimal infusion, and the magical butter maker gives you the flexibility to adjust the temperature according to your needs. It uses advanced temperature regulation techniques to maintain a steady and accurate temperature throughout the infusion process, ensuring that you achieve the desired results every time.

Understanding the Different Temperature Settings

When it comes to temperature options for extraction, it is crucial to understand the different settings available.

The magical butter maker offers a range of temperatures to choose from, each serving a specific purpose in the extraction process.

In this discussion, I will delve into the temperature options explained, as well as explore the optimal temperature for extraction.

Temperature Options Explained

To understand the temperature options on your magical butter maker, it’s helpful to know what each setting represents. The temperature control techniques used in the magical butter maker are crucial for achieving the desired potency in your infusions.

Here are the temperature options explained:

  • Low Setting: This setting maintains a temperature between 130°F and 160°F, which is ideal for delicate herbs and flowers. It allows for gentle extraction of flavors and aromas without degrading the potency.

  • High Setting: The high setting maintains a temperature between 160°F and 200°F. This temperature range is suitable for more robust herbs and spices, providing a stronger infusion and extracting a higher potency.

Understanding the impact of temperature on potency is essential. Higher temperatures can lead to a more potent infusion, but also risk degrading the cannabinoids and terpenes. Lower temperatures preserve the delicate compounds but may result in a less potent infusion. It’s vital to find the right balance based on your desired outcome and the specific herbs or flowers you are using.

Optimal Temperature for Extraction

The optimal temperature for extraction depends on the specific herbs or flowers being used and the desired potency of the infusion. Different botanicals have different chemical compositions, and extracting their beneficial compounds requires precise temperature control.

For example, some herbs may require a lower temperature range of 160-180 degrees Fahrenheit to preserve delicate flavors and aromas, while others may need a higher range of 200-220 degrees Fahrenheit to release their potent medicinal properties.

Temperature control techniques, such as using a thermometer or a specialized infusion device like the Magical Butter Maker, allow for accurate and consistent temperature regulation during the extraction process.

How Temperature Affects the Extraction Process

When it comes to extracting cannabinoids from plant material, the optimal extraction temperature is a crucial factor to consider.

The heat applied during extraction plays a significant role in activating the cannabinoids and enhancing their bioavailability.

Additionally, the temperature also has a direct impact on the flavor profile of the final product, as certain terpenes and volatile compounds can be lost or altered at higher temperatures.

Optimal Extraction Temperature

The optimal extraction temperature for the magical butter maker varies depending on the desired results. Achieving the perfect temperature is crucial for maximizing the potency and flavor of your infusions. The magical butter maker offers precise temperature control with its temperature settings, allowing you to customize the extraction process to meet your specific needs.

Here are two key factors to consider when determining the optimal temperature for your magical butter maker:

  1. Desired Potency:

    • Lower temperatures (around 160°F to 180°F) are ideal for preserving the delicate flavors and aromas of herbs, resulting in a milder potency.
    • Higher temperatures (around 190°F to 220°F) can enhance the extraction process, producing a more potent infusion with stronger effects.
  2. Extraction Time:

    • Longer extraction times at lower temperatures can yield a more comprehensive extraction, allowing for a more thorough release of cannabinoids and other desirable compounds.
    • Shorter extraction times at higher temperatures can expedite the process, but may result in a less complete extraction.

Heat and Cannabinoid Activation

Achieving the perfect temperature is crucial for maximizing the potency and flavor of your infusions in the magical butter maker. When it comes to cannabinoid activation techniques, temperature plays a vital role in extraction efficiency.

The magical butter maker offers different temperature options to cater to varying needs and preferences. By selecting the appropriate temperature, you can optimize the extraction process and ensure that you’re getting the most out of your herbs or ingredients.

Higher temperatures, such as 160°F (71°C), can lead to faster extraction but may result in a slightly different taste profile. On the other hand, lower temperatures, like 130°F (54°C), can provide a gentler extraction, preserving the delicate flavors and aromas of your botanicals.

Understanding the relationship between temperature and extraction efficiency is key to achieving the desired potency and flavor in your infusions.

Impact on Flavor Profile

To optimize the flavor of your infusions, try experimenting with different temperature options in the magical butter maker. Temperature plays a crucial role in flavor preservation, as it affects the extraction of compounds from the botanicals.

Here are two ways temperature experimentation can impact the flavor profile:

  • High Temperature:

  • Enhances the extraction of cannabinoids, resulting in a stronger flavor.

  • May lead to a more pronounced herbal or grassy taste.

  • Low Temperature:

  • Preserves the delicate terpenes, which contribute to the aroma and taste.

  • Can result in a smoother and more nuanced flavor profile.

Exploring the Benefits of Low Temperature Infusion

By using lower temperatures, you can extract more beneficial compounds from your herbs and infuse them into your butter using the magical butter maker. This low temperature infusion technique has numerous benefits and advantages, making it a popular choice among culinary enthusiasts. The magical butter maker allows for precise temperature control, ensuring optimal extraction of desired compounds while minimizing the degradation of sensitive ingredients.

One of the key advantages of low temperature infusion is the preservation of delicate flavors and aromas. By avoiding high heat, the magical butter maker helps retain the natural essence of the herbs, resulting in a more flavorful and aromatic butter. Additionally, this method allows for the extraction of a wider range of beneficial compounds, such as cannabinoids and terpenes, which are known for their therapeutic properties.

The table below highlights some of the benefits and advantages of low temperature infusion using the magical butter maker:

Benefits Advantages
Preserves delicate flavors Allows for precise control
Maximizes compound extraction Minimizes ingredient degradation
Enhances therapeutic properties Ensures consistent results

Overall, low temperature infusion with the magical butter maker offers a superior way to extract beneficial compounds from herbs and infuse them into butter, resulting in a more flavorful and potent end product.

High Temperature Infusion: When and Why to Use It

After exploring the benefits of low temperature infusion in my previous subtopic, I want to now discuss high temperature infusion and when it is appropriate to use it.

High temperature infusion refers to the process of infusing ingredients at higher temperatures, typically above 212°F (100°C). While low temperature infusion is known for its ability to preserve delicate flavors and aromas, there are certain situations where high temperature infusion can be advantageous.

Some benefits of high temperature infusion include:

  • Enhanced extraction: Higher temperatures can accelerate the extraction of flavors and compounds from ingredients, resulting in a more intense infusion.
  • Sterilization: Infusing at high temperatures can help kill bacteria and other microorganisms, ensuring the safety of the final product.

To achieve high temperature infusion, temperature control techniques such as using a double boiler or a precise heating element are essential. These techniques allow for precise control and prevent overheating or scorching of the ingredients.

The Science Behind Temperature Variation in the Magical Butter Maker

The science behind temperature variation in the Magical Butter Maker allows for precise control of the infusion process. Heat transfer plays a crucial role in this machine, ensuring that the desired temperature is reached and maintained throughout the extraction process.

By understanding the impact of temperature on extraction efficiency, users can optimize their infusions to achieve the desired results. Different temperatures can lead to varying levels of extraction, as heat helps to break down the compounds in the ingredients and facilitate infusion.

Higher temperatures can result in faster extraction but may also degrade some sensitive compounds. On the other hand, lower temperatures may require longer infusion times but can help preserve delicate flavors and aromas.

The ability to adjust and control the temperature in the Magical Butter Maker allows users to tailor their infusions to their specific needs and preferences.

Factors That Influence Temperature Fluctuations

Understanding the factors that influence temperature fluctuations in the Magical Butter Maker can help users achieve precise control over the infusion process. Several key factors can affect the accuracy of the temperature in the machine:

  • Heating element efficiency:

  • The quality of the heating element can impact its ability to maintain a consistent temperature.

  • The design and placement of the heating element can also affect heat distribution.

  • Insulation:

  • The level of insulation in the Magical Butter Maker can impact temperature fluctuations.

  • Insufficient insulation can lead to heat loss and inconsistent temperatures.

By considering these factors, users can implement temperature regulation techniques to improve accuracy and consistency in their infusions. Understanding the importance of a high-quality heating element and ensuring proper insulation can greatly enhance the performance of the Magical Butter Maker.

Transition: Now that we understand the factors influencing temperature fluctuations, let’s explore some troubleshooting techniques for addressing temperature issues with your Magical Butter Maker.

Troubleshooting Temperature Issues With Your Magical Butter Maker

When it comes to troubleshooting temperature issues with a Magical Butter Maker, two key points to consider are inconsistent temperature readings and understanding temperature fluctuations.

Inconsistent temperature readings can be frustrating and lead to inconsistent results in your recipes.

Understanding temperature fluctuations is important because it allows you to make necessary adjustments and ensure that your Magical Butter Maker is functioning properly.

Inconsistent Temperature Readings

There’s something strange about the temperature readings on my magical butter maker. Despite its claims of temperature accuracy and consistency, I’ve noticed some discrepancies that have left me perplexed.

  • Temperature Accuracy:

  • The readings on the display do not always match the actual temperature inside the machine.

  • When using an external thermometer, I’ve found variations of up to 10 degrees Fahrenheit.

  • Temperature Consistency:

  • The temperature inside the butter maker fluctuates during the cooking process, leading to inconsistent results.

  • The temperature rises too quickly or drops too suddenly, affecting the overall quality of the final product.

These inconsistencies raise concerns about the reliability of the magical butter maker. It is important for a device like this to maintain accurate and consistent temperatures to ensure consistent results.

I will need to further investigate and find a solution to these temperature issues.

Understanding Temperature Fluctuations

The temperature inside my magical butter maker sometimes fluctuates, which can affect the consistency of the final product. Understanding temperature fluctuations is essential for achieving desired results.

Temperature regulation is a critical aspect of the butter-making process, and various temperature control techniques can be employed. One technique involves using a thermostat to maintain a constant temperature within the machine. This ensures that the butter mixture is heated evenly and consistently throughout the process.

Another technique is incorporating a heat diffuser, which helps distribute heat more evenly, preventing hotspots and temperature spikes. Additionally, monitoring the temperature throughout the entire process, using a reliable thermometer, allows for adjustments to be made promptly.

Tips for Achieving Consistent Temperatures in Your Infusions

To achieve consistent temperatures in your infusions, it’s important to follow these tips:

  • Use a reliable thermometer: Accurate temperature readings are crucial for achieving precision in your infusions. Invest in a high-quality thermometer that provides accurate readings to ensure your infusions are heated to the desired temperature.

  • Optimize heat distribution: Uneven heat distribution can lead to inconsistent temperatures in your infusions. Stir or agitate your mixture regularly to ensure heat is evenly distributed throughout the infusion process.

  • Stirring technique: Use a gentle stirring motion to prevent excessive agitation, which may affect the infusion process.

  • Heat source placement: Ensure that your heat source is evenly distributed beneath the infusion vessel to avoid hot spots and temperature fluctuations.

Maximizing Flavor and Potency With the Right Temperature

Maximizing flavor and potency is possible by using the right temperature in your infusions.

When it comes to low temperature infusion, there are numerous benefits to enjoy. Firstly, lower temperatures help preserve the delicate flavors and aromas of your ingredients, resulting in a more nuanced and enjoyable end product.

Additionally, low temperature infusions can also help retain the potency of certain compounds, such as cannabinoids and terpenes, which can be lost at higher temperatures.

However, it is important to troubleshoot any temperature issues that may arise. Inconsistent or fluctuating temperatures can lead to uneven extraction and ultimately affect the final taste and potency of your infusions.

Frequently Asked Questions

How Do I Clean the Magical Butter Maker After Using Different Temperature Settings?

After using different temperature settings on my Magical Butter Maker, I clean it by following a specific cleaning process. It involves disassembling the machine, washing each part thoroughly, and drying them before reassembling. Regular maintenance tips are also important for its longevity.

Can I Adjust the Temperature Settings on the Magical Butter Maker?

Yes, you can adjust the temperature settings on the Magical Butter Maker. It allows you to select the optimal temperature range for different recipes, ensuring precise and consistent results every time.

Is There a Specific Temperature Range That Is Considered the Most Effective for Infusions?

The most efficient temperature for infusions is the optimal infusion temperature. It ensures that the ingredients are properly extracted and the desired effects are achieved. The Magical Butter Maker offers different temperature settings to cater to various infusion needs.

What Are the Potential Risks or Drawbacks of Using High Temperature Infusion?

Using high temperature infusion in the Magical Butter Maker can pose risks and drawbacks. The heat may degrade the quality of the ingredients, alter the flavor, and potentially reduce the potency of the final product.

Are There Any Safety Precautions I Should Take When Using the Magical Butter Maker at Different Temperatures?

When using the Magical Butter Maker at different temperatures, it’s important to take safety precautions. Follow the manufacturer’s guidelines for cleaning methods to ensure proper maintenance and prevent any potential risks or accidents.

Conclusion

In conclusion, the temperature control feature of the Magical Butter Maker is crucial for achieving the desired results in your infusions. Understanding the different temperature settings and how they affect the extraction process is key to maximizing flavor and potency.

It is interesting to note that according to a study conducted by the Magical Butter company, infusions made at lower temperatures (below 160°F) have been found to retain more beneficial compounds and flavors compared to higher temperature infusions. Therefore, mastering temperature control is essential for creating the best infusions with your Magical Butter Maker.

Continue Reading

Production & Processing

Why Is the Answer for Alcohol Whiskey Maker Butter, Scotch

Published

on

By

An image showcasing a rustic wooden barrel, half-filled with golden whiskey, surrounded by a lush Scottish landscape, with a slab of creamy butter melting on top, symbolizing the unique and flavorful process of whiskey-making

As a whiskey enthusiast, I’ve always been fascinated by the intricate process of whiskey making. From the history and traditions to the modern techniques, there’s so much to explore.

But what about the role of butter and the influence of Scotch whiskey? In this article, we’ll delve into the reasons why butter is a crucial ingredient for whiskey makers and how Scotch whiskey has shaped the alcohol industry.

Join me on this journey as we uncover the secrets behind the perfect glass of whiskey.

Key Takeaways

  • Butter is added to whiskey before aging to mellow out the harshness of wood and create a smoother drinking experience.
  • Distillation is a crucial step in whiskey production, with distilleries experimenting with vacuum distillation to preserve delicate flavors.
  • Scotch whiskey has had a significant impact on the global spirits industry, contributing to international trade and symbolizing heritage and refinement.
  • The debate between traditional methods and modern techniques in whiskey production raises questions about the future of the industry, balancing tradition with innovation.

The History of Whiskey Making

The history of whiskey making is a fascinating journey through time. Whiskey, a beloved spirit, has evolved over the centuries to become the complex and diverse beverage we know today.

The origins of whiskey can be traced back to ancient civilizations, where the art of distillation was discovered. As time went on, techniques improved, and different styles of whiskey emerged, such as Scotch, Irish, and Bourbon.

However, one significant event that had a profound impact on the whiskey industry was the era of prohibition in the United States. During this time, the production, sale, and consumption of alcoholic beverages were banned, forcing many distilleries to close their doors.

The end of prohibition marked a turning point, leading to the resurgence of whiskey making and the birth of new distilleries, forever shaping the whiskey industry.

The Role of Butter in Whiskey Production

Butter plays a significant role in the production of whiskey. While it may seem unusual, butter production is an essential step in creating the rich and complex flavors that whiskey enthusiasts love.

During the aging process, whiskey is stored in oak barrels, which impart flavors and aromas into the spirit. However, the wood can sometimes be too overpowering, resulting in an unbalanced taste. This is where butter comes in.

Before aging, a small amount of butter is added to the whiskey, which helps to mellow out the harshness of the wood and create a smoother, more enjoyable drinking experience. The butter acts as a natural emulsifier, binding together the various flavors and allowing them to harmonize over time.

Exploring the Distillation Process

When you’re learning about the distillation process, it’s fascinating to see how the flavors and aromas are concentrated through the heating and cooling of the liquid. Distillation is a key step in whiskey production, where alcohol is separated from impurities and the desired flavors are intensified.

Exploring innovation in distillation techniques has led to the development of new methods that enhance the quality and complexity of whiskey. For example, some distilleries are experimenting with vacuum distillation, which allows for lower temperatures and can preserve delicate flavors that might be lost with traditional methods.

Additionally, the impact of climate on whiskey aging cannot be underestimated. The temperature, humidity, and air quality of the aging environment all contribute to the final taste and character of the whiskey, making each batch truly unique. Understanding and adapting to these environmental factors is crucial for producing exceptional whiskey.

The Influence of Scotch Whiskey on the Alcohol Industry

When it comes to the influence of Scotch whiskey on the alcohol industry, there are three key points to consider: its impact on global markets, its cultural significance, and its deep-rooted tradition.

In terms of global markets, Scotch whiskey has become a staple in the spirits industry, with its production and consumption spanning across continents.

Culturally, Scotch whiskey holds a special place in the hearts of many, symbolizing heritage, sophistication, and refinement.

Lastly, the tradition of Scotch whiskey production dates back centuries, with distilleries upholding time-honored practices to create this beloved spirit.

Impact on Global Markets

You should consider the impact of whiskey and scotch makers on global markets.

The global economy is greatly affected by the trade dynamics of these industries. Whiskey and scotch are not just alcoholic beverages; they are valuable commodities that contribute to international trade and economic growth.

The demand for these spirits has created a thriving market, leading to increased exports and imports, and stimulating economic activity worldwide. Whiskey and scotch makers play a crucial role in shaping trade dynamics, as they navigate international regulations, negotiate trade agreements, and establish distribution networks.

The global market for whiskey and scotch is highly competitive, with various countries vying for market share. As consumers’ tastes evolve, whiskey and scotch makers must adapt, innovate, and maintain their position in the global marketplace.

Understanding the impact of these industries on the global economy and trade dynamics is essential for any discerning observer.

Cultural Significance and Tradition

The cultural significance and tradition surrounding whiskey and scotch are deeply ingrained in many societies around the world.

Whiskey, in particular, holds a special place in the hearts of people, as it represents not just a drink, but also a symbol of cultural preservation and traditional techniques.

The art of whiskey-making has been passed down through generations, with distilleries carefully guarding their recipes and methods. These traditional techniques ensure that the flavors and aromas of whiskey are preserved, creating a unique experience for enthusiasts.

Cultural preservation is also evident in the rituals and customs associated with whiskey consumption, such as whisky tastings and whiskey festivals. These events celebrate the rich history and heritage of whiskey, bringing people together to appreciate and enjoy this beloved spirit.

Traditional Methods Vs. Modern Techniques

When it comes to the age-old debate of tradition versus innovation, the world of whiskey production is no exception.

On one hand, there are those who argue that sticking to time-honored methods is crucial for maintaining the essence and character of the drink. Craftsmanship and attention to detail are emphasized, with a focus on preserving heritage and the artistry involved.

On the other hand, there are proponents of modern techniques, who believe that efficiency and progress are key in order to meet the demands of a rapidly evolving industry.

Ultimately, the clash between age-old practices and innovative approaches raises important questions about the future of whiskey production and the balance between tradition and advancement.

Age-Old Vs. Innovation

Although innovation is important, there is something timeless and intriguing about age-old traditions. Age-old techniques have been passed down through generations, honed and perfected over time. These methods have stood the test of time and continue to produce exceptional results. The precision and attention to detail that come with age-old techniques cannot be replicated by innovative approaches alone.

Innovation has its merits, of course. It allows for new possibilities and advancements in various fields. It brings fresh ideas and perspectives, pushing boundaries and challenging the status quo. However, it is important to recognize that innovation should not completely overshadow age-old traditions. There is a certain charm and authenticity that comes with using techniques that have been proven effective for centuries.

Craftsmanship Vs. Efficiency

You can appreciate the artistry and attention to detail in traditional craftsmanship, even though efficiency may be prioritized in modern times. Craftsmanship, with its emphasis on handwork and traditional techniques, holds a certain allure that cannot be replicated by automation.

Here are three sub-lists that highlight the deeper meaning behind the craftsmanship vs. automation debate:

  • Craftsmanship:

  • Preserves cultural heritage and traditional knowledge.

  • Allows for customization and uniqueness in each piece.

  • Demonstrates the skill and expertise of the artisan.

  • Automation:

  • Increases production efficiency and reduces costs.

  • Ensures consistency and uniformity in the final product.

  • Incorporates modern technology to streamline processes.

While automation may offer benefits in terms of speed and mass production, traditional craftsmanship brings a level of artistry and authenticity that cannot be replicated. It is important to strike a balance between the two, preserving traditional techniques while embracing the advantages of modern technology.

Heritage Vs. Progress

In the world of whiskey making, there is an ongoing debate between heritage and progress. Traditional methods passed down through generations are pitted against modern techniques that promise efficiency and consistency. As a whiskey enthusiast, I find myself caught between the nostalgia of the past and the allure of innovation.

To better understand this clash, let’s take a look at a comparison between traditional methods and modern techniques in whiskey production:

Traditional Methods Modern Techniques
Hand-mashing of grains Automated mashing process
Copper pot stills Continuous column stills
Aging in oak barrels Rapid aging through technology
Small batch production Large-scale industrial production

Both approaches have their merits. Traditional methods, rooted in heritage, often yield unique and complex flavors. On the other hand, modern techniques offer consistency and efficiency, allowing for greater production volumes.

Ultimately, the choice between heritage and progress depends on personal preferences and the desired outcome. Some whiskey enthusiasts may appreciate the craftsmanship and depth of flavor that comes from traditional methods, while others may prioritize efficiency and accessibility offered by modern techniques. Whichever path is chosen, both heritage and progress play a vital role in the ever-evolving world of whiskey making.

The Science Behind the Butter-Scotch Connection

The science behind the butter-scotch connection is fascinating. Through scientific analysis, researchers have discovered the intricate relationship between butter and scotch, shedding light on the flavors and textures that make this combination so enticing. Here are some key insights:

  • Chemical Reactions:
    The fats in butter interact with the alcohol in scotch, creating a smooth and creamy mouthfeel.
    The caramel notes in scotch complement the rich, buttery flavors, enhancing the overall taste experience.

  • Flavor Perception:
    Butter’s high fat content coats the taste buds, intensifying the perception of the scotch’s flavors.
    The combination of butter and scotch creates a unique flavor profile that is both indulgent and complex.

  • Aroma Enhancement:
    Butter’s aroma compounds enhance the aromatic notes present in scotch, heightening the olfactory experience.

Understanding the science behind the butter-scotch connection allows us to appreciate the combination on a deeper level, unlocking the secrets behind its irresistible allure.

Understanding the Flavor Profile of Whiskey

Understanding the flavor profile of whiskey can be a complex endeavor, as it involves unraveling the intricate combination of ingredients that contribute to its unique taste experience. Flavor development in whiskey is a result of various factors, including the grains used, the fermentation process, the type of yeast, the distillation method, and the aging process.

Sensory analysis plays a crucial role in understanding the flavors present in whiskey. By carefully examining the aroma, taste, and mouthfeel, experts can identify the different flavor components, such as fruity, floral, spicy, or smoky notes. This analysis helps whiskey enthusiasts appreciate the subtle nuances and complexities in each bottle.

Whether it’s the smooth sweetness of bourbon or the peaty richness of Scotch, the flavor profile of whiskey is a testament to the craftsmanship and artistry of the distiller.

The Art of Barrel Aging

Barrel aging is a crucial step in the whiskey-making process. It greatly impacts the flavor profile of the final product. During the flavor transformation process, the whiskey undergoes chemical changes as it interacts with the wood of the barrel. This results in the development of unique flavors and aromas.

Time and maturation play a significant role in this process. The longer the whiskey is aged, the more pronounced and complex its flavors become.

Additionally, the selection of the barrel type and the quality of the wood have a direct impact on the final flavor. Different types of wood impart distinct characteristics to the whiskey.

Flavor Transformation Process

During fermentation, yeast converts sugars into alcohol, which then undergoes a distillation process to create whiskey. The flavor development in whiskey is a fascinating transformation process that involves a series of intricate reactions.

To truly understand the depth of flavors, sensory analysis plays a crucial role. Here are three key aspects to consider:

  • Raw Materials: The choice of grains, such as barley or corn, affects the flavor profile of the whiskey.
  • Distillation Technique: The shape and size of the stills, as well as the cut points during distillation, influence the final flavor.
  • Maturation: The interaction between the whiskey and the oak barrels during aging contributes to the development of complex flavors.

By carefully examining these factors through sensory analysis, distillers can create a whiskey with a well-balanced and nuanced flavor profile.

Now, let’s explore the impact of time and maturation on whiskey.

Time and Maturation

In my previous subtopic, I discussed the fascinating process of flavor transformation in whiskey production. Now, let’s delve into the crucial role that time and maturation play in this process.

One of the key factors contributing to the rich flavors of whiskey is barrel aging. Whiskey is aged in wooden barrels, typically made from oak, which impart unique characteristics to the spirit. As whiskey matures, it undergoes chemical reactions with the wood, resulting in the development of complex flavors and aromas.

To showcase the impact of time and maturation on whiskey, let’s take a look at the table below:

Age of Whiskey Flavor Profile
Young (3-5 years) Bold, fiery, with hints of grain and spice
Mature (8-12 years) Smooth, mellow, with notes of caramel, vanilla, and oak
Extra Aged (15+ years) Deep, rich, with layers of dried fruit, dark chocolate, and tobacco

As you can see, the longer whiskey ages in the barrel, the more it transforms, acquiring a sophisticated and nuanced flavor profile. Barrel aging is an art that whiskey makers master to create exceptional spirits that delight the palate.

Barrel Selection Impact

The choice of which wooden barrels to use greatly affects the flavor profile of aged spirits like whiskey. Barrel aging techniques play a crucial role in flavor development, as different types of wood can impart distinct flavors and characteristics to the whiskey.

Here are three important factors to consider when selecting barrels for aging:

  1. Wood Type: The type of wood used, such as oak, plays a significant role in flavor development. Oak barrels are commonly used due to their ability to enhance the whiskey’s aroma, color, and taste.

  2. Barrel Size: The size of the barrel affects the interaction between the whiskey and the wood. Smaller barrels allow for more contact and faster aging, while larger barrels provide a more mellow flavor over a longer period.

  3. Barrel History: The previous contents of the barrel can influence the flavor profile. For instance, barrels previously used for aging wine may add fruity or tannic notes to the whiskey.

The Significance of Quality Ingredients

Using high-quality ingredients is essential for producing a great-tasting whiskey. When it comes to whiskey making, two key factors that greatly influence the flavor profile are terroir and climate change.

Terroir refers to the unique characteristics of the land where the ingredients are grown, including the soil composition, altitude, and weather patterns. These factors play a significant role in the flavor development of grains such as barley and rye, which are the primary ingredients in whiskey production.

Additionally, climate change has a direct impact on the quality of ingredients. Rising temperatures and unpredictable weather patterns can affect crop yields and alter the flavor profiles of grains. As a whiskey maker, it is crucial to carefully select ingredients from regions with favorable terroir and adapt to the changing climate to ensure the production of exceptional whiskey.

Moving forward, these considerations will shape the future of whiskey making.

The Future of Whiskey Making

As we explore the future of whiskey making, it is important to consider the innovations and sustainability practices that will shape this industry. Whiskey makers are constantly striving to improve their craft and create new experiences for whiskey enthusiasts.

Here are some key aspects to look out for:

  • Advanced distillation techniques:
    Utilizing cutting-edge technology to enhance flavor profiles and improve efficiency.
    Exploring new methods of aging whiskey to achieve unique and complex flavors.

  • Sustainable sourcing and production:
    Embracing organic farming practices to ensure the quality and sustainability of ingredients.
    Implementing renewable energy sources to reduce carbon footprint and minimize environmental impact.

  • Whiskey aging experiments:
    Conducting research on alternative aging methods, such as using different types of wood or experimenting with temperature and humidity controls.

Frequently Asked Questions

How Long Has Whiskey Making Been Around?

Whiskey making has a rich history that spans centuries. Its evolution can be traced back to ancient times, where it was first distilled by monks. The process has since evolved, resulting in the diverse range of whiskey varieties we enjoy today.

How Does the Addition of Butter Affect the Taste of Whiskey?

Adding butter to whiskey can have a significant impact on its flavor. The butter adds a creamy and smooth texture, enhancing the richness of the whiskey. Butter infused whiskey recipes are becoming popular for their unique taste.

What Are the Different Steps Involved in the Distillation Process?

When making whiskey, different types of stills are used in a meticulous process. The aging process plays a vital role in developing the rich flavors and smoothness that are characteristic of a fine whiskey.

How Has Scotch Whiskey Influenced the Alcohol Industry?

Scotch whiskey has had a significant influence on mixology and has gained global popularity. Its unique flavors and production methods have elevated the whiskey experience, making it a favorite choice for many enthusiasts around the world.

Are Traditional Methods of Whiskey Making Still Used in the Modern Era?

Yes, modern distilleries use new techniques, but traditional whiskey making is far from a dying art. It’s like a well-aged oak barrel, rooted in history but still evolving, producing the smooth elixir we know as whiskey.

Conclusion

In conclusion, as a whiskey maker, I am constantly amazed by the intricate process of creating this beloved spirit. From the historical importance of butter in whiskey production to the influential role of Scotch whiskey, every step is a delicate dance of tradition and innovation.

Barrel aging adds depth and character, while quality ingredients elevate the final product. As I envision the future of whiskey making, I am filled with excitement and curiosity, eager to explore new techniques and flavors.

The journey of whiskey making is a fascinating blend of artistry and science, and I am honored to be a part of it.

Continue Reading

Trending