Connect with us

Butter Tips and Tricks

How to Make Weed Gummies With Magical Butter Maker

Published

on

An image showcasing a vibrant kitchen countertop with a sleek Magical Butter Maker

Hey there!

Ever wondered how to make delicious and potent weed gummies right at home? Look no further, because I’ve got you covered.

In this article, I’ll guide you through the step-by-step process of making mouthwatering weed gummies using the incredible Magical Butter Maker.

Get ready to embark on a journey where you’ll learn how to choose the perfect strain, activate the THC, infuse cannabis into butter, and create the perfect gummy mixture.

So, grab your apron and let’s dive into the world of homemade weed gummies!

Key Takeaways

  • Choosing the right strain with a balanced ratio of THC and CBD is crucial for desired potency and effects in weed gummies.
  • Decarboxylation, the process of heating cannabis at a specific temperature, is essential for making THC psychoactive in gummies.
  • Infusing cannabis into unsalted butter using the Magical Butter Maker simplifies and enhances the infusion process.
  • Precise measurements, accurate dosing, and proper mixing and heating are necessary for achieving the desired consistency and dosage of weed gummies.

[bulkimporter_image id=’2′]

Choosing the Right Strain for Weed Gummies

You’ll want to choose a strain of cannabis that has a balanced ratio of THC and CBD for your weed gummies. The strain selection is crucial as it determines the potency and effects of your gummies. When it comes to making weed gummies, it’s important to consider both the THC and CBD content to achieve a well-balanced experience.

THC (tetrahydrocannabinol) is the psychoactive compound in cannabis that provides the euphoric effects, while CBD (cannabidiol) is known for its relaxing and therapeutic properties. A balanced ratio of THC and CBD ensures that your gummies offer a pleasant and enjoyable experience without being overwhelming.

Furthermore, strain selection also plays a role in the flavor customization of your gummies. Different strains have distinct flavors and aromas, ranging from fruity and citrusy to earthy and herbal. By choosing a strain with a flavor profile that complements your desired taste, you can enhance the overall experience of your weed gummies.

Now that you understand the importance of strain selection and flavor customization, let’s move on to the next step: decarboxylation, which is crucial for activating the THC in your cannabis.

[bulkimporter_image id=’3′]

Decarboxylation: Activating the THC

Decarboxylation is a crucial step in the process of making weed gummies, as it activates the THC in the cannabis flower, making it psychoactive. This process involves heating the cannabis at a specific temperature to convert the non-psychoactive THCA into the psychoactive THC.

There are several methods to decarboxylate cannabis, including oven decarboxylation, sous vide decarboxylation, and using a decarboxylation device like the Nova Decarboxylator.

Importance of Decarboxylation

To maximize the potency of your weed gummies, it’s crucial to properly decarboxylate your cannabis before infusing it with the Magical Butter Maker. Decarboxylation is the process of activating the THC in your cannabis by applying heat.

Here are some key reasons why temperature control and debunking decarboxylation myths are important:

  • Importance of temperature control:

  • Consistent temperature ensures even decarboxylation throughout the cannabis.

  • High temperatures can degrade the cannabinoids and terpenes, reducing the overall potency and flavor.

  • Decarboxylation myths:

  • Myth 1: "Microwaving the cannabis will decarboxylate it quickly." In reality, microwaving can lead to uneven heating and inconsistent results.

  • Myth 2: "Decarboxylation can be skipped if using the Magical Butter Maker." This is false. Decarboxylation is necessary to activate the THC and maximize the potency of your gummies.

Decarboxylation Methods Explained

Understanding the different methods of decarboxylation can help you activate the THC in your cannabis effectively.

Decarboxylation is a process that converts the non-psychoactive THCA compound found in raw cannabis into the psychoactive THC compound.

There are various techniques you can use to achieve this.

One popular method is oven decarboxylation, which involves baking your cannabis at a specific temperature and time to activate the THC.

Another method is using a decarboxylation device, such as a decarboxylator, which precisely controls the temperature and time for optimal THC activation.

Each method has its own benefits, such as convenience, accuracy, and efficiency.

[bulkimporter_image id=’4′]

Gathering the Necessary Ingredients

First, you’ll want to make sure you have all the necessary ingredients for making weed gummies with the magical butter maker. Here’s a list of what you’ll need:

  • Cannabis strain: Choosing the right cannabis strain is crucial for achieving the desired effects in your gummies. Opt for a strain that is high in THC if you want a more potent experience, or choose a strain with higher levels of CBD for a more calming effect.

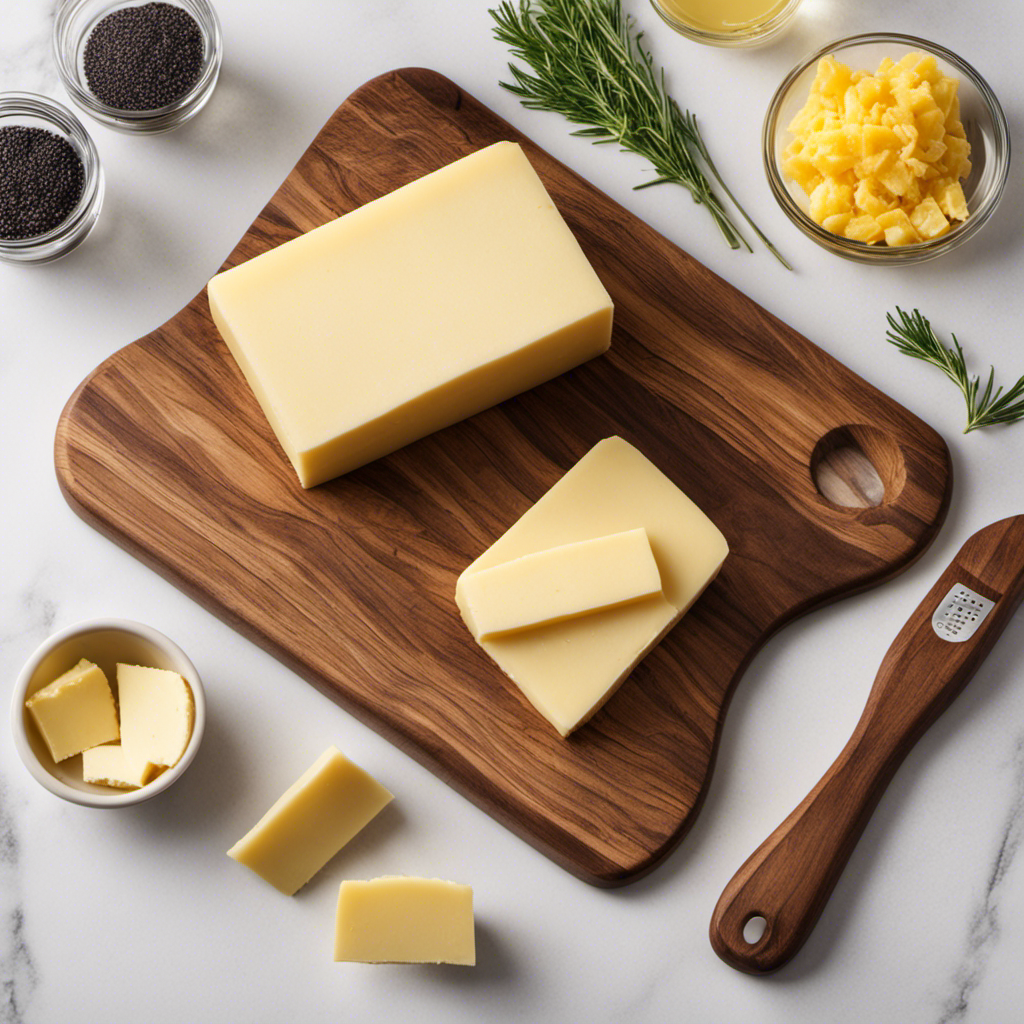
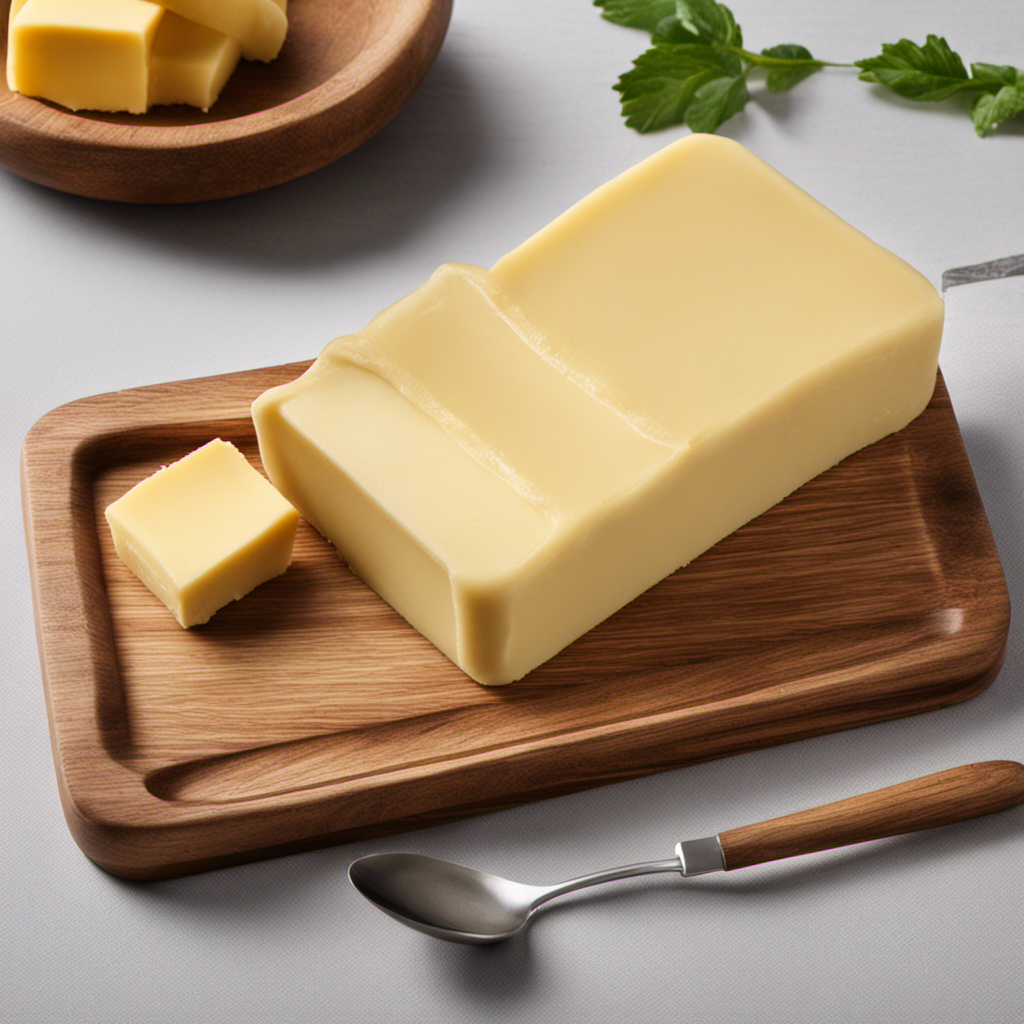
  • Butter: Infusing butter with cannabis is an essential step in making weed gummies. Use unsalted butter for better control over the flavor and consistency of your gummies.

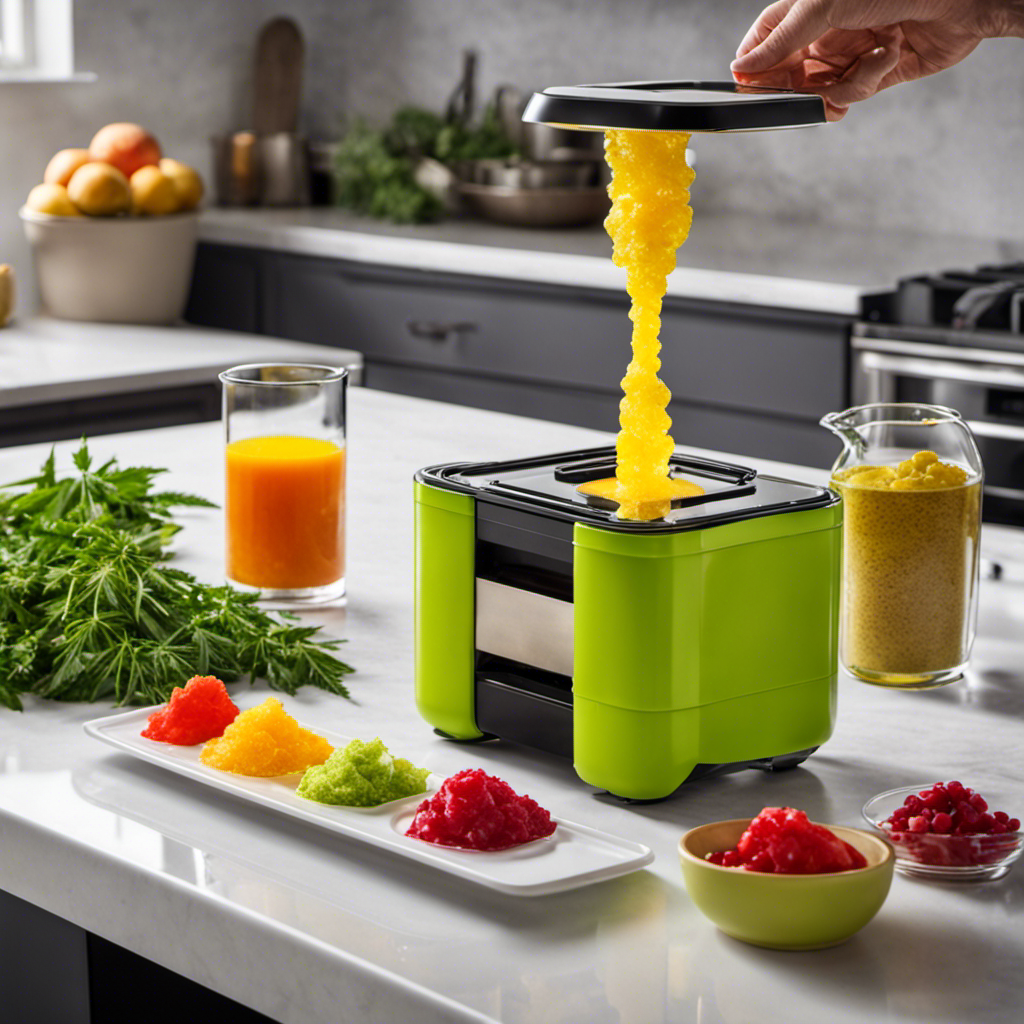
  • Magical butter maker: This device will make the infusion process much easier and more efficient. It allows you to infuse butter with cannabis at the perfect temperature and time, ensuring maximum potency.

  • Gummy molds: To give your gummies their iconic shape, you’ll need silicone gummy molds. These are readily available online or at baking supply stores.

Once you have gathered all the necessary ingredients, you can move on to the next step of infusing cannabis into butter with the magical butter maker. This process will ensure that your gummies are infused with the cannabinoids and flavors of your chosen strain effectively.

[bulkimporter_image id=’5′]

Infusing Cannabis Into Butter With the Magical Butter Maker

When it comes to infusing cannabis into butter, the process can be time-consuming and tricky to get right. However, with the help of the Magical Butter Maker, the task becomes much more efficient and effective.

In this discussion, I will delve into the butter infusion process using the Magical Butter Maker and explore its effectiveness in producing high-quality cannabis-infused butter.

Butter Infusion Process

To start infusing the butter, you’ll need to decarboxylate the cannabis by baking it in the oven. This process activates the THC in the cannabis, making it more potent. Once decarboxylated, you can proceed with the butter infusion techniques using the Magical Butter Maker.

Here’s a step-by-step guide to achieve the perfect butter infusion for your gummies:

  • Grind the decarboxylated cannabis into a fine powder.
  • Place the cannabis and butter into the Magical Butter Maker, ensuring that the butter covers the cannabis completely.
  • Set the temperature to 160 degrees Fahrenheit and the time to two hours.
  • Stir the mixture occasionally to ensure even infusion.
  • After the infusion is complete, strain the butter to remove any plant material.
  • Let the butter cool and solidify before using it in your gummy recipe.

Following these butter infusion tips will help you achieve a smooth and potent cannabis-infused butter, resulting in gummies with the perfect consistency.

Magical Butter Maker Effectiveness

Now that we understand the butter infusion process, let’s explore the effectiveness of using a Magical Butter Maker for making weed gummies.

While the Magical Butter Maker is a popular choice for infusing butter with cannabis, there are alternatives available for those who don’t have access to this specific device. One alternative is to use a slow cooker or a double boiler to infuse the butter with cannabis. These methods require more hands-on attention, but they can still yield excellent results.

When using the Magical Butter Maker, it streamlines the process and ensures consistent and precise infusion. The machine’s temperature and time settings are specifically designed for creating potent cannabis-infused butter. Additionally, its built-in blending and straining capabilities make the process much easier and faster.

However, if you don’t have a Magical Butter Maker, don’t worry! There are still effective butter infusion techniques you can use.

With the butter infused, it’s time to move on to preparing the gummy mixture.

[bulkimporter_image id=’6′]

Preparing the Gummy Mixture

Mix all the ingredients together until well combined.

The gummy recipe variations are endless, and one way to switch things up is by using different sweeteners. Here are two options to consider:

  • Honey: Add a natural sweetness to your gummies by using honey as a sweetener. Not only does honey provide a delightful flavor, but it also offers some health benefits. It contains antioxidants and has antimicrobial properties, which can be beneficial for your immune system. Honey also adds a distinctive taste that pairs well with the cannabis-infused oil.

  • Agave syrup: For those looking for a vegan-friendly alternative, agave syrup is an excellent choice. It is derived from the agave plant and has a mild, sweet taste. Agave syrup is known for its low glycemic index, making it a suitable option for individuals with diabetes or those watching their sugar intake. It blends well with the other gummy ingredients and provides a pleasant sweetness to the final product.

[bulkimporter_image id=’7′]

Adding the Infused Butter to the Gummy Mixture

When it comes to making cannabis-infused gummies, there are a few key points to consider.

First, mastering the butter infusion technique is crucial for achieving the desired potency and flavor. I’ll share some tips and techniques on how to properly infuse butter with cannabis to ensure optimal results.

Additionally, achieving the perfect gummy consistency can be a bit tricky, so I’ll provide some helpful tips to ensure your gummies turn out just right.

Lastly, dosage considerations are essential to ensure a safe and enjoyable experience. I’ll discuss how to calculate the appropriate dosage for your gummies based on your desired strength and individual tolerance.

Butter Infusion Techniques

To achieve optimal butter infusion in your weed gummies, it’s important to follow the recommended techniques. Here are some tips for achieving consistent infusion:

  • Choosing the right butter for infusion:
  • Use unsalted butter for a cleaner taste in your gummies.
  • Opt for high-quality butter with a higher fat content, as it will result in a more potent infusion.

Tips for achieving consistent infusion:

  • Decarboxylate your weed before infusing it with butter. This process activates the THC, making it more potent.
  • Use a Magical Butter Maker to ensure even distribution of the infused butter throughout your gummy mixture.
  • Stir the melted butter and weed mixture frequently to prevent burning and ensure a consistent infusion.
  • Strain the infused butter to remove any plant material, resulting in a smoother texture in your gummies.

Gummy Consistency Tips

When it comes to making weed gummies with the Magical Butter Maker, achieving the right gummy consistency is key. You want your gummies to have that perfect chewy texture that we all love.

To help you achieve this, I have some tips to share.

Firstly, make sure you follow the recipe instructions carefully. The Magical Butter Maker comes with a recipe book that provides precise measurements and steps to ensure the best results.

Secondly, consider using a gummy mold. This will give your gummies a professional look and help maintain their shape.

Lastly, don’t be afraid to experiment with flavor variations. You can add different extracts, juices, or even mix in some fruit puree to create unique and delicious gummy flavors.

Dosage Considerations for Gummies

Achieving the right dose of THC in your gummies is important for a consistent and enjoyable experience. To ensure accuracy when measuring the potency of your gummies, here are a few tips:

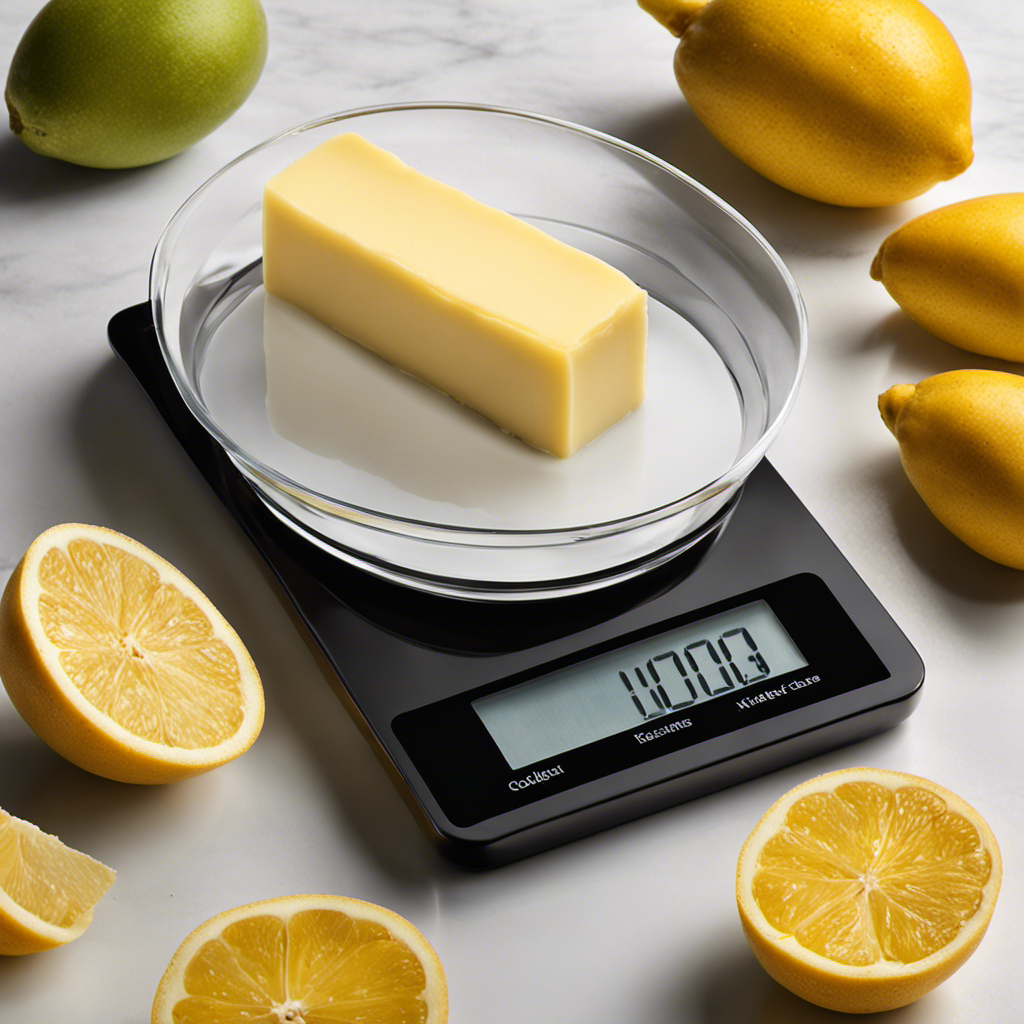
  • Use a reliable scale: Invest in a digital scale that measures in milligrams to accurately measure the amount of THC or CBD you’re adding to your gummy mixture.

  • Adjust potency: If your gummies are too strong or too weak, you can easily adjust the potency by adding more or less cannabis-infused oil or tincture.

  • For stronger gummies, increase the amount of infused oil or tincture.

  • For milder gummies, decrease the amount of infused oil or tincture.

By following these tips, you can ensure that each gummy contains the desired dosage of THC for a consistent and enjoyable experience.

[bulkimporter_image id=’8′]

Mixing and Heating the Gummy Mixture

After adding the cannabis-infused butter, proceed to mix and heat the gummy mixture until it becomes smooth and well combined. This step is crucial for achieving the perfect texture and flavor in your homemade weed gummies. Mixing and heating the gummy mixture properly ensures that the ingredients are evenly distributed and that the gummies set correctly.

To help you understand the process better, here’s a table outlining some gummy flavor variations and gummy texture adjustments you can make:

Flavor Variation Texture Adjustment
Lemon Chewy
Strawberry Soft and Gooey
Blueberry Firm and Bouncy
Watermelon Jelly-like

Experimenting with different flavors and textures can add excitement to your gummy-making journey. Whether you prefer a tangy lemon flavor or a juicy strawberry taste, adjusting the texture can also enhance the overall experience. For a chewier gummy, you can reduce the heating time slightly, while a softer and gooier texture can be achieved by increasing the amount of gelatin.

Remember to mix the gummy mixture continuously while heating to prevent any lumps from forming. Heating the mixture over low heat ensures that the cannabis-infused butter is fully incorporated while maintaining the potency of the THC. Once the mixture is smooth and well combined, you can proceed to pour it into the gummy molds and allow it to set.

[bulkimporter_image id=’9′]

Pouring the Gummy Mixture Into Molds

When it comes to making gummies, there are a few key points to consider: molding techniques, proper filling of molds, and mold selection and preparation.

Molding techniques for gummies involve determining the shape and size you want for your gummies, as well as the type of mold you will be using.

Proper filling of molds is important to ensure consistent and evenly shaped gummies, which can be achieved by using a piping bag or a spoon to carefully fill each mold.

Lastly, mold selection and preparation involves choosing the right type of mold for your gummies, whether it’s silicone, plastic, or metal, and properly preparing the mold by greasing it or using a non-stick spray to prevent sticking.

Molding Techniques for Gummies

To get the perfect gummy shape, you’ll need to use the right molding techniques when making weed gummies with the magical butter maker. Here are some tips to enhance the texture and shape of your gummies:

  • Use silicone molds: Silicone molds are flexible and make it easy to remove the gummies without damaging their shape.

  • Chill the mixture: Before pouring the gummy mixture into the molds, make sure it is chilled. This helps the mixture to set quickly and maintain its shape.

  • Fill the molds evenly: To ensure consistent shapes, fill each mold cavity with an equal amount of the gummy mixture. This avoids any lopsided or uneven gummies.

  • Tap out air bubbles: After pouring the mixture into the molds, gently tap the molds on a flat surface to remove any air bubbles. This helps in achieving a smooth and uniform texture.

  • Refrigerate for optimal setting: Once the molds are filled, refrigerate the gummies for at least 2 hours or until firm. This allows the gummies to fully set and hold their shape.

Proper Filling of Molds

For even and consistent gummy shapes, remember to evenly fill each mold cavity with the chilled gummy mixture. When making gummies, it’s important to use the right mold to achieve the desired shape and size.

While traditional gummy molds are readily available, there are also alternative options you can explore. Silicone molds, for example, are a popular choice as they are flexible and easy to remove the gummies from.

When filling the molds, take care to distribute the gummy mixture evenly in each cavity. This can be done using a spoon or a pipette for more precise filling. Make sure not to overfill the molds, as this can result in misshapen gummies.

Once the molds are filled, allow the gummies to set completely before removing them.

Now that you know some filling technique tips, let’s move on to mold selection and preparation.

Mold Selection and Preparation

Silicone molds are a flexible and popular option for creating gummy shapes. When it comes to mold selection and preparation, there are a few important things to keep in mind. Here’s what you need to know:

  • Mold Cleaning:
    Before using your silicone molds, it’s crucial to clean them thoroughly. This ensures that there are no contaminants or residue that could affect the quality of your gummies. To clean silicone molds, simply wash them with warm, soapy water and rinse them well. You can also use a soft brush or sponge to remove any stubborn residue.

  • Gummy Texture:
    Silicone molds are known for their ability to create smooth and detailed gummy shapes. The flexibility of the molds allows for easy removal of the gummies without affecting their texture. To achieve the desired gummy texture, make sure to follow the recipe instructions accurately. The right balance of ingredients and proper mixing will help you achieve the perfect consistency for your gummies.

[bulkimporter_image id=’10’]

Setting and Cooling the Gummies

Once the gummy mixture has been poured into the molds, I let them sit and cool for at least two hours. This step is crucial for achieving the perfect gummy texture. Allowing enough time for the gummies to set ensures that they firm up and hold their shape. It also gives the flavors time to meld together, resulting in a more delicious and enjoyable treat.

To further enhance the gummy texture, I have found a couple of tips that can make a difference. First, adding a small amount of citric acid to the mixture can help improve the chewiness. Citric acid acts as a natural flavor enhancer and can give the gummies a nice tangy kick. Second, using a silicone mold instead of a traditional plastic one can also contribute to a better texture. Silicone molds are more flexible, making it easier to remove the gummies without causing any damage or altering their shape.

When it comes to storing the gummies, it’s important to keep them in a cool and dry place. Heat and humidity can cause the gummies to become sticky or melt. I recommend storing them in an airtight container or a resealable bag to maintain their freshness and prevent any moisture from getting in.

[bulkimporter_image id=’11’]

Removing the Gummies From the Molds

To easily remove the gummies from the molds, simply press on the bottom of each mold cavity and gently pop them out. Here are some mold removal techniques and gummy demolding tips that can help you with this process:

  • Prepare the workspace: Before removing the gummies from the molds, make sure you have a clean and flat surface to work on. This will prevent any accidental damage to the gummies.

  • Apply gentle pressure: Place your fingers on the bottom of the mold cavity and apply gentle pressure. This will help loosen the gummy and make it easier to remove.

  • Use a silicone mold: Silicone molds are flexible and make it easier to remove the gummies without damaging their shape. The flexibility of the mold allows you to push on the bottom and pop the gummies out effortlessly.

  • Chill the molds: If you’re having trouble removing the gummies, you can try chilling the molds in the refrigerator for a few minutes. This can help solidify the gummies and make them easier to remove.

  • Be patient: Sometimes, gummies can be stubborn and may require a bit of patience. Take your time and gently work on removing each gummy from the mold.

[bulkimporter_image id=’12’]

Storing and Preserving Weed Gummies

If you want to store and preserve your weed gummies, you should keep them in an airtight container to maintain their freshness. Proper storage is essential to extend the shelf life of your gummies and ensure they stay potent and delicious. Here are some gummy storage tips to help you make the most of your cannabis-infused treats:

Storage Tip Description
Keep in a cool, dark place Heat and light can degrade the potency of your gummies, so store them in a cool, dark area, such as a pantry or cupboard.
Avoid moisture Moisture can cause your gummies to become sticky and lose their texture. Make sure the container is completely dry before storing your gummies.
Separate flavors To prevent flavors from mixing, store different flavors of gummies in separate containers or use dividers within the container.
Label the container Properly label the container with the date of preparation to keep track of the gummies’ freshness.
Don’t freeze Freezing gummies can change their texture and make them less enjoyable to eat. It’s best to avoid freezing them.

[bulkimporter_image id=’13’]

Calculating the THC Dosage in Weed Gummies

Now that we know how to store and preserve our delicious weed gummies, let’s dive into the world of calculating THC dosage. It’s important to know exactly how potent our gummies are, so we can consume them responsibly and enjoy the experience to the fullest.

Here’s how to calculate the potency and measure the dosage of your weed gummies:

  • Start by determining the total amount of THC in the cannabis you used to make the infused oil or butter. This information can usually be found on the packaging of the cannabis product.

  • Next, calculate the total amount of infused oil or butter you used in your gummy recipe.

  • Divide the total amount of THC by the total amount of infused oil or butter to find the concentration of THC per unit of oil or butter.

  • Now, determine the number of gummies you made and multiply it by the concentration of THC per unit of oil or butter. This will give you the total amount of THC in your batch of gummies.

  • Finally, divide the total amount of THC in your batch by the number of gummies to find the dosage of THC in each individual gummy.

[bulkimporter_image id=’14’]

Experimenting With Flavors and Additives

When experimenting with flavors and additives in your homemade edibles, remember to start with small amounts and gradually increase to find the perfect balance for your taste preferences.

There are countless flavor combinations and different types of additives you can try to enhance your edibles. Let me share some tips to help you navigate this exciting journey.

Firstly, when it comes to flavor combinations, the possibilities are endless. You can mix and match flavors to create unique and delicious treats. For example, you can try classic combinations like chocolate and mint, or get adventurous with tropical flavors like pineapple and coconut. Don’t be afraid to experiment and discover your own signature flavor combinations.

In addition to flavors, you can also experiment with different types of additives to enhance the texture and overall experience of your edibles. Additives like lecithin can improve the absorption of cannabinoids, while coconut oil can add a smooth and creamy texture. Other popular additives include fruit juices, essential oils, and even spices like cinnamon or ginger.

Remember, when adding flavors and additives, start with small amounts and gradually increase to avoid overpowering the taste or texture of your edibles. Keep a record of the combinations and amounts used, so you can replicate your favorite recipes in the future.

Have fun exploring the wonderful world of flavors and additives, and enjoy the delicious journey of creating your own unique homemade edibles.

[bulkimporter_image id=’15’]

Troubleshooting Common Issues With Weed Gummies

One common issue with homemade edibles is that the gummies may turn out too sticky or gooey, which can be solved by adjusting the amount of gelatin used in the recipe. Troubleshooting gummy consistency is key to ensure that your homemade edibles turn out just right.

Here are a few tips to help you troubleshoot and achieve the perfect gummy texture:

  • Adjusting the amount of gelatin:
    If your gummies are too sticky or gooey, try reducing the amount of gelatin in the recipe. This will result in a firmer texture.
    On the other hand, if your gummies are too firm or hard, you can increase the amount of gelatin to achieve a softer consistency.

  • Adjusting the dosage for desired effects:
    If you find that your gummies are not potent enough, you can increase the amount of cannabis-infused oil or tincture in the recipe.
    Conversely, if your gummies are too strong, you can decrease the amount of cannabis-infused oil or tincture.

[bulkimporter_image id=’16’]

Exploring Alternative Methods for Making Weed Gummies

If you’re looking for different ways to create cannabis-infused gummies, you can try using a tincture or cannabis oil as an alternative method. Making weed gummies is a fun and tasty way to enjoy the benefits of cannabis.

One popular method for making these delicious treats is by using a magical butter maker. This handy device can simplify the process and provide consistent results.

The magical butter maker is a versatile kitchen appliance that can be used to infuse cannabis into various recipes, including gummies. It allows you to extract the cannabinoids from the plant material and incorporate them into your gummy mixture. This ensures that each gummy contains a consistent dosage of THC or CBD, depending on your desired effects.

Using the magical butter maker for your weed gummy recipes has several benefits. First, it saves time and effort by automating the process of infusing cannabis into your gummy mixture. The machine does all the work for you, ensuring that the cannabinoids are evenly distributed throughout the gummies.

Additionally, the magical butter maker allows for precise control over dosage. You can easily adjust the strength of your gummies by adding more or less cannabis to the machine. This ensures that you can customize your gummies to suit your preferences and desired effects.

Frequently Asked Questions

Can I Use a Different Type of Butter Instead of Infusing Cannabis Into Butter With the Magical Butter Maker?

Yes, you can use different types of oils for infusing cannabis instead of butter with the Magical Butter Maker. However, using butter has its benefits, like its ability to bind to THC and enhance the effects of cannabis in gummies.

What Are Some Common Additives That Can Be Used to Enhance the Flavors of Weed Gummies?

There are many flavoring options and recipe variations that can enhance the flavors of weed gummies. Some common additives include fruit extracts, essential oils, and flavored gelatin. These can add depth and variety to your homemade gummies.

How Can I Troubleshoot Issues With Gummies Not Setting Properly?

When making weed gummies, troubleshooting the consistency is key. To prevent them from melting, ensure proper temperature control and use the right amount of gelatin. Experimentation and patience are crucial for perfecting the process.

Are There Any Alternative Methods for Making Weed Gummies Without Using the Magical Butter Maker?

There are alternative methods to make weed gummies without the Magical Butter Maker. You can use other butter or oil infusions and follow a similar recipe. The type of butter used can affect the texture of the gummies.

How Can I Calculate the THC Dosage in Weed Gummies for Accurate Dosing?

To calculate the THC dosage in weed gummies accurately, start by measuring the potency of your cannabis. Use a formula to determine the amount of THC per serving, ensuring precise dosing for a consistent experience.

Conclusion

In conclusion, making weed gummies with the Magical Butter Maker has been an incredible journey. From choosing the perfect strain to infusing cannabis into butter, each step has been crucial in creating the ultimate edible experience.

By experimenting with flavors and additives, the possibilities are endless. However, it’s important to troubleshoot any common issues that may arise. And for those who prefer alternative methods, there are plenty of options to explore.

So grab your Magical Butter Maker and get ready to indulge in some delicious, mind-altering treats. You won’t be disappointed!

Continue Reading

Butter Tips and Tricks

How Many Cups of Butter in a Stick

Published

on

By

An image showing a neatly arranged cup filled with liquid butter, surrounded by a stack of butter sticks, one by one, gradually being poured into the cup until it reaches the brim

Have you ever wondered how many cups of butter are in a stick? Well, I’ve got the answer for you! Understanding butter measurements can be a bit confusing, but fear not, I’m here to simplify it for you.

In this article, we’ll explore the standard stick of butter and how to convert it to cups. We’ll also delve into equivalents and measurements, as well as provide a handy butter conversion chart.

So, let’s dive in and demystify the world of butter measurements together!

Key Takeaways

  • One stick of butter is equal to 1/2 cup or 8 tablespoons.
  • Butter can be measured in grams or ounces for more precise measurements.
  • Conversion charts and kitchen scales are useful tools for accurate measurement conversion.
  • Knowing the equivalents (e.g., 1 stick = 1/2 cup, 2 sticks = 1 cup) helps measure butter accurately in recipes.

[bulkimporter_image id=’2′]

Understanding Butter Measurements

There’s no need to worry about how many cups of butter are in a stick because it’s a common measurement used in recipes. When it comes to accurately measuring butter, it’s important to understand the conversion from sticks to cups.

One stick of butter is equal to 1/2 cup or 8 tablespoons. This measurement is widely accepted and used in baking and cooking. However, it’s good to know that butter can also be measured in grams or ounces for more precise measurements.

To convert butter measurements for recipes, you can use a kitchen scale or refer to conversion charts that provide the equivalent measurements. Understanding these conversions ensures that you can accurately measure and use butter in your favorite recipes.

Now, let’s dive into the details of the standard stick of butter.

[bulkimporter_image id=’3′]

The Standard Stick of Butter

To determine the amount of butter in a standard stick, you’ll need to understand the conversion ratio. Understanding butter packaging and different butter measurements is crucial to accurately measuring ingredients in recipes. Here are some key points to keep in mind:

  • A standard stick of butter in the United States weighs 1/2 cup or 8 tablespoons.
  • The measurements on butter packaging are typically marked in tablespoons and cups.
  • European butter is often sold in 250-gram blocks, which is approximately 1 cup or 2 sticks of butter.
  • Some recipes may call for butter in ounces or grams, so it’s important to have a kitchen scale for precise measurements.
  • It’s also helpful to know that butter comes in different fat percentages, such as salted and unsalted.

[bulkimporter_image id=’4′]

Converting Sticks to Cups

When it comes to converting sticks to cups, it is important to understand the stick to cup ratio for accurate measurement conversion.

The stick to cup ratio is 1 stick of butter equals 1/2 cup. This means that if a recipe calls for 1 cup of butter, you will need 2 sticks.

Stick to Cup Ratio

The stick to cup ratio for butter is approximately 1/2 cup per stick. This ratio is important to know when it comes to baking and following recipes accurately.

Here are a few key points to keep in mind when it comes to butter measurements and baking conversions:

  • 1 stick of butter is equal to 1/2 cup or 8 tablespoons.
  • If a recipe calls for 1 cup of butter, you will need 2 sticks.
  • To convert tablespoons to cups, divide the number of tablespoons by 16.
  • It’s important to note that butter measurements can vary depending on the brand or type of butter you are using, so always check the packaging for accurate measurements.
  • When in doubt, it’s always a good idea to weigh your butter using a kitchen scale for precise measurements.

Knowing the stick to cup ratio and understanding butter measurements is essential for successful baking and achieving the desired results in your recipes.

Accurate Measurement Conversion

Remember, accurately converting measurements is crucial for achieving the desired results in your baking recipes.

When it comes to understanding butter measurements, it’s important to measure accurately to ensure your baked goods turn out just right.

Butter is often measured in sticks, and it’s helpful to know that one stick of butter is equal to 1/2 cup or 8 tablespoons.

This knowledge is especially handy when a recipe calls for a certain amount of cups and you only have sticks of butter on hand.

By measuring butter accurately, you can ensure that your recipes turn out perfectly every time.

Now that we understand how to measure butter correctly, let’s explore the equivalents and measurements for other common baking ingredients.

[bulkimporter_image id=’5′]

Equivalents and Measurements

You’ll need to know how many cups of butter are in a stick for accurate measurements. When it comes to butter measurement equivalents, it’s important to have the right conversions. Here are a few key measurements to keep in mind:

  • 1 stick of butter is equal to 1/2 cup
  • 1/2 stick of butter is equal to 1/4 cup
  • 2 sticks of butter is equal to 1 cup
  • 4 sticks of butter is equal to 2 cups
  • 8 sticks of butter is equal to 4 cups

Knowing these equivalents will help you measure butter accurately in your recipes.

Now that you have a good understanding of how many cups are in a stick of butter, let’s move on to the next section about how much butter is in a cup.

[bulkimporter_image id=’6′]

How Much Butter Is in a Cup

When it comes to baking or cooking, understanding the butter-to-cup ratio is crucial. Knowing how much butter is in a cup can make a huge difference in the outcome of your recipe.

In this discussion, we will explore the conversion of butter measurements and how to accurately measure the right amount of butter for your culinary endeavors.

Butter-To-Cup Ratio

To figure out the butter-to-cup ratio, divide the number of cups by the number of sticks. This ratio is essential when converting butter measurements or finding butter equivalents. Here are some important points to consider:

  • 1 stick of butter is equal to 1/2 cup.
  • 2 sticks of butter make 1 cup.
  • If a recipe calls for 1 cup of butter, you will need 2 sticks.
  • For 1/4 cup of butter, use half a stick.
  • To measure 1/3 cup of butter, you’ll need 5 and 1/3 tablespoons.

Understanding the butter-to-cup ratio allows for accurate measurements in recipes. Whether you’re baking cookies or making a savory dish, having the correct amount of butter is crucial for achieving the desired taste and texture.

Converting Butter Measurements?

Understanding how to convert butter measurements is essential for accurate recipe preparation. When it comes to converting butter measurements, there are a few common mistakes that people often make.

One of the most common mistakes is not knowing the correct conversion ratio. In the United States, butter is typically sold in sticks, with each stick weighing 1/2 cup or 8 tablespoons. However, in some recipes, butter may be measured in grams or ounces.

Another mistake people make is not properly measuring the butter. It is important to use a kitchen scale or measuring cups to ensure precise measurements.

Additionally, some recipes may call for melted butter, which can be measured differently than solid butter.

Understanding these conversions and avoiding these common mistakes will help ensure that your recipes turn out perfectly every time.

[bulkimporter_image id=’7′]

Measuring Butter for Baking

There’s no need to guess how many cups of butter are in a stick when measuring for baking. As someone who loves to bake, I have found that using the right tools for measuring butter is crucial for accurate results. Here are the best tools for measuring butter:

  • Measuring cups: These are the most common tools used for measuring butter. Make sure to use a dry measuring cup and pack the butter firmly for accurate measurements.

  • Kitchen scale: For precise measurements, a kitchen scale is the way to go. It allows you to measure the exact amount of butter required for your recipe.

  • Butter dish with markings: Some butter dishes come with markings that indicate the measurements. This makes it convenient to measure the required amount of butter directly from the dish.

  • Butter cutter: A butter cutter is a handy tool that helps you measure the butter by slicing it into tablespoons or teaspoons.

  • Butter wrappers: Butter wrappers often have measurements marked on them, making it easy to cut the butter into the desired amount.

By using these tools, you can ensure that your butter is measured accurately for your recipes.

Now, let’s move on to the next section where we will discuss a butter conversion chart.

[bulkimporter_image id=’8′]

Butter Conversion Chart

Now that we know how to measure butter for baking, let’s talk about butter conversion chart and how to convert butter for recipes.

It’s common to come across recipes that call for butter in different measurements, such as cups, tablespoons, or grams. To make things easier, there are some standard butter measurement equivalents that can be used for conversion.

For example, one stick of butter is equal to half a cup or 8 tablespoons. So if a recipe calls for 1 cup of butter, you would need 2 sticks or 16 tablespoons. It’s important to have these conversions handy to ensure you’re using the correct amount of butter in your recipes.

Now that we understand the butter conversion chart, let’s move on to some tips for measuring butter accurately.

[bulkimporter_image id=’9′]

Tips for Measuring Butter

To accurately measure butter, it’s helpful to soften it beforehand. Softening butter makes it easier to measure and ensures accurate results in your cooking. Here are some tips for measuring butter for cooking:

  • Take the butter out of the refrigerator and let it sit at room temperature for about 30 minutes before measuring.
  • Use a sharp knife to cut the butter into tablespoon-sized portions.
  • Fill a measuring cup with water and place the cut butter into the cup, submerging it completely.
  • Remove the butter from the water and drain any excess water.
  • Measure the butter in tablespoons or cups, depending on your recipe’s requirements.

[bulkimporter_image id=’10’]

Common Butter Measurement Mistakes

A common mistake when measuring butter is not using a sharp knife to cut it into proper portions. Accurately measuring butter is crucial in baking to achieve the desired results.

When butter is too soft or melted, it can throw off the texture and consistency of your baked goods. To measure butter accurately, start by using a sharp knife to cut the stick into tablespoon-sized portions. Then, use a measuring spoon to scoop out the desired amount.

It’s important to level off the butter with the back of a knife to ensure precise measurements. Another common mistake is eyeballing the amount of butter, which can lead to inconsistent results.

Frequently Asked Questions

Can I Use Margarine Instead of Butter in Baking Recipes?

I prefer using butter over margarine in baking recipes because it adds more flavor and richness. Margarine can affect the texture of baked goods, often making them softer and less tender. So, while margarine can be used as a substitute for butter in some recipes, it’s important to consider the impact on taste and texture.

How Can I Accurately Measure Butter Without Using a Scale?

When it comes to accurately measuring butter without a scale, it can be a bit tricky. But fear not! I’ve got you covered. Let me walk you through the process of converting butter measurements like a pro.

Can I Substitute Oil for Butter in a Recipe?

Substituting butter with oil in a recipe can have pros and cons. Oil can add moisture and make baked goods lighter, but it may also affect the taste and texture. The best oil substitutes for baking are vegetable oil, coconut oil, and olive oil.

How Much Butter Should I Use if the Recipe Calls for a Certain Number of Sticks?

When converting butter measurements, accurately measuring the amount of butter needed is crucial. If a recipe calls for a certain number of sticks, I can help you determine how much butter to use.

Can I Use Unsalted Butter Instead of Salted Butter in Baking Recipes?

Using unsalted butter for baking has its pros and cons. Pros include having more control over the saltiness of the recipe, while cons include potentially missing out on the flavor that salted butter provides.

Conclusion

In conclusion, understanding butter measurements is essential for successful baking. While a standard stick of butter is equivalent to 1/2 cup or 8 tablespoons, it’s important to note that this can vary depending on the brand or region.

To convert sticks to cups, simply divide the number of sticks by 2. Additionally, knowing that 1 cup of butter is equivalent to 2 sticks can help when following recipes.

By following a butter conversion chart and being mindful of common measurement mistakes, bakers can ensure accurate and delicious results.

Continue Reading

Butter Tips and Tricks

How Many Sticks Is 1/3 Cup of Butter

Published

on

By

An image showcasing three sticks of butter, each represented by a traditional wooden butter mold

As I stood in my kitchen, preparing to bake a delicious batch of cookies, I found myself facing a common dilemma: how many sticks of butter should I use for 1/3 cup? It’s a question that many home bakers have pondered.

Thankfully, with a little bit of knowledge and a quick conversion, this mystery can be easily solved. In this article, let’s unravel the secret behind the perfect butter-to-stick ratio and simplify the process of measuring butter in sticks.

Get ready to bake with confidence!

Key Takeaways

  • 1/3 cup of butter is equivalent to 5 and 1/3 tablespoons or 2 and 2/3 sticks of butter.
  • Butter is typically sold in 1/2 cup sticks, which equals 8 tablespoons or 1/4 pound.
  • To convert 1/3 cup of butter to stick equivalents, divide 1/3 by 1/2, resulting in 2/3. Therefore, 1/3 cup of butter is equivalent to 2/3 of a stick.
  • Understanding the butter-to-stick ratio is crucial in baking. One stick of butter equals 1/2 cup or 8 tablespoons. Knowing the butter-to-stick ratio helps achieve the desired texture and flavor in baked goods.

Understanding the Measurement: 1/3 Cup of Butter

To understand how many sticks 1/3 cup of butter is, you’ll need to know that it is equivalent to 5 and 1/3 tablespoons or 2 and 2/3 sticks of butter.

When it comes to stick to cup conversion and converting butter measurements, it’s important to be precise. Butter is typically sold in 1/2 cup sticks, which equals 8 tablespoons or 1/4 pound.

So, if you have a recipe that calls for 1/3 cup of butter, you can simply take 2 and 2/3 sticks of butter, which is about 11 and 1/3 tablespoons.

It’s always helpful to have these conversions in mind when working in the kitchen, as it ensures accurate measurements and delicious results.

Converting Cups to Sticks: The Basics

When it comes to baking, understanding the equivalency between butter sticks and cup measurements is essential. Converting cup measurements to sticks of butter can be a bit confusing at first, but with a few practical tips, you’ll be able to navigate this aspect of baking with ease.

In this discussion, I will explain the butter stick equivalents. I will provide a simple guide to converting cup measurements and share some practical tips to help you in your baking endeavors.

Butter Stick Equivalents

The equivalent of 1/3 cup of butter is approximately 5 and 1/3 sticks. When converting cup measurements to stick equivalents for butter, it’s important to know that one stick of butter typically equals 1/2 cup or 8 tablespoons. Therefore, to determine the number of sticks in 1/3 cup of butter, we divide 1/3 by 1/2. This gives us a quotient of 2/3.

Since there are three sticks in a whole cup of butter, we multiply the quotient by three to get the final answer. Therefore, 2/3 multiplied by 3 equals 2. Hence, 1/3 cup of butter is approximately 5 and 1/3 sticks.

This conversion is useful when following recipes that call for butter in stick measurements rather than cups.

Converting Cup Measurements

Converting measurements can be helpful in following recipes that use stick equivalents instead of cups. When it comes to converting butter measurements, it’s important to know that one stick of butter is equal to 1/2 cup.

So, if a recipe calls for 1/3 cup of butter, you would need to convert it to stick equivalents. To do this, you divide 1/3 by 1/2, which equals 2/3. Therefore, 1/3 cup of butter is equivalent to 2/3 of a stick.

This conversion can be useful when you have a recipe that lists measurements in cups and you prefer to use sticks of butter instead.

Now that we’ve covered the basics of converting measurements, let’s move on to practical tips for baking.

Practical Tips for Baking

Baking can be easier if you follow these practical tips.

  1. Use a kitchen scale: Measuring ingredients by weight ensures accuracy and consistency in your baking.

  2. Spoon and level: When measuring dry ingredients, use a spoon to fill your measuring cup, then level it off with a straight edge for precise measurements.

  3. Butter alternatives: If you don’t have a stick of butter, you can use alternative measurements such as tablespoons or grams. Just make sure to convert the amount accurately.

  4. Use the right tools: Invest in good quality measuring cups and spoons to ensure accurate measurements every time.

By following these tips, you can improve the accuracy of your measurements and achieve better results in your baking.

Now, let’s dive into the secret behind the butter-to-stick ratio.

The Butter-to-Stick Ratio: Unveiling the Secret

When it comes to butter-to-stick ratio in baking, it’s important to know how many sticks are needed for a certain amount of butter. Understanding the butter stick ratios is essential for accurate measurements and achieving the desired texture and flavor in your baked goods.

One stick of butter typically equals 1/2 cup or 8 tablespoons. However, if you don’t have sticks of butter on hand, there are butter stick substitutes available. Some common substitutes include margarine, shortening, or coconut oil. These substitutes can be used in the same amount as the required sticks of butter.

Now that we’ve covered the basics of butter stick ratios and substitutes, let’s move on to the quick and easy conversion of 1/3 cup into sticks.

Quick and Easy Conversion: 1/3 Cup Into Sticks

When it comes to baking, accurate measurements are key. Understanding the conversion between sticks of butter and cups can make a difference in the outcome of your recipe.

In this discussion, we will delve into the topic of sticks in butter conversion and explore the importance of butter measurement conversion in ensuring the perfect balance of ingredients.

Sticks in Butter Conversion

To convert 1/3 cup of butter to sticks, you would use 5 and 1/3 sticks. It may seem like a strange way to measure butter, but it’s actually quite common in recipes. As a home cook, I’ve come across this measurement many times and have learned a few things along the way.

Here’s what you need to know about converting measurements and finding butter substitutes:

  1. Precision: Converting measurements requires accuracy. It’s important to follow the recipe closely to maintain the intended flavors and textures.

  2. Informative: Knowing the equivalent measurements helps in adjusting recipes according to personal preferences or dietary restrictions.

  3. Detailed: Understanding butter substitutes allows for flexibility in recipes. For example, coconut oil can be used as a vegan alternative.

  4. Emotion: Experimenting with different ingredients and measurements can spark creativity in the kitchen and bring joy to cooking.

Butter Measurement Conversion

Understanding the equivalent measurements of butter can be helpful in adjusting recipes to personal preferences or dietary restrictions.

When it comes to converting butter measurements, it’s important to know the alternative measurements for butter. One common measurement is the stick of butter, which is equivalent to 1/2 cup or 8 tablespoons. This is useful to know because many recipes call for butter in terms of sticks.

However, if you don’t have sticks of butter on hand, you can also measure it in cups. One cup of butter is equal to 2 sticks or 16 tablespoons.

Additionally, if you prefer to use weight measurements, 1 stick of butter weighs approximately 1/4 pound or 113 grams.

Simplifying Baking Measurements: Butter in Stick Form

The equivalent of 1/3 cup of butter in stick form is approximately 5 tablespoons. When it comes to baking with butter, precise measurements are crucial for successful results. Here are some alternative butter measurements that can simplify your baking experience:

  1. 1 stick of butter: This is equal to 1/2 cup or 8 tablespoons. It’s the most commonly used measurement in recipes.

  2. 1/4 cup of butter: This is half a stick or 4 tablespoons. It’s a convenient measurement for smaller batches of baked goods.

  3. 1/2 cup of butter: This is 1 stick or 8 tablespoons. It’s commonly used in recipes that require a richer buttery flavor.

  4. 1 cup of butter: This is 2 sticks or 16 tablespoons. It’s typically used in larger recipes or when doubling the original amount.

Finding the Perfect Balance: Stick Measurement for 1/3 Cup of Butter

Finding the perfect balance for 1/3 cup of butter can be achieved by using approximately 5 tablespoons in stick form. Converting butter measurements can sometimes be confusing, but using sticks simplifies the process.

One stick of butter is equal to 1/2 cup or 8 tablespoons. So, for 1/3 cup, we can estimate that it would be around 5 tablespoons. This alternative measurement allows for easy portioning and ensures accuracy in your recipe.

Using butter in stick form also eliminates the need for measuring cups, making it convenient and less messy. Expert tips and tricks for measuring butter in sticks can further enhance your baking experience.

Now, let’s dive into some helpful techniques to master the art of measuring butter in sticks.

Expert Tips and Tricks for Measuring Butter in Sticks

To enhance your baking experience, you can easily master the art of measuring butter in stick form with these expert tips and tricks. Here are some alternative butter measurement methods that you can try:

  1. Kitchen Scale: Invest in a good kitchen scale that can accurately measure butter in grams or ounces. This will give you precise measurements every time.

  2. Measuring Cups: Use measuring cups to measure out the required amount of butter. Most measuring cups have markings for tablespoons, so you can easily measure out the needed quantity.

  3. Tablespoon Conversion: If you don’t have measuring cups, you can use tablespoons as a substitute. One stick of butter is equal to 8 tablespoons, so you can measure out the required amount using tablespoons.

  4. Butter Wrappers: Many butter wrappers have markings that indicate tablespoon measurements. Use these markings as a guide to measure out the desired amount of butter.

With these alternative methods, you can confidently measure butter without sticks and achieve perfect results in your baking endeavors.

Frequently Asked Questions

Can I Use Margarine Instead of Butter in Stick Form When Measuring 1/3 Cup?

Yes, you can use margarine as a substitute for butter in stick form when measuring 1/3 cup. However, keep in mind that the texture and flavor may be slightly different, so it’s important to consider how it will affect your recipe.

Can I Substitute Oil for Butter in Stick Form When Measuring 1/3 Cup?

Sure, you can substitute oil for butter in stick form when measuring 1/3 cup. However, keep in mind that the texture and taste may be slightly different. It’s best to use a neutral-flavored oil for a more versatile result.

How Do I Measure 1/3 Cup of Butter if I Don’t Have the Appropriate Measuring Tools?

If I don’t have the right measuring tools, I can use measuring alternatives like eyeballing or using a tablespoon to estimate 1/3 cup of butter. Converting butter measurements can be tricky, but with practice, it becomes easier.

What Is the Weight of 1/3 Cup of Butter in Grams or Ounces?

Converting the weight of 1/3 cup of butter to grams or ounces depends on the density of the butter. If substituting, remember that 1/3 cup of butter equals about 5 1/3 tablespoons or 2 2/3 ounces.

Can I Use Whipped Butter Instead of Solid Butter in Stick Form When Measuring 1/3 Cup?

Using whipped butter instead of solid butter in stick form can affect the measurement when measuring 1/3 cup. It is important to note the difference in consistency and adjust accordingly for accurate results.

Conclusion

After delving into the world of butter measurements, I’ve discovered the secret behind converting 1/3 cup of butter into sticks.

It turns out that 1/3 cup of butter is equivalent to 5 and 1/3 tablespoons, or approximately 2 and 2/3 sticks.

This knowledge will simplify baking measurements and ensure the perfect balance in your recipes.

So, next time you’re in the kitchen, remember the symbolism of butter in stick form and embrace the ease and precision it brings to your culinary adventures.

Continue Reading

Butter Tips and Tricks

How Many Sticks of Butter Is 1 Cup

Published

on

By

An image showing a neatly arranged stack of 10 tablespoons of butter, each tablespoon represented by a smooth, rectangular slab with rounded edges, resembling traditional stick-shaped butter

Have you ever wondered how many sticks of butter are in one cup? Well, I’ve got the answer for you!

Picture this: you’re in the middle of baking your favorite recipe and suddenly realize you’re out of butter. Panic sets in as you scramble to figure out the conversion from cups to sticks. But fear not!

In this article, I’ll break it down for you, providing all the information you need to know about the butter-to-cup ratio and how to make your baking adventures a breeze.

Key Takeaways

  • 1 cup of butter is equal to 2 sticks or 16 tablespoons.
  • Converting butter measurements from cups to sticks or vice versa is crucial for accurate recipe adjustments.
  • Different brands may have varying measurements for butter, so it’s important to be aware of equivalents.
  • Using the measurement markings on the butter wrapper allows for precise cutting of fractional amounts.
[bulkimporter_image id=’2′]

Understanding the Butter-to-Cup Ratio

1 cup of butter is equal to 2 sticks. When it comes to converting butter measurements, it’s important to understand the ratios.

If a recipe calls for tablespoons of butter, 1 stick is equivalent to 8 tablespoons. So, if you need 1 cup of butter, you’ll need 16 tablespoons or 2 sticks.

It’s also important to note the difference between salted and unsalted butter. Salted butter contains added salt, while unsalted butter does not. This can affect the taste and overall flavor of your dish.

When a recipe calls for unsalted butter, it’s best to stick to that recommendation to have better control over the amount of salt in the recipe. However, if you only have salted butter on hand, you can reduce the amount of added salt in the recipe.

[bulkimporter_image id=’3′]

Converting Butter Measurements: Cups to Sticks

When it comes to baking, understanding the butter cup to stick ratio is crucial. Knowing how many sticks of butter make up one cup can make or break a recipe.

In addition to the ratio, having an accurate conversion method from cups to sticks is essential for precise measurements.

Lastly, it’s important to familiarize oneself with common butter measurements to ensure successful baking endeavors.

Butter Cup to Stick Ratio

To determine the ratio of sticks of butter to cups, we can use this conversion chart. Understanding butter measurements is essential for baking and cooking. Converting butter ratios is a common task in the kitchen.

The standard stick of butter in the United States weighs 1/2 cup or 8 tablespoons. Therefore, if a recipe calls for 1 cup of butter, you will need 2 sticks. If the recipe calls for 1/2 cup of butter, you will need 1 stick.

It’s important to note that butter measurements can vary by country, so always consult a reliable conversion chart if you’re working with international recipes. By knowing the butter cup to stick ratio, you can confidently adapt recipes to suit your needs.

Accurate Conversion Method

The most accurate way to convert measurements is by consulting a reliable conversion chart. When it comes to measuring butter, it can be tricky since it often comes in sticks or cups. Here are some tips to help you accurately measure butter:

  1. Use a conversion chart: This will give you the exact measurement equivalents for butter, whether it’s in sticks or cups.
  2. Soften the butter: If a recipe calls for melted butter, measure it in its solid form and then melt it. This ensures accurate measurements.
  3. Use a kitchen scale: Weighing the butter can give you precise measurements, especially when dealing with small amounts.
  4. Know the standard measurements: One stick of butter is equal to 1/2 cup or 8 tablespoons. A cup of butter, on the other hand, is equal to 2 sticks or 16 tablespoons.

Common Butter Measurements?

Knowing the equivalents for different measurements of butter, such as tablespoons and sticks, can be helpful when following recipes. It ensures that you are adding the right amount of butter, which can greatly impact the outcome of your dish. Here are some common butter measurement equivalents to keep in mind:

Measurement Equivalent
1 stick 1/2 cup (8 tablespoons)
1/2 stick 1/4 cup (4 tablespoons)
1/4 stick 1/8 cup (2 tablespoons)
1 tablespoon 1/16 cup (1/2 stick)

When measuring butter, it’s important to be accurate. Use a kitchen scale for precise measurements, especially if the recipe calls for weight measurements. If you don’t have a scale, use a butter dish with marked measurements. Softened butter should be leveled off with a knife. When using tablespoons, make sure to fill them completely and level off the excess with a straight edge. These tips will help you measure butter accurately and achieve the best results in your recipes.

[bulkimporter_image id=’4′]

The Standard Size of a Stick of Butter

A stick of butter is typically equal to 1/2 cup. Understanding butter packaging and different butter measurements in other countries can be confusing.

Here are some key points to help you navigate the world of butter measurements:

  1. In the United States, butter is commonly sold in sticks, with each stick weighing 1/4 pound or 1/2 cup. This makes it easy to measure and use in recipes.
  2. In some European countries, butter is sold in blocks or tubs, with measurements listed in grams or kilograms. It’s important to convert these measurements to cups or ounces for American recipes.
  3. In Australia, butter is usually sold in 250g or 500g blocks, which can be converted to cups or ounces using conversion charts.
  4. When traveling or using international recipes, it’s helpful to familiarize yourself with the local butter measurements to ensure accurate results.
[bulkimporter_image id=’5′]

How Much Butter Is in 1 Cup

When it comes to baking, understanding the butter to cup ratio is crucial. Knowing how much butter is in 1 cup can help ensure that your recipes turn out perfectly.

Additionally, learning how to convert butter measurements can be helpful when using recipes from different countries or regions.

Lastly, if you’re looking for butter substitutes in baking, there are several options available that can still provide the moisture and richness that butter brings to baked goods.

Butter to Cup Ratio

To measure the butter to cup ratio, you can easily convert sticks of butter to cups. Understanding butter density is key to accurately converting butter measurements from tablespoons to cups. Here’s a step-by-step guide:

  1. Start by knowing that one stick of butter is equal to 1/2 cup. This is a common measurement used in many recipes.
  2. If your recipe calls for a different amount of butter in cups, you can use this conversion: 1 cup of butter is equivalent to 2 sticks or 16 tablespoons.
  3. To convert tablespoons to cups, divide the number of tablespoons by 16. For example, if you have 8 tablespoons of butter, it would be equal to 1/2 cup.
  4. Remember, when measuring butter, it’s important to consider its density. Softened or melted butter may take up less space compared to cold or solid butter.

Converting Butter Measurements

Understanding the conversion of butter measurements can help me confidently adjust my recipe. When it comes to baking or cooking, accuracy is key. Knowing the equivalents of butter can save me time and ensure the perfect outcome.

One cup of butter is equal to two sticks or 16 tablespoons. This information is crucial when a recipe calls for a specific amount of butter in cups, but I only have sticks. Conversely, if a recipe specifies butter in sticks, I can easily convert it to cups by dividing the number of sticks by two.

To measure butter accurately, I can use a kitchen scale or the markings on the butter wrapper. Softened butter should be packed into measuring cups, while solid butter should be cut according to the desired quantity.

With these tips, I can confidently use the correct amount of butter in my recipes.

Butter Substitutes in Baking

If you’re looking to substitute butter in your baking, there are various options available that can still yield delicious results. Here are four butter alternatives that not only provide a healthier option but also offer unique flavors and health benefits:

  1. Coconut oil: This versatile alternative adds a subtle tropical taste to your baked goods and is rich in healthy fats, promoting heart health.
  2. Avocado: Creamy and nutrient-dense, mashed avocado can replace butter in certain recipes, providing a boost of vitamins and minerals.
  3. Greek yogurt: With its tangy flavor and creamy texture, Greek yogurt adds moisture and protein to your baked treats while reducing the fat content.
  4. Applesauce: A natural sweetener and fat substitute, applesauce adds moisture and tenderness to your baked goods, making them lighter and healthier.
[bulkimporter_image id=’6′]

Butter Conversion: Cups to Sticks Simplified

You can easily convert 1 cup of butter to sticks by knowing that it equals 2 sticks.

When it comes to butter storage, it is important to consider the packaging. Butter is typically sold in wrapped blocks or sticks. The packaging not only protects the butter from external factors like air and light but also keeps it fresh for longer periods.

The most common packaging for butter is a waxed paper or foil wrapper. This type of packaging helps to maintain the butter’s quality and prevent it from spoiling. It is recommended to store butter in its original packaging or transfer it to an airtight container to maintain its freshness.

Proper butter storage ensures that it remains usable for a longer time and retains its flavor and texture.

[bulkimporter_image id=’7′]

Calculating Sticks of Butter for Your Recipe

To calculate the number of sticks needed for your recipe, it’s helpful to divide the total amount of butter by the conversion factor of 2. This will give you the accurate measurement in sticks.

Here are some tips for understanding butter measurements and achieving accurate conversions:

  1. Always use the conversion factor of 2 when converting cups to sticks of butter.
  2. Make sure to measure butter in its solid form for precise results.
  3. If your recipe calls for a fraction of a stick, you can easily cut it using the measurement markings on the wrapper.
  4. Remember that butter is sold in different sizes, so check the weight or volume on the packaging to ensure accuracy.

Now that you understand how to calculate the number of sticks needed for your recipe, let’s move on to some tips for measuring butter in cups.

[bulkimporter_image id=’8′]

Tips for Measuring Butter in Cups

When measuring butter in cups, it’s important to remember that different brands may have different measurements on their packaging. To ensure accuracy in your recipes, it’s helpful to be aware of butter measurement equivalents.

One cup of butter is equal to 2 sticks or 16 tablespoons. However, some brands of butter may label their packaging differently, so it’s always a good idea to double-check.

If you don’t have measuring cups or sticks of butter, there are alternative methods for measuring butter. One option is to use a kitchen scale to measure the desired amount in grams or ounces. Another option is to use the markings on the butter wrapper itself. Most butter sticks have measurements marked on the packaging, allowing you to easily cut off the desired amount.

[bulkimporter_image id=’9′]

Butter Conversions Made Easy: Cups to Sticks

When it comes to baking or cooking with butter, it’s important to have a clear understanding of the measurement equivalents. Knowing how many sticks of butter are in a cup can save time and ensure accurate results.

In this discussion, we will explore simple conversion techniques for butter measurements, providing you with the knowledge and confidence to easily adapt recipes to your preferred measurements.

Butter Measurement Equivalents

You can easily convert 1 cup of butter into sticks by dividing it into 2 sticks. This is a common measurement used in baking and cooking.

When it comes to understanding butter ratios and ensuring accurate measuring, here are some tips to keep in mind:

  1. Use a liquid measuring cup: Butter is a solid, but using a liquid measuring cup allows for more precise measurements.
  2. Soften the butter: To accurately measure butter, it should be softened to room temperature. This ensures that it is easily spreadable and can be measured accurately.
  3. Use a knife or bench scraper: When measuring butter, use a knife or bench scraper to level off the top. This will provide a consistent and accurate measurement.
  4. Pack it tightly: If a recipe calls for packed butter, make sure to tightly pack the butter into the measuring cup. This will give you the correct amount needed for the recipe.

Simple Conversion Techniques

To simplify conversions, try using a kitchen scale for more precise measurements. When it comes to baking, accurate measurements are crucial for the success of your recipe. Butter measurement equivalents in recipes can sometimes be confusing, especially when converting between different units.

Converting butter measurements for baking can be made easier by using a kitchen scale. By weighing the butter, you can accurately determine the amount needed for your recipe. For example, if a recipe calls for 1 cup of butter, you can weigh it on the scale to get the precise measurement in grams or ounces. This eliminates any guesswork and ensures that your baked goods turn out just right.

Now, let’s move on to how to substitute sticks of butter for cups.

[bulkimporter_image id=’10’]

How to Substitute Sticks of Butter for Cups

If you’re substituting sticks of butter for cups, it’s important to know that one stick of butter is equivalent to 1/2 cup. This knowledge is crucial for measuring accuracy in recipes.

Here are four key points to keep in mind when substituting sticks of butter for cups:

  1. Butter substitutes: In case you don’t have sticks of butter on hand, you can use other ingredients as substitutes. Options include margarine, shortening, coconut oil, or even applesauce for a healthier alternative.
  2. Measuring accuracy: When measuring butter in stick form, it’s essential to accurately cut the stick to the correct length. Each stick is typically 8 tablespoons or 1/2 cup, so make sure to measure it precisely.
  3. Conversions: If a recipe calls for a specific amount of cups, you may need to convert it to sticks of butter. Remember that two sticks of butter are equal to 1 cup, so adjust accordingly.
  4. Recipe adjustments: When substituting sticks of butter for cups, consider the impact on your recipe. Butter provides moisture and flavor, so using different substitutes may affect the final texture and taste.
[bulkimporter_image id=’11’]

Common Butter Measurements: Cups Vs Sticks

When baking, it’s helpful to know the difference between measuring butter in cups versus sticks. Understanding butter measurements and being able to convert between cups and sticks can make a big difference in the outcome of your baked goods. Here’s a simple table to help you understand the conversion:

Cups Sticks Grams
1 0.5 113
2 1 227
3 1.5 340

For example, if a recipe calls for 1 cup of butter, you can use 2 sticks or 227 grams. Similarly, if a recipe calls for 3 sticks of butter, you can use 1.5 cups or 340 grams. Having this understanding and being able to convert between cups and sticks will ensure that your baked goods turn out perfectly every time.

Frequently Asked Questions

Can I Use Margarine Instead of Butter When Measuring in Cups or Sticks?

Sure, you can use margarine instead of butter when measuring in cups or sticks. However, keep in mind that margarine has a different texture and flavor, so it may affect the outcome of your recipe. The butter vs margarine debate is a matter of personal preference.

How Much Does a Stick of Butter Weigh in Ounces?

A stick of butter weighs 4 ounces. Converting butter measurements can be tricky, but knowing that a stick of butter is 1/2 cup or 8 tablespoons helps in cooking and baking.

Can I Use Salted Butter Instead of Unsalted Butter in a Recipe That Calls for Measuring in Cups?

Yes, you can use salted butter instead of unsalted butter in a recipe that calls for measuring in cups. Just remember to adjust the amount of salt in the recipe accordingly.

Are There Any Special Considerations When Measuring Butter in High-Altitude Baking?

When baking at high altitudes, there are special considerations for measuring butter. The altitude affects the air pressure, which can impact the texture and rising of baked goods. Adjustments may be needed to ensure successful results.

Is There a Difference in Measurement if the Butter Is Cold or at Room Temperature When Using Cups or Sticks?

When measuring butter, it’s important to note that the accuracy may vary depending on whether the butter is cold or at room temperature. This applies to both measuring cups and sticks.

Conclusion

In conclusion, understanding the butter-to-cup ratio is crucial when it comes to baking. Converting measurements from cups to sticks can be simplified by knowing that one cup of butter is equal to two sticks.

It is important to note that a standard stick of butter typically measures 1/2 cup or 8 tablespoons. When measuring butter in cups, it is recommended to use precise measuring tools to ensure accurate results.

Remember, as the saying goes, “Measure twice, bake once!”

Continue Reading

Trending