Connect with us

Butter Tips and Tricks

Make THC Gummies with Magic Butter Maker: 5 Easy Steps

Published

on

An image showcasing a vibrant kitchen counter adorned with a Magic Butter Maker, a tray of THC-infused gummy bears in various fruity colors, and an assortment of ingredients like cannabis oil, gelatin, and fruit juice

I enjoy creating treats from scratch, particularly those with an added punch. This is why I’m thrilled to present my technique for crafting THC-infused gummies with the help of the Magic Butter Maker.

With just a few simple steps, you can infuse your gummies with the perfect amount of THC for a deliciously elevated experience. So gather your ingredients, prepare your Magic Butter Maker, and get ready to embark on a tasty adventure in homemade edibles.

Let’s dive in!

Key Takeaways

  • Accurately measure THC oil or tincture and gelatin powder and sugar for precise dosage and consistency.
  • Select the appropriate strainer option (fine mesh or cheesecloth) and practice patience during the time-consuming straining process.
  • Infused butter adds a unique flavor profile to gummies and can be adjusted to control THC dosage for a personalized experience.
  • Choose gummy molds that suit your needs and properly fill them to ensure consistent THC dosage and taste.

[bulkimporter_image id=’2′]

Gather Your Ingredients

Advertisement

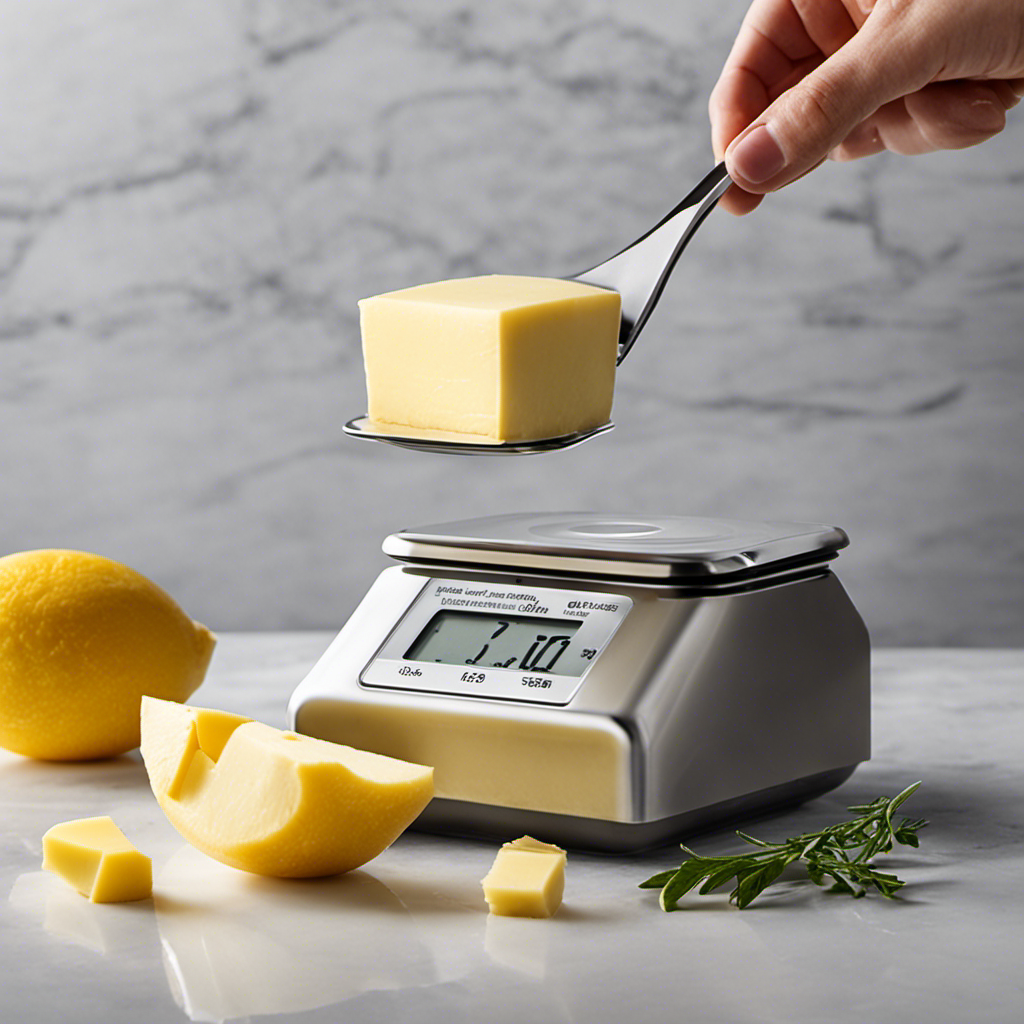
First, make sure you’ve gathered all of your ingredients for making the THC gummies with the magic butter maker. Measuring accuracy is essential in creating the perfect batch of gummies. You’ll need to measure your ingredients precisely to ensure the right potency and consistency.

Start by measuring your desired amount of THC oil or tincture. Use a kitchen scale or a measuring spoon to accurately measure the oil. Next, measure your gelatin powder and sugar. A digital scale will provide the most accurate measurements, but measuring cups can also work well.

Once you have all your ingredients measured, it’s time to choose your gummy molds. Silicone molds are highly recommended as they are flexible and make it easy to remove the gummies without breaking them. You can find various shapes and sizes online or at kitchen supply stores. It’s important to choose a mold that can hold the desired amount of gummy mixture.

Small, bite-sized molds are great for portion control, while larger molds can create fun and eye-catching gummies. By ensuring measuring accuracy and choosing the right gummy molds, you’ll be well on your way to creating delicious and potent THC gummies with the magic butter maker.

Advertisement

[bulkimporter_image id=’3′]

Prepare Your Magic Butter Maker

To get started, ensure you’ve properly set up your Magic Butter Maker for use. This versatile machine will make the process of making THC gummies a breeze. Here are some key steps to follow:

  • Choose the right strainer option: Depending on your preference and the texture you desire for your gummies, you can opt for a fine mesh strainer or a cheesecloth. The fine mesh strainer will remove smaller particles, while the cheesecloth will give a smoother consistency.

  • Straining techniques: When it comes to straining, there are a few techniques you can use. One method is to pour the mixture through the strainer and gently press down with a spoon to extract as much liquid as possible. Another technique is to use a spatula to scrape the sides of the strainer, ensuring you capture all the goodness.

  • Patience is key: Straining can be a time-consuming process, but it’s important to be patient. Take your time to ensure you remove any unwanted particles and achieve a smooth, clear liquid for your gummies.

  • Clean as you go: After each use, make sure to clean your strainer thoroughly to remove any residue or buildup. This will maintain its effectiveness and ensure the best results for future batches.

By following these straining tips, you’ll be able to create delicious THC gummies with ease using your Magic Butter Maker.

Happy cooking!

Advertisement

[bulkimporter_image id=’4′]

Decarb Your Cannabis

Before starting the decarbing process, ensure you have properly prepared your cannabis for maximum potency.

Advertisement

Decarbing, short for decarboxylation, is a crucial step in making THC gummies with the Magic Butter Maker. It involves heating your cannabis at a specific temperature to activate the cannabinoids, specifically THC, present in the plant material. This process converts the non-psychoactive THCA into the psychoactive THC, which is responsible for the desired effects of the gummies.

To decarb your cannabis, you will need to set your oven to a specific temperature. The ideal decarb temperature is around 220-240°F (104-115°C). This temperature range ensures that the cannabinoids are activated without causing them to degrade or evaporate. It is important to monitor the temperature carefully to avoid overheating and damaging the cannabinoids.

To begin the decarb process, spread your prepared cannabis evenly on a baking sheet lined with parchment paper. Place the baking sheet in the preheated oven and let it bake for around 30-45 minutes. During this time, the heat will activate the THC and other cannabinoids, making them ready for extraction in the Magic Butter Maker.

Once the decarb process is complete, remove the baking sheet from the oven and let the cannabis cool completely before proceeding with the extraction process. This step ensures that the cannabinoids are fully activated and ready to be infused into your THC gummies.

Advertisement
[bulkimporter_image id=’5′]

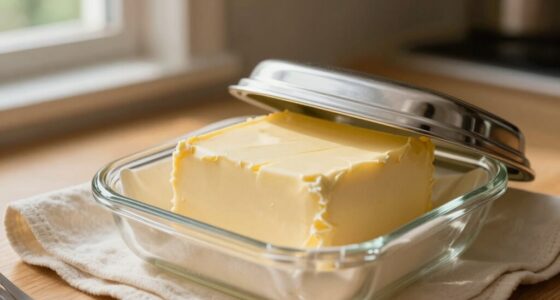
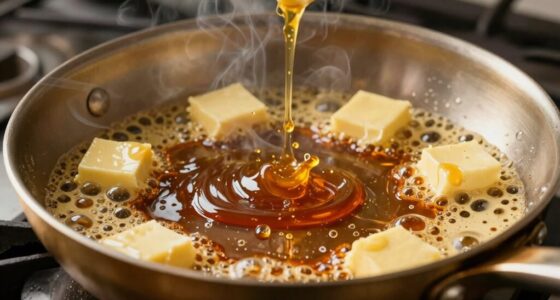
Infuse Your Butter With THC

Once the cannabis has been decarbed, you can start infusing your butter with THC. Infusing butter with cannabis is a simple yet effective way to incorporate the benefits of THC into your favorite recipes, such as gummies. Here are some reasons why THC infused gummies are a popular choice among cannabis enthusiasts:

  • Enhanced relaxation: THC is known for its relaxing properties, and when infused into gummies, it provides a convenient and tasty way to unwind after a long day.

  • Precise dosing: With THC infused gummies, you can easily control the amount of THC you consume, allowing you to personalize your experience and find the perfect dosage for your needs.

  • Discreet consumption: Gummies are a discreet option for consuming THC, as they resemble regular candies and can be enjoyed without drawing unwanted attention.

  • Long-lasting effects: When THC is ingested through gummies, the effects tend to last longer compared to other consumption methods, providing a prolonged experience of relaxation and euphoria.

Now that your butter is infused with THC, it’s time to move on to the next step: straining your infused butter.

[bulkimporter_image id=’6′]

Advertisement

Strain Your Infused Butter

When it comes to making infused butter, straining is a crucial step that shouldn’t be overlooked. The importance of straining lies in removing any plant material or impurities from your butter, resulting in a smoother and more enjoyable final product.

There are various strainer options and techniques available, such as using cheesecloth, a fine-mesh sieve, or a specialized strainer bag, each offering different levels of filtration and ease of use.

To ensure effective straining, it’s essential to follow a few tips. First, allow the butter to cool slightly before straining. This will make the process easier and prevent any potential burns.

Advertisement

Next, apply gentle pressure to extract all the infused goodness from the plant material. This will help maximize the flavor and potency of your infused butter.

Lastly, be patient and take your time to achieve the desired clarity in your butter. Rushing the straining process may result in a less refined final product.

Importance of Straining

To ensure a smooth and pure mixture, it’s crucial to strain the infused oil before adding it to the gummy mixture. Straining removes any plant material or impurities, resulting in a cleaner and more enjoyable final product.

When it comes to straining, using a fine mesh strainer offers several benefits:

  • Improved texture: A fine mesh strainer allows for a finer filtration, removing even the tiniest particles from the infused oil. This leads to a smoother texture in your gummies.

  • Enhanced flavor: By straining out any unwanted debris, the infused oil retains its original flavor and potency. This ensures that your gummies taste and smell amazing.

  • Consistency: Using a fine mesh strainer ensures a consistent and even distribution of the infused oil throughout the gummy mixture, resulting in consistent dosing and a more enjoyable experience.

  • Professional results: By using a fine mesh strainer, you can achieve a level of quality comparable to commercially made gummies, making your homemade treats look and taste professional.

Don’t underestimate the importance of straining with a fine mesh strainer. It’s a small step that makes a big difference in the quality of your THC gummies.

Advertisement

Strainer Options and Techniques

Using a fine mesh strainer offers a more efficient and effective way to strain the infused oil for your gummies.

When it comes to straining techniques, there are different types of strainers available that can suit your needs. One popular option is a fine mesh sieve, which has tightly woven mesh that prevents any solids from passing through, resulting in a smooth and clean oil.

Another option is a cheesecloth, which is a loosely woven fabric that allows the oil to pass through while trapping any solids. This technique requires multiple layers of cheesecloth to achieve a finer strain.

Additionally, using a coffee filter or a nut milk bag can also yield good results.

Experimenting with different straining techniques can help you find the method that works best for you in achieving the desired consistency for your THC-infused oil.

Advertisement

Tips for Effective Straining

Experimenting with different straining techniques can help you discover the most effective method for achieving your desired consistency in the THC-infused oil.

Here are some tips to make your straining process more efficient:

  • Use a fine mesh strainer or cheesecloth to remove any plant material or residue from the oil.
  • Consider using a coffee filter for an extra level of filtration, ensuring a smoother and cleaner end product.
  • Apply gentle pressure when straining to avoid pushing any unwanted particles through the filter.
  • If you have a lot of oil to strain, consider using a straining bag or a nut milk bag for larger batches.

By utilizing these straining techniques and equipment, you can achieve a more refined and potent THC-infused oil for your gummies.

Happy straining!

[bulkimporter_image id=’7′]

Advertisement

Measure Your Ingredients

Make sure you’re accurately measuring all of your ingredients for the THC gummies with the magic butter maker. Accurate measurements are crucial when it comes to making cannabis-infused gummies.

Not only do accurate measurements ensure that your gummies turn out perfectly every time, but they also play a significant role in the potency and consistency of your edibles.

When it comes to measuring your ingredients, there are different techniques you can use. The most common method is using measuring cups and spoons. These tools allow you to measure both dry and liquid ingredients accurately. Be sure to level off your dry ingredients with a straight edge to ensure precise measurements.

Another technique you can use is weighing your ingredients using a kitchen scale. This method is particularly useful when working with more potent ingredients like cannabis-infused oil or tinctures. Weighing your ingredients provides a higher level of accuracy, especially when dealing with small quantities.

No matter which technique you choose, it is essential to follow the recipe instructions closely and measure each ingredient accurately. This will ensure that your THC gummies are consistent in taste, texture, and potency.

Advertisement

[bulkimporter_image id=’8′]

Prepare Your Gummy Molds

To prepare your gummy molds, first, ensure that they are clean and free from any debris or residue. This step is crucial in ensuring that your gummies come out perfectly shaped and clean.

Here are some tips for gummy mold selection and proper gummy mold care:

  • Choose the right size and shape of molds that suit your desired gummy shape. From bears to worms, there are various options available in the market.
  • Look for molds made of food-grade silicone material. This ensures that your gummies are safe to consume and easy to remove from the molds.
  • Before using the molds, wash them thoroughly with warm soapy water and rinse them well. This helps remove any manufacturing residues or dust particles.
  • After each use, clean the molds with warm water and mild soap, making sure to remove any leftover gummy residue. Dry them thoroughly before storing to prevent mold growth.

Proper gummy mold care is essential for maintaining the quality and longevity of your molds. By following these steps, you can ensure that your gummies turn out perfect every time.

Now, let’s move on to the next step: heating your gummy mixture.

Advertisement

[bulkimporter_image id=’9′]

Heat Your Gummy Mixture

Now that your gummy molds are prepared, it’s time to heat your gummy mixture to the perfect temperature. Controlling the heat during the gummy making process is crucial to achieving the desired texture and consistency. Here are some tips to help you get it right.

Firstly, it’s important to use a reliable thermometer to monitor the temperature. This will ensure that you don’t overheat or underheat the mixture. The ideal temperature for gummy making is around 160°F (71°C). Going above this temperature can result in a sticky and gooey mess, while going below can lead to a runny and unset gummy.

To maintain a consistent heat, it’s recommended to use a double boiler or a candy thermometer. This will prevent the mixture from overheating or scorching. If you don’t have a double boiler, you can create one by placing a heatproof bowl over a pot of simmering water.

Advertisement

If you encounter any issues with heating the gummy mixture, there are a few troubleshooting steps you can take. If the mixture becomes too thick, you can add a small amount of water or juice to thin it out. On the other hand, if the mixture is too thin, you can heat it for a bit longer to evaporate excess liquid.

[bulkimporter_image id=’10’]

Mix in Your Infused Butter

Once you’ve prepared your gummy molds and heated your gummy mixture to the perfect temperature, it’s time to mix in your infused butter for an extra kick of flavor and potency. The infusion process is essential in creating THC gummies that pack a punch. Here are some key points to consider when it comes to mixing in your infused butter:

  • Importance of straining: Straining your infused butter ensures that any plant material or unwanted particles are removed, resulting in a smoother and more enjoyable gummy experience. It also helps to enhance the overall taste and texture of your gummies.

  • Different strainer options: There are various strainer options available, depending on your preference and the level of filtration you desire. Some popular choices include cheesecloth, fine-mesh sieves, or even specialized straining bags. Experiment with different options to find the one that works best for you.

  • Fine-tuning potency: The amount of infused butter you mix into your gummy mixture will determine the potency of your gummies. It’s important to consider your desired dosage and the strength of your infused butter. Start with a smaller amount and gradually increase as needed to achieve the desired effects.

  • Balancing flavor: Infused butter can add a delicious and unique flavor profile to your gummies. Experiment with different strains and flavors to find the perfect combination. Remember to consider the overall taste of your gummy mixture and adjust the amount of infused butter accordingly.

Advertisement
[bulkimporter_image id=’11’]

Add Flavor and Coloring

When it comes to making gummies, one important aspect is the flavor options available. Whether you prefer fruity, sour, or even savory flavors, there are a wide variety of options to choose from.

Another consideration is the choice between natural and artificial coloring, each with their own pros and cons.

Lastly, achieving the desired taste for your gummies can be a bit of an art form, but with some tips and tricks, you can create delicious and flavorful treats that everyone will enjoy.

Flavor Options for Gummies

To add variety to your gummies, you can experiment with different flavors such as strawberry, watermelon, or even sour apple. Adding different flavors not only enhances the taste but also makes the gummy experience more enjoyable.

Advertisement

Here are some flavor options to consider:

  • Strawberry: A classic flavor that is sweet and refreshing.
  • Watermelon: A juicy and summery flavor that will make your taste buds dance.
  • Sour Apple: For those who enjoy a tangy and tart taste, this flavor is perfect.
  • Blueberry: Bursting with antioxidants and a hint of sweetness, this flavor is a crowd-pleaser.

When it comes to making gummies, the texture is crucial. You want them to be chewy and soft, just like store-bought gummies. Additionally, dosage accuracy is essential to ensure consistent effects. By following a reliable recipe and measuring your ingredients carefully, you can achieve the perfect gummy texture and dosage accuracy every time.

Natural Vs Artificial Coloring

Using natural coloring for your gummies can provide a healthier option compared to artificial coloring. Natural coloring benefits include being derived from plants, fruits, and vegetables, making them a more natural and sustainable choice. On the other hand, health concerns with artificial coloring include potential allergic reactions, hyperactivity in children, and links to certain diseases. Here is a comparison of natural and artificial coloring:

Natural Coloring Artificial Coloring
Derived from plants, fruits, and vegetables Made from synthetic chemicals
Contains beneficial nutrients and antioxidants May contain harmful additives
Colors may vary slightly due to natural variations Colors are consistent and vibrant
Generally safe for consumption Some artificial colors are banned or restricted in certain countries

Tips for Achieving Desired Taste

You can enhance the taste of your gummies by experimenting with different flavor combinations. Achieving the desired potency and masking the cannabis taste can be a challenge, but with a few tricks, you can create delicious gummies that will satisfy your cravings.

Here are some tips to help you achieve the desired taste:

  • Add natural fruit juices or extracts: Incorporating flavors like strawberry, pineapple, or mango can help mask the cannabis taste and give your gummies a fruity twist.

  • Use flavored gelatin: Opt for flavored gelatin packets that complement the cannabis taste. This will add an extra layer of flavor to your gummies.

  • Sweeten it up: Adding a bit of honey, agave syrup, or sugar can help balance out the bitterness of the cannabis and make your gummies more enjoyable.

  • Experiment with herbs and spices: Infuse your gummies with herbs like mint or spices like cinnamon to create unique flavor combinations that can help mask the cannabis taste.

By following these tips, you can create gummies that taste great while still maintaining the desired potency.

Advertisement

Happy gummy making!

[bulkimporter_image id=’12’]

Fill Your Gummy Molds

First, grab your gummy molds and start filling them with the THC-infused mixture. This is an important step in making your own THC gummies, as the mold shape and type can affect the final product. There are various gummy mold types available in the market, such as silicone, plastic, and metal molds. Each type has its own advantages and disadvantages, so it’s important to choose the one that suits your needs.

Different gummy shapes can also add some fun and variety to your homemade THC gummies. You can find molds in shapes like bears, worms, fruits, and even dinosaurs. Experimenting with different shapes can make your gummies more appealing and enjoyable to consume.

Advertisement

To help you visualize the different gummy mold types and shapes, here’s a handy table:

Gummy Mold Type Advantages Disadvantages
Silicone Flexible and easy to remove gummies Can be more expensive
Plastic Affordable and durable May produce less detailed shapes
Metal Retains shape well Can be harder to remove gummies from

Remember to properly fill your gummy molds with the THC-infused mixture, ensuring that each mold is evenly filled. This will help ensure that your gummies have a consistent THC dosage and taste. Once filled, allow the gummies to set in the molds before removing and storing them.

[bulkimporter_image id=’13’]

Let the Gummies Set

When it comes to letting the gummies set, there are a few key points to consider.

Advertisement

First, the time required for the gummies to set will vary depending on the recipe and ingredients used. It’s important to follow the instructions closely to ensure the gummies have enough time to firm up properly.

Secondly, finding the best storage method for your gummies is crucial in maintaining their freshness and texture. Storing them in an airtight container in a cool, dry place is recommended to prevent them from becoming too soft or sticky.

Lastly, if you’re looking to enhance the flavors of your gummies, there are a few tricks you can try. Adding a splash of citrus juice or incorporating flavored extracts can help intensify the taste and make your gummies even more enjoyable.

Setting Time Required

The setting time required for THC gummies can vary depending on the recipe. It usually takes around 2-4 hours for the gummies to set completely. However, there are a few tips you can follow to speed up the setting time:

  • Increase the amount of gelatin in the recipe: Gelatin is responsible for the gummies’ firmness, so adding more can help them set faster.
  • Chill the mixture before pouring it into the molds: Cooling the mixture before pouring it into the molds can help it set quicker.
  • Use a silicone mold: Silicone molds can help the gummies set faster compared to other materials.

If your gummies don’t set properly, here are some troubleshooting tips:

  • Check the gelatin-to-liquid ratio: Ensure that you have used the correct amount of gelatin in relation to the liquid ingredients.
  • Refrigerate for longer: If the gummies are still not setting, try refrigerating them for a few more hours or overnight.

Best Storage Methods

To preserve the freshness and potency of your THC gummies, it’s important to store them in an airtight container in a cool, dark place. The best storage containers for THC gummies are ones that provide a tight seal to prevent air and moisture from getting in. Glass jars with rubber gaskets or plastic containers with secure lids are excellent choices. These containers create a barrier that keeps the gummies fresh and prevents them from absorbing any odors or flavors from their surroundings.

Additionally, storing your THC gummies in a cool, dark place helps to maintain their potency. Heat and light can degrade the THC, reducing its effectiveness. By following these storage methods, you can ensure that your THC gummies remain potent and delicious for a longer period of time.

Advertisement

Enhancing Gummy Flavors

When it comes to making THC gummies, enhancing the texture and flavors is key to creating a delightful experience. One way to achieve this is by adding CBD to the gummies. CBD not only adds a unique twist to the flavor profile but also offers potential health benefits.

Here are a few ways to enhance the gummy texture and incorporate CBD:

  • Use gelatin or agar agar to create a chewy texture.
  • Add fruit purees or juices for a burst of natural flavor.
  • Experiment with different sweeteners like honey or maple syrup for a rich taste.
  • Infuse the gummies with CBD oil or isolate for a calming effect.

By incorporating these techniques, you can create THC gummies that not only taste amazing but also offer a pleasant and satisfying texture.

[bulkimporter_image id=’14’]

Remove the Gummies From the Molds

Once the gummies have cooled completely, you can easily remove them from the molds. Removing gummies from the molds may seem like a simple task, but it can sometimes be tricky. Here are a few tips to help you successfully remove your gummies from the molds without any issues.

Advertisement

Firstly, make sure that the gummies have completely cooled down before attempting to remove them. This will ensure that they have set properly and won’t stick to the molds. If you try to remove them too soon, they may break or lose their shape.

To remove the gummies, gently push on the bottom of the mold to loosen them. You can also use a small, blunt object like a butter knife to carefully lift the edges of the gummies away from the mold. Be careful not to apply too much pressure, as this may cause the gummies to break.

If you’re having trouble removing the gummies, try placing the mold in the freezer for a few minutes. The cold temperature will help firm up the gummies, making them easier to remove. Alternatively, you can try lightly greasing the molds with a non-stick cooking spray before pouring in the gummy mixture. This will help prevent sticking and make removal easier.

[bulkimporter_image id=’15’]

Advertisement

Store Your THC Gummies Properly

Storing your THC gummies properly will help maintain their freshness and potency. As someone who has been making homemade edibles for years, I’ve learned a thing or two about preserving the texture and taste of these delicious treats. Here are some tips to ensure your gummies stay in their prime:

  • Keep them in an airtight container: This will prevent moisture from seeping in and causing the gummies to become sticky or lose their shape.

  • Store in a cool, dark place: Heat and light can degrade the THC in your gummies, so it’s important to keep them away from direct sunlight and high temperatures.

  • Separate different flavors: If you have multiple flavors of gummies, store them separately to prevent cross-contamination and preserve the unique taste of each batch.

  • Use desiccant packs: These little packets absorb moisture and can help extend the shelf life of your gummies, keeping them fresh and chewy.

By following these simple steps, you can enjoy your THC gummies for longer periods of time while preserving their delightful texture.

[bulkimporter_image id=’16’]

Enjoy Your Homemade THC Gummies

Now that you have properly stored your homemade THC gummies, it’s time to enjoy them! But before you dive in, here are a few tips for dosage control and experimenting with different strains.

Advertisement

Dosage control is crucial when consuming THC gummies. Start with a low dose, especially if you are new to edibles or have a low tolerance. Remember, the effects of edibles can take longer to kick in compared to smoking or vaping, so be patient. Allow at least 1-2 hours for the full effects to manifest before deciding to consume more.

Experimenting with different strains can add variety to your THC gummy experience. Each strain has its own unique combination of cannabinoids and terpenes, which contribute to its specific effects. Some strains are known for their uplifting and energizing properties, while others are more relaxing and sedating. Try different strains to see which ones suit your preferences and desired effects.

Keep track of the strains and dosages you try, along with the effects they produce. This can help you identify your favorites and tailor your future THC gummy creations accordingly.

With these tips, you can now enjoy your homemade THC gummies with confidence and control. Remember to consume responsibly and always prioritize your safety and well-being.

Frequently Asked Questions

Can I Use Any Type of Cannabis for Making THC Gummies?

Yes, you can use different types of cannabis for making THC gummies. It’s a great way to experiment with flavors and benefits of different strains. Don’t limit yourself to just gummies, explore other cannabis recipes too!

Advertisement

How Long Does It Take to Decarb Cannabis in the Magic Butter Maker?

Decarbing cannabis in the Magic Butter Maker takes about 2 hours. It’s crucial to maintain the optimal temperature for activating THC. I’ve found that this machine simplifies the process, making it easier to enjoy homemade THC gummies.

Can I Use Regular Butter Instead of Infused Butter?

I wouldn’t recommend using regular butter instead of infused butter for making THC gummies. Infused butter contains the cannabinoids needed for potency. Using regular butter may result in a less potent product.

How Do I Know if I Have Strained My Infused Butter Properly?

When I strain my infused butter, I look for a clear, golden liquid without any plant matter. A common mistake is not squeezing the cheesecloth enough, leaving residue behind. Properly strained butter is crucial for delicious THC gummies.

How Long Should I Let the Gummies Set Before Removing Them From the Molds?

I usually let the gummies set for about 2-3 hours before removing them from the molds. This ensures that they have a firm texture. It’s also important to properly store THC gummies to maintain their freshness and potency.

Conclusion

In conclusion, making THC gummies with the Magic Butter Maker is a straightforward process that anyone can do at home. By following the steps outlined in this article, you can create your own delicious and potent treats.

Advertisement

But here’s the best part: once you’ve made your gummies, the real magic happens when you consume them. The anticipation builds as you wait for the effects to kick in, and when they do, you’ll be transported to a world of relaxation and euphoria.

So why wait? Start making your own THC gummies today and experience the magic for yourself.

Continue Reading
Advertisement

Butter Tips and Tricks

Butter Hacks: 2/3 Cup Butter Is How Many Tablespoons?

Published

on

By

converting butter measurements easily

If you’ve ever wondered, 2/3 cup of butter equals around 10.67 tablespoons. This handy conversion guarantees your recipes turn out just right.

Key Takeaways

  • 2/3 cup of butter equals 10.67 tablespoons.
  • Useful for recipes specifying butter in tablespoons.
  • Ensures precise measurements in cooking.
  • Simplifies adjusting butter quantities.
  • Essential for accurate recipe results.

The Full Conversion Chart

Exploring the entire conversion chart for butter measurements can simplify your cooking endeavors. Understanding the different measurements for butter, such as blocks, sticks, cups, tablespoons, and weight in grams, allows you to easily adapt recipes to suit your needs.

For example, knowing that a block of butter weighs 5.33 ounces and that this is equivalent to 2.67 ounces in stick form can be incredibly helpful when following a recipe that specifies one form over the other.

Furthermore, realizing that 1/6 pound of butter is equal to one cup, or that one tablespoon of butter is approximately 80 milliliters, enables you to make precise adjustments based on what measuring tools you have available.

This detailed chart provides you with the flexibility to confidently experiment in the kitchen, ensuring that your dishes turn out just right every time. Whether you’re baking, sautéing, or simply spreading butter on your toast, having a solid grasp on these conversions will surely enhance your culinary skills.

How Much Is 1 Stick?

price of a single stick

To accurately measure butter, understanding the quantity in 1 stick is important for following recipes effectively. One stick of butter equals 8 tablespoons, approximately 4 ounces or 113 grams in weight, and fills half a cup. When working with recipes that call for butter, this information is vital for precise measurements.

Butter sticks are conveniently marked with tablespoon measurements, simplifying the process of cutting the right amount. By knowing how much butter is in 1 stick, you can easily adapt recipes to suit your needs without any guesswork.

Advertisement

Whether you’re baking a batch of cookies or whipping up a savory sauce, having this knowledge at your fingertips guarantees your dishes turn out just right every time. So next time you reach for a stick of butter, remember these measurements to ensure cooking or baking success.

Measuring Butter From Sticks

butter measurement using sticks

When measuring butter from sticks, make certain you understand that each stick is equivalent to 8 tablespoons or 1/2 cup. This means that if a recipe calls for 2/3 cup of butter, you’d need 1 stick plus 2 and 2/3 tablespoons of butter. Understanding this conversion is essential for accurately measuring butter in various recipes.

Measuring butter from sticks is a convenient way to portion out the right amount for your cooking or baking needs. By knowing that one stick equals 8 tablespoons, you can easily adjust the quantity of butter required for a recipe.

Whether you’re using butter in cups, tablespoons, or sticks, being able to convert between these measurements guarantees that your dishes turn out just right.

Next time you reach for a stick of butter, remember that it contains 8 tablespoons or 1/2 cup. This knowledge will simplify your cooking process and help you achieve consistent results in the kitchen.

Butter in Tablespoons (Tbsp.)

butter measurement in tablespoons

When measuring butter in tablespoons (Tbsp.), it’s essential to know that 2/3 cup of butter is equivalent to 10 and 2/3 tablespoons. Understanding this butter conversion can simplify your cooking and baking experience.

Here are a few key points to keep in mind:

Advertisement
  • Converting cups to tablespoons: To convert 2/3 cup of butter to tablespoons, multiply 2/3 by 16 (since 1 cup equals 16 tablespoons).
  • Precise measurement: The calculation results in 10.67 tablespoons, which can be rounded to 10 and 2/3 tablespoons. This accuracy is vital for achieving consistent results in your recipes.
  • Convenience in recipes: Knowing the butter measurements in tablespoons can be handy when a recipe specifies butter in this unit rather than cups, making it easier to follow instructions accurately.

Mastering butter measurements in tablespoons allows you to confidently navigate various recipes and secures your dishes turn out just right.

Butter Vs. Margarine Conversion

dairy debate butter or margarine

For a straightforward butter versus margarine conversion comparison, consider the differences in teaspoons and tablespoons.

ButterMargarine
1 Teaspoon1 Teaspoon
1 Tablespoon1 Tablespoon
1/4 Cup1/4 Cup

When substituting butter for margarine in recipes, bear in mind the conversion rate between the two. While both butter and margarine serve as fats in baking and cooking, they have slightly different compositions due to their ingredients. If a recipe calls for margarine but you prefer to use butter, a simple swap can be made using the table above. Remember that the water content in butter is higher than in margarine, which can affect the final texture of your dish. Experimenting with different ratios based on the conversion table can help you achieve the desired result.

Olive Oil Conversion

cooking with olive oil

To convert olive oil measurements effectively in your recipes, remember the following equivalences:

  • 1/4 Cup of olive oil is equivalent to 1/4 Cup of butter/margarine.
  • 1/4 Cup + 2 Tablespoons of olive oil is equal to 1/2 Cup of butter/margarine.
  • 1/2 Cup of olive oil is the same as 1/2 Cup + 1 Tablespoon of butter/margarine.

When substituting olive oil for butter or margarine in your recipes, keep these conversions in mind to guarantee your dish turns out just right. Whether you’re aiming for a healthier option or simply prefer the taste of olive oil, knowing how to make these conversions can make a significant difference in your cooking.

Next time you reach for olive oil instead of butter, confidently adjust your measurements using these simple equivalences.

Healthy Alternative: Olive Oil

heart healthy cooking with olives

Looking to make healthier choices in your cooking? Olive oil can be a great alternative to butter, providing a higher content of monounsaturated fats.

Benefits of Olive Oil

Consider incorporating olive oil into your cooking routine as a healthier alternative to butter, thanks to its rich content of monounsaturated fats. Substituting butter with olive oil not only reduces saturated fat intake but also maintains a similar texture and flavor profile in your dishes.

Here are some benefits of using olive oil:

  • Healthier Fat Option: Olive oil is packed with monounsaturated fats, which are considered heart-healthy fats that can help lower bad cholesterol levels.
  • Versatility in Cooking: From baking to sautéing and creating flavorful dressings, olive oil proves to be a versatile ingredient suitable for various cooking methods.
  • Unique Flavor Profile: Unlike butter, olive oil adds a distinct taste to your dishes, enhancing the overall flavor experience while offering a healthier alternative.

Incorporating olive oil into your daily cooking not only brings health benefits but also contributes to a more balanced and flavorful diet.

Cooking With Olive Oil

Enhance your cooking routine by incorporating olive oil as a healthier alternative to butter in various dishes. Olive oil offers a distinct flavor profile that can elevate the taste of your meals while providing several health benefits. Rich in monounsaturated fats, olive oil is considered heart-healthy and can help lower bad cholesterol levels.

Advertisement

When cooking with olive oil, you have the flexibility to use it in different methods such as sautéing, roasting, and making salad dressings. This versatility makes it a great choice for a wide range of recipes. By substituting butter with olive oil, you can reduce your saturated fat intake without compromising on flavor.

Next time you’re in the kitchen, consider reaching for olive oil instead of butter. Not only will you be making a healthier choice, but you’ll also be adding a delicious twist to your favorite dishes. Experiment with olive oil in your cooking and discover the wonderful benefits it can bring to your meals.

Contact & Copyright Information

contact and copyright details

For more details on butter and olive oil conversions, contact Monadnock Oil and Vinegar, LLC at their Dublin branch by dialing 603-563-7066 or at their Amherst branch at 603-589-9954.

If you prefer email correspondence, you can reach them at [emailprotected].

Remember that all content related to butter and olive oil conversions is protected by copyright owned by Monadnock Oil and Vinegar, LLC. Reproduction rights are reserved from 2015 to 2024, and any unauthorized use is strictly prohibited.

If you intend to use or refer to their content, make sure you have the appropriate permissions to avoid any copyright violations.

Advertisement

Frequently Asked Questions

How Many Tablespoons Is 2/3 Cup in a Stick of Butter?

To know how many tablespoons are in 2/3 cup of butter in a stick, remember it’s around 10 2/3 tablespoons or about 1 stick plus 2 tablespoons. This helps you accurately measure butter for recipes.

Is 1 Stick of Butter the Same as 1 2 Cup?

Yes, 1 stick of butter is equal to 1/2 cup. That means a stick of butter contains 8 tablespoons. Understanding these measurements can make your cooking and baking experiences smoother and more precise.

How Many Tablespoons Is a Full Cup of Butter?

To measure a full cup of butter, you’d need 16 tablespoons. That’s the scoop for your baking adventures. Remember this handy conversion to make your kitchen creations a piece of cake!

How Much Is 1 Cup of Butter in Stick Butter?

To convert 1 cup of butter to sticks, you need 2 sticks. For tablespoons, that’s 16 tablespoons. Knowing these conversions helps in precise measuring for recipes. It’s essential for successful baking and cooking.

Conclusion

Remember, when it comes to butter hacks, knowing how to convert measurements can make all the difference in your cooking.

Advertisement

As the saying goes, ‘A little butter can make everything better.’

So next time you’re in the kitchen and wondering how many tablespoons are in 2/3 cup of butter, you’ll be prepared to whip up something delicious with ease.

Happy cooking!

Continue Reading

Butter Tips and Tricks

How Many Sticks of Butter in 1 Cup: A Step-by-Step Guide

Published

on

By

An image showing a neatly arranged stack of 10 tablespoons of butter, each tablespoon represented by a smooth, rectangular slab with rounded edges, resembling traditional stick-shaped butter

Ever wondered how many sticks of butter are in one cup? Well, I have the answer for you!

Picture this: you’re in the middle of baking your favorite recipe and suddenly realize you’re out of butter. Panic sets in as you scramble to figure out the conversion from cups to sticks. But fear not!

In this article, I’ll break it down for you, providing all the information you need to know about the butter-to-cup ratio and how to make your baking adventures a breeze.

Key Takeaways

  • 1 cup of butter is equal to 2 sticks or 16 tablespoons.
  • Converting butter measurements from cups to sticks or vice versa is crucial for accurate recipe adjustments.
  • Different brands may have varying measurements for butter, so it’s important to be aware of equivalents.
  • Using the measurement markings on the butter wrapper allows for precise cutting of fractional amounts.
[bulkimporter_image id=’2′]

Understanding the Butter-to-Cup Ratio

1 cup of butter is equal to 2 sticks. When it comes to converting butter measurements, it’s important to understand the ratios.

If a recipe calls for tablespoons of butter, 1 stick is equivalent to 8 tablespoons. So, if you need 1 cup of butter, you’ll need 16 tablespoons or 2 sticks.

It’s also important to note the difference between salted and unsalted butter. Salted butter contains added salt, while unsalted butter does not. This can affect the taste and overall flavor of your dish.

When a recipe calls for unsalted butter, it’s best to stick to that recommendation to have better control over the amount of salt in the recipe. However, if you only have salted butter on hand, you can reduce the amount of added salt in the recipe.

[bulkimporter_image id=’3′]

Converting Butter Measurements: Cups to Sticks

When it comes to baking, understanding the butter cup to stick ratio is crucial. Knowing how many sticks of butter make up one cup can make or break a recipe.

In addition to the ratio, having an accurate conversion method from cups to sticks is essential for precise measurements.

Lastly, it’s important to familiarize oneself with common butter measurements to ensure successful baking endeavors.

Butter Cup to Stick Ratio

To determine the ratio of sticks of butter to cups, we can use this conversion chart. Understanding butter measurements is essential for baking and cooking. Converting butter ratios is a common task in the kitchen.

The standard stick of butter in the United States weighs 1/2 cup or 8 tablespoons. Therefore, if a recipe calls for 1 cup of butter, you will need 2 sticks. If the recipe calls for 1/2 cup of butter, you will need 1 stick.

It’s important to note that butter measurements can vary by country, so always consult a reliable conversion chart if you’re working with international recipes. By knowing the butter cup to stick ratio, you can confidently adapt recipes to suit your needs.

Accurate Conversion Method

The most accurate way to convert measurements is by consulting a reliable conversion chart. When it comes to measuring butter, it can be tricky since it often comes in sticks or cups. Here are some tips to help you accurately measure butter:

  1. Use a conversion chart: This will give you the exact measurement equivalents for butter, whether it’s in sticks or cups.
  2. Soften the butter: If a recipe calls for melted butter, measure it in its solid form and then melt it. This ensures accurate measurements.
  3. Use a kitchen scale: Weighing the butter can give you precise measurements, especially when dealing with small amounts.
  4. Know the standard measurements: One stick of butter is equal to 1/2 cup or 8 tablespoons. A cup of butter, on the other hand, is equal to 2 sticks or 16 tablespoons.

Common Butter Measurements?

Knowing the equivalents for different measurements of butter, such as tablespoons and sticks, can be helpful when following recipes. It ensures that you are adding the right amount of butter, which can greatly impact the outcome of your dish. Here are some common butter measurement equivalents to keep in mind:

Measurement Equivalent
1 stick 1/2 cup (8 tablespoons)
1/2 stick 1/4 cup (4 tablespoons)
1/4 stick 1/8 cup (2 tablespoons)
1 tablespoon 1/16 cup (1/2 stick)

When measuring butter, it’s important to be accurate. Use a kitchen scale for precise measurements, especially if the recipe calls for weight measurements. If you don’t have a scale, use a butter dish with marked measurements. Softened butter should be leveled off with a knife. When using tablespoons, make sure to fill them completely and level off the excess with a straight edge. These tips will help you measure butter accurately and achieve the best results in your recipes.

[bulkimporter_image id=’4′]

The Standard Size of a Stick of Butter

A stick of butter is typically equal to 1/2 cup. Understanding butter packaging and different butter measurements in other countries can be confusing.

Here are some key points to help you navigate the world of butter measurements:

  1. In the United States, butter is commonly sold in sticks, with each stick weighing 1/4 pound or 1/2 cup. This makes it easy to measure and use in recipes.
  2. In some European countries, butter is sold in blocks or tubs, with measurements listed in grams or kilograms. It’s important to convert these measurements to cups or ounces for American recipes.
  3. In Australia, butter is usually sold in 250g or 500g blocks, which can be converted to cups or ounces using conversion charts.
  4. When traveling or using international recipes, it’s helpful to familiarize yourself with the local butter measurements to ensure accurate results.
[bulkimporter_image id=’5′]

How Much Butter Is in 1 Cup

When it comes to baking, understanding the butter to cup ratio is crucial. Knowing how much butter is in 1 cup can help ensure that your recipes turn out perfectly.

Additionally, learning how to convert butter measurements can be helpful when using recipes from different countries or regions.

Lastly, if you’re looking for butter substitutes in baking, there are several options available that can still provide the moisture and richness that butter brings to baked goods.

Butter to Cup Ratio

To measure the butter to cup ratio, you can easily convert sticks of butter to cups. Understanding butter density is key to accurately converting butter measurements from tablespoons to cups. Here’s a step-by-step guide:

  1. Start by knowing that one stick of butter is equal to 1/2 cup. This is a common measurement used in many recipes.
  2. If your recipe calls for a different amount of butter in cups, you can use this conversion: 1 cup of butter is equivalent to 2 sticks or 16 tablespoons.
  3. To convert tablespoons to cups, divide the number of tablespoons by 16. For example, if you have 8 tablespoons of butter, it would be equal to 1/2 cup.
  4. Remember, when measuring butter, it’s important to consider its density. Softened or melted butter may take up less space compared to cold or solid butter.

Converting Butter Measurements

Understanding the conversion of butter measurements can help me confidently adjust my recipe. When it comes to baking or cooking, accuracy is key. Knowing the equivalents of butter can save me time and ensure the perfect outcome.

One cup of butter is equal to two sticks or 16 tablespoons. This information is crucial when a recipe calls for a specific amount of butter in cups, but I only have sticks. Conversely, if a recipe specifies butter in sticks, I can easily convert it to cups by dividing the number of sticks by two.

To measure butter accurately, I can use a kitchen scale or the markings on the butter wrapper. Softened butter should be packed into measuring cups, while solid butter should be cut according to the desired quantity.

With these tips, I can confidently use the correct amount of butter in my recipes.

Butter Substitutes in Baking

If you’re looking to substitute butter in your baking, there are various options available that can still yield delicious results. Here are four butter alternatives that not only provide a healthier option but also offer unique flavors and health benefits:

  1. Coconut oil: This versatile alternative adds a subtle tropical taste to your baked goods and is rich in healthy fats, promoting heart health.
  2. Avocado: Creamy and nutrient-dense, mashed avocado can replace butter in certain recipes, providing a boost of vitamins and minerals.
  3. Greek yogurt: With its tangy flavor and creamy texture, Greek yogurt adds moisture and protein to your baked treats while reducing the fat content.
  4. Applesauce: A natural sweetener and fat substitute, applesauce adds moisture and tenderness to your baked goods, making them lighter and healthier.
[bulkimporter_image id=’6′]

Butter Conversion: Cups to Sticks Simplified

You can easily convert 1 cup of butter to sticks by knowing that it equals 2 sticks.

When it comes to butter storage, it is important to consider the packaging. Butter is typically sold in wrapped blocks or sticks. The packaging not only protects the butter from external factors like air and light but also keeps it fresh for longer periods.

The most common packaging for butter is a waxed paper or foil wrapper. This type of packaging helps to maintain the butter’s quality and prevent it from spoiling. It is recommended to store butter in its original packaging or transfer it to an airtight container to maintain its freshness.

Proper butter storage ensures that it remains usable for a longer time and retains its flavor and texture.

[bulkimporter_image id=’7′]

Calculating Sticks of Butter for Your Recipe

To calculate the number of sticks needed for your recipe, it’s helpful to divide the total amount of butter by the conversion factor of 2. This will give you the accurate measurement in sticks.

Here are some tips for understanding butter measurements and achieving accurate conversions:

  1. Always use the conversion factor of 2 when converting cups to sticks of butter.
  2. Make sure to measure butter in its solid form for precise results.
  3. If your recipe calls for a fraction of a stick, you can easily cut it using the measurement markings on the wrapper.
  4. Remember that butter is sold in different sizes, so check the weight or volume on the packaging to ensure accuracy.

Now that you understand how to calculate the number of sticks needed for your recipe, let’s move on to some tips for measuring butter in cups.

[bulkimporter_image id=’8′]

Tips for Measuring Butter in Cups

When measuring butter in cups, it’s important to remember that different brands may have different measurements on their packaging. To ensure accuracy in your recipes, it’s helpful to be aware of butter measurement equivalents.

One cup of butter is equal to 2 sticks or 16 tablespoons. However, some brands of butter may label their packaging differently, so it’s always a good idea to double-check.

If you don’t have measuring cups or sticks of butter, there are alternative methods for measuring butter. One option is to use a kitchen scale to measure the desired amount in grams or ounces. Another option is to use the markings on the butter wrapper itself. Most butter sticks have measurements marked on the packaging, allowing you to easily cut off the desired amount.

[bulkimporter_image id=’9′]

Butter Conversions Made Easy: Cups to Sticks

When it comes to baking or cooking with butter, it’s important to have a clear understanding of the measurement equivalents. Knowing how many sticks of butter are in a cup can save time and ensure accurate results.

In this discussion, we will explore simple conversion techniques for butter measurements, providing you with the knowledge and confidence to easily adapt recipes to your preferred measurements.

Butter Measurement Equivalents

You can easily convert 1 cup of butter into sticks by dividing it into 2 sticks. This is a common measurement used in baking and cooking.

When it comes to understanding butter ratios and ensuring accurate measuring, here are some tips to keep in mind:

  1. Use a liquid measuring cup: Butter is a solid, but using a liquid measuring cup allows for more precise measurements.
  2. Soften the butter: To accurately measure butter, it should be softened to room temperature. This ensures that it is easily spreadable and can be measured accurately.
  3. Use a knife or bench scraper: When measuring butter, use a knife or bench scraper to level off the top. This will provide a consistent and accurate measurement.
  4. Pack it tightly: If a recipe calls for packed butter, make sure to tightly pack the butter into the measuring cup. This will give you the correct amount needed for the recipe.

Simple Conversion Techniques

To simplify conversions, try using a kitchen scale for more precise measurements. When it comes to baking, accurate measurements are crucial for the success of your recipe. Butter measurement equivalents in recipes can sometimes be confusing, especially when converting between different units.

Converting butter measurements for baking can be made easier by using a kitchen scale. By weighing the butter, you can accurately determine the amount needed for your recipe. For example, if a recipe calls for 1 cup of butter, you can weigh it on the scale to get the precise measurement in grams or ounces. This eliminates any guesswork and ensures that your baked goods turn out just right.

Now, let’s move on to how to substitute sticks of butter for cups.

[bulkimporter_image id=’10’]

How to Substitute Sticks of Butter for Cups

If you’re substituting sticks of butter for cups, it’s important to know that one stick of butter is equivalent to 1/2 cup. This knowledge is crucial for measuring accuracy in recipes.

Here are four key points to keep in mind when substituting sticks of butter for cups:

  1. Butter substitutes: In case you don’t have sticks of butter on hand, you can use other ingredients as substitutes. Options include margarine, shortening, coconut oil, or even applesauce for a healthier alternative.
  2. Measuring accuracy: When measuring butter in stick form, it’s essential to accurately cut the stick to the correct length. Each stick is typically 8 tablespoons or 1/2 cup, so make sure to measure it precisely.
  3. Conversions: If a recipe calls for a specific amount of cups, you may need to convert it to sticks of butter. Remember that two sticks of butter are equal to 1 cup, so adjust accordingly.
  4. Recipe adjustments: When substituting sticks of butter for cups, consider the impact on your recipe. Butter provides moisture and flavor, so using different substitutes may affect the final texture and taste.
[bulkimporter_image id=’11’]

Common Butter Measurements: Cups Vs Sticks

When baking, it’s helpful to know the difference between measuring butter in cups versus sticks. Understanding butter measurements and being able to convert between cups and sticks can make a big difference in the outcome of your baked goods. Here’s a simple table to help you understand the conversion:

Cups Sticks Grams
1 0.5 113
2 1 227
3 1.5 340

For example, if a recipe calls for 1 cup of butter, you can use 2 sticks or 227 grams. Similarly, if a recipe calls for 3 sticks of butter, you can use 1.5 cups or 340 grams. Having this understanding and being able to convert between cups and sticks will ensure that your baked goods turn out perfectly every time.

Frequently Asked Questions

Can I Use Margarine Instead of Butter When Measuring in Cups or Sticks?

Sure, you can use margarine instead of butter when measuring in cups or sticks. However, keep in mind that margarine has a different texture and flavor, so it may affect the outcome of your recipe. The butter vs margarine debate is a matter of personal preference.

How Much Does a Stick of Butter Weigh in Ounces?

A stick of butter weighs 4 ounces. Converting butter measurements can be tricky, but knowing that a stick of butter is 1/2 cup or 8 tablespoons helps in cooking and baking.

Can I Use Salted Butter Instead of Unsalted Butter in a Recipe That Calls for Measuring in Cups?

Yes, you can use salted butter instead of unsalted butter in a recipe that calls for measuring in cups. Just remember to adjust the amount of salt in the recipe accordingly.

Are There Any Special Considerations When Measuring Butter in High-Altitude Baking?

When baking at high altitudes, there are special considerations for measuring butter. The altitude affects the air pressure, which can impact the texture and rising of baked goods. Adjustments may be needed to ensure successful results.

Is There a Difference in Measurement if the Butter Is Cold or at Room Temperature When Using Cups or Sticks?

When measuring butter, it’s important to note that the accuracy may vary depending on whether the butter is cold or at room temperature. This applies to both measuring cups and sticks.

Conclusion

In conclusion, understanding the butter-to-cup ratio is crucial when it comes to baking. Converting measurements from cups to sticks can be simplified by knowing that one cup of butter is equal to two sticks.

It is important to note that a standard stick of butter typically measures 1/2 cup or 8 tablespoons. When measuring butter in cups, it is recommended to use precise measuring tools to ensure accurate results.

Remember, as the saying goes, “Measure twice, bake once!”

Continue Reading

Butter Tips and Tricks

How Many Cups of Butter Equal a Stick: A Simple Guide

Published

on

By

An image showing a neatly arranged cup filled with liquid butter, surrounded by a stack of butter sticks, one by one, gradually being poured into the cup until it reaches the brim

Ever thought about how many cups of butter are in one stick? Well, I have the answer for you! Deciphering butter measurements can be tricky, but don’t worry, I’m here to make it easier for you.

In this article, we’ll explore the standard stick of butter and how to convert it to cups. We’ll also delve into equivalents and measurements, as well as provide a handy butter conversion chart.

So, let’s dive in and demystify the world of butter measurements together!

Key Takeaways

  • One stick of butter is equal to 1/2 cup or 8 tablespoons.
  • Butter can be measured in grams or ounces for more precise measurements.
  • Conversion charts and kitchen scales are useful tools for accurate measurement conversion.
  • Knowing the equivalents (e.g., 1 stick = 1/2 cup, 2 sticks = 1 cup) helps measure butter accurately in recipes.

[bulkimporter_image id=’2′]

Understanding Butter Measurements

There’s no need to worry about how many cups of butter are in a stick because it’s a common measurement used in recipes. When it comes to accurately measuring butter, it’s important to understand the conversion from sticks to cups.

One stick of butter is equal to 1/2 cup or 8 tablespoons. This measurement is widely accepted and used in baking and cooking. However, it’s good to know that butter can also be measured in grams or ounces for more precise measurements.

To convert butter measurements for recipes, you can use a kitchen scale or refer to conversion charts that provide the equivalent measurements. Understanding these conversions ensures that you can accurately measure and use butter in your favorite recipes.

Advertisement

Now, let’s dive into the details of the standard stick of butter.

[bulkimporter_image id=’3′]

The Standard Stick of Butter

To determine the amount of butter in a standard stick, you’ll need to understand the conversion ratio. Understanding butter packaging and different butter measurements is crucial to accurately measuring ingredients in recipes. Here are some key points to keep in mind:

  • A standard stick of butter in the United States weighs 1/2 cup or 8 tablespoons.
  • The measurements on butter packaging are typically marked in tablespoons and cups.
  • European butter is often sold in 250-gram blocks, which is approximately 1 cup or 2 sticks of butter.
  • Some recipes may call for butter in ounces or grams, so it’s important to have a kitchen scale for precise measurements.
  • It’s also helpful to know that butter comes in different fat percentages, such as salted and unsalted.

[bulkimporter_image id=’4′]

Converting Sticks to Cups

When it comes to converting sticks to cups, it is important to understand the stick to cup ratio for accurate measurement conversion.

The stick to cup ratio is 1 stick of butter equals 1/2 cup. This means that if a recipe calls for 1 cup of butter, you will need 2 sticks.

Stick to Cup Ratio

The stick to cup ratio for butter is approximately 1/2 cup per stick. This ratio is important to know when it comes to baking and following recipes accurately.

Here are a few key points to keep in mind when it comes to butter measurements and baking conversions:

Advertisement

  • 1 stick of butter is equal to 1/2 cup or 8 tablespoons.
  • If a recipe calls for 1 cup of butter, you will need 2 sticks.
  • To convert tablespoons to cups, divide the number of tablespoons by 16.
  • It’s important to note that butter measurements can vary depending on the brand or type of butter you are using, so always check the packaging for accurate measurements.
  • When in doubt, it’s always a good idea to weigh your butter using a kitchen scale for precise measurements.

Knowing the stick to cup ratio and understanding butter measurements is essential for successful baking and achieving the desired results in your recipes.

Accurate Measurement Conversion

Remember, accurately converting measurements is crucial for achieving the desired results in your baking recipes.

When it comes to understanding butter measurements, it’s important to measure accurately to ensure your baked goods turn out just right.

Butter is often measured in sticks, and it’s helpful to know that one stick of butter is equal to 1/2 cup or 8 tablespoons.

This knowledge is especially handy when a recipe calls for a certain amount of cups and you only have sticks of butter on hand.

By measuring butter accurately, you can ensure that your recipes turn out perfectly every time.

Advertisement

Now that we understand how to measure butter correctly, let’s explore the equivalents and measurements for other common baking ingredients.

[bulkimporter_image id=’5′]

Equivalents and Measurements

You’ll need to know how many cups of butter are in a stick for accurate measurements. When it comes to butter measurement equivalents, it’s important to have the right conversions. Here are a few key measurements to keep in mind:

  • 1 stick of butter is equal to 1/2 cup
  • 1/2 stick of butter is equal to 1/4 cup
  • 2 sticks of butter is equal to 1 cup
  • 4 sticks of butter is equal to 2 cups
  • 8 sticks of butter is equal to 4 cups

Knowing these equivalents will help you measure butter accurately in your recipes.

Now that you have a good understanding of how many cups are in a stick of butter, let’s move on to the next section about how much butter is in a cup.

[bulkimporter_image id=’6′]

How Much Butter Is in a Cup

When it comes to baking or cooking, understanding the butter-to-cup ratio is crucial. Knowing how much butter is in a cup can make a huge difference in the outcome of your recipe.

In this discussion, we will explore the conversion of butter measurements and how to accurately measure the right amount of butter for your culinary endeavors.

Advertisement

Butter-To-Cup Ratio

To figure out the butter-to-cup ratio, divide the number of cups by the number of sticks. This ratio is essential when converting butter measurements or finding butter equivalents. Here are some important points to consider:

  • 1 stick of butter is equal to 1/2 cup.
  • 2 sticks of butter make 1 cup.
  • If a recipe calls for 1 cup of butter, you will need 2 sticks.
  • For 1/4 cup of butter, use half a stick.
  • To measure 1/3 cup of butter, you’ll need 5 and 1/3 tablespoons.

Understanding the butter-to-cup ratio allows for accurate measurements in recipes. Whether you’re baking cookies or making a savory dish, having the correct amount of butter is crucial for achieving the desired taste and texture.

Converting Butter Measurements?

Understanding how to convert butter measurements is essential for accurate recipe preparation. When it comes to converting butter measurements, there are a few common mistakes that people often make.

One of the most common mistakes is not knowing the correct conversion ratio. In the United States, butter is typically sold in sticks, with each stick weighing 1/2 cup or 8 tablespoons. However, in some recipes, butter may be measured in grams or ounces.

Another mistake people make is not properly measuring the butter. It is important to use a kitchen scale or measuring cups to ensure precise measurements.

Additionally, some recipes may call for melted butter, which can be measured differently than solid butter.

Advertisement

Understanding these conversions and avoiding these common mistakes will help ensure that your recipes turn out perfectly every time.

[bulkimporter_image id=’7′]

Measuring Butter for Baking

There’s no need to guess how many cups of butter are in a stick when measuring for baking. As someone who loves to bake, I have found that using the right tools for measuring butter is crucial for accurate results. Here are the best tools for measuring butter:

  • Measuring cups: These are the most common tools used for measuring butter. Make sure to use a dry measuring cup and pack the butter firmly for accurate measurements.

  • Kitchen scale: For precise measurements, a kitchen scale is the way to go. It allows you to measure the exact amount of butter required for your recipe.

  • Butter dish with markings: Some butter dishes come with markings that indicate the measurements. This makes it convenient to measure the required amount of butter directly from the dish.

  • Butter cutter: A butter cutter is a handy tool that helps you measure the butter by slicing it into tablespoons or teaspoons.

  • Butter wrappers: Butter wrappers often have measurements marked on them, making it easy to cut the butter into the desired amount.

By using these tools, you can ensure that your butter is measured accurately for your recipes.

Now, let’s move on to the next section where we will discuss a butter conversion chart.

[bulkimporter_image id=’8′]

Butter Conversion Chart

Now that we know how to measure butter for baking, let’s talk about butter conversion chart and how to convert butter for recipes.

Advertisement

It’s common to come across recipes that call for butter in different measurements, such as cups, tablespoons, or grams. To make things easier, there are some standard butter measurement equivalents that can be used for conversion.

For example, one stick of butter is equal to half a cup or 8 tablespoons. So if a recipe calls for 1 cup of butter, you would need 2 sticks or 16 tablespoons. It’s important to have these conversions handy to ensure you’re using the correct amount of butter in your recipes.

Now that we understand the butter conversion chart, let’s move on to some tips for measuring butter accurately.

[bulkimporter_image id=’9′]

Tips for Measuring Butter

To accurately measure butter, it’s helpful to soften it beforehand. Softening butter makes it easier to measure and ensures accurate results in your cooking. Here are some tips for measuring butter for cooking:

  • Take the butter out of the refrigerator and let it sit at room temperature for about 30 minutes before measuring.
  • Use a sharp knife to cut the butter into tablespoon-sized portions.
  • Fill a measuring cup with water and place the cut butter into the cup, submerging it completely.
  • Remove the butter from the water and drain any excess water.
  • Measure the butter in tablespoons or cups, depending on your recipe’s requirements.

[bulkimporter_image id=’10’]

Common Butter Measurement Mistakes

A common mistake when measuring butter is not using a sharp knife to cut it into proper portions. Accurately measuring butter is crucial in baking to achieve the desired results.

When butter is too soft or melted, it can throw off the texture and consistency of your baked goods. To measure butter accurately, start by using a sharp knife to cut the stick into tablespoon-sized portions. Then, use a measuring spoon to scoop out the desired amount.

Advertisement

It’s important to level off the butter with the back of a knife to ensure precise measurements. Another common mistake is eyeballing the amount of butter, which can lead to inconsistent results.

Frequently Asked Questions

Can I Use Margarine Instead of Butter in Baking Recipes?

I prefer using butter over margarine in baking recipes because it adds more flavor and richness. Margarine can affect the texture of baked goods, often making them softer and less tender. So, while margarine can be used as a substitute for butter in some recipes, it’s important to consider the impact on taste and texture.

How Can I Accurately Measure Butter Without Using a Scale?

When it comes to accurately measuring butter without a scale, it can be a bit tricky. But fear not! I’ve got you covered. Let me walk you through the process of converting butter measurements like a pro.

Can I Substitute Oil for Butter in a Recipe?

Substituting butter with oil in a recipe can have pros and cons. Oil can add moisture and make baked goods lighter, but it may also affect the taste and texture. The best oil substitutes for baking are vegetable oil, coconut oil, and olive oil.

How Much Butter Should I Use if the Recipe Calls for a Certain Number of Sticks?

When converting butter measurements, accurately measuring the amount of butter needed is crucial. If a recipe calls for a certain number of sticks, I can help you determine how much butter to use.

Advertisement

Can I Use Unsalted Butter Instead of Salted Butter in Baking Recipes?

Using unsalted butter for baking has its pros and cons. Pros include having more control over the saltiness of the recipe, while cons include potentially missing out on the flavor that salted butter provides.

Conclusion

In conclusion, understanding butter measurements is essential for successful baking. While a standard stick of butter is equivalent to 1/2 cup or 8 tablespoons, it’s important to note that this can vary depending on the brand or region.

To convert sticks to cups, simply divide the number of sticks by 2. Additionally, knowing that 1 cup of butter is equivalent to 2 sticks can help when following recipes.

By following a butter conversion chart and being mindful of common measurement mistakes, bakers can ensure accurate and delicious results.

Advertisement

Continue Reading
Advertisement

Affiliate disclaimer

As an affiliate, we may earn a commission from qualifying purchases. We get commissions for purchases made through links on this website from Amazon and other third parties.

Advertisement

Trending