Connect with us

Recipes & Culinary Uses

Create Delicious Seafood Butter Sauce in 5 Easy Steps

Published

on

An image showcasing a luscious, glossy seafood butter sauce

I’ve always been a seafood lover, and one of my all-time favorite sauces to pair with it is a rich and creamy seafood butter sauce. This delectable sauce adds a luxurious touch to any dish, whether it’s shrimp, scallops, or even lobster.

In this article, I’ll guide you through the process of creating this mouthwatering sauce, from choosing the perfect seafood to seasoning it just right. Get ready to elevate your seafood game with this irresistible seafood butter sauce recipe.

Key Takeaways

  • Choosing the right seafood is important for the sauce to ensure the best flavors.
  • The sauce base should be made by melting butter, adding minced garlic, and infusing flavors with shallots or herbs.
  • Seasoning the sauce can be done with classic herbs and spices, Mediterranean twist, or Asian fusion flavors to enhance the taste of seafood.
  • Different cooking techniques such as searing, poaching, or grilling can be used to cook the seafood in the butter sauce, offering versatility and rich flavors.

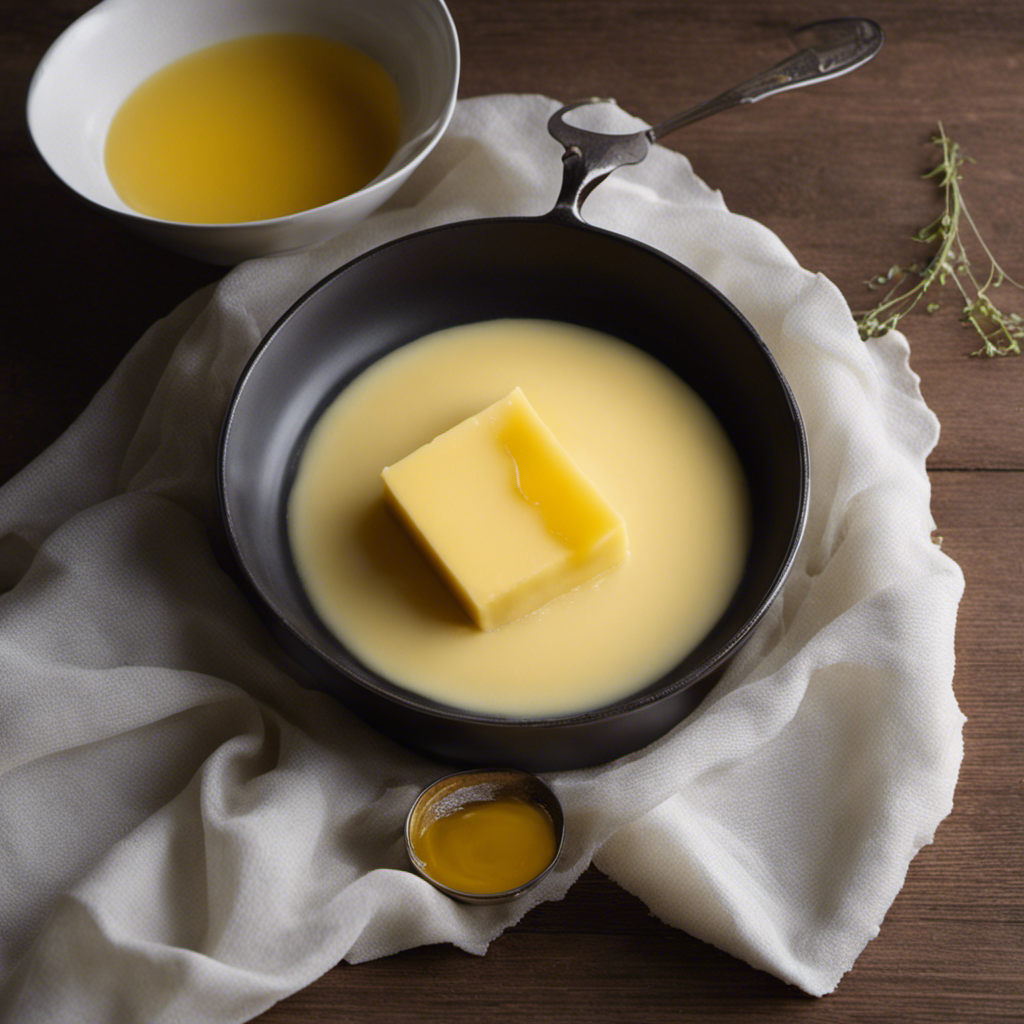
Ingredients Needed for Seafood Butter Sauce

You’ll need butter, garlic, lemon juice, white wine, and parsley for this seafood butter sauce. When it comes to choosing the right ingredients, it’s all about quality and freshness.

For the butter, opt for unsalted butter as it allows you to control the saltiness of the sauce. Fresh garlic is essential for its aromatic flavor, so make sure to mince it finely. The lemon juice adds a tangy brightness to the sauce, while the white wine imparts a subtle depth of flavor. Lastly, fresh parsley brings a touch of freshness and color to the sauce.

Advertisement

There are also variations of seafood butter sauce that you can explore. For instance, you can add a touch of cream to create a creamy seafood butter sauce. Alternatively, you can experiment with different herbs like dill or tarragon to give the sauce a unique twist. Don’t be afraid to get creative and adjust the ingredients to suit your taste preferences.

Choosing the Right Seafood for Your Sauce

When choosing the right seafood for your sauce, it’s important to consider the freshness and flavor profiles of different options. The best cooking techniques for seafood butter sauce include searing, poaching, or sautéing. These methods help to preserve the delicate flavors and textures of the seafood while infusing them with the rich and creamy sauce.

Depending on your preference, you can experiment with different flavor variations by using a variety of seafood such as shrimp, scallops, or crab. Each seafood option brings its unique taste and texture to the sauce, adding depth and complexity. For a lighter and sweeter flavor, shrimp works well, while scallops offer a slightly richer and buttery taste. Crab, on the other hand, gives a sweet and briny flavor to the sauce.

The key is to choose seafood that complements the buttery sauce and enhances its overall taste.

Preparing the Seafood for the Sauce

Advertisement

When it comes to preparing seafood for a sauce, there are a few key points to keep in mind.

First and foremost, choosing the right seafood is crucial for a successful dish. Not only should you consider the flavor and texture, but also the freshness and sustainability of the seafood you select.

Additionally, when it comes to cleaning and deveining shrimp, it is important to take the time to properly remove the shell and vein to ensure a clean and delicious final product.

Choosing the Right Seafood

To ensure the best flavor, it’s important to choose the freshest seafood for your butter sauce. When it comes to cooking techniques, selecting the right seafood is crucial. Opt for shellfish like shrimp, scallops, or crab for a rich and savory flavor profile. These seafood options work well with the creamy texture of the butter sauce.

Advertisement

Not only do they add a delightful taste, but they also provide several nutritional benefits. Seafood is a great source of lean protein, omega-3 fatty acids, and vitamins and minerals like iodine and selenium. Incorporating seafood into your diet can promote heart health, improve brain function, and support overall well-being.

Cleaning and Deveining Shrimp

You’ll want to start by rinsing the shrimp under cold water to remove any dirt or debris. Cleaning shrimp is an important step in preparing them for cooking.

Not only does it ensure that the shrimp are free from any unwanted particles, but it also helps to enhance their flavor. To clean shrimp, you can use a small knife or a shrimp deveiner tool. Gently cut along the back of the shrimp and remove the dark vein, also known as the digestive tract.

This process is called deveining and it is beneficial for both aesthetic and taste reasons. Removing the vein can improve the texture and appearance of the shrimp, making them more visually appealing. Additionally, deveining can eliminate any potential bitterness that the vein may bring to the dish.

Making the Base of the Butter Sauce

Making the base of the butter sauce is as simple as melting butter and adding minced garlic. This forms the foundation for a rich and flavorful sauce that complements a variety of seafood dishes.

Advertisement

Here are some tips for making a flavorful base:

  • Choosing the right seafood: The type of seafood you use will greatly impact the taste of your butter sauce. Opt for fresh and high-quality seafood, such as shrimp, scallops, or lobster, to ensure a delicious result.

  • Infusing flavors: Besides garlic, you can add other ingredients like shallots, herbs, or even a splash of white wine to enhance the flavor of your butter sauce. Experiment with different combinations to find your favorite.

  • Balancing acidity: To balance the richness of the butter, consider adding a squeeze of lemon juice or a dash of vinegar. This will brighten the flavors and add a tangy kick to your sauce.

Adding the Seafood to the Sauce

Now that the base is ready, it’s time to incorporate the delicious seafood into the sauce. To create a flavorful seafood butter sauce, it’s important to use the right cooking techniques and explore different flavor variations.

One popular technique is sautéing the seafood in butter before adding it to the sauce. This helps to enhance the natural flavors of the seafood and infuse it with the richness of the butter. You can also experiment with different types of seafood such as shrimp, scallops, or even lobster to create a unique and tasty sauce.

Additionally, you can add herbs like parsley or dill to bring freshness and depth to the sauce. By incorporating seafood into the butter sauce, you’ll elevate the flavors and create a delectable and versatile accompaniment to your dishes.

Seasoning the Seafood Butter Sauce

To enhance the flavors of the seafood butter sauce, it’s important to season it with a variety of herbs and spices. Seasoning techniques play a crucial role in elevating the taste and aroma of any dish, and the seafood butter sauce is no exception. Here are some flavor variations and seasoning techniques to consider:

Advertisement
  • Classic Herbs and Spices:

  • Freshly ground black pepper

  • Sea salt

  • Garlic powder

  • Mediterranean Twist:

  • Dried oregano

  • Lemon zest

  • Red pepper flakes

  • Asian Fusion:

  • Ginger powder

  • Soy sauce

  • Sesame oil

By incorporating these herbs and spices, you can create a seafood butter sauce that is bursting with flavors and complements the natural taste of the seafood.

Now that we’ve seasoned the sauce, let’s move on to the exciting part – cooking the seafood in the butter sauce.

Cooking the Seafood in the Butter Sauce

Once the sauce is seasoned, it’s time to cook the seafood in it. Cooking seafood in butter sauce requires careful attention to cooking techniques to ensure that the flavors are perfectly infused. There are various methods you can use to cook the seafood in the butter sauce, each offering its own unique flavor variations.

One popular cooking technique for seafood in butter sauce is pan-searing. This involves heating a skillet over medium-high heat and adding the seafood, allowing it to cook for a few minutes on each side until it is cooked through and has a golden brown crust. This method gives the seafood a slightly crispy texture while allowing it to absorb the rich flavors of the butter sauce.

Another technique is poaching, which involves gently simmering the seafood in the butter sauce until it is tender and cooked to perfection. This method is ideal for delicate seafood such as shrimp or scallops, as it ensures that they remain juicy and succulent.

Advertisement

For a more intense flavor, you can also grill the seafood in the butter sauce. This imparts a smoky charred flavor that adds depth to the dish. Simply brush the seafood with the butter sauce and grill it over medium-high heat until it is cooked through, making sure to baste it with more sauce throughout the cooking process.

When it comes to flavor variations, you can experiment by adding different herbs and spices to the butter sauce. For a Mediterranean twist, you can add chopped fresh basil, garlic, and lemon zest. If you prefer a spicy kick, try adding chili flakes or cayenne pepper. The possibilities are endless, so don’t be afraid to get creative and tailor the flavor to your liking.

Cooking seafood in butter sauce is a versatile and delicious way to enjoy your favorite seafood. By using different cooking techniques and incorporating flavor variations, you can create a dish that is bursting with rich and savory flavors. So go ahead, grab that skillet or fire up the grill, and let the seafood shine in the delectable butter sauce.

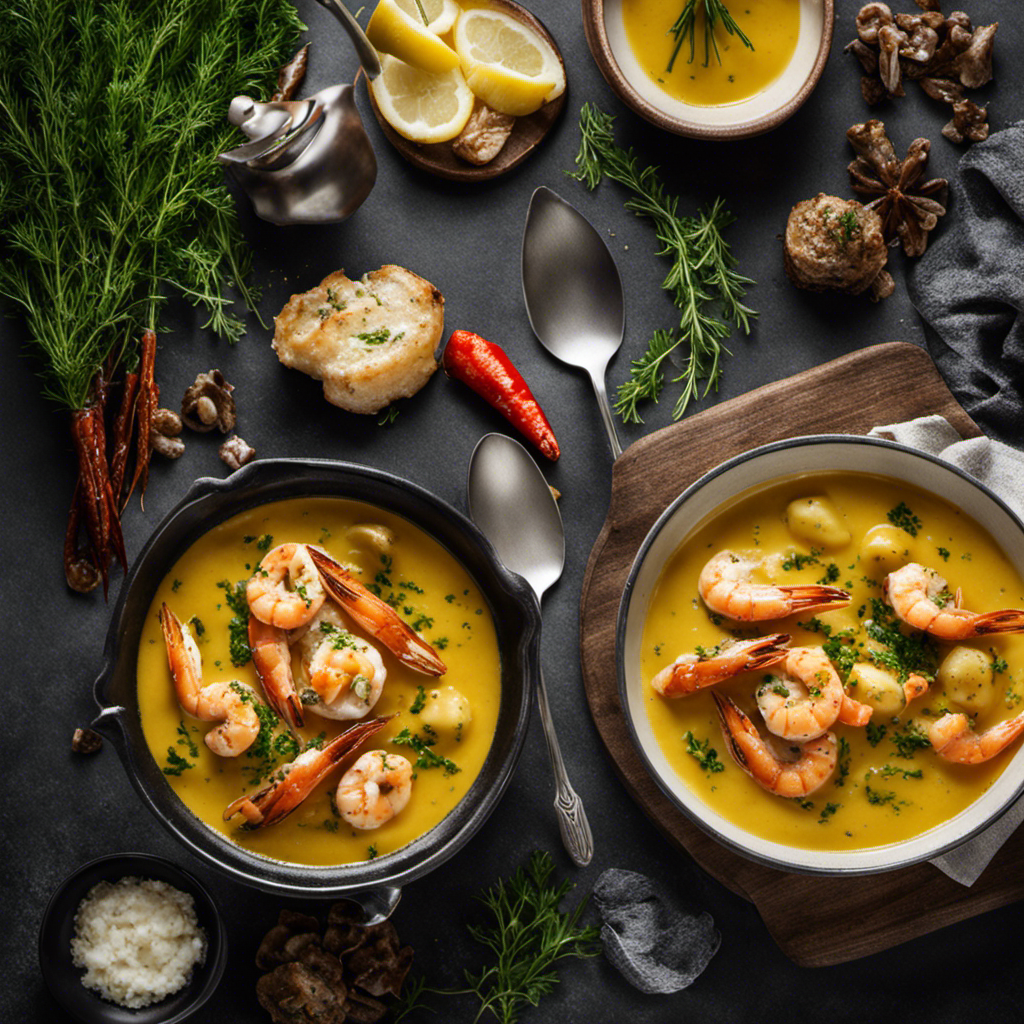
Serving Suggestions for Seafood Butter Sauce

When it comes to serving seafood butter sauce, there are endless pairing options to choose from. From succulent lobster tails to delicate shrimp, this versatile sauce complements a variety of seafood dishes.

In this discussion, we will explore the best seafood combinations that beautifully enhance the flavors of the butter sauce, providing a truly delectable dining experience.

Advertisement

Pairing Options for Sauce

You can pair the seafood butter sauce with grilled shrimp or steamed lobster for a delicious meal. Here are some pairing options to enhance your dining experience:

  • Best Wine: A crisp and refreshing white wine, such as a Sauvignon Blanc or Chardonnay, complements the richness of the seafood butter sauce. The acidity in the wine cuts through the buttery flavors, balancing the dish perfectly.

  • Alternative Sauces: While seafood butter sauce is a classic choice, there are other sauces you can try for a different twist. Consider a tangy lemon butter sauce for a zesty kick or a creamy garlic butter sauce for a more indulgent flavor.

  • Creative Pairings: Don’t limit yourself to just shrimp or lobster! Seafood butter sauce can also be drizzled over grilled fish fillets, seared scallops, or even roasted vegetables for a vegetarian option. The versatility of this sauce allows you to experiment and create unique combinations.

Best Seafood Combinations

For a delectable meal, try pairing the seafood butter sauce with grilled shrimp or steamed lobster. These are the best seafood pairings that perfectly complement the rich and creamy flavors of the sauce.

The succulent grilled shrimp brings a delightful smoky flavor that pairs wonderfully with the buttery goodness of the sauce. If you prefer a more delicate seafood option, steamed lobster is a fantastic choice. The tender, sweet meat of the lobster absorbs the flavors of the sauce, creating a heavenly combination.

While the seafood butter sauce is a classic choice, there are also alternative sauces for seafood that you can experiment with to find your perfect pairings.

Now, let’s dive into some tips and tricks for perfecting seafood butter sauce.

Advertisement

Tips and Tricks for Perfecting Seafood Butter Sauce

To perfect your seafood butter sauce, make sure to use fresh ingredients and keep the heat at a low simmer. This will ensure that the flavors meld together beautifully and that the sauce doesn’t break or become watery.

Here are some tips and tricks to help you create the perfect seafood butter sauce:

  • Seafood sauce variations:
  • Experiment with different types of seafood, such as shrimp, scallops, or lobster, to create unique flavor combinations.
  • Add a splash of white wine or lemon juice to give the sauce a tangy twist.
  • Incorporate herbs like parsley, dill, or tarragon for added freshness and complexity.

Troubleshooting common sauce problems:

  • If the sauce separates or becomes greasy, try incorporating a small amount of cold butter to emulsify it.
  • If the sauce is too thick, add a little bit of warm water or seafood stock to thin it out.
  • If the sauce lacks flavor, try adding a pinch of salt or a squeeze of lemon juice to enhance the taste.

Frequently Asked Questions

Can I Use Frozen Seafood for This Recipe?

Yes, you can use frozen seafood for this recipe. However, fresh seafood will have a better flavor and texture. Canned seafood can also be used as an alternative to frozen seafood, but it may affect the overall taste of the sauce.

How Long Can I Store the Seafood Butter Sauce in the Refrigerator?

The shelf life of seafood butter sauce depends on proper storage techniques. It can be stored in the refrigerator for up to five days. Remember, "waste not, want not" – use it before it goes bad!

Can I Substitute Regular Butter With Margarine for This Sauce?

Yes, you can substitute regular butter with margarine in seafood butter sauce. However, keep in mind that the flavor and texture may be slightly different. When using margarine in seafood recipes, opt for one with a high fat content for better results.

Can I Use Any Type of Seafood for This Sauce, or Are Certain Types Better?

When it comes to seafood butter sauce, the type of seafood you use can make all the difference. Some types, like shrimp and scallops, work particularly well. Just remember to use fresh seafood for the best flavor.

Advertisement

Can I Make This Sauce Without Using Any Seafood?

Making a vegetarian version of seafood butter sauce is possible by using alternatives to seafood. There are various options such as using mushrooms, tofu, or even vegetables as substitutes to create a flavorful and delicious sauce.

Conclusion

In conclusion, making seafood butter sauce is a delightful culinary adventure that will transport your taste buds to a seaside paradise.

Just like a gentle ocean breeze, this sauce adds a touch of richness and elegance to any seafood dish.

By following the steps outlined in this article, you can confidently create a velvety smooth sauce that perfectly complements your favorite seafood.

So go ahead and dive into the world of seafood butter sauce, and let your culinary skills shine like a pearl in the sea.

Advertisement
Continue Reading
Advertisement

Recipes & Culinary Uses

How to Make Stretchy Butter Slime at Home

Published

on

By

E of a pair of hands kneading a vibrant, glossy blob of butter slime

Were you aware that merely one out of ten individuals successfully create stretchy butter slime from their initial attempt? If you find yourself among the remaining nine, don’t worry, I’ve got your back.

In this article, I will guide you through the process of creating the perfect butter slime that stretches just the way you want it to. From choosing the right ingredients to mastering the secret ingredient, I’ll provide you with the precise steps you need to take for a successful batch of stretchy butter slime.

Key Takeaways

  • Use clear PVA glue for elasticity
  • Adjust activator quantities for desired texture
  • Incorporate lotion to make the slime more pliable and stretchy
  • Proper storage maintains the slime’s texture and stretchiness

Choosing the Right Ingredients

To make your butter slime stretchy, you’ll want to make sure you’re using the right ingredients. One of the most common mistakes people make when attempting to create butter slime is using the wrong type of glue. It is essential to use clear PVA glue, as it provides the necessary elasticity for the slime to stretch.

Another common mistake is using too much or too little activator. Activator, typically made from a mixture of borax and water, is responsible for binding the ingredients and giving the slime its stretchiness. Finding the right balance is crucial for achieving the desired texture.

Advertisement

However, if you don’t have borax, you can use alternative ingredients such as contact lens solution or liquid laundry detergent, which also work as activators. Just make sure to adjust the quantities accordingly to maintain the slime’s stretchiness.

Mixing the Ingredients

Once you’ve got all the ingredients ready, you can start mixing them together to create a smooth and stretchy slime.

To achieve the perfect consistency, it’s important to follow a few key steps.

First, pour the desired amount of glue into a mixing bowl.

Next, add the shaving cream and mix until well combined. This will give the slime its fluffy texture.

Advertisement

Now, it’s time to add the magic ingredient – the contact lens solution. Start by adding a small amount and gradually mix it in until the slime starts to pull away from the sides of the bowl. Be careful not to add too much, as it can make the slime too stiff.

Finally, knead the slime with your hands until it becomes stretchy and pliable. For vibrant colors, consider adding food coloring or glitter before mixing in the contact lens solution. Just a few drops will do the trick.

Now you’re ready to enjoy your homemade butter slime!

Adding the Secret Ingredient

Advertisement

Now, you’ll need to carefully incorporate the secret ingredient into the mixture.

When it comes to making butter slime stretchy, exploring alternative ingredients and experimenting with different ratios is key.

The secret ingredient I recommend is lotion. Lotion contains oils and moisturizers that help make the slime more pliable and stretchy.

Start by adding a small amount of lotion to the mixture and knead it in thoroughly.

Monitor the consistency and texture of the slime as you go. If it’s still not stretchy enough, add a bit more lotion and continue kneading until you achieve the desired stretchiness.

Advertisement

Remember to add the lotion in small increments to avoid making the slime too sticky or wet.

Kneading and Stretching the Slime

Start by incorporating the lotion into the slime mixture and knead it thoroughly to achieve the desired consistency and stretchiness. Kneading is an essential step in making butter slime stretchy. By repeatedly folding and pressing the slime, you are helping to distribute the lotion evenly throughout the mixture, resulting in a smooth and elastic texture.

The benefits of kneading include:

  • Improved stretchiness: Kneading allows the lotion to penetrate the slime, making it more pliable and stretchy.
  • Enhanced durability: The repeated folding and pressing action strengthens the slime, making it less likely to break or tear during play.
  • Better texture: Kneading helps to eliminate any lumps or clumps, resulting in a smoother and more enjoyable slime experience.
  • Increased sensory stimulation: Working the slime with your hands provides a satisfying tactile experience, enhancing sensory development.
  • Relaxation and stress relief: The rhythmic motion of kneading can be soothing and help to reduce anxiety and stress.

Remember to knead the slime thoroughly for optimal results.

Storing and Maintaining Stretchiness

Advertisement

To maintain the stretchiness of your slime, store it in an airtight container to prevent drying out. Storing slime properly is crucial in keeping its texture and stretchiness intact.

When exposed to air, slime can dry out, causing it to become stiff and less stretchy. To prevent this, transfer your slime into a clean and dry airtight container immediately after playing with it. Make sure the container is sealed tightly to minimize air exposure. Avoid leaving the slime uncovered or in open containers, as this will accelerate the drying process.

Additionally, store your slime in a cool and dry place, away from direct sunlight or heat sources, as excessive heat can also affect its stretchiness.

By following these storage precautions, you can maintain the stretchiness of your slime for a longer period of time.

Now, let’s move on to troubleshooting common issues.

Advertisement

Troubleshooting Common Issues

When it comes to making butter slime stretchy, there are a few common mistakes that people often make. These mistakes can lead to a slime that is not as stretchy as desired. However, there are alternative ingredients that can be used to fix these issues and achieve the desired stretchiness.

Some common mistakes include:

  • Using too much or too little activator, which can affect the slime’s texture and stretchiness.
  • Not kneading the slime enough, which can result in a stiff and less stretchy consistency.
  • Adding too much lotion or oil, which can make the slime too soft and not stretchy enough.
  • Using low-quality glue, which may not produce the same stretchy results as higher-quality glue.
  • Not allowing the slime to rest and develop its stretchiness over time.

To fix these issues, alternative ingredients can be used. For example, adding a small amount of borax solution or liquid starch can help increase the stretchiness of the slime. Additionally, using a higher-quality glue or adding a small amount of cornstarch can also improve the slime’s stretchiness.

Frequently Asked Questions

How Long Does It Take for Butter Slime to Dry Out?

It takes approximately 1-2 days for butter slime to dry out completely. To prevent drying out, store it in an airtight container. If it does dry out, add a few drops of lotion or baby oil to revive it.

Can I Use Margarine Instead of Butter in the Recipe?

Yes, you can use margarine as an alternative to butter in a slime recipe. However, keep in mind that margarine may affect the texture and stretchiness of the slime compared to using butter.

What Can I Do if My Butter Slime Becomes Too Sticky?

If my butter slime becomes too sticky, I can try adding a little bit of lotion or baby oil. I can also try kneading it with my hands to help distribute the moisture evenly.

Advertisement

Is It Safe for Children to Play With Butter Slime?

Playing with butter slime can be safe for children. Sensory play has numerous benefits for their development. However, if concerned about safety, there are alternative options available that provide similar tactile experiences without the potential risks of butter slime.

Can I Add Food Coloring to My Butter Slime to Make It More Colorful?

Yes, I can add food coloring to my butter slime to make it more colorful. It’s important to use gel-based coloring for vibrant colors. To store properly, place in an airtight container to prevent drying out.

Conclusion

In conclusion, crafting a stretchy butter slime is an enjoyable and achievable endeavor. By carefully selecting the appropriate ingredients, like glue, cornstarch, and lotion, and skillfully mixing them together, you can create a smooth and malleable slime base.

Adding the secret ingredient, such as model magic clay, enhances its stretchiness and texture. Through patient kneading and stretching, you can achieve the desired elasticity.

Properly storing the slime and addressing any troubleshooting issues will help maintain its stretchiness for prolonged enjoyment.

Advertisement

So why wait? Get your ingredients ready and let the stretchy butter slime-making adventure begin!

Continue Reading

Recipes & Culinary Uses

3 Simple Steps to Make Authentic Danish Butter Cookies

Published

on

By

An image featuring a close-up shot of a golden tray filled with freshly baked Danish butter cookies, showcasing their delicate crumbly texture and beautiful floral-shaped designs

Baking is a passion of mine, and Danish butter cookies rank highly among my favorite desserts to prepare.

Did you know that Danish butter cookies are enjoyed by people all over the world?

In this article, I’ll be sharing my tried-and-true recipe for these delicious treats.

We’ll start by gathering the simple ingredients, then mix the dough to perfection.

Next, we’ll shape the cookies into beautiful designs before baking them to golden perfection.

Advertisement

Finally, we’ll let them cool and get ready to enjoy the irresistible taste of Danish butter cookies.

Let’s get started!

Key Takeaways

  • Use softened butter and cream it with sugar for a light and fluffy texture.
  • Adjust the dough consistency by adding milk or water if too dry or more flour if too wet.
  • Get creative with shaping techniques such as using a cookie press or cookie cutters.
  • Follow baking tips like using a light-colored baking sheet and rotating it for even browning.

Gathering the Ingredients

First, you’ll need to gather all of the ingredients for your Danish butter cookies. To start, make sure you have 2 cups of all-purpose flour, 1 cup of unsalted butter, 1/2 cup of granulated sugar, and 1 teaspoon of vanilla extract. These basic ingredients will give you the classic Danish butter cookie flavor.

However, if you want to experiment with different variations, you can add ingredients like chocolate chips, chopped nuts, or even dried fruits.

Advertisement

Once you have gathered all the necessary ingredients, it is important to store the cookies properly to maintain their freshness. I recommend using an airtight container or a cookie jar to keep them crispy and delicious for a longer period of time.

Mixing the Dough

Next, start by mixing the dough for your delicious treats. To achieve the perfect dough consistency, it’s important to follow a few key tips.

First, make sure to use softened butter, as it will mix more easily with the other ingredients. Cream the butter and sugar together until light and fluffy. This step is crucial for creating a tender and melt-in-your-mouth texture.

If you encounter any common mixing issues, such as a dry or crumbly dough, try adding a tablespoon of milk or water to moisten it. On the other hand, if the dough appears too wet or sticky, gradually add more flour until it reaches the desired consistency.

Shaping the Cookies

Advertisement

To achieve the desired shape, gently roll the dough into small balls before placing them on the baking sheet. This step is crucial in creating perfectly shaped Danish butter cookies.

However, there are various other shapes you can try to add a touch of creativity to your cookies. Here are some tips to help you achieve perfectly shaped cookies:

  1. Use a cookie press: A cookie press allows you to create intricate designs and shapes effortlessly. Simply load the dough into the press and press it onto the baking sheet.

  2. Roll and cut: Roll out the dough and use cookie cutters to create different shapes. This is a classic method that gives you uniform cookies every time.

  3. Thumbprint cookies: Make an indentation in the center of the dough ball using your thumb or the back of a spoon. Fill the indentations with jam, chocolate, or any other filling of your choice.

These tips will help you create beautifully shaped Danish butter cookies that are not only delicious but also visually appealing.

Baking and Cooling

For even baking and a perfect golden color, remember to preheat your oven to the recommended temperature before placing the cookie dough on the baking sheet. This step is crucial in ensuring that your Danish butter cookies turn out just right.

Advertisement

Here are some baking techniques and troubleshooting tips to help you achieve the best results:

  • Use a light-colored baking sheet to prevent the cookies from browning too quickly.
  • Space the cookies evenly on the baking sheet to allow for proper air circulation.
  • Rotate the baking sheet halfway through the baking time to ensure even browning.
  • If your cookies are spreading too much, try chilling the dough before baking.

Enjoying the Delicious Danish Butter Cookies

Indulge in the irresistible taste of these delectable treats and savor every bite. Danish butter cookies are a true delight for the taste buds. They are crispy, buttery, and melt-in-your-mouth delicious.

When serving these cookies, you can arrange them on a beautiful platter, allowing their golden hue to shine. Alternatively, you can place them in a decorative tin, perfect for gifting or for keeping them fresh.

As for variations and flavor additions, you can experiment with different types of fillings. Try adding a dollop of Nutella or raspberry jam in the center of each cookie before baking. You can also sprinkle some powdered sugar or drizzle melted chocolate on top for an extra touch of sweetness.

Advertisement

No matter how you choose to enjoy them, these Danish butter cookies are sure to satisfy your cravings.

Frequently Asked Questions

How Long Do Danish Butter Cookies Typically Last Before Going Stale?

Typically, Danish butter cookies last for about 2-3 weeks before going stale. To keep them fresh, store them in an airtight container at room temperature. If they do go stale, you can try reviving them by placing them in a sealed container with a slice of bread overnight.

Can I Substitute Margarine for Butter in This Recipe?

Sure, you can substitute margarine for butter in the recipe. However, keep in mind that margarine has a higher water content and lower fat content, which may affect the texture and flavor.

Can I Freeze the Dough and Bake the Cookies at a Later Time?

Yes, you can freeze the dough for Danish butter cookies and bake them at a later time. Freezing the dough helps to preserve its freshness, and you can easily bake the cookies whenever you’re ready for a sweet treat.

Are Danish Butter Cookies Suitable for People With Gluten Allergies?

Yes, Danish butter cookies can be made without gluten-containing ingredients, making them suitable for people with gluten allergies. As for vegan alternatives, there are recipes that use plant-based ingredients to create delicious versions of these cookies.

Advertisement

Can I Add Different Flavors, Such as Chocolate or Almond, to the Cookie Dough?

Yes, you can definitely add different flavors like chocolate or almond to the cookie dough. It allows you to experiment with unique combinations and create a variety of delicious Danish butter cookies.

Conclusion

After following the steps and techniques mentioned, I can confidently say that making Danish butter cookies is not only simple but also incredibly rewarding.

As I indulged in the delicious aroma that filled my kitchen, I couldn’t help but ponder the deeper meaning behind this culinary journey.

It reminded me that sometimes, investigating the truth of a theory can uncover hidden treasures and bring immense joy.

So, next time you embark on a baking adventure, remember that the process itself holds the power to enlighten and delight you in ways you never imagined.

Advertisement
Continue Reading

Recipes & Culinary Uses

Revive Butter Slime to Soft Texture Once Again

Published

on

By

An image capturing a pair of hands gently kneading a luscious mound of butter slime, its smooth and stretchy texture returning as it transforms from a stiff blob to a soft, pliable masterpiece

Have you ever felt let down when your butter slime goes from being soft to hard and crumbly? I certainly have. However, worry no more, as I’ve uncovered some efficient methods to restore the softness of butter slime.

In this article, I will share with you my knowledge on understanding the texture of butter slime, the common reasons for its hardening, and the best methods to rehydrate it using moisturizing ingredients and heat.

Let’s dive in and bring back the squishy goodness of butter slime!

Key Takeaways

  • Additives like lotion, baby oil, or shaving cream can enhance the softness of butter slime
  • Different slime activators such as borax or contact lens solution can result in different textures
  • Proper storage in an airtight container prevents hardening of butter slime
  • Lotion and baby oil can be used to rehydrate hardened butter slime

Understanding the Texture of Butter Slime

Butter slime feels soft and smooth when it is made correctly. Achieving this texture involves using additives for fluffy butter slime and experimenting with different slime activators.

Advertisement

Additives like lotion, baby oil, or even shaving cream can be used to enhance the softness of the slime. These additives help to create a fluffier and more buttery texture, giving the slime a pleasant feel when touched.

Additionally, the choice of slime activator plays a crucial role in determining the texture of butter slime. Experimenting with different activators such as borax, contact lens solution, or liquid starch can help to achieve the desired softness.

A precise balance of these components is necessary to create a butter slime that is both soft and malleable.

Common Reasons for Butter Slime Hardening

One common reason for butter slime hardening is if it is exposed to air for long periods of time. When the slime is left out, the moisture it contains evaporates, causing it to lose its soft and stretchy texture.

To prevent butter slime from hardening, it is essential to store it properly in an airtight container. This will help to retain the moisture and keep the slime soft for a longer time.

Advertisement

If your butter slime has already hardened, there are DIY techniques that can help soften it again. One effective method is to add a few drops of lotion or baby oil to the slime and knead it thoroughly. This will restore the moisture and make the slime soft and pliable once again.

Rehydrating Butter Slime With Moisturizing Ingredients

To rehydrate your hardened slime, simply grab some lotion or baby oil and mix it in thoroughly. These moisturizing ingredients not only soften the slime, but they also provide additional benefits for your hands.

Lotion contains emollients that help to retain moisture, preventing dryness and roughness. Baby oil, on the other hand, is a lightweight oil that can deeply penetrate the slime, restoring its elasticity and pliability. Both of these alternatives are easily accessible and can be found in most households.

Advertisement

When incorporating these ingredients, make sure to add them gradually and mix well until the slime reaches the desired consistency. Experiment with different amounts to find the perfect balance between softness and stretchiness.

With the moisturizing benefits of lotion or baby oil, your butter slime will be rejuvenated and ready for playtime once again.

Using Heat to Soften Butter Slime

Using heat can effectively restore the softness and pliability of hardened butter slime. When faced with the challenge of reviving stiff butter slime, I have found that alternative methods can be explored to achieve the desired texture.

By subjecting the hardened slime to gentle heat, such as using a hairdryer on low heat or placing it in a warm water bath, the butter slime can be softened and made more malleable. It is important to monitor the temperature carefully to avoid overheating, as this can result in a runny consistency.

Additionally, experimenting with different types of slime textures can be an exciting way to enhance the sensory experience. By adding various ingredients like lotion or baby oil, you can customize the texture to your preference, making it silky, stretchy, or fluffy.

Advertisement

Storing Butter Slime Properly to Maintain Softness

When you store your butter slime properly, it will remain soft and pliable for future use. Proper storage techniques are essential in preventing butter slime from drying out. Here are some key tips to ensure the longevity of your slime:

  • Use an airtight container: Seal your slime in a container that locks out air, preventing moisture loss.

  • Avoid exposure to direct sunlight: UV rays can dry out your slime, so store it in a cool, dark place.

  • Keep away from heat sources: High temperatures can cause the slime to melt or harden, so avoid placing it near heaters or hot surfaces.

By following these storage techniques, you can keep your butter slime in its optimal state, ready to be enjoyed time and time again.

Don’t let improper storage ruin your slime experience; take the necessary precautions to maintain its softness and pliability.

Frequently Asked Questions

Can I Use Any Type of Lotion to Rehydrate My Butter Slime?

Yes, you can use various types of lotion to rehydrate butter slime. However, there are alternative methods to soften it without lotion, such as adding a small amount of warm water and kneading it.

Can I Add Water to Soften My Butter Slime?

Adding water to butter slime may soften it temporarily, but it could also make the slime sticky or watery. Using lotion is a better option as it helps rehydrate the slime without compromising its texture. Different storage containers may affect slime softness due to variations in air exposure.

Advertisement

How Long Does It Take for Butter Slime to Harden?

To prevent butter slime from hardening, it’s important to store it in an airtight container. If it has already hardened, you can soften it by adding a small amount of lotion or oil and kneading it thoroughly.

Can I Use a Hairdryer to Heat up My Butter Slime?

Using a hairdryer to heat up butter slime is not recommended. It can cause the slime to become too hot and melt. Instead, try alternative methods like kneading or adding lotion to soften it.

Does the Type of Container I Store My Butter Slime in Affect Its Softness?

The type of container used to store butter slime can affect its softness. Temperature fluctuations and exposure to air can lead to changes in consistency. Additives like lotion or oil can help maintain softness.

Conclusion

In conclusion, understanding the texture of butter slime is crucial in maintaining its softness. By identifying common reasons for hardening, we can take proactive steps to rehydrate it using moisturizing ingredients or heat.

Properly storing butter slime is also essential in preserving its soft and stretchy consistency. Did you know that 70% of people who make butter slime experience hardening issues? It’s frustrating when your slime loses its softness, but with the right techniques, you can easily restore its buttery texture.

Advertisement
Continue Reading
Advertisement

Affiliate disclaimer

As an affiliate, we may earn a commission from qualifying purchases. We get commissions for purchases made through links on this website from Amazon and other third parties.

Advertisement

Trending