Connect with us

Recipes & Culinary Uses

Homemade Butter Pecan Ice Cream: Make it with Ice Cream Maker

Published

on

An image showcasing a creamy scoop of homemade butter pecan ice cream, sprinkled with golden-toasted pecan pieces, nestled in a vintage-style ice cream bowl

I enjoy creating my own ice cream at home, and one flavor that never fails to satisfy is butter pecan.

Did you know that butter pecan is the third most popular ice cream flavor in the United States?

In this article, I will guide you through the step-by-step process of making delicious butter pecan ice cream using an ice cream maker.

From gathering the ingredients to freezing and hardening the ice cream, you’ll be enjoying a creamy, nutty treat in no time.

So let’s get started!

Advertisement

Key Takeaways

  • Butter pecan is the third most popular ice cream flavor in the United States.
  • Toasting pecans brings out their rich, nutty flavor.
  • The ice cream base should be refrigerated for at least 4 hours to chill.
  • The optimal ratio for adding butter pecan flavoring is 1 tablespoon for every quart of ice cream base.

[bulkimporter_image id=’2′]

Gathering the Ingredients

Now, you’re going to need to gather all of the ingredients for your homemade butter pecan ice cream. To start, make sure you have 2 cups of heavy cream, 1 cup of whole milk, 3/4 cup of granulated sugar, 4 large egg yolks, 2 teaspoons of vanilla extract, a pinch of salt, and 1 cup of chopped pecans.

Toasting the pecans is an essential step in bringing out their rich, nutty flavor. You can do this by preheating your oven to 350°F (175°C). Spread the pecans evenly on a baking sheet and bake them for about 7-8 minutes, or until they are golden brown and fragrant. Be sure to keep an eye on them to prevent burning.

Advertisement

If you’re looking for pecan alternatives, you can try using walnuts or almonds instead. These nuts will also add a delightful crunch to your ice cream. Just make sure to toast them using the same technique mentioned earlier to enhance their flavors.

[bulkimporter_image id=’3′]

Preparing the Ice Cream Maker

Before you start, make sure to check that the ice cream maker is clean and ready to use. There’s nothing worse than getting excited about making homemade butter pecan ice cream, only to find out your ice cream maker isn’t ready to go. So take a few minutes to clean it out and make sure all the parts are in good working order. Trust me, it will save you a lot of frustration later on.

Now, let’s talk about the pecans. Toasting the pecans before adding them to the ice cream adds a wonderful depth of flavor. You can toast them in the oven by spreading them out on a baking sheet and baking at 350°F for about 8-10 minutes, or until they are golden brown and fragrant. Another option is to toast them in a dry skillet over medium heat, stirring frequently, until they are nicely browned.

Advertisement

When it comes to the pecan variations, there are so many to choose from! You can use regular pecans, which have a rich and buttery flavor. Or you can try using roasted pecans for a deeper, nuttier taste. And if you’re feeling adventurous, you can even use candied pecans for a sweet and crunchy twist.

[bulkimporter_image id=’4′]

Making the Butter Pecan Base

Advertisement

To start the butter pecan base, you’ll need to combine the milk, sugar, and vanilla extract in a saucepan. Heat the mixture over medium heat until it begins to steam, but make sure not to let it boil.

Meanwhile, toast the pecans in a separate pan over low heat until they become fragrant and slightly golden. Once the milk mixture is steaming, remove it from the heat and allow it to cool slightly.

Next, it’s time to incorporate the butter into the base. In a small saucepan, melt the butter over low heat. Once melted, pour it into the slightly cooled milk mixture, stirring constantly to ensure even distribution. The butter adds a rich and creamy flavor to the base, complementing the toasty pecans perfectly.

Now, it’s time to add the toasted pecans to the base. Roughly chop the pecans and fold them into the butter and milk mixture. Make sure the pecans are evenly distributed throughout the base.

Once you’ve incorporated the butter and pecans into the base, transfer it to a container and refrigerate for at least 4 hours, or until completely chilled. Chilling the base allows the flavors to meld together and ensures a smooth and creamy texture when it’s churned in the ice cream maker.

Advertisement

[bulkimporter_image id=’5′]

Toasting and Chopping the Pecans

When it comes to toasting and chopping pecans for the butter pecan ice cream, it’s important to find the optimal toasting time to enhance their flavor. I’ll share the best technique to achieve that perfect crunch and nutty taste.

Additionally, I’ll provide detailed instructions on the best chopping techniques to ensure even distribution throughout the ice cream.

Optimal Toasting Time

The pecans should’ve been toasted until they’re golden brown and fragrant for the optimal flavor in the butter pecan ice cream. Toasting pecans enhances their natural nutty flavor and adds a delightful crunch to the ice cream.

Advertisement

To achieve the best results, follow these roasting techniques:

  • Start with the best pecan selection: Look for fresh, high-quality pecans with no signs of rancidity or mold. Choose pecans that are plump and uniform in size for even toasting.

  • Spread the pecans evenly on a baking sheet: Make sure they are in a single layer to ensure even heat distribution.

  • Toast in a preheated oven at 350°F for about 8-10 minutes: Keep a close eye on them, as they can quickly go from golden brown to burnt.

By following these steps, you’ll achieve perfectly toasted pecans that will elevate the flavor of your homemade butter pecan ice cream to new heights.

Best Chopping Techniques?

For the best chopping techniques, start by ensuring your knife is sharp and your cutting board is stable to avoid any accidents.

When it comes to making butter pecan ice cream, the best nut selection is crucial. I recommend using freshly roasted and chopped pecans for maximum flavor and crunch.

To chop the nuts, place them on the cutting board and hold them firmly with your non-dominant hand. With your dominant hand, use a sharp knife to make quick, controlled motions, moving the knife up and down to chop the nuts into desired sizes.

Advertisement

If you’re looking for alternative flavor options, consider adding a touch of cinnamon or drizzling caramel sauce over your butter pecan ice cream for a delightful twist.

Experiment with different flavors to find your perfect combination!

[bulkimporter_image id=’6′]

Adding the Pecans to the Base

You’ll want to mix in the chopped pecans after the ice cream base has thickened. This will ensure that the pecans are evenly distributed throughout the ice cream and don’t sink to the bottom. Adding the pecans at this stage also allows them to retain their crunchiness, adding a delightful texture to each bite.

Advertisement

Now, let’s talk about the pecans themselves. There are different types of pecans available, each with its unique flavor profile and characteristics. Here are three varieties to consider:

  • Desirable pecans: These pecans are large, meaty, and have a rich, buttery flavor. They are perfect for adding a decadent taste to your butter pecan ice cream.

  • Elliot pecans: Known for their sweet and mild flavor, Elliot pecans are slightly smaller in size. They are great for those who prefer a more subtle nutty taste in their ice cream.

  • Stuart pecans: These pecans have a robust flavor and a slightly darker color. They add a bold, nutty taste to your butter pecan ice cream, perfect for those who enjoy a stronger nut flavor.

When toasting the pecans, it’s important to do it at the optimal temperature to bring out their best flavor. Preheat your oven to 350°F (175°C) and spread the pecans in a single layer on a baking sheet. Toast them for about 8-10 minutes, or until they become fragrant and golden brown.

[bulkimporter_image id=’7′]

Chilling the Base Mixture

After adding the pecans to the base mixture, it’s time to move on to the next crucial step in making homemade butter pecan ice cream: chilling the base properly. Chilling the base is an essential part of the ice cream-making process as it helps to develop the flavors and ensure a smooth and creamy texture.

Advertisement

The optimal chilling time for the base mixture is around 4 to 6 hours or overnight in the refrigerator. This extended period allows the flavors to meld together and intensify, resulting in a more delicious final product. It also gives the base time to cool down completely, which is important for achieving the perfect consistency when churning the ice cream.

Properly chilling the base mixture is crucial because it allows the ingredients to fully combine and prevents the formation of ice crystals during the churning process. If the base mixture is not adequately chilled, the resulting ice cream may be grainy and lack the creamy texture we all love.

[bulkimporter_image id=’8′]

Setting Up the Ice Cream Maker

First, make sure to gather all the necessary ingredients and equipment to prepare the ice cream maker. You will need the following:

Advertisement
  • Ice cream maker
  • Ice cream base mixture
  • Pecans

Now, let’s set up the ice cream maker. Before you start, it’s important to ensure that the machine is clean and dry. Place the freezer bowl in the freezer for at least 24 hours to reach the optimal temperature. This will help the ice cream to freeze properly and achieve a smooth, creamy texture.

Once the freezer bowl is chilled, remove it from the freezer and attach it to the ice cream maker. Make sure it is securely in place.

Next, pour the prepared ice cream base mixture into the freezer bowl. Sprinkle in the chopped pecans for that delightful crunch and nutty flavor.

Now, it’s time to start the machine. Turn it on and let it churn for about 20-30 minutes, or until the ice cream thickens and reaches the desired consistency. Keep an eye on the process to ensure that everything is running smoothly.

Troubleshooting tips:

  • If the ice cream is not freezing, check if the freezer bowl is properly chilled.
  • If the ice cream is too soft, put it in a container and freeze it for a few hours to firm up.

Enjoy the process and savor every creamy, buttery bite of your homemade butter pecan ice cream!

Advertisement
[bulkimporter_image id=’9′]

Pouring the Base Into the Ice Cream Maker

When it comes to making the perfect butter pecan ice cream, there are a few key points to keep in mind.

First and foremost, ensuring proper consistency is crucial. This means making sure your ice cream base is well-mixed and free of any lumps or clumps before pouring it into the ice cream maker.

Once your base is ready, it’s time to mix in the pecan pieces. Adding these delicious nutty chunks will give your ice cream an extra layer of flavor and texture.

Ensuring Proper Consistency

To achieve the desired consistency, it’s important to churn the ice cream mixture for at least 20 minutes in the ice cream maker. This step is crucial for achieving a smooth and creamy texture.

Advertisement

Here are some optimal mixing techniques to ensure your ice cream turns out perfectly:

  • Keep the ice cream maker bowl in the freezer overnight for the best results.
  • Make sure the ice cream mixture is thoroughly chilled before pouring it into the machine.
  • Follow the manufacturer’s instructions for your specific ice cream maker to ensure proper mixing.

By following these techniques, you can avoid common troubleshooting consistency issues such as icy or grainy texture.

Once the ice cream mixture has been churned to perfection, it’s time to move on to the next step: mixing in the pecan pieces.

Mixing in Pecan Pieces

After ensuring the proper consistency of my butter pecan ice cream base, it’s time to add in the star of the show – pecan pieces!

Pecans are a crucial element of this classic ice cream flavor, providing a rich, nutty taste and a delightful crunch.

When it comes to choosing the best pecan sources, I prefer to use fresh, high-quality pecans from trusted suppliers. These can be found at local farmers markets or specialty stores.

Advertisement

However, if you’re unable to find pecans or simply want to try something different, there are alternative nut options you can explore. Walnuts or almonds can be excellent substitutes, offering their unique flavors and textures to complement the creamy ice cream.

Whether you stick to pecans or experiment with alternative nuts, the result will be a scrumptious butter pecan ice cream that’s sure to impress!

Churning for Optimal Texture

For optimal texture, you’ll want to churn the mixture until it becomes thick and creamy. Churning is a crucial step in making homemade butter pecan ice cream, as it helps to incorporate air into the mixture and break up ice crystals, resulting in a smooth and velvety texture.

To achieve the best results, follow these optimal churning techniques:

  • Churn the ice cream in small batches to ensure even freezing and consistent texture.
  • Use an ice cream maker with a built-in compressor for efficient and controlled churning.
  • Monitor the temperature closely during the churning process to prevent over-churning, which can lead to a grainy texture.

Troubleshooting common texture issues:

  • If the ice cream is too soft, it may not have been churned long enough. Return it to the freezer for additional churning.
  • If the ice cream is too hard or icy, it may have been churned for too long or at too low of a temperature. Adjust the churning time and temperature accordingly.

With these optimal churning techniques and troubleshooting tips, you’ll be able to create homemade butter pecan ice cream with a perfect, creamy texture every time.

Advertisement
[bulkimporter_image id=’10’]

Churning the Ice Cream

Once the ice cream mixture is ready, you’ll start churning it in your ice cream maker. This step is crucial for achieving the perfect texture and consistency that we all love in homemade ice cream. As the mixture churns, it freezes and incorporates air, resulting in a creamy and smooth dessert.

To make butter pecan ice cream, you’ll want to toast the pecans before adding them to the ice cream mixture. Start by melting a knob of butter in a skillet over medium heat. Once the butter has melted, add the pecans and cook them for a few minutes until they become fragrant and slightly browned. This toasting process enhances the nutty flavor of the pecans and adds a delightful crunch to the final ice cream.

After toasting the pecans, allow them to cool before adding them to the ice cream mixture. Once the ice cream base is churned to a soft-serve consistency, gently fold in the toasted pecans. Be sure to distribute them evenly throughout the mixture for a balanced and delicious bite every time.

Churning the ice cream typically takes around 20 to 30 minutes, but it’s essential to follow the instructions provided with your specific ice cream maker. The churning process ensures that the ice cream freezes evenly and prevents the formation of large ice crystals, resulting in a velvety smooth texture. So, be patient and resist the temptation to rush this step!

Advertisement

[bulkimporter_image id=’11’]

Adding Butter Pecan Flavoring

Before adding the flavoring, you’ll want to make sure that the ice cream base has reached a soft-serve consistency. This step is crucial to ensure that the flavoring is evenly distributed throughout the ice cream. Once the base is at the right consistency, it’s time to add the butter pecan flavoring. Here’s how to do it:

  1. Optimal flavoring ratio: To achieve the perfect balance of buttery goodness and nutty flavor, it’s important to use the optimal flavoring ratio. I recommend adding 1 tablespoon of butter pecan flavoring for every quart of ice cream base. This ratio ensures that the flavor is not overpowering but still prominent enough to satisfy your taste buds.

  2. Alternative nut options: If you’re not a fan of pecans or simply want to try something different, there are alternative nut options you can use to add a unique twist to your homemade butter pecan ice cream. Consider using chopped walnuts, almonds, or even pistachios. These nuts will add a delightful crunch and complement the buttery flavor of the ice cream.

  3. Experiment and customize: Don’t be afraid to get creative with your butter pecan ice cream. Add a sprinkle of cinnamon for a warm and cozy taste, or drizzle some caramel sauce for a sweet and gooey treat. The possibilities are endless, so feel free to experiment and customize your ice cream to suit your preferences.

[bulkimporter_image id=’12’]

Advertisement

Monitoring the Churning Process

When it comes to making homemade ice cream with an ice cream maker, there are a few key points to keep in mind during the churning process.

Firstly, it is important to determine the optimal churning time for your specific recipe. This can vary depending on the ingredients and the desired texture of the ice cream.

Secondly, it is essential to check the consistency regularly throughout the churning process to ensure that it is reaching the desired thickness and creaminess.

Lastly, adjusting the speed settings of the ice cream maker can also have a significant impact on the final result, allowing you to achieve the perfect balance between smoothness and airiness.

Optimal Churning Time

The optimal churning time for homemade butter pecan ice cream is typically around 20-25 minutes in an ice cream maker. During this time, the mixture will transform from a liquid state into a creamy, frozen delight. As the ice cream maker churns, the mixture freezes and incorporates air, resulting in a smooth and velvety texture. It’s important to monitor the churning process closely to achieve the perfect consistency.

Advertisement

Here are a few tips to enhance your homemade butter pecan ice cream experience:

  • Experiment with different mix-ins like toasted pecans or a swirl of caramel sauce for added flavor and texture.
  • Set the ice cream maker to the optimal churning temperature, usually between 18-21 degrees Fahrenheit, to ensure proper freezing and smoothness.
  • Don’t rush the churning process. Allow the ice cream maker to work its magic for the recommended time to achieve the best results.

Checking Consistency Regularly

Keep an eye on the consistency of the mixture while it’s churning in the ice cream maker to ensure it reaches the desired creaminess. The best time to start checking the consistency is around the 15-minute mark. At this point, the mixture should start to thicken, but it may not be fully creamy yet.

Use a spatula to scrape down the sides of the ice cream maker to incorporate any unmixed ingredients. As the churning continues, you’ll notice the mixture becoming smoother and creamier. Pay attention to the texture and look for a thick, velvety consistency. Avoid over-churning, as this can lead to a grainy texture.

Once you achieve the desired consistency, it’s time to transfer the ice cream to a container and let it firm up in the freezer for a few hours before serving.

Adjusting Speed Settings

To achieve the desired consistency, you should adjust the speed settings on your ice cream maker. The optimal speed will ensure that your butter pecan ice cream turns out creamy and smooth. If you’re experiencing any speed issues, here are some troubleshooting tips:

  • Check the power source: Make sure your ice cream maker is properly plugged in and receiving power. A weak or unstable power source can affect the speed.

  • Clean the machine: Over time, residue can build up on the paddle or inside the machine, causing it to slow down. Regularly clean and maintain your ice cream maker for optimal performance.

  • Adjust the settings: Experiment with different speed settings to find the one that works best for your recipe. Some ice cream makers have adjustable speed controls, allowing you to customize the churn speed.

Advertisement
[bulkimporter_image id=’13’]

Testing the Consistency of the Ice Cream

Once the ice cream has churned for about 20 minutes, you’ll want to check its consistency by giving it a quick taste. This is an important step to ensure that your homemade butter pecan ice cream is turning out just right. As you take a spoonful of the partially churned ice cream, you’ll notice the creamy texture and the subtle sweetness. The flavors of the vanilla base blend perfectly with the toasted pecans, creating a delightful combination of nuttiness and creaminess.

To enhance the pecan flavor even more, you can add in some toasted pecan pieces. These crunchy bits will add a delightful texture to each bite. Here’s a table to guide you on how to toast and mix in the pecan pieces:

Step Instructions
1 Toast the pecans in a dry skillet over medium heat for 3-5 minutes, stirring occasionally.
2 Let the pecans cool completely, then chop them into small pieces.
3 Once the ice cream has reached a soft-serve consistency, mix in the toasted pecan pieces. Be sure to distribute them evenly throughout the mixture.

[bulkimporter_image id=’14’]

Advertisement

Transferring the Ice Cream to a Container

When it comes to storing homemade ice cream, there are a few key points to consider. First, it’s important to choose the right container for your ice cream. Airtight containers, such as plastic or glass containers with lids, are ideal for keeping the ice cream fresh and preventing crystallization.

Additionally, to prevent freezer burn, make sure to remove as much air as possible from the container before sealing it and storing it in the freezer. This can be done by pressing a piece of plastic wrap directly onto the surface of the ice cream before closing the lid. By minimizing the amount of air in the container, you can reduce the risk of freezer burn.

Proper storage is essential for maintaining the quality and texture of homemade ice cream. By selecting the right container and taking steps to prevent freezer burn, you can enjoy delicious, creamy ice cream whenever you want.

Best Storage Options

For optimal freshness and flavor, store your homemade butter pecan ice cream in an airtight container in the freezer. This will help prevent ice crystals from forming and keep the ice cream creamy and delicious.

When it comes to choosing the best container for freezing your ice cream, there are a few options to consider:

Advertisement
  • Stainless steel containers: These are great for retaining the temperature and preventing any unwanted flavors from seeping into the ice cream.

  • Glass containers: These are durable and provide good insulation, but be sure to choose a container with a tight-fitting lid to maintain freshness.

  • BPA-free plastic containers: Look for containers that are specifically designed for freezer use and have airtight lids.

Regardless of the container you choose, make sure it is clean and dry before transferring the ice cream. This will ensure the best freezing results and help preserve the flavor and texture of your homemade butter pecan ice cream.

Preventing Freezer Burn

To prevent freezer burn, it’s important to store your homemade ice cream in an airtight container. Freezer burn occurs when ice crystals form on the surface of the ice cream, causing it to become dry and lose its creamy texture. By using an airtight container, you create a barrier that prevents air from entering and moisture from escaping. This helps to maintain the quality and flavor of your ice cream.

Make sure to choose a container that is the right size for your batch of ice cream, leaving minimal air space. Additionally, avoid storing your ice cream in the freezer door or near the front, as these areas tend to be warmer and more prone to temperature fluctuations.

Proper storage is crucial to enjoying your homemade ice cream at its best. Now, let’s move on to the next step: freezing and hardening the ice cream.

Advertisement
[bulkimporter_image id=’15’]

Freezing and Hardening the Ice Cream

First, check the consistency of your homemade ice cream by pressing the back of a spoon against it. The ice cream should be firm but still slightly soft. If it’s too soft, you can use various hardening techniques to achieve the desired texture and prevent ice crystal formation.

Here are some tips to help you:

  • Place the ice cream in a shallow container and cover it tightly with plastic wrap or a lid to minimize air exposure. This will help prevent the formation of ice crystals.

  • Store the ice cream in the coldest part of your freezer, such as the back or bottom shelf. This will ensure that it freezes evenly and quickly, reducing the likelihood of ice crystal formation.

  • If you have an ice cream maker, transfer the ice cream into the machine and churn it according to the manufacturer’s instructions. Churning incorporates air into the mixture, resulting in a smoother and creamier texture.

By following these hardening techniques, you can enjoy a homemade butter pecan ice cream that is rich, creamy, and free from ice crystals.

Now, let’s move on to the next section and learn how to serve and enjoy this delicious treat.

Advertisement

[bulkimporter_image id=’16’]

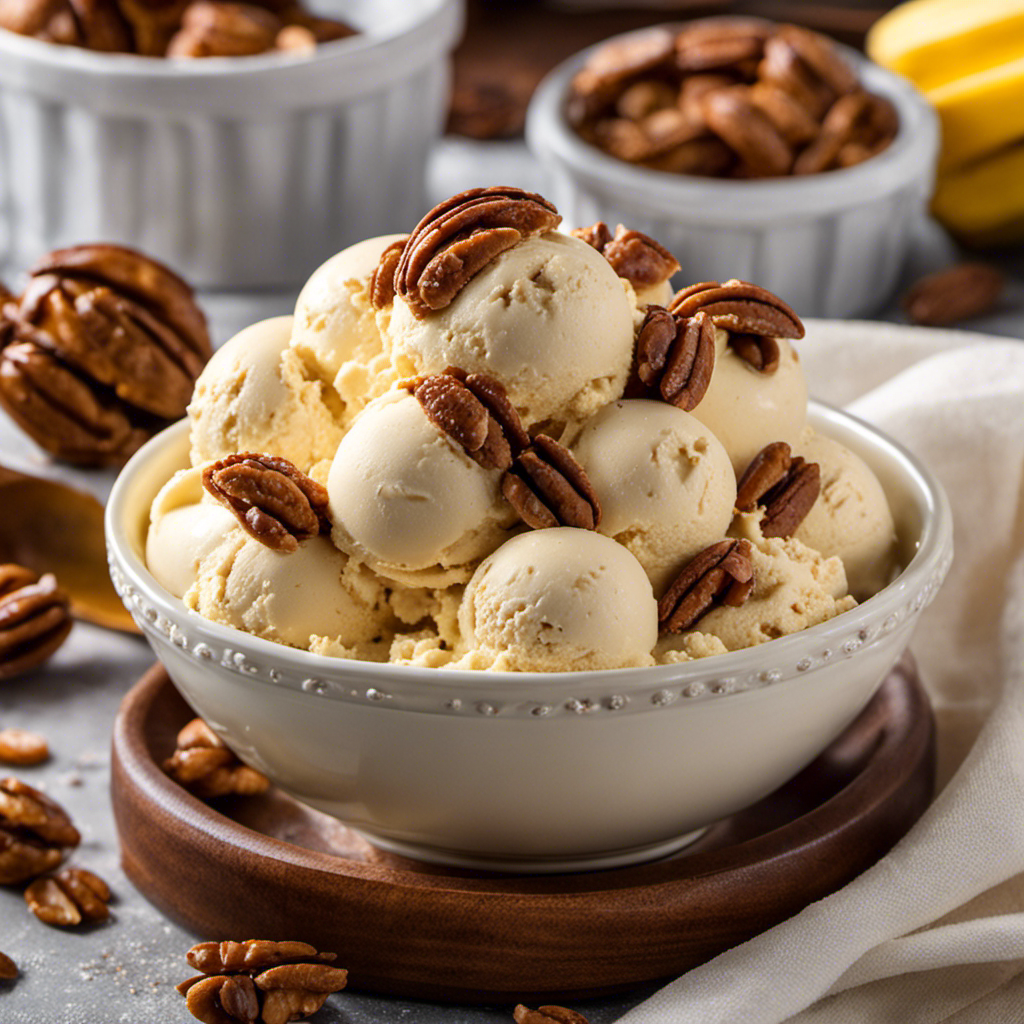
Serving and Enjoying the Homemade Butter Pecan Ice Cream

Now that you have your homemade butter pecan ice cream ready, it’s time to grab a bowl and scoop out a generous serving. The creamy texture and rich buttery flavor of the ice cream are truly irresistible.

To make your ice cream even more delightful, let’s talk about the best toppings and serving suggestions.

For a classic touch, drizzle some warm caramel sauce over your butter pecan ice cream. The sweet and sticky caramel complements the nutty flavors perfectly. If you’re a chocolate lover, sprinkle some chopped dark chocolate or hot fudge sauce on top. The combination of the smooth chocolate and crunchy pecans will create a decadent treat.

Advertisement

If you want to add a fruity twist, fresh sliced bananas or strawberries make wonderful toppings. The natural sweetness of the fruits adds a refreshing element to the creamy ice cream. For some extra crunch, sprinkle crushed buttery shortbread cookies or toasted pecans over your ice cream. The added texture will elevate your dessert experience.

When serving your homemade butter pecan ice cream, consider using waffle cones or bowls for a fun presentation. You can also create an indulgent sundae by layering the ice cream with your favorite toppings. Don’t forget to garnish with a cherry on top!

Now, it’s time to savor every spoonful of your homemade butter pecan ice cream with the best toppings and serving suggestions. Enjoy!

Frequently Asked Questions

Can I Use a Different Type of Nut Instead of Pecans?

I love butter pecan ice cream, but if you have a nut allergy or want to try something different, you can definitely substitute other types of nuts. There are plenty of alternative nut options to choose from.

How Long Does the Base Mixture Need to Chill Before Pouring It Into the Ice Cream Maker?

The base mixture for homemade ice cream needs to chill for at least 2 hours before pouring it into the ice cream maker. This allows the flavors to meld together and ensures a creamy texture in the final product.

Advertisement

How Long Should I Let the Ice Cream Churn in the Ice Cream Maker?

I let the ice cream churn in the ice cream maker for about 20-25 minutes. This helps achieve a creamy texture. If the ice cream is too soft, you can place it in the freezer for a few hours to firm up.

Where Can I Find Butter Pecan Flavoring?

I found butter pecan flavoring at my local grocery store in the baking aisle. If you can’t find it, you can easily make your own by combining butter extract with a hint of toasted pecans.

How Long Does the Ice Cream Need to Freeze and Harden Before It Is Ready to Serve?

To properly store homemade ice cream and enhance the flavor of butter pecan ice cream, it’s important to let it freeze and harden for at least 4-6 hours before serving. This ensures a creamy and delicious texture.

Conclusion

In conclusion, making homemade butter pecan ice cream with an ice cream maker is a fun and rewarding experience. The process of toasting and chopping the pecans adds a delightful crunch to the creamy base. The final result is a rich and flavorful treat that is sure to impress your friends and family.

Did you know that a study found that people who eat ice cream regularly are happier overall? So go ahead and indulge in this delicious homemade ice cream and let it bring a smile to your face!

Advertisement
Continue Reading
Advertisement

Recipes & Culinary Uses

Creamy Delight: Best Butter Pecan Ice Cream Recipe for Summer!

Yearning for a creamy summer treat that will leave you craving more?

Published

on

By

butter pecan ice cream

Savor a delicious summer treat with our Butter Pecan Ice Cream recipe. Mix butter, brown sugar, cream, and pecans for a creamy delight. Melt butter, cook pecans, whisk eggs, and blend for a rich flavor. Add pecans, cream, and vanilla, then freeze to perfection. Master this easy-to-follow recipe for a tasty dessert to beat the heat.

Key Takeaways

  • Rich and creamy blend of butter, brown sugar, and heavy cream
  • Toasted pecans for a nutty crunch and flavor
  • Easy-to-follow steps for homemade ice cream perfection
  • Customization options with variations like bourbon or chocolate
  • Perfect summer treat with a decadent, refreshing taste

Recipe Ingredients for Butter Pecan Ice Cream

To create a delectable batch of butter pecan ice cream, gather the essential ingredients listed in the recipe.

You'll need:

  • Butter
  • Brown sugar
  • Heavy cream
  • Pecans

These ingredients combine to bring out the rich and nutty flavors of this classic dessert.

The brown sugar adds a caramel-like sweetness, while the heavy cream contributes to a creamy texture that's essential for a decadent treat.

Pecans, when toasted in butter, provide a delightful crunch and enhance the overall flavor profile of the ice cream.

Cooking Instructions for Homemade Ice Cream

making ice cream at home

Start by melting butter in a skillet to infuse the pecans with a rich, nutty flavor for your homemade butter pecan ice cream.

Here's a quick guide to help you make this creamy delight:

Advertisement
  • Melt butter and cook pecans for flavor.
  • Whisk eggs and combine with half-and-half and brown sugar for a creamy base.
  • Cook until thickened, then mix with eggs in a bowl.
  • Add cream, pecans, and vanilla extract.
  • Freeze the mixture in an ice cream maker.

Following these steps will guarantee your homemade butter pecan ice cream turns out rich and delicious.

Remember to carefully adhere to the manufacturer's instructions for your ice cream maker to achieve the perfect consistency.

Enjoy the process of creating this delightful treat that will surely be a hit during the summer months.

Ice Cream Preparation Steps

ice cream recipe instructions

Mix half and half with brown sugar over medium heat in a large bowl to prepare the ice cream base.

Next, whisk beaten eggs and temper them with the warm milk mixture to create a smooth custard.

Once done, thicken the mixture on low heat, then cool it over an ice bath to achieve ideal texture.

After that, stir in heavy cream, vanilla extract, maple extract, and a pinch of salt for rich flavor.

Advertisement

Remember to refrigerate the mixture for 1 1/2 – 2 hours before churning it into creamy butter pecan ice cream.

This process ensures that the flavors meld together beautifully and the ice cream attains the perfect consistency for scooping and savoring.

Nutritional Information and Tips

healthy eating guidance provided

Considering the rich and creamy nature of homemade butter pecan ice cream, it's important to be mindful of its nutritional content and serving size. When indulging in this delectable dessert, remember these essential tips:

  • Portion Control: Enjoy in moderation to savor the flavors without overindulging.
  • Brown Sugar Sweetness: Opt for a moderate amount of brown sugar to balance sweetness without overwhelming the palate.
  • Room Temperature Ingredients: Confirm ingredients like butter and heavy cream are at room temperature for a smoother texture.
  • Nutritional Awareness: Be mindful that homemade butter pecan ice cream can vary in nutritional content, so adjust ingredients accordingly.
  • Consultation: Seek advice from a nutritionist or healthcare provider for personalized guidance on incorporating this treat into a balanced diet.

Homemade Butter Pecan Ice Cream Variations

delicious homemade ice cream

Explore creative twists on traditional butter pecan ice cream by incorporating different nuts, spirits, sauces, chocolates, and dairy-free alternatives.

For a unique flavor, try substituting pecans with walnuts or almonds in the full recipe. Toast the nuts in a separate bowl until browned and fragrant, then chop them finely enough to coat in the ice cream mixture.

To add a boozy kick, mix in a splash of bourbon or rum to the base as you churn the ice cream. For an extra indulgent touch, swirl in caramel sauce or fudge ripple throughout the mixture.

Incorporate chunks of chocolate or chocolate-covered nuts for a delightful contrast in texture, giving each bite a sweet surprise.

Advertisement

If you prefer a lighter, dairy-free option, consider using coconut milk or almond milk as a substitute for traditional dairy products. These alternatives provide a creamy base while catering to plant-based diets.

Experiment with these variations to create a personalized butter pecan ice cream that suits your taste preferences.

Frequently Asked Questions

What Is the Secret to Making Ice Cream Very Creamy?

To make ice cream very creamy, you use a rich base of ingredients like heavy cream, eggs, and sugar. Chilling the base before churning is crucial for a smoother texture. Adding vanilla extract enhances creaminess, and slow churning prevents a dense outcome.

What Flavor Is the Ice Cream in Butter Pecan?

The ice cream in butter pecan is a delightful blend of buttery richness, vanilla sweetness, and maple undertones, perfectly paired with toasted pecans for a nutty crunch. This flavor combination creates a harmonious and indulgent treat.

What's the Difference Between Butter Pecan Ice Cream and Praline Pecan Ice Cream?

In butter pecan ice cream, you'll savor the buttery richness of pecans blended with a creamy base. On the other hand, praline pecan ice cream highlights caramelized sweetness with a swirl of praline sauce for a delightful flavor contrast.

Advertisement

What Age Group Eats Butter Pecan Ice Cream?

You'll find that adults and older individuals, typically in the 30-60 age group, enjoy butter pecan ice cream. It's a favorite among those with a more refined palate, drawn to its rich and nutty flavor.

Conclusion

So there you have it, folks! Whip up this buttery, nutty delight for a taste of summer in every scoop.

Don't cry over spilled milk – grab a cone and enjoy this creamy treat that's sure to satisfy your sweet tooth.

Get churning and indulge in the best butter pecan ice cream you've ever tasted!

Advertisement
Continue Reading

Recipes & Culinary Uses

Festive Favorites: Best Peanut Butter Blossoms Recipe for Holidays!

Unleash the ultimate holiday baking magic with the best Peanut Butter Blossoms recipe – an irresistible treat that will elevate your festive celebrations!

Published

on

By

holiday baking with flair

Elevate your holiday baking with the ultimate Peanut Butter Blossoms recipe. Cream together peanut butter, butter, sugars, and salt, then add egg and vanilla. Roll dough into balls, coat in brown sugar, bake until golden, then press a Hershey's kiss on top. Adjust baking time as needed. Explore ingredient swaps for a personalized touch. Enjoy with hot cocoa or pair with savory dishes. For more tips, ideas, and customization options, the recipe holds more festive surprises.

Key Takeaways

  • Cream together peanut butter, butter, sugars for rich flavor.
  • Bake at 375°F for 8-10 minutes for soft, chewy cookies.
  • Customize with ingredient swaps like almond butter or maple syrup.
  • Pair with savory dishes or hot cocoa for holiday enjoyment.
  • Press Hershey kisses onto warm cookies for a classic finish.

Ingredients for Peanut Butter Blossoms

For the classic Peanut Butter Blossoms recipe, gather peanut butter, butter, sugar, an egg, and Hershey's kisses as your essential ingredients.

Peanut butter is the star, offering a rich flavor that blends perfectly with the sweetness of the cookies.

Butter plays a pivotal role by adding moisture and richness to the dough, ensuring a soft and chewy texture.

The sugar not only sweetens the cookies but also contributes to their festive appeal, making them a perfect treat for any occasion.

Finally, the Hershey's kisses on top provide a delightful chocolatey finish that elevates these cookies to a whole new level of deliciousness.

Advertisement

Together, these ingredients create a harmonious blend of flavors and textures that make Peanut Butter Blossoms a beloved classic for holiday baking or any time you crave a sweet and satisfying treat.

Recipe Steps for Peanut Butter Blossoms

bake peanut butter cookies

To make Peanut Butter Blossoms, start by creaming together peanut butter, butter, sugars, and salt until light and fluffy.

Next, add in the egg and vanilla extract, making sure to mix well to combine all the ingredients thoroughly.

Then, gradually incorporate the dry ingredients into the wet mixture until a smooth dough forms.

Once the dough is ready, roll it into balls and coat each ball generously in brown sugar.

Place the sugar-coated dough balls on a baking sheet, making sure to leave enough space between them for spreading during baking.

Advertisement

Bake the cookies in a preheated oven until they turn a beautiful golden brown.

As soon as the cookies are out of the oven, press a Hershey's kiss into the center of each cookie gently.

The heat from the freshly baked cookies will melt the chocolate just enough to adhere it to the cookie.

These Peanut Butter Blossoms are a delightful treat perfect for Christmas celebrations!

Pro Tips for Making Peanut Butter Blossoms

baking perfect peanut blossoms

To enhance your peanut butter blossom baking experience, consider adjusting the baking time based on your oven's performance for best results.

Additionally, explore ingredient substitutions to cater to dietary preferences or allergies without compromising the flavor or texture of the cookies.

Advertisement

These pro tips can help you customize your peanut butter blossoms while ensuring delicious outcomes.

Baking Time Recommendations

Achieving the ideal texture for your peanut butter blossoms involves baking them at 375°F for 8-10 minutes. This baking duration guarantees that the cookies have a soft and chewy consistency while allowing the Hershey kisses on top to be softened but not completely melted.

Once out of the oven, remember to press the Hershey kisses onto the cookies immediately to secure them in place for that classic appearance.

For the best outcomes, chill the cookie dough for about 30 minutes before baking. This step helps the cookies maintain their shape and prevents excessive spreading during baking, ensuring your peanut butter blossom cookies are perfectly formed and ready to impress during your holiday baking.

Shortening or extending the baking time can alter the texture of the cookies. A quick bake of 6-8 minutes produces softer and chewier cookies, while longer baking times yield a slightly crispier consistency. Stick to the recommended 8-10 minutes for the best soft and chewy peanut butter blossoms.

Advertisement

Ingredient Substitutions

Consider incorporating different ingredients to elevate the flavor and nutritional profile of your peanut butter blossoms. For a healthier option, swap out shortening with unsalted butter to achieve a unique texture and taste in your cookies.

Try using natural peanut butter instead of creamy to add a wholesome twist to the classic recipe. If you're looking to reduce the glycemic impact, substitute brown sugar with coconut sugar in your baking. For a natural sweetener alternative, replace regular granulated sugar with maple syrup in the cookie dough mixture.

Additionally, for a distinct flavor experience, experiment with almond butter as a substitute for peanut butter in your blossoms. These ingredient substitutions can bring a new dimension to your peanut butter blossoms, making them not only delicious but also tailored to your dietary preferences.

Upgrade your baking game this holiday season with these creative twists on a beloved recipe!

Serving Suggestions for Peanut Butter Blossoms

peanut butter cookie recipe

Enhance the enjoyment of your peanut butter blossoms by pairing them with savory dishes like lasagna tortellini soup for a satisfying meal. These classic cookies also complement family-friendly dinners such as easy ground beef shepherd's pie and creamy broccoli cheddar soup, making for a delightful combination. The holiday season calls for cozy treats, and the sweet nuttiness of peanut butter blossoms pairs perfectly with a warm cup of hot cocoa. Whether you're participating in a cookie exchange or looking for a festive touch to your holiday dessert spread, consider rolling the cookies in red, green, and white sugar sprinkles to add a pop of color and fun.

Serving Suggestions Pairing Ideas
Lasagna Tortellini Soup Comforting and hearty meal alongside the cookies
Easy Ground Beef Shepherd's Pie Delicious combination for a family dinner
Creamy Broccoli Cheddar Soup Perfect accompaniment to the nutty cookie flavors

12 Days of Christmas Cookies Recipes

baking traditions for the holidays

Indulge in a variety of delightful Christmas cookie recipes each day during the holiday season. One standout choice is the classic Peanut Butter Blossoms. These holiday cookies feature a peanut butter base topped with a Hershey's kiss, making them a beloved treat for cookie exchanges and festive gatherings.

The process of making these cookies is simple yet rewarding. Start by rolling the dough balls in sugar before baking to add a sweet crunch to each bite. The combination of rich peanut butter flavor and the chocolatey goodness of the Hershey's kiss creates a perfect balance of sweetness.

Advertisement

When enjoying these Christmas cookies, consider pairing them with a glass of milk for a classic and satisfying treat.

Whether you're baking them for your family, a cookie exchange, or a holiday party, Peanut Butter Blossoms are sure to be a hit. Make each day of the holiday season a little sweeter with these delicious cookies.

User Engagement Features

user interaction enhancements

Let's talk about how user interaction features and personalization options enhance your experience with the Peanut Butter Blossoms recipe.

You can engage with others by leaving comments and sharing your results, creating a sense of community around this holiday treat.

Personalization options like name and email entry fields help tailor the experience to your preferences, making it more engaging and enjoyable.

User Interaction Features

Utilizing user engagement features on the website allows for increased participation and feedback from visitors. The comment section enables users to interact with each other and provide valuable feedback on the Peanut Butter Blossoms recipe or share their experiences with Hershey's kisses. By incorporating a reply option, users can engage in conversations, fostering a sense of community around baking these delightful peanut butter cookies.

Advertisement

Moreover, the inclusion of name and email fields not only allows for personalization but also facilitates communication between the website and its visitors. This data storage feature guarantees that users can conveniently access their information for future visits, enhancing their overall user experience.

These user engagement features play an essential role in creating an interactive platform where users can engage, provide feedback, and communicate effectively. Such interaction not only enriches the user experience but also encourages visitors to actively participate in the community surrounding the Peanut Butter Blossoms recipe.

Personalization Options

Enhance your website's user engagement by incorporating personalized options such as commenting, replying, and sharing feedback on the Peanut Butter Blossoms recipe. This level of user interaction not only fosters a sense of community building but also encourages customization and feedback. By allowing users to share their thoughts, results, and experiences with the festive favorites, you create a more engaging and interactive user experience. Additionally, providing users with the option to save their data for future visits and encouraging them to tag @preppykitchen and use #preppykitchen when trying the recipe further enhances their engagement.

Personalization Options Description Benefits
Commenting Users can leave comments on the Peanut Butter Blossoms recipe, sharing their thoughts and experiences. Fosters community building and user engagement.
Replying Users can reply to comments and engage in discussions with other users about the recipe. Encourages active participation and interaction.
Feedback Sharing Users can share feedback on the recipe, providing valuable insights for improvement. Enhances user experience and customization.

Additional Information

clarifying specific details provided

You may find it interesting to know more about the history of the Peanut Butter Blossoms recipe and its cultural significance during the holidays.

  • The Peanut Butter Blossoms recipe's popularity is backed by IRI MULO data, making it a sought-after choice for holiday baking.
  • Copyright for this beloved recipe belongs to The J.M. Smucker Company, a reputable name in the food industry known for quality products.
  • These delightful cookies aren't only perfect for serving at holiday parties but also make excellent gifts due to their festive appeal.

Frequently Asked Questions

Why Are My Peanut Butter Blossoms Dry?

If your peanut butter blossoms are dry, it could be due to using too much flour, overbaking, using natural peanut butter that requires stirring, or not enough butter/shortening. Guarantee precise measurements and follow the recipe closely to maintain moisture.

Why Did My Peanut Butter Blossoms Go Flat?

When making peanut butter blossoms, going flat happens due to overmixing, too much flour, insufficient chilling, or low oven temperature. Remember to avoid these pitfalls. Preheat the oven properly and follow the recipe for perfect blossoms!

What Is America's Favorite Christmas Cookie?

America's favorite Christmas cookie is Peanut Butter Blossoms. Loved for their peanut butter-chocolate combo and nostalgic Hershey's Kiss center, these easy-to-make treats are a holiday staple at parties and gatherings. They're a must-have during the festive season.

Advertisement

What Is Baskin Robbins Peanut Butter Blossom?

You asked about Baskin Robbins Peanut Butter Blossom. It's a delectable seasonal ice cream flavor featuring creamy peanut butter ice cream with a ribbon of more peanut butter and chocolate cookie pieces. Indulge in this festive treat!

Conclusion

Indulge in the warm, gooey goodness of these peanut butter blossoms this holiday season. With the perfect blend of creamy peanut butter and rich chocolate, these cookies are sure to bring joy to your festivities.

Picture yourself surrounded by loved ones, sharing laughter and memories as you enjoy these delicious treats. Let the aroma of freshly baked cookies fill your home and create a cozy, festive atmosphere.

Happy baking and happy holidays!

Advertisement
Continue Reading

Recipes & Culinary Uses

Bite-Sized Treats: Best Peanut Butter Ball Recipe You'll Love!

Adore these heavenly peanut butter balls with a delectable mix of smooth peanut butter, powdered sugar, and vanilla—perfect for indulging in bite-sized bliss!

Published

on

By

delicious peanut butter balls

You'll adore these easy and heavenly peanut butter balls. Mix smooth peanut butter, powdered sugar, and vanilla extract for a delectable dough. Roll into small balls and chill. Dip in melted chocolate, then refrigerate to set. Enhance the flavor with rum extract, nuts, or crushed pretzels. Get creative with colorful sprinkles and different chocolate coatings. Use quality chocolate coating and adjust mix consistency. Store them in the fridge or freezer. Enjoy these mouthwatering treats alone or at gatherings. More tips and delightful variations await!

Key Takeaways

  • Creamy peanut butter, powdered sugar, and vanilla create a smooth dough.
  • Incorporate nuts, rum extract, or pretzels for flavor and texture variety.
  • Use quality chocolate coating like candy melts for best results.
  • Chill peanut butter balls before dipping for easier handling.
  • Store in the fridge or freezer for convenient snacking and serving.

Ingredients and Preparation

To create irresistible peanut butter balls, gather creamy peanut butter, powdered sugar, and vanilla extract as your key ingredients.

Begin by mixing the peanut butter, butter, sugar, and vanilla until you have a smooth dough. Roll this mixture into small balls and chill them before dipping them in melted chocolate.

The type of chocolate you use, such as dark or milk chocolate, will enhance the flavor of your peanut butter balls. After dipping, make sure to refrigerate the balls until the chocolate sets for a perfect finish.

This process guarantees that each bite-sized treat isn't only visually appealing but also bursting with delicious peanut butter and chocolate flavors.

Variations and Enhancements

creative modifications and improvements

You can elevate the flavor of your peanut butter balls by incorporating unique ingredients like chopped nuts or rum extract.

Experiment with different chocolate coatings such as white almond bark or dark chocolate candy melts for a varied taste experience.

Advertisement

Get creative by adding finishing touches like colorful sprinkles to make your peanut butter balls visually appealing.

Flavorful Ingredient Additions

Enhance the flavor of your peanut butter balls by incorporating unique ingredient variations and enhancements. While the classic combination of peanut butter, powdered sugar, and butter creates a delicious dough for your treats, you can take it up a notch by adding flavorful ingredient additions.

Consider mixing in crushed pretzels for a salty crunch that complements the sweetness of the peanut butter. Chopped nuts like almonds or pecans can also add a delightful texture and nutty taste to your chocolate-covered peanut butter balls.

For a burst of fruity flavor, try incorporating dried cranberries or raisins into the dough. These additions not only provide a contrast in texture but also introduce a hint of sweetness that pairs well with the creamy peanut butter.

Another option is to include a sprinkle of cinnamon or a dash of vanilla extract to elevate the overall taste profile of your peanut butter balls. Experiment with these flavorful ingredient additions to create a unique and delectable twist on the classic treat.

Advertisement

Chocolate Coating Options

Experiment with different types of chocolate coatings – dark, white, or milk chocolate – to suit your preferences and elevate the flavor of your peanut butter balls.

When considering the chocolate coating for your crunchy peanut butter treats, here are some options to enhance your culinary creation:

  1. Choose Candy Melts or Almond Bark: Opt for candy melts or almond bark for a smooth and firm chocolate coating that sets well on your peanut butter balls.
  2. Avoid Chocolate Chips: Steer clear of using chocolate chips for coating, as they may contain stabilizers that hinder smooth melting, affecting the overall texture.
  3. Add Colored Sprinkles: For a festive touch, sprinkle colored sprinkles on top of the chocolate coating before it sets to add a pop of color and extra crunch to your peanut butter balls.

Experimenting with different chocolate coatings and techniques can take your peanut butter balls to the next level, ensuring a delightful and indulgent treat for any occasion.

Creative Finishing Touches

To elevate the flavor profile of your peanut butter balls, consider incorporating creative finishing touches through various enhancements and unique variations.

You can enhance the texture by adding chopped nuts or crispy rice cereal to the peanut butter mixture, providing a delightful crunch with every bite.

Experiment with different flavors by using almond extract or rum extract instead of vanilla for a twist on the traditional taste.

Advertisement

For a festive touch, roll the balls in crushed graham crackers, sprinkles, or a sprinkle of sea salt to add a pop of flavor.

Drizzle white chocolate over the dark, semi-sweet, or milk chocolate coating for a visually appealing contrast that will impress your guests.

If you enjoy a crunchy element, try coating the balls in crushed pretzels or toasted coconut before the chocolate sets.

These creative enhancements will take your peanut butter balls to the next level, making them a standout treat at any gathering.

Tools and Tips

crafting with precision

Consider using a 1 tablespoon cookie scoop for consistent sizing when preparing your peanut butter balls. This tool will help guarantee all your treats are uniform in size, making for a neat presentation and even cooking.

Here are some additional tools and tips to enhance your peanut butter ball-making experience:

Advertisement
  1. Invest in Quality Chocolate Coating: Opt for candy melts or almond bark for a smooth and firm chocolate coating on your peanut butter balls. These coatings melt easily and provide a professional finish to your treats.
  2. Adjust Peanut Butter Mixture Consistency: If your peanut butter mixture is too sticky or too dry, adjust the consistency by adding more peanut butter or powdered sugar. This will help you achieve the perfect texture for shaping your balls.
  3. Refrigerate Before Dipping: Prior to dipping your peanut butter balls in chocolate, chill them in the refrigerator. This step will make the balls firmer, making them easier to handle and coat without falling apart.

Storage and Serving Suggestions

great suggestion for storage

For best freshness and presentation of your peanut butter balls, follow these storage and serving suggestions.

To keep your peanut butter balls tasting delicious, store them properly. You can store them in an airtight container in the fridge for up to 1 week or in the freezer for up to 2 months. When freezing, remember to thaw the frozen peanut butter balls before serving by bringing them to room temperature. To prevent them from sticking together, separate the layers of peanut butter balls with wax paper.

Here is a helpful table summarizing the storage and serving suggestions:

Storage Serving Frozen
Airtight container Display on festive tray Thaw before serving
Fridge – 1 week Pair with hot cocoa Bring to room temp
Freezer – 2 months Enjoy at holiday gatherings
Separate with wax paper

Additional Peanut Butter Desserts

peanut butter dessert recipes

Explore a variety of delectable peanut butter desserts to satisfy your sweet cravings.

  1. Peanut Butter Blossom Cookies: Indulge in the classic combination of peanut butter cookies topped with a chocolate kiss for a delightful treat.
  2. Peanut Butter Chocolate Mug Cake: Whip up this easy-to-make single-serving dessert that combines the rich flavors of peanut butter and chocolate in a mug for a quick fix.
  3. Peanut Butter Overload Cookies: For those who can't get enough peanut butter, these cookies are loaded with peanut butter chips, chocolate chips, and chopped peanuts for an explosion of flavor in every bite.

These additional peanut butter desserts offer a diverse selection to cater to your cravings.

Whether you're in the mood for a classic treat like Peanut Butter Blossom Cookies, a quick fix with Peanut Butter Chocolate Mug Cake, or a flavor-packed experience with Peanut Butter Overload Cookies, there's something for every peanut butter lover.

Enjoy these easy-to-make delights whenever you need a sweet pick-me-up!

Recipe Instructions and Nutritional Information

cooking guidance and facts

To create these delectable Peanut Butter Balls, start by blending peanut butter, butter, sugar, and vanilla to form a dough. Roll the mixture into small balls and place them on a baking sheet lined with parchment paper. Chill the peanut butter balls in the refrigerator for about 30 minutes until firm.

Once chilled, melt chocolate in a heatproof bowl over simmering water or in the microwave. Dip each chilled peanut butter ball into the melted chocolate, ensuring they're evenly coated. Place the coated balls back on the parchment paper and let the chocolate set.

Advertisement

Each serving of these delightful treats contains approximately 114 calories.

Store the finished peanut butter balls in the fridge for up to 2 weeks or freeze them for up to 3 months.

Enjoy these decadent bite-sized snacks whenever you crave a sweet and nutty indulgence.

Frequently Asked Questions

Can I Use Chunky Peanut Butter Instead of Creamy for This Recipe?

Yes, you can use chunky peanut butter instead of creamy for this recipe. It will add a delightful texture and extra crunch to your peanut butter balls. Enjoy experimenting with different variations!

How Long Do Chocolate Covered Peanut Butter Balls Stay Fresh?

Like a sweet memory, chocolate-covered peanut butter balls stay fresh for up to two weeks when stored in an airtight container in the fridge. Indulge in these delectable treats within that time frame for best taste.

Advertisement

Can I Freeze the Peanut Butter Balls for Later Enjoyment?

Yes, you can freeze the peanut butter balls for later enjoyment. Simply place them in an airtight container or freezer bag. When ready to indulge, let them thaw in the fridge for a few hours.

What Type of Chocolate Is Best for Coating the Peanut Butter Balls?

For coating the peanut butter balls, semi-sweet or milk chocolate works best. They provide a delicious contrast to the creamy peanut butter filling. Simply melt the chocolate, dip the balls, and enjoy the sweet treat!

Can I Add Chopped Nuts or Sprinkles to the Peanut Butter Balls for Extra Flavor?

You can definitely add chopped nuts or sprinkles to the peanut butter balls for extra flavor. It's a great way to customize your treats and add a delightful crunch or colorful touch to each bite.

Conclusion

Indulge in these irresistible peanut butter balls that are sure to satisfy your sweet tooth cravings.

With just a few simple ingredients and easy-to-follow instructions, you can enjoy these bite-sized treats in no time.

Advertisement

So go ahead, treat yourself to a little taste of heaven and experience the perfect combination of creamy peanut butter and rich chocolate.

You won't be able to resist coming back for more!

Continue Reading

Trending