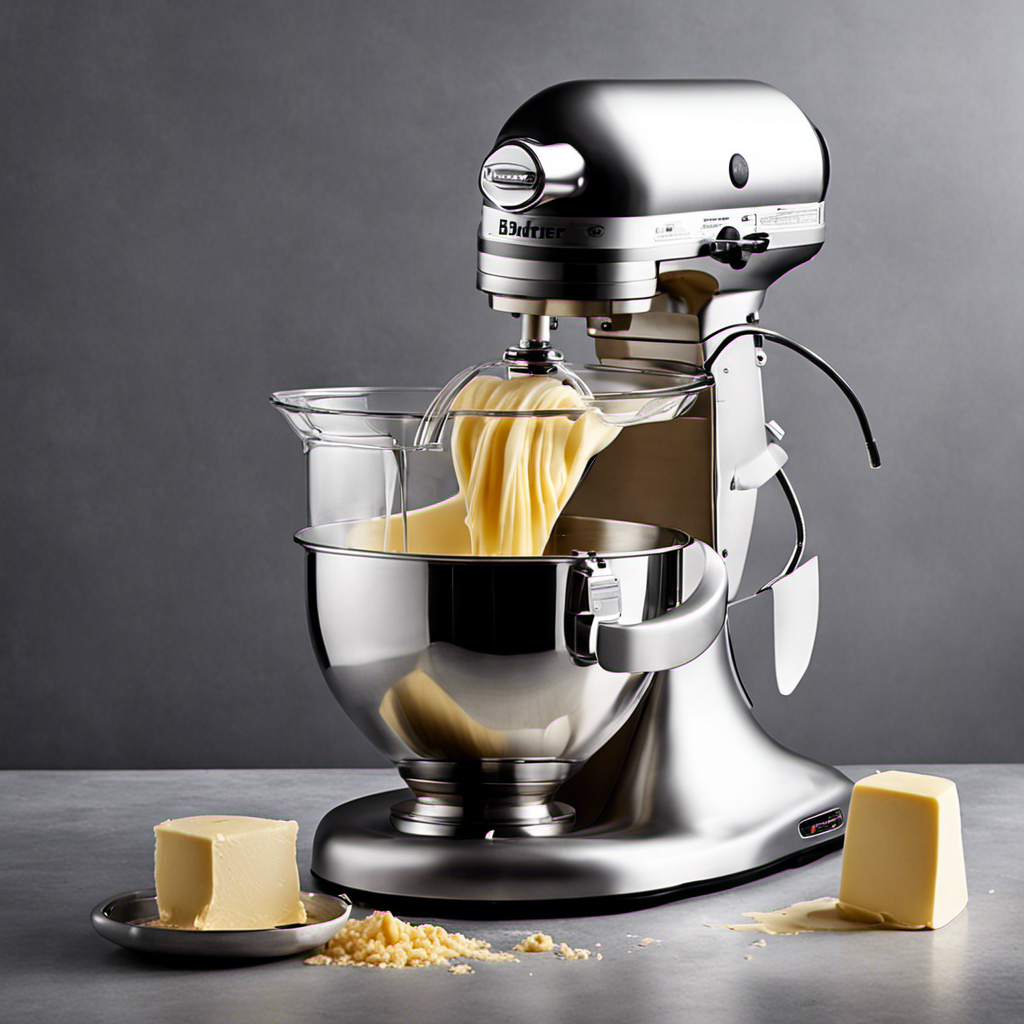
Are you aware that creating butter using a Kitchenaid mixer is not only simple but also extremely fulfilling? Unleash the secret to making your very own creamy butter at home and experience the joy of preparing a staple ingredient yourself. Keep reading to discover a fun and rewarding kitchen hack that will elevate your cooking game!
In this article, I’ll guide you through the step-by-step process of transforming cream into delicious homemade butter using your trusty Kitchenaid.
With just a few ingredients and some simple tools, you’ll be able to churn out the creamiest, freshest butter you’ve ever tasted.
So, let’s get started and embark on this culinary adventure together!
Key Takeaways
- Choose the right Kitchenaid mixer and attachments for your needs
- Properly gather all necessary ingredients and tools before starting
- Follow the steps for preparing the cream and achieving the desired consistency
- Monitor the mixing process and troubleshoot any issues that may arise

Flex Edge Beater for KitchenAid 4.5/5 QT Tilt Head Stand Mixer Kitchen Aid Mixer Accessory,With Silicone Edges For Kitchen Aid Accessories and Attachments
- Scrapes sides for even mixing: Flex edge beater scrapes bowl sides
- Reduces mixing time: Ensures thorough ingredient incorporation
- Eases baking tasks: Improves mixing for cakes and fillings
As an affiliate, we earn on qualifying purchases.
As an affiliate, we earn on qualifying purchases.
Choosing the Right Kitchenaid Mixer
When choosing the right Kitchenaid mixer, it’s important to consider the size and power you need.
The size of the mixer will depend on your kitchen space and the amount of food you plan on preparing. If you have a small kitchen or only cook for yourself, a compact mixer would be a good choice. However, if you have a large family or frequently entertain guests, a larger mixer with a higher capacity would be more suitable.
In terms of power, it’s important to choose a mixer that has enough wattage to handle the tasks you will be using it for.
Additionally, when choosing the best attachments for your mixer, consider the types of recipes you will be making and make sure the attachments are compatible.
Lastly, if you encounter any common issues with your Kitchenaid mixer, such as motor overheating or speed control problems, consult the troubleshooting guide provided by the manufacturer or contact customer support for assistance.
Gathering the Ingredients and Tools
First, gather all the necessary ingredients and tools to make your homemade butter with your Kitchenaid mixer. To start, you’ll need to choose the right cream for your butter. Look for heavy cream or whipping cream with a high fat content, as this will result in a creamy and flavorful butter.
Next, consider the different types of butter churners available. You can opt for a traditional hand-crank churner or a modern electric churner, like the Kitchenaid mixer attachment. Both options will yield excellent results, so choose the one that suits your preferences and convenience.
Once you have your cream and churner ready, you can move on to preparing the cream for churning and transforming it into delicious homemade butter.
Preparing the Cream
To start, you’ll need to gather the appropriate cream for your homemade butter. Look for heavy cream or whipping cream with a high fat content. Once you have the cream, it’s time to prepare it for churning. Here are the steps to follow:
-
Temperature: Allow the cream to come to room temperature before churning. Cold cream can take longer to churn and may result in a less smooth butter.
-
Flavoring options: If desired, you can add flavorings to your butter. Popular options include salt, herbs, garlic, or even honey for a touch of sweetness. Experiment with different flavors to find your favorite combination.
Troubleshooting common issues:
-
If your butter isn’t forming or the churning process is taking too long, the cream may not have enough fat content. Ensure you are using a cream with a high fat percentage.
-
If your butter is too soft or greasy, it may not have been churned long enough. Keep churning until the butter separates from the buttermilk completely.
Setting Up the Kitchenaid Mixer
When it comes to setting up a Kitchenaid mixer, there are a few key points to keep in mind.
First, understanding the different speed settings is crucial for achieving the desired results in your recipes.
Second, knowing which attachments and accessories to use for different tasks can greatly enhance your mixing experience.
And finally, proper bowl placement is essential for ensuring that your ingredients are mixed thoroughly and evenly.
Mixer Speed Settings
The mixer’s speed settings determine how quickly the butter will be made. It’s important to understand the different speed options and how they affect the butter-making process. Here are some key things to know about mixer speed control:
-
Speed levels: Most KitchenAid mixers have 10 speed settings, ranging from low to high. Each level corresponds to a specific rotation per minute (RPM), which affects the whipping and mixing action.
-
Slow and steady: Using lower speeds, like 1 or 2, is ideal for incorporating ingredients and avoiding splatters. It’s great for starting the butter-making process.
-
High speeds for whipping: Once the butter starts to form, increasing the speed to 8 or 10 will help whip it into a smooth, creamy consistency.
Troubleshooting common issues with mixer speed control:
-
Motor overheating: If your mixer’s motor gets too hot, try reducing the speed and allowing it to cool down before continuing.
-
Uneven mixing: If you notice uneven mixing or lumps in the butter, adjust the speed or pause periodically to scrape down the sides of the bowl.
Attachments and Accessories
You can enhance your mixer’s capabilities by exploring the various attachments and accessories available.
The attachments selection for a KitchenAid mixer is extensive, allowing you to do more than just mix ingredients. There are attachments for slicing, shredding, grinding, and even making pasta. These attachments can transform your mixer into a versatile kitchen tool.
When selecting attachments, consider what tasks you frequently perform in the kitchen and choose accordingly. However, if you encounter any issues with your attachments, troubleshooting is relatively simple. Ensure that the attachment is properly secured to the mixer and that it is compatible with your specific model. If the attachment is not working properly, check for any obstructions or damage.
With the right attachments and troubleshooting know-how, your mixer can become a true kitchen powerhouse.
Proper Bowl Placement
Ensure your mixer’s bowl is properly placed before starting any mixing or blending tasks. This is crucial for achieving the desired butter consistency and maintaining the temperature throughout the process.
To ensure proper bowl placement:
- Align the bowl with the mixer’s base and lower it onto the pins until it clicks into place.
- Check that the bowl is securely locked by giving it a gentle shake.
Proper bowl placement is essential because it allows the attachment to reach all areas of the bowl, ensuring even mixing. Without proper placement, the butter may not be thoroughly blended, resulting in an uneven consistency. Additionally, maintaining the temperature is important to prevent the butter from melting or becoming too hard.
Proper bowl placement helps in creating a stable environment for the butter, allowing it to maintain its desired consistency and temperature. So, always double-check that your mixer’s bowl is properly placed before starting your butter-making journey.
Starting the Mixing Process
Once the ingredients are added, it’s time to start mixing with your Kitchenaid. To achieve the perfect butter consistency, it’s important to understand the proper mixing techniques and be aware of any potential troubleshooting issues that may arise.
Firstly, ensure that the speed setting is appropriate for the amount of butter you are making. Start on low speed and gradually increase as the mixture thickens. This will prevent splattering and ensure even mixing.
If the butter is not forming or seems too soft, try refrigerating the bowl for a few minutes before continuing to mix. On the other hand, if the butter becomes too hard, let it sit at room temperature for a while.
Remember to scrape down the sides of the bowl periodically to ensure all the ingredients are fully incorporated.
With these tips in mind, you’ll be well on your way to making delicious homemade butter with your Kitchenaid.
Monitoring the Progress
After starting the mixing process, it’s important to monitor the progress of the butter. I like to keep a close eye on the temperature and consistency to ensure the best results. Here’s how I do it:
-
Monitoring Temperature:
-
Use a kitchen thermometer to check the temperature of the butter mixture regularly.
-
Keep the temperature between 50-55°F (10-13°C) for optimal butter formation.
-
Checking Consistency:
-
Stop the mixer occasionally and scrape down the sides of the bowl to ensure even mixing.
-
Check the consistency by pinching a small amount of the mixture between your fingers. It should be firm and no longer resemble whipped cream.
Adding Flavorings (Optional
When it comes to making butter, there are endless possibilities for creative flavor combinations. From savory herbs like rosemary and garlic to sweet additions like honey and cinnamon, the options are truly limitless.
Creative Flavor Combinations
If you’re feeling adventurous, you can try experimenting with different flavor combinations to make your butter unique. Get ready to embark on a delicious journey of creative flavor pairings and discover new and exciting ways to elevate your butter recipes.
Here are a few ideas to get you started:
-
Sweet and Savory:
-
Honey and Thyme: Add a touch of sweetness with honey and a hint of earthiness with fresh thyme leaves.
-
Maple and Bacon: Indulge your taste buds with the perfect blend of sweet maple syrup and crispy bacon bits.
-
Exotic and Spicy:
-
Curry and Lime: Give your butter an exotic twist by mixing in fragrant curry powder and zesty lime juice.
-
Chili and Garlic: Add a kick to your butter with spicy chili flakes and aromatic minced garlic.
These unique butter recipes will take your culinary creations to the next level. So go ahead, unleash your creativity and let your taste buds guide you on this flavor-filled adventure.
Enhancing Butter’s Taste
After exploring creative flavor combinations, let’s dive into enhancing the taste of homemade butter. Incorporating flavorful additions not only adds a delicious twist but also helps in butter preservation.
Here are some exciting options to elevate your butter’s taste:
| Flavorful Addition | Description |
|---|---|
| Herbs | Fresh or dried herbs like rosemary, thyme, or basil can infuse a delightful aroma into the butter. |
| Citrus Zest | Grating the zest of lemons, limes, or oranges adds a refreshing citrusy flavor to the butter. |
| Spices | Experiment with spices like cinnamon, nutmeg, or cardamom to create a warm and aromatic butter blend. |
Separating the Butter and Buttermilk
Once the butter and buttermilk have been separated, you can move on to the next step. Separating butter from buttermilk is an essential part of making homemade butter. There are a few techniques you can use to achieve this. One method is using a cheesecloth or a fine-mesh strainer to strain the mixture. Another technique is using a butter churner or a stand mixer fitted with a whisk attachment to agitate the mixture until the butter solids separate from the liquid.
Once you have successfully separated the butter and buttermilk, you might wonder what to do with the leftover buttermilk. Buttermilk is a versatile ingredient that can be used in various recipes. It adds a tangy flavor and helps tenderize baked goods like pancakes, biscuits, and cakes. You can also use it as a marinade for chicken or in salad dressings for a creamy and tangy twist. Don’t let the leftover buttermilk go to waste – it’s a valuable ingredient in the kitchen!
Washing and Straining the Butter
When it comes to making butter, proper straining techniques and the importance of washing cannot be overlooked. Straining the butter allows you to remove any remaining buttermilk, ensuring a smoother and longer-lasting product.
Additionally, washing the butter helps remove any excess moisture and impurities, resulting in a purer and more flavorful end result.
Proper Straining Techniques
To strain the butter, you’ll want to use a fine mesh sieve or cheesecloth. These straining techniques help remove any remaining buttermilk or impurities from the butter, resulting in a smoother and creamier texture. Here are some tips for proper straining:
- Place the sieve or cheesecloth over a bowl or container to catch the liquid that drains out.
- Gently pour the freshly made butter into the sieve or onto the cheesecloth.
- If using a sieve, press down on the butter with a spatula to help separate any excess liquid.
- If using cheesecloth, gather the corners and twist it to squeeze out any remaining liquid.
Once strained, you can add flavorings to the butter if desired, such as herbs, spices, or even honey for a sweet variation.
Importance of Washing
Remember, it’s essential to wash the butter thoroughly to remove any excess buttermilk and ensure a longer shelf life. When making butter, the importance of rinsing cannot be overstated.
By rinsing the butter, you not only remove the residual buttermilk, but you also eliminate any impurities that may have accumulated during the churning process. This step is crucial in maintaining the quality and flavor of your homemade butter.
To enhance the benefits of rinsing, consider using filtered water. Filtered water helps to remove any potential contaminants that may be present in tap water, ensuring a cleaner and purer final product. By using filtered water, you can further enhance the taste and texture of your homemade butter, making it even more enjoyable to savor on your favorite bread or baked goods.
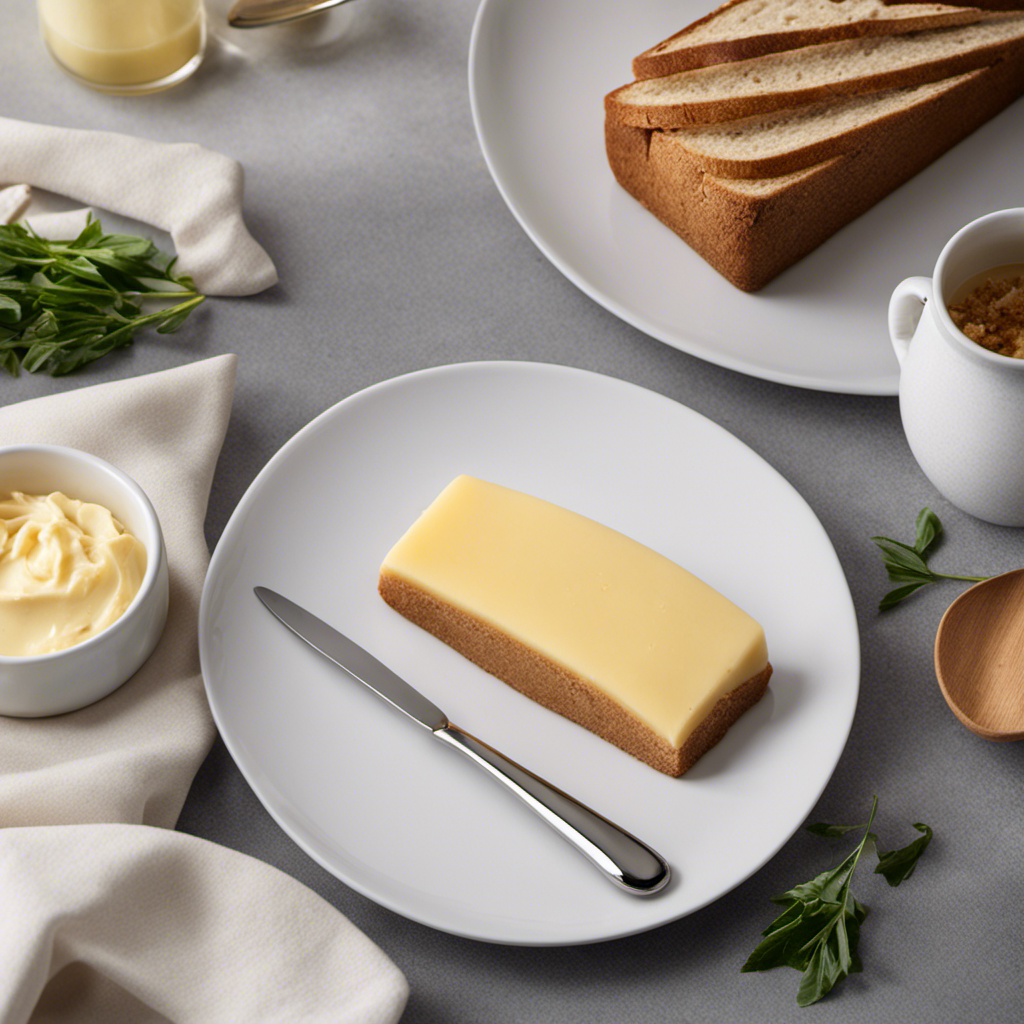
Shaping and Storing the Butter
After separating the butter from the liquid, it’s time to shape and store it. Shaping the butter is a fun and creative process that allows you to customize its appearance. Here are some shaping techniques you can try:
-
Roll it into a log: Place the butter on a sheet of parchment paper, roll it tightly into a log shape, and twist the ends to secure.
-
Use a mold: Butter molds come in various shapes and designs. Simply press the softened butter into the mold and refrigerate until firm.
Once you’ve shaped the butter, it’s important to store it properly to maintain its freshness. Here are some butter storage options:
-
Butter dish: Keep the butter at room temperature in a covered dish for easy spreading.
-
Butter keeper: These specialized containers have water-filled bases that create a seal, keeping the butter fresh for longer.
Troubleshooting Tips
Now that you’ve learned how to shape and store your homemade butter, let’s discuss some troubleshooting tips to help you avoid common mistakes and find solutions to any issues you may encounter along the way.
One common mistake is not using cold enough cream. If your cream is not chilled, it can take longer to separate into butter and buttermilk. To avoid this, make sure your cream is well chilled before starting the process.
Another mistake is over-churning the butter. If you churn the cream for too long, the butter can become too hard and lose its creamy texture. To prevent this, stop churning as soon as you see the butter solids separate from the buttermilk.
If your butter turns out too soft or too hard, you can adjust the temperature. For softer butter, let it sit at room temperature for a while. For harder butter, place it in the refrigerator to firm up.
Frequently Asked Questions
Can I Use Any Type of Cream to Make Butter With a Kitchenaid Mixer?
Yes, you can use any type of cream to make butter with a Kitchenaid mixer. However, it’s important to use heavy cream or whipping cream for the best results. Avoid using light cream or half-and-half, as they have lower fat content and won’t churn into butter properly.
How Long Does It Typically Take to Make Butter Using a Kitchenaid Mixer?
Making butter with a Kitchenaid mixer is a breeze. I’ll share some tips on how to speed up the process. Avoid overmixing or using warm cream. In no time, you’ll have creamy butter to spread on toast!
Can I Add Salt to the Butter During the Mixing Process?
Yes, you can add salt to the butter during the mixing process. It’s a great way to enhance the flavor of your butter. Experiment with different amounts of salt to create various flavor variations.
Can I Use a Hand Mixer Instead of a Kitchenaid Mixer to Make Butter?
Using a hand mixer for making butter is possible, but using a Kitchenaid mixer offers advantages like its powerful motor and sturdy attachments. It makes the process easier and more efficient.
How Long Can I Store Homemade Butter in the Refrigerator?
I store homemade butter in the refrigerator for up to two weeks. It’s important to keep it in an airtight container to maintain freshness. The shelf life can vary depending on storage conditions.
Conclusion
In conclusion, making butter with a Kitchenaid mixer is a delightful journey that allows you to harness the magic of transformation.
With careful selection of the right mixer and gathering of quality ingredients, the process becomes a symphony of flavors and textures.
As the cream swirls and spins in the mixer, it undergoes a metamorphosis that separates the butter and buttermilk, creating a tantalizing dance of richness.
With each step, from washing and straining to shaping and storing, you become the curator of your own unique butter masterpiece.
So why not embark on this butter-making adventure and savor the joy of creation?