Connect with us

Recipes & Culinary Uses

Create Butter Slime Without Clay: 10 Easy Steps

Published

on

An image showcasing the step-by-step process of making butter slime without clay

I’ve always been a fan of slime, but sometimes finding the right ingredients can be a challenge. That’s why I’m excited to share with you my technique for making butter slime without clay.

With just a few simple ingredients and some easy-to-follow steps, you’ll be able to create a smooth and stretchy slime that’s perfect for hours of sensory play.

So let’s get started and learn how to make this clay-free butter slime that will keep you entertained for hours.

Key Takeaways

  • Clay alternatives like cornstarch or instant snow can be used to make butter slime without clay.
  • Mixing techniques should be precise and careful to achieve the desired consistency.
  • Non-toxic glue should be used for safety and peace of mind.
  • Alternative ingredients such as baby oil, lotion, shaving cream, and instant snow can be used to create different textures and sensations in butter slime.

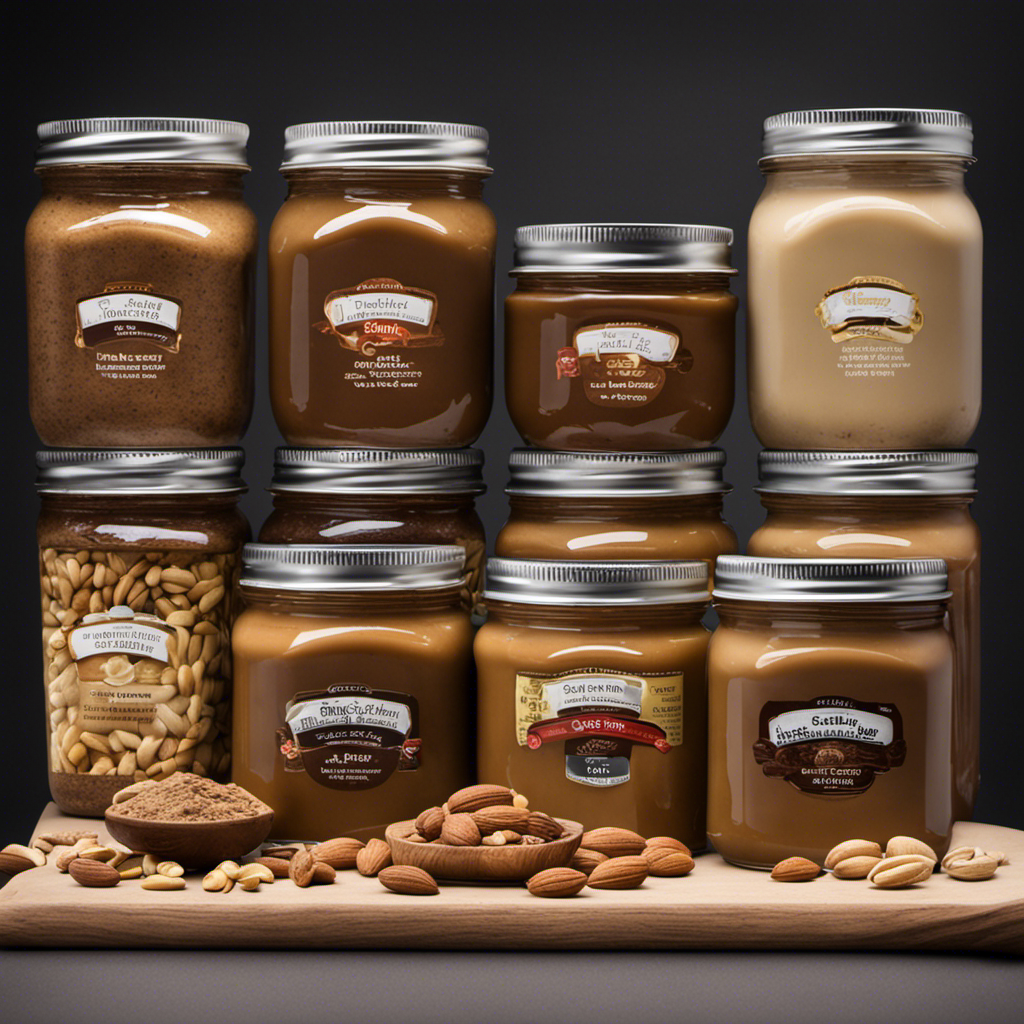
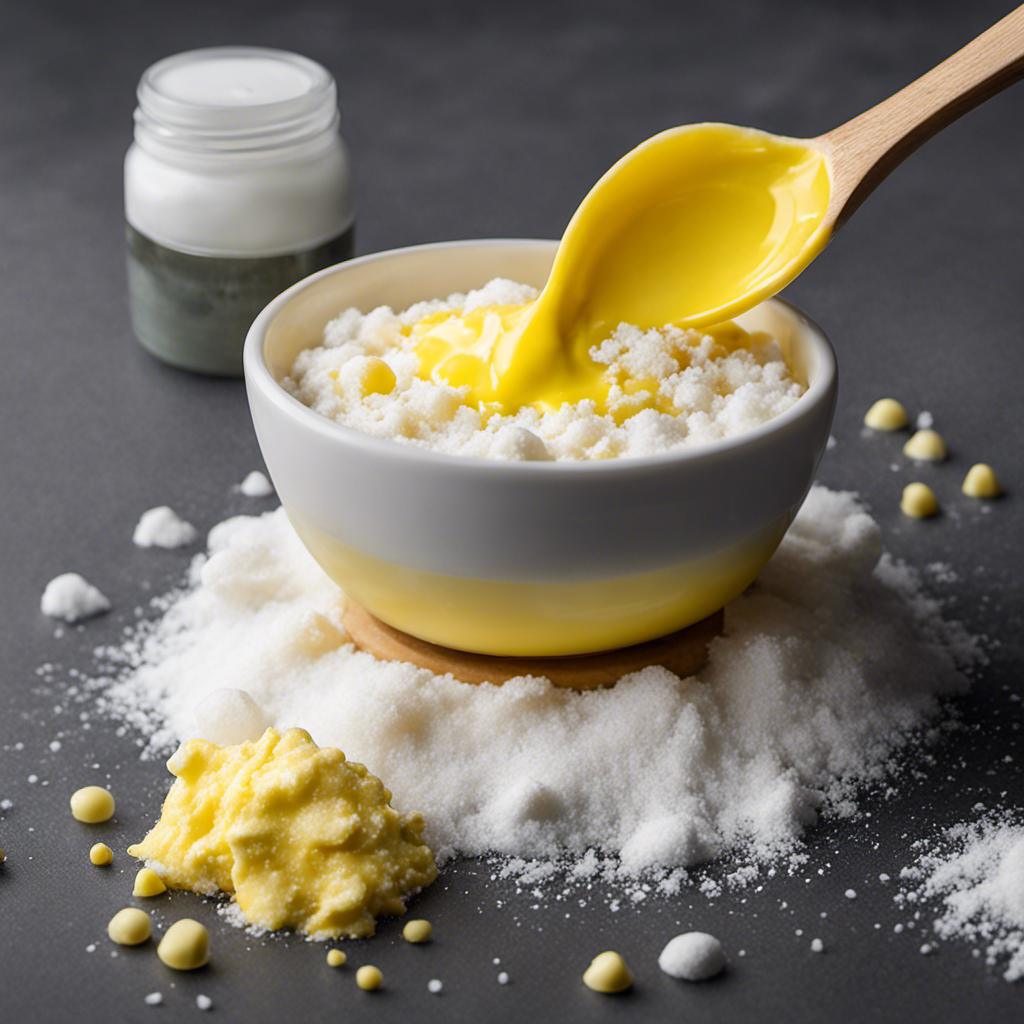
Ingredients Needed for Butter Slime

To make butter slime without clay, you’ll need a few key ingredients.

Advertisement

Instead of clay, you can opt for alternatives like cornstarch or instant snow. These ingredients will give your slime a smooth and stretchy texture, similar to butter.

Additionally, you’ll need white school glue, which acts as the base for the slime. To enhance the buttery feel, consider adding lotion or baby oil.

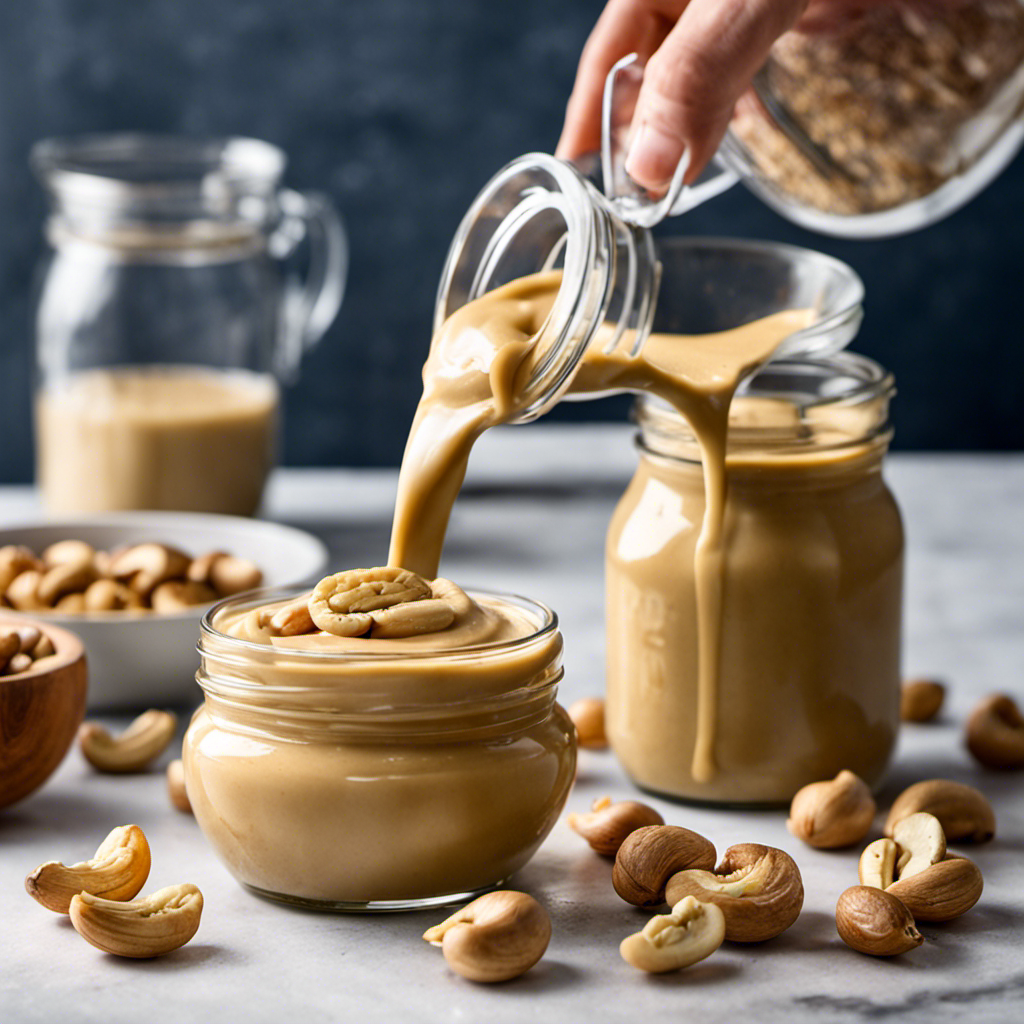
Mix these ingredients together using precise and careful mixing techniques. Start by pouring the glue into a mixing bowl, followed by the alternative ingredient of your choice. Slowly add in the lotion or baby oil, stirring continuously until the mixture reaches the desired consistency.

Once everything is well combined, you can move on to the step-by-step instructions for making butter slime.

Step-by-Step Instructions for Butter Slime

Follow these step-by-step instructions to create your own smooth and stretchy slime using simple ingredients.

Advertisement
  • Gather the following materials: glue, lotion, baby oil, contact lens solution, and food coloring.

  • In a mixing bowl, pour 4 ounces of glue.

  • Add 1 tablespoon of lotion and 1 teaspoon of baby oil to the bowl.

  • Mix the ingredients together using a spoon until well combined.

  • Add a few drops of food coloring to achieve the desired color.

  • Slowly pour in the contact lens solution, stirring as you go.

  • Continue adding the solution until the slime starts to come together and is no longer sticky.

  • Knead the slime with your hands until it becomes smooth and stretchy.

  • If the slime is too sticky, add a little more contact lens solution.

  • Store the slime in an airtight container when not in use.

Choosing the Right Glue for Butter Slime

When making butter slime, it’s important to choose the right type of glue. I have found that choosing a non-toxic glue is essential for the safety of the slime and also for peace of mind.

To find the perfect glue, I have conducted extensive testing of different glue brands. I carefully examined the ingredients list, ensuring that there were no harmful chemicals or irritants present. Additionally, I considered the consistency of the glue, as a thicker glue tends to produce a better butter slime texture.

Alternative Ingredients for Clay-Free Butter Slime

There are several other ingredients you can use to create a clay-free butter slime. In addition to clay, there are alternative ingredients that can give your slime a soft and buttery texture. Here are five options to consider in your DIY butter slime recipes:

Advertisement
  • Cornstarch: This fine powder helps to thicken the slime and create a smooth and stretchy consistency.

  • Baby oil: Adding a few drops of baby oil can make your slime more glossy and spreadable.

  • Shaving cream: Incorporating shaving cream into your slime mixture can give it a fluffy and light texture.

  • Lotion: Mixing in a small amount of lotion can make your slime softer and more pliable.

  • Instant snow: This unique ingredient can be mixed with glue to create a slime that feels cold and fluffy.

Mixing Colors and Additives for Butter Slime

When it comes to creating visually appealing slime, color combinations play a crucial role. Choosing the right colors can enhance the overall aesthetic and make your slime stand out.

Additionally, selecting the right additives can add unique properties and textures to your slime, such as glitter, foam beads, or even scents. Experimenting with different textures can further elevate your slime-making experience, allowing you to create slime with varying levels of stretchiness, fluffiness, or crunchiness.

Color Combinations for Slime

To create unique color combinations for your slime, you can mix different shades of food coloring together. This allows you to experiment and create your own custom colors for your slime.

Advertisement

When mixing colors, keep in mind the color wheel and how different colors interact with each other. Here are some tips to help you create stunning color combinations for your slime:

  • Mix primary colors (red, blue, and yellow) to create secondary colors (orange, green, and purple).
  • Use complementary colors (colors opposite each other on the color wheel) to create contrast and make your slime pop.
  • Experiment with different ratios of colors to achieve different shades and intensities.
  • Add a touch of black or white to darken or lighten your colors, respectively.
  • Don’t be afraid to add glitter to your slime for some extra sparkle and dimension.

Choosing the Right Additives

You can enhance the texture and appearance of your slime by adding various additives such as foam beads, sequins, or even glow-in-the-dark powder. These mix-ins can give your butter slime a unique and personalized touch. Additionally, adding scents can elevate your slime-making experience even further. Here are some ideas for mix-ins and scents that you can incorporate into your butter slime:

Mix-Ins Scents
Foam Beads Vanilla
Sequins Strawberry
Glow-in-the-Dark Powder Lavender
Glitter Mint

Experimenting With Different Textures

If you want to explore different textures, try incorporating ingredients like foam beads, sequins, or glitter into your slime mixture. These additives can enhance the sensory experience and add a unique touch to your slime creations. Here are five options to consider:

  • Foam Beads: These tiny colorful beads can be mixed into your slime to create a crunchy and satisfying texture.

  • Sequins: Add a touch of sparkle and shine by including sequins in your slime. They will give your slime a glamorous and eye-catching look.

  • Glitter: Experiment with different colors and sizes of glitter to create a mesmerizing and sparkling effect in your slime.

  • Scented Additives: Explore scented oils or extracts, such as lavender or vanilla, to add a delightful aroma to your slime.

  • Butter Slime Sensory Play Bin: Create a dedicated sensory play bin filled with butter slime and various textures like rice or pasta. This will provide a multi-sensory experience and endless opportunities for tactile exploration.

How to Achieve the Perfect Consistency for Butter Slime

Mixing the ingredients thoroughly is key to achieving the perfect consistency for your butter slime. The right texture is crucial for a satisfying slime experience. To make butter slime without borax, you can use alternative ingredients like contact lens solution or liquid starch. These ingredients help bind the slime together and give it a stretchy, buttery feel. When adding the contact lens solution or liquid starch, it’s important to start with a small amount and gradually add more until you reach the desired consistency. You can also experiment with different scents to make your butter slime even more enjoyable. Here are some creative ways to incorporate scents into your slime:

Scents Description Benefits
Lavender Calming and relaxing Reduces stress and anxiety
Citrus Energizing and refreshing Boosts mood and concentration
Vanilla Sweet and comforting Creates a cozy atmosphere

Remember to mix the scent into the slime thoroughly to evenly distribute the fragrance. Enjoy the sensory experience of your perfect butter slime!

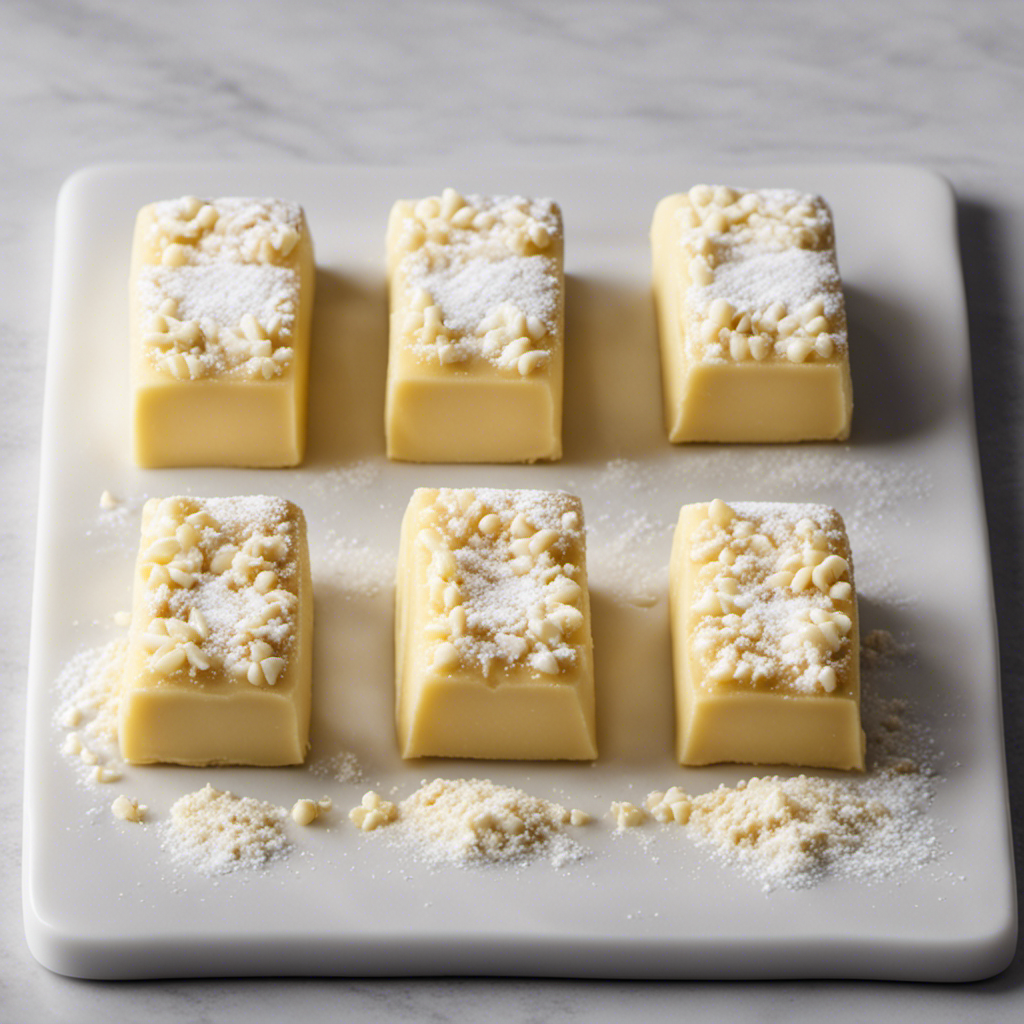
Tips for Storing and Preserving Butter Slime

To keep your butter slime fresh and prevent it from drying out, store it in an airtight container. This will help maintain its soft and gooey texture for a longer period of time.

Advertisement

Here are some effective storing methods to consider:

  • Sealed plastic bag: Place your butter slime in a Ziploc bag and press out any excess air before sealing it tightly. This will create a barrier and prevent the slime from being exposed to air.

  • Glass jar with lid: Transfer your butter slime into a glass jar with a secure lid. The transparency of the jar allows you to admire the vibrant colors of your slime while keeping it safe from drying out.

  • Silicone container: Opt for a silicone container that can be tightly sealed. These containers are flexible, durable, and non-stick, making them ideal for storing butter slime.

  • Vacuum-sealed bag: If you want to take extra precautions, consider using a vacuum-sealed bag. This method will completely remove any air from the bag, ensuring maximum freshness and preventing mold.

  • Refrigerator: For long-term storage, you can refrigerate your butter slime. Make sure to place it in an airtight container before placing it in the refrigerator to prevent any odors from seeping into the slime.

Common Mistakes to Avoid When Making Butter Slime

When it comes to making slime, ingredient substitutions can often lead to unexpected results. One common mistake is overmixing the ingredients, which can result in a sticky and less desirable texture. To avoid this, it is important to follow the recipe instructions carefully and not overmix the ingredients.

Additionally, using the wrong type or amount of ingredients can also contribute to a sticky texture, so it is crucial to use the recommended ingredients or find suitable substitutes that will not alter the desired consistency.

Ingredient Substitutions for Slime

You can use cornstarch as a substitute for clay in your butter slime recipe. Cornstarch provides a similar texture and helps create a smooth, buttery consistency.

Here are some other substitutes for clay that you can try in your butter slime recipe variations:

Advertisement
  • Instant mashed potatoes: This adds a fluffy and airy texture to your slime.
  • Baby powder: Gives a silky feel and a pleasant scent to your slime.
  • Shaving cream: Adds a fluffy and light texture, perfect for cloud-like slime.
  • Soap flakes: Provides a unique texture and can create a more stretchy slime.
  • Body lotion: Adds a creamy and smooth texture to your slime, making it extra soft and pliable.

Experimenting with different substitutes for clay can give you a variety of butter slime textures and sensations. Have fun and get creative with your butter slime recipes!

Overmixing and Sticky Texture

Mixing your slime too much can result in a sticky texture that is difficult to work with. Overmixing causes the slime to become over-activated, leading to a breakdown of the glue’s structure and resulting in a slimy, gooey mess. This can be frustrating, especially when you’ve put time and effort into making the perfect slime. However, there are potential fixes to salvage your slime and restore its desired texture. One way to fix overmixed slime is by adding a small amount of activator, such as borax solution or contact lens solution, to re-activate the glue and bring it back to its original consistency. Another fix is to add a small amount of lotion or oil to help reduce stickiness and make the slime more pliable. Remember, it’s important to mix your slime gently and only until the ingredients are fully incorporated to avoid overmixing and its consequences.

Overmixing Consequences Potential Fixes
Sticky texture Add activator
Slimy consistency Use lotion/oil
Breakdown of structure Mix gently
Difficult to work with Incorporate slowly
Frustrating Don’t overmix

Frequently Asked Questions About Clay-Free Butter Slime

If you want to make butter slime without clay, there are some frequently asked questions you might have. Here are the answers to those questions:

  • Choosing the best fragrance: When selecting a fragrance for your butter slime, it’s important to consider the scent’s compatibility with the other ingredients. Opt for scents that are oil-based and won’t interfere with the slime’s texture or color.

  • Preventing slime from hardening: To prevent your butter slime from hardening, store it in an airtight container when not in use. Additionally, adding a small amount of lotion or baby oil to the slime can help maintain its soft and buttery consistency.

  • How long does butter slime last?: With proper storage and care, butter slime can last for several weeks. Keep it away from direct sunlight and excessive heat to prevent it from drying out.

  • Can I add glitter to butter slime?: Yes, you can add glitter to butter slime to give it a sparkly touch. Mix the glitter into the slime during the kneading process for even distribution.

  • What if my slime becomes too sticky?: If your butter slime becomes too sticky, add a small amount of cornstarch or borax solution to the mixture and knead it until the desired consistency is achieved.

Troubleshooting Common Issues With Butter Slime

When troubleshooting common issues with butter slime, it’s important to address any stickiness or hardness.

If your slime is too sticky, try adding a small amount of borax solution or contact lens solution to the mixture. Start with just a few drops at a time and mix well until the desired consistency is achieved.

If your slime is too hard, you can try adding a bit of lotion or oil to soften it. Be sure to add these ingredients slowly and mix thoroughly to avoid over-saturating the slime.

Advertisement

Additionally, to prevent your slime from hardening over time, store it in an airtight container when not in use and avoid exposing it to direct sunlight or extreme temperatures.

By troubleshooting these common issues and taking proper storage precautions, you can maintain the perfect texture for your butter slime creations.

Now, let’s move on to fun variations and ideas for butter slime creations.

Fun Variations and Ideas for Butter Slime Creations

To create unique and colorful butter slime creations, you can experiment with adding different types of food coloring or glitter to the mixture. The addition of these fun texture additives can elevate your slime-making experience and produce visually stunning results. Here are some ideas to inspire your creativity:

  • Sparkling glitter in vibrant colors, such as gold, silver, or rainbow.
  • Neon food coloring to create bold and eye-catching slime.
  • Glow-in-the-dark pigments for an extra element of excitement.
  • Metallic paint or powder for a shiny and luxurious finish.
  • Shimmering mica powders in various shades to add a touch of elegance.

Additionally, don’t forget to think outside the box when it comes to containers for your butter slime. Consider using unique butter slime containers like mini mason jars, cute shaped plastic containers, or even repurposed glass bottles. These containers can add an extra touch of charm and make your butter slime creations even more delightful.

Frequently Asked Questions

Can I Use Regular White Glue Instead of Clear Glue for Butter Slime?

Yes, you can use regular white glue instead of clear glue for butter slime. I have experimented with different types of glue for butter slime and found that both work well.

Advertisement

Can I Use Food Coloring Instead of Acrylic Paint to Color My Butter Slime?

I experimented with using food coloring instead of acrylic paint to color my butter slime. The pros of using food coloring are its accessibility and wide range of colors. However, it may stain hands and surfaces more than acrylic paint.

Can I Add Fragrance or Essential Oils to My Butter Slime?

Yes, you can add fragrance or essential oils to your butter slime. However, it’s important to consider safety concerns. Choose fragrance options that are skin-safe and non-toxic, and avoid using too much oil to prevent the slime from becoming too sticky.

How Long Does Butter Slime Usually Last Before It Starts to Dry Out?

Butter slime typically lasts for about 1-2 weeks before it starts to dry out. To prevent this, store it in an airtight container or resealable bag, and avoid exposing it to excessive heat or air.

Can I Add Glitter or Sequins to My Butter Slime for Added Sparkle?

Adding glitter or sequins to butter slime can enhance its appearance and create a sparkling effect. However, it can affect the texture and consistency of the slime. Glitter may be easier to mix, while sequins can add a unique dimensional look.

Conclusion

In conclusion, creating butter slime without clay is a fun and easy DIY project that anyone can enjoy. By following the step-by-step instructions and choosing the right glue, you can achieve a smooth and buttery texture that is perfect for sensory play.

Advertisement

Don’t be afraid to experiment with alternative ingredients and mix in different colors and additives to customize your slime. Remember to avoid common mistakes and troubleshoot any issues that may arise.

With these tips and tricks, you’ll be able to create amazing butter slime creations that will amaze your friends and family. So go ahead and get your hands dirty, and let your creativity flow with this anachronistic recipe for buttery fun.

Continue Reading
Advertisement

Recipes & Culinary Uses

Creamy Delight: Best Butter Pecan Ice Cream Recipe for Summer!

Yearning for a creamy summer treat that will leave you craving more?

Published

on

By

butter pecan ice cream

Savor a delicious summer treat with our Butter Pecan Ice Cream recipe. Mix butter, brown sugar, cream, and pecans for a creamy delight. Melt butter, cook pecans, whisk eggs, and blend for a rich flavor. Add pecans, cream, and vanilla, then freeze to perfection. Master this easy-to-follow recipe for a tasty dessert to beat the heat.

Key Takeaways

  • Rich and creamy blend of butter, brown sugar, and heavy cream
  • Toasted pecans for a nutty crunch and flavor
  • Easy-to-follow steps for homemade ice cream perfection
  • Customization options with variations like bourbon or chocolate
  • Perfect summer treat with a decadent, refreshing taste

Recipe Ingredients for Butter Pecan Ice Cream

To create a delectable batch of butter pecan ice cream, gather the essential ingredients listed in the recipe.

You'll need:

  • Butter
  • Brown sugar
  • Heavy cream
  • Pecans

These ingredients combine to bring out the rich and nutty flavors of this classic dessert.

The brown sugar adds a caramel-like sweetness, while the heavy cream contributes to a creamy texture that's essential for a decadent treat.

Pecans, when toasted in butter, provide a delightful crunch and enhance the overall flavor profile of the ice cream.

Cooking Instructions for Homemade Ice Cream

making ice cream at home

Start by melting butter in a skillet to infuse the pecans with a rich, nutty flavor for your homemade butter pecan ice cream.

Here's a quick guide to help you make this creamy delight:

Advertisement
  • Melt butter and cook pecans for flavor.
  • Whisk eggs and combine with half-and-half and brown sugar for a creamy base.
  • Cook until thickened, then mix with eggs in a bowl.
  • Add cream, pecans, and vanilla extract.
  • Freeze the mixture in an ice cream maker.

Following these steps will guarantee your homemade butter pecan ice cream turns out rich and delicious.

Remember to carefully adhere to the manufacturer's instructions for your ice cream maker to achieve the perfect consistency.

Enjoy the process of creating this delightful treat that will surely be a hit during the summer months.

Ice Cream Preparation Steps

ice cream recipe instructions

Mix half and half with brown sugar over medium heat in a large bowl to prepare the ice cream base.

Next, whisk beaten eggs and temper them with the warm milk mixture to create a smooth custard.

Once done, thicken the mixture on low heat, then cool it over an ice bath to achieve ideal texture.

After that, stir in heavy cream, vanilla extract, maple extract, and a pinch of salt for rich flavor.

Advertisement

Remember to refrigerate the mixture for 1 1/2 – 2 hours before churning it into creamy butter pecan ice cream.

This process ensures that the flavors meld together beautifully and the ice cream attains the perfect consistency for scooping and savoring.

Nutritional Information and Tips

healthy eating guidance provided

Considering the rich and creamy nature of homemade butter pecan ice cream, it's important to be mindful of its nutritional content and serving size. When indulging in this delectable dessert, remember these essential tips:

  • Portion Control: Enjoy in moderation to savor the flavors without overindulging.
  • Brown Sugar Sweetness: Opt for a moderate amount of brown sugar to balance sweetness without overwhelming the palate.
  • Room Temperature Ingredients: Confirm ingredients like butter and heavy cream are at room temperature for a smoother texture.
  • Nutritional Awareness: Be mindful that homemade butter pecan ice cream can vary in nutritional content, so adjust ingredients accordingly.
  • Consultation: Seek advice from a nutritionist or healthcare provider for personalized guidance on incorporating this treat into a balanced diet.

Homemade Butter Pecan Ice Cream Variations

delicious homemade ice cream

Explore creative twists on traditional butter pecan ice cream by incorporating different nuts, spirits, sauces, chocolates, and dairy-free alternatives.

For a unique flavor, try substituting pecans with walnuts or almonds in the full recipe. Toast the nuts in a separate bowl until browned and fragrant, then chop them finely enough to coat in the ice cream mixture.

To add a boozy kick, mix in a splash of bourbon or rum to the base as you churn the ice cream. For an extra indulgent touch, swirl in caramel sauce or fudge ripple throughout the mixture.

Incorporate chunks of chocolate or chocolate-covered nuts for a delightful contrast in texture, giving each bite a sweet surprise.

Advertisement

If you prefer a lighter, dairy-free option, consider using coconut milk or almond milk as a substitute for traditional dairy products. These alternatives provide a creamy base while catering to plant-based diets.

Experiment with these variations to create a personalized butter pecan ice cream that suits your taste preferences.

Frequently Asked Questions

What Is the Secret to Making Ice Cream Very Creamy?

To make ice cream very creamy, you use a rich base of ingredients like heavy cream, eggs, and sugar. Chilling the base before churning is crucial for a smoother texture. Adding vanilla extract enhances creaminess, and slow churning prevents a dense outcome.

What Flavor Is the Ice Cream in Butter Pecan?

The ice cream in butter pecan is a delightful blend of buttery richness, vanilla sweetness, and maple undertones, perfectly paired with toasted pecans for a nutty crunch. This flavor combination creates a harmonious and indulgent treat.

What's the Difference Between Butter Pecan Ice Cream and Praline Pecan Ice Cream?

In butter pecan ice cream, you'll savor the buttery richness of pecans blended with a creamy base. On the other hand, praline pecan ice cream highlights caramelized sweetness with a swirl of praline sauce for a delightful flavor contrast.

Advertisement

What Age Group Eats Butter Pecan Ice Cream?

You'll find that adults and older individuals, typically in the 30-60 age group, enjoy butter pecan ice cream. It's a favorite among those with a more refined palate, drawn to its rich and nutty flavor.

Conclusion

So there you have it, folks! Whip up this buttery, nutty delight for a taste of summer in every scoop.

Don't cry over spilled milk – grab a cone and enjoy this creamy treat that's sure to satisfy your sweet tooth.

Get churning and indulge in the best butter pecan ice cream you've ever tasted!

Advertisement
Continue Reading

Recipes & Culinary Uses

Festive Favorites: Best Peanut Butter Blossoms Recipe for Holidays!

Unleash the ultimate holiday baking magic with the best Peanut Butter Blossoms recipe – an irresistible treat that will elevate your festive celebrations!

Published

on

By

holiday baking with flair

Elevate your holiday baking with the ultimate Peanut Butter Blossoms recipe. Cream together peanut butter, butter, sugars, and salt, then add egg and vanilla. Roll dough into balls, coat in brown sugar, bake until golden, then press a Hershey's kiss on top. Adjust baking time as needed. Explore ingredient swaps for a personalized touch. Enjoy with hot cocoa or pair with savory dishes. For more tips, ideas, and customization options, the recipe holds more festive surprises.

Key Takeaways

  • Cream together peanut butter, butter, sugars for rich flavor.
  • Bake at 375°F for 8-10 minutes for soft, chewy cookies.
  • Customize with ingredient swaps like almond butter or maple syrup.
  • Pair with savory dishes or hot cocoa for holiday enjoyment.
  • Press Hershey kisses onto warm cookies for a classic finish.

Ingredients for Peanut Butter Blossoms

For the classic Peanut Butter Blossoms recipe, gather peanut butter, butter, sugar, an egg, and Hershey's kisses as your essential ingredients.

Peanut butter is the star, offering a rich flavor that blends perfectly with the sweetness of the cookies.

Butter plays a pivotal role by adding moisture and richness to the dough, ensuring a soft and chewy texture.

The sugar not only sweetens the cookies but also contributes to their festive appeal, making them a perfect treat for any occasion.

Finally, the Hershey's kisses on top provide a delightful chocolatey finish that elevates these cookies to a whole new level of deliciousness.

Advertisement

Together, these ingredients create a harmonious blend of flavors and textures that make Peanut Butter Blossoms a beloved classic for holiday baking or any time you crave a sweet and satisfying treat.

Recipe Steps for Peanut Butter Blossoms

bake peanut butter cookies

To make Peanut Butter Blossoms, start by creaming together peanut butter, butter, sugars, and salt until light and fluffy.

Next, add in the egg and vanilla extract, making sure to mix well to combine all the ingredients thoroughly.

Then, gradually incorporate the dry ingredients into the wet mixture until a smooth dough forms.

Once the dough is ready, roll it into balls and coat each ball generously in brown sugar.

Place the sugar-coated dough balls on a baking sheet, making sure to leave enough space between them for spreading during baking.

Advertisement

Bake the cookies in a preheated oven until they turn a beautiful golden brown.

As soon as the cookies are out of the oven, press a Hershey's kiss into the center of each cookie gently.

The heat from the freshly baked cookies will melt the chocolate just enough to adhere it to the cookie.

These Peanut Butter Blossoms are a delightful treat perfect for Christmas celebrations!

Pro Tips for Making Peanut Butter Blossoms

baking perfect peanut blossoms

To enhance your peanut butter blossom baking experience, consider adjusting the baking time based on your oven's performance for best results.

Additionally, explore ingredient substitutions to cater to dietary preferences or allergies without compromising the flavor or texture of the cookies.

Advertisement

These pro tips can help you customize your peanut butter blossoms while ensuring delicious outcomes.

Baking Time Recommendations

Achieving the ideal texture for your peanut butter blossoms involves baking them at 375°F for 8-10 minutes. This baking duration guarantees that the cookies have a soft and chewy consistency while allowing the Hershey kisses on top to be softened but not completely melted.

Once out of the oven, remember to press the Hershey kisses onto the cookies immediately to secure them in place for that classic appearance.

For the best outcomes, chill the cookie dough for about 30 minutes before baking. This step helps the cookies maintain their shape and prevents excessive spreading during baking, ensuring your peanut butter blossom cookies are perfectly formed and ready to impress during your holiday baking.

Shortening or extending the baking time can alter the texture of the cookies. A quick bake of 6-8 minutes produces softer and chewier cookies, while longer baking times yield a slightly crispier consistency. Stick to the recommended 8-10 minutes for the best soft and chewy peanut butter blossoms.

Advertisement

Ingredient Substitutions

Consider incorporating different ingredients to elevate the flavor and nutritional profile of your peanut butter blossoms. For a healthier option, swap out shortening with unsalted butter to achieve a unique texture and taste in your cookies.

Try using natural peanut butter instead of creamy to add a wholesome twist to the classic recipe. If you're looking to reduce the glycemic impact, substitute brown sugar with coconut sugar in your baking. For a natural sweetener alternative, replace regular granulated sugar with maple syrup in the cookie dough mixture.

Additionally, for a distinct flavor experience, experiment with almond butter as a substitute for peanut butter in your blossoms. These ingredient substitutions can bring a new dimension to your peanut butter blossoms, making them not only delicious but also tailored to your dietary preferences.

Upgrade your baking game this holiday season with these creative twists on a beloved recipe!

Serving Suggestions for Peanut Butter Blossoms

peanut butter cookie recipe

Enhance the enjoyment of your peanut butter blossoms by pairing them with savory dishes like lasagna tortellini soup for a satisfying meal. These classic cookies also complement family-friendly dinners such as easy ground beef shepherd's pie and creamy broccoli cheddar soup, making for a delightful combination. The holiday season calls for cozy treats, and the sweet nuttiness of peanut butter blossoms pairs perfectly with a warm cup of hot cocoa. Whether you're participating in a cookie exchange or looking for a festive touch to your holiday dessert spread, consider rolling the cookies in red, green, and white sugar sprinkles to add a pop of color and fun.

Serving Suggestions Pairing Ideas
Lasagna Tortellini Soup Comforting and hearty meal alongside the cookies
Easy Ground Beef Shepherd's Pie Delicious combination for a family dinner
Creamy Broccoli Cheddar Soup Perfect accompaniment to the nutty cookie flavors

12 Days of Christmas Cookies Recipes

baking traditions for the holidays

Indulge in a variety of delightful Christmas cookie recipes each day during the holiday season. One standout choice is the classic Peanut Butter Blossoms. These holiday cookies feature a peanut butter base topped with a Hershey's kiss, making them a beloved treat for cookie exchanges and festive gatherings.

The process of making these cookies is simple yet rewarding. Start by rolling the dough balls in sugar before baking to add a sweet crunch to each bite. The combination of rich peanut butter flavor and the chocolatey goodness of the Hershey's kiss creates a perfect balance of sweetness.

Advertisement

When enjoying these Christmas cookies, consider pairing them with a glass of milk for a classic and satisfying treat.

Whether you're baking them for your family, a cookie exchange, or a holiday party, Peanut Butter Blossoms are sure to be a hit. Make each day of the holiday season a little sweeter with these delicious cookies.

User Engagement Features

user interaction enhancements

Let's talk about how user interaction features and personalization options enhance your experience with the Peanut Butter Blossoms recipe.

You can engage with others by leaving comments and sharing your results, creating a sense of community around this holiday treat.

Personalization options like name and email entry fields help tailor the experience to your preferences, making it more engaging and enjoyable.

User Interaction Features

Utilizing user engagement features on the website allows for increased participation and feedback from visitors. The comment section enables users to interact with each other and provide valuable feedback on the Peanut Butter Blossoms recipe or share their experiences with Hershey's kisses. By incorporating a reply option, users can engage in conversations, fostering a sense of community around baking these delightful peanut butter cookies.

Advertisement

Moreover, the inclusion of name and email fields not only allows for personalization but also facilitates communication between the website and its visitors. This data storage feature guarantees that users can conveniently access their information for future visits, enhancing their overall user experience.

These user engagement features play an essential role in creating an interactive platform where users can engage, provide feedback, and communicate effectively. Such interaction not only enriches the user experience but also encourages visitors to actively participate in the community surrounding the Peanut Butter Blossoms recipe.

Personalization Options

Enhance your website's user engagement by incorporating personalized options such as commenting, replying, and sharing feedback on the Peanut Butter Blossoms recipe. This level of user interaction not only fosters a sense of community building but also encourages customization and feedback. By allowing users to share their thoughts, results, and experiences with the festive favorites, you create a more engaging and interactive user experience. Additionally, providing users with the option to save their data for future visits and encouraging them to tag @preppykitchen and use #preppykitchen when trying the recipe further enhances their engagement.

Personalization Options Description Benefits
Commenting Users can leave comments on the Peanut Butter Blossoms recipe, sharing their thoughts and experiences. Fosters community building and user engagement.
Replying Users can reply to comments and engage in discussions with other users about the recipe. Encourages active participation and interaction.
Feedback Sharing Users can share feedback on the recipe, providing valuable insights for improvement. Enhances user experience and customization.

Additional Information

clarifying specific details provided

You may find it interesting to know more about the history of the Peanut Butter Blossoms recipe and its cultural significance during the holidays.

  • The Peanut Butter Blossoms recipe's popularity is backed by IRI MULO data, making it a sought-after choice for holiday baking.
  • Copyright for this beloved recipe belongs to The J.M. Smucker Company, a reputable name in the food industry known for quality products.
  • These delightful cookies aren't only perfect for serving at holiday parties but also make excellent gifts due to their festive appeal.

Frequently Asked Questions

Why Are My Peanut Butter Blossoms Dry?

If your peanut butter blossoms are dry, it could be due to using too much flour, overbaking, using natural peanut butter that requires stirring, or not enough butter/shortening. Guarantee precise measurements and follow the recipe closely to maintain moisture.

Why Did My Peanut Butter Blossoms Go Flat?

When making peanut butter blossoms, going flat happens due to overmixing, too much flour, insufficient chilling, or low oven temperature. Remember to avoid these pitfalls. Preheat the oven properly and follow the recipe for perfect blossoms!

What Is America's Favorite Christmas Cookie?

America's favorite Christmas cookie is Peanut Butter Blossoms. Loved for their peanut butter-chocolate combo and nostalgic Hershey's Kiss center, these easy-to-make treats are a holiday staple at parties and gatherings. They're a must-have during the festive season.

Advertisement

What Is Baskin Robbins Peanut Butter Blossom?

You asked about Baskin Robbins Peanut Butter Blossom. It's a delectable seasonal ice cream flavor featuring creamy peanut butter ice cream with a ribbon of more peanut butter and chocolate cookie pieces. Indulge in this festive treat!

Conclusion

Indulge in the warm, gooey goodness of these peanut butter blossoms this holiday season. With the perfect blend of creamy peanut butter and rich chocolate, these cookies are sure to bring joy to your festivities.

Picture yourself surrounded by loved ones, sharing laughter and memories as you enjoy these delicious treats. Let the aroma of freshly baked cookies fill your home and create a cozy, festive atmosphere.

Happy baking and happy holidays!

Advertisement
Continue Reading

Recipes & Culinary Uses

Bite-Sized Treats: Best Peanut Butter Ball Recipe You'll Love!

Adore these heavenly peanut butter balls with a delectable mix of smooth peanut butter, powdered sugar, and vanilla—perfect for indulging in bite-sized bliss!

Published

on

By

delicious peanut butter balls

You'll adore these easy and heavenly peanut butter balls. Mix smooth peanut butter, powdered sugar, and vanilla extract for a delectable dough. Roll into small balls and chill. Dip in melted chocolate, then refrigerate to set. Enhance the flavor with rum extract, nuts, or crushed pretzels. Get creative with colorful sprinkles and different chocolate coatings. Use quality chocolate coating and adjust mix consistency. Store them in the fridge or freezer. Enjoy these mouthwatering treats alone or at gatherings. More tips and delightful variations await!

Key Takeaways

  • Creamy peanut butter, powdered sugar, and vanilla create a smooth dough.
  • Incorporate nuts, rum extract, or pretzels for flavor and texture variety.
  • Use quality chocolate coating like candy melts for best results.
  • Chill peanut butter balls before dipping for easier handling.
  • Store in the fridge or freezer for convenient snacking and serving.

Ingredients and Preparation

To create irresistible peanut butter balls, gather creamy peanut butter, powdered sugar, and vanilla extract as your key ingredients.

Begin by mixing the peanut butter, butter, sugar, and vanilla until you have a smooth dough. Roll this mixture into small balls and chill them before dipping them in melted chocolate.

The type of chocolate you use, such as dark or milk chocolate, will enhance the flavor of your peanut butter balls. After dipping, make sure to refrigerate the balls until the chocolate sets for a perfect finish.

This process guarantees that each bite-sized treat isn't only visually appealing but also bursting with delicious peanut butter and chocolate flavors.

Variations and Enhancements

creative modifications and improvements

You can elevate the flavor of your peanut butter balls by incorporating unique ingredients like chopped nuts or rum extract.

Experiment with different chocolate coatings such as white almond bark or dark chocolate candy melts for a varied taste experience.

Advertisement

Get creative by adding finishing touches like colorful sprinkles to make your peanut butter balls visually appealing.

Flavorful Ingredient Additions

Enhance the flavor of your peanut butter balls by incorporating unique ingredient variations and enhancements. While the classic combination of peanut butter, powdered sugar, and butter creates a delicious dough for your treats, you can take it up a notch by adding flavorful ingredient additions.

Consider mixing in crushed pretzels for a salty crunch that complements the sweetness of the peanut butter. Chopped nuts like almonds or pecans can also add a delightful texture and nutty taste to your chocolate-covered peanut butter balls.

For a burst of fruity flavor, try incorporating dried cranberries or raisins into the dough. These additions not only provide a contrast in texture but also introduce a hint of sweetness that pairs well with the creamy peanut butter.

Another option is to include a sprinkle of cinnamon or a dash of vanilla extract to elevate the overall taste profile of your peanut butter balls. Experiment with these flavorful ingredient additions to create a unique and delectable twist on the classic treat.

Advertisement

Chocolate Coating Options

Experiment with different types of chocolate coatings – dark, white, or milk chocolate – to suit your preferences and elevate the flavor of your peanut butter balls.

When considering the chocolate coating for your crunchy peanut butter treats, here are some options to enhance your culinary creation:

  1. Choose Candy Melts or Almond Bark: Opt for candy melts or almond bark for a smooth and firm chocolate coating that sets well on your peanut butter balls.
  2. Avoid Chocolate Chips: Steer clear of using chocolate chips for coating, as they may contain stabilizers that hinder smooth melting, affecting the overall texture.
  3. Add Colored Sprinkles: For a festive touch, sprinkle colored sprinkles on top of the chocolate coating before it sets to add a pop of color and extra crunch to your peanut butter balls.

Experimenting with different chocolate coatings and techniques can take your peanut butter balls to the next level, ensuring a delightful and indulgent treat for any occasion.

Creative Finishing Touches

To elevate the flavor profile of your peanut butter balls, consider incorporating creative finishing touches through various enhancements and unique variations.

You can enhance the texture by adding chopped nuts or crispy rice cereal to the peanut butter mixture, providing a delightful crunch with every bite.

Experiment with different flavors by using almond extract or rum extract instead of vanilla for a twist on the traditional taste.

Advertisement

For a festive touch, roll the balls in crushed graham crackers, sprinkles, or a sprinkle of sea salt to add a pop of flavor.

Drizzle white chocolate over the dark, semi-sweet, or milk chocolate coating for a visually appealing contrast that will impress your guests.

If you enjoy a crunchy element, try coating the balls in crushed pretzels or toasted coconut before the chocolate sets.

These creative enhancements will take your peanut butter balls to the next level, making them a standout treat at any gathering.

Tools and Tips

crafting with precision

Consider using a 1 tablespoon cookie scoop for consistent sizing when preparing your peanut butter balls. This tool will help guarantee all your treats are uniform in size, making for a neat presentation and even cooking.

Here are some additional tools and tips to enhance your peanut butter ball-making experience:

Advertisement
  1. Invest in Quality Chocolate Coating: Opt for candy melts or almond bark for a smooth and firm chocolate coating on your peanut butter balls. These coatings melt easily and provide a professional finish to your treats.
  2. Adjust Peanut Butter Mixture Consistency: If your peanut butter mixture is too sticky or too dry, adjust the consistency by adding more peanut butter or powdered sugar. This will help you achieve the perfect texture for shaping your balls.
  3. Refrigerate Before Dipping: Prior to dipping your peanut butter balls in chocolate, chill them in the refrigerator. This step will make the balls firmer, making them easier to handle and coat without falling apart.

Storage and Serving Suggestions

great suggestion for storage

For best freshness and presentation of your peanut butter balls, follow these storage and serving suggestions.

To keep your peanut butter balls tasting delicious, store them properly. You can store them in an airtight container in the fridge for up to 1 week or in the freezer for up to 2 months. When freezing, remember to thaw the frozen peanut butter balls before serving by bringing them to room temperature. To prevent them from sticking together, separate the layers of peanut butter balls with wax paper.

Here is a helpful table summarizing the storage and serving suggestions:

Storage Serving Frozen
Airtight container Display on festive tray Thaw before serving
Fridge – 1 week Pair with hot cocoa Bring to room temp
Freezer – 2 months Enjoy at holiday gatherings
Separate with wax paper

Additional Peanut Butter Desserts

peanut butter dessert recipes

Explore a variety of delectable peanut butter desserts to satisfy your sweet cravings.

  1. Peanut Butter Blossom Cookies: Indulge in the classic combination of peanut butter cookies topped with a chocolate kiss for a delightful treat.
  2. Peanut Butter Chocolate Mug Cake: Whip up this easy-to-make single-serving dessert that combines the rich flavors of peanut butter and chocolate in a mug for a quick fix.
  3. Peanut Butter Overload Cookies: For those who can't get enough peanut butter, these cookies are loaded with peanut butter chips, chocolate chips, and chopped peanuts for an explosion of flavor in every bite.

These additional peanut butter desserts offer a diverse selection to cater to your cravings.

Whether you're in the mood for a classic treat like Peanut Butter Blossom Cookies, a quick fix with Peanut Butter Chocolate Mug Cake, or a flavor-packed experience with Peanut Butter Overload Cookies, there's something for every peanut butter lover.

Enjoy these easy-to-make delights whenever you need a sweet pick-me-up!

Recipe Instructions and Nutritional Information

cooking guidance and facts

To create these delectable Peanut Butter Balls, start by blending peanut butter, butter, sugar, and vanilla to form a dough. Roll the mixture into small balls and place them on a baking sheet lined with parchment paper. Chill the peanut butter balls in the refrigerator for about 30 minutes until firm.

Once chilled, melt chocolate in a heatproof bowl over simmering water or in the microwave. Dip each chilled peanut butter ball into the melted chocolate, ensuring they're evenly coated. Place the coated balls back on the parchment paper and let the chocolate set.

Advertisement

Each serving of these delightful treats contains approximately 114 calories.

Store the finished peanut butter balls in the fridge for up to 2 weeks or freeze them for up to 3 months.

Enjoy these decadent bite-sized snacks whenever you crave a sweet and nutty indulgence.

Frequently Asked Questions

Can I Use Chunky Peanut Butter Instead of Creamy for This Recipe?

Yes, you can use chunky peanut butter instead of creamy for this recipe. It will add a delightful texture and extra crunch to your peanut butter balls. Enjoy experimenting with different variations!

How Long Do Chocolate Covered Peanut Butter Balls Stay Fresh?

Like a sweet memory, chocolate-covered peanut butter balls stay fresh for up to two weeks when stored in an airtight container in the fridge. Indulge in these delectable treats within that time frame for best taste.

Advertisement

Can I Freeze the Peanut Butter Balls for Later Enjoyment?

Yes, you can freeze the peanut butter balls for later enjoyment. Simply place them in an airtight container or freezer bag. When ready to indulge, let them thaw in the fridge for a few hours.

What Type of Chocolate Is Best for Coating the Peanut Butter Balls?

For coating the peanut butter balls, semi-sweet or milk chocolate works best. They provide a delicious contrast to the creamy peanut butter filling. Simply melt the chocolate, dip the balls, and enjoy the sweet treat!

Can I Add Chopped Nuts or Sprinkles to the Peanut Butter Balls for Extra Flavor?

You can definitely add chopped nuts or sprinkles to the peanut butter balls for extra flavor. It's a great way to customize your treats and add a delightful crunch or colorful touch to each bite.

Conclusion

Indulge in these irresistible peanut butter balls that are sure to satisfy your sweet tooth cravings.

With just a few simple ingredients and easy-to-follow instructions, you can enjoy these bite-sized treats in no time.

Advertisement

So go ahead, treat yourself to a little taste of heaven and experience the perfect combination of creamy peanut butter and rich chocolate.

You won't be able to resist coming back for more!

Continue Reading

Trending