Connect with us

Recipes & Culinary Uses

How to Make Delicious Butter Pecan Syrup in 5 Easy Steps

Published

on

An image showcasing a golden-brown syrup cascading slowly over a stack of fluffy pancakes

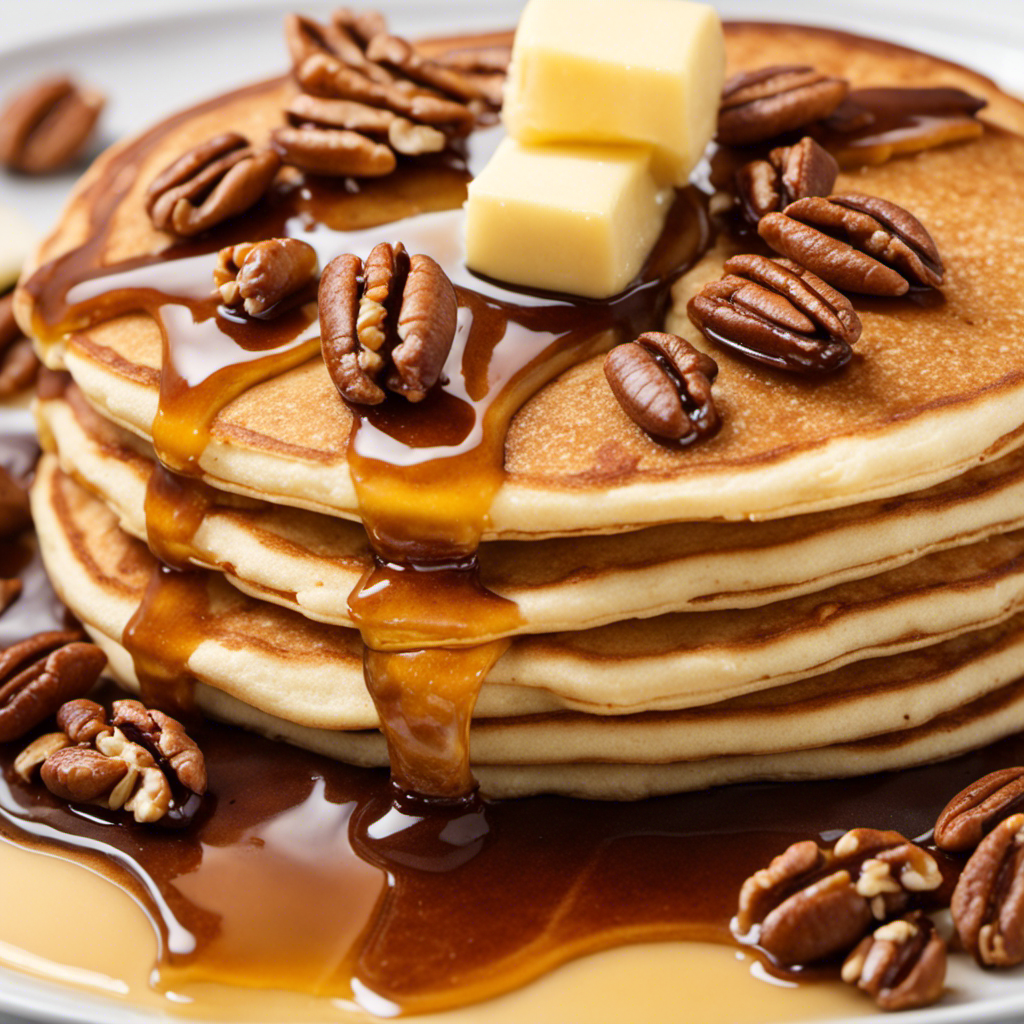
I adore breakfast. It is the most crucial meal of the day, and there is nothing quite like beginning with a pile of light and fluffy pancakes topped with a generous drizzle of warm, buttery syrup.

But why settle for ordinary when you can have extraordinary? Introducing my secret recipe for homemade Butter Pecan Syrup. It’s a delectable blend of rich, nutty flavors that will take your breakfast to the next level.

Get ready to tantalize your taste buds and impress your brunch guests with this irresistible syrup.

Key Takeaways

  • Toasting pecans in the oven enhances their flavor and adds crunch to the syrup.
  • Infusion time and temperature are crucial for extracting flavors and achieving a smooth and flavorful infusion.
  • High-quality butter greatly influences the richness and creaminess of the syrup.
  • Proper storage is crucial for preserving the flavor and quality of the butter pecan syrup.

Gathering the Ingredients

Before you begin making the butter pecan syrup, make sure you’ve gathered all of the necessary ingredients.

Advertisement

Firstly, you’ll need to prepare the pecans. Start by roasting them in the oven for a few minutes until they become fragrant and slightly golden. Let them cool completely before chopping them into small pieces. This will give the syrup a delightful crunch and enhance the overall flavor.

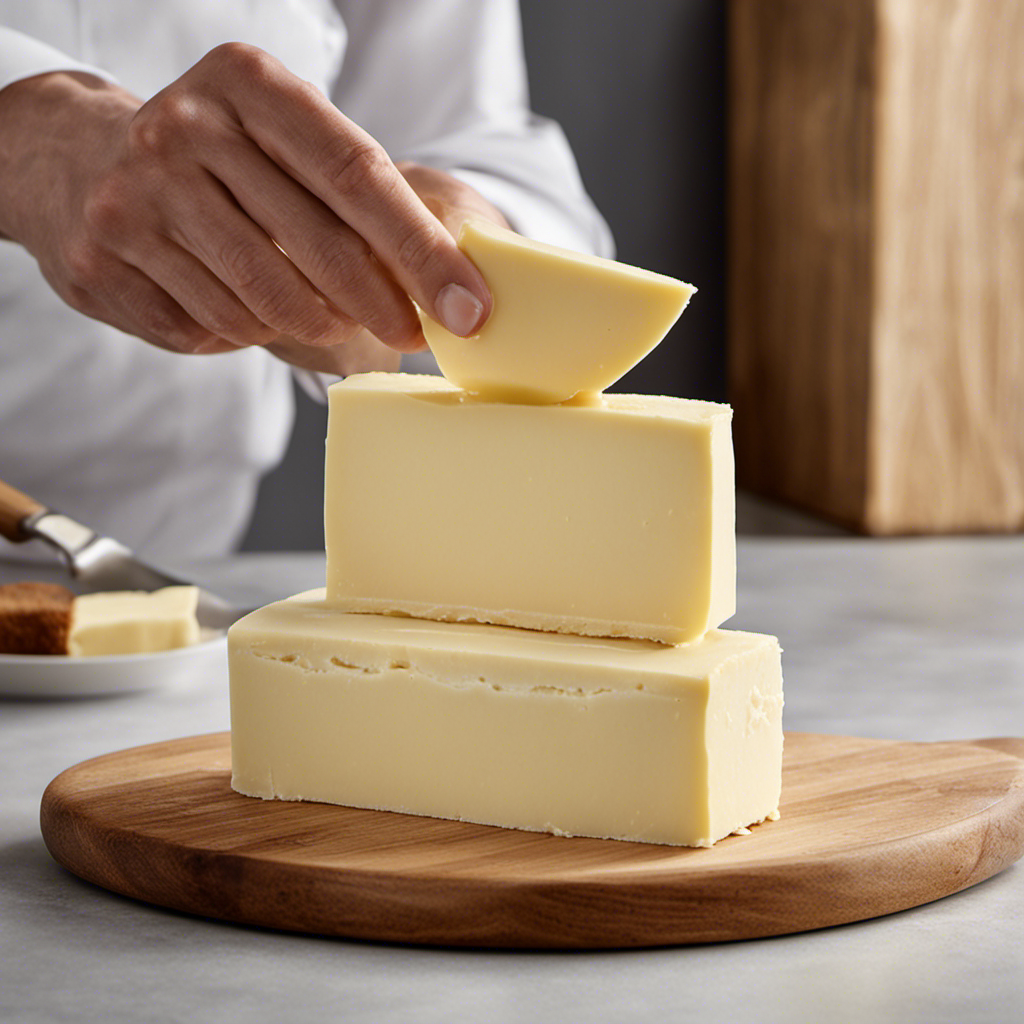
Moving on to the butter, it’s crucial to choose the right one. Opt for unsalted butter as it allows you to control the saltiness of the syrup. Make sure the butter is at room temperature for easy mixing. Remember, the quality of the butter will greatly influence the richness and creaminess of your syrup. So, choose wisely!

Toasting the Pecans

As you toast the pecans, be sure to keep a close eye on them so they don’t burn. The process of toasting nuts is crucial in achieving that rich, nutty flavor infusion that will make your butter pecan syrup truly irresistible. The aroma that fills the kitchen as the nuts slowly turn golden brown is simply divine.

The crackling sound of the pecans as they heat up in the pan creates a sense of anticipation. The sight of the nuts transforming from pale to a deep, toasty brown is visually appealing. The warm, earthy scent that wafts through the air evokes a feeling of comfort and warmth.

Toasting the pecans not only enhances their flavor but also adds a delightful crunch to your syrup. So take your time, savor the process, and let the toasted nuts work their magic in your butter pecan syrup.

Advertisement

Making the Butter Infusion

When it comes to making the perfect butter infusion, there are a few key factors to consider.

First, the infusion time and temperature play a crucial role in extracting the rich flavors from the butter. Getting the timing and temperature just right can make all the difference in achieving a smooth and flavorful infusion.

Second, the quality of the butter you use is essential. Opting for a high-quality butter will result in a richer and more flavorful infusion.

Advertisement

Lastly, the quantity of butter used also matters. Finding the right balance between too much and too little butter will ensure that the infusion is not overpowering or lacking in flavor.

Infusion Time and Temperature

To properly infuse the butter pecan flavor into the syrup, you’ll want to let it steep for at least 30 minutes at a low temperature. This is crucial for achieving that rich, nutty taste that we all love. The key to successful infusion lies in temperature control. I recommend using a stove on the lowest heat setting or a slow cooker set to low. This gentle heat allows the butter and pecans to slowly release their flavors into the syrup, without burning or overpowering the mixture.

Now, let me share with you three important things to consider during the infusion process:

  • Patience: Infusing syrup takes time, so be patient and let the flavors meld together gradually.
  • Aroma: As the syrup simmers, a delightful aroma will fill your kitchen, creating a warm and inviting atmosphere.
  • Customization: Don’t be afraid to experiment with different flavor variations. Add a touch of cinnamon or a splash of vanilla extract to enhance the butter pecan profile.

Butter Quality and Quantity

For the best results, remember that using high-quality butter and the right amount will greatly impact the overall taste and texture of your homemade concoction. The flavor of butter is crucial in creating a delicious butter pecan syrup. Opt for unsalted butter, as it allows you to control the saltiness of the syrup. Look for butter with a rich and creamy taste, as it will enhance the sweetness of the pecans. When melting the butter, be careful not to let it burn, as it can affect the flavor and create a bitter taste. Use a low heat setting and stir constantly until the butter is melted and golden brown. Remember, the quality of butter and the skillful melting process can elevate your butter pecan syrup to new heights of flavor.

Butter Quality Butter Quantity
High-quality Right Amount
Rich and creamy Control the saltiness
Melts evenly Golden brown and not burnt
Enhances sweetness Delicious butter flavor
No bitter taste Perfect texture

Preparing the Simple Syrup

When it comes to preparing the simple syrup for your butter pecan creation, there are a few key points you’ll want to keep in mind.

First, let’s talk about the ingredients you’ll need. You’ll typically find that simple syrup is made from just two ingredients: sugar and water.

Advertisement

The cooking time required can vary depending on the desired consistency, but a general rule of thumb is to simmer the mixture for about 10-15 minutes until the sugar has completely dissolved.

Once your syrup is ready, it’s important to store it properly to maintain its freshness. I recommend transferring it to a clean glass jar or bottle and keeping it in the refrigerator.

This will help extend its shelf life and ensure that you can enjoy your delicious butter pecan syrup for as long as possible.

Ingredients for Syrup

The ingredients you’ll need for the syrup are butter, pecans, brown sugar, heavy cream, and vanilla extract. Gathering these ingredients is the first step in creating a delectable butter pecan syrup that will elevate any dish.

As you gather the ingredients, you can already imagine the rich aroma of toasted pecans wafting through your kitchen. The anticipation builds, knowing that these simple ingredients will come together to create a creamy and nutty syrup that will tantalize your taste buds.

Advertisement

There’s something magical about toasting pecans, as the heat brings out their natural oils and intensifies their flavor. The crackling sound and the warm, nutty scent fill the air, creating a sense of warmth and comfort.

It’s a small act that adds depth and complexity to your syrup, making it truly irresistible.

Cooking Time Required

Once you’ve gathered all the ingredients, you’ll need to cook the syrup for a specific amount of time to achieve the perfect consistency and flavor. Cooking time is crucial in making butter pecan syrup, as it allows the flavors to meld together and creates a rich, velvety texture. The infusion techniques used during this process enhance the taste and aroma of the syrup, elevating it to a whole new level. To give you an idea of the cooking time required, refer to the table below:

Cooking Time Consistency Flavor
10 minutes Thin Mild
20 minutes Medium Rich
30 minutes Thick Intense

Storage Recommendations for Syrup?

To maintain optimal quality, it’s important to store the syrup in an airtight container in the refrigerator. This will help prolong its shelf life and preserve its delicious flavor.

Here are some key tips for storing butter pecan syrup:

Advertisement
  • Keep it sealed: Make sure the container is tightly sealed to prevent air from entering and causing the syrup to spoil.

  • Store it upright: Storing the syrup upright helps prevent any leakage or spills that may occur if it’s stored on its side.

  • Keep it cool: The refrigerator is the best storage option for butter pecan syrup. The cool temperature helps maintain its freshness and prevents bacterial growth.

By following these storage recommendations, you can enjoy your butter pecan syrup for longer periods of time without compromising its quality.

Combining the Ingredients

After blending the butter and pecans, you’ll want to add the remaining ingredients to the mixture. This is where the magic really happens in creating that delicious butter pecan syrup.

There are a few cooking techniques you can use to bring out the best flavors in your syrup. One option is to gently simmer the mixture on low heat, allowing the flavors to meld together slowly. Another technique is to bring the mixture to a rolling boil, which will give the syrup a thicker consistency.

As for flavor variations, you can get creative and add a hint of vanilla extract for a sweet and aromatic twist. If you prefer a little kick, a dash of cinnamon or nutmeg can add a warm and spicy note. The possibilities are endless when it comes to customizing your butter pecan syrup to suit your taste buds.

Cooking the Syrup

While gently simmering or boiling the mixture, you can add flavor variations such as vanilla extract, cinnamon, or nutmeg to customize your delicious syrup.

Advertisement

The cooking techniques used in making butter pecan syrup are all about infusing the flavors together, creating a rich and aromatic blend.

As the syrup simmers, the fragrant scents of vanilla and cinnamon fill the air, creating a warm and inviting atmosphere.

The sweetness of the syrup melds with the subtle spiciness of the cinnamon, resulting in a tantalizing combination of flavors that will leave your taste buds begging for more.

The addition of nutmeg adds a hint of warmth and depth, elevating the syrup to a whole new level of deliciousness.

Once the cooking process is complete, it’s time to move on to the next step: straining and bottling the syrup.

Advertisement

Straining and Bottling the Syrup

Once the syrup has finished cooking, it’s time to strain and bottle it for future use.

The first step is to ensure that the bottles are properly sterilized to prevent any contamination. I like to use hot, soapy water to clean the bottles thoroughly, followed by a rinse with boiling water. This ensures that the syrup stays fresh and safe to consume for a longer period.

Once the bottles are sterilized, it’s time to strain the syrup to remove any impurities or chunks. I usually use a fine mesh strainer to achieve a smooth and consistent syrup. The syrup should have a thick yet pourable consistency, similar to honey.

Once strained, carefully pour the syrup into the sterilized bottles, leaving a little bit of space at the top. Seal the bottles tightly, and store them in a cool, dark place for future use.

Storing and Shelf Life

To ensure the syrup stays fresh and safe to consume for a longer period, it’s important to store the bottles in a cool, dark place. Proper storage is crucial for preserving the rich flavor and quality of butter pecan syrup.

Advertisement

Here are some storage options to keep your syrup fresh and delicious:

  • Refrigerator: Keep the syrup in the refrigerator to maintain its freshness and prevent spoilage. The cool temperature helps to preserve the flavor and consistency.

  • Pantry: If refrigeration is not possible, storing the syrup in a dark pantry is another option. Make sure the area is cool and away from direct sunlight to prevent heat damage.

  • Sealed Containers: Transfer the syrup into airtight containers to prevent air exposure and maintain its freshness. This will also prevent any unwanted odors or flavors from seeping in.

Serving and Enjoying the Syrup

When serving and enjoying the syrup, it’s important to consider portion sizes to avoid excessive sweetness.

Butter pecan syrup is a delightful treat that can add a burst of flavor to your pancakes, waffles, or ice cream.

To enhance your dining experience, here are some serving suggestions and flavor variations to try.

For a classic combination, drizzle the syrup over a stack of warm pancakes and top it off with a dollop of whipped cream and a sprinkle of chopped pecans.

Advertisement

If you’re feeling adventurous, mix the syrup with some cream cheese and spread it on a toasted bagel for a unique and delicious breakfast.

For flavor variations, you can add a dash of cinnamon or a hint of vanilla to the syrup to elevate the taste.

Frequently Asked Questions

Can I Use a Different Type of Nut Instead of Pecans for This Syrup?

Sure, you can use different nuts for the butter pecan syrup. There are plenty of alternatives to pecans, like walnuts or almonds, that would give a delicious flavor to your syrup. Experiment and find your favorite!

Can I Use Margarine Instead of Butter for the Butter Infusion?

Margarine vs. butter: which is better for baking? While margarine can be used as a substitute for butter, it may alter the flavor and texture. When infusing flavors into butter-based syrups, using real butter is recommended for a rich and authentic taste.

Can I Substitute the Sugar in the Simple Syrup With a Sugar Substitute?

Can I substitute the sugar in the simple syrup with a sugar substitute? While sugar substitutes offer benefits like lower calorie content, it’s crucial to consider the impact on taste and texture. Experimentation may be needed to achieve desired results.

Advertisement

How Long Can I Store the Syrup in the Refrigerator?

I store my homemade syrup in the refrigerator for up to two weeks. It’s important to use a clean, airtight container to extend the shelf life. Remember to give it a good shake before using!

Can I Use This Syrup as a Topping for Other Desserts Besides Ice Cream?

Yes, this syrup can be used as a topping for various desserts besides ice cream. It adds a delicious butter pecan flavor that can elevate the taste of cakes, pancakes, waffles, and more. Get creative with different flavors and enjoy!

Conclusion

And there you have it, a homemade butter pecan syrup that will take your breakfasts to the next level.

The combination of rich butter, toasted pecans, and sweet simple syrup creates a flavor explosion that will leave you wanting more.

As the saying goes, ‘good things come to those who wait,’ and the time and effort put into making this syrup will be well worth it when you taste the delicious results.

Advertisement

So go ahead, indulge in a little culinary adventure and treat yourself to the delectable goodness of butter pecan syrup.

Your pancakes and waffles will thank you!

Continue Reading
Advertisement

Recipes & Culinary Uses

Creamy Delight: Best Butter Pecan Ice Cream Recipe for Summer!

Yearning for a creamy summer treat that will leave you craving more?

Published

on

By

butter pecan ice cream

Savor a delicious summer treat with our Butter Pecan Ice Cream recipe. Mix butter, brown sugar, cream, and pecans for a creamy delight. Melt butter, cook pecans, whisk eggs, and blend for a rich flavor. Add pecans, cream, and vanilla, then freeze to perfection. Master this easy-to-follow recipe for a tasty dessert to beat the heat.

Key Takeaways

  • Rich and creamy blend of butter, brown sugar, and heavy cream
  • Toasted pecans for a nutty crunch and flavor
  • Easy-to-follow steps for homemade ice cream perfection
  • Customization options with variations like bourbon or chocolate
  • Perfect summer treat with a decadent, refreshing taste

Recipe Ingredients for Butter Pecan Ice Cream

To create a delectable batch of butter pecan ice cream, gather the essential ingredients listed in the recipe.

You'll need:

  • Butter
  • Brown sugar
  • Heavy cream
  • Pecans

These ingredients combine to bring out the rich and nutty flavors of this classic dessert.

The brown sugar adds a caramel-like sweetness, while the heavy cream contributes to a creamy texture that's essential for a decadent treat.

Pecans, when toasted in butter, provide a delightful crunch and enhance the overall flavor profile of the ice cream.

Cooking Instructions for Homemade Ice Cream

making ice cream at home

Start by melting butter in a skillet to infuse the pecans with a rich, nutty flavor for your homemade butter pecan ice cream.

Here's a quick guide to help you make this creamy delight:

Advertisement
  • Melt butter and cook pecans for flavor.
  • Whisk eggs and combine with half-and-half and brown sugar for a creamy base.
  • Cook until thickened, then mix with eggs in a bowl.
  • Add cream, pecans, and vanilla extract.
  • Freeze the mixture in an ice cream maker.

Following these steps will guarantee your homemade butter pecan ice cream turns out rich and delicious.

Remember to carefully adhere to the manufacturer's instructions for your ice cream maker to achieve the perfect consistency.

Enjoy the process of creating this delightful treat that will surely be a hit during the summer months.

Ice Cream Preparation Steps

ice cream recipe instructions

Mix half and half with brown sugar over medium heat in a large bowl to prepare the ice cream base.

Next, whisk beaten eggs and temper them with the warm milk mixture to create a smooth custard.

Once done, thicken the mixture on low heat, then cool it over an ice bath to achieve ideal texture.

After that, stir in heavy cream, vanilla extract, maple extract, and a pinch of salt for rich flavor.

Advertisement

Remember to refrigerate the mixture for 1 1/2 – 2 hours before churning it into creamy butter pecan ice cream.

This process ensures that the flavors meld together beautifully and the ice cream attains the perfect consistency for scooping and savoring.

Nutritional Information and Tips

healthy eating guidance provided

Considering the rich and creamy nature of homemade butter pecan ice cream, it's important to be mindful of its nutritional content and serving size. When indulging in this delectable dessert, remember these essential tips:

  • Portion Control: Enjoy in moderation to savor the flavors without overindulging.
  • Brown Sugar Sweetness: Opt for a moderate amount of brown sugar to balance sweetness without overwhelming the palate.
  • Room Temperature Ingredients: Confirm ingredients like butter and heavy cream are at room temperature for a smoother texture.
  • Nutritional Awareness: Be mindful that homemade butter pecan ice cream can vary in nutritional content, so adjust ingredients accordingly.
  • Consultation: Seek advice from a nutritionist or healthcare provider for personalized guidance on incorporating this treat into a balanced diet.

Homemade Butter Pecan Ice Cream Variations

delicious homemade ice cream

Explore creative twists on traditional butter pecan ice cream by incorporating different nuts, spirits, sauces, chocolates, and dairy-free alternatives.

For a unique flavor, try substituting pecans with walnuts or almonds in the full recipe. Toast the nuts in a separate bowl until browned and fragrant, then chop them finely enough to coat in the ice cream mixture.

To add a boozy kick, mix in a splash of bourbon or rum to the base as you churn the ice cream. For an extra indulgent touch, swirl in caramel sauce or fudge ripple throughout the mixture.

Incorporate chunks of chocolate or chocolate-covered nuts for a delightful contrast in texture, giving each bite a sweet surprise.

Advertisement

If you prefer a lighter, dairy-free option, consider using coconut milk or almond milk as a substitute for traditional dairy products. These alternatives provide a creamy base while catering to plant-based diets.

Experiment with these variations to create a personalized butter pecan ice cream that suits your taste preferences.

Frequently Asked Questions

What Is the Secret to Making Ice Cream Very Creamy?

To make ice cream very creamy, you use a rich base of ingredients like heavy cream, eggs, and sugar. Chilling the base before churning is crucial for a smoother texture. Adding vanilla extract enhances creaminess, and slow churning prevents a dense outcome.

What Flavor Is the Ice Cream in Butter Pecan?

The ice cream in butter pecan is a delightful blend of buttery richness, vanilla sweetness, and maple undertones, perfectly paired with toasted pecans for a nutty crunch. This flavor combination creates a harmonious and indulgent treat.

What's the Difference Between Butter Pecan Ice Cream and Praline Pecan Ice Cream?

In butter pecan ice cream, you'll savor the buttery richness of pecans blended with a creamy base. On the other hand, praline pecan ice cream highlights caramelized sweetness with a swirl of praline sauce for a delightful flavor contrast.

Advertisement

What Age Group Eats Butter Pecan Ice Cream?

You'll find that adults and older individuals, typically in the 30-60 age group, enjoy butter pecan ice cream. It's a favorite among those with a more refined palate, drawn to its rich and nutty flavor.

Conclusion

So there you have it, folks! Whip up this buttery, nutty delight for a taste of summer in every scoop.

Don't cry over spilled milk – grab a cone and enjoy this creamy treat that's sure to satisfy your sweet tooth.

Get churning and indulge in the best butter pecan ice cream you've ever tasted!

Advertisement
Continue Reading

Recipes & Culinary Uses

Festive Favorites: Best Peanut Butter Blossoms Recipe for Holidays!

Unleash the ultimate holiday baking magic with the best Peanut Butter Blossoms recipe – an irresistible treat that will elevate your festive celebrations!

Published

on

By

holiday baking with flair

Elevate your holiday baking with the ultimate Peanut Butter Blossoms recipe. Cream together peanut butter, butter, sugars, and salt, then add egg and vanilla. Roll dough into balls, coat in brown sugar, bake until golden, then press a Hershey's kiss on top. Adjust baking time as needed. Explore ingredient swaps for a personalized touch. Enjoy with hot cocoa or pair with savory dishes. For more tips, ideas, and customization options, the recipe holds more festive surprises.

Key Takeaways

  • Cream together peanut butter, butter, sugars for rich flavor.
  • Bake at 375°F for 8-10 minutes for soft, chewy cookies.
  • Customize with ingredient swaps like almond butter or maple syrup.
  • Pair with savory dishes or hot cocoa for holiday enjoyment.
  • Press Hershey kisses onto warm cookies for a classic finish.

Ingredients for Peanut Butter Blossoms

For the classic Peanut Butter Blossoms recipe, gather peanut butter, butter, sugar, an egg, and Hershey's kisses as your essential ingredients.

Peanut butter is the star, offering a rich flavor that blends perfectly with the sweetness of the cookies.

Butter plays a pivotal role by adding moisture and richness to the dough, ensuring a soft and chewy texture.

The sugar not only sweetens the cookies but also contributes to their festive appeal, making them a perfect treat for any occasion.

Finally, the Hershey's kisses on top provide a delightful chocolatey finish that elevates these cookies to a whole new level of deliciousness.

Advertisement

Together, these ingredients create a harmonious blend of flavors and textures that make Peanut Butter Blossoms a beloved classic for holiday baking or any time you crave a sweet and satisfying treat.

Recipe Steps for Peanut Butter Blossoms

bake peanut butter cookies

To make Peanut Butter Blossoms, start by creaming together peanut butter, butter, sugars, and salt until light and fluffy.

Next, add in the egg and vanilla extract, making sure to mix well to combine all the ingredients thoroughly.

Then, gradually incorporate the dry ingredients into the wet mixture until a smooth dough forms.

Once the dough is ready, roll it into balls and coat each ball generously in brown sugar.

Place the sugar-coated dough balls on a baking sheet, making sure to leave enough space between them for spreading during baking.

Advertisement

Bake the cookies in a preheated oven until they turn a beautiful golden brown.

As soon as the cookies are out of the oven, press a Hershey's kiss into the center of each cookie gently.

The heat from the freshly baked cookies will melt the chocolate just enough to adhere it to the cookie.

These Peanut Butter Blossoms are a delightful treat perfect for Christmas celebrations!

Pro Tips for Making Peanut Butter Blossoms

baking perfect peanut blossoms

To enhance your peanut butter blossom baking experience, consider adjusting the baking time based on your oven's performance for best results.

Additionally, explore ingredient substitutions to cater to dietary preferences or allergies without compromising the flavor or texture of the cookies.

Advertisement

These pro tips can help you customize your peanut butter blossoms while ensuring delicious outcomes.

Baking Time Recommendations

Achieving the ideal texture for your peanut butter blossoms involves baking them at 375°F for 8-10 minutes. This baking duration guarantees that the cookies have a soft and chewy consistency while allowing the Hershey kisses on top to be softened but not completely melted.

Once out of the oven, remember to press the Hershey kisses onto the cookies immediately to secure them in place for that classic appearance.

For the best outcomes, chill the cookie dough for about 30 minutes before baking. This step helps the cookies maintain their shape and prevents excessive spreading during baking, ensuring your peanut butter blossom cookies are perfectly formed and ready to impress during your holiday baking.

Shortening or extending the baking time can alter the texture of the cookies. A quick bake of 6-8 minutes produces softer and chewier cookies, while longer baking times yield a slightly crispier consistency. Stick to the recommended 8-10 minutes for the best soft and chewy peanut butter blossoms.

Advertisement

Ingredient Substitutions

Consider incorporating different ingredients to elevate the flavor and nutritional profile of your peanut butter blossoms. For a healthier option, swap out shortening with unsalted butter to achieve a unique texture and taste in your cookies.

Try using natural peanut butter instead of creamy to add a wholesome twist to the classic recipe. If you're looking to reduce the glycemic impact, substitute brown sugar with coconut sugar in your baking. For a natural sweetener alternative, replace regular granulated sugar with maple syrup in the cookie dough mixture.

Additionally, for a distinct flavor experience, experiment with almond butter as a substitute for peanut butter in your blossoms. These ingredient substitutions can bring a new dimension to your peanut butter blossoms, making them not only delicious but also tailored to your dietary preferences.

Upgrade your baking game this holiday season with these creative twists on a beloved recipe!

Serving Suggestions for Peanut Butter Blossoms

peanut butter cookie recipe

Enhance the enjoyment of your peanut butter blossoms by pairing them with savory dishes like lasagna tortellini soup for a satisfying meal. These classic cookies also complement family-friendly dinners such as easy ground beef shepherd's pie and creamy broccoli cheddar soup, making for a delightful combination. The holiday season calls for cozy treats, and the sweet nuttiness of peanut butter blossoms pairs perfectly with a warm cup of hot cocoa. Whether you're participating in a cookie exchange or looking for a festive touch to your holiday dessert spread, consider rolling the cookies in red, green, and white sugar sprinkles to add a pop of color and fun.

Serving Suggestions Pairing Ideas
Lasagna Tortellini Soup Comforting and hearty meal alongside the cookies
Easy Ground Beef Shepherd's Pie Delicious combination for a family dinner
Creamy Broccoli Cheddar Soup Perfect accompaniment to the nutty cookie flavors

12 Days of Christmas Cookies Recipes

baking traditions for the holidays

Indulge in a variety of delightful Christmas cookie recipes each day during the holiday season. One standout choice is the classic Peanut Butter Blossoms. These holiday cookies feature a peanut butter base topped with a Hershey's kiss, making them a beloved treat for cookie exchanges and festive gatherings.

The process of making these cookies is simple yet rewarding. Start by rolling the dough balls in sugar before baking to add a sweet crunch to each bite. The combination of rich peanut butter flavor and the chocolatey goodness of the Hershey's kiss creates a perfect balance of sweetness.

Advertisement

When enjoying these Christmas cookies, consider pairing them with a glass of milk for a classic and satisfying treat.

Whether you're baking them for your family, a cookie exchange, or a holiday party, Peanut Butter Blossoms are sure to be a hit. Make each day of the holiday season a little sweeter with these delicious cookies.

User Engagement Features

user interaction enhancements

Let's talk about how user interaction features and personalization options enhance your experience with the Peanut Butter Blossoms recipe.

You can engage with others by leaving comments and sharing your results, creating a sense of community around this holiday treat.

Personalization options like name and email entry fields help tailor the experience to your preferences, making it more engaging and enjoyable.

User Interaction Features

Utilizing user engagement features on the website allows for increased participation and feedback from visitors. The comment section enables users to interact with each other and provide valuable feedback on the Peanut Butter Blossoms recipe or share their experiences with Hershey's kisses. By incorporating a reply option, users can engage in conversations, fostering a sense of community around baking these delightful peanut butter cookies.

Advertisement

Moreover, the inclusion of name and email fields not only allows for personalization but also facilitates communication between the website and its visitors. This data storage feature guarantees that users can conveniently access their information for future visits, enhancing their overall user experience.

These user engagement features play an essential role in creating an interactive platform where users can engage, provide feedback, and communicate effectively. Such interaction not only enriches the user experience but also encourages visitors to actively participate in the community surrounding the Peanut Butter Blossoms recipe.

Personalization Options

Enhance your website's user engagement by incorporating personalized options such as commenting, replying, and sharing feedback on the Peanut Butter Blossoms recipe. This level of user interaction not only fosters a sense of community building but also encourages customization and feedback. By allowing users to share their thoughts, results, and experiences with the festive favorites, you create a more engaging and interactive user experience. Additionally, providing users with the option to save their data for future visits and encouraging them to tag @preppykitchen and use #preppykitchen when trying the recipe further enhances their engagement.

Personalization Options Description Benefits
Commenting Users can leave comments on the Peanut Butter Blossoms recipe, sharing their thoughts and experiences. Fosters community building and user engagement.
Replying Users can reply to comments and engage in discussions with other users about the recipe. Encourages active participation and interaction.
Feedback Sharing Users can share feedback on the recipe, providing valuable insights for improvement. Enhances user experience and customization.

Additional Information

clarifying specific details provided

You may find it interesting to know more about the history of the Peanut Butter Blossoms recipe and its cultural significance during the holidays.

  • The Peanut Butter Blossoms recipe's popularity is backed by IRI MULO data, making it a sought-after choice for holiday baking.
  • Copyright for this beloved recipe belongs to The J.M. Smucker Company, a reputable name in the food industry known for quality products.
  • These delightful cookies aren't only perfect for serving at holiday parties but also make excellent gifts due to their festive appeal.

Frequently Asked Questions

Why Are My Peanut Butter Blossoms Dry?

If your peanut butter blossoms are dry, it could be due to using too much flour, overbaking, using natural peanut butter that requires stirring, or not enough butter/shortening. Guarantee precise measurements and follow the recipe closely to maintain moisture.

Why Did My Peanut Butter Blossoms Go Flat?

When making peanut butter blossoms, going flat happens due to overmixing, too much flour, insufficient chilling, or low oven temperature. Remember to avoid these pitfalls. Preheat the oven properly and follow the recipe for perfect blossoms!

What Is America's Favorite Christmas Cookie?

America's favorite Christmas cookie is Peanut Butter Blossoms. Loved for their peanut butter-chocolate combo and nostalgic Hershey's Kiss center, these easy-to-make treats are a holiday staple at parties and gatherings. They're a must-have during the festive season.

Advertisement

What Is Baskin Robbins Peanut Butter Blossom?

You asked about Baskin Robbins Peanut Butter Blossom. It's a delectable seasonal ice cream flavor featuring creamy peanut butter ice cream with a ribbon of more peanut butter and chocolate cookie pieces. Indulge in this festive treat!

Conclusion

Indulge in the warm, gooey goodness of these peanut butter blossoms this holiday season. With the perfect blend of creamy peanut butter and rich chocolate, these cookies are sure to bring joy to your festivities.

Picture yourself surrounded by loved ones, sharing laughter and memories as you enjoy these delicious treats. Let the aroma of freshly baked cookies fill your home and create a cozy, festive atmosphere.

Happy baking and happy holidays!

Advertisement
Continue Reading

Recipes & Culinary Uses

Bite-Sized Treats: Best Peanut Butter Ball Recipe You'll Love!

Adore these heavenly peanut butter balls with a delectable mix of smooth peanut butter, powdered sugar, and vanilla—perfect for indulging in bite-sized bliss!

Published

on

By

delicious peanut butter balls

You'll adore these easy and heavenly peanut butter balls. Mix smooth peanut butter, powdered sugar, and vanilla extract for a delectable dough. Roll into small balls and chill. Dip in melted chocolate, then refrigerate to set. Enhance the flavor with rum extract, nuts, or crushed pretzels. Get creative with colorful sprinkles and different chocolate coatings. Use quality chocolate coating and adjust mix consistency. Store them in the fridge or freezer. Enjoy these mouthwatering treats alone or at gatherings. More tips and delightful variations await!

Key Takeaways

  • Creamy peanut butter, powdered sugar, and vanilla create a smooth dough.
  • Incorporate nuts, rum extract, or pretzels for flavor and texture variety.
  • Use quality chocolate coating like candy melts for best results.
  • Chill peanut butter balls before dipping for easier handling.
  • Store in the fridge or freezer for convenient snacking and serving.

Ingredients and Preparation

To create irresistible peanut butter balls, gather creamy peanut butter, powdered sugar, and vanilla extract as your key ingredients.

Begin by mixing the peanut butter, butter, sugar, and vanilla until you have a smooth dough. Roll this mixture into small balls and chill them before dipping them in melted chocolate.

The type of chocolate you use, such as dark or milk chocolate, will enhance the flavor of your peanut butter balls. After dipping, make sure to refrigerate the balls until the chocolate sets for a perfect finish.

This process guarantees that each bite-sized treat isn't only visually appealing but also bursting with delicious peanut butter and chocolate flavors.

Variations and Enhancements

creative modifications and improvements

You can elevate the flavor of your peanut butter balls by incorporating unique ingredients like chopped nuts or rum extract.

Experiment with different chocolate coatings such as white almond bark or dark chocolate candy melts for a varied taste experience.

Advertisement

Get creative by adding finishing touches like colorful sprinkles to make your peanut butter balls visually appealing.

Flavorful Ingredient Additions

Enhance the flavor of your peanut butter balls by incorporating unique ingredient variations and enhancements. While the classic combination of peanut butter, powdered sugar, and butter creates a delicious dough for your treats, you can take it up a notch by adding flavorful ingredient additions.

Consider mixing in crushed pretzels for a salty crunch that complements the sweetness of the peanut butter. Chopped nuts like almonds or pecans can also add a delightful texture and nutty taste to your chocolate-covered peanut butter balls.

For a burst of fruity flavor, try incorporating dried cranberries or raisins into the dough. These additions not only provide a contrast in texture but also introduce a hint of sweetness that pairs well with the creamy peanut butter.

Another option is to include a sprinkle of cinnamon or a dash of vanilla extract to elevate the overall taste profile of your peanut butter balls. Experiment with these flavorful ingredient additions to create a unique and delectable twist on the classic treat.

Advertisement

Chocolate Coating Options

Experiment with different types of chocolate coatings – dark, white, or milk chocolate – to suit your preferences and elevate the flavor of your peanut butter balls.

When considering the chocolate coating for your crunchy peanut butter treats, here are some options to enhance your culinary creation:

  1. Choose Candy Melts or Almond Bark: Opt for candy melts or almond bark for a smooth and firm chocolate coating that sets well on your peanut butter balls.
  2. Avoid Chocolate Chips: Steer clear of using chocolate chips for coating, as they may contain stabilizers that hinder smooth melting, affecting the overall texture.
  3. Add Colored Sprinkles: For a festive touch, sprinkle colored sprinkles on top of the chocolate coating before it sets to add a pop of color and extra crunch to your peanut butter balls.

Experimenting with different chocolate coatings and techniques can take your peanut butter balls to the next level, ensuring a delightful and indulgent treat for any occasion.

Creative Finishing Touches

To elevate the flavor profile of your peanut butter balls, consider incorporating creative finishing touches through various enhancements and unique variations.

You can enhance the texture by adding chopped nuts or crispy rice cereal to the peanut butter mixture, providing a delightful crunch with every bite.

Experiment with different flavors by using almond extract or rum extract instead of vanilla for a twist on the traditional taste.

Advertisement

For a festive touch, roll the balls in crushed graham crackers, sprinkles, or a sprinkle of sea salt to add a pop of flavor.

Drizzle white chocolate over the dark, semi-sweet, or milk chocolate coating for a visually appealing contrast that will impress your guests.

If you enjoy a crunchy element, try coating the balls in crushed pretzels or toasted coconut before the chocolate sets.

These creative enhancements will take your peanut butter balls to the next level, making them a standout treat at any gathering.

Tools and Tips

crafting with precision

Consider using a 1 tablespoon cookie scoop for consistent sizing when preparing your peanut butter balls. This tool will help guarantee all your treats are uniform in size, making for a neat presentation and even cooking.

Here are some additional tools and tips to enhance your peanut butter ball-making experience:

Advertisement
  1. Invest in Quality Chocolate Coating: Opt for candy melts or almond bark for a smooth and firm chocolate coating on your peanut butter balls. These coatings melt easily and provide a professional finish to your treats.
  2. Adjust Peanut Butter Mixture Consistency: If your peanut butter mixture is too sticky or too dry, adjust the consistency by adding more peanut butter or powdered sugar. This will help you achieve the perfect texture for shaping your balls.
  3. Refrigerate Before Dipping: Prior to dipping your peanut butter balls in chocolate, chill them in the refrigerator. This step will make the balls firmer, making them easier to handle and coat without falling apart.

Storage and Serving Suggestions

great suggestion for storage

For best freshness and presentation of your peanut butter balls, follow these storage and serving suggestions.

To keep your peanut butter balls tasting delicious, store them properly. You can store them in an airtight container in the fridge for up to 1 week or in the freezer for up to 2 months. When freezing, remember to thaw the frozen peanut butter balls before serving by bringing them to room temperature. To prevent them from sticking together, separate the layers of peanut butter balls with wax paper.

Here is a helpful table summarizing the storage and serving suggestions:

Storage Serving Frozen
Airtight container Display on festive tray Thaw before serving
Fridge – 1 week Pair with hot cocoa Bring to room temp
Freezer – 2 months Enjoy at holiday gatherings
Separate with wax paper

Additional Peanut Butter Desserts

peanut butter dessert recipes

Explore a variety of delectable peanut butter desserts to satisfy your sweet cravings.

  1. Peanut Butter Blossom Cookies: Indulge in the classic combination of peanut butter cookies topped with a chocolate kiss for a delightful treat.
  2. Peanut Butter Chocolate Mug Cake: Whip up this easy-to-make single-serving dessert that combines the rich flavors of peanut butter and chocolate in a mug for a quick fix.
  3. Peanut Butter Overload Cookies: For those who can't get enough peanut butter, these cookies are loaded with peanut butter chips, chocolate chips, and chopped peanuts for an explosion of flavor in every bite.

These additional peanut butter desserts offer a diverse selection to cater to your cravings.

Whether you're in the mood for a classic treat like Peanut Butter Blossom Cookies, a quick fix with Peanut Butter Chocolate Mug Cake, or a flavor-packed experience with Peanut Butter Overload Cookies, there's something for every peanut butter lover.

Enjoy these easy-to-make delights whenever you need a sweet pick-me-up!

Recipe Instructions and Nutritional Information

cooking guidance and facts

To create these delectable Peanut Butter Balls, start by blending peanut butter, butter, sugar, and vanilla to form a dough. Roll the mixture into small balls and place them on a baking sheet lined with parchment paper. Chill the peanut butter balls in the refrigerator for about 30 minutes until firm.

Once chilled, melt chocolate in a heatproof bowl over simmering water or in the microwave. Dip each chilled peanut butter ball into the melted chocolate, ensuring they're evenly coated. Place the coated balls back on the parchment paper and let the chocolate set.

Advertisement

Each serving of these delightful treats contains approximately 114 calories.

Store the finished peanut butter balls in the fridge for up to 2 weeks or freeze them for up to 3 months.

Enjoy these decadent bite-sized snacks whenever you crave a sweet and nutty indulgence.

Frequently Asked Questions

Can I Use Chunky Peanut Butter Instead of Creamy for This Recipe?

Yes, you can use chunky peanut butter instead of creamy for this recipe. It will add a delightful texture and extra crunch to your peanut butter balls. Enjoy experimenting with different variations!

How Long Do Chocolate Covered Peanut Butter Balls Stay Fresh?

Like a sweet memory, chocolate-covered peanut butter balls stay fresh for up to two weeks when stored in an airtight container in the fridge. Indulge in these delectable treats within that time frame for best taste.

Advertisement

Can I Freeze the Peanut Butter Balls for Later Enjoyment?

Yes, you can freeze the peanut butter balls for later enjoyment. Simply place them in an airtight container or freezer bag. When ready to indulge, let them thaw in the fridge for a few hours.

What Type of Chocolate Is Best for Coating the Peanut Butter Balls?

For coating the peanut butter balls, semi-sweet or milk chocolate works best. They provide a delicious contrast to the creamy peanut butter filling. Simply melt the chocolate, dip the balls, and enjoy the sweet treat!

Can I Add Chopped Nuts or Sprinkles to the Peanut Butter Balls for Extra Flavor?

You can definitely add chopped nuts or sprinkles to the peanut butter balls for extra flavor. It's a great way to customize your treats and add a delightful crunch or colorful touch to each bite.

Conclusion

Indulge in these irresistible peanut butter balls that are sure to satisfy your sweet tooth cravings.

With just a few simple ingredients and easy-to-follow instructions, you can enjoy these bite-sized treats in no time.

Advertisement

So go ahead, treat yourself to a little taste of heaven and experience the perfect combination of creamy peanut butter and rich chocolate.

You won't be able to resist coming back for more!

Continue Reading

Trending